

Newport – altering a prefabricated wall
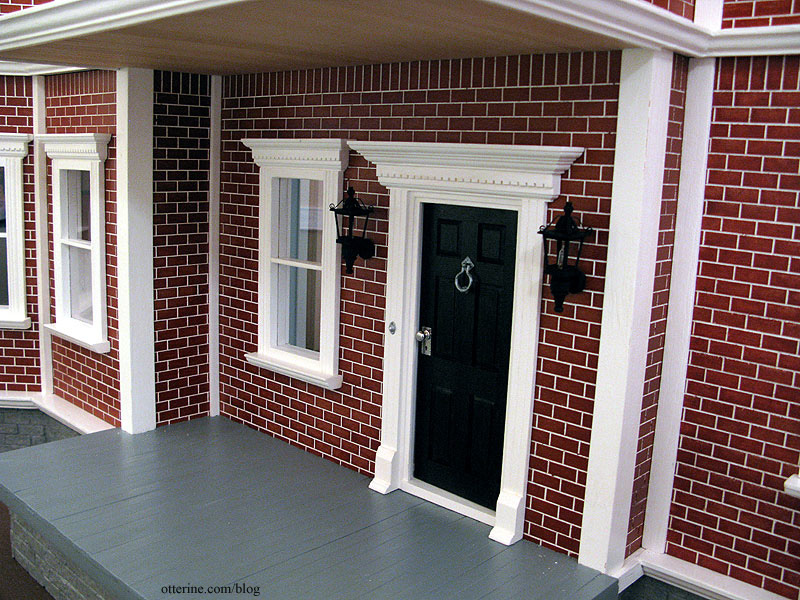
The brick on the Newport is a finish the manufacturer completes before shipping the kit. If it’s marred, there isn’t a way to fix it. And, there’s no way to replicate it, either. The photo of the front porch below shows how the front of the house is recessed by the front porch window.
If built per the manufacturer instructions, the second floor would mimic this recessed pattern. Here’s the Real Good Toys photo showing the way the house is supposed to be put together.

Since I extended the front porch, put the addition on the “wrong” side — I planned it that way :] — and flipped the stairs, I needed to push the front wall on the second floor forward. This not only eliminated the huge flat roof on top of the porch but also gave me more room inside the structure. My problem is getting the front to look like one continuous wall on the outside.
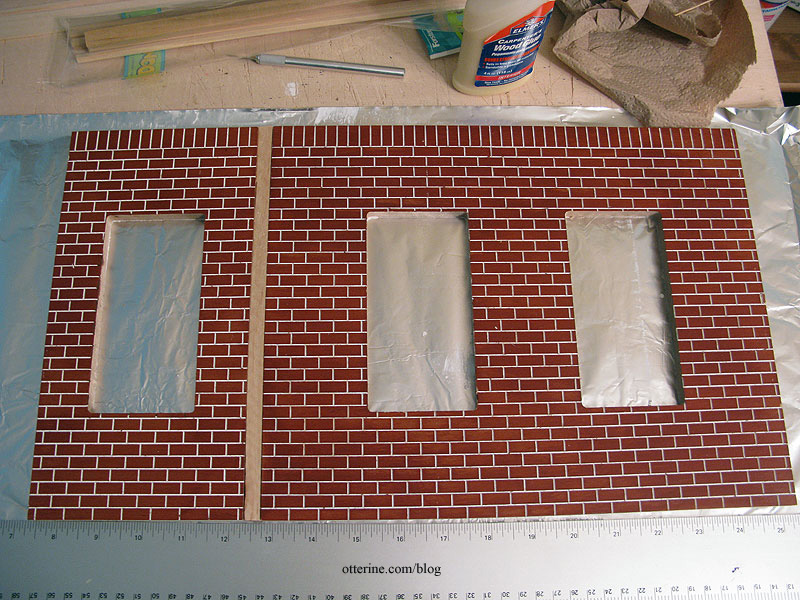
The rub is that the walls are pre-cut with the brick finish. So, I couldn’t just glue the two pieces together since (1) the brick pattern wouldn’t match, (2) there was a gap between the two wall pieces since there was supposed to be room for the connectors that make the recess, and (3) the reason for the recess in the first place was to give the illusion of a tower running up the middle.
To fix the gap, I used a 3/8″ x 3/8″ strip of wood.
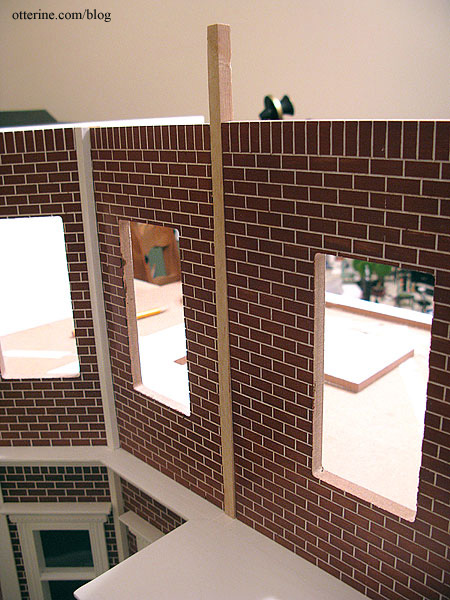
I glued each wall to the strip wood and let it dry.
To mask the strip wood and to follow the original vertical line of the mock tower, I cut a piece of 1/2″ x 1/16″ strip of wood and painted it white to match the other connectors. I glued it in place, lining it up with the connector on the first floor.
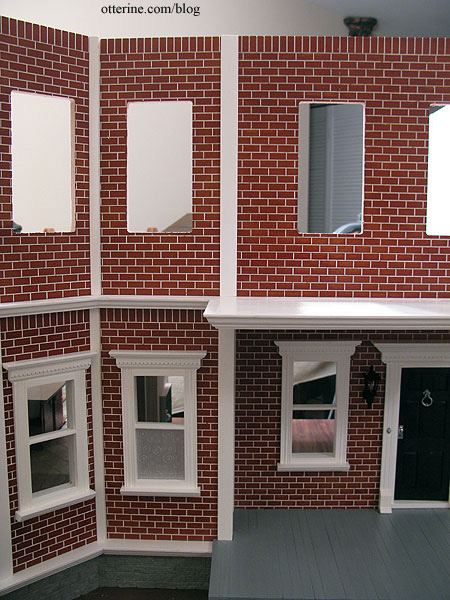
The strip wood connector won’t show on the inside once the wallpaper is in place. :] Problem solved!
Categories: The Newport
June 3, 2010 | 0 commentsBaslow Ranch – Attic
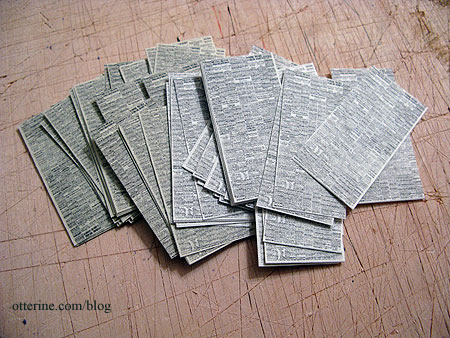
The attic was a lot of fun. I’ve seen other miniaturists’ attics with newspaper wallpaper, and I wanted to do something similar. I took images from newspapers online, resized and printed sheets on two shades of parchment paper I had in my stash from my old art school days. The subtle translucent quality and the mottled coloration added a lot of realism.

Then came the task of cutting out each individual page of newsprint so I could apply the paper piece by piece.
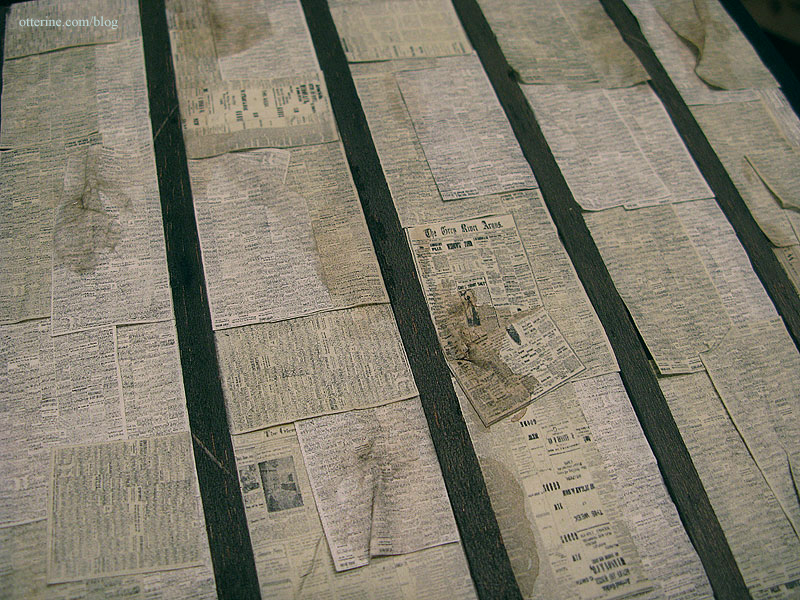
Once the attic floor was in place (in the photo below, you can see the pieces of strip wood I used to brace the divider), I glued beams along the walls, leaving 1 1/2″ between them. I then coated the wood beams with a black and brown wash.

I used the individual newspaper pieces to cover the sections between the beams, mashing the paper, gluing wrinkles in place and turning some corners down.

I love the way this turned out! :D

I used the same process on the ceiling portion of the attic and added some water spots with a brown paint wash.
I had these books from a lot of furniture and accessories I bought from craigslist and covered them with covers I found on printmini.com, printed on parchment paper.

I placed one book in the room below and rest into a purchased crate that I aged with paint washes. The hurricane lamp is by Clare Bell Brass aged with brown paint. Its cord is hidden under the crate. This is a tiny room, but leaving it dark meant you couldn’t see the details I added.
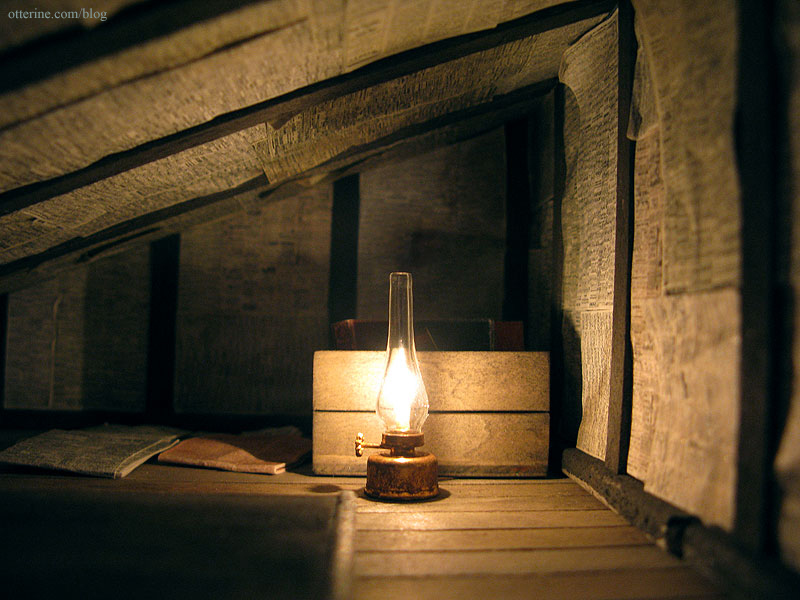
I love it!!!! :D And, the great thing about this room is that the older and dustier it gets over the years, the more realistic it will look.
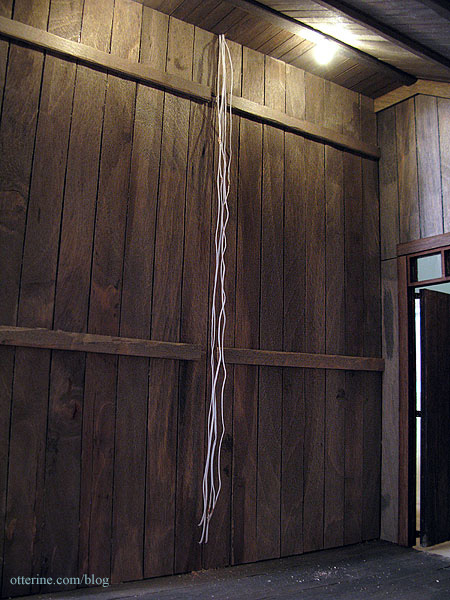
Update from 2012: In addition to the light coating of dust from the past two years, the barn has apparently attracted the attention of small spiders — as barns are apt to do. There is a fine covering of webs inside the top of the barn by the lights.
Quite marvelous, don’t you think? :D It’s interesting to me since the lights aren’t often on and they wouldn’t really attract insects of any sort besides, but this is exactly where spiders would congregate in a real life barn — the perfect place to catch any insects attracted to the lights.
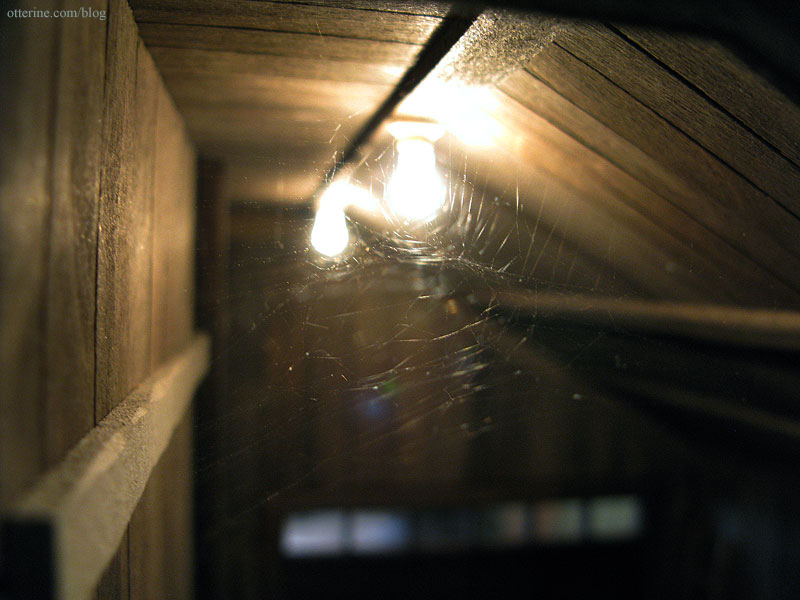
They aren’t shown in this photo, but the webs continue under the slight lip of the roof outside this wall, too. I suppose someday I’ll have to dust the house and remove the webs when they become overwhelming, but not yet.
Categories: Baslow Ranch
June 1, 2010 | 0 commentsBaslow Ranch – Room for Rent
The floor is made by scoring the kit’s floor piece to simulate planks. Using an X-Acto knife, I cut out pieces along some of the lines to create broken boards. I used a nail set to create the illusion of nails at the ends of the planks and then stained the wood with a paint wash.
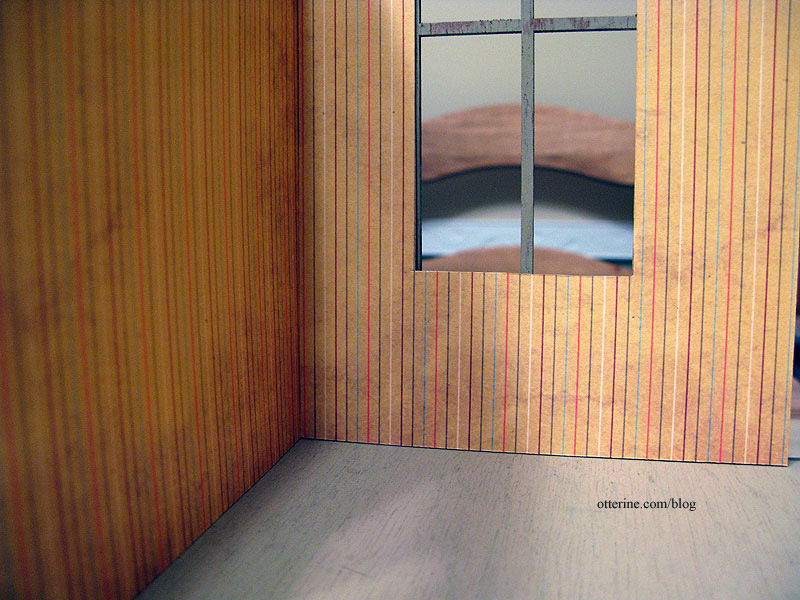
The wallpaper is scrapbook paper called Simple Stripes/Grandma’s Kitchen by We R Memory Keepers. It’s fantastic since it already has that worn and aged look printed in the design.
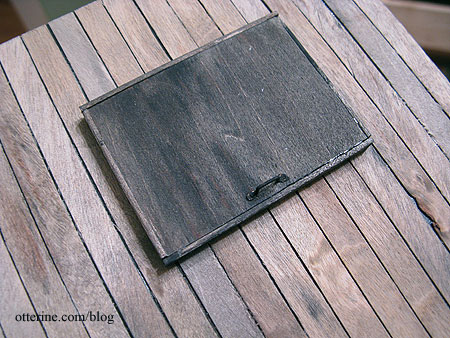
Using 1/8″ mdf, I added a ceiling to the side room to create an attic, access to which is simulated with a faux trap door (I used the tutorial on the Greenleaf site). The attic floor is covered with the same siding strips I used throughout, cut in half lengthwise, and then stained with a light wash.
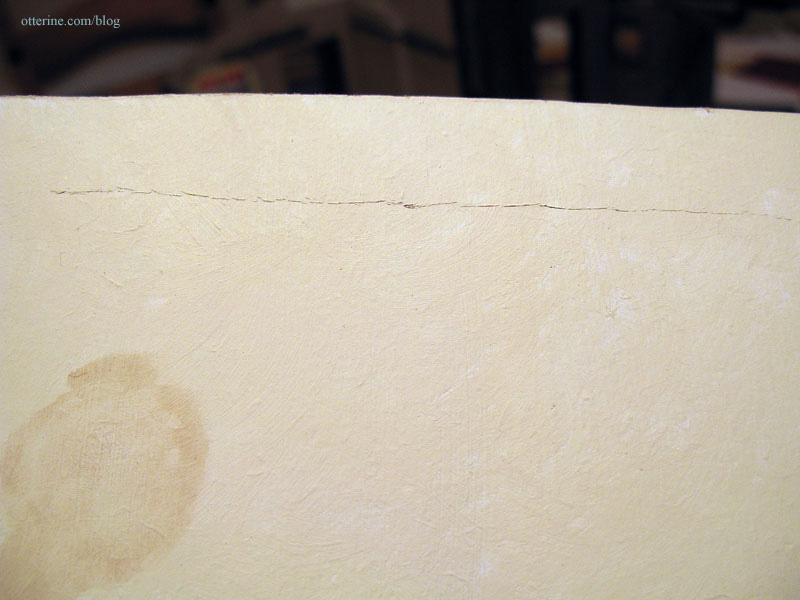
On the underside, I primed the ceiling with white paint and then swirled on Vintage White paint by Folk Art. I used a brown paint wash to create water stains on the ceiling and trailed an X-Acto knife from the corners of the attic door to create cracks. I painted over the brass handle in the process. If you’ve ever seen an old house, you know painting over hardware was a common practice. :]
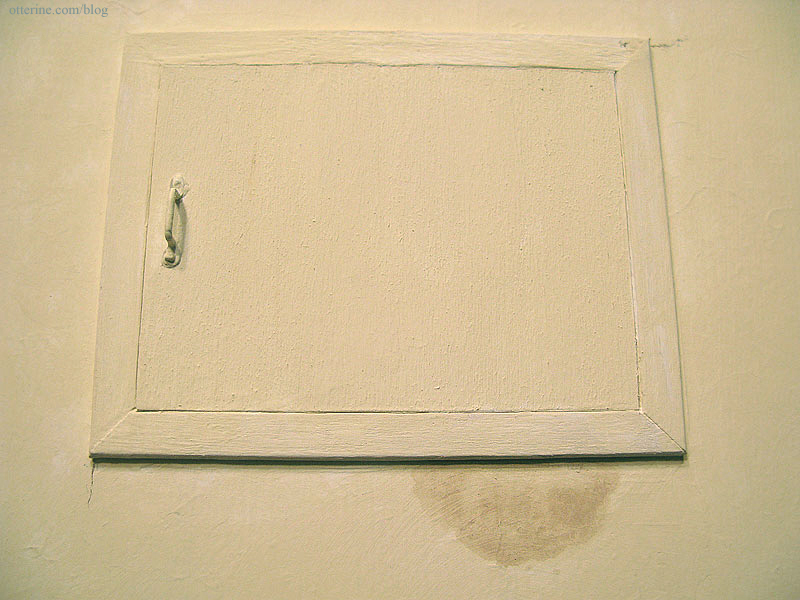
One happy accident happened as I was measuring for something. I had the ceiling taped in place at the time and accidentally made a long pencil mark on the freshly painted surface. Instead of trying to cover it with paint, which I didn’t think would work all that well, I used my X-Acto knife to lift the paint all along the pencil mark, creating a long crack in the ceiling.
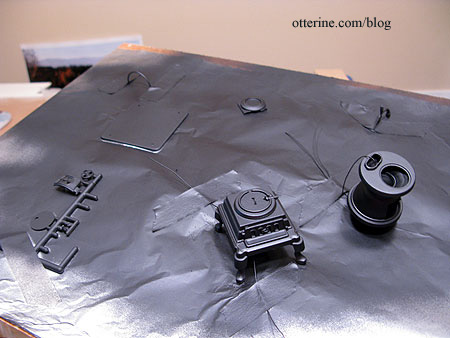
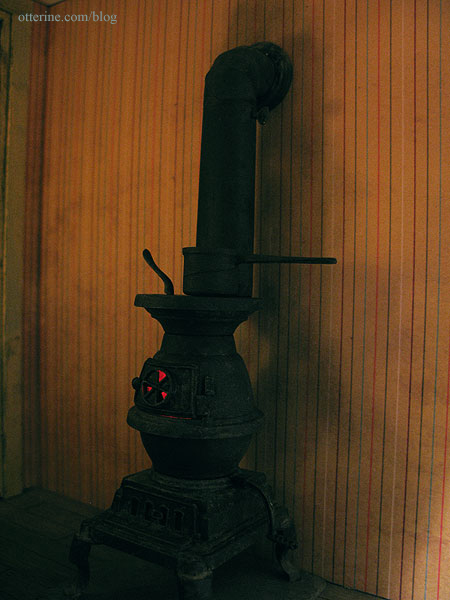
I made the stove from a Chrysnbon plastic kit. I found this kit to be both realistic and very easy to assemble. Although the kit came in plastic molded in the proper color, I still sprayed all of the pieces with Testors flat black. I also sprayed the chrome pieces since I wanted this to look like an old stove without any fancy accents.
I added a red bulb to simulate warm coals.
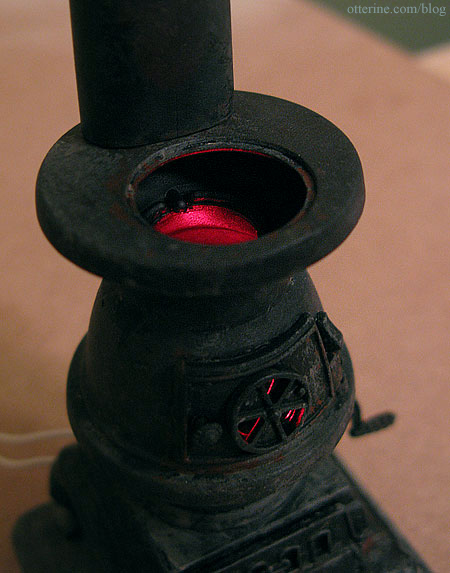
To achieve the aged look, I dabbed on Mushroom acrylic paint by Folk Art and a paint by Testors appropriately called Rust. :D
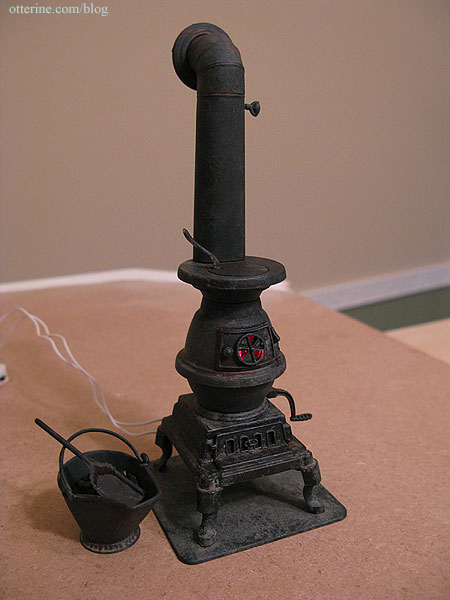
I painted the wires black and glued them to the inside of one of the back legs before feeding them through the floor. I used an X-Acto knife to shave dust from a black conte crayon and used a dry brush to dirty the wall and ceiling around the stove.
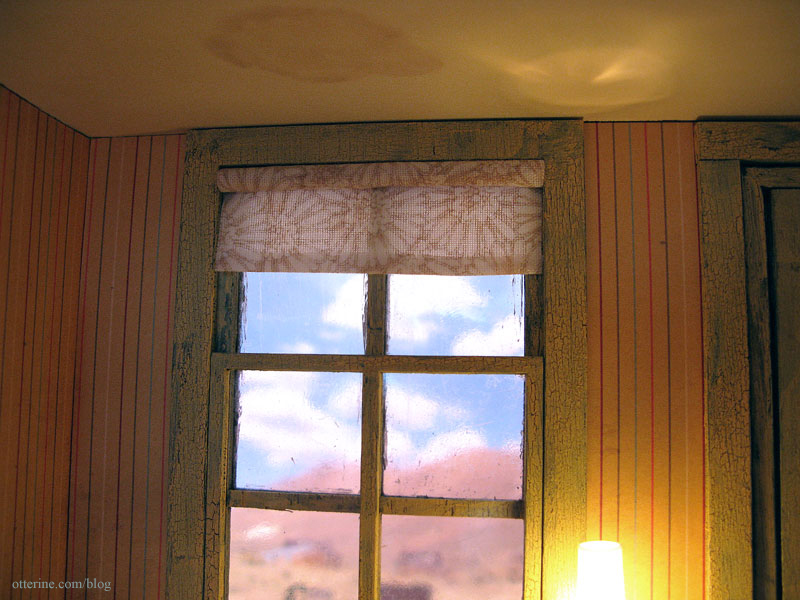
The windows, door and trims were first aged by beating, cutting and otherwise marring the finish and applying a wash of brown and black paint. I applied Crackle Medium by Folk Art and then painted Sunflower yellow by Folk Art.
The lower interior window is removable so I can have the window partially open or closed completely. To age the glass (acrylic), I brushed on some Gloss Varnish by Delta Ceramcoat and then wiped away the excess. It took a few turns of this process to get a realistic look. The rolling shade is made from a scrap of fabric glued around a wooden dowel.
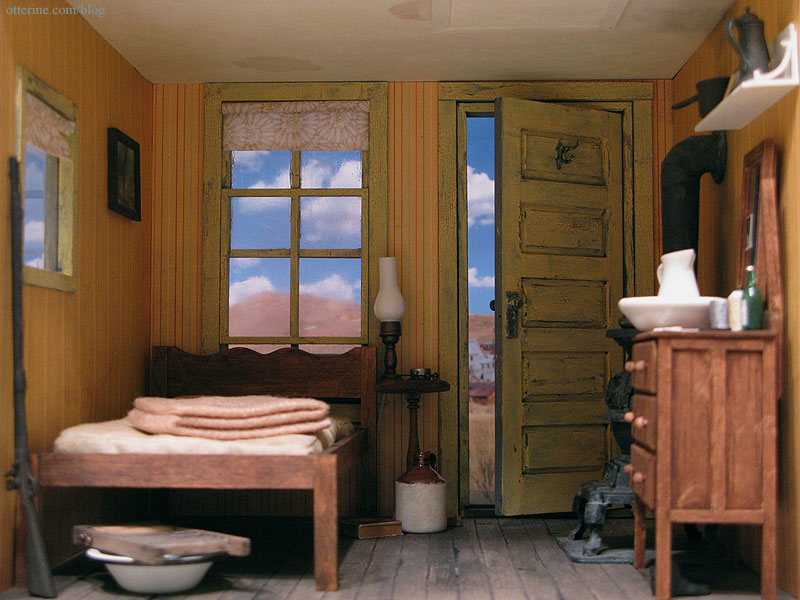
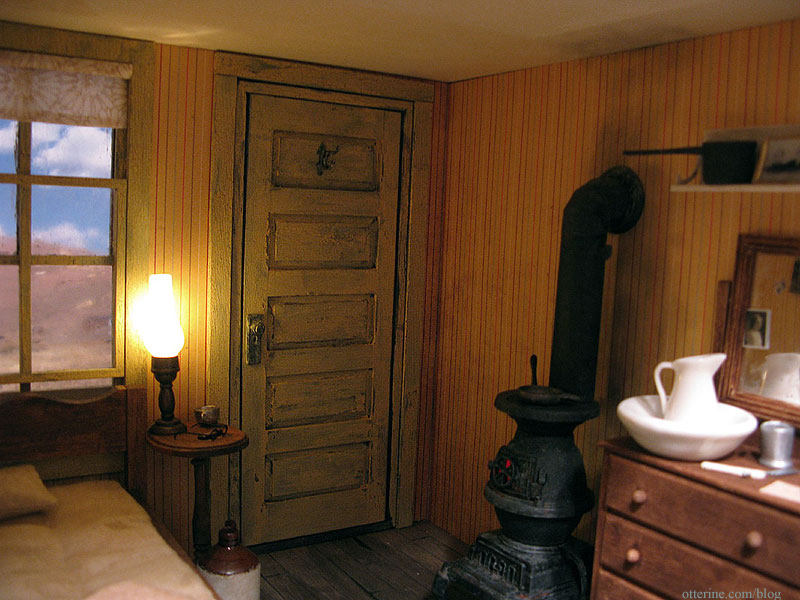
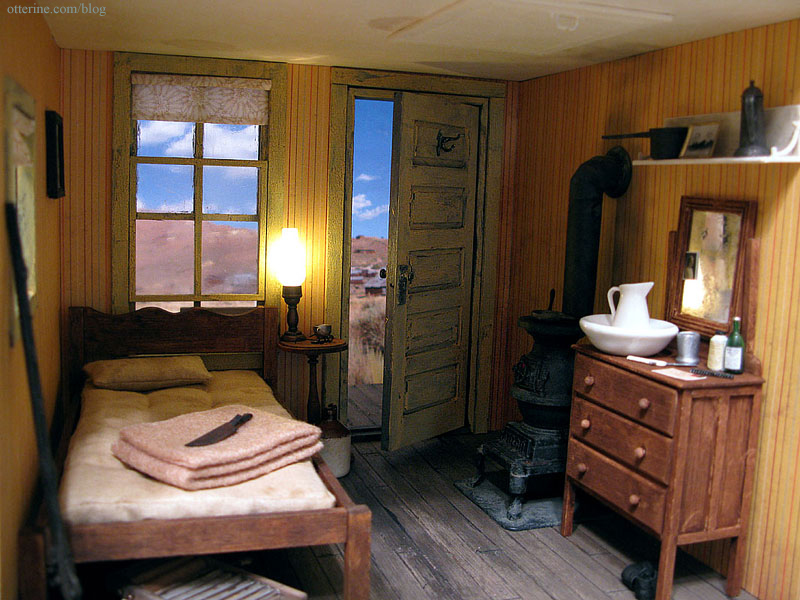
When the backdrop is in place, it really feels like you’re standing in a real life room. :D
Categories: Baslow Ranch
June 1, 2010 | 0 commentsBaslow Ranch – Furnishings and Accessories
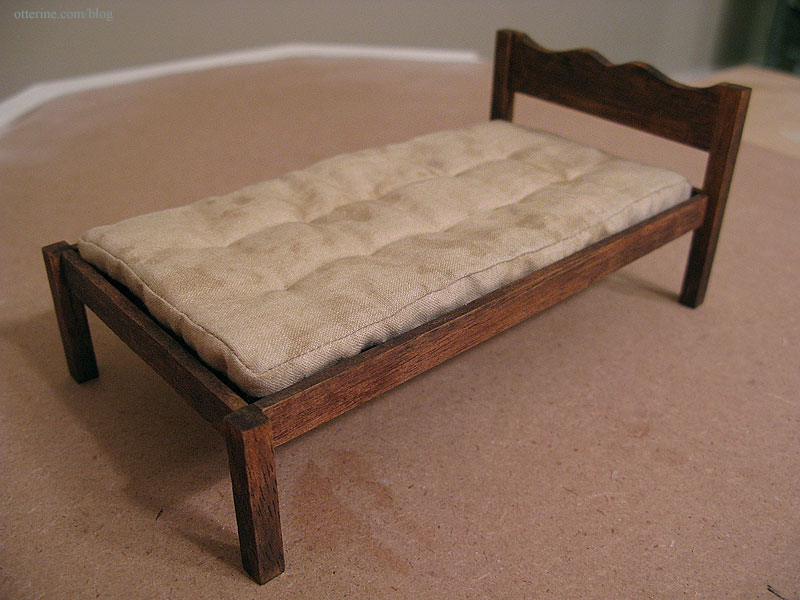
The bed was made from a House of Miniatures single low post bed kit. I left off the fancy post tops for a more rustic look. The mini bedside table is also from a House of Miniatures kit, from a set of two side tables. I stained both with IKEA antique pine stain and then weathered with Antiquing Medium by Folk Art and a slight wash of black and brown paint.
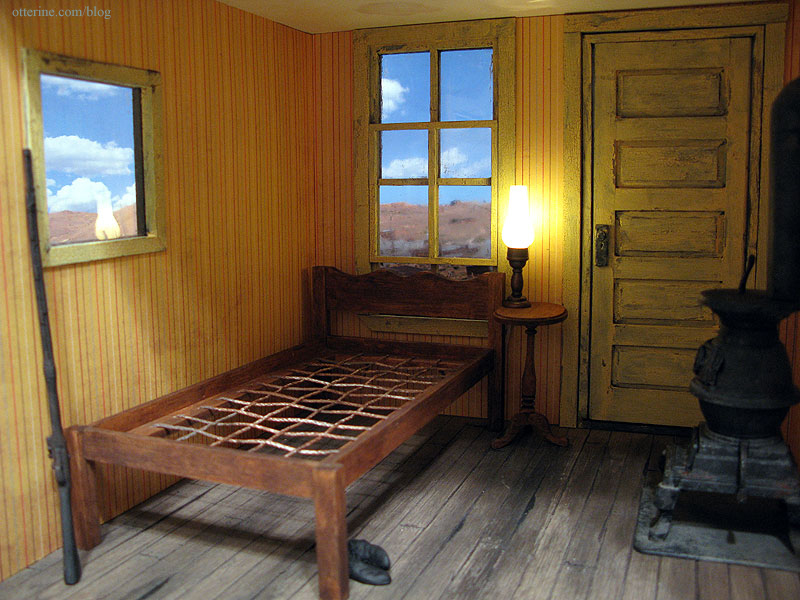
The mattress was made from fabric that had an old, stained look to it, stuffed with four layers of a felt-like batting and quilted. I love the way the bed looks with the ropes exposed, but I wanted the option to show it either empty or fully dressed.
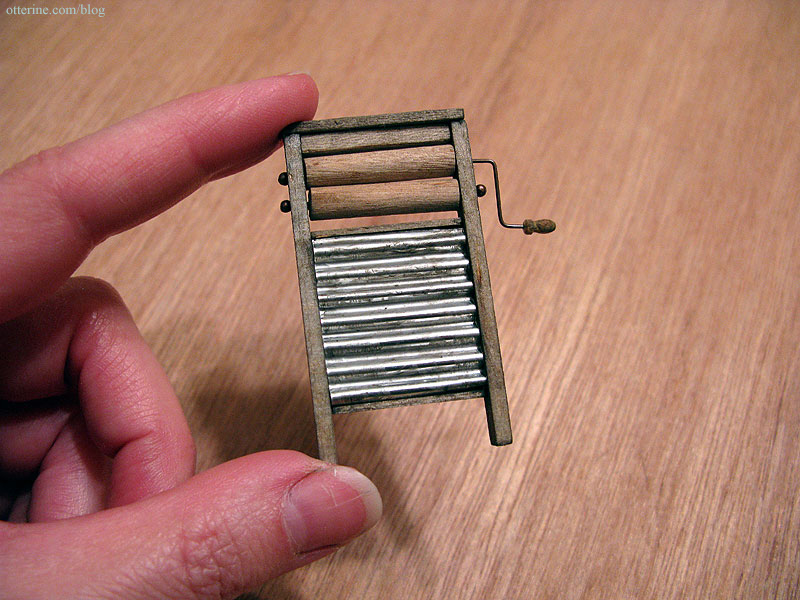
The washboard was made from a pattern in Thirties & Forties Miniatures in 1:12 Scale by Jane Harrop. Here are the pieces, cut and weathered with a wash of black and brown paint.
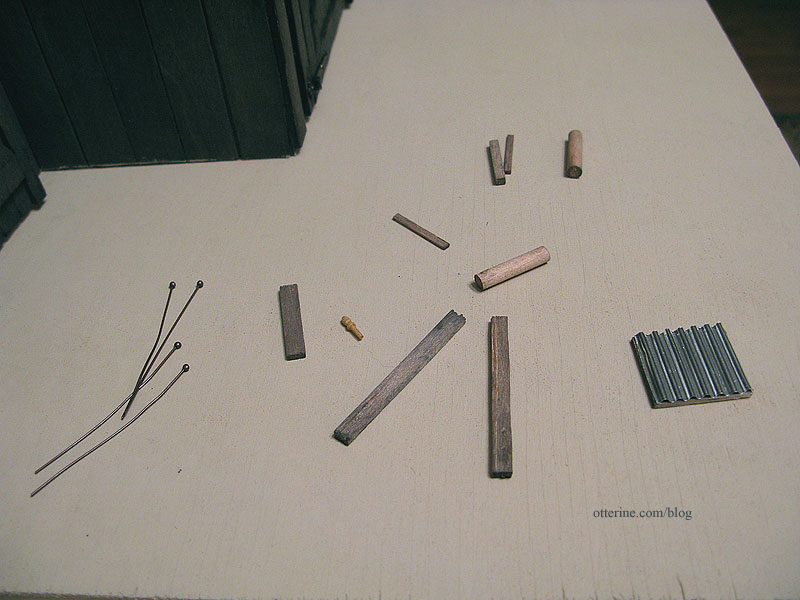
The parts are all fixed in place, but I love this piece. It turned out better than I had hoped. The metal is the same material I used for the roof, run through a Fiskars crimper.
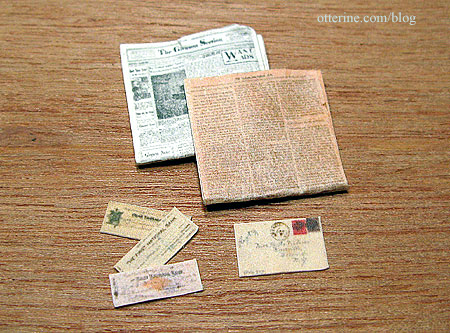
I found a lot of great images online for old time mail, bank notes, newspapers and pharmacy items. I printed the majority of my minis for this project on parchment paper. The newspapers ended up in the attic, the letter on the dresser and the bank notes in a drawer unseen.
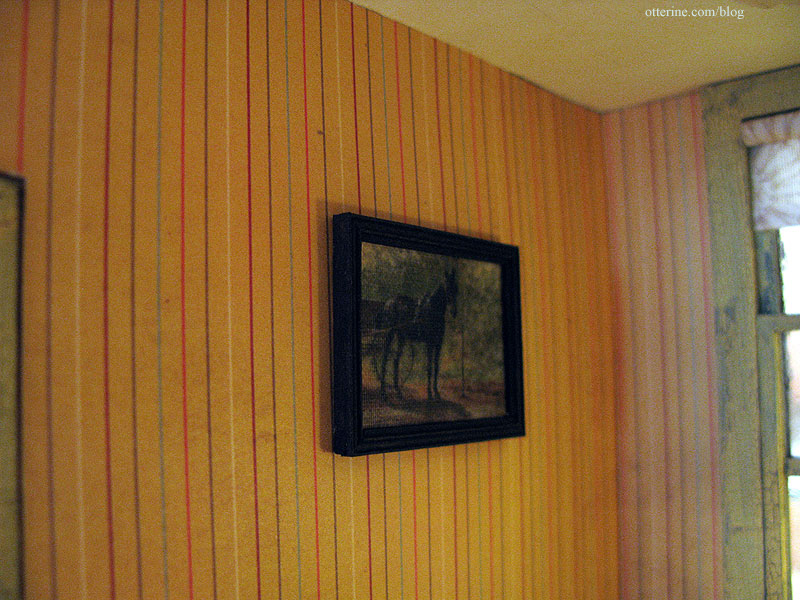
The horse painting is Horse with Wagon at Hitching Post by Edward Lamson Henry. I sharpened the image a bit and then printed it on Art Canvas, a specialty paper by The Crafty PC. I made the frame from strip wood. There’s no particular significance to the painting – I just liked it. :]
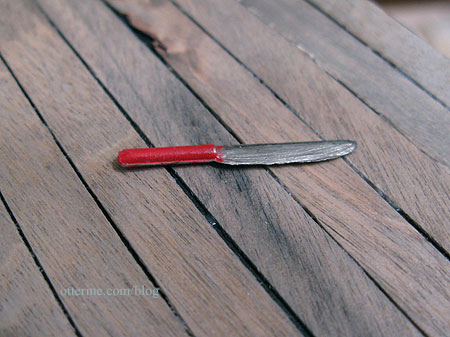
There are a few artisan-made knives with leather sheaths on the market, but I decided to give it a try myself. I started out with a kitchen knife with a red handle.
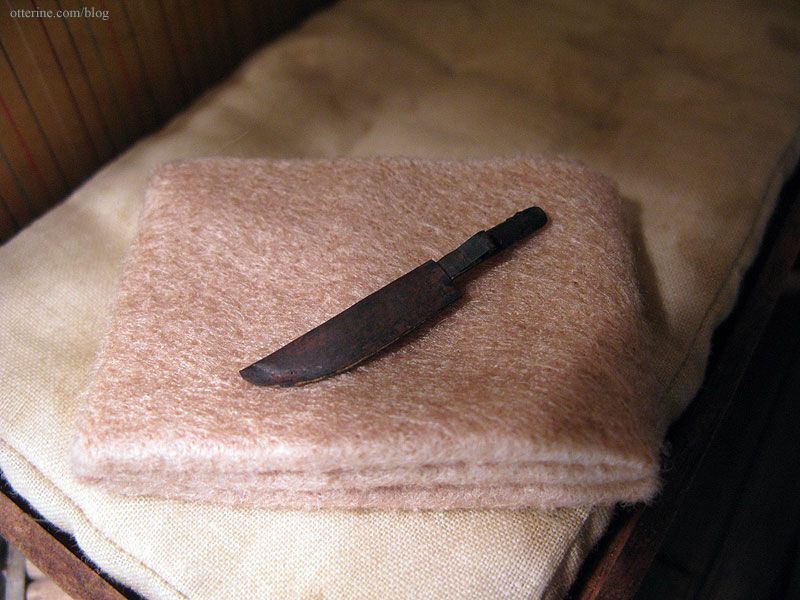
I painted the handle black and then made a sheath with a belt loop out of scrapbook paper called Buckskin Brown by The Paper Company. I used a bit of black paint to age the paper once the glue was dry. The blanket is a folded piece of felt pressed into shape with an iron.
The dresser with the mirror was made from a pattern in Thirties & Forties Miniatures in 1:12 Scale by Jane Harrop. This project was labeled advanced, and though it was a real bear cutting all the pieces precisely, I love the way it turned out. I stained all of the pieces with IKEA antique pine stain before assembly and then aged it with Antiquing Medium by Folk Art after it was built.
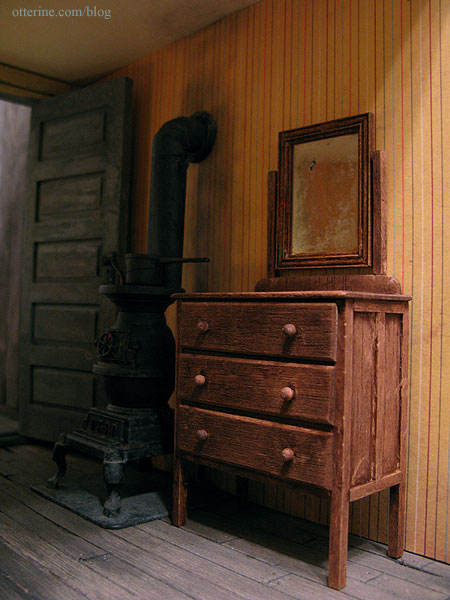
The mirror is made from plastic mirror sheet by Darice. This material was great to work with. The finish was pristine when I pulled it from the package, so I had to beat it up a bit for it to blend with the old dresser. I used an X-Acto knife to scrape some of the backing away.
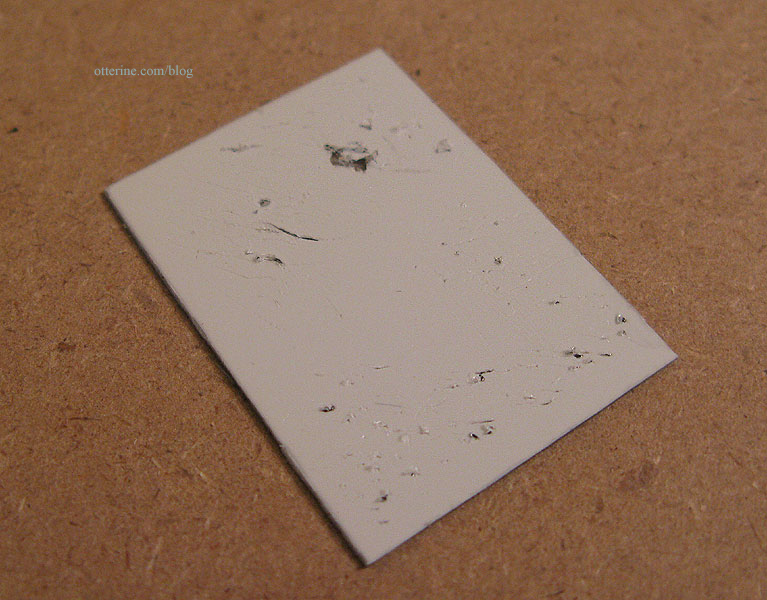
This created spots in the reflection.
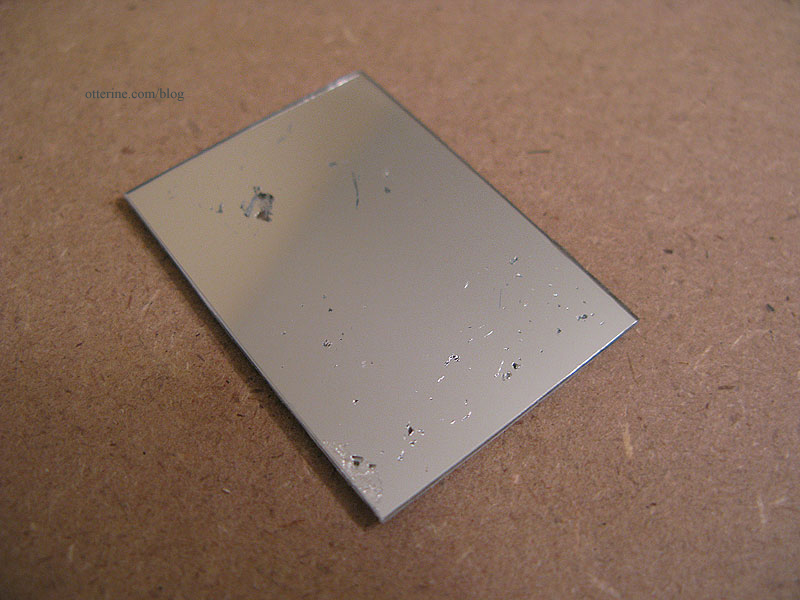
Using the same process as I had for the windows, I brushed on some Gloss Varnish by Delta Ceramcoat and then wiped away the excess. I painted the wood backer black as well. Now it looks like an old weathered mirror.
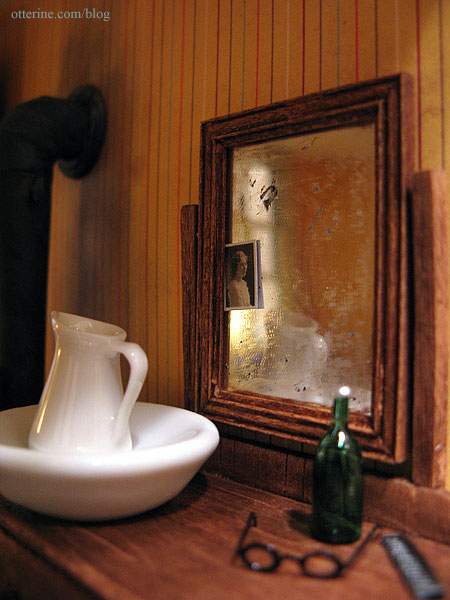
The apothecary items were made from a glass bottle and an unpainted metal miniature. I used brown paint to dirty the glass and painted the metal bottle with acrylics. I then glued on tiny antique medicine labels I found online. I crinkled the label on the metal bottle before gluing it since the bottle itself seemed a bit beat up. The razor and shaving mug were unpainted metal minis that I detailed. The shelf was made using pieces from my scrap wood bag.
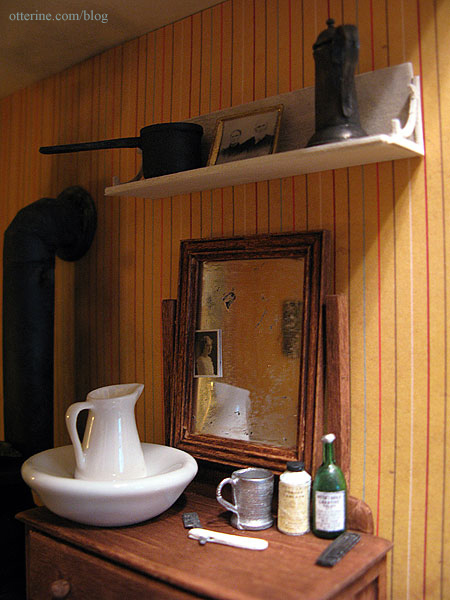
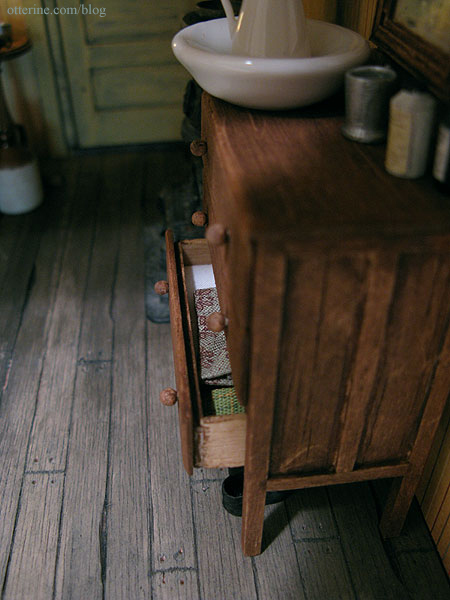
I’m a big fan of hidden elements, so while I didn’t make any actual miniature clothing, I did place some folded fabric scraps in the drawers. :D
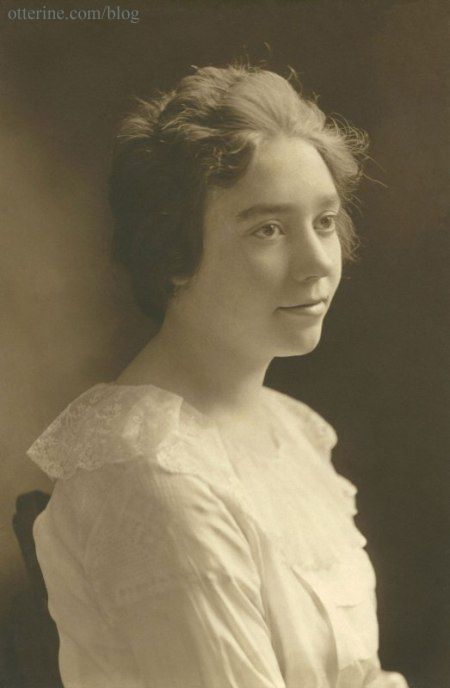
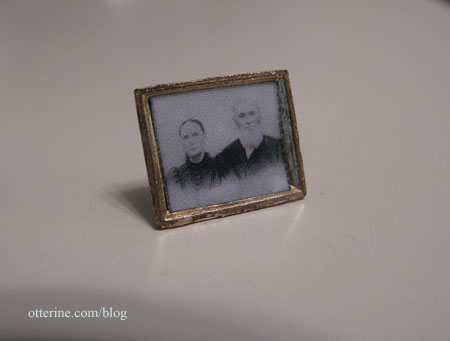
A couple of more personal details I included are the photographs of my own ancestors. The young woman on the mirror is my great grandmother Mary Jane Bartlett (nee Watson) in her graduation photo. She was born in 1900 and passed away in 2005 just shy of her 105th birthday. She was young at heart and lived on her own until a few months before she passed. She wasn’t even hard of hearing; she cooked her own meals and cleaned her own home. She was a remarkable woman with a terrific laugh, and I am lucky to have known her well into my adult life.
The second photo is that of her grandparents: Augustus Samuel Watson (1827-1901) and Mary Jane Cameron (1827-1900). That would make them my great, great, great grandparents.
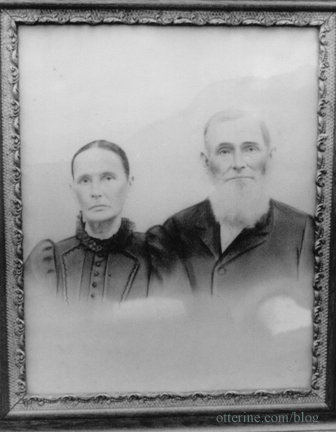
My reproductions might be a bit large for proper 1:12 scale, but I wanted them to show well in the room.
Categories: Baslow Ranch
June 1, 2010 | 0 commentsBaslow Ranch – Barn interior details
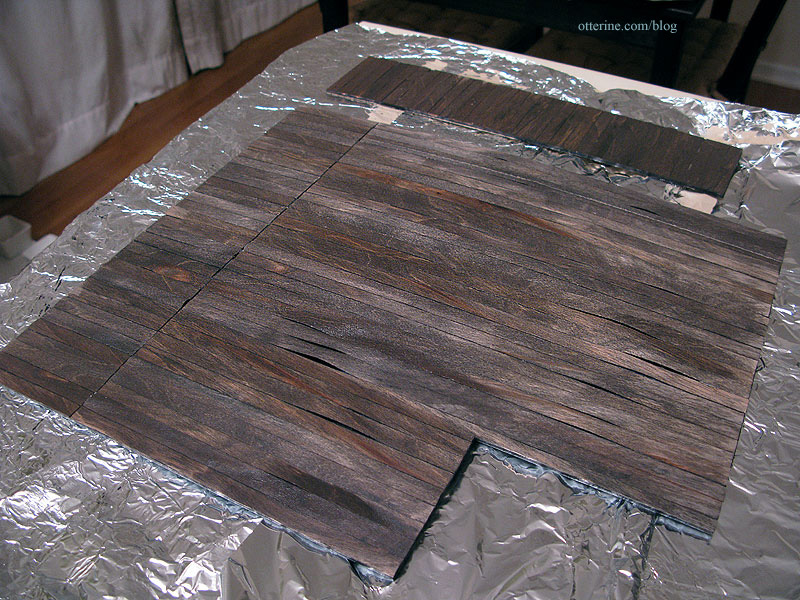
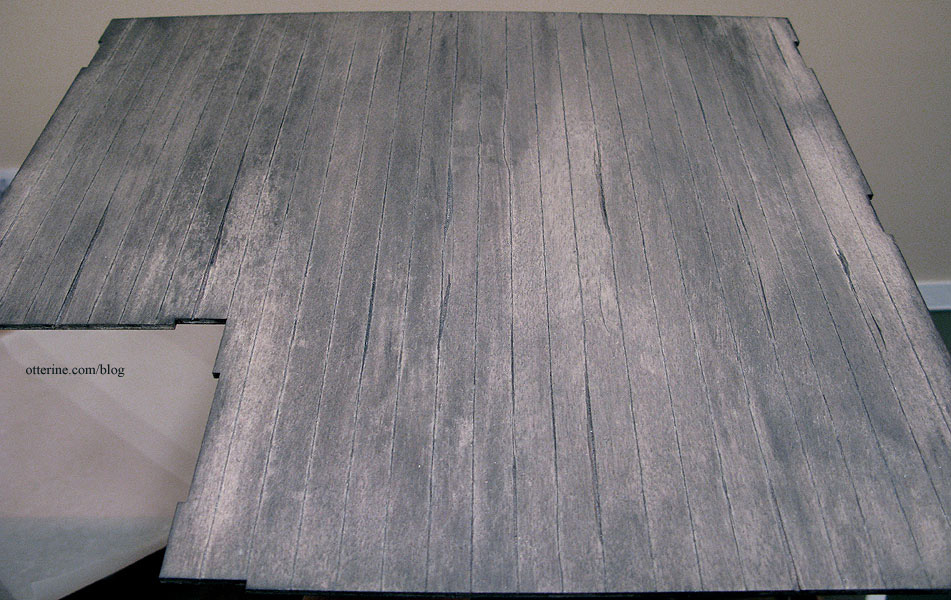
I covered the interior roof panels with the 3/4″ siding used for the walls, only cut in half lengthwise. Here are the pieces after the wash, just before putting weights on them to dry. You can see how the siding would lift and create gaps. Once pressed and dry, however, they were perfectly flat.
I scored the kit floor piece to simulate plank flooring. Using an X-Acto blade, I cut out some sections along the lines to create broken and worn boards. I then used a paint wash on them to bring out the grain.
I added some strip wood at regular intervals to simulate support beams; these were cut and pounded to weather them. Most of my wiring ran from on top of the garage roof to the underside of the side room.
I used channel molding to hide the wires. It has a drop of glue holding it flat against the boards, but it can be easily removed for access to the wires. The power strip resides under the room addition.
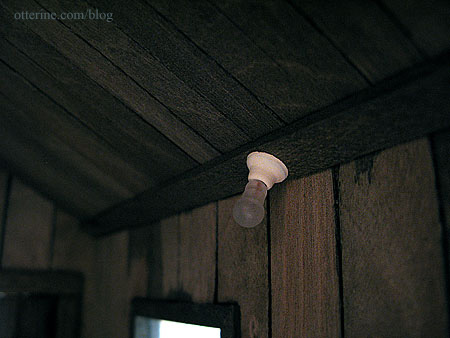
The light fixtures are frosted bare bulbs. Though the bases were molded in white plastic, I painted them with Tapioca paint by Folk Art to give them a more opaque finish.
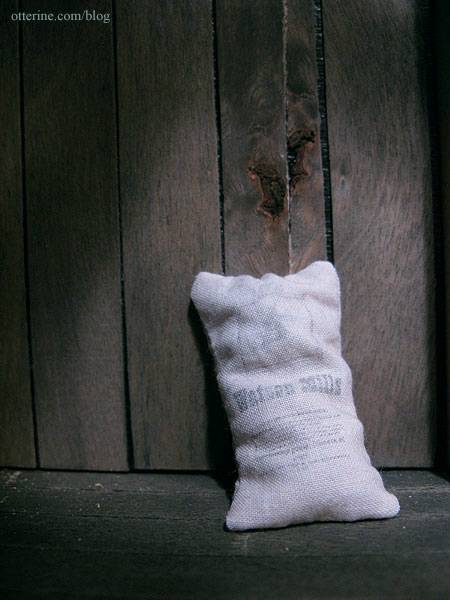
The feed and flour sacks have my own custom made designs printed on fabric. The horse and cow are rubber stamp images I found online; the sunflower is clipart. I designed the text and layout in Word. Since water will ruin the printed images, I first ran the fabric through the printer using a tea-stain color. I then printed my images on that darkened and aged background. I left the bottom half of the fabric sheet plain so I would have excess for the backs.

I filled the bags with beads to make them easier to position. I have no idea if these are historically accurate, but I just love the way they look! I also love the knot in the plank – I just had to use that piece when I found it.
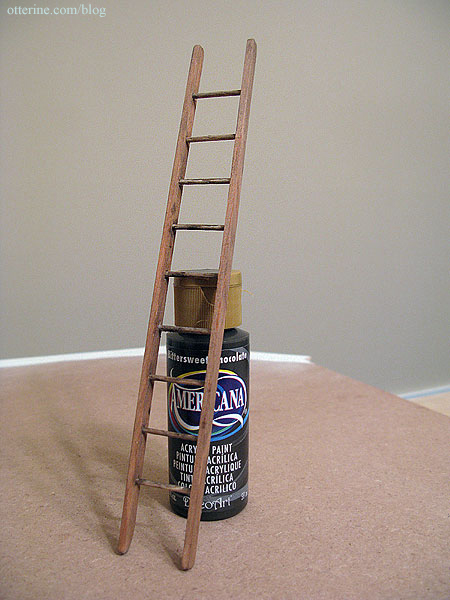
I made a ladder based on a pattern from Making Miniature Gardens by Freida Gray.
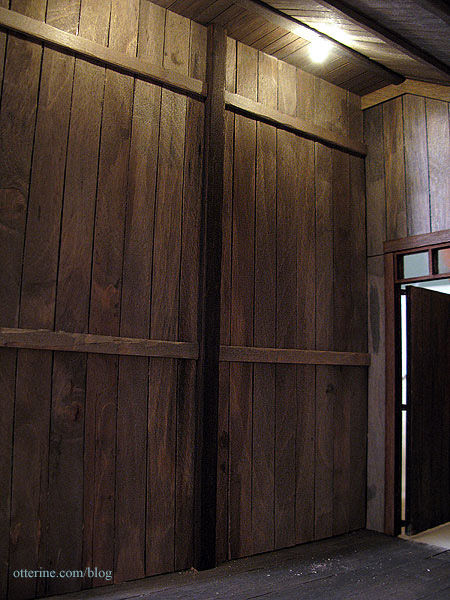
I used a scratch built board latch on the inside of the main door; the small metal latch I had used on the side door wasn’t substantial enough.
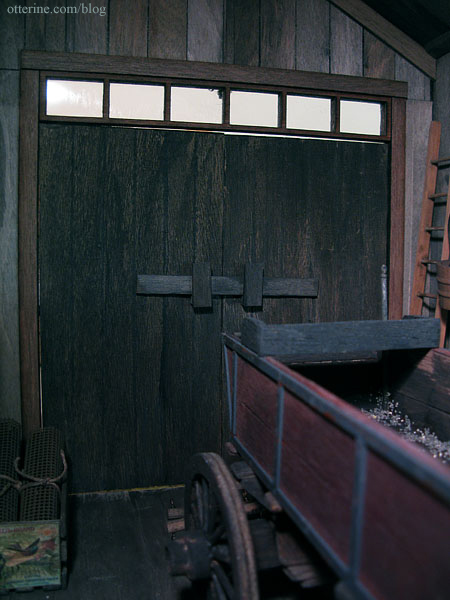
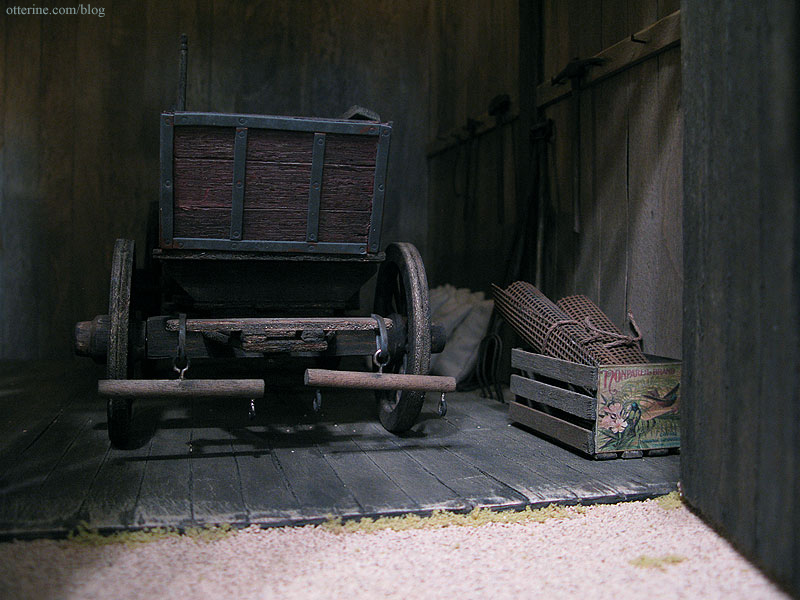
The crates are made from strip wood and skinny sticks, aged with a black and brown paint wash. I found these vintage labels online and printed them on parchment paper. They, too, have a light wash of black and brown paint to age the paper. I had planned to make more of these, but with all of the other things in the barn, I didn’t need a lot. The Blue Goose image is from thelabelman.com; I don’t recall where I got the other.

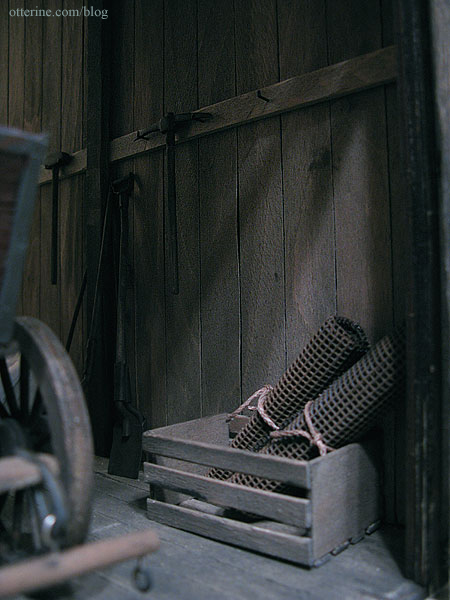
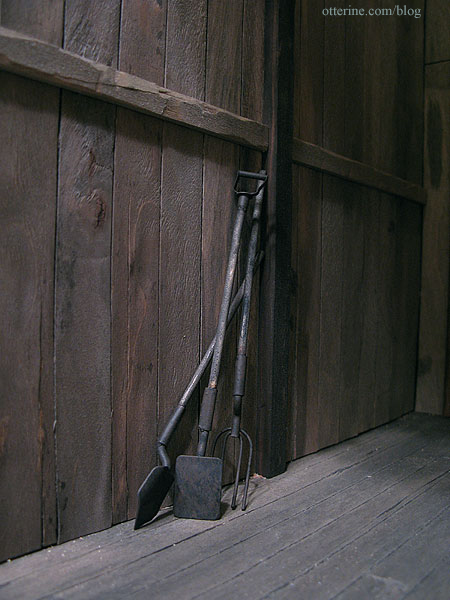
Most of the metal tools and accessories were made from unpainted pewter miniatures. I first sprayed them with a coat of Testors flat black and then used regular acrylics to detail them. To hang the tools along the beam, I found something I never knew existed. I was looking for scale railroad spikes on the internet and found these Mini RR Spikes for 5th String Capo meant for banjos. Who knew?!

I’m not sure if they are exact to scale, but they work wonderfully and don’t look out of place. I drilled pilot holes into the beam and then pressed the spikes in place. They worked perfectly for holding tools on the wall. The rolled up fencing is actually a piece of flat metal mesh called Hannah’s Helper scour screen that I found in the cleaning aisle of Jewel. I painted it brown, cut it in half and tied the rolls with leftover rope from the bed kit.
These tools were originally shiny silver with red metal accents.
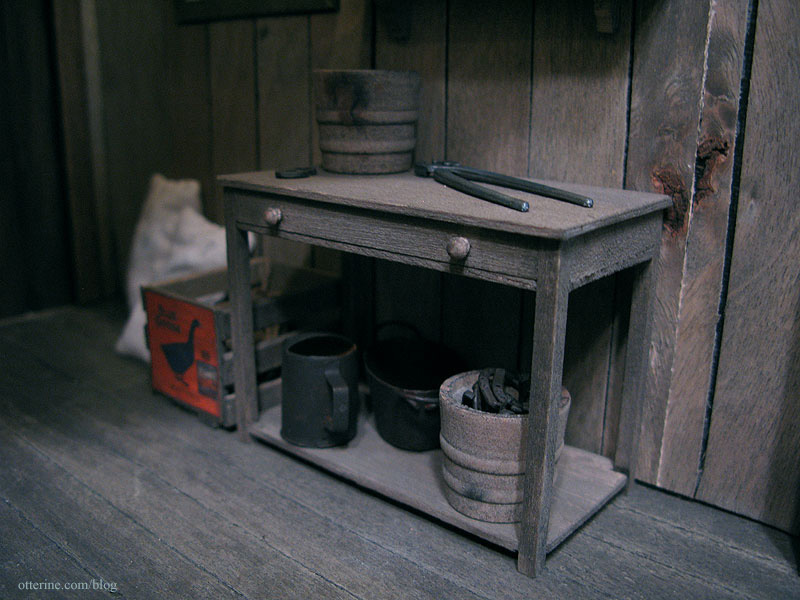
The table was based on a pattern in the book Finishing Touches by Jane Harrop, though I made mine a bit larger to fit the space in the barn better. The shelf above it was made from pieces in my scrap wood bag.
I made a false back wall from black foam core board and applied the same aged birch siding used throughout the build to this board. When propped up behind the open back, the structure looks whole when the front doors are open.
Categories: Baslow Ranch
May 31, 2010 | 0 comments


NOTE: All content on otterine.com is copyrighted and may not be reproduced in part or in whole. It takes a lot of time and effort to write and photograph for my blog. Please ask permission before reproducing any of my content. Please click for copyright notice and Pinterest use.


