

Baslow Ranch – Exterior details
The doors and windows provided with the original kit offered some nice details but I wanted to go a step further. I found an image of a fraternity house in the ghost town of Elkhorn, Montana that had some very nice lines on the front. I used cardboard and a large circle punch to create similar arches and cut strip wood to complement the design. I used the punch to create the sign, too.
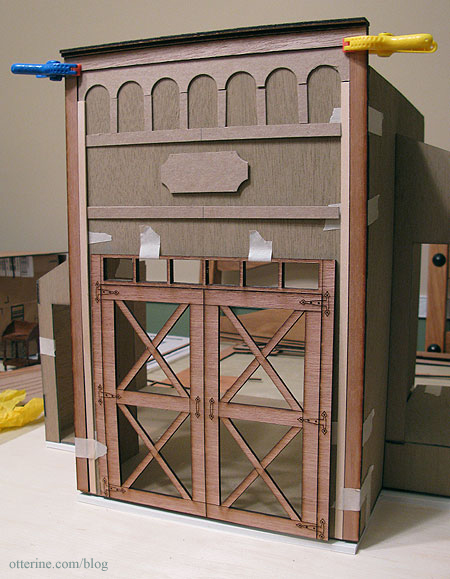
Once I had the layout I wanted, I used the cardboard pieces as patterns to cut pieces from bass wood. In the end, it turned out just as I had hoped.
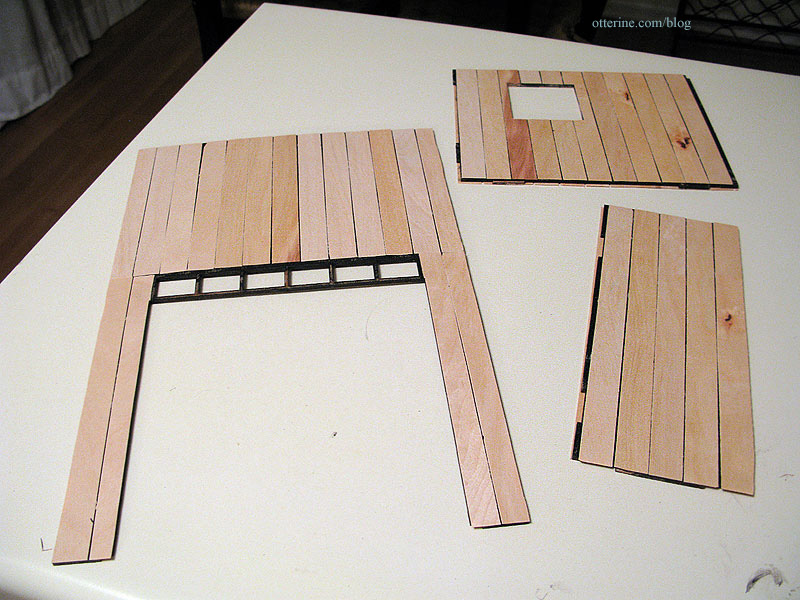
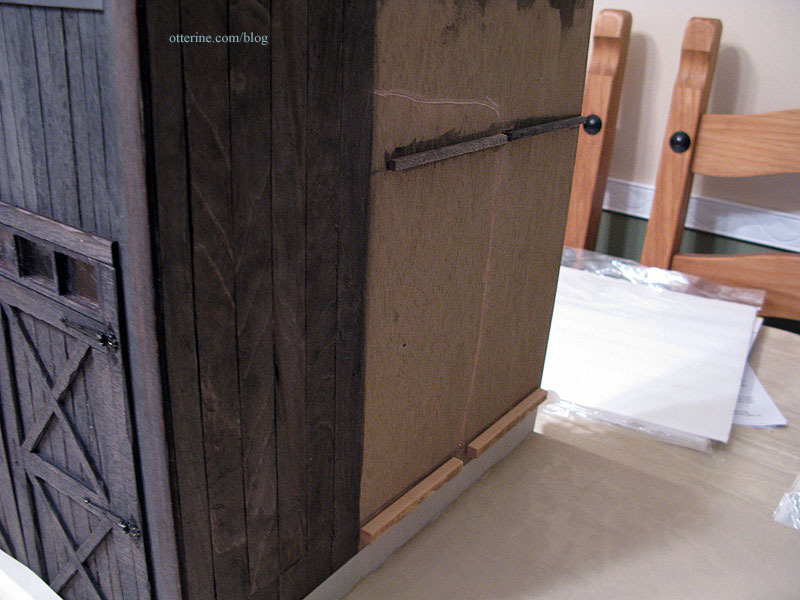
The siding application was an involved process. I first primed all the plywood pieces with black acrylic paint, pressing the pieces under weights to keep them flat. I glued on 3/4″ birch siding strips by Corona Concepts, leaving a little give between the planks. I pressed the boards again as the glue dried. I used Aleene’s quick dry tacky glue and was careful not to get any on the faces of the boards since I planned to stain them.
For the exterior walls, I used a wash of black, brown and grey paint – heavy on the black. For the interior, I used a wash of black and brown – heavy on the brown. I wanted the exterior to look more weathered. I had to press the walls each time I added a wash.
For the main facade, I cut the 3/4″ strips in half lengthwise to better accent the arch trim I had made.
It might not be the way to normally assemble a kit, but I prepared all of the walls first and then assembled the structure. I kept dry fitting during the siding and staining process to make sure I had the siding adhered in a way that wouldn’t interfere with the tab and slot assembly. I also had to prepare the walls in groups since I had limited space for pressing.
I tried the siding/painting process start to finish on the side room first, figuring if it ended up being a disaster, I could still use and assemble the garage kit on its own.
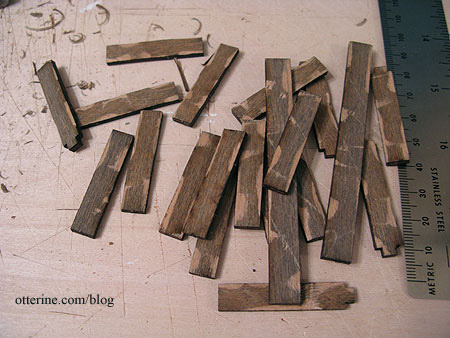
Here are some of the pieces during the siding process:
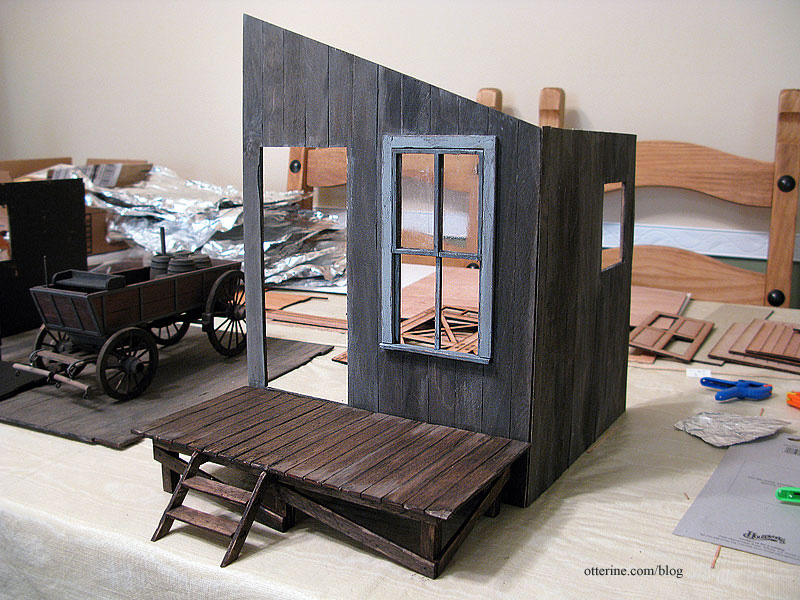
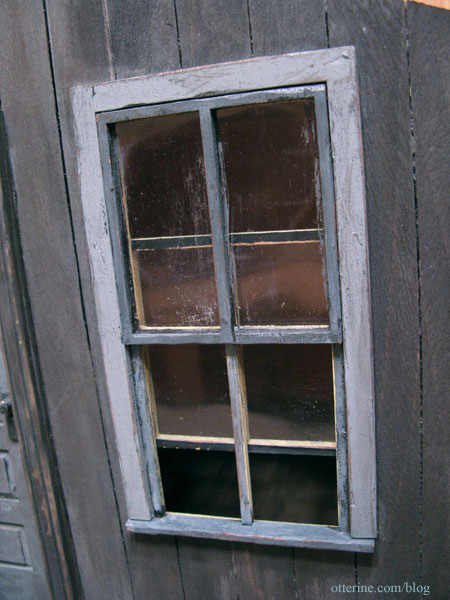
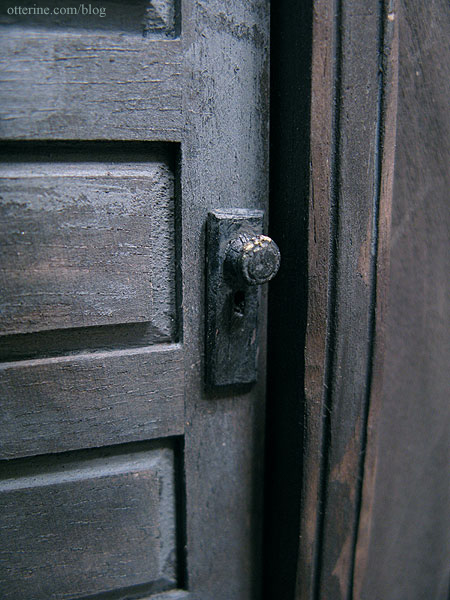
I replaced the two side windows with Houseworks dormer windows and used a Houseworks five panel interior door for the front door. All required very little adjustment to the size of the openings, but they had too much depth for the 1/8″ thick plywood walls. For the front door, I used the outer trim that came with the kit to line the doorway, cutting away the excess to sit flush along the edges of the Houseworks door. I also flipped the opening direction of the door (see my earlier blog entry). For both windows, I created a frame using 1/8″ strip wood under the outer frame.
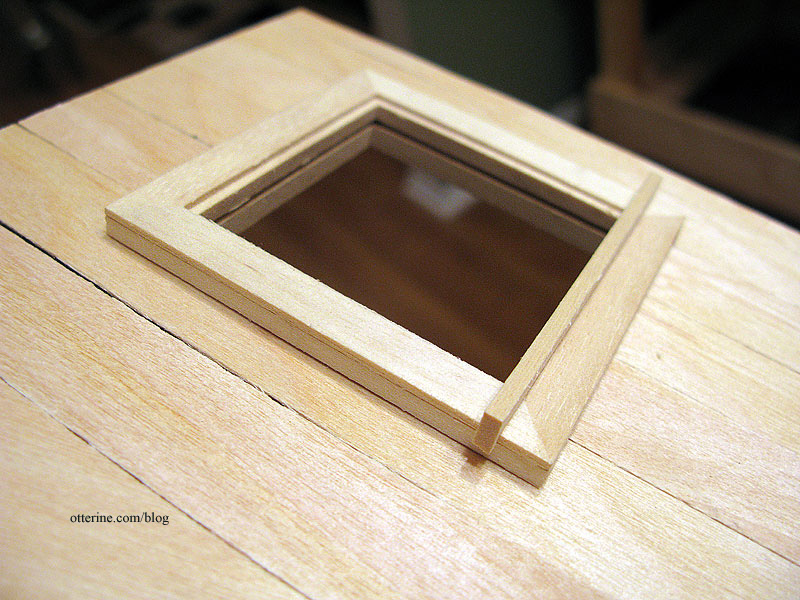
To create the aged front door and window trim, I kept washing on Slate Grey paint by Americana, wiping it off, using crackle medium and repeating until it looked the way I wanted.
The doorknob is an unfinished pewter piece that I painted to match the door.
For the garage main doors and side door, I did an extensive amount of cutting, scoring and general beating the tar out of the wood with whatever tools I had within reach. I even put in a wide gap between the mock boards of the left door. Forgive the dirty nails – that’s what spending a week using black and brown paint washes will do to your hands!
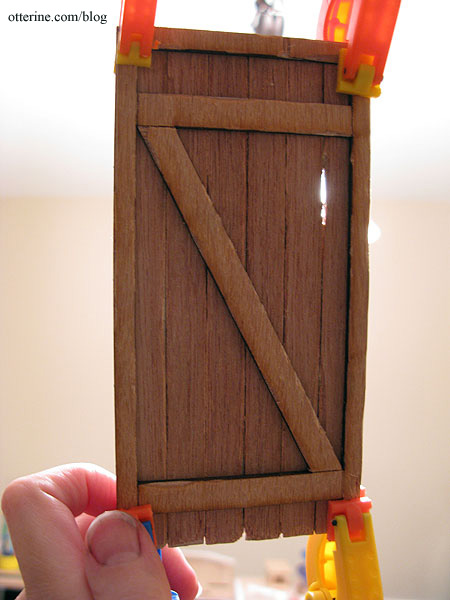
Though only the exteriors of the doors were laser scored in the original kit, I measured and carried that pattern over to the reverse sides.
I used working hinges for the garage doors, dabbing black paint to cover the brass nails. I also used black paint to color in the original laser etched hinges since my working hinges didn’t cover them completely.
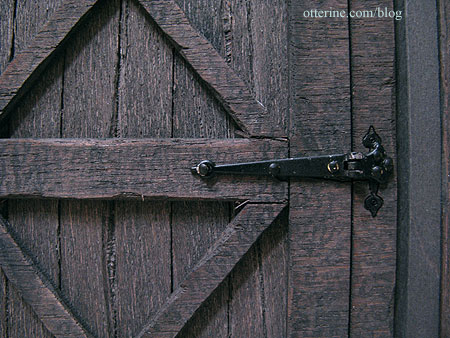
I attached the metal hinges before the walls were assembled so I could lay them flat and get the proper fit. I had to do some altering of the lower edges of the doors and the front edges of the floor after assembling the structure, but it worked out better in the long run.
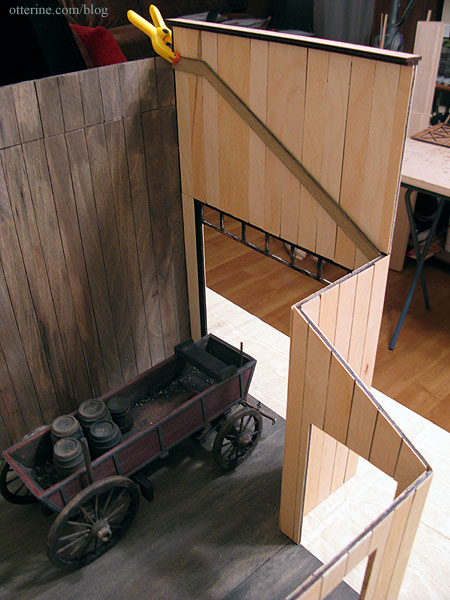
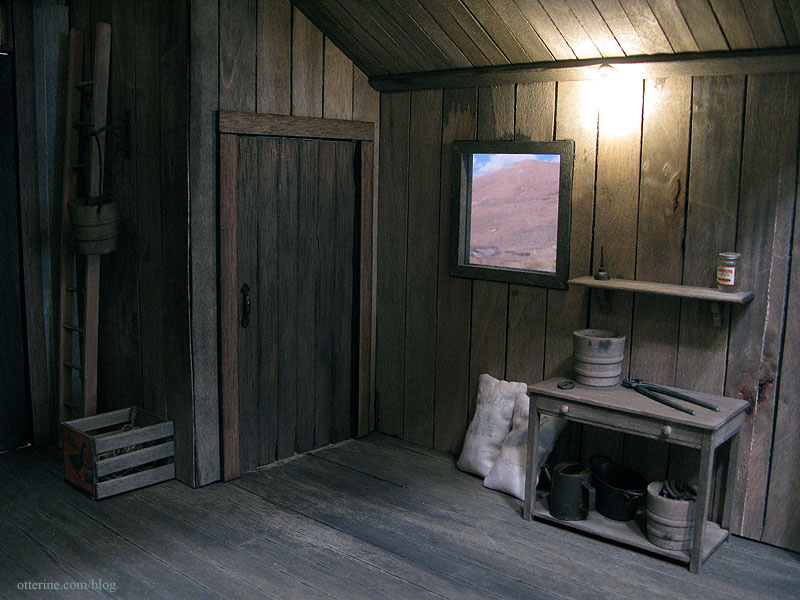
To get a firm fit when attaching the room addition to the main structure, I glued strip wood to act as a brace under the floor and to support the ceiling board to create an attic. I left space between the boards to run wiring (you can see the channel I made with my rotary tool).
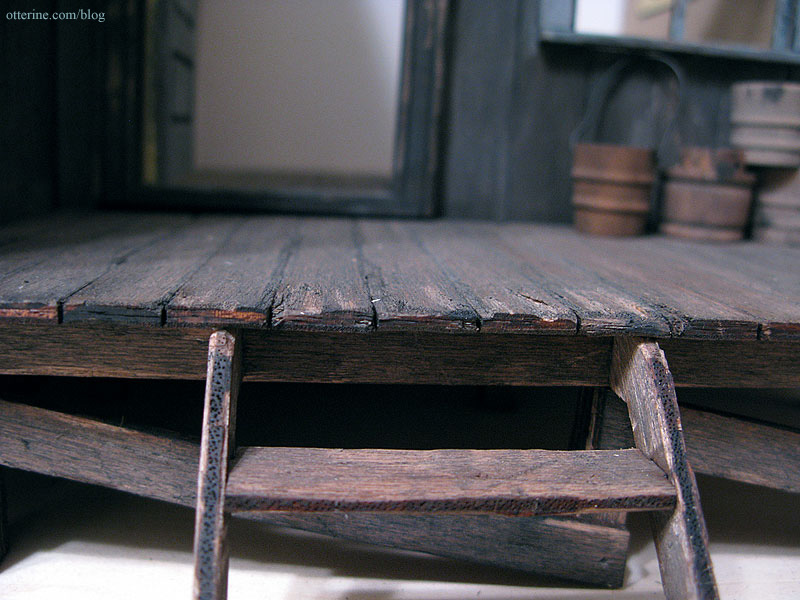
The porch construction was exceptionally easy and might be one of my favorite parts of the kit. I again cut and pounded the boards to create an aged look.
I used an awl to puncture nail holes along the boards and a tiny drill to simulate bolts on the lower support beams.
I especially beat up the edges of the boards and exaggerated the laser scored lines and cuts along the front edge.
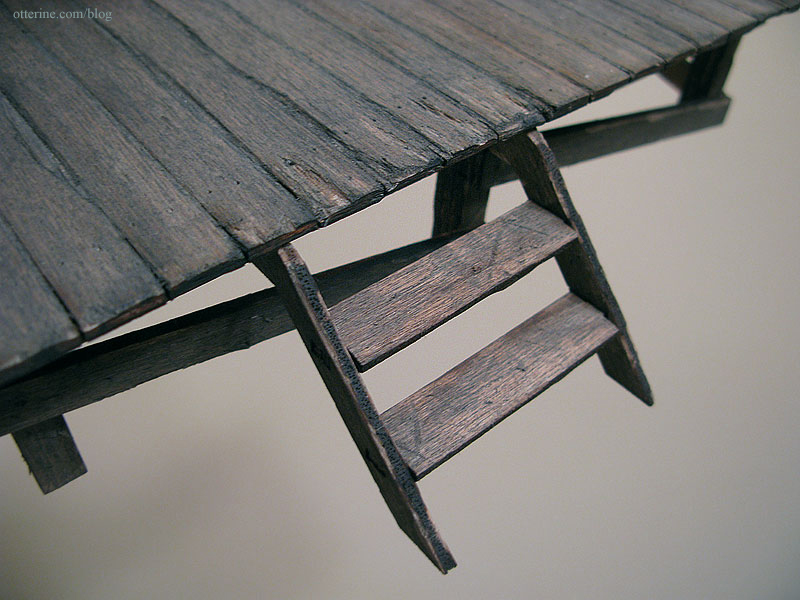
This created a really nice walking wear pattern at the top of the stairs.
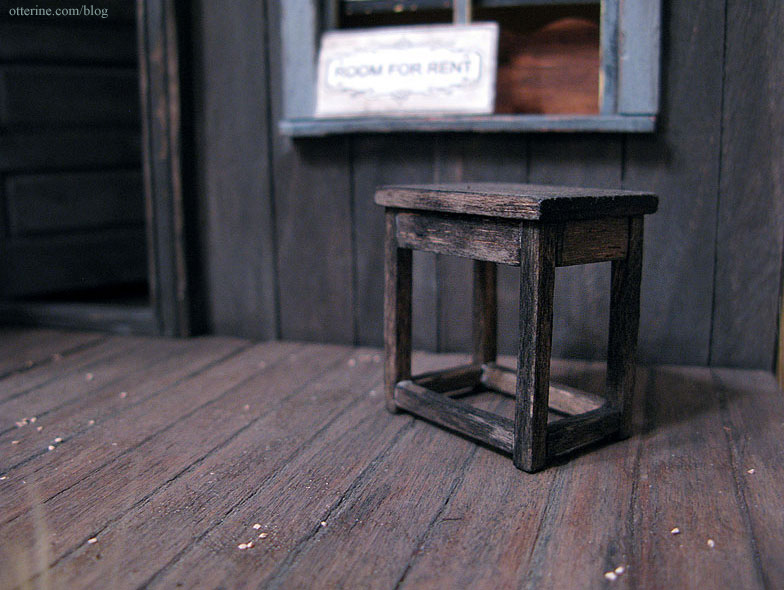
I made the stool using a pattern in the book Finishing Touches by Jane Harrop. It, too, was aged with the black and brown paint wash.
Categories: Baslow Ranch
May 31, 2010 | 0 commentsBaslow Ranch – Tin Roof

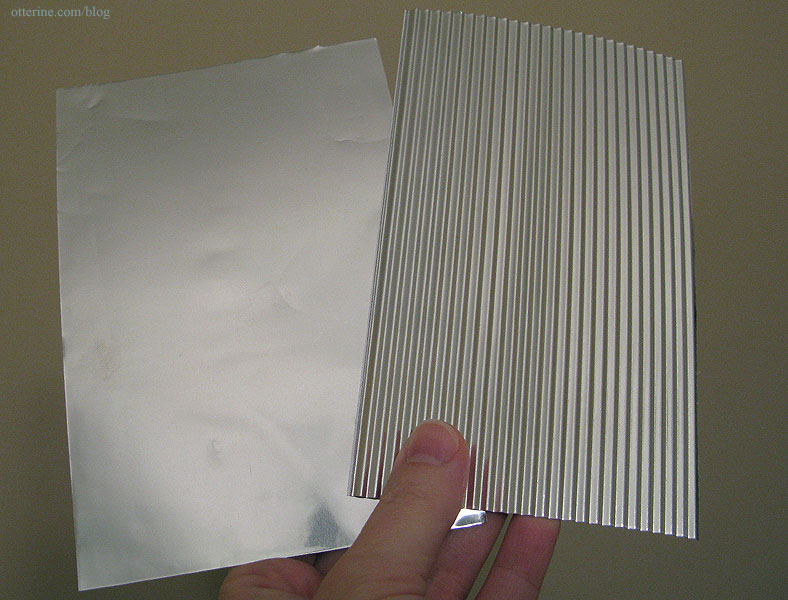
My initial idea for the roof was corrugated cardboard painted to simulate tin since I’ve seen that done before with good results, but I found two items that allowed me to go for an even more durable finish. The first was a pack of 12 metal sheets with an adhesive backing. Each sheet measured 4″ x 12″ and the pack was very reasonable in price – $5 at Hobby Lobby. I then bought a paper crimper by Fiskars to turn 4″ x 6″ pieces of the metal sheet into corrugated tin roofing. :D
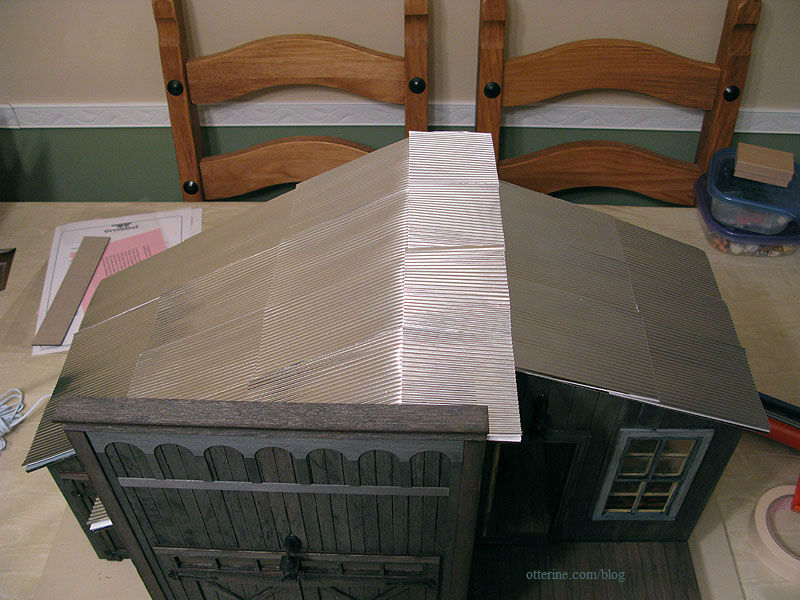
I taped the layout onto the roof with masking tape to figure out what would look best.
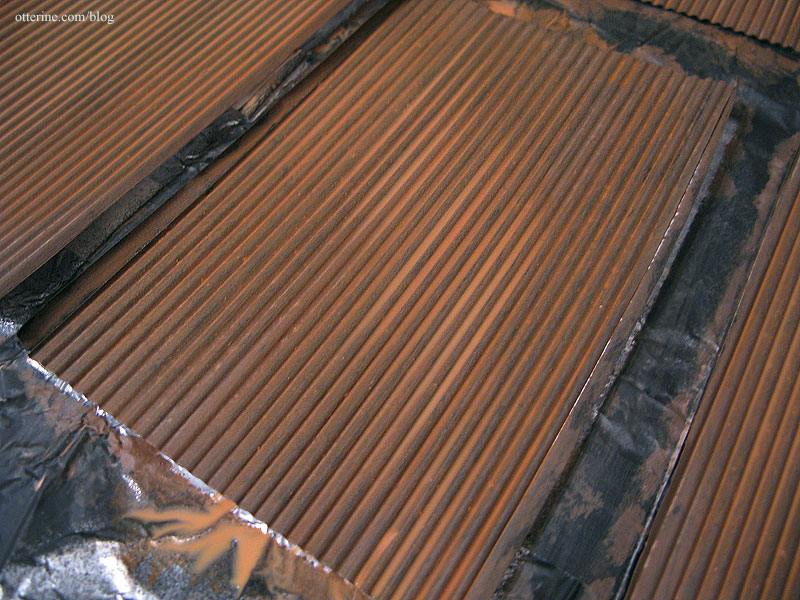
After transferring the pieces onto a foil covered board, I sprayed them with a thin coat of Testors flat black spray paint.

Once the black paint was dry, I started layering different colors of paint using a stencil brush. I used Bittersweet Chocolate by Americana, Coffee Bean by Folk Art and Terra Cotta by Americana. Once I had a good base of brown and rust colors, I used a watered down wash of the Terra Cotta paint to smooth the surface. Here is the final look.
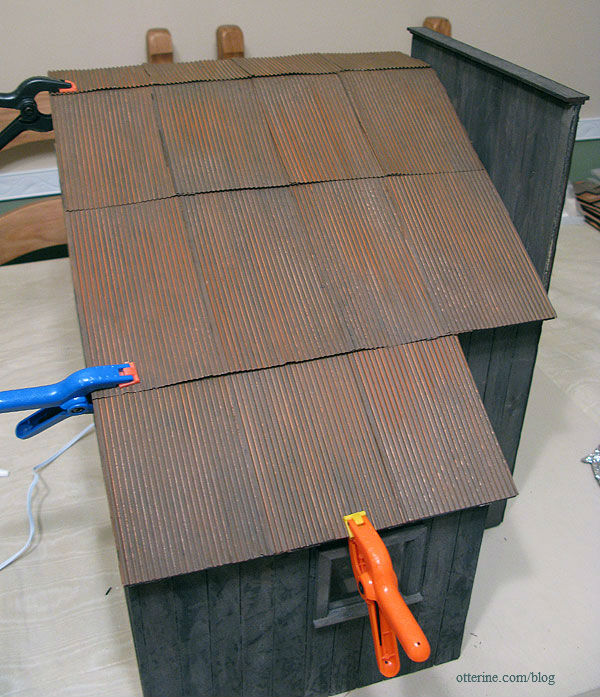
The metal had an adhesive backing, but I added some tacky glue after peeling away the backing to affix the pieces to the roof.

Some of the edges lifted as the glue dried, but that only added to the worn effect.
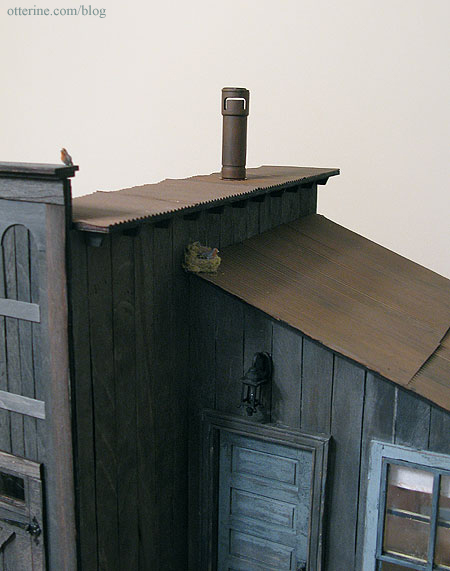
The chimney was made from spare bits and bobs. I glued the pieces together and then sprayed with Testors flat black. I “rusted” it with paint and glued it to the roof. (I didn’t make a connecting pipe inside the barn due to lack of time.)
The birds nest was made using an online tutorial as a starting point, but I used what I had on hand: jute twine and some leftover Woodland Scenics ground cover. It made sense to me that a bird would make use of the materials growing in the environment, so I wanted it to match the plants I had put around the building.
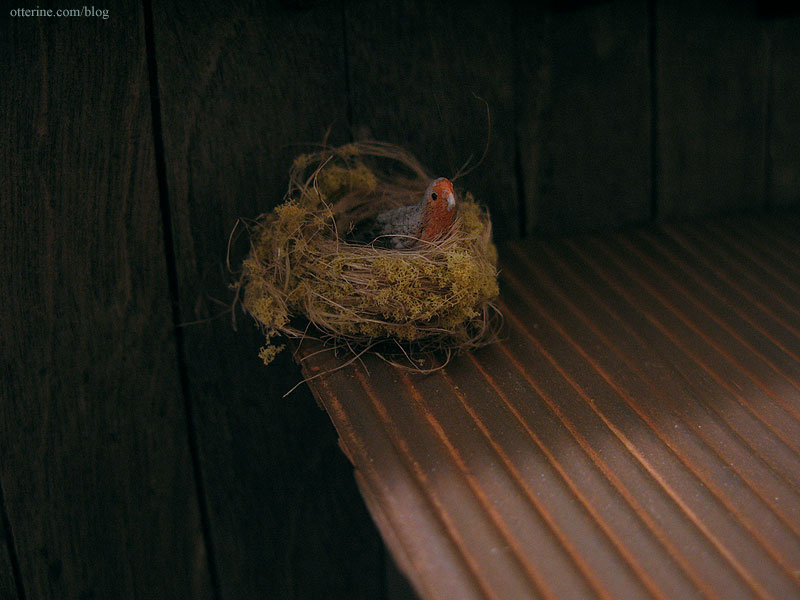
I placed one bird in the nest below the eave of the upper roof and the other bird on the top of the facade. The birds are by Falcon Miniatures.

Categories: Baslow Ranch
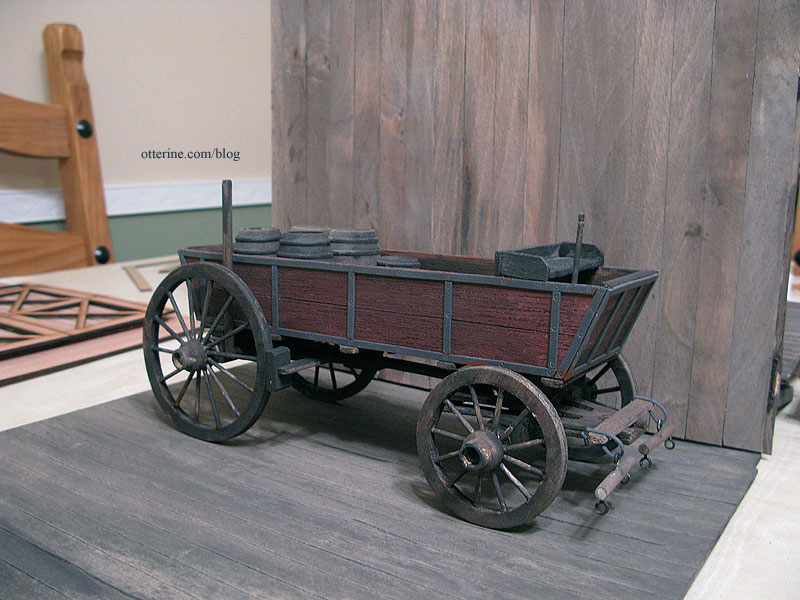
May 31, 2010 | 0 commentsBaslow Ranch – Farm wagon
This was one of the initial things I built for Baslow Ranch. As an integral part of my idea, I had to figure out from the start if it would even work the way I wanted.
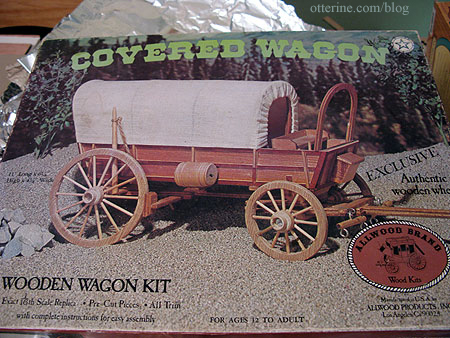
My wagon was adapted from a covered wagon kit by Allwood (made in the 70s, I think). I changed it from a covered wagon to a farm wagon since the kit was 1:16 scale and, as a covered wagon, it would have been a bit small in relation to the barn. Here’s the box image.
The kit was partially assembled when I bought it. Three of the four wheels were already done as well as the main body. The faux wood trim didn’t look right (think wood paneling on an old station wagon), so I ended up taking the body apart altogether and cut new pieces from a scrap of plywood I already had. This allowed me to score the inner and outer surfaces of the pieces to mimic wood planks.
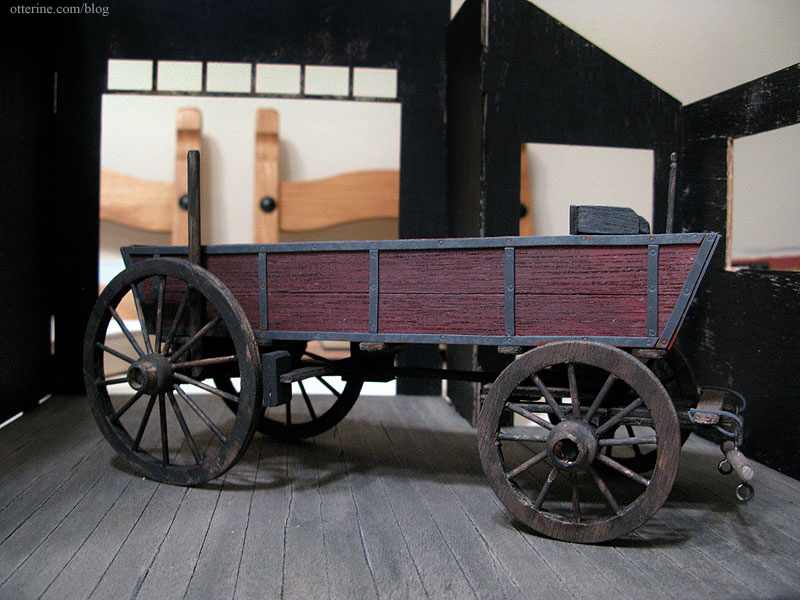
I painted the outer body Black Cherry by Folk Art. I painted the rest of the pieces with a wash of black and brown paint and used some of this wash to age the Black Cherry paint.
The trim is made from 1/8″ wide Instant Lead Lines by Plaid. This is a self-adhesive material used for faux stained glass. Once in place, I pressed a nail set into the lines to create rivets. A little rust paint added here and there aged the look a bit.

I added some ballast by Woodland Scenics to dirty up the inside.
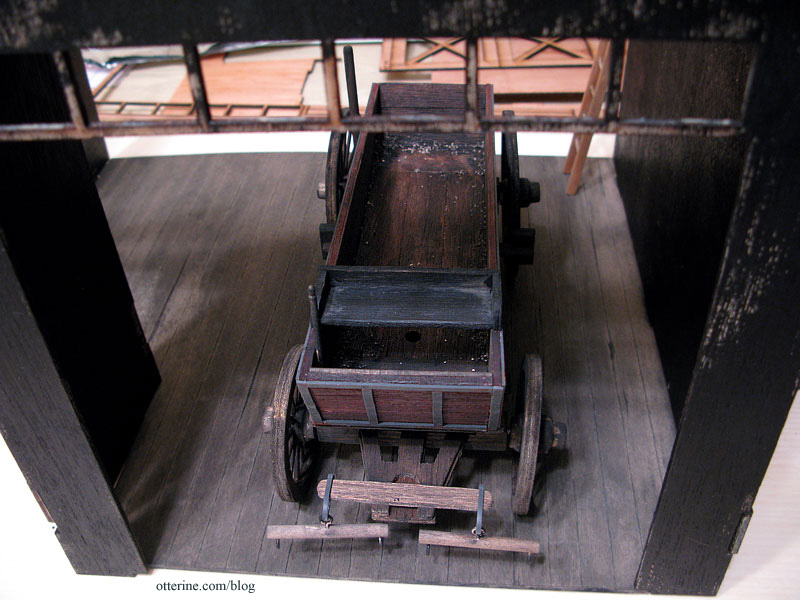
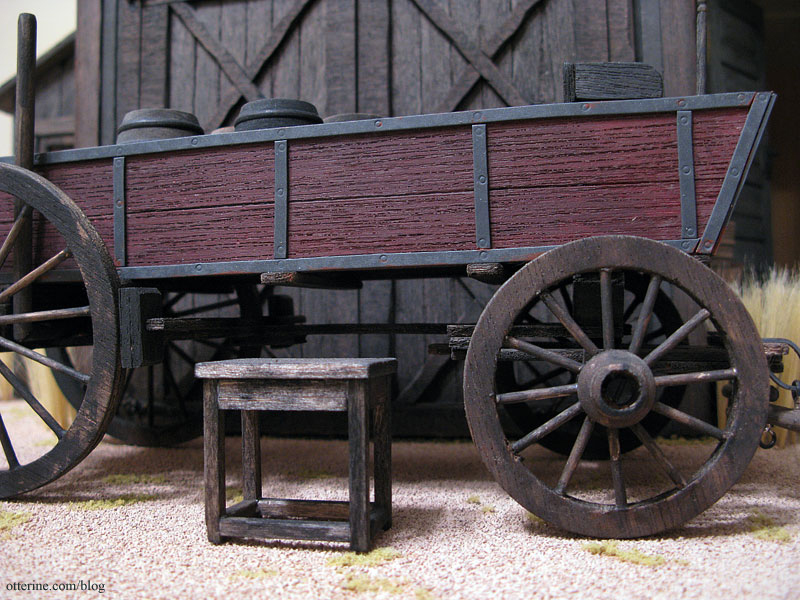
It’s a good thing this was meant to be a rickety ol’ wagon, because the wheels are nowhere near straight. Three of the four wheels were assembled by the previous owner, but I my fourth wheel wasn’t much better. The chassis and basic structure are solid, though.
It ended up fitting perfectly in the barn space.
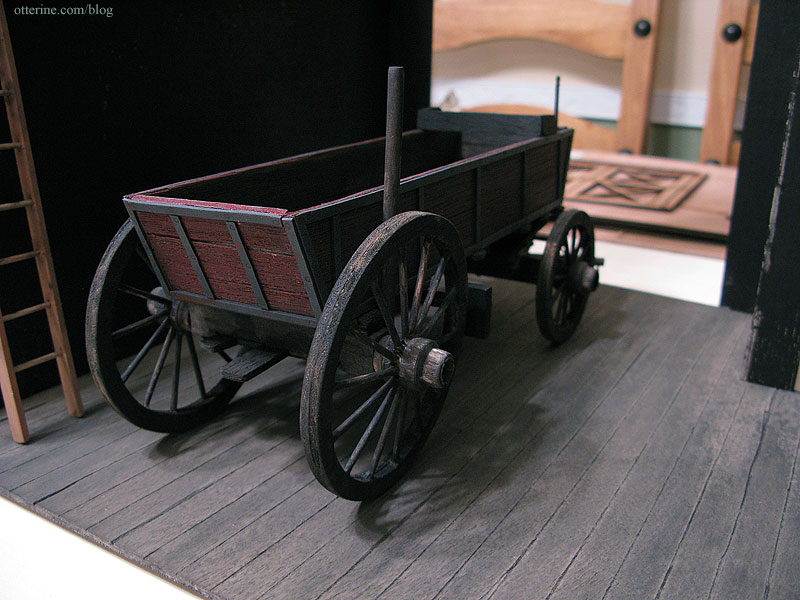
I applied multiple paint washes to some unfinished wood barrels I purchased and put them in the back of the wagon.
I made the stool using a pattern in the book Finishing Touches by Jane Harrop. It, too, was aged with a black and brown paint wash.
The wagon has a removable tongue, too, though it makes the wagon too long to park inside the barn with the doors closed.
Categories: Baslow Ranch, Model Cars, Vehicles
May 30, 2010 | 0 commentsGreenleaf 2010 Spring Fling – Baslow Ranch
This was my first time working with a Greenleaf kit. The 1/8″ plywood walls gave me some fits with the warping, but the laser cut pieces were great to work with. Overall, I loved this kit!
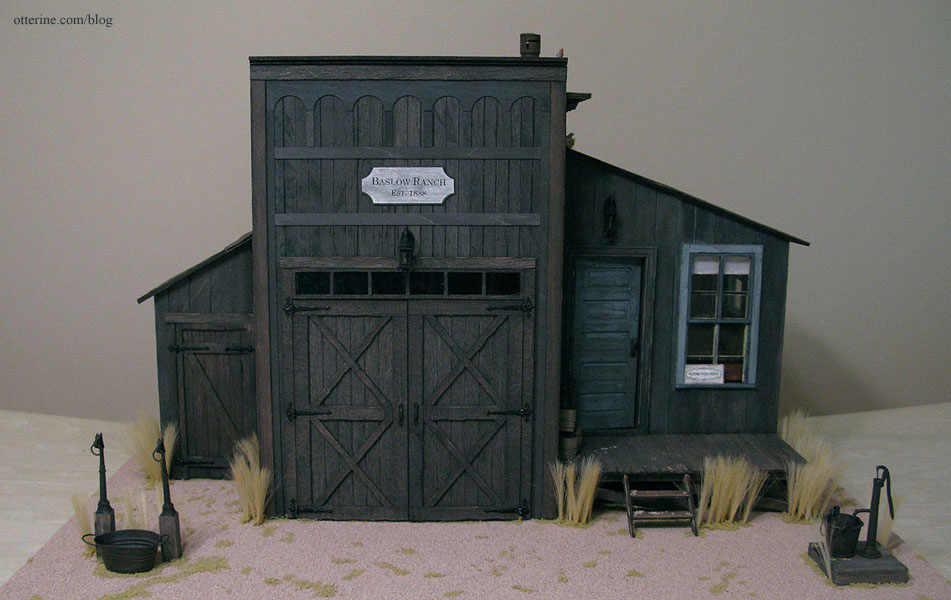
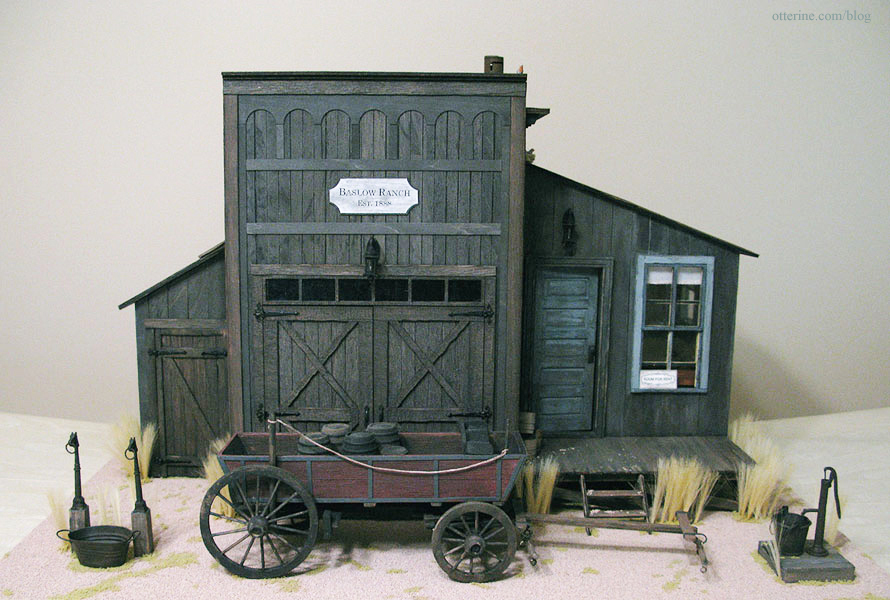
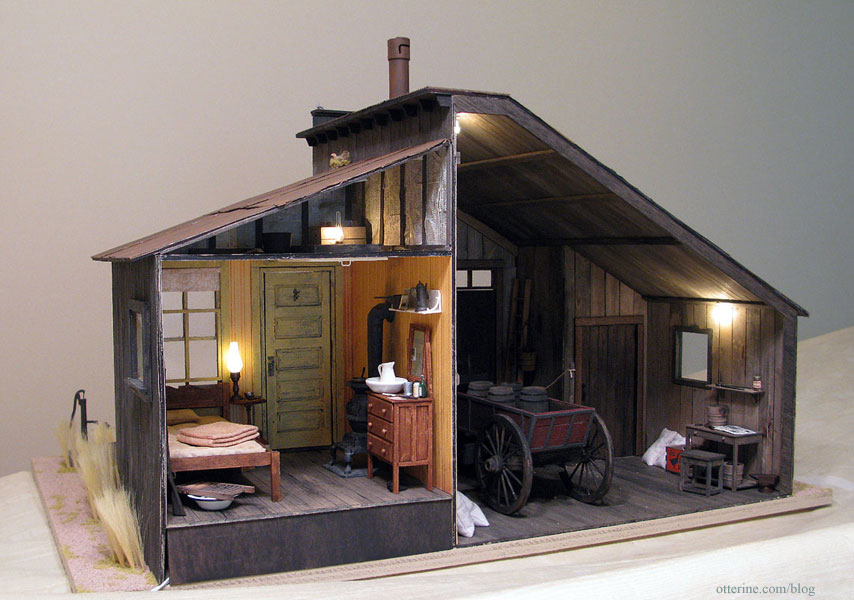
The overall feel I went for with this project was that of a late 1880s building that had been updated over time with electricity and other “modern” features of the passing times. It now sits as an open air, living museum to remind us how people lived and worked. I relied heavily on my trip to Bodie, CA – an open ghost town where you can walk around and explore – as well as other living museums I have visited.
I’ve named the Spring Fling structure Baslow Ranch, established in 1888. The name is in honor of several of my recent pets: Basil (pronounced bazzill), my beloved cat who passed away in September 2009; Clover, a sleek and beautiful Chinese dwarf hamster; and Willow, a Russian dwarf hamster who went through a lot in his long life and held on tenaciously until the very end.
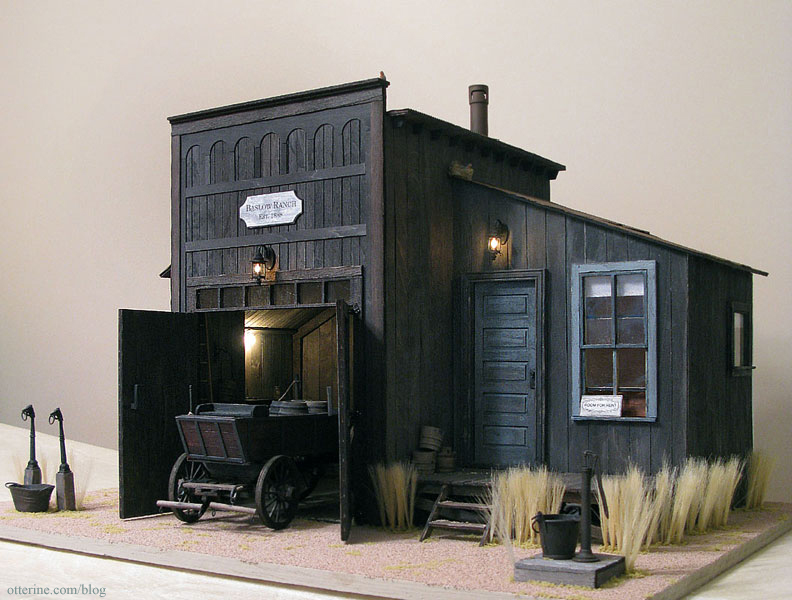
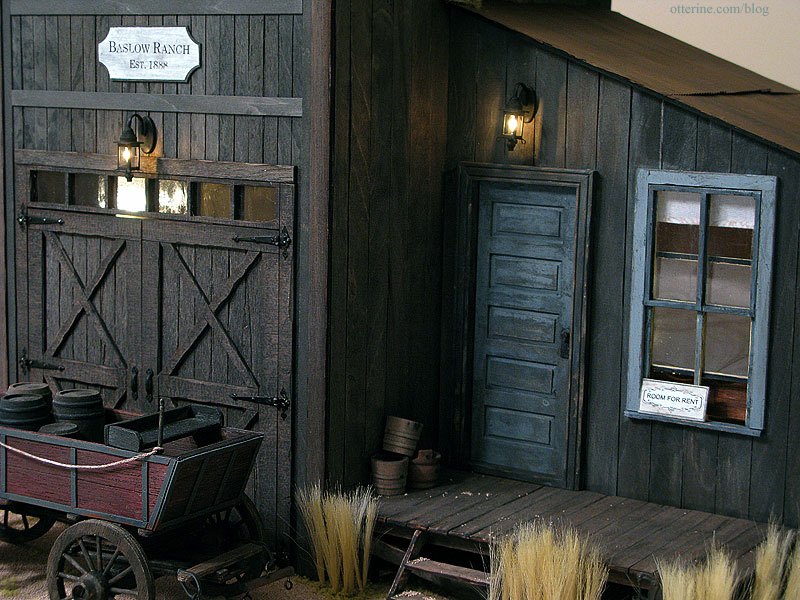
And, the back:
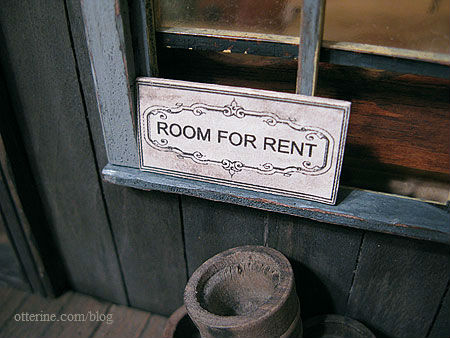
A close up of the sign and light over the barn doors.
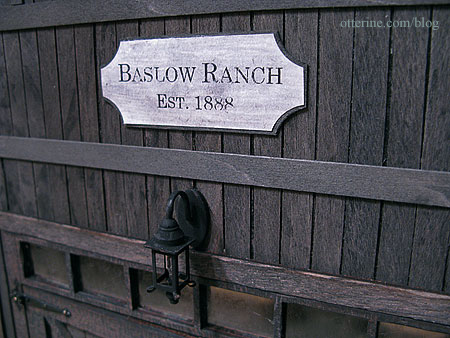
Attached to the main barn is a room for rent. Both the above sign and this one were created in Word and printed on paper. I glued the paper to a wood backing and aged with paint washes.
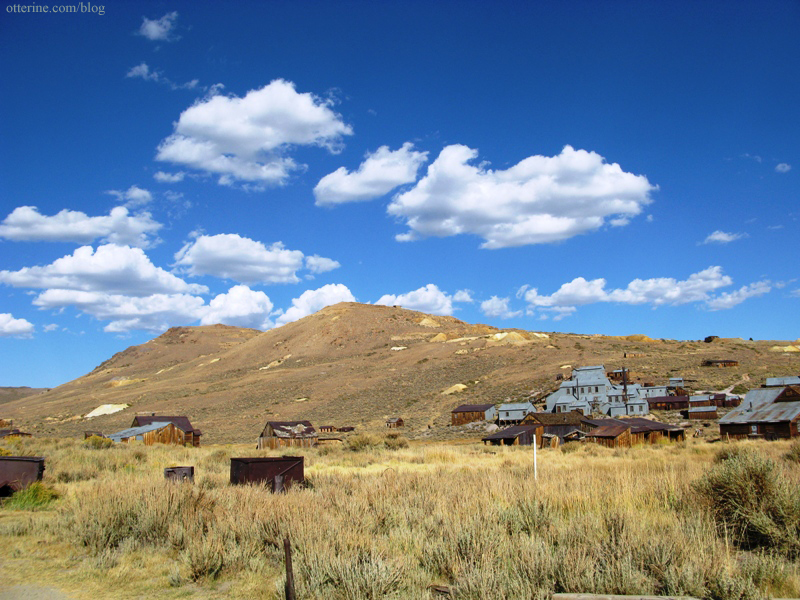
The backdrop I used in some of the shots is a photograph I took in Bodie, CA. This was a great place to visit – a bit of a chore to get there but more than worth the effort (bring a hat and sunscreen!). I took over a hundred photos walking around this open museum ghost town.
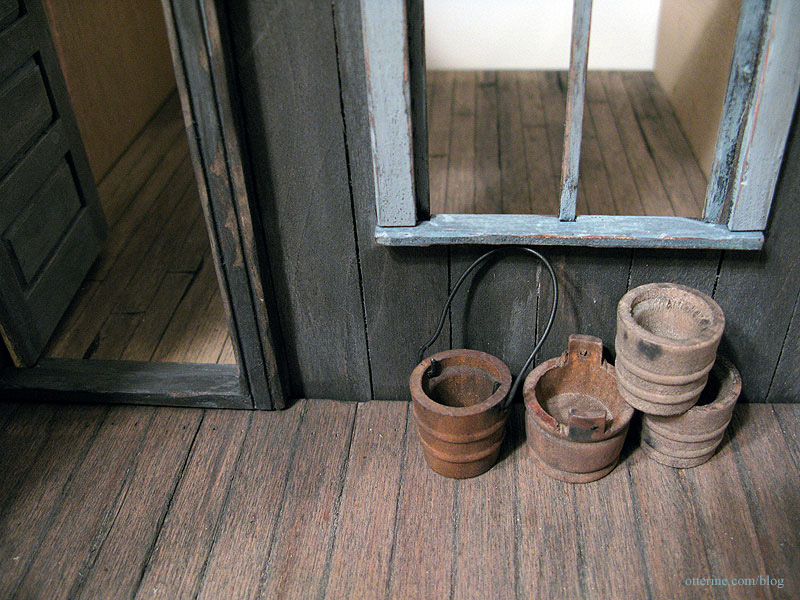
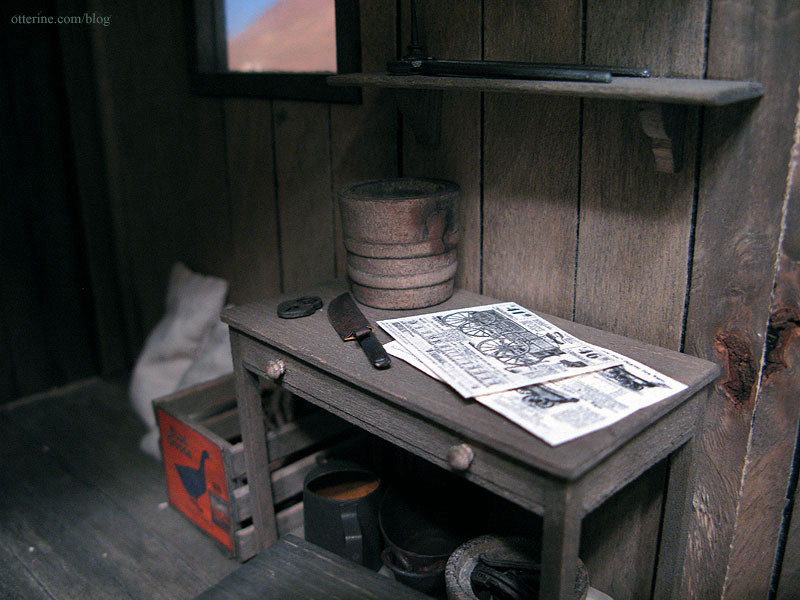
I tried to make as much as possible for this project, not only to stay on budget but to see what I could accomplish on my own. The things I didn’t make include: lights, buckets, barrels, as well as the glass, ceramic and metal minis. Of the minis I bought, however, I still changed most in some way by either painting or weathering or both. The blog entries for this build might jump around a bit in the actual chronology of assembly, but I’ve tried to group portions together in a way that makes sense.
Even though I mostly relied on my own photos from my Bodie, CA ghost town visit, I did do some minor research through the library on wagons and rural life of the late 1800s/early 1900s. I highly recommend the book I See by Your Outfit: Historic Cowboy Gear of the Northern Plains by Tom Lindmier and Steve Mount. It has an amazing collection of old photographs that are an excellent source of study as well as being just plain interesting to look at. Some of the photographs are so clear you can see the texture of the fabrics and the individual hairs of the horses.

Some other notable books I looked at had schematic drawings of wagons and carts. I reduced a couple of the vintage advertisements in one of the books and printed them for inclusion in the barn. I don’t recall which book exactly, but all of the ones I viewed were by John Thompson.
Categories: Baslow Ranch
May 28, 2010 | 0 commentsItalian shoes and matching handbag
I now own three things from Italy, though I have never been there. First is a Venetian mask I bought online about ten years ago. And, now…these beautiful shoes with a matching handbag from the wonderfully talented Patrizia Santi. :D I just love them!
I originally saw the shoes at the Bishop Show in Chicago back in April. I hesitated about buying them and lost out. The price was reasonable considering the outstanding workmanship and time involved; I just hadn’t wanted to go overboard with shopping on my first night at the show. When I went back later, however, the ones I wanted were gone.
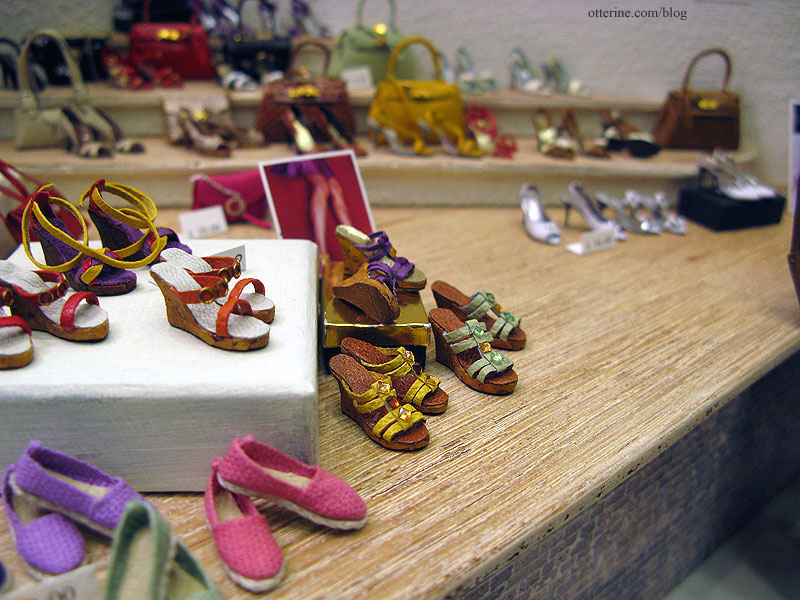
After looking at the photo I took at the show over and over, I decided to write to the artist to find out what I had to do to get those shoes! She made a pair for me and (as a complete surprise to me) included a matching handbag. It was so thoughtful of her. I think the shoe box and shopping bag are so awesome, too. :D
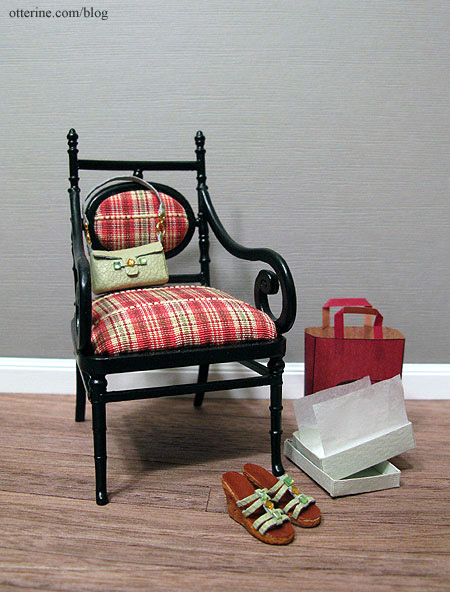
I don’t typically carry handbags in real life, but I would carry this one and I would definitely wear those shoes! :D
Categories: Miniatures
May 22, 2010 | 0 comments


NOTE: All content on otterine.com is copyrighted and may not be reproduced in part or in whole. It takes a lot of time and effort to write and photograph for my blog. Please ask permission before reproducing any of my content. Please click for copyright notice and Pinterest use.


