

Installing NovaLyte LED Recessed Can Lights
Someone recently contacted me with questions about installing the NovaLyte recessed can lights, so I figured while I was replying I would post a blog entry on it in case anyone else was interested in how I installed them.
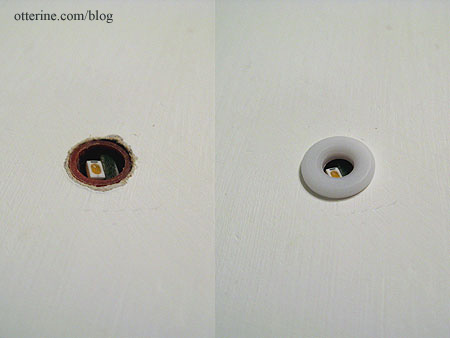
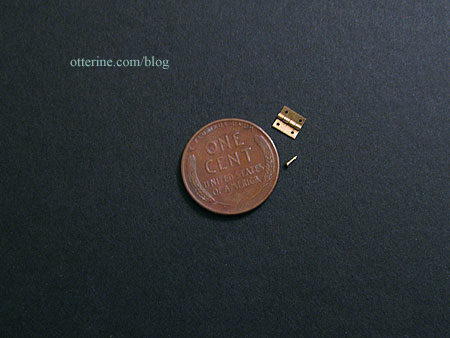
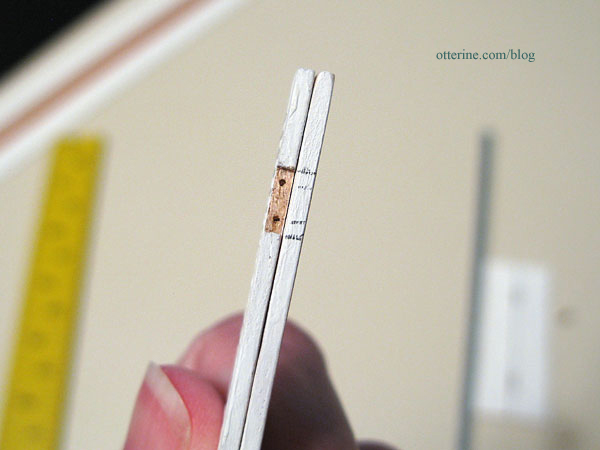
Here’s the LED without the finishing ring (that’s popped in place after you install the lights). According to the NovaLyte website (no longer active as of 2024), these measure 5/16″ L x 5/16″ W with a required clearance hole of 21/64″.
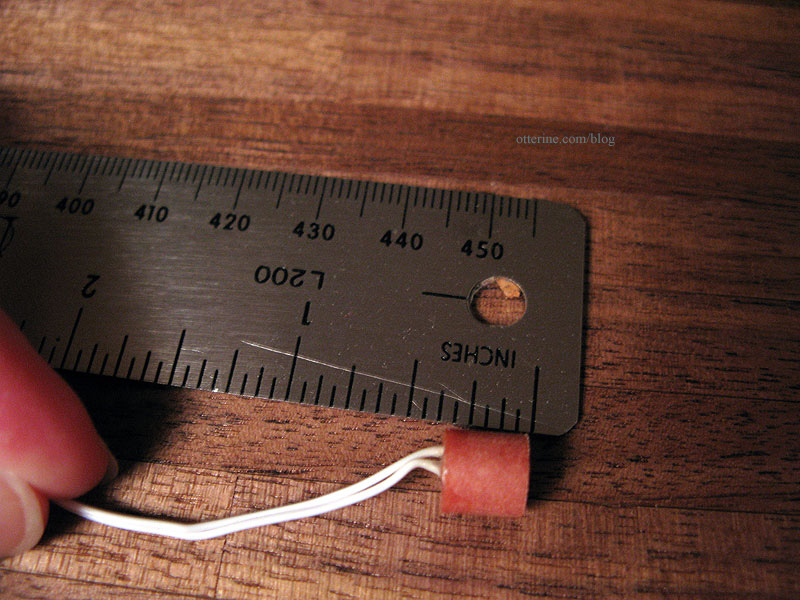
Here’s the LED with the 21/64″ Dewalt drill bit I used to make the clearance holes.
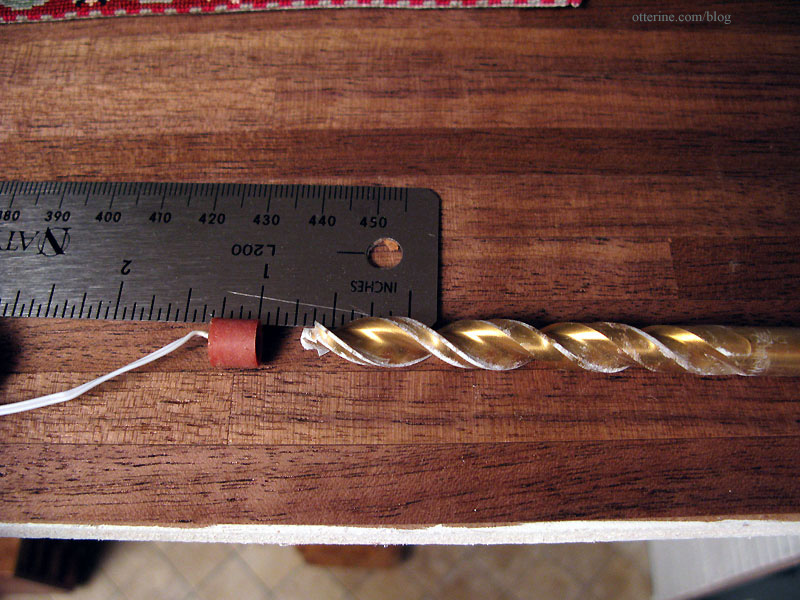
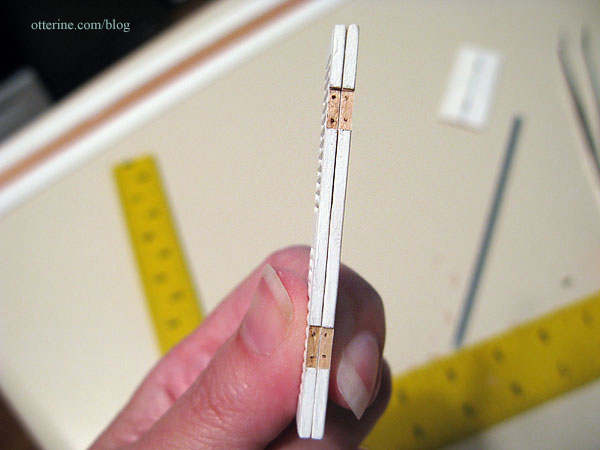
The walls and floors of the Newport are 3/8″ thick, so there was plenty of room for them to fit inside the drilled holes without having to build up the floor board. With thinner materials, you’ll need to pad either the ceiling these are lighting or the floor above to hide the excess. These are cohesive units and therefore can’t be cut down.
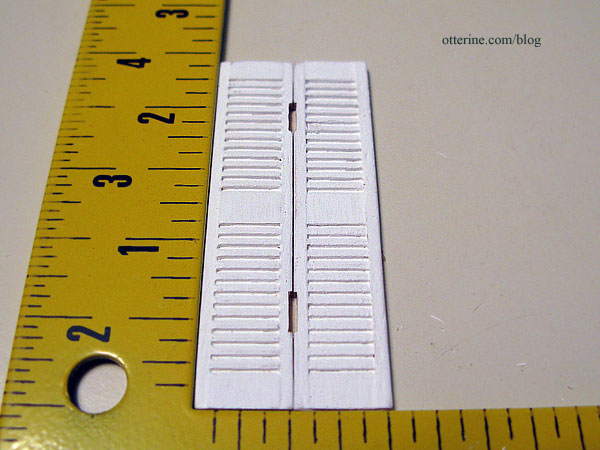
Here’s the light in place in the floor board. The can light illuminates the room below this floor. I found that feeding the wire up through the hole and pressing it in place gives a nice flush finish with the ceiling.
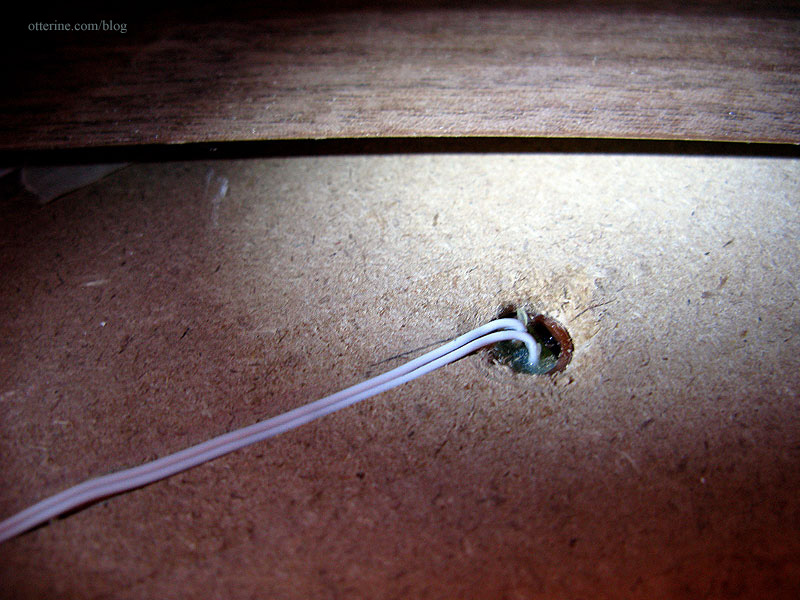
I’ve cut channels for my wires since I’ve hard-wired the Newport. If you’re working with tape wire, you’ll need to figure out how to best attach them. I know absolutely nothing about tape wire.
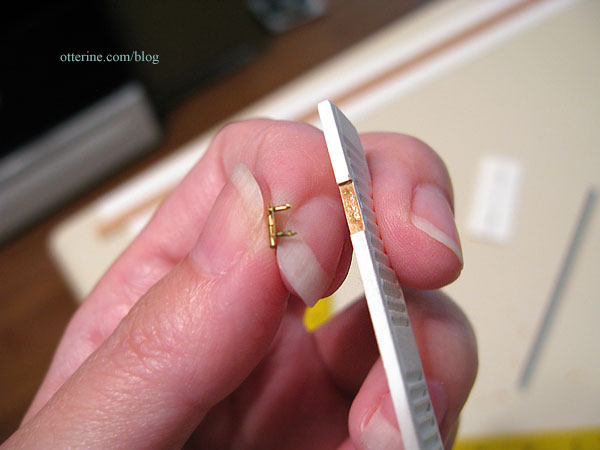
Using the 21/64″ drill bit gives the light a nice snug fit. The dress ring is then popped onto the light to finish it.
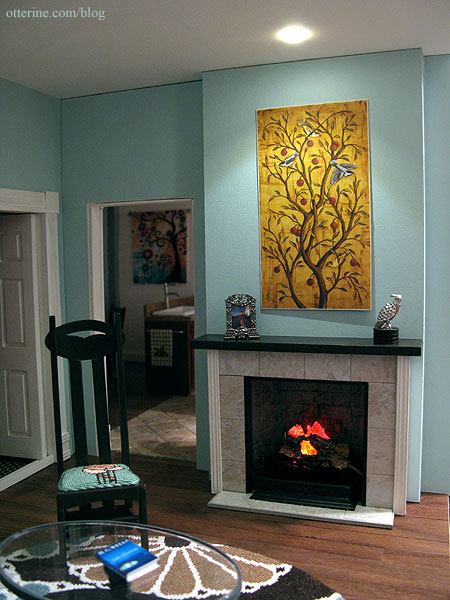
Here’s the finished look in the living room.
Categories: The Newport
January 26, 2011 | 0 commentsVintage crochet throw blanket
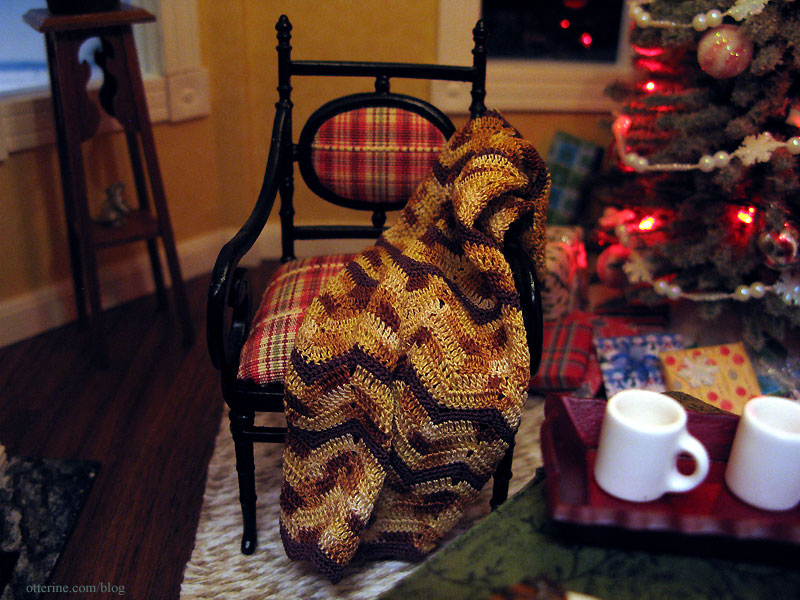
I am ever in awe of those who can crochet in miniature. I have the patience for needlework, but I don’t think I could wrap my mind around using sewing thread as yarn with a tiny crochet hook well enough to produce anything close to resembling the works of art Mary of Roslyn Treasures makes.
After admiring her work for close to a year, I bought myself an early Christmas present…one of her fabulous miniature crochet blankets, just like the ones my grandma and great grandma used to make (mom still has one of the life sized ones).
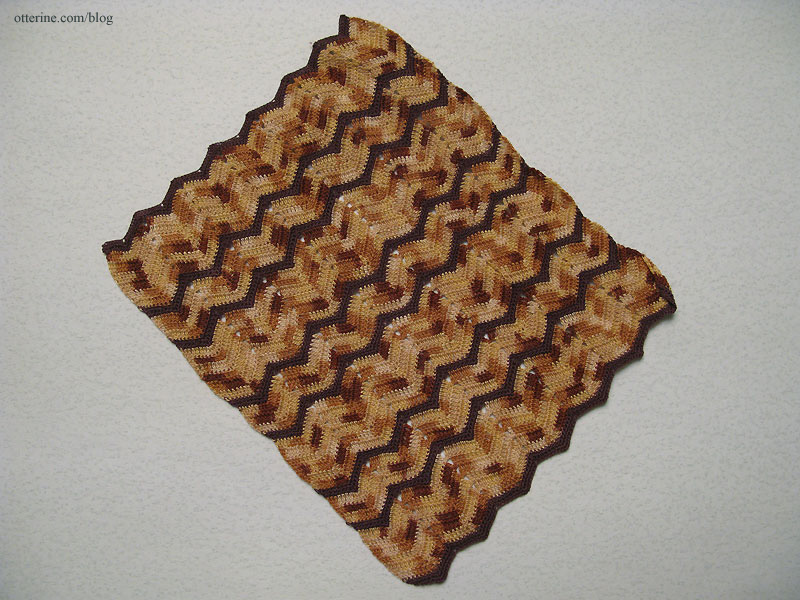
Mary does flawless work. Magnified, the stitches are indiscernible from a real life sized blanket.
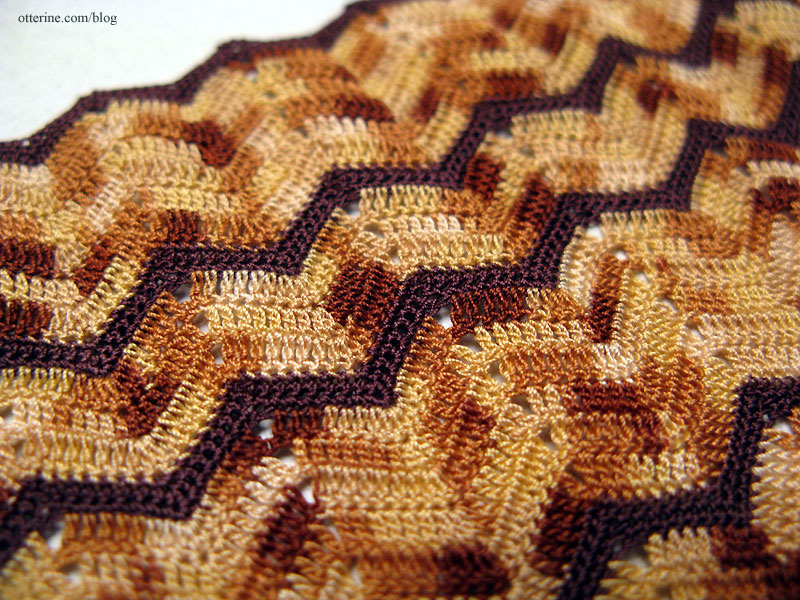
And, her creations drape so realistically.
Categories: Miniatures
December 14, 2010 | 0 commentsCafé shutters
This tutorial ran in the September 2010 Greenleaf Gazette. :D For those who missed it, here it is in its entirety.
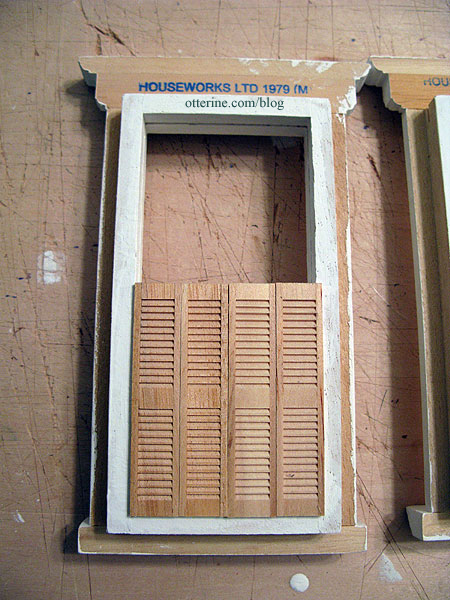
For the master bathroom, the need for privacy while bathing was a must. In order to stick with the clean lines of the room so far, I decided to make some café shutters for the bottom halves of the windows.
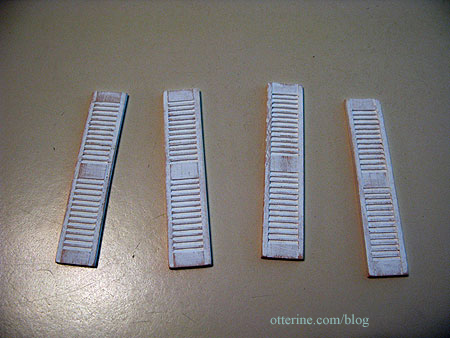
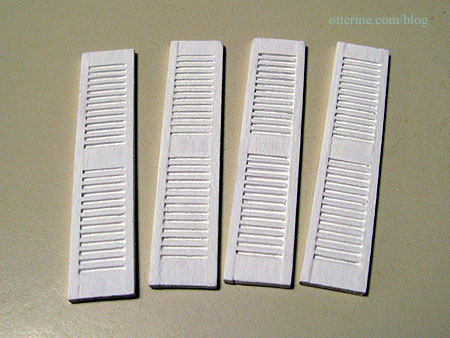
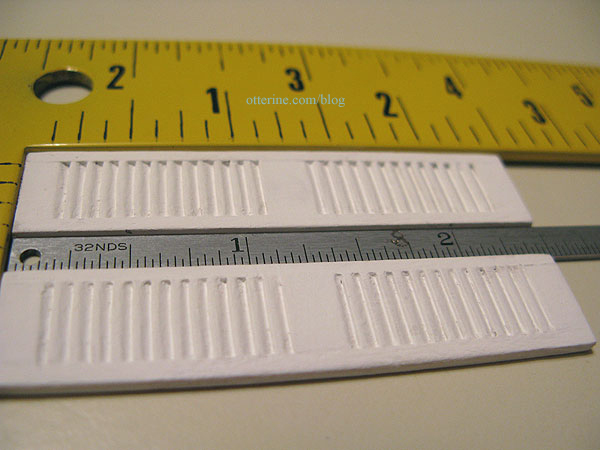
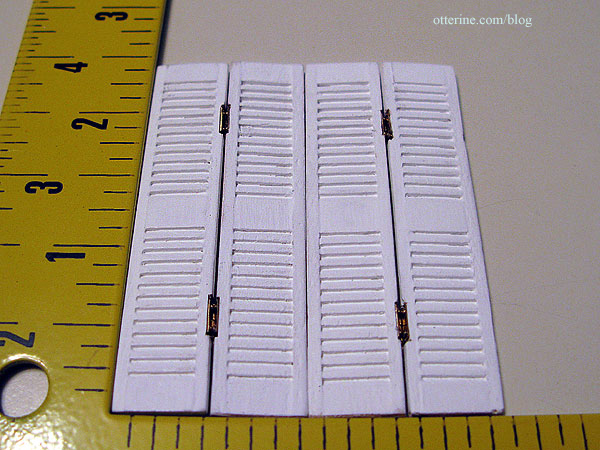
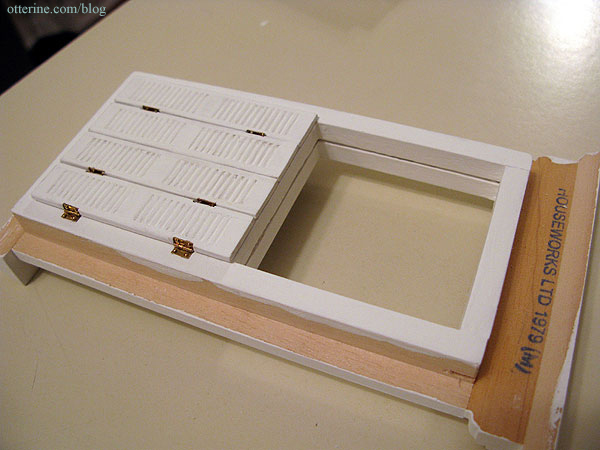
I started with half scale window shutters from Houseworks. Each one measures approximately 1/2″ x 2 1/2″. Four of them lined up side by side are just about the right fit for the standard windows of the Newport. If you wanted the look of café shutters without the work of putting the hinges on them, you could paint them, glue them together along the edges and glue them as a single piece to the window frame.
I painted the shutters white, including the plain (non-louvered) backs. Once dry, I sanded them before putting on a second coat.
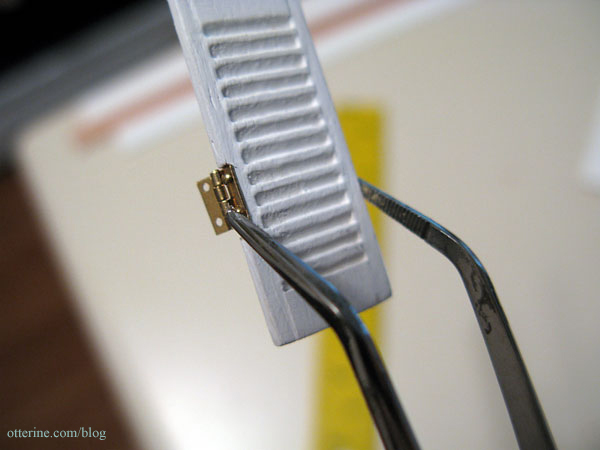
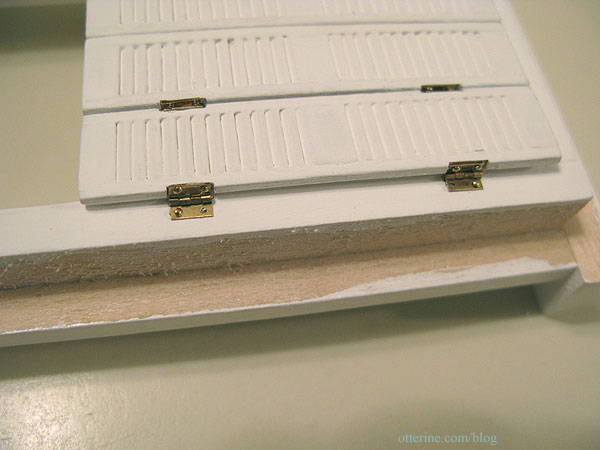
In order to make the shutters functional, I used eight very tiny hinges per window; they each measure 3/16″ square when open. They have incredibly tiny nails as well. I recommend working in an area where you won’t easily misplace them (spoken from experience). Cats get very curious about you when you are scrounging on the floor on all fours, but they are not much help. I did find the wayward nail, by the way…all four times!
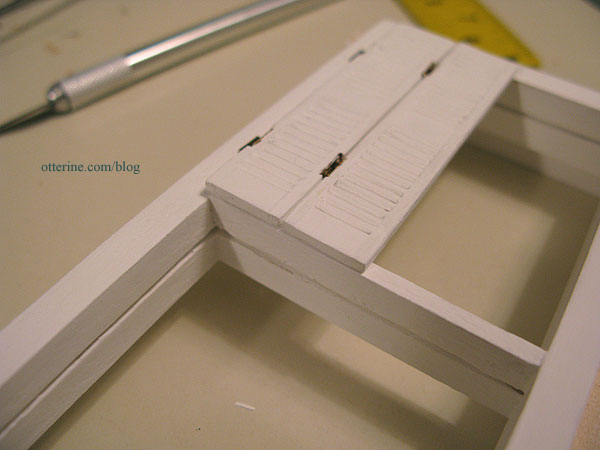
Lining up two shutters with the louvers going the same direction, I marked the hinge placement 1/2″ from each end.
I used a tiny hand drill to make shallow pilot holes.
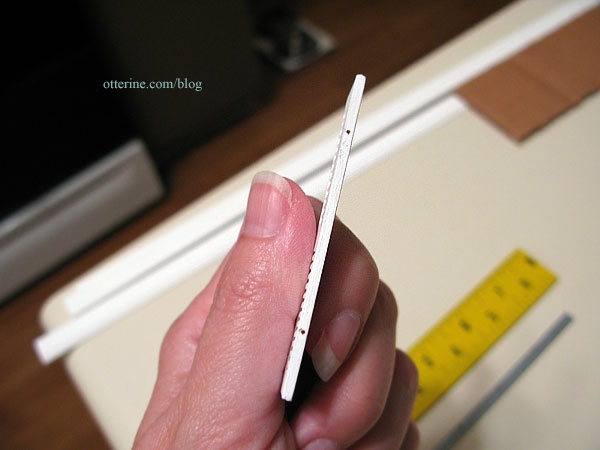
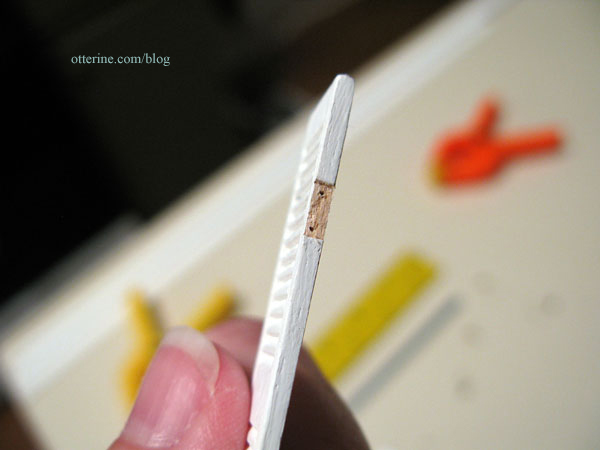
I cut out an indentation in the sides to allow for a recessed fit for each hinge, otherwise there would be gaps between the shutters and they would no longer fit the window width correctly.
Holding the two shutters side by side and aligned top to bottom (plain backs together, with louvers on the fronts going the same direction), I copied the indentations and nail placement onto the second shutter.
After putting a tiny dab of clear gel glue on each nail and inside the indentation, I pressed the nails into place using tweezers. Be careful not to mar the opposite side by squeezing too hard or at the wrong angle (also spoken from experience). But, that’s what spackle is for!
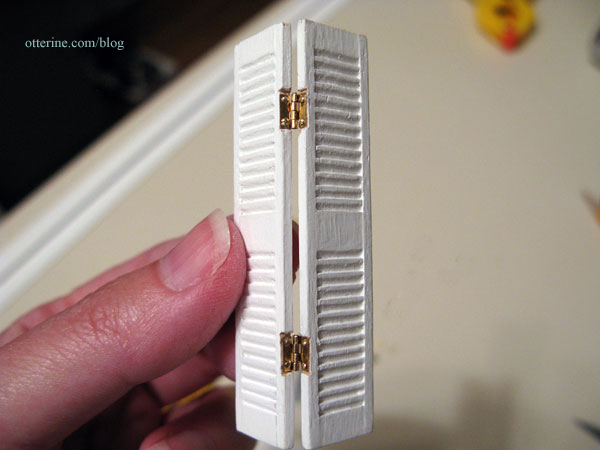
Attaching the hinges takes time and a lot of patience. I attached the first set of two shutters in one long sitting and then came back to the project the following night. Remarkably, it took considerably less time and effort for the second set. When doing the second set, make sure the louvers are going in the same direction as your first set.
After the hinges were in place on both sets, I touched up any imperfections in the finish. I finished the bathroom window inside and out. Your window may or may not need to be installed before attaching the shutters, depending on your structure. In my case, I was able to work on the window while separate from the house.
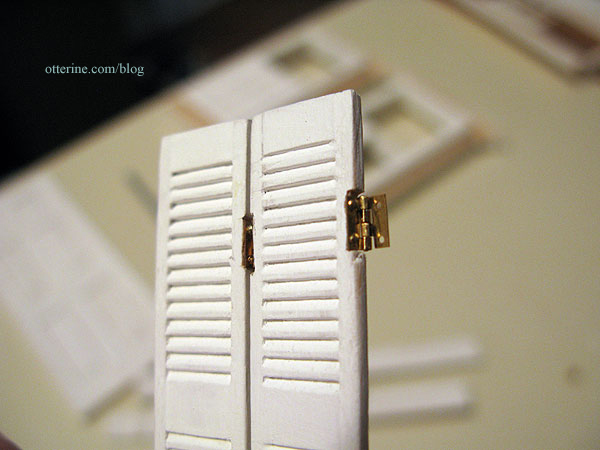
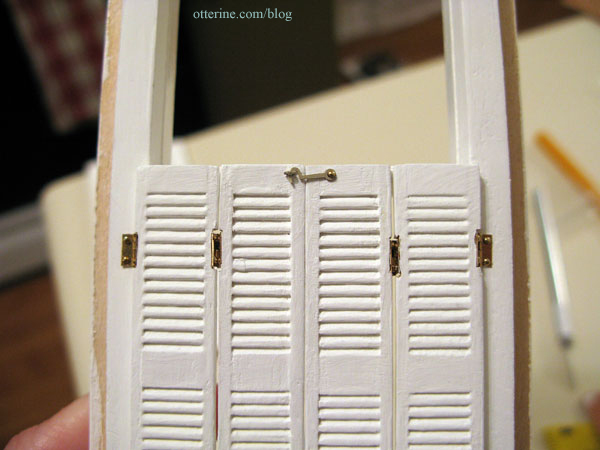
Next, the two outer hinges were attached using the same process as the inner hinges: pilot holes were drilled, notches were cut out, small dabs of glue were put on the nails and the nails were pressed in place.
I placed the hinged shutter assembly on the window with the non-hinged side lined up with the center of the window and the top edges of the shutters flush with the board across the middle of the window. If your window doesn’t have this feature, you may need to add one for stability.
I marked the nail holes for the hinges on the side pane. I drilled pilot holes for the nails and cut out a thin indentation to allow for better movement of the hinge.
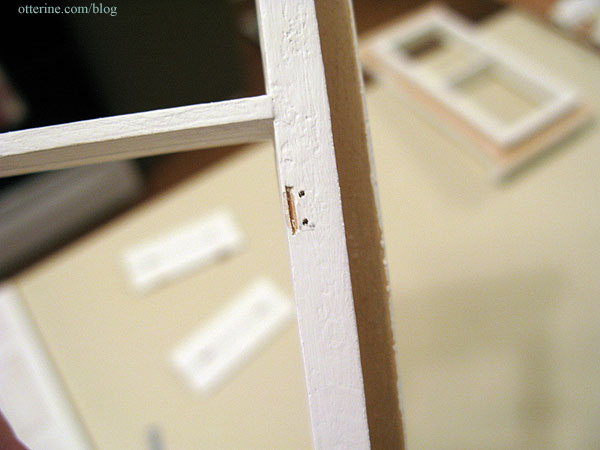
After putting a tiny dab of glue on the nail, I attached the hinges to the pane using the end of the tweezers to press the nails in.

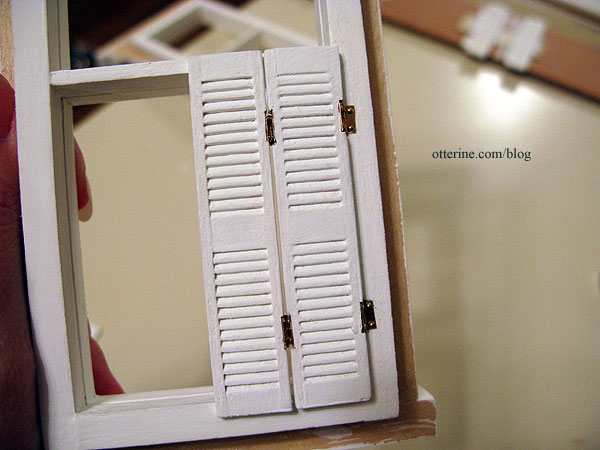
The assembly should open smoothly. These assemblies need to be treated gently – the hinges are tiny and can be easily bent.
Making sure the louvers of the second set were going the same direction as the first, I attached the outer hinges on the second set. After butting the center edges together, I marked the hinge placement on the pane. To keep the whole assembly from shifting, I pressed in the top and bottom nails first.
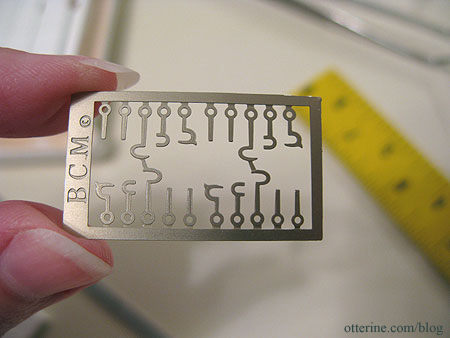
For the finishing hardware, I used laser cut brass hooks and eyes from The Ironworks (website appears to be defunct as of 2024). Closures can be fashioned from wire as well.
I bought extra hinges and one of them was bent on arrival – instant extra nails! I used one of those extra hinge nails to attach the hook, leaving a bit of slack so it would turn freely. I had to cut the eye pin short since its length was longer than my shutter thickness. I used the tip of an X-Acto blade to make an incision and then glued the eye in place.
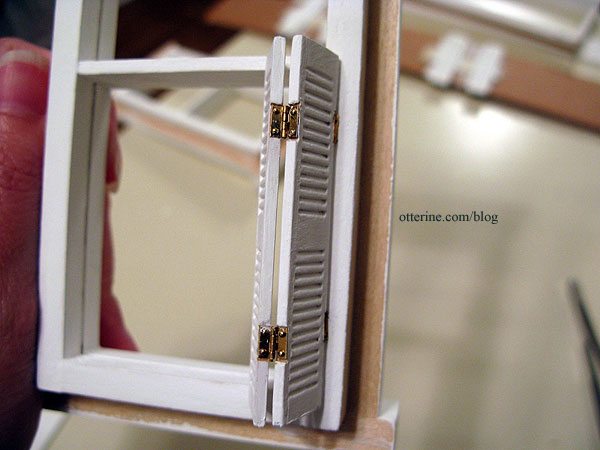
Once the window was installed, I added the interior trim while making sure there would be ample room for the shutters to open and close.
And open…
Categories: Miniatures
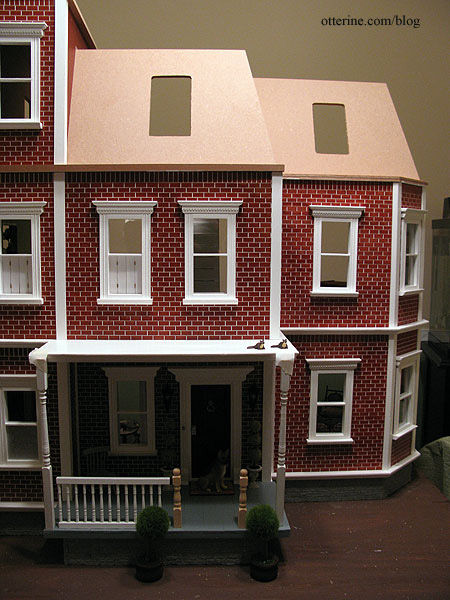
October 17, 2010 | 0 commentsThe Newport in brick a.k.a. The Beast
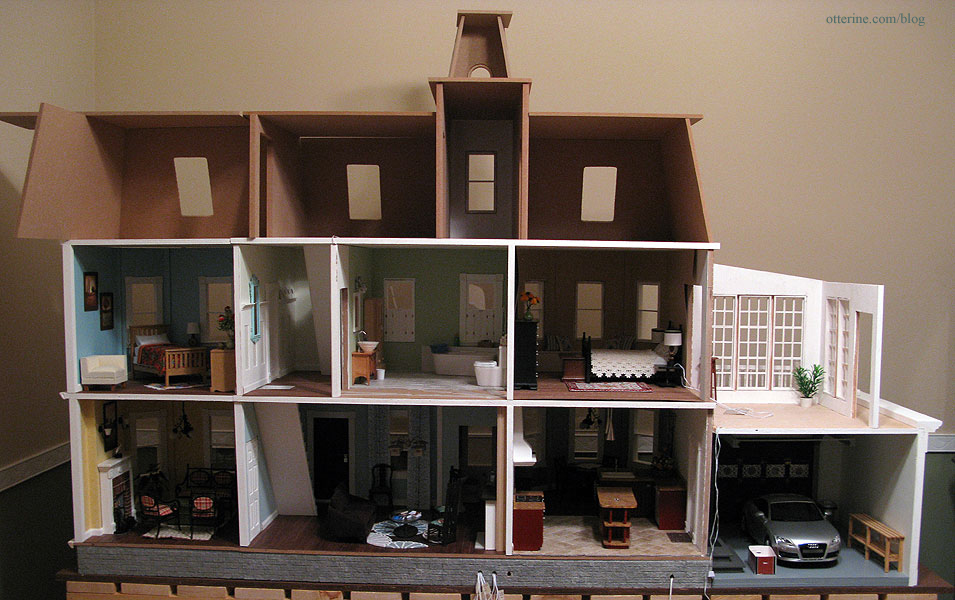
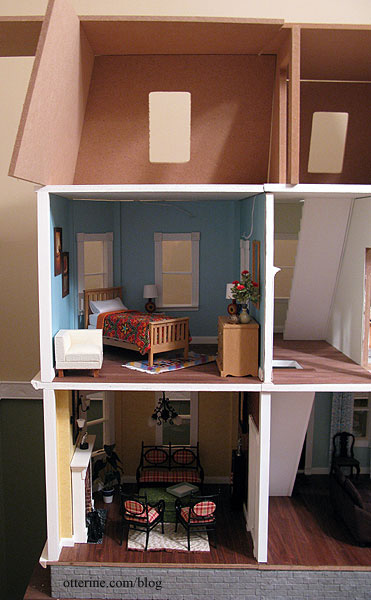
Since I’ve been making some (slow) progress on the second floor, I decided to go ahead and do another dry fit of the third floor. There will be the rooms behind the mansard roof currently planned to be an artist studio, a bathroom, a sewing studio and a secret nook. But, I enjoyed making the guest and master bedrooms so much that I might combine and/or eliminate one of the creative rooms and create another bedroom upstairs.
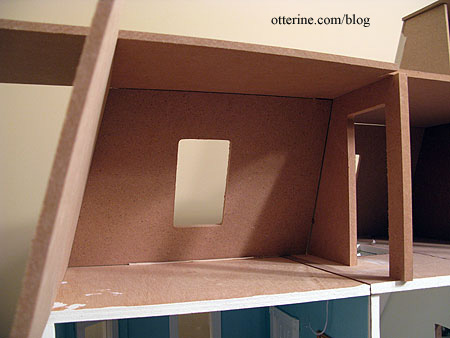
What a massive house! The rest of the roofline will also have the widow’s walk, though I will figure all that out later. The three open window holes will be dormers, and the conservatory will have a roof as well.
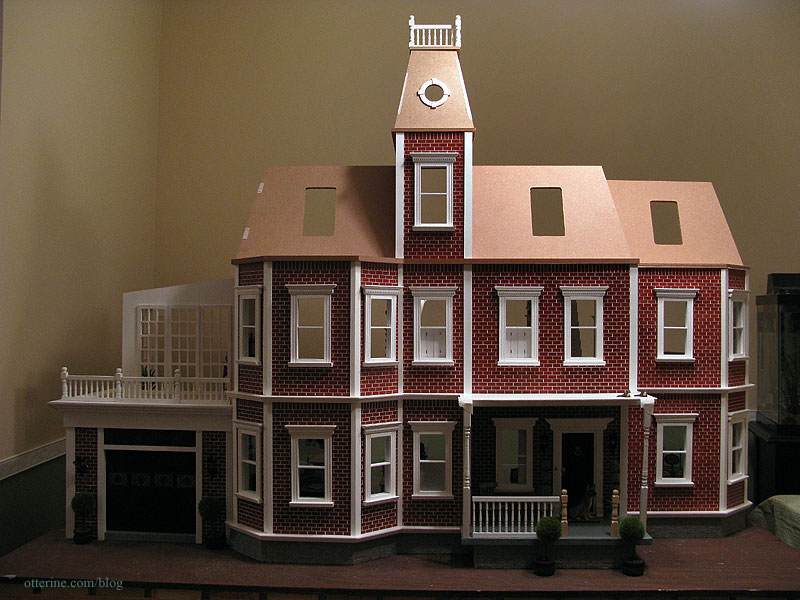
And, from the back. I’ll likely change the layout of the doors in the “tower” section, otherwise everything will be shoved into the house and nothing will be displayed toward the open back.
Just as a refresher, here is the Newport in brick (the base kit only). The two-story addition is made for the left side, but I flipped it and put it on the right side. I also bashed a Foxhall Conservatory kit to make the garage and cut a new conservatory for on top of that garage.

The two-story addition had a flat roof as purchased, so I ordered additional roof parts from the main Newport kit to create an additional rooftop room that will have a dormer matching the rest of the roofline. There will also be a railing on top of the extended front porch I added.
The extra roof pieces will be cut to fit later.
The room created with the extra pieces will be a tiny room that I want to do something special with. What, I have no idea yet. :D
Categories: The Newport
October 12, 2010 | 0 commentsNewport – master bathroom
Though the Newport was sold eventually, I’ve compiled some of the posts I made when I first started building it.
—-
The second floor rooms will be from left to right: the guest room (in the two story addition), the stairway hallway, the master bath (which is technically shared with the guest room), the master bedroom and then the conservatory (over the garage).
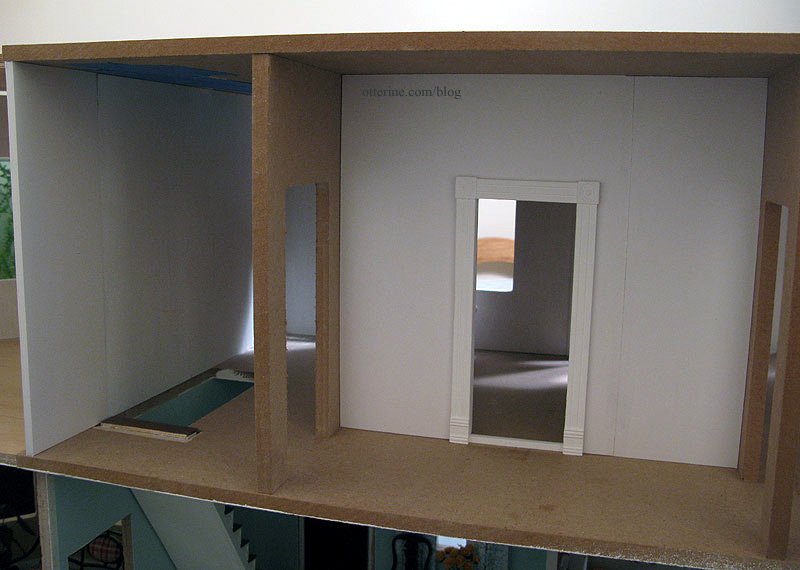
In order to fit the second floor stairs in that position, I had to move the far wall forward over the porch. This gave me more room inside the second floor and eliminated having a huge flat roof over the front porch extension. Adding this extra space made planning the master bath difficult. Can you actually have too large of a bathroom? :D Apparently so.
This gave me the idea of putting in a removable wall, as I had done for the powder room, creating a hallway between the stairs and the master bedroom.
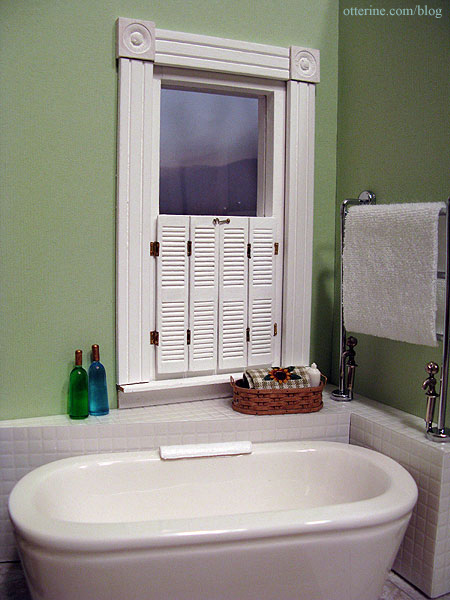
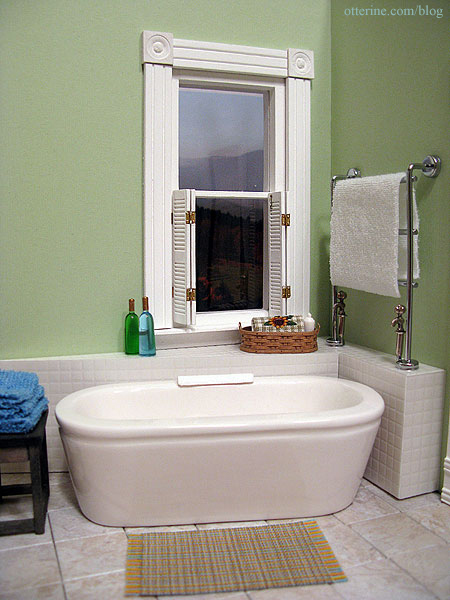
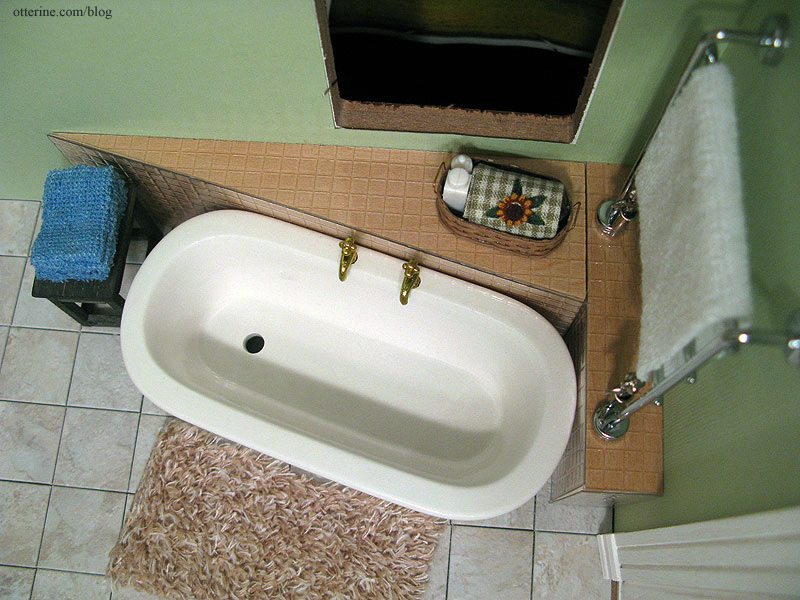
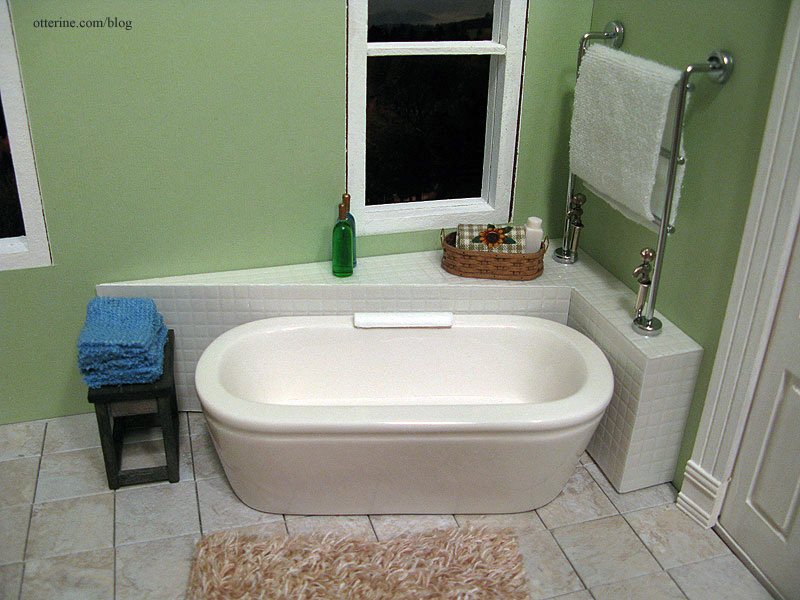
After trying different layouts, this is the final arrangement for the room. The soft green wallpaper is scrapbook paper, and the flooring was made from Greenleaf vinyl tiles (see kitchen post). I am using a modern bathtub and commode from a supplier in the UK. The rya rug was made by Glenda at Peppercorn Minis in New Zealand.
The vessel sink came from Silly Sisters in The Netherlands. The Mackintosh sideboard was supposed to be a stand-in for a kit I still need to make as the vanity, but I really like it as is! Hmm…I might need to think about this a bit more.
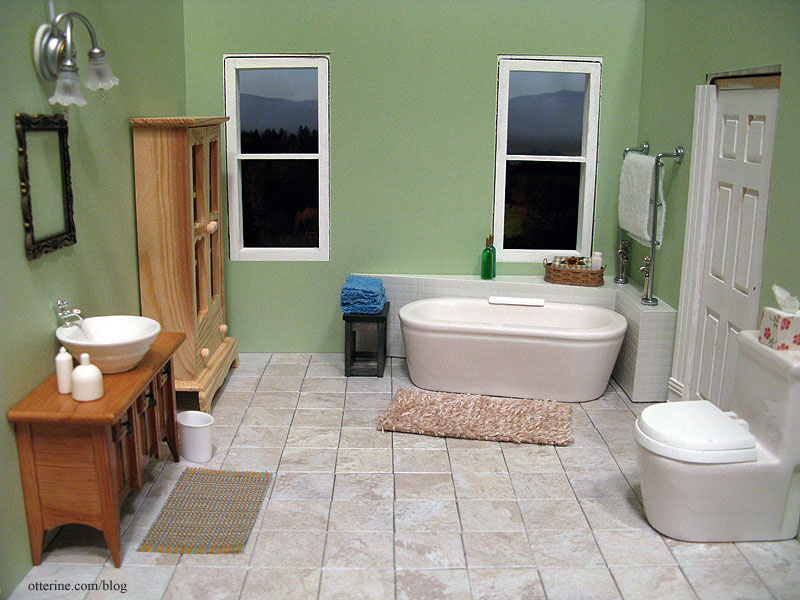
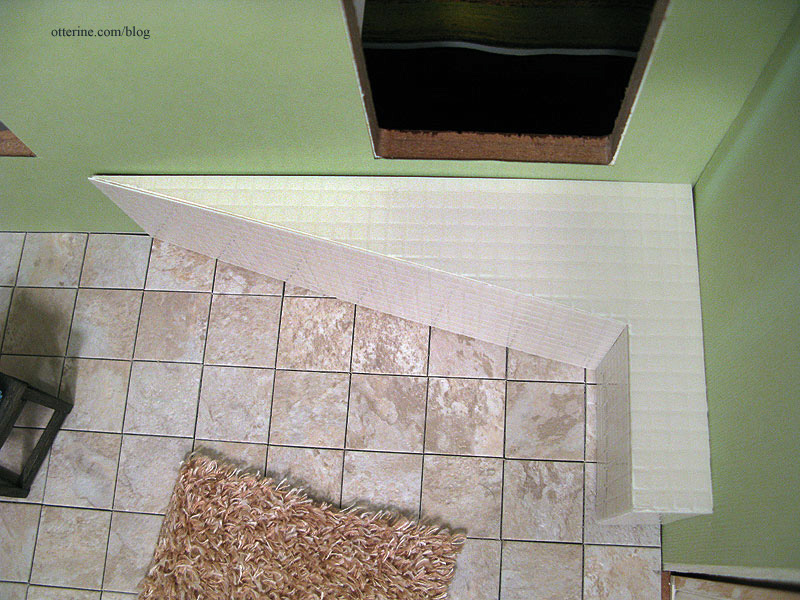
To finish the low wall around the bath, I used a clear plastic sheet embossed with 1/4-inch square tiles from miniatures.com. You paint the underside, and the top side shows as shiny tiles. I like that the surface has a little bit of texture the way real tiles would.
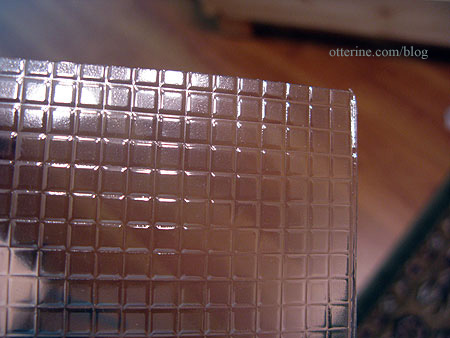
I cut the clear sheet to fit around the scratch-built wood base, trying to line up the tiles on the top with those on the sides. I’ve never done tile work, but it seems neater to align the tiles.
I tried a few different painting treatments on some small scraps to determine which color tiles I wanted. In the end, I decide all white was the way to go. It’s a clean, classic design. I painted the wood base all white with acrylics but used Krylon gloss white spray paint on the back of the tile sheets; it was faster, cleaner and left no brush marks on the tiles. I used regular tacky glue to adhere the tiles to the wood base.
I’ve removed the gold twin faucets from the tub and put a painted cap on the holes for now. I am still working on faucet options. If anyone ever decides to make better miniature faucets, I will be first in line!
The whole assembly is removable at the moment, just sits flush against the corner walls. Once the wallpaper is in permanently, I will glue it in place and finish the bottom edges where it meets the floor.
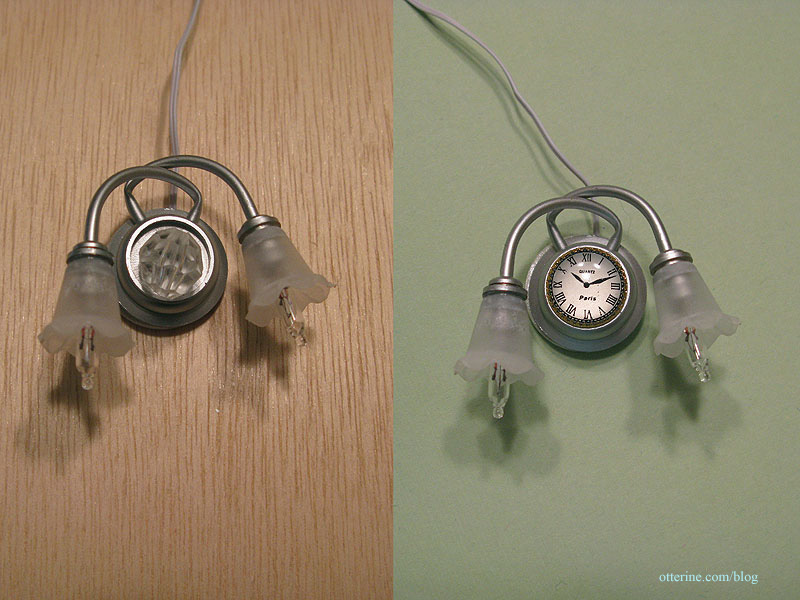
I modified this light from The Dolls House Emporium. It originally had a faceted bead, and I replaced it with a clock face I bought at the Bishop Show in April. I had no purpose for the clock face when I bought it; I just liked it. :D
In the original setup I used a metal scrapbook frame as a stand-in mirror. I liked it, but it was a bit small for the space. I made my own vanity mirror from strip wood framing and plastic mirror sheet by Darice. I also added a modern faucet from ELF Miniatures in the UK (I painted the tip of the faucet black for added realism).

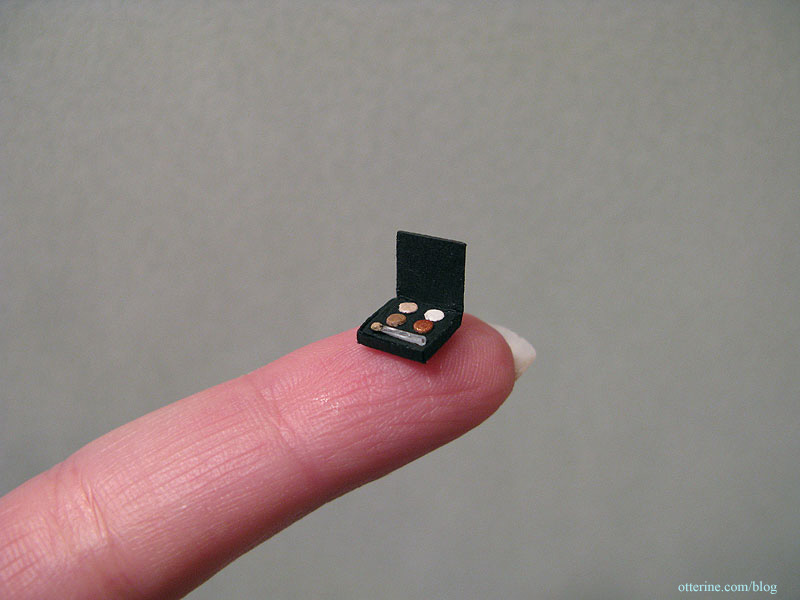
I made the eyeshadow makeup compact.
Since the light above the vanity is pretty bright for a standard dollhouse fixture, I plan to add two NovaLyte LED can lights to spread the light evenly in the room. Here is the room with one taped in place. Not quite enough light over the tub.
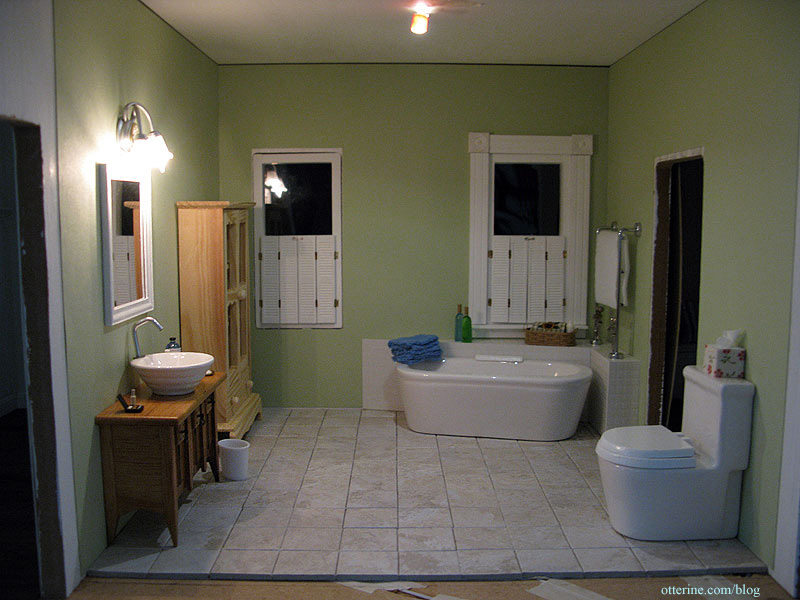
The working café shutters are made from half scale shutters and super tiny hinges. My tutorial ran in the September 2010 Greenleaf Gazette.
Categories: The Newport
October 5, 2010 | 0 comments


NOTE: All content on otterine.com is copyrighted and may not be reproduced in part or in whole. It takes a lot of time and effort to write and photograph for my blog. Please ask permission before reproducing any of my content. Please click for copyright notice and Pinterest use.


