

Oly Studio Ichibad Side Table in miniature
Here is the side table I built, inspired by the Oly Studio Ichibad Side Table (as of 2024, the link to the square top table no longer works, but they have this round version).

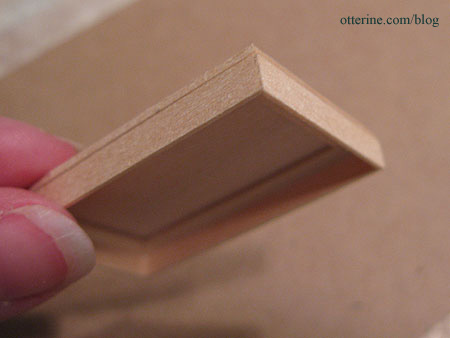
My version was made from a premade wood square that measured 1 1/4″ across and 1/8″ thick and wood spindles by Tiny Turnings. Mine is a bit larger than a direct 1:12 scale conversion, but that actually works better for the scene it’s intended for.

I first drew a 1/8″ grid on the square with pencil and then used an X-Acto knife to score along those lines.

I painted the edges and back of the square with black acrylic and then started washing on various paint colors watered down to keep the color transparent (Coffee Bean, Black Cherry and Sunflower by Folk Art; Terra Cotta by Americana; and Barn Red by Apple Barrel).
I had to go over the scored lines again after painting with the X-Acto knife. I then used two coats of Triple Thick Gloss Glaze by Americana on the top and one coat of Delta Ceramcoat Satin Varnish on the sides. My scored lines aren’t as obvious as in the inspiration table, but I still like the way it turned out. Too much surface texture on a mini table can also make it difficult to display things on it.
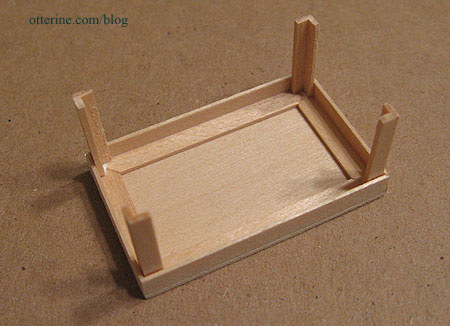
For the legs, I cut the Tiny Turnings into 2″ lengths with the connectors intact. For the separators, I cut 1 3/16″ lengths also with the connectors intact.

I sanded around the ends of the separators with an emery board to make a smaller dowel that would fit into a drilled hole in the leg.


I cut one of the separators in half, splitting the connector in half. I sanded around the outer ends of the separators but left the inner connector halves as is.

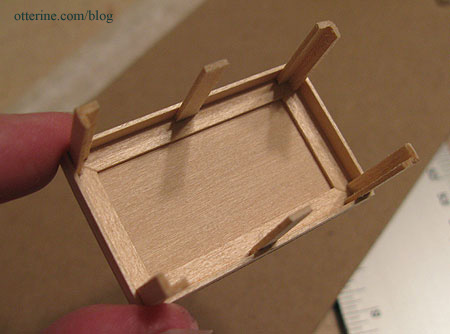
I am not really a fan of brass or gold finishes, so I painted the bottom portion with two coats of Iridescent Silver by Liquitex. It was a little shiny and new, so I applied a black paint wash over the finish and dabbed away the excess. It was just enough to add some depth to the color.
I then drilled holes in the bottom of the table for the tops of the legs.

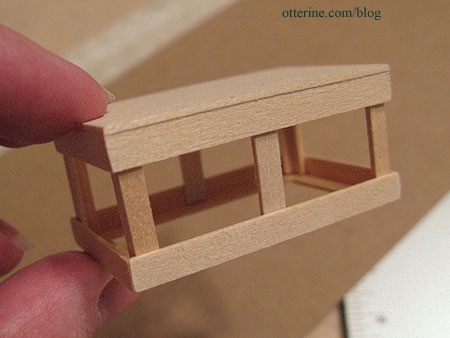
I think it turned out pretty well! :] It’s a bit rickety from being top heavy, but that’s the nature of lightweight materials in miniature.
Categories: Furniture
June 2, 2011 | 0 commentsBaxter Pointe Villa – chimney
Where there’s a fireplace, there must be a chimney! This is my first time building one of these, and so far it hasn’t been bad, just time-consuming.
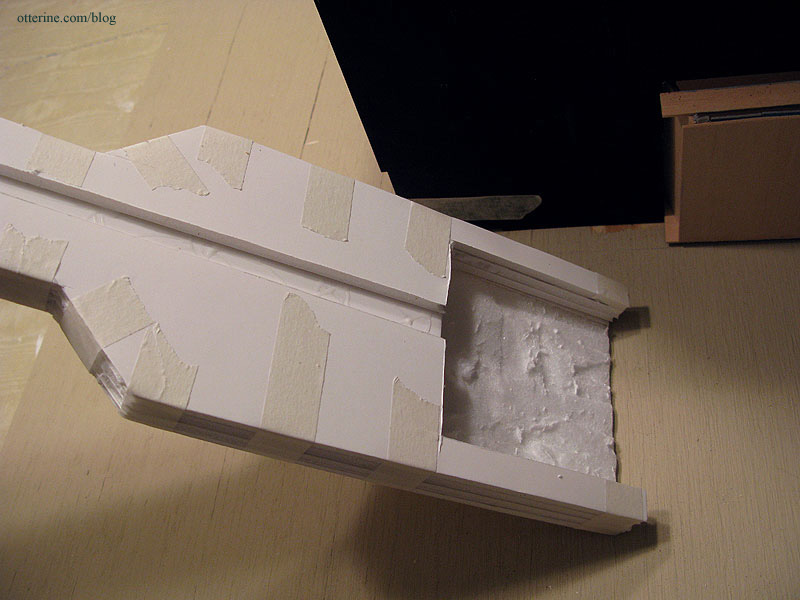
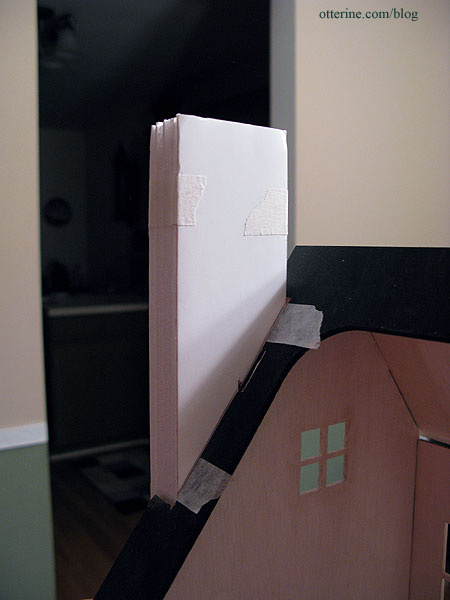
I built the base from foam core board layers glued together and loosely taped to hold the shape while the glue dried. This is actually the second base I built for this project, and the final one. The first one was a bit too narrow and more of a mockup to see how it would look in general.
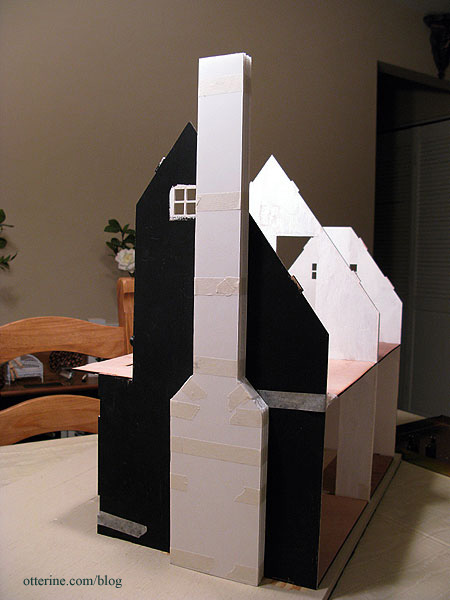
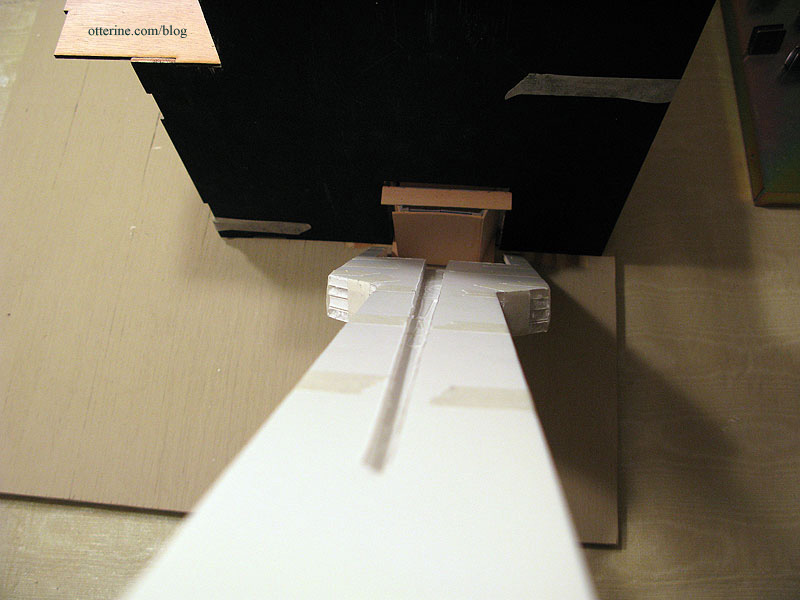
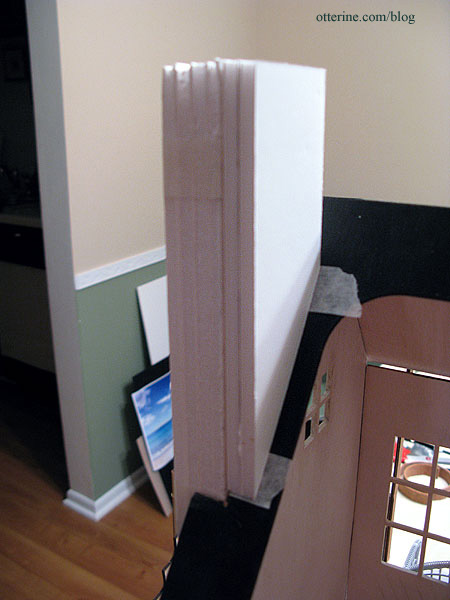
It has a hole built to fit around the firebox. The skinny channel in the middle is to disguise later electrical wiring for the upstairs rooms.
And sits behind it like so.
I’m using egg carton bricks for this as well, though I’ve cut them a tad smaller than I did for the firebox (1/4″ x 11/16″). I actually did some math on the final foam core base before cutting it out so I would have the right dimensions for my bricks. The bottom is equal to six complete miniature bricks across the bottom edge.
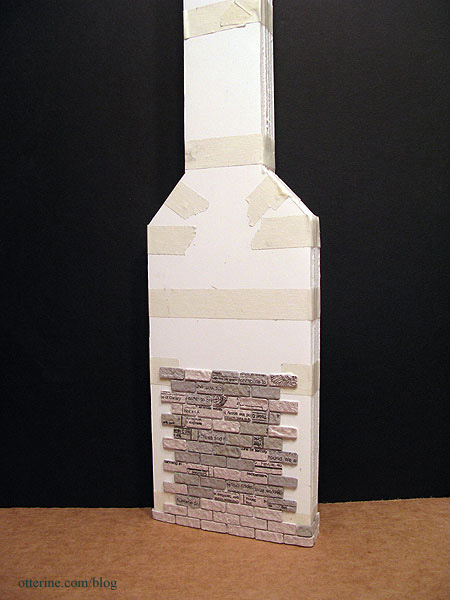
I cut longer egg carton pieces to wrap around the edges to give the appearance of three dimensional brick.
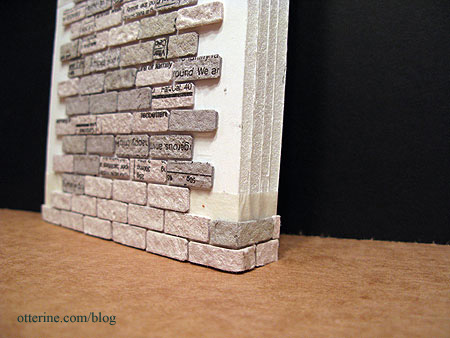
Have I mentioned I love egg carton bricks? :D Yes, they are a lot of work and very time-consuming, but they just give such an awesome result.

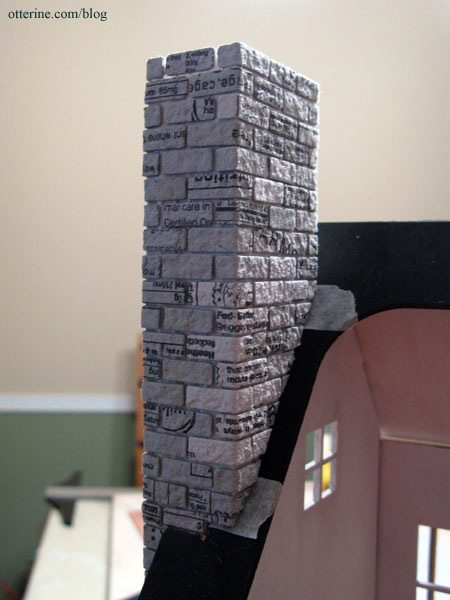
I had to cut away the roof to make room for the chimney.
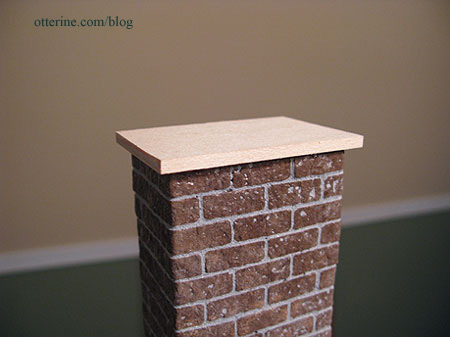
I then cut two additional pieces of foam core board to finish the chimney on top of the roof.
Getting level and complete coverage of bricks around this top section was challenging but so worth it. :]
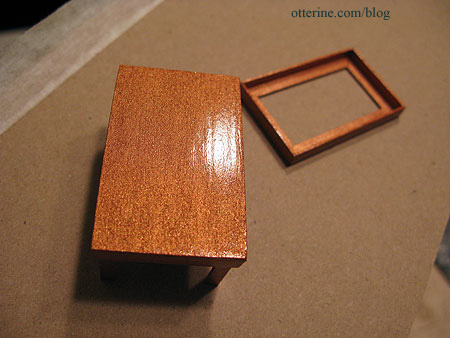
This next part was later damaged and is no longer part of the build. After the chimney been painted and grouted (I used Mini Mortar), I made a topper.
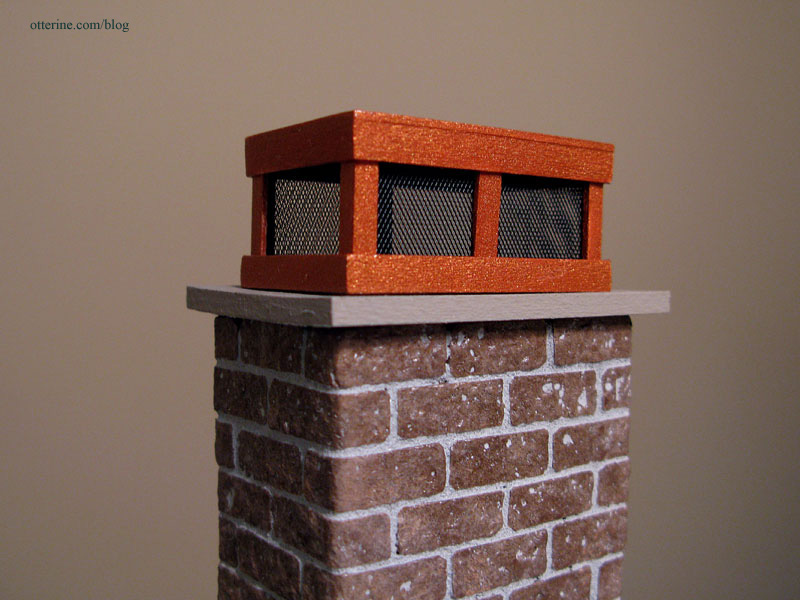
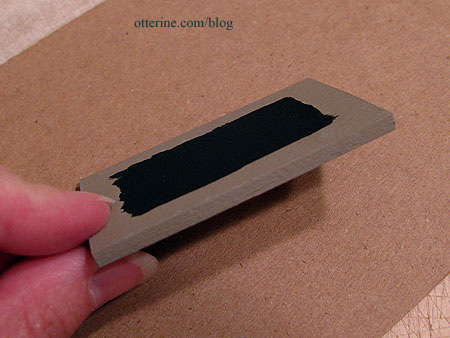
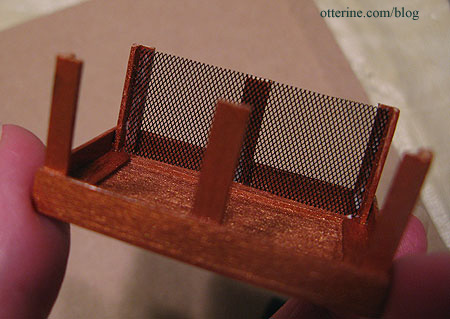
I did a quick google search for chimney toppers and found a fabulous photo from Mountaintop Construction. I decided to emulate the style using wood and aluminum mesh. First, I cut a piece of 1/8″ thick basswood to serve as a base.
I painted it with a mixture of Slate Grey by Americana and Mushroom by Folk Art. I then painted the inner portion black. When looking into the topper, I wanted it to look like there was a chimney opening.
To build the actual topper, I started with 1/8″ and 3/16″ bass wood corner trim.

I used an Easy Cutter to make 45° cuts in the 3/16″ corner trim to form two frames.
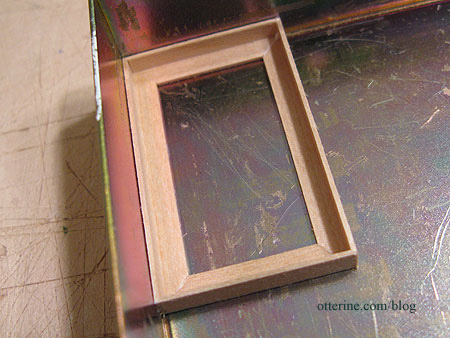
I cut a cover for one of the frames from 1/16″ thick bass wood and glued it on top.
I cut 3/4″ lengths of the 1/8″ corner trim and glued them into the four corners of the frame.
I then added 3/4″ lengths of 1/16″ x 1/8″ strip wood in the center of each side of the frame.
While the glue was still drying, I checked the fit of the bottom frame to make sure the corner pieces were straight and level but did not glue the two assemblies together.
I painted both the upper and lower portions Pure Bronze by Apple Barrel. It was a little glitterageous after the first coat, so I sanded that down before putting on a second coat. Once the paint was dry, I finished it off with three coats of Delta Ceramcoat Gloss Varnish.
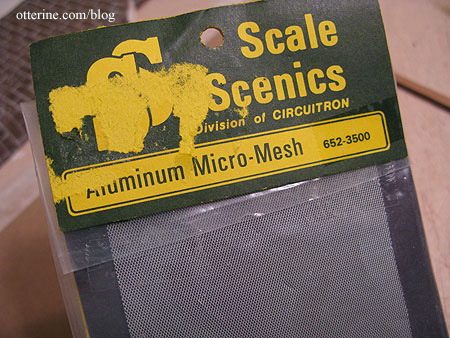
The aluminum mesh I used is by Scale Scenics. It’s old stock I bought at the recent Bishop Show in Chicago. Sometimes it pays to dig through dusty bins of old miscellaneous materials. :]
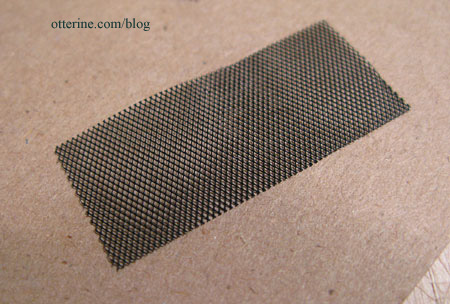
I cut the pieces of mesh to fit inside the assembly.
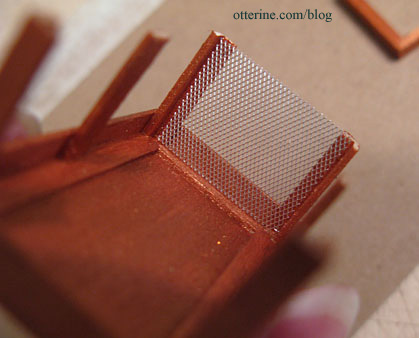
I then spray painted them flat black.
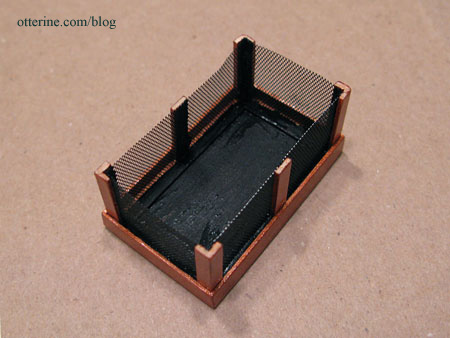
I glued the painted mesh pieces inside the frame at the corners and sides.
Then I painted the inside black.
I glued the bottom frame onto the assembly.
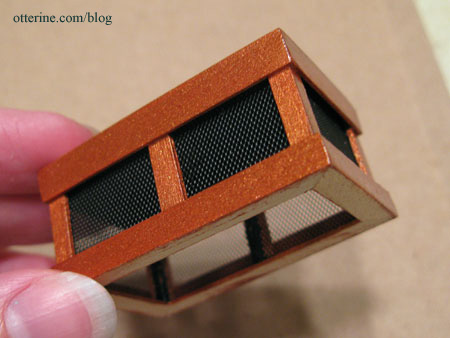
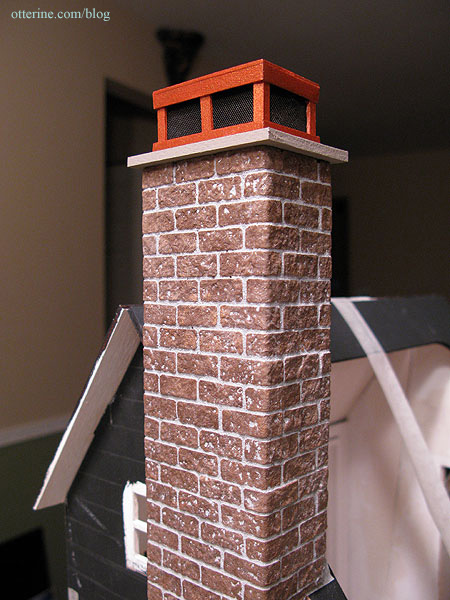
And, finally…I glued the topper on top of the chimney. :]
Categories: Baxter Pointe Villa
May 22, 2011 | 0 commentsIs it drafty in here?
I love how the front door turned out! I primed the whole assembly with white acrylic and then painted the front of the door with Robin’s Egg Blue from Jo-Ann Craft Essentials (left over from the mirror in the Newport hallway). The interior I left white.

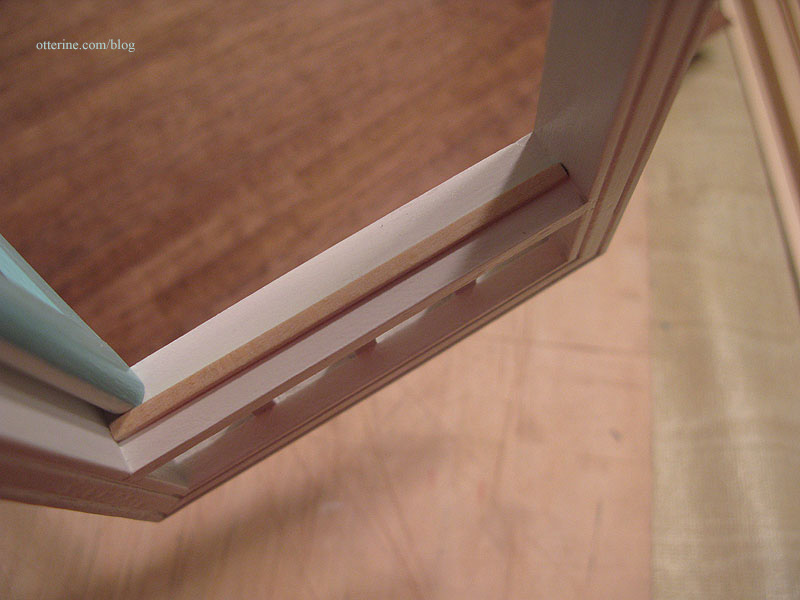
But something seemed off to me…then I noticed the gaps all around the door.
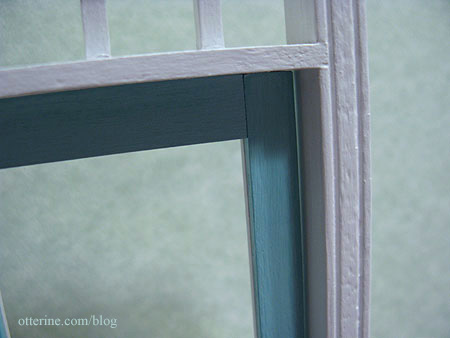
To fix this problem, I cut strips of 1/16″ x 3/32″ bass wood to create an inner frame.
Could I have noticed this before I had the whole thing painted and sealed? No, that would have interfered with my master plan to do things the hard way. :D
I painted the inner frame white to match the rest of the door frame. Ah, much better…

For the record, this door was a bit damaged and rough when I bought it…but I didn’t repair it past sanding a bit. I wanted it to look weathered but in reasonably good shape as though it gets a fair amount of wear but the homeowners try to keep up with the painting. :]
Categories: Miniatures
May 21, 2011 | 0 commentsOld World Tile review
I’ve seen this brand of flooring online, but it is very pricey. The various descriptions state the tile sheets come with a stylus for detailing the grout lines and end up looking very realistic. I’ve not seen any photos of it installed in a dollhouse or room box, though. I think perhaps the retail price of $25 per sheet (plus shipping) is a bit steep to buy it without knowing how it will work out.
Well, I ended up finding an unfinished sheet on eBay for a fraction of the cost, though it didn’t come with the stylus indicated. I figured it was worth a try.
It’s a very high quality printed paper that you adhere to an included white board with spray adhesive. The grout lines are raised on the print.

The instructions are very precise, including exactly which products to use for the assembly and finishing of the flooring. I cut my board to my room size and used scraps to try out the sealing process.
The manufacturer suggests up to five coats of Delta Ceramcoat Gloss sealer applied with a brush. Here is the sample I did following those instructions.
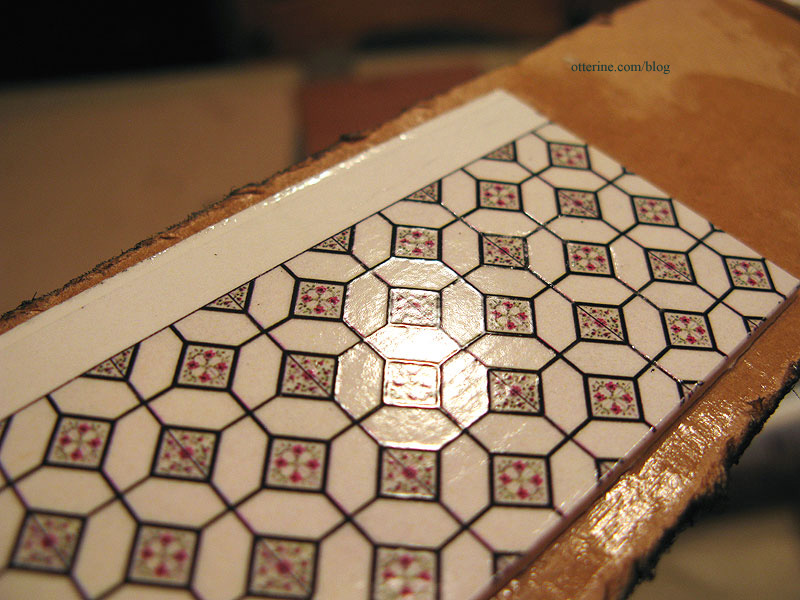
I also covered a sample by brushing on one coat of Triple Thick Gloss Glaze by Americana. Here is the sample with that product.
I think I’d need more coats of the first sealer to equal the results I got with the one coat of Triple Thick Gloss Glaze, and there are no brush lines with the Triple Thick. It evens out as it settles and dries. I rather like that it looks like sheet linoleum, too!
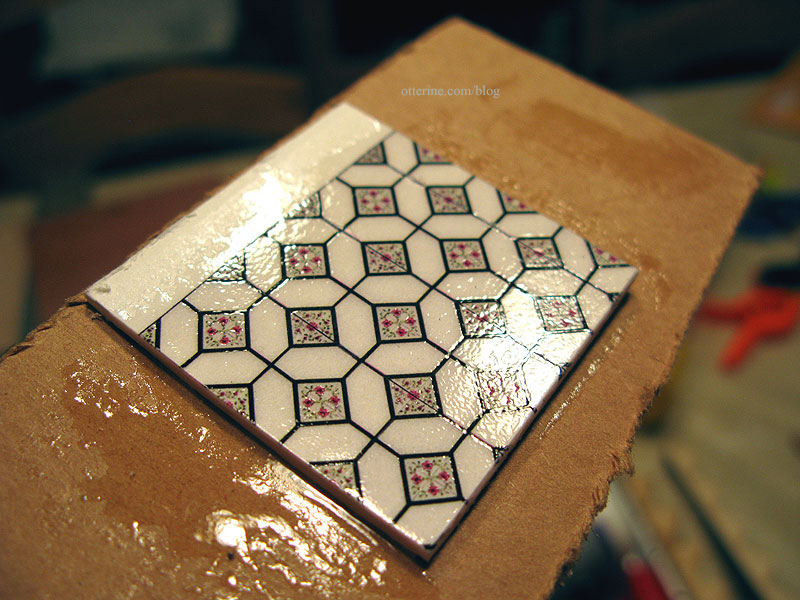
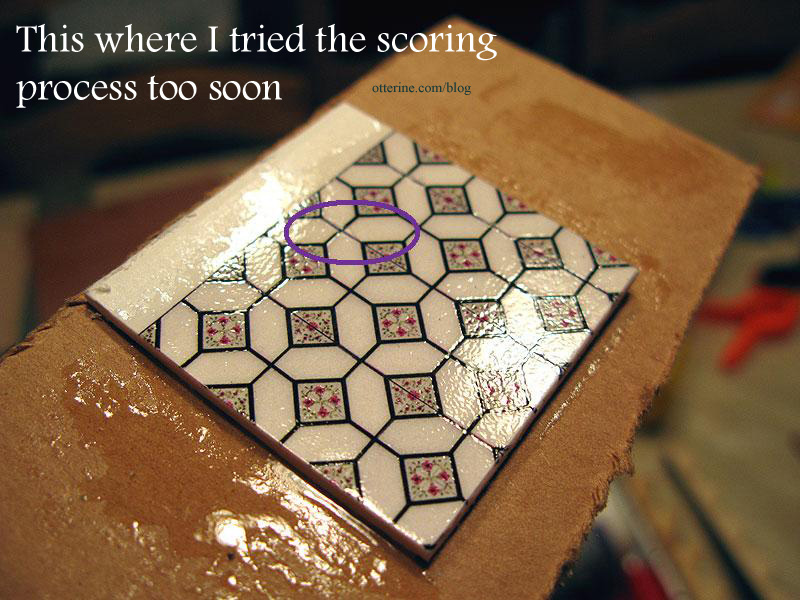
You are then supposed to use the stylus to lightly score along the lines, indenting the finish but not the paper to create the look of recessed grout lines. I tried the scoring process with my own stylus but found it didn’t really work for me. It marred the finish even though I wasn’t pressing hard at all.
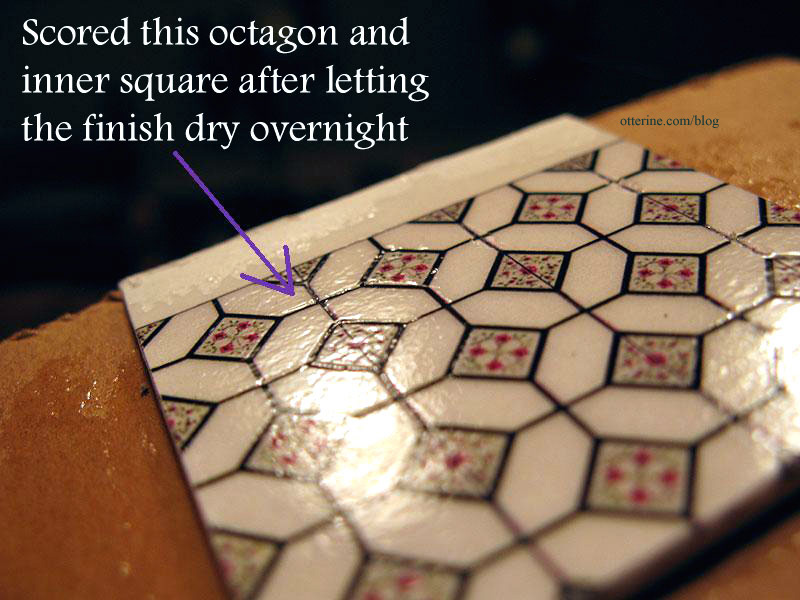
I thought perhaps I hadn’t let the finish dry long enough so I tried it again the following night. It worked without lifting the sealer but I honestly didn’t think it added anything so fabulous to merit the amount of work it would take to trace all of those tiny lines. And, any mistakes would be irreversible. So, I am opting for the Triple Thick finish without the scored lines.
With this particular sheet, I was able to do one room of flooring with enough left to do a tiny room for another project, or perhaps a backsplash, counter or serving tray.
It really is a beautifully made and realistic flooring, but I still think $25 per sheet is too much regardless of including a stylus that could just as well be sold separately. You really wouldn’t need a new stylus included each time you bought a piece of flooring from this product line.
Categories: Baxter Pointe Villa
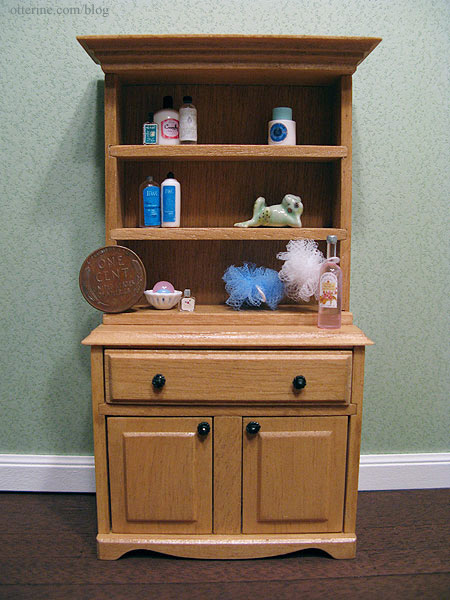
May 13, 2011 | 0 commentsNewport – master bath cabinet
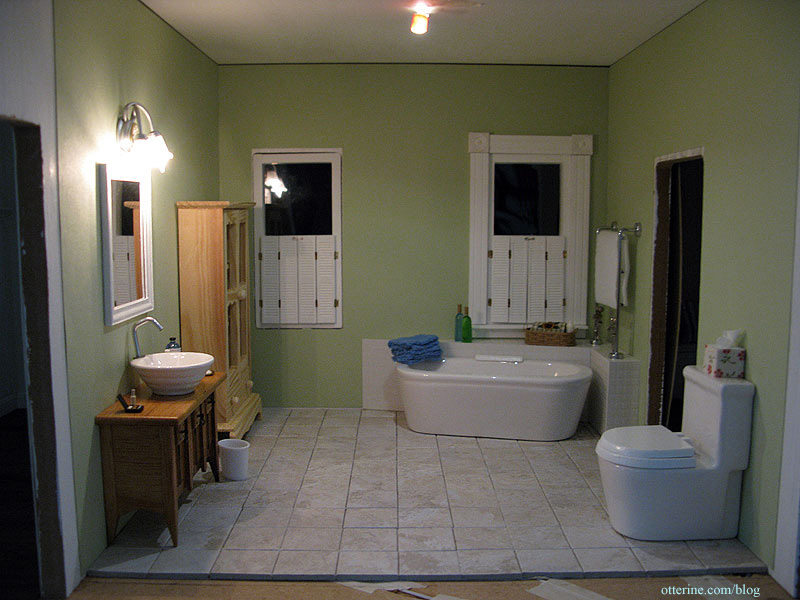
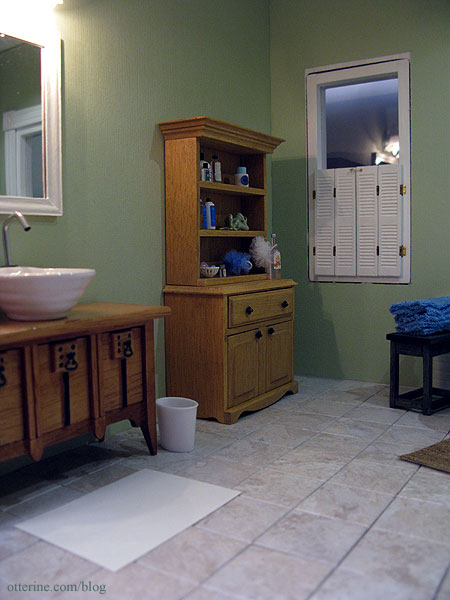
Back to work on the master bath in the Newport. Here’s the view from where I left off.
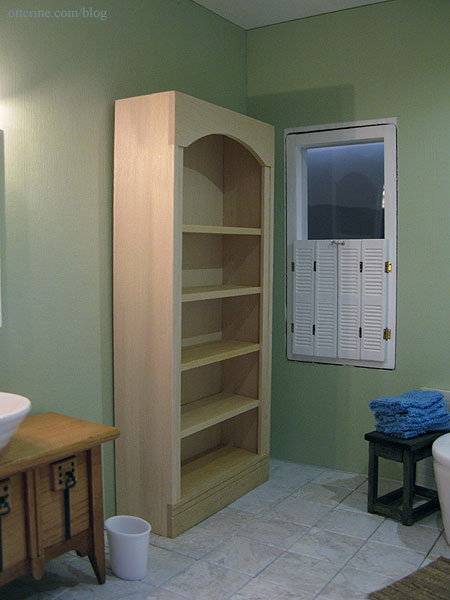
The original Michael’s cabinet (shown in the photo above) I had as a stand-in seemed too country for this more modern bathroom, so that one moved back into my supplies. I thought about using a Houseworks bookcase instead, but it was too big and open. Not everything you keep in a bathroom should be on display. ;]
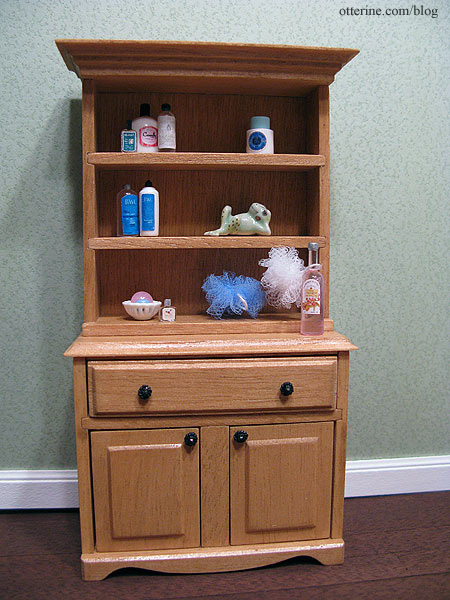
So, I put two House of Miniatures kits together to make a custom cabinet: a Closed Cabinet Top (which I left open) and a Hutch Cabinet.
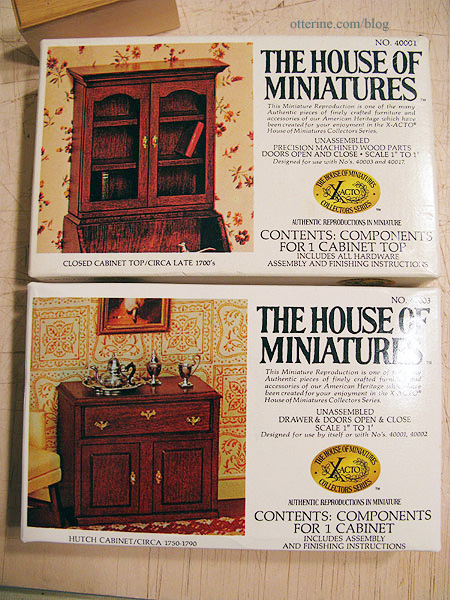
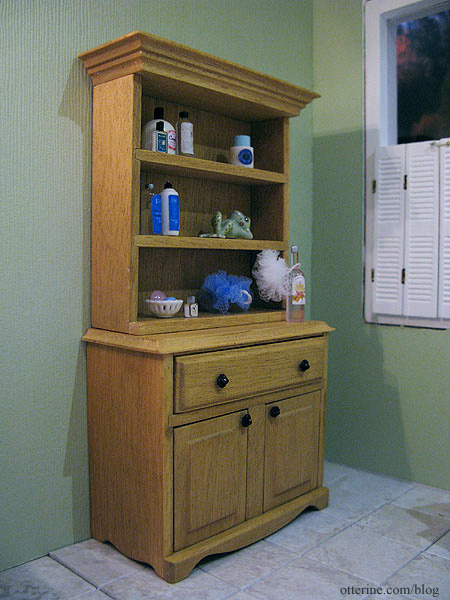
I stained the pieces IKEA antique pine and sealed with Delta Ceramcoat satin varnish before assembly. I wanted to tie the cabinet in with the vanity (a Mackintosh sideboard) since there was getting to be too much white in this room. The knobs are jewelry findings painted with Testors flat black enamel.
I left the doors off the top part to have some place to display minis. :]
I hid a few things inside, too! I made the towel but bought the other minis.
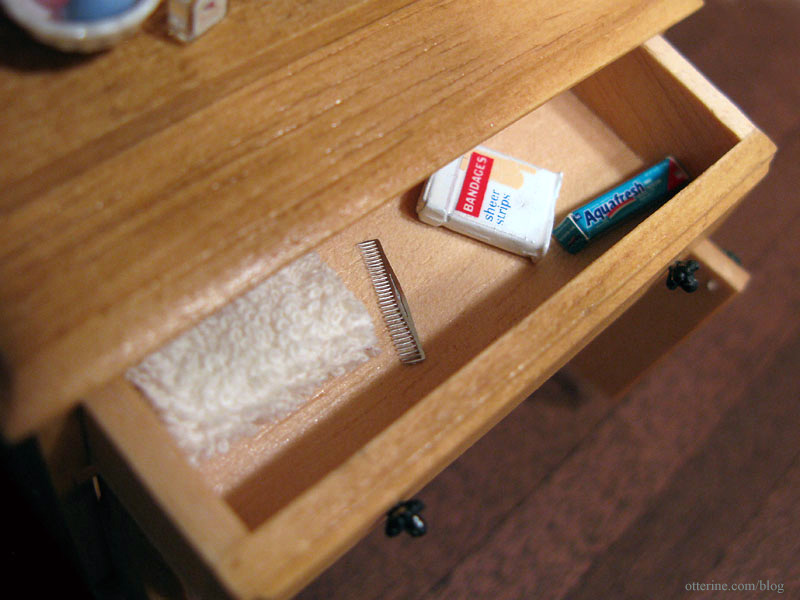
The towels were made from terry cloth from fabric.com. I had to fold a few in various ways to figure out the sizes that would fit and look true to scale in the cabinet before gluing them into their final shapes. The bottles are various types of blanks I picked up here and there (except the Listerine bottle, which I bought along with the toilet tissue).
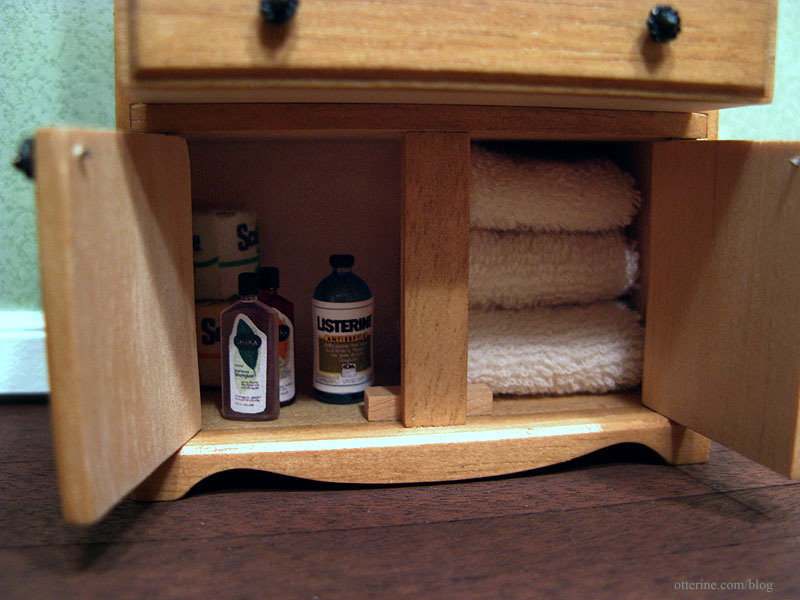
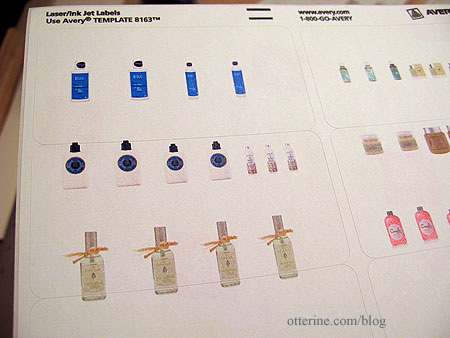
I found images of product lines I liked online and printed a few labels on white Avery sticker labels (though I still needed to supplement the adhesive with a glue stick for some). The bottle shapes and colors don’t emulate the original products exactly, but I like them! :]
Here’s a better view from the front.
The loofah scrubbies were made from fine tulle also from fabric.com that I sewed together with white thread twisted to form a rope.
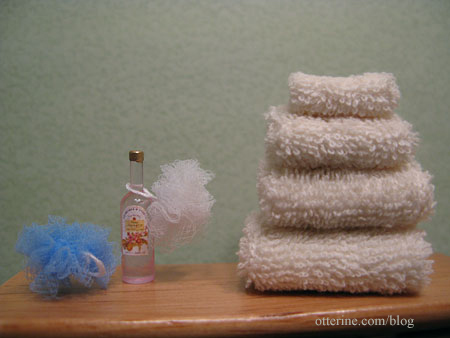
If you want to see how impossibly tiny some of these bottles are, just check out the penny on the lower shelf. That tiny clear bottle has a label that measures 1/8″ square.
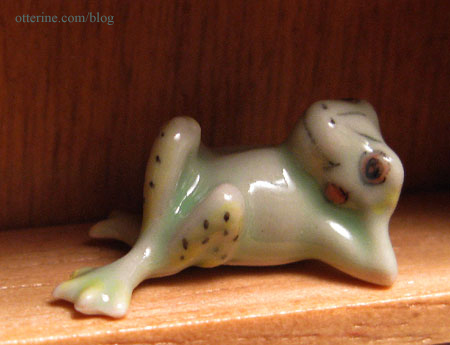
I love this little guy! :D
There will be a better setup added in time, but this is where I’ve started.
Categories: The Newport
April 27, 2011 | 0 comments


NOTE: All content on otterine.com is copyrighted and may not be reproduced in part or in whole. It takes a lot of time and effort to write and photograph for my blog. Please ask permission before reproducing any of my content. Please click for copyright notice and Pinterest use.


