

Snake Plant
One of the few remaining items from my earlier dollhouse days is a book on making miniature plants out of florist tape called Miniature House Plants by Ruth Hanke. I made an elephant ear plant from a DVD called Master Miniaturists: Flowers & Plants. It has a similar approach.

There are a ton of house plants in this 1988 book, and I know I’ve made at least one of them before. This time around, I opted for the snake plant.

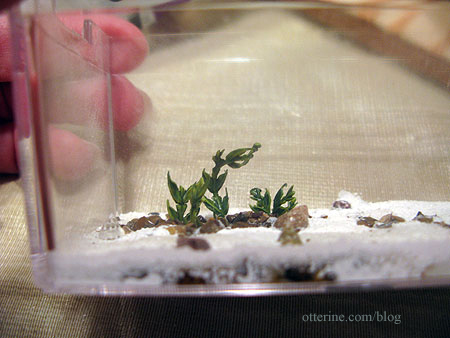
For the dirt, I glued in a piece of styrofoam into a ceramic pot. I then covered the surface with tacky glue and sprinkled on earl grey tea. It has a nice peat moss quality.

In the book example, while the author did include painting the rough stripes of the plant, she didn’t include the wide light green outer edges so I added those based on the real deal. :D I then sealed the leaves with Delta Ceramcoat Satin Varnish.

I poked holes in the styrofoam base, clipped the long wires and glued each leaf in place. The plant stand is a McQueenie Miniatures kit I made previously.

I rather like how this plant turned out. :D I think I’ll be making a few more examples from this book.
Note: for those of you who work in half scale, this book includes both 1″ and 1/2″ scale patterns.
Categories: Flowers, plants, and trees
July 19, 2011 | 0 commentsBaxter Point Villa – main structural changes
I have a separate detailed post on how I added area to the side addition room, which made the addition front wall continuous with the main structure front wall on the lower floor. But, the biggest change I made to the base kit of Baxter Pointe Villa was to replace the upper portion with a taller front wall to create a wraparound deck.
My inspiration for the deck came from a wonderful porch by designer Amanda Nisbet. In fact, her design inspired the cedar shake exterior as well. More on that later.
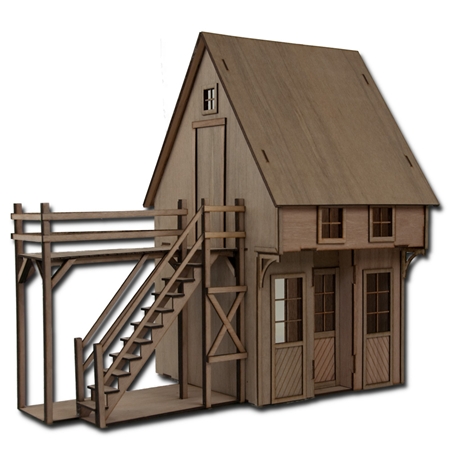
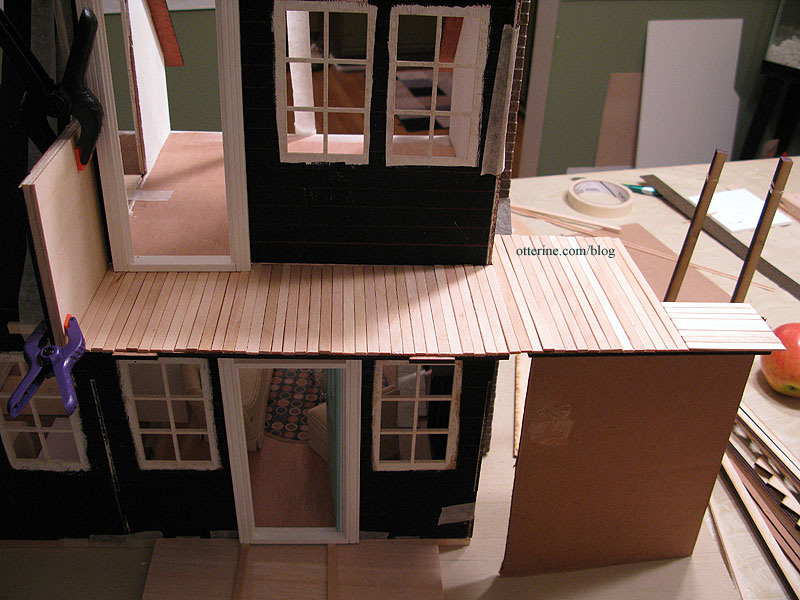
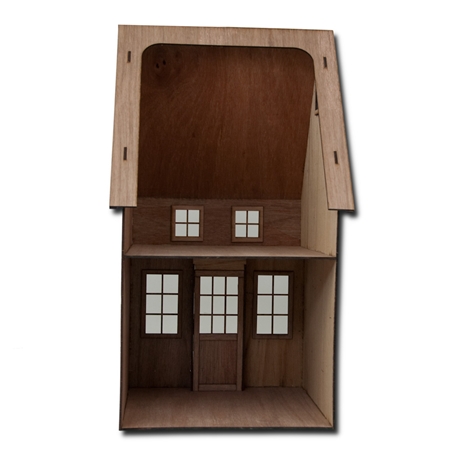
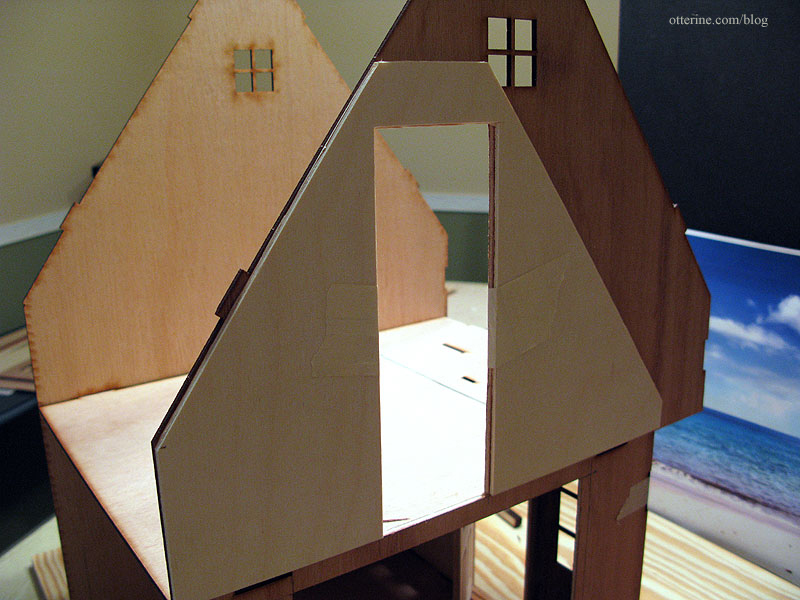
To get this porch in front of the second floor bedroom, it took a lot of kit bashing. Here’s what the kit and addition originally looked like:
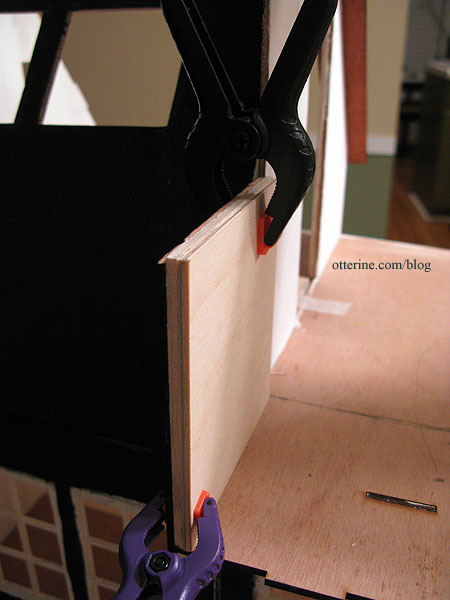
I used the front wall of a second addition kit I bought to make a new front wall in the bedroom.

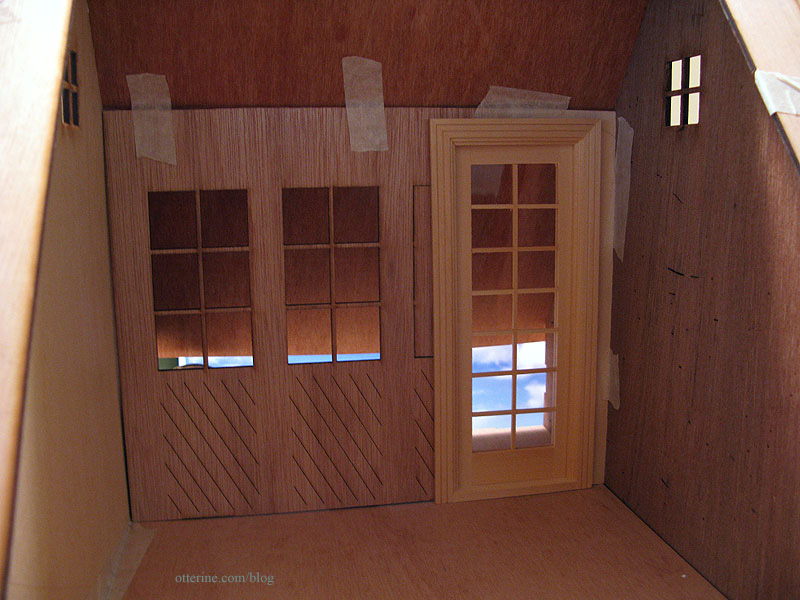
That change created enough room for a small deck. Here you can see how I sheared off part of the outer wall all the way to the floor, making it flush with the new bedroom wall.
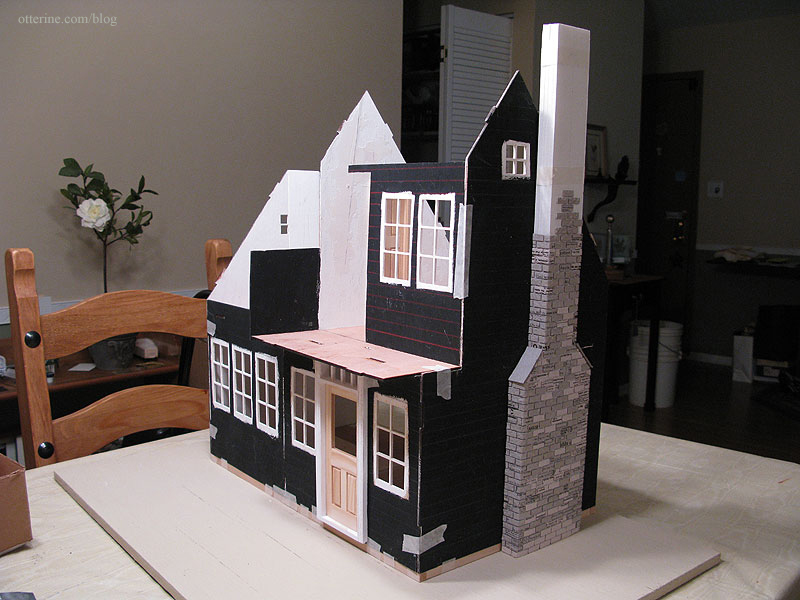
I had to piece the wall around the door since this originally had three window openings. I ended up leaving the mullions out of the French door since I wanted an unobstructed view of the beach.
On the end of the deck next to the addition, I cut off the top portion flush with the new bedroom wall and created a short wall just outside the added door. I had to leave some wall there since cutting it off to the floor would have caused problems with the roof line of the addition. I glued a triangle of wood near the front edge of the angled piece to create a square. I padded this low wall with two pieces of 1/8″ thick scrap wood to make it look more realistic in size.
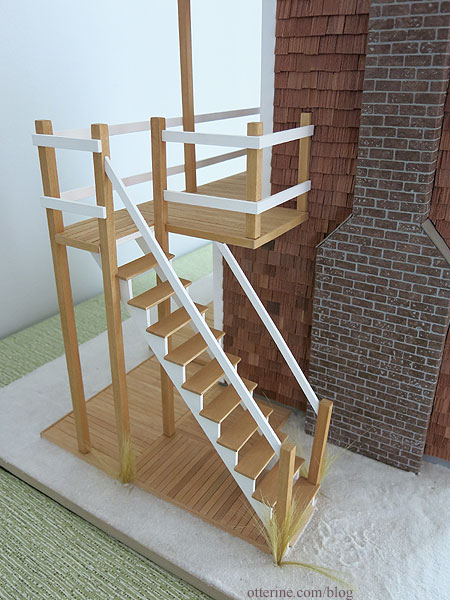
My stairs connected to the deck didn’t quite end up looking like the kit photo, either.
Where to start? I didn’t end up using the posts that came with the kit. I bought a bunch of 5/16″ x 5/16″ strip wood from Hobby Lobby and saved the laser cut wood from the kit for other projects.
I had ordered the base kit plus two side additions, one left and one right, though I planned to use only one or the other — with the second one used for spare parts. I quickly opted for the addition on the left, but that presented an issue with what I wanted to do with the stairs. I needed them exactly the opposite of how they were designed, so I flipped the base and the upper deck upside down. Problem solved! Sort of….
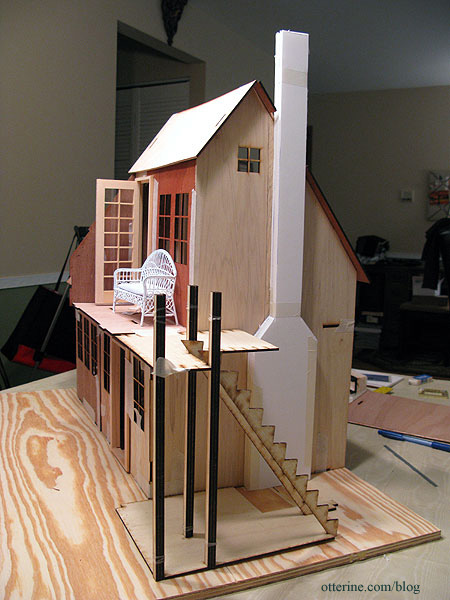
The reason I couldn’t have the stairs next to the main house is that I wanted a chimney. But, even with flipping the stairs, the deck was too long. I cut off a portion of it in the back to clear the chimney and moved the whole assembly flush with the front of the new deck. This meant I couldn’t use the laser cut lines of the stair kit, but I wouldn’t have been able to match those with the new deck anyway.
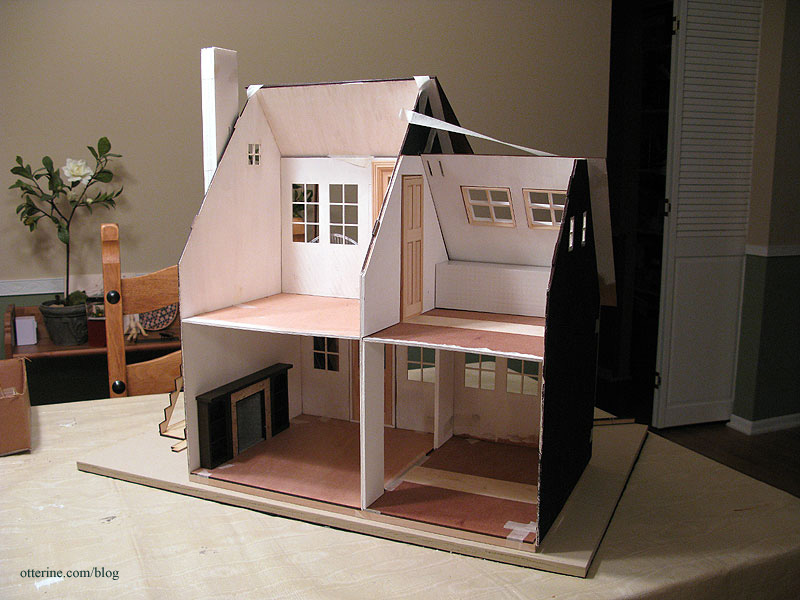
Here you can see my first chimney mockup and the short wall of the deck before I modified it. I used the original kit posts for planning purposes.
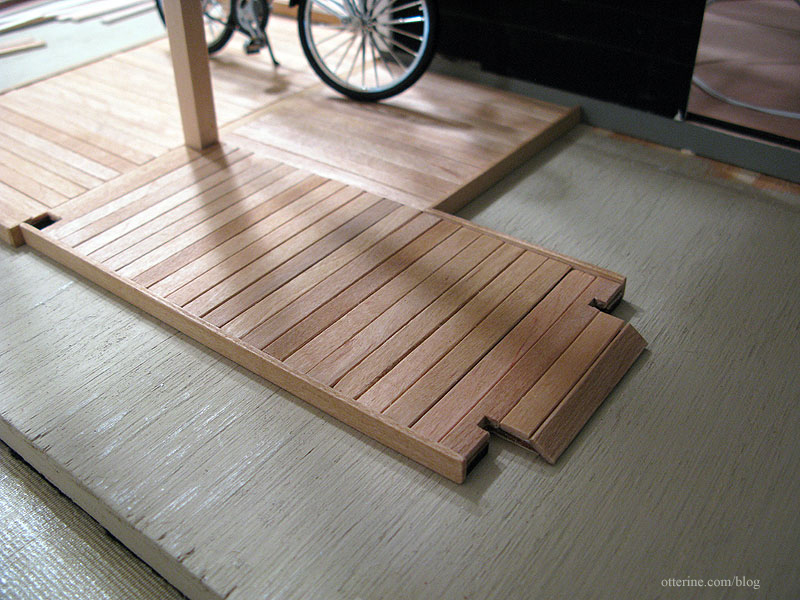
The porch boards were made from Woodsies skinny sticks stained with IKEA antique pine (shown here pre-stain). I followed a front to back direction until I reached the stairs, where I turned the boards the same direction as the stairs. I also flipped the opening direction of the French door to open in to the left instead of in to the right.
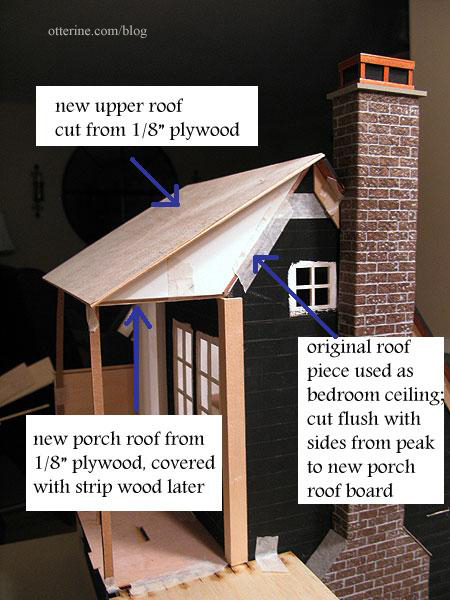
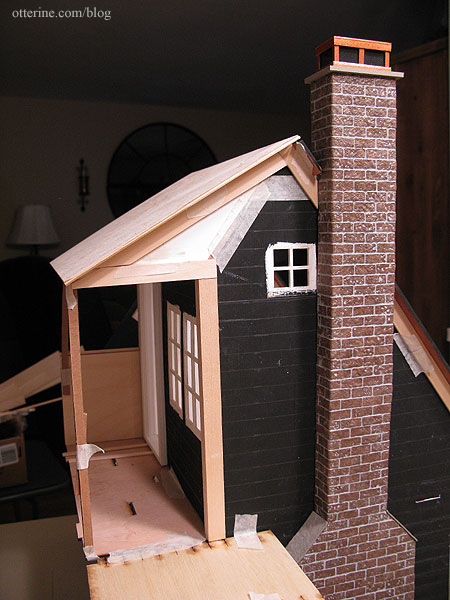
With all of these changes in place, this is how I managed the roof pieces. I used the original roof piece for the bedroom ceiling, cutting it off flush with the side walls from the peak to the top of the new front wall. I also cut it flush with the side walls. I then used 1/8″ thick plywood to make a new top roof and a flat soffit board for the porch that I later covered with strip wood and painted. The white pieces are foam core board cut to fill in between the original house and the new front porch roof line.
I then cut trim to follow the new roof line.
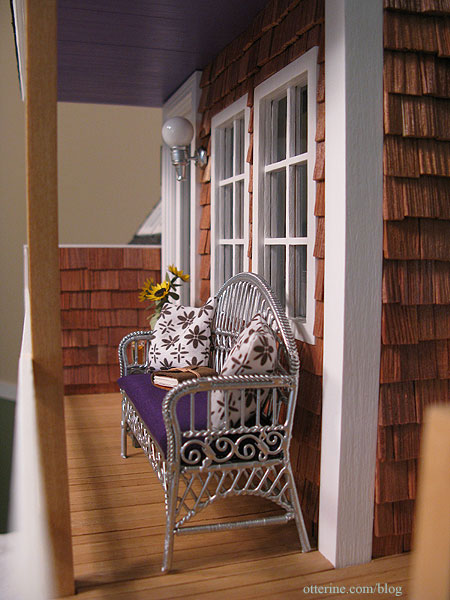
The porch soffit was made using strip wood. I didn’t use skinny sticks here since I wanted a cleaner look than I did for the porch boards. The floor gets more wear than the ceiling. I painted the ceiling Lilac Love by Folk Art. The porch light is a brass fixture I painted silver.
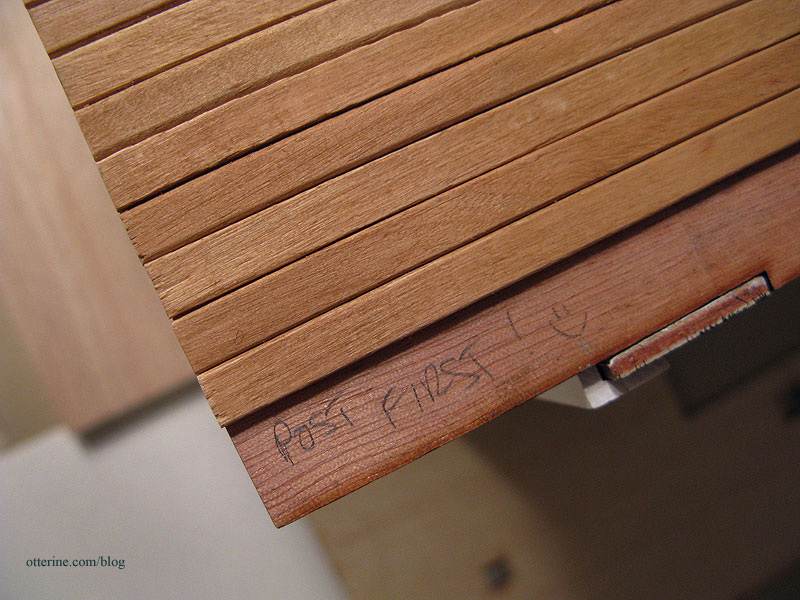
The posts are 5/16″ strip wood stained IKEA antique pine. Sometimes when I work late and get a little punchy, I have to leave myself notes to keep from doing things in the wrong order.
The stair stringer didn’t allow me to use an even number of skinny sticks for the stair treads, but I wanted them to match the deck in color and general appearance. I left off the kit stairs and replaced the treads with bass wood pieces cut using the original laser cut ones as patterns. I stained these with IKEA antique pine as well.
Since the stair stringer was laser cut plywood and the rest was light colored wood, I painted the stringers white. They would not have coordinated with the other stained pieces otherwise.
To keep with the white and natural wood color scheme, I used the existing kit laser cut railings and painted them white. I had to cut a few down to size and add some pieces that were meant to make the posts since my deck was a different configuration from the original. I didn’t bother adding the supports under the deck, either. I don’t know if it would pass a structural inspection, but I like the clean lines of my deck and porch. To hide the laser scored lines on the now underside of the deck portion, I used skinny sticks in the same fashion as I had on the top, continuing along the front entryway soffit.
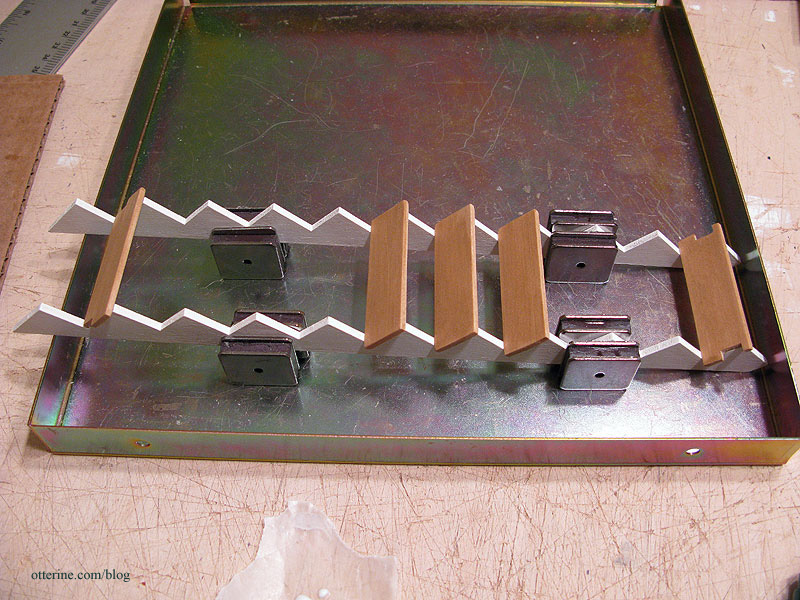
The front lower patio structure is a purchased frame. When I’m on a deadline, I love shortcuts that cost $1.49! I covered this with skinny sticks stained IKEA antique pine.

The lower side deck is made partially from the original Greenleaf stairs kit. In order to have the side deck meet up with the front deck, I added a piece of 1/8″ thick balsa wood to fill in the missing areas. I then continued the skinny stick coverage on the entire lower side deck. Since skinny sticks come in predetermined lengths, I used some strip wood to break the deck into areas and tried to create a nice pattern for the boards.
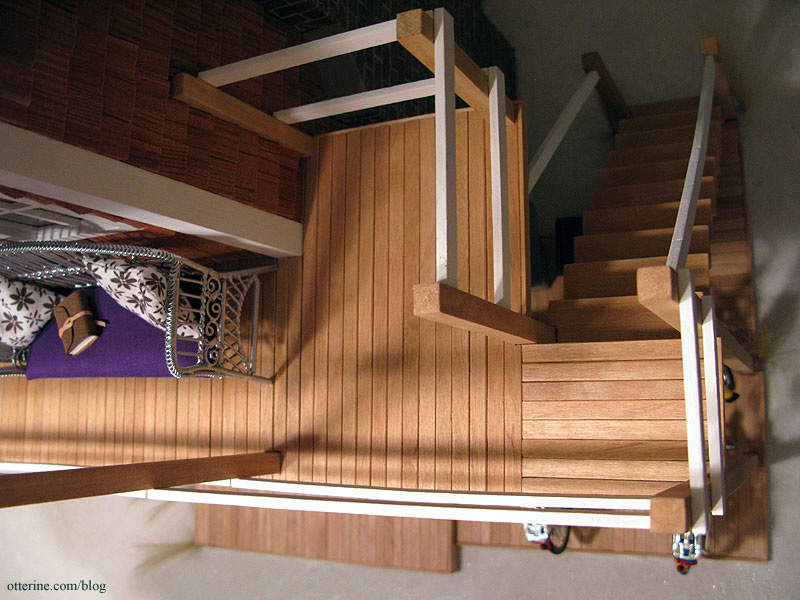
To finish off the front deck and lower side deck, I added strip wood stained to match along the outer edges and curved the last board down just under the first step (stairs obviously not shown here).
The end result is a light, airy staircase separating the upper and lower decks.
Bedroom
The changes noted above led to a completely revamped bedroom space as well.
The original bedroom area was an odd shaped room. From the front, there were two small windows and a steep, long roof.
The adjustment in depth on the side addition allowed me to add a working narrow door to the bathroom, and I really like how that turned out.
There was still minimal usable room in this part of the structure because of the steep roofline in the back. I was able to put in a bed, two tiny side tables, a small dresser and not much else, but it was much better than the original layout.
Bathroom
As much as I like to zoom in for realism, this house has some nice “dollhouse views” when you show the open back.
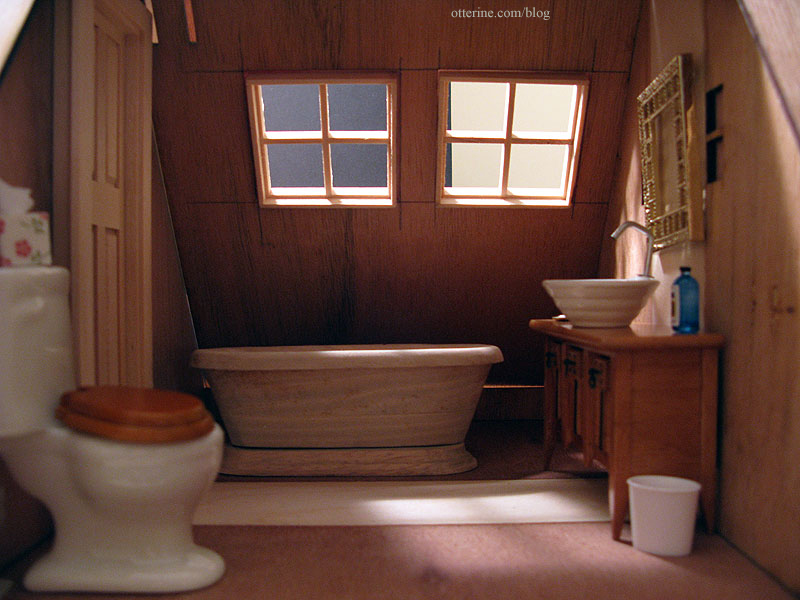
This was a tiny, dark room when I first started planning.
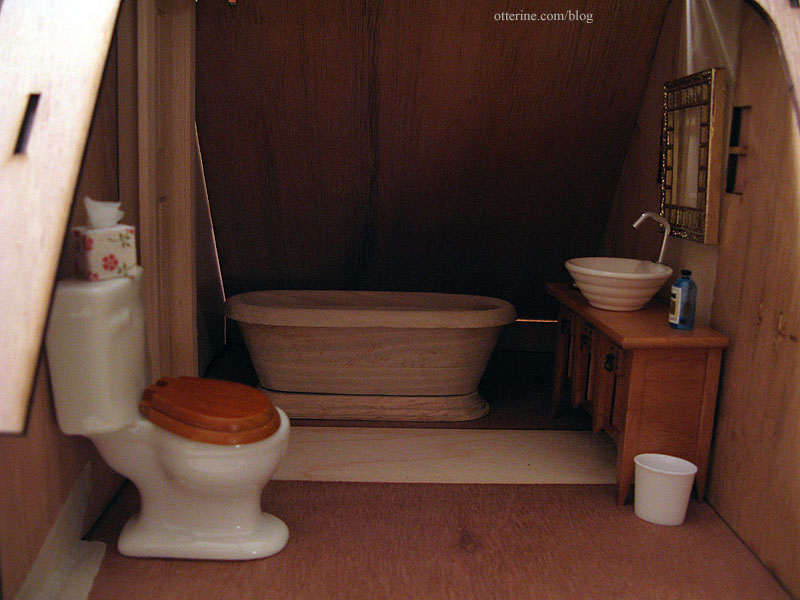
I cut out two skylight windows, which completely changed the feel of the room.
To install a working narrow door, I padded the wall separating the bedroom and bathroom with 1/8″ plywood to solve the problem of the wall being too thin for the ready-made door.
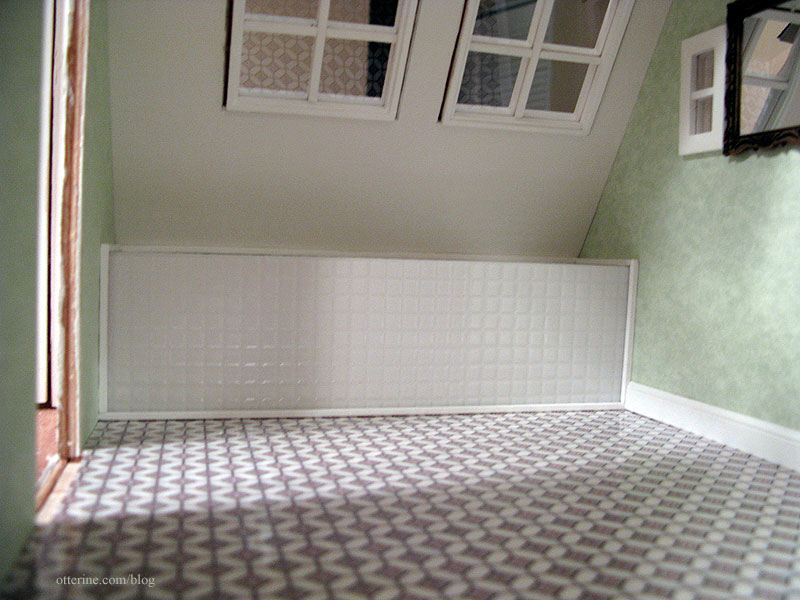
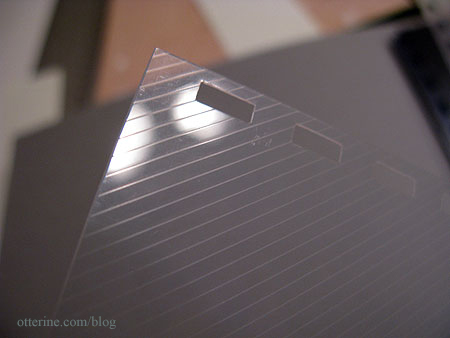
Because the room has a steep angle on the window wall, I built a wall shelf from basswood and foam core board that I then primed with white paint. I covered it with pieces of clear plastic tile sheet that had 1/4″ squares embossed in the surface. I used Krylon gloss white spray paint on the underside of the tile sheet and glued to the basswood base. I added tiny wood trim around the edges to finish it off and hide any gaps.
Exterior
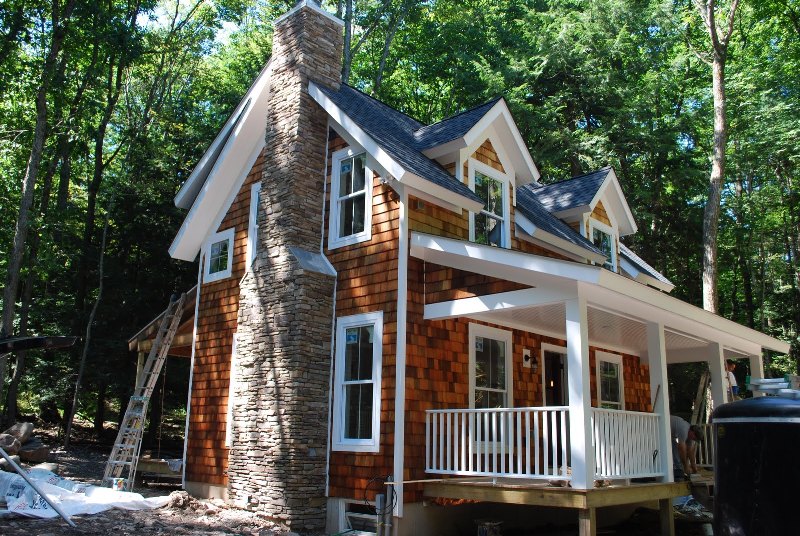
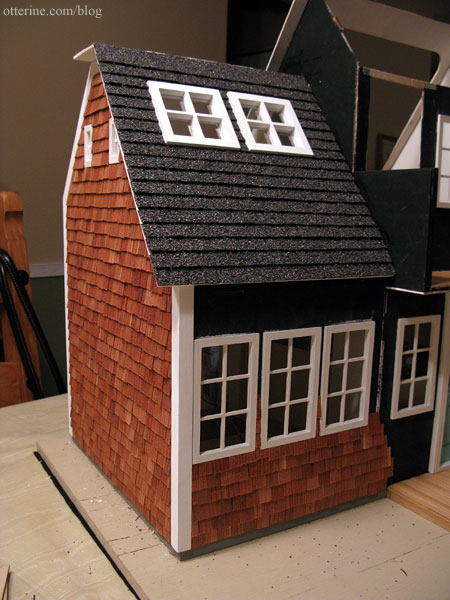
The cedar shake exterior with white trim was inspired by Catskill Farms. They have countless beautiful cottages on their blog that are perfect inspirations for miniature homes. I love the way the cedar shake exterior pops with the white trim and grey roof. I was sold!
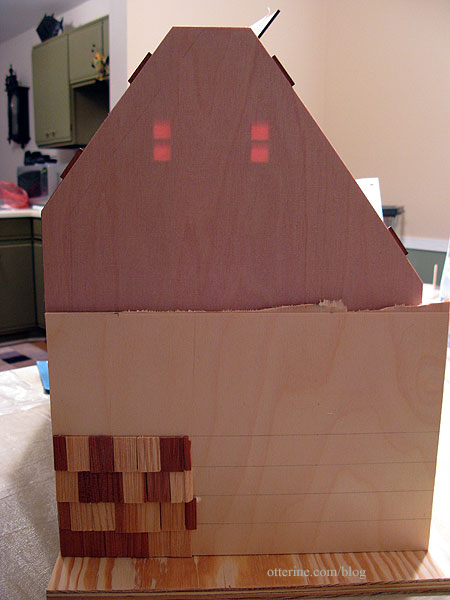
Once upon a time, I had a Dura-Craft dollhouse that never got built and whose pieces were lost to a flood. Some pieces survived since they were stored elsewhere, and included in those miscellaneous parts was a huge bag of cedar shake shingles (say that phrase ten times fast). So, no need to buy materials for the exterior. I made a sample of the exterior finish on a piece of scrap board and positioned it next to the dry fit structure. Whoa! Those windows are a little Amityville Horror, no?
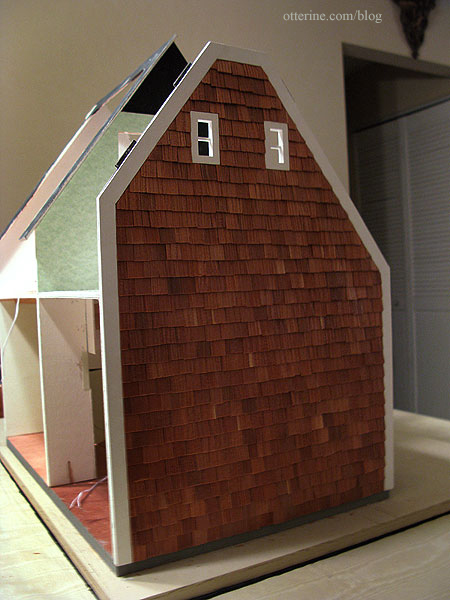
First, I didn’t care for the wide variety of shades in the cedar. It looked like a cedar polka dotted house. So, I spent my lunch hour one day at work sorting cedar shakes into three piles: light, dark and broken. It sounded like I was playing poker, counting out the chips! I used the darker shades since I planned to leave them natural.
Second, I thought the shakes were too big for scale. I looked up the real life size of cedar shakes online and found them to be pretty close to exact 1:12 scale. But, for looks, it just didn’t work for me.
So, I commenced to splitting 1,700 cedar shakes individually by hand. I first split them lengthwise to a width of 1/2″ with an Easy Cutter, and it was easy. I then split them across the grain to a height of 3/4″ with the Easy Cutter, which was not easy. Even with a new blade, the shakes were hard to cut across the grain and were prone to splitting. But, the end result was a better scale match and well worth all the work. This is also one of the most forgiving finishes I’ve worked with so far. Unevenness in application and splits in the wood add to the realism instead of detracting from it.
In addition, it was easy to remove and then replace a section of shingles when I accidentally cut my wiring while installing the kitchen floor. With siding, I would have had to tear a lot more out than the 2″ x 3″ section that I did. After the repair, the new shingles just slipped right into place as though it had never happened. :]
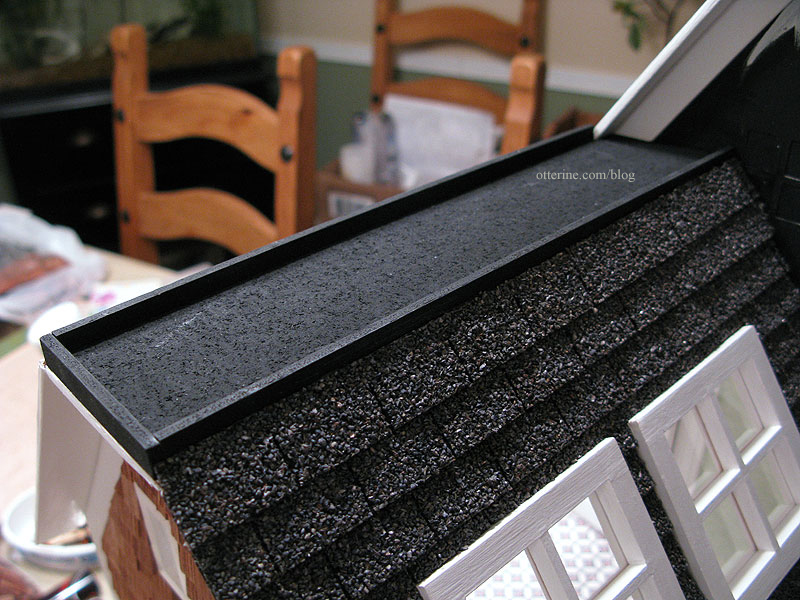
I put the roof of the addition on and shingled that with grey asphalt shingles by What’s Next before applying the cedar shakes on the adjacent wall. There are a number of cedar shake houses in my area, so I was able to see some real life examples of how to handle some of these structural challenges.
The back roof piece of the addition was a challenge. I don’t know if it was my alteration of the design or just a stubborn warp in the outer wall of the addition, but I could not get the main house roof, the new flat top roof I put in and the addition roof to square up. Finally, I just attacked it with duct tape, and that worked! There is still glue at the joins, but the duct tape is the main support for the bond.
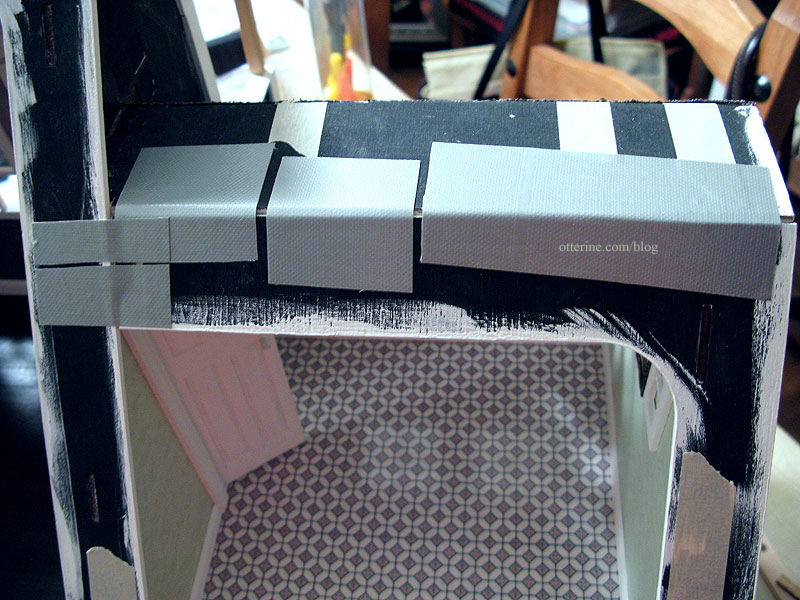
I then created a parapet on the flat top portion using some of the left over kit wood from the stair posts. Inside this wood frame, I painted a piece of cork sheet to simulate the tar and gravel covering. I used Quick Grip glue to attach the shingles and cork piece of the upper roof and had no problems with those things adhering, which was my only concern in using duct tape.
Now, I can’t take credit for even knowing what a parapet was…that was all mom’s influence. I had no idea how to finish this part of the roof until she came up with the idea. Hooray for mom!!! The wind turbine I added later is from ELF Miniatures.
Categories: Baxter Pointe Villa
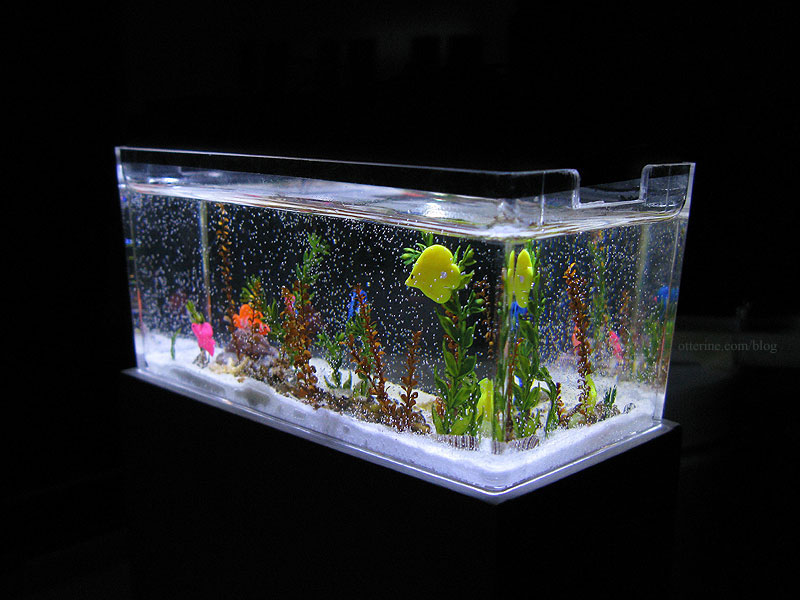
July 6, 2011 | 0 commentsSaltwater aquarium in 1:12 scale
One of the main features of Baxter Pointe Villa is the saltwater aquarium room divider. This post shows the process I followed for my test tank and this final tank below.
There are several miniature aquariums on the market, some with lighting. In fact, I had one in my childhood dollhouse, though I lost track of it a long time ago. Additionally, there are miniaturists out there who have made their own fish tanks. There’s a wonderful tutorial on the Greenleaf forum for just such a tank.
I wanted to go one step further and make an elaborate saltwater tank with bright, vibrant fish and custom lighting. My inspiration for the overall size and feel of the aquarium came from various real life tanks where the aquarium is mounted in the wall and often serves as a room divider. Very posh. (For real life examples, see Fish World.)
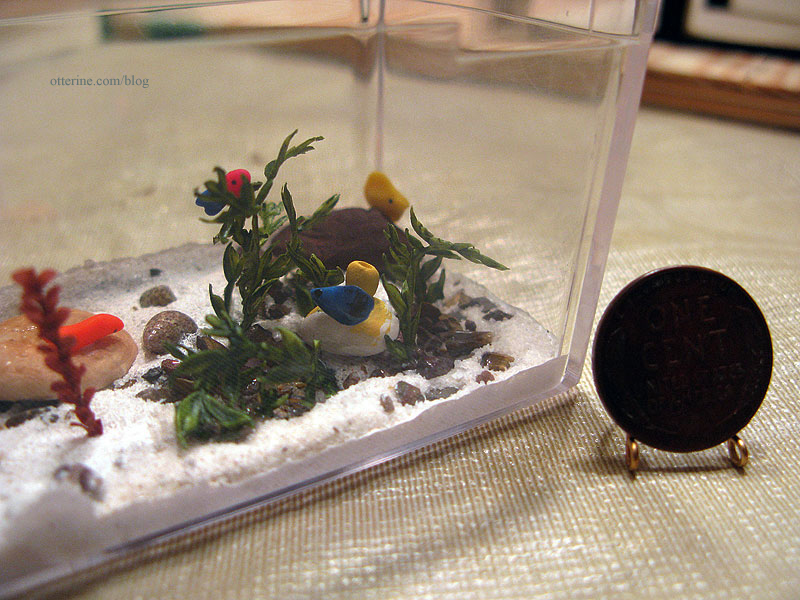
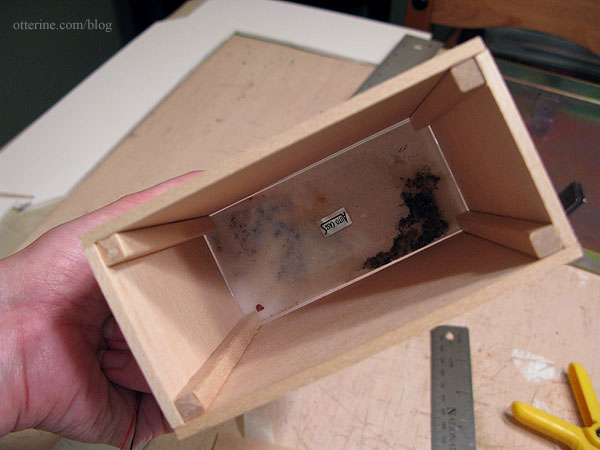
While I did have a few smaller acrylic boxes on hand, I wanted a larger tank…something that would be better suited as a room divider than a fish tank in the corner. I found these boxes, the original purpose of which was to display diecast cars. They measure approximately 4″ L x 2″ H x 2″ D each, though the usable area is shorter since there is a noticeable lip around the top that would detract from the illusion of a real life sized aquarium. Ten dollars for five tanks gave me five attempts to get it right, though I think if it had taken me five attempts I’d have given up around three in a fit of tears and curse words.
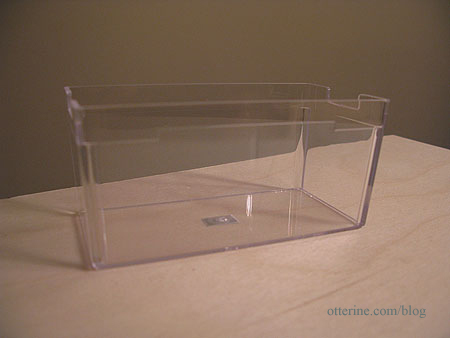
It probably would have been better if I had a tank that were tall instead of short and more straight-sided, but I think it works well for what I intended.
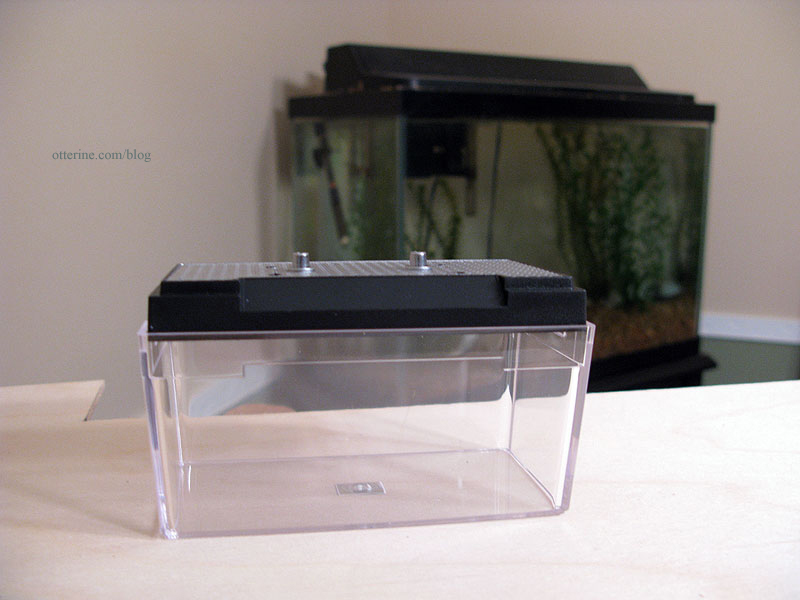
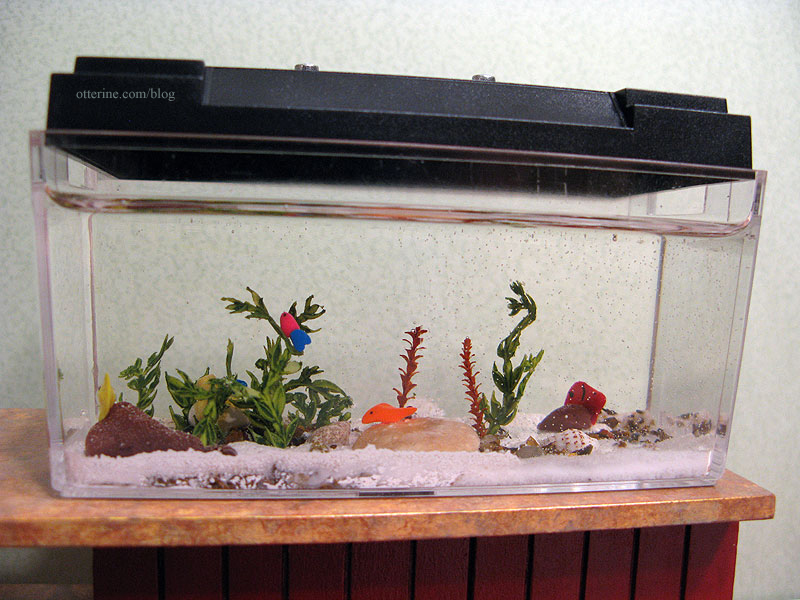
Interestingly enough, the bases seem very well suited to aquarium hoods when turned upside down. Remove the knobs on top (or not), add a quick coat of paint, and you’re all set. They even have pre-drilled holes if you wanted to add lighting.
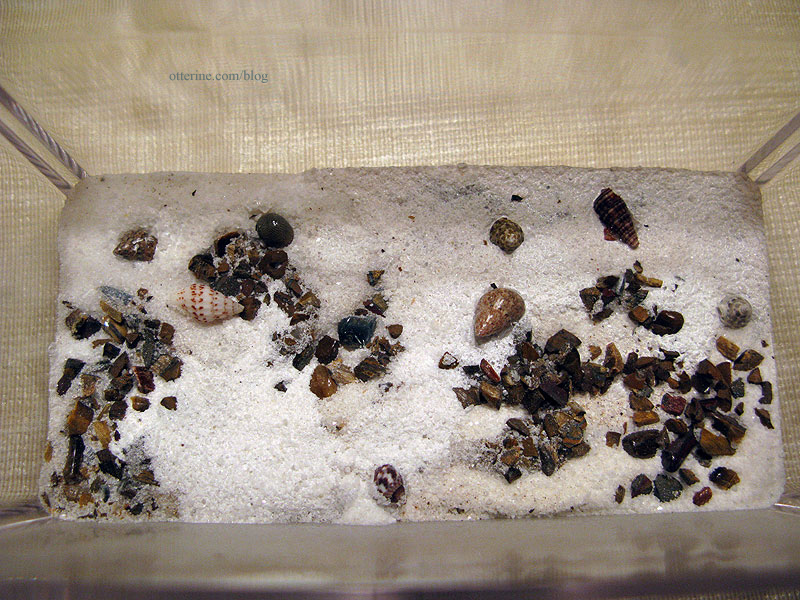
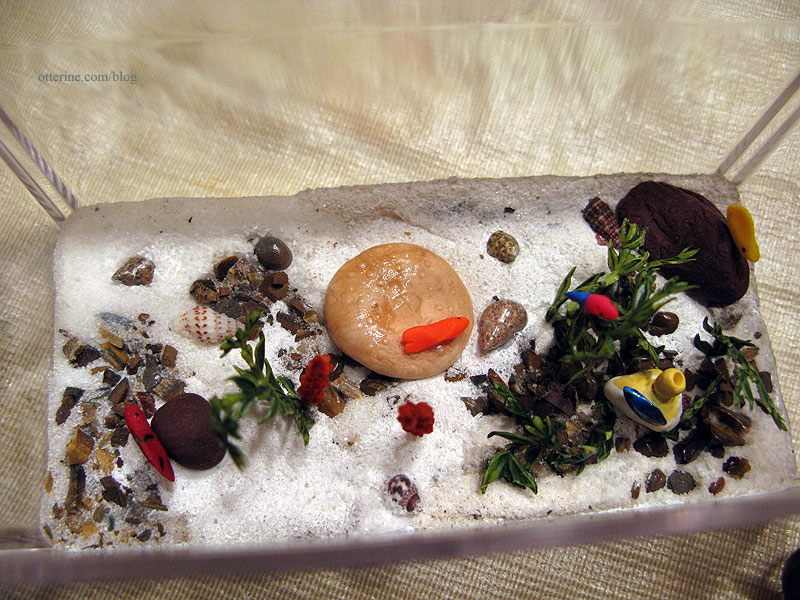
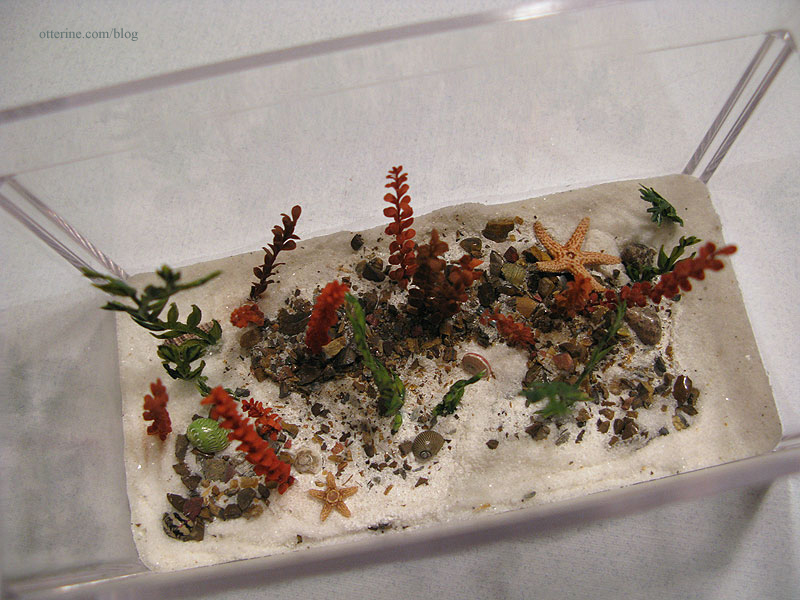
Since I had never worked with resin water before, I decided to do a test tank. I started with white sand I bought at the dollar store. I figured I would need to glue everything in place before adding the resin water, so I experimented with several different methods for gluing the sand in the tank.
I used a mixture of sand, glue and paint. For the gravel, I used gemstone beads that I smashed with a hammer into finer bits. I used the same glue/paint/sand techniques to attach the gravel to see which worked the best. Here’s the result of those multiple techniques.

I ordered some tiny, tiny, TINY shells from Ronni at Marco Island Shells, and in my package she included a bunch of slightly imperfect shells. I dipped a few in glue and pressed them into place. Actually, these aren’t the smallest she carries…she has micromini shells, too!!! :D

Look at all the intricate detail! Isn’t the natural world a remarkable thing? :]
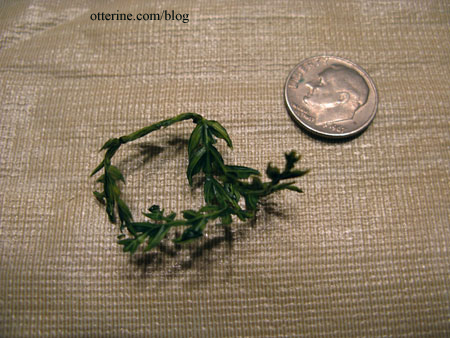
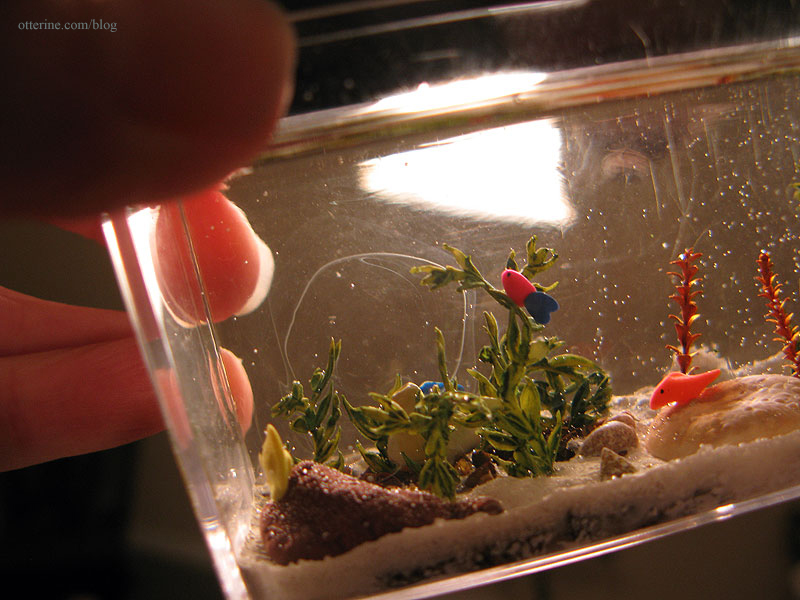
I found some great plastic plants from A Little More in Miniatures at a local mini show. I cut them into varying lengths and used clear glue to attach them to the tank floor.

For the larger stones, fish and other live creatures, I used polymer clay. Since this was a test tank, I didn’t put a whole lot of effort into the sculpts before baking. Some were baked attached to rocks, while others were glued in place after baking. I love Sculpey Bake N Bond! Just a dab really holds so you don’t mar your creations by pressing them together.
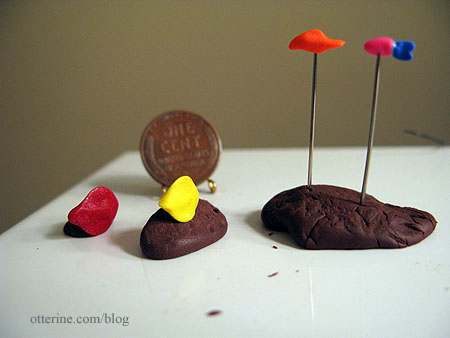
I bought two sea urchin polymer clay molds from Tina at Beadcomber. These were cast from actual urchins and they have wonderful details.
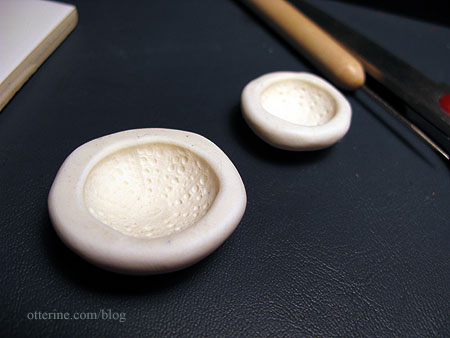
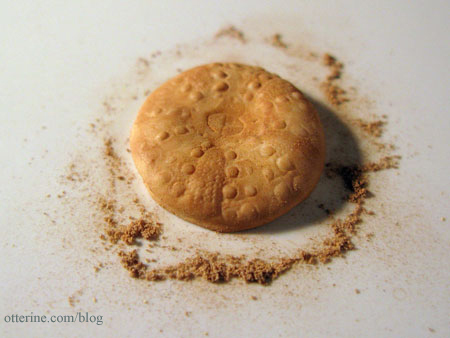
I used the smaller one to create a flat sea creature…sort of a mix between coral and urchin. :] I dusted it with pastels before baking.
The blue fish was painted with metallic Testors paint; the rest were formed of colored clay. The rock the blue fish is on was painted with regular craft acrylic paint. As a final touch, I painted eyes on all the fish with Testors black paint using a sewing pin. The fish were all glued in place with Aleene’s clear gel glue before I added the resin.
I sealed half of the urchin creature with acrylic sealer and added a couple of non-plastic plants just to see how the resin would react with these materials.
Of course, my test tank was looking better with everything I added. Isn’t that always the case? Now, I was worried about ruining it with the resin. But, there was no turning back!
I bought Acrylic Water from Walmart since others who have made these tanks recommended it. It was also way cheaper than other casting resins on the market. It was super easy to use, but I must say finding measuring cups was not easy. Sure, I could have ordered them online, but really…a craft store that sells resin kits should have plastic measuring cups. I ended up buying a pack of 9oz. Chinet cups from Target and made my own measuring cups. :D
The test tank took 6oz. of resin mixture. I filled it to the line around the top to make it less obvious.
The directions said to mix the epoxy with the hardener and stir “until clear.” Well, it was clear but it had streak-like formations in it that I didn’t notice until after it was poured into the tank. I don’t know if that meant I didn’t stir it long enough or if that was just the nature of the resin.
During the first few minutes, some large bubbles rose to the top and popped. Using a toothpick, I dislodged a few that were stuck as well. There were some tiny bubbles left in the resin, but I liked the look of them. That sort of aeration is similar to what a real tank has.
After 48 hours, the resin had hardened and looked good for the most part.
Most of the streaks had disappeared, but there was a halo in the area where I had painted a rock with acrylic paints. Though I wasn’t sure it was a reaction with the resin, I figured it was best to eliminate those paints in the next trial just in case.
Had I intended to display the tank in a cabinet with a backdrop, the halo wouldn’t matter since I could likely disguise it…but I wanted to be able to see it from both sides and the streak ruined the illusion of real water. Still, not bad for a test tank.
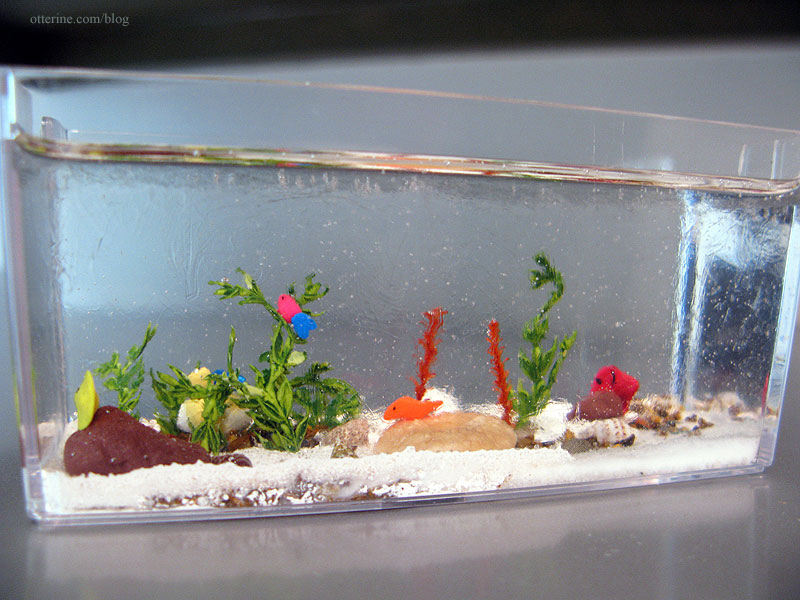
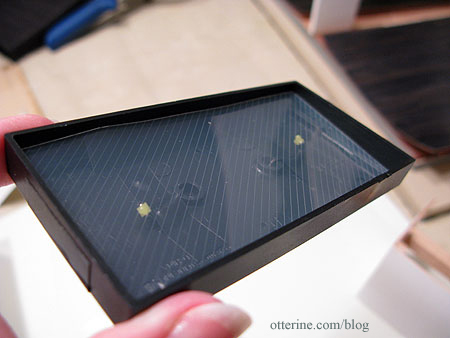
For the second and final tank, I skipped the sea urchin creature and instead added two starfish, also from Ronni at Marco Island Shells.
I put in more plants as well as taller plants. I spent a bit more time sculpting the fish and added a bit more detail to them.
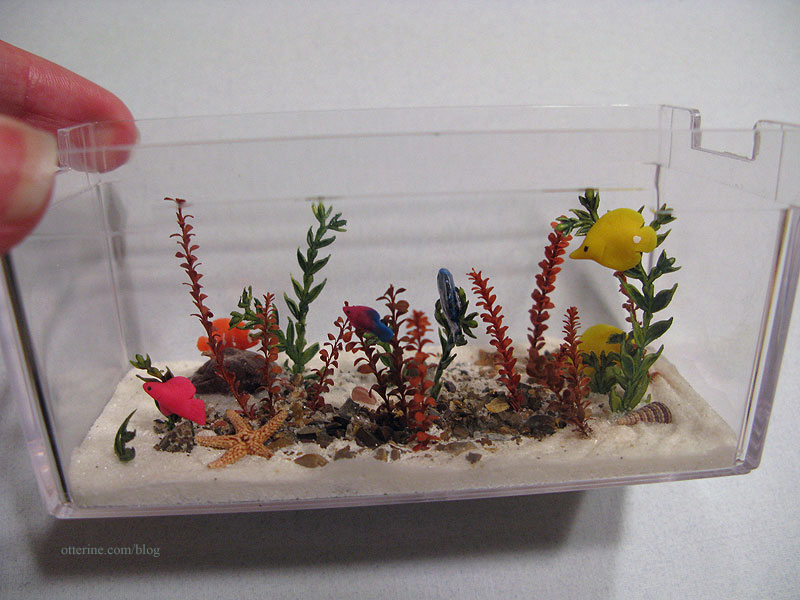
I also stirred the resin for close to ten minutes to make sure it was as clear as I could get it before filling it up to the side openings along the rim to take advantage of all the usable space available. I got a few more bubbles this time – probably from too much stirring, but I think it turned out fabulous!
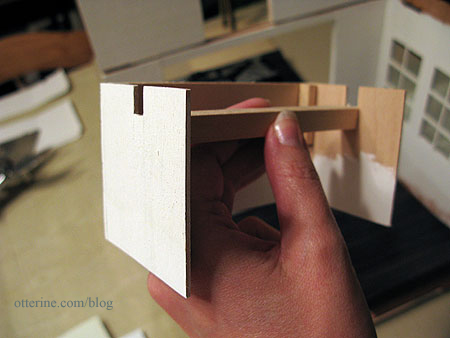
To place it in the wall, I built a base that fits just around the tiny lip on the bottom (shown with the test tank).
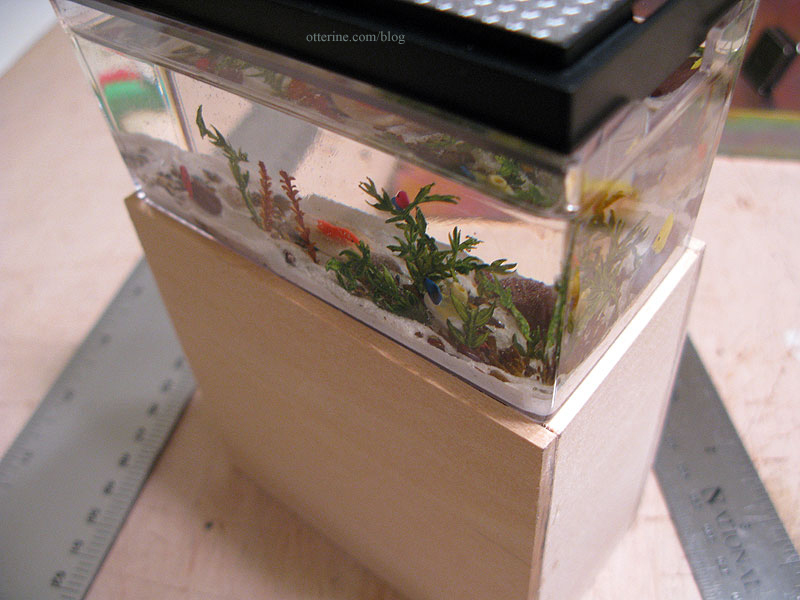
I used square posts in the corners for stability.
I built the soffit in the same manner, cutting notches for the thin room divider near the ceiling and adding a brace across the inside to glue it in place. Here it is shown without the back, which was put on after installation.
I bought two cool white LEDs from Evan Designs to light the tank. To diffuse the lighting at bit, I used a recycled report cover with a lined texture to finish the inside of the topper.
And, here is the final tank set in the wall. I love it! I especially love the way the lights pick up the bubbles in the resin.
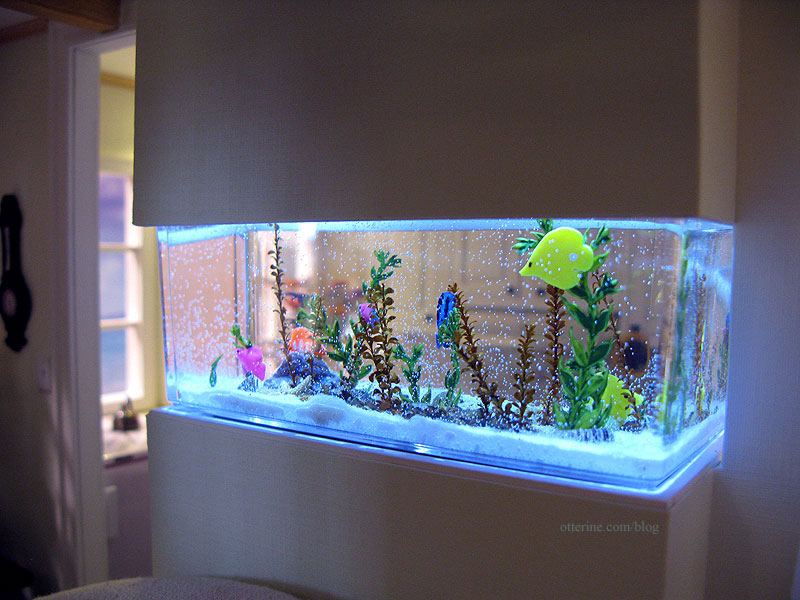
There is a door on the kitchen side of the aquarium soffit that allows access to the tank. I hardwired the lighting, so it’s meant only as a means for the residents to feed the fish! :D
Note: any resin used will likely yellow over time, so use at your own discretion. The resin for the tank made in this post is now very dark yellow.
Categories: Animals and birds
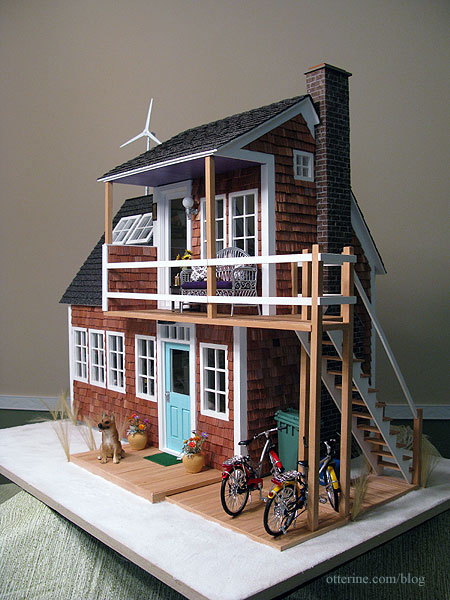
July 3, 2011 | 0 commentsBaxter Pointe Villa
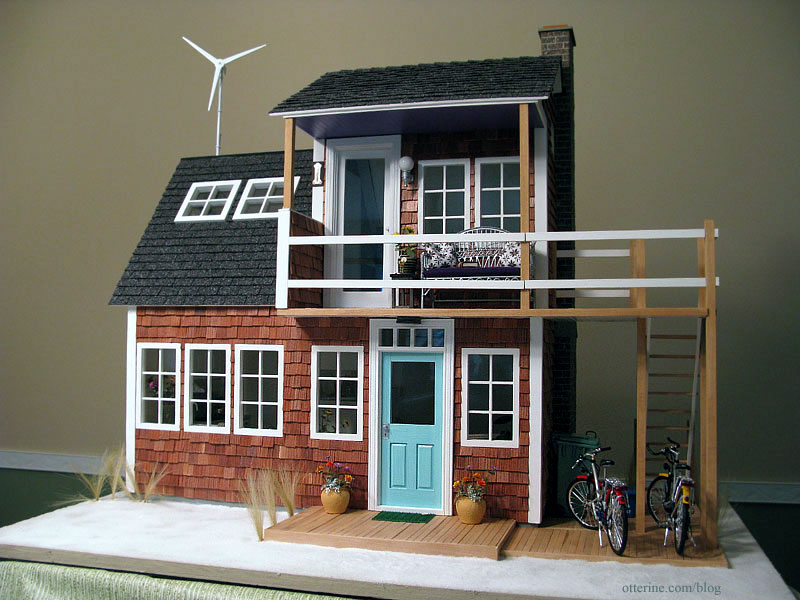
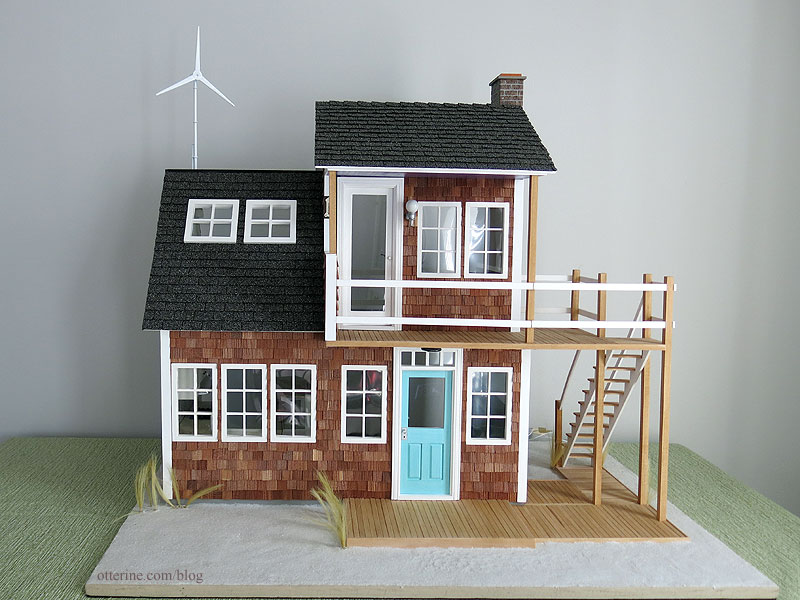
Baxter Pointe Villa was built for the 2011 Greenleaf Spring Fling contest. It’s a cozy beach house, perfect for a relaxing getaway.
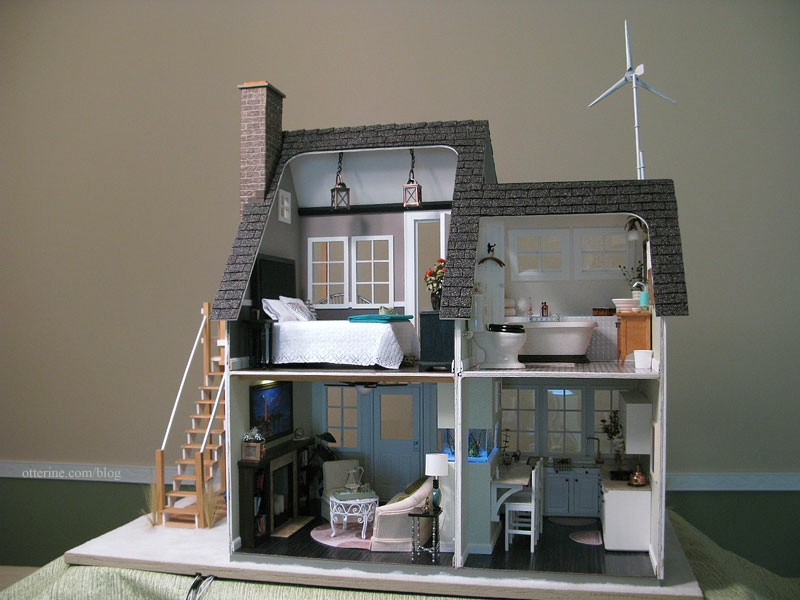
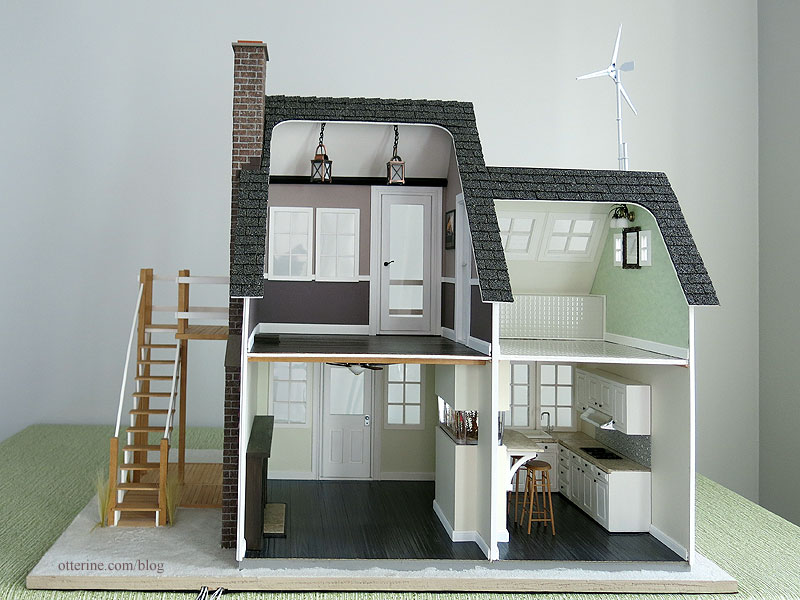
It features a living room and kitchen on the first floor, and there’s a bathroom and bedroom on the upper floor.
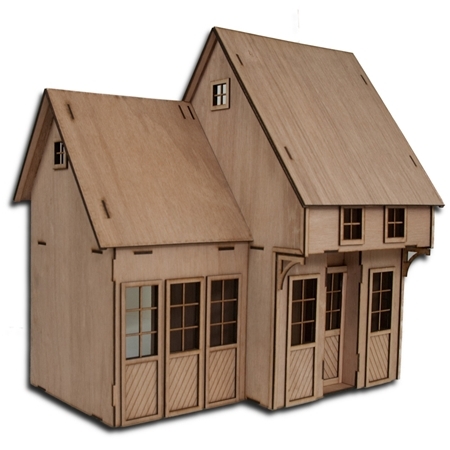
Here is what the original kit with the side addition looked like on the Greenleaf website.
Mine’s a bit different, no? ;] I took a front wall from a second addition kit to make a deck on the second floor of the main house. I also added 2 1/8″ to the depth of this addition, which gave me a lot more space to work with in the end. (Detailed post on the structural changes here.)
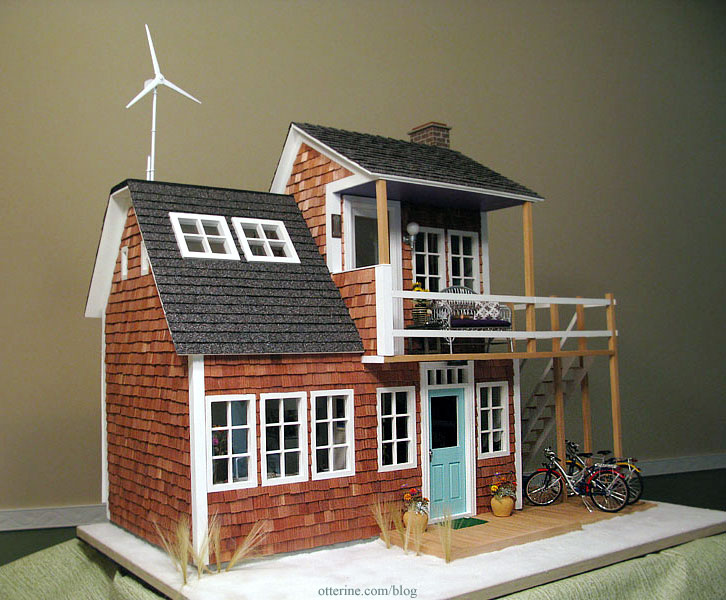
Below is the initial mockup of my idea, before I found the wind turbine or realized the cupola would not work on my redesigned roof line. I also hadn’t thought about a chimney yet that caused me to flip the direction of the stairs. I still think I came pretty close to what I initially imagined.

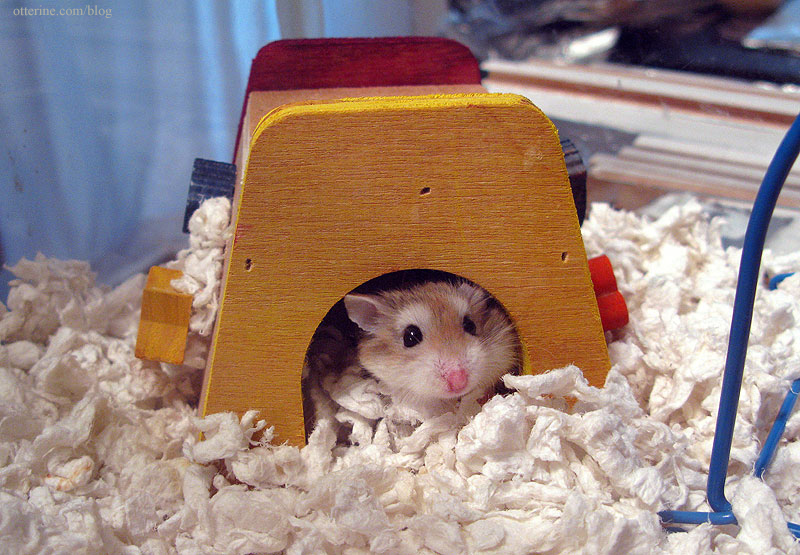
The cottage is named after my dwarf hamster companion who won the lottery by being featured in the Greenleaf Gazette’s Critter Corner as Hamster in Half Scale (well, to a hamster, $25 worth of yogurt yummies is decidedly a jackpot).
The scene in the background is appropriately captioned On the Beach. Though I am a hobbyist photographer myself and I’ve been to the beach many times, the only photos I have seem to be in mid-autumn or have a lighthouse in the background. Not necessarily a bad thing but not what I was going for. And, any ‘sunlight’ you see in the photos, well, that’s just my dining room ceiling fixture. Even I can’t believe how well this fixture lights this house from outside!
I tried to make as much as possible and am very pleased with how the build turned out overall, but I must say the aquarium is my favorite! I used the Greenleaf tutorial for it, adding my own sculpted polymer clay fish and LED lighting. :D

The LEDs make the fish glow, and I love the way the lights pick up the bubbles in the resin.
I would love to sit in this living room, honestly. It has such a serene quality to it.
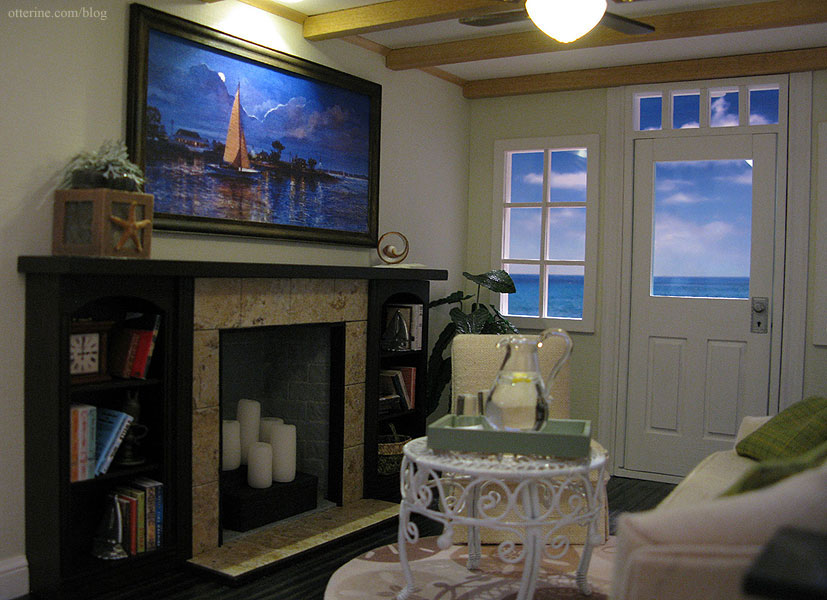
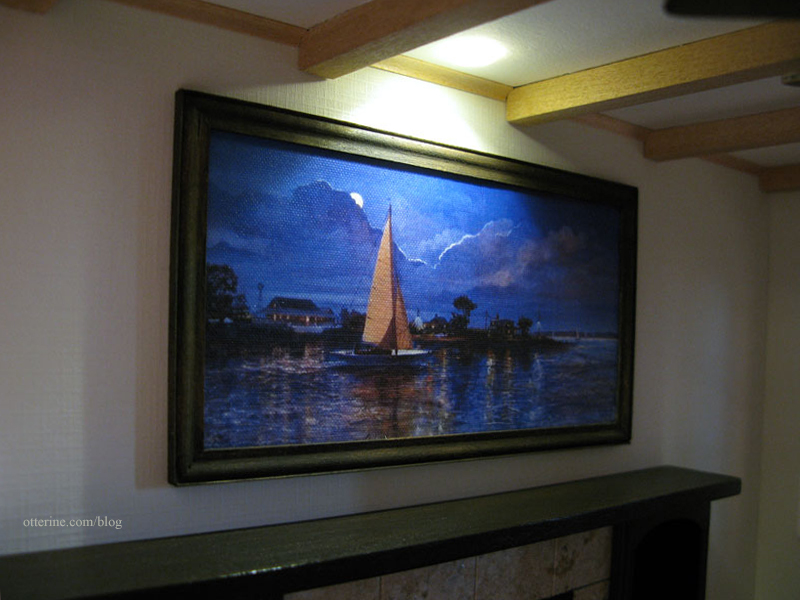
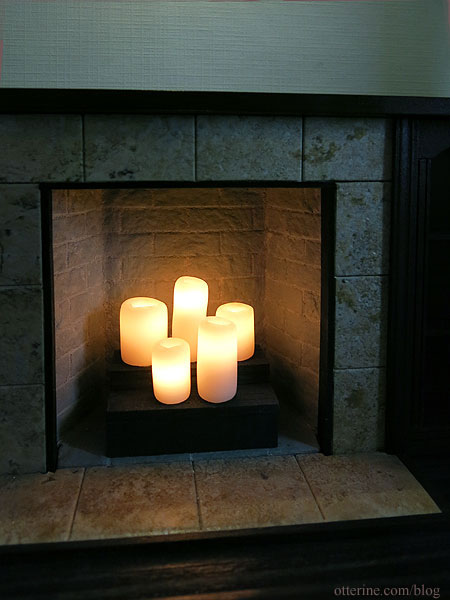
The artwork is Racing with the Moon by Jacqueline Penney printed on Art Canvas by The Crafty PC. It has a canvas texture that really brings it to life. I installed a NovaLyte can light over the fireplace to illuminate the artwork.
The candles in the fireplace are polymer clay and are lighted. They have a very soft light and this photo is a fairly good approximation of what they look like in person.
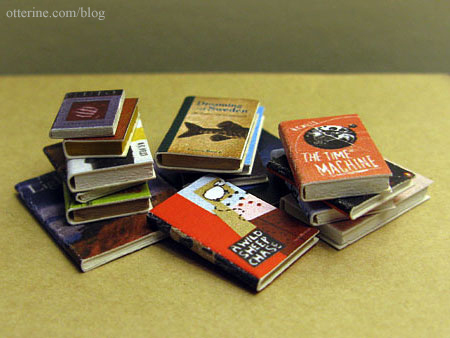
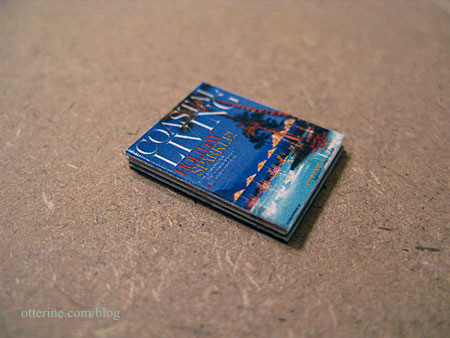
I made a lot of the books myself but supplemented the collection with some from The Miniature Bookshelf and other miscellaneous suppliers.
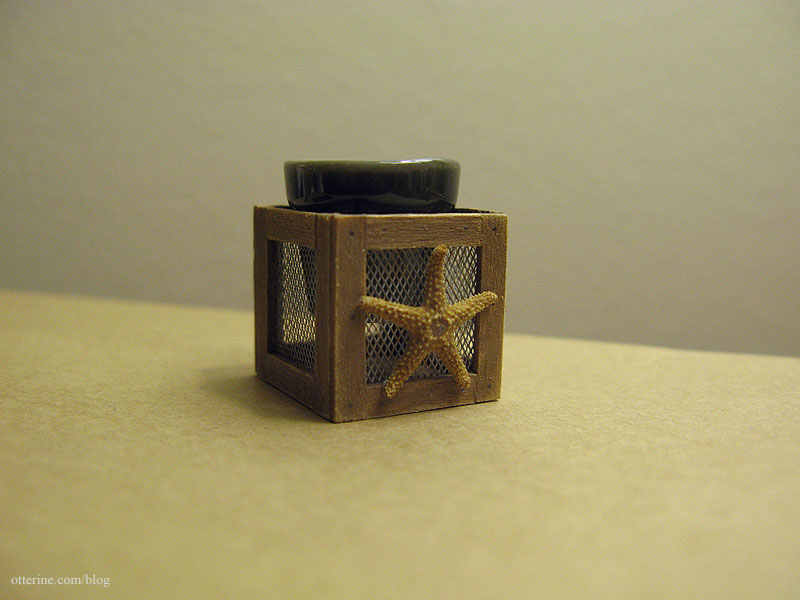
The starfish planter is a replica of one I saw on The Lettered Cottage made from a vintage cricket cage.
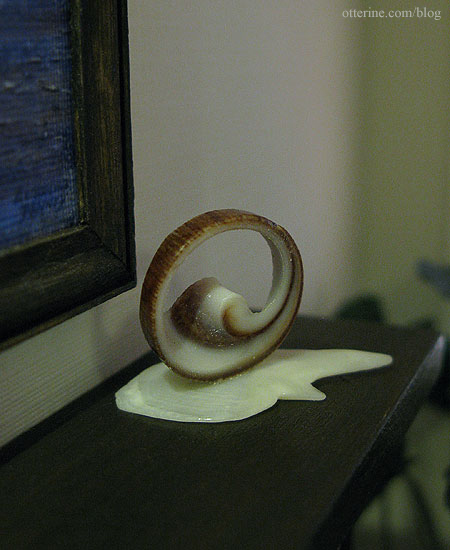
The sea sculpture is a cross section of a shell attached to a gar scale from Marco Island Shells.
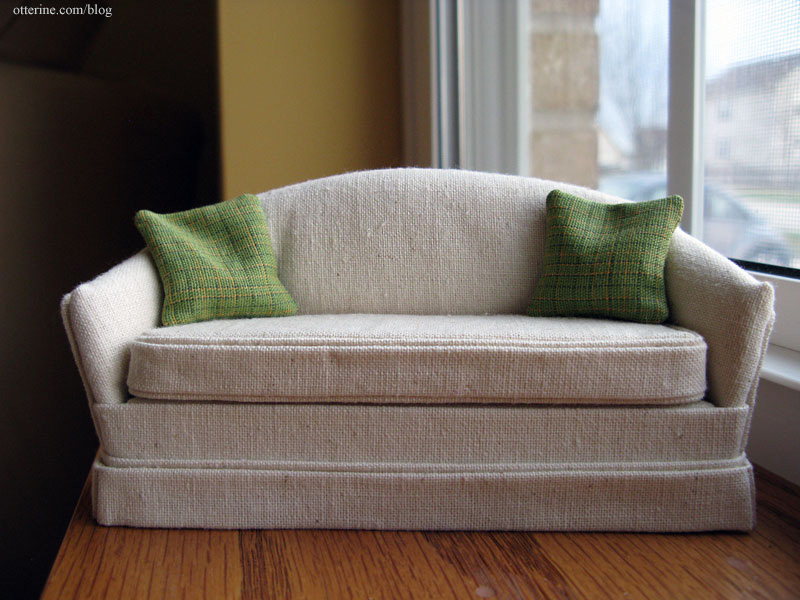
Another early project included the Millie August sofa and chair. I found these at a hobby store liquidation sale and had them stored in a box since then. When I first started figuring out the beach decor, I remembered these and thought they would be the perfect addition.
My side table is a replica inspired by the Oly Studio Ichibad Side Table.

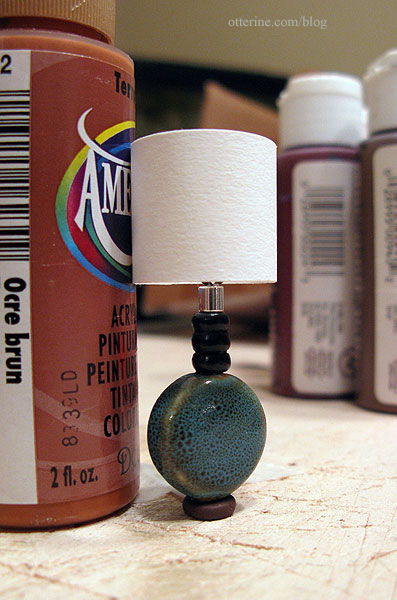
I scratch built the table lamp from a ceramic bead, a wood bead, a metal bead and a NovaLyte LED. The base is made from polymer clay (shown here in the original brown before I painted it black to coordinate). Two jewelry findings hold the shade in place. The shade is a strip of drawing paper 7/8″ wide by 3″ long glued with a overlapping seam.
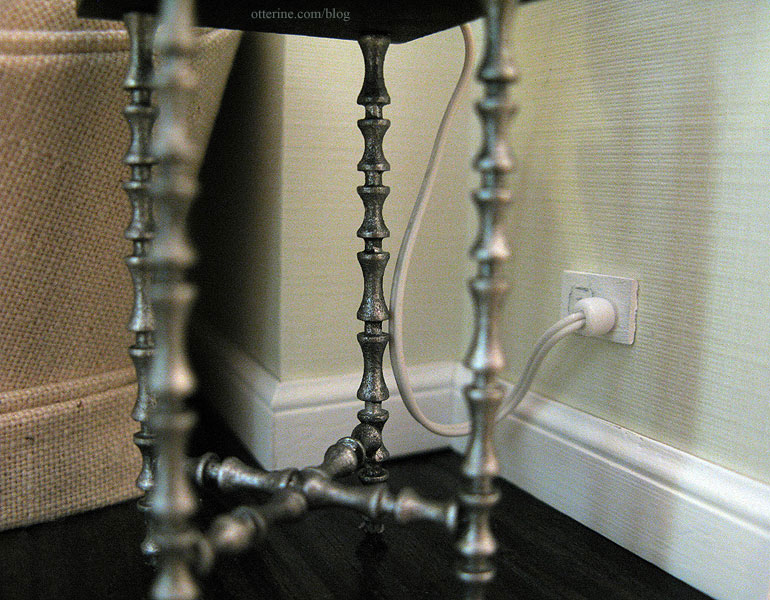
I made a mock outlet out of 1/64in wood veneer to disguise where the wire enters the wall. There’s a plastic bead to serve as the plug and the open side of the outlet has a drawn on receptacle. The wire then runs through the wall and into a channel as part of the hard wired system. For my tutorial on perfectly mitred baseboards, click here.
The entry table is borrowed from the Newport and is a Concord Miniatures side table painted black. I bought the vase at the Bishop Show, and the flowers were made from a Bonnie Lavish kit. The camera and film box were from my childhood dollhouse, one of the few remaining pieces I have from back then. The barometer was purchased from a fellow Greenleaf member. I changed the bottom sticker since the original didn’t fit well. I still need to replace the thermometer sticker on top for the same reason. The light switch plates throughout the house are actually stickers from miniatures.com. They photograph wonderfully!

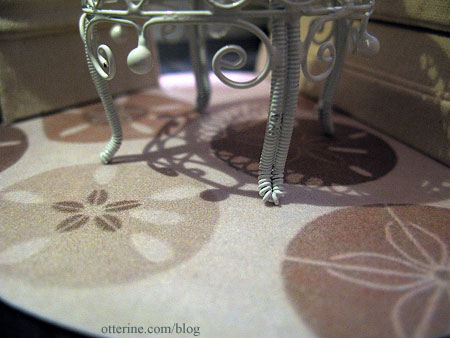
The rug is called Sand Dollar and found at Shor Home. I printed the image on Velour Card Stock by The Crafty PC. I love this paper, though my printer put a nice streak down the middle where it flattened the pile. :\ At least it’s not really noticeable.
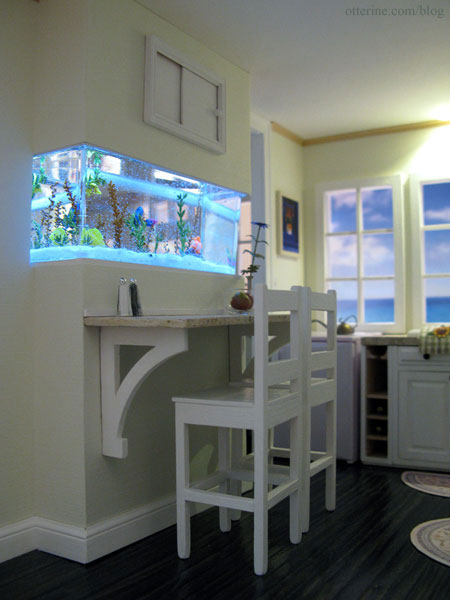
There’s a breakfast counter in front of the tank that I made from a curved scrap piece from the kit.
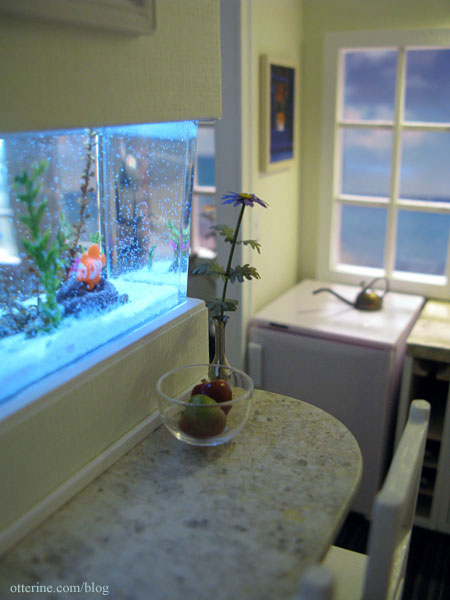
Here’s the door I made and posted about earlier…it’s a means to feed the fish! The counter stools are modified versions of the side chair pattern found in the book Finishing Touches by Jane Harrop.
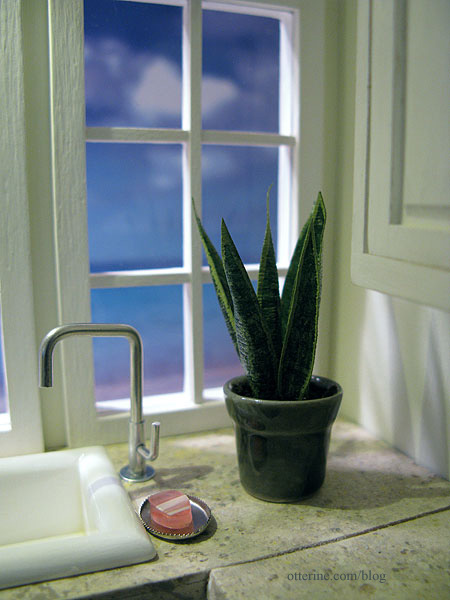
This is an efficiency kitchen with only a range top and a half fridge. When you are vacationing on the beach, you don’t need to be indoors cooking. :D
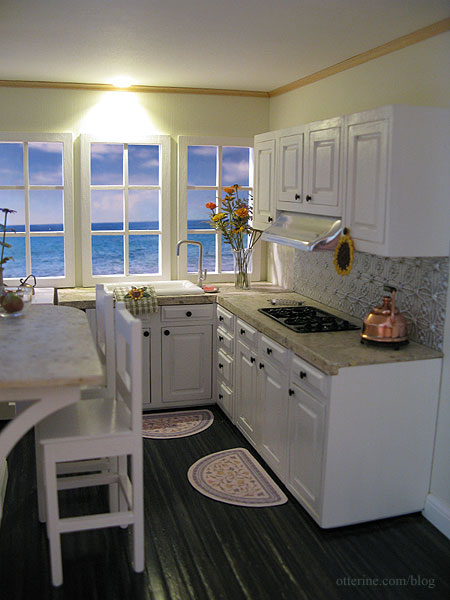
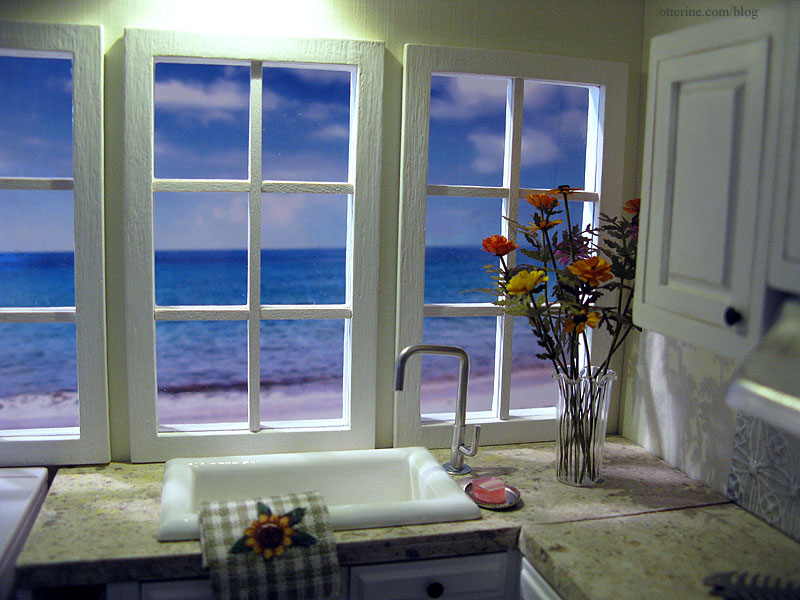
The sink was made in a similar fashion as the one in the Newport kitchen. The faucet is by ELF Miniatures. I offset it from the sink for two reasons. I was unable to center the sink with the windows so I figured a centered faucet would make this more obvious (I’ve seen this in real life houses as well). Second, it would have been a tight fit to get the faucet between the sink and the window behind the sink. Don’t want to hamper the view, either.
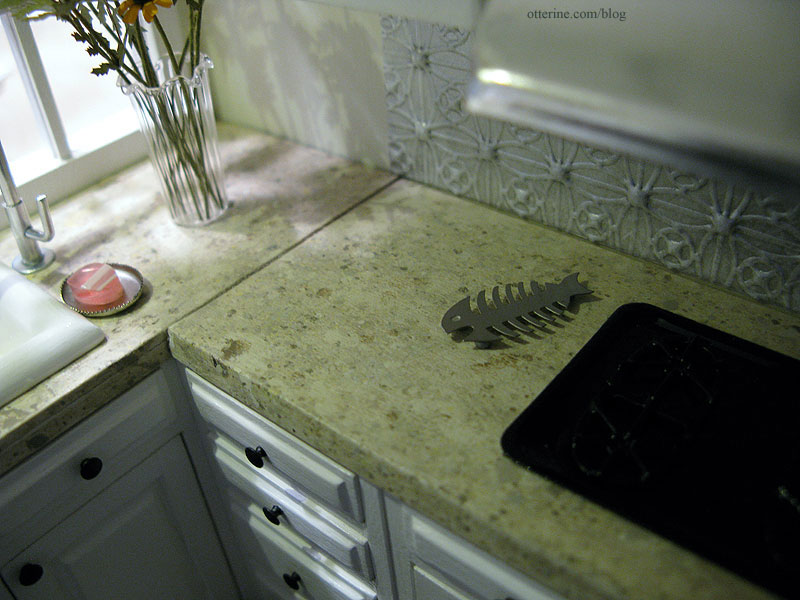
I used Houseworks cabinet kits that were partially assembled but unfinished. I cut the bases off the cabinets since they were going to be too tall with the added countertop to sit under the window trim. The counter top was made from 1/16″ thick bass wood painted to look like stone. The Houseworks range top was plain metal that I spray painted gloss black. The fish trivet is from The Dolls House Mall.
Rounding out the appliances is the Meile half fridge. Though there was probably room for a full size refrigerator next to the range, I opted for this smaller unit. I also omitted a full oven. This is a luxury vacation villa…you don’t need an oven or a huge refrigerator! :]
I padded the wall separating the kitchen and living with plywood to aid in supporting the ceiling and to give a little more thickness to the walls surrounding the opening. It wouldn’t have looked realistic to have a tiny wall separating the two rooms.
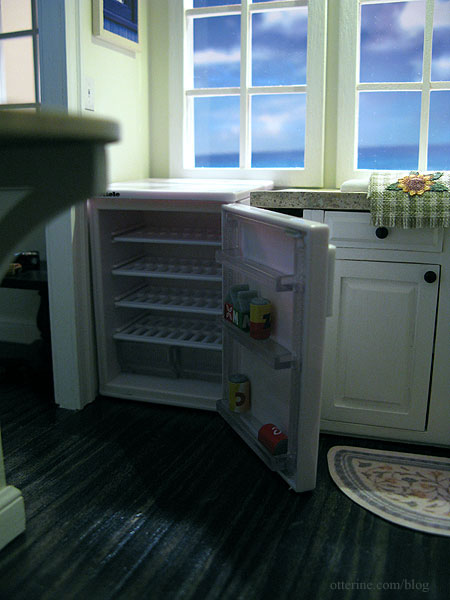
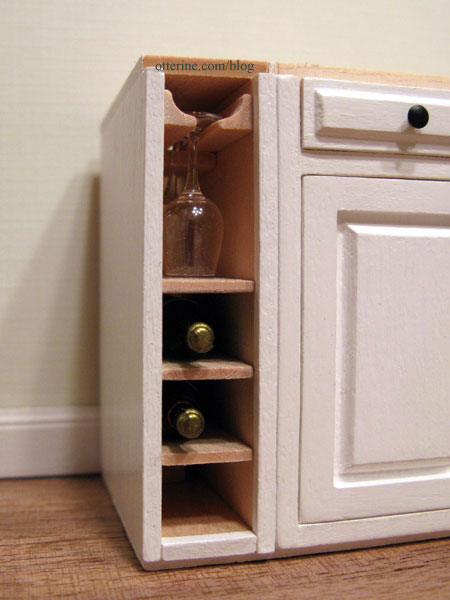
After coming up with the best layout possible for the kitchen and padding the dividing wall between the kitchen and the living room, there was still extra space between the fridge and the sink unit. To bridge that gap, I installed a built-in wine rack (shown here before countertop installation).
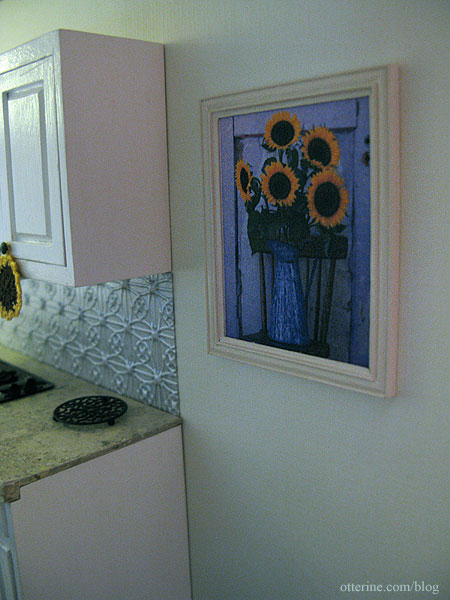
For artwork, I used two images by Steve Terrill, one of which has very long title: Sunflowers Displayed in Enamelware Pitcher, Willamette Valley, Oregon USA and Window with Sunflowers in Vase.

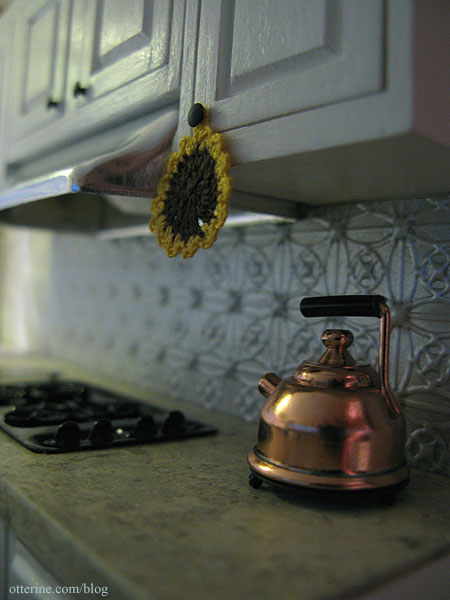
Some of the accessories I had on hand and don’t recall exactly where I got them. I bought the mini watercan above at the Bishop Show. I’ve had the copper tea kettle for some time, and the trivet under it was also bought at the Bishop Show. The crocheted sunflower potholder is by Blohm Design.
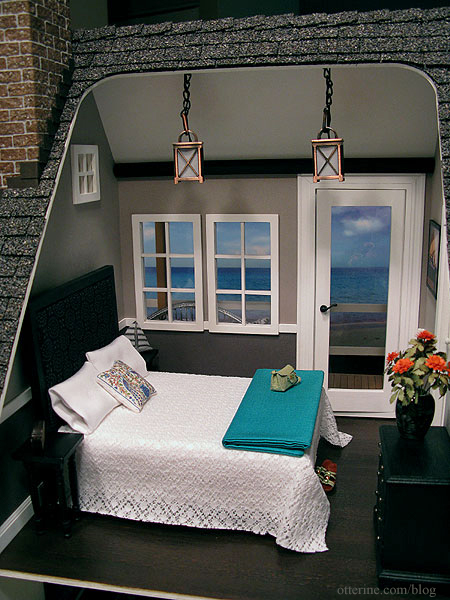
Upstairs is a minimalist and serene bedroom. The bedroom required a lot of changes.
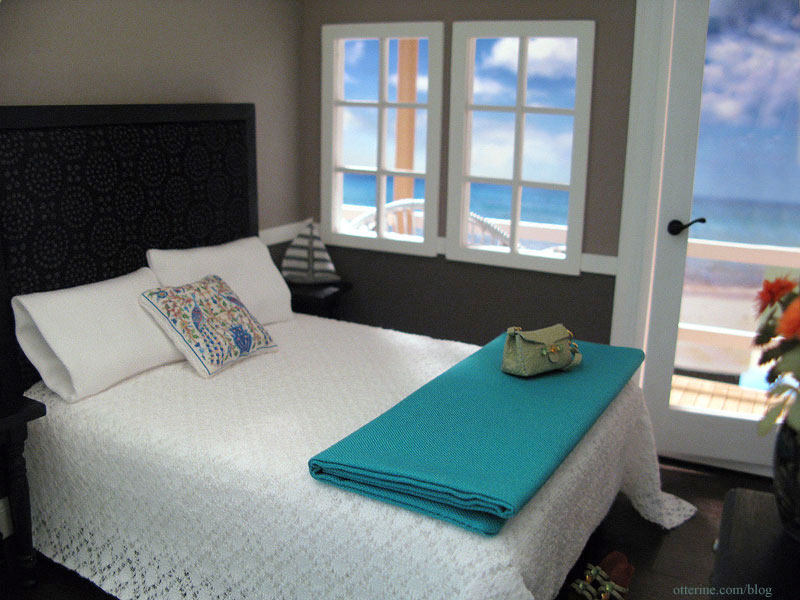
Even after modification, there was still very little usable room in this part of the structure because of the steep roofline in the back. I was able to put in a bed, two tiny side tables, a small dresser and not much else. I had originally planned to make two bedside lamps from metal beads, but they were very uncooperative during the creation phase. Instead, I used two Reutter Porzellan copper lanterns that ended up being better than my original idea. There is so little color in this room, they really pop.
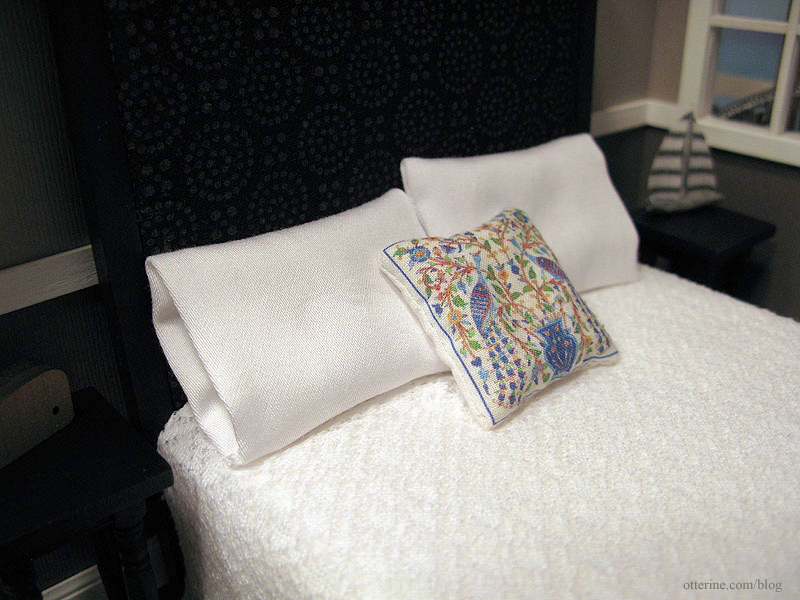
The bed is a bit smaller than exact scale, but it looks good in proportion to the room and other furnishings. I opted to add a headboard at the last minute since the room is so tall and there was so much blank space on that wall. I used a scrap of plywood to make the basic shape. I added a bit of padding to the top and then upholstered with Hanami Circle Dots Onyx cotton fabric. I apparently cut the board too small, so I added a 1/4″ strip wood border painted black to make up the difference. I dug through my stash of fabric, found some lace I’ve had for years and cut a piece to size. I pressed the pleats at the end slightly to keep it in shape.
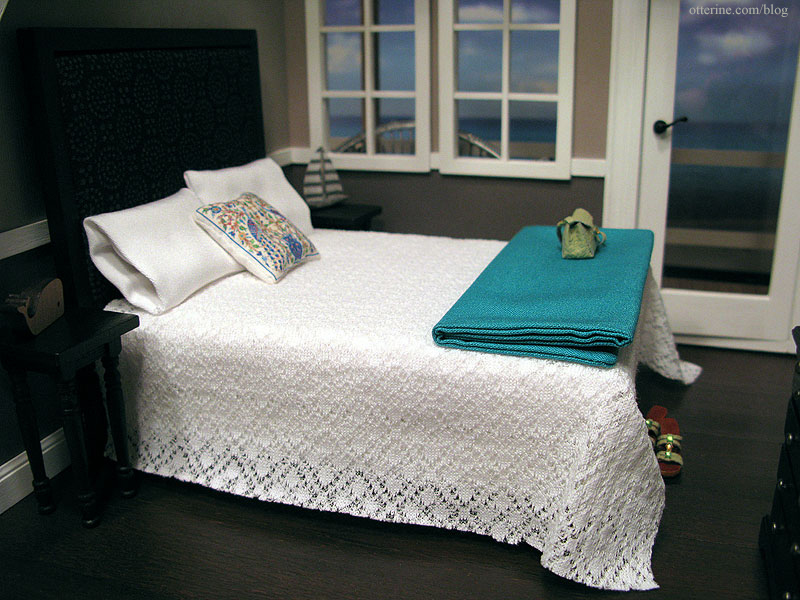
The folded blanket was made from a poly cotton blend, a remnant bin find. I sewed two pieces together, pressed into shape with an iron and then tacked together with a tiny bit of glue. The leather purse and shoes were made by Patrizia Santi.
For the pillowcases, I used white cotton sateen. The peacock pillow was made from a resized image of tiles by Jerusalem Pottery which I then printed on fabric.
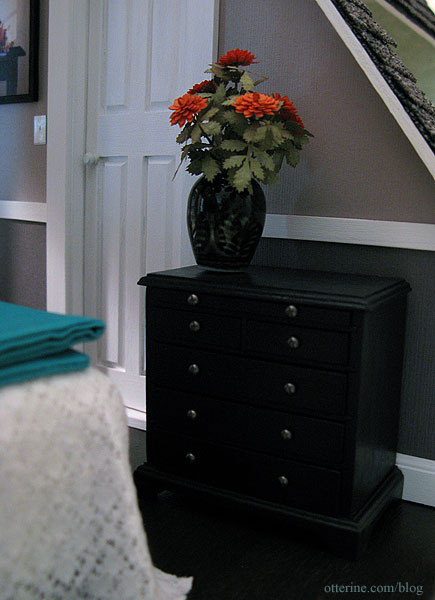
The dresser was made from a House of Miniatures Bachelor’s Chest kit. It’s the perfect size to sit next to the narrow door. Not a lot of storage in this room, but we’ll just pretend the closet is behind you on the open wall. The flowers are Bonnie Lavish dahlias in orange. The vase is from Manor House Miniatures.
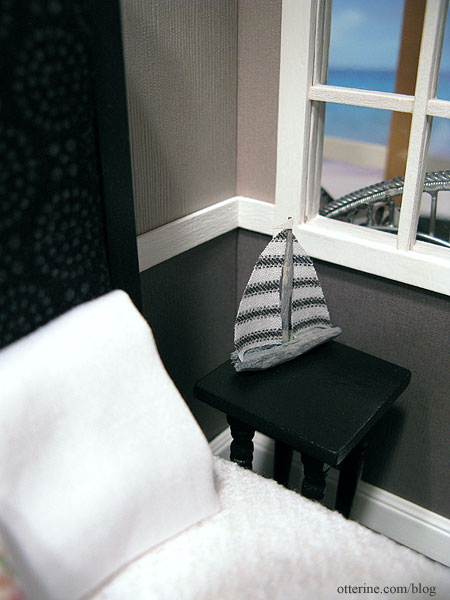
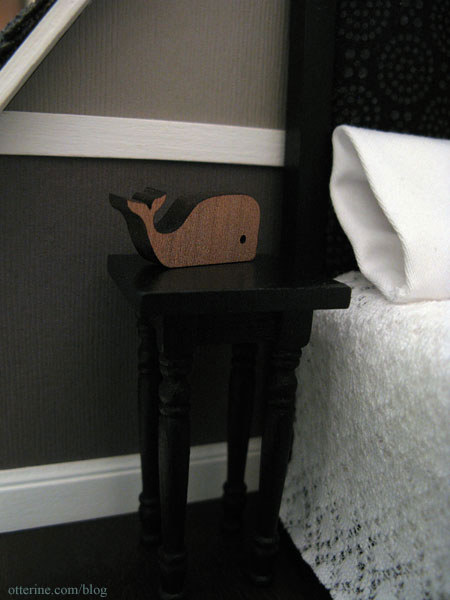
The side tables were made from precut wood shapes for the tops, scrap kit wood for the base and Houseworks legs. I kept them simple since the overall décor of this room was meant to be minimalist and serene. On either side table I have modest decor. First, the sailboat I made based on an original from White Flower Farmhouse that I first saw on on The Lettered Cottage.
And, second, a tiny laser cut wooden whale from Pepper Sprout Designs.
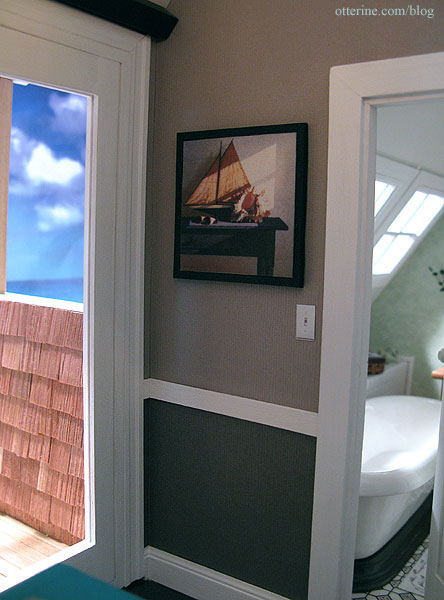
The artwork is Zhen-Huan Lu’s Days Gone By. I printed the image on regular paper in a few sizes to determine which size would work best in the space. I then sharpened the image in PhotoShop before printing on Art Canvas by The Crafty PC. The sunlight through the window effect in the painting is actually part of the painting, not a light reflection.
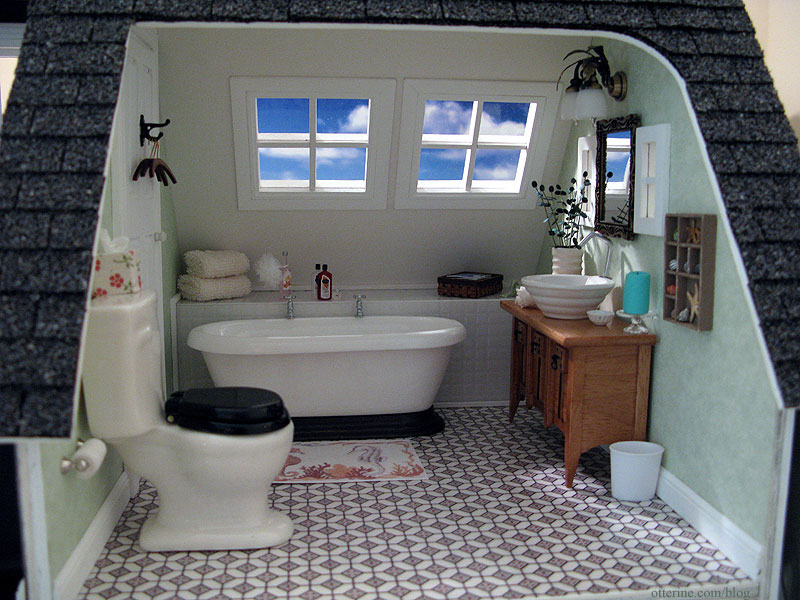
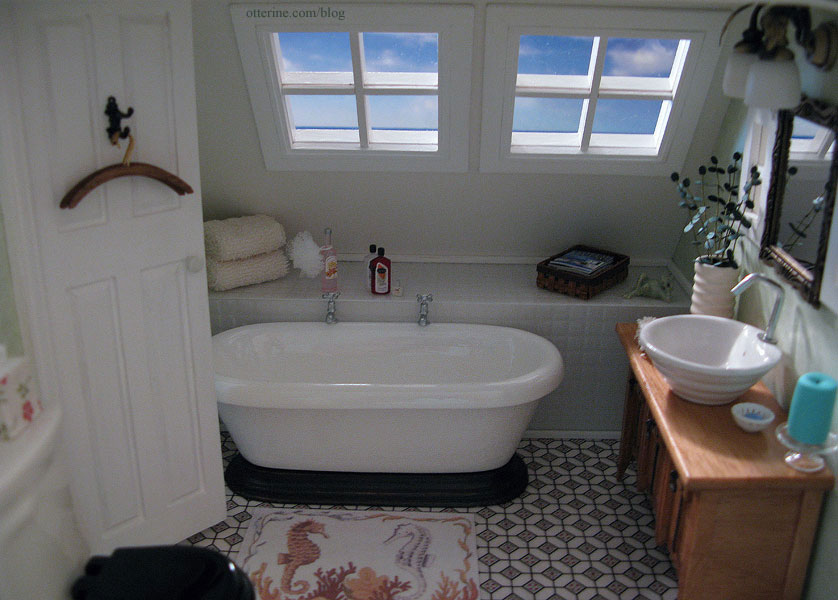
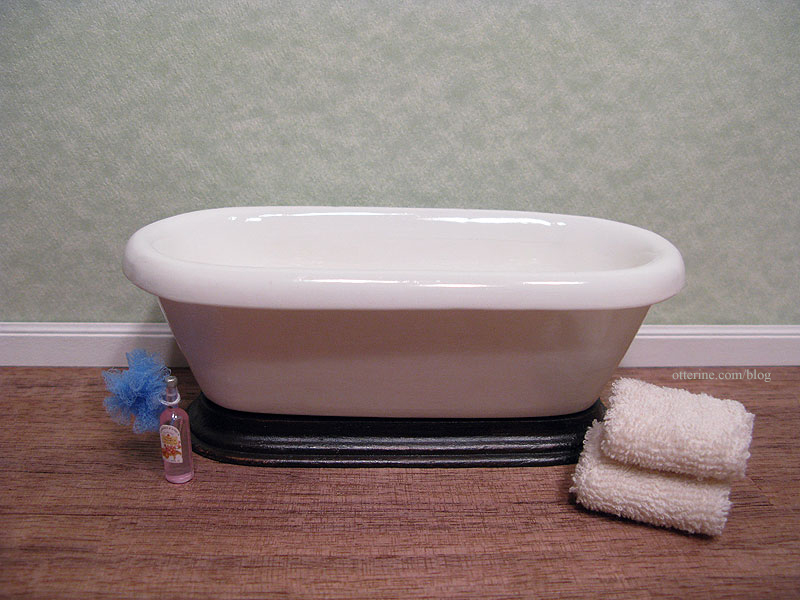
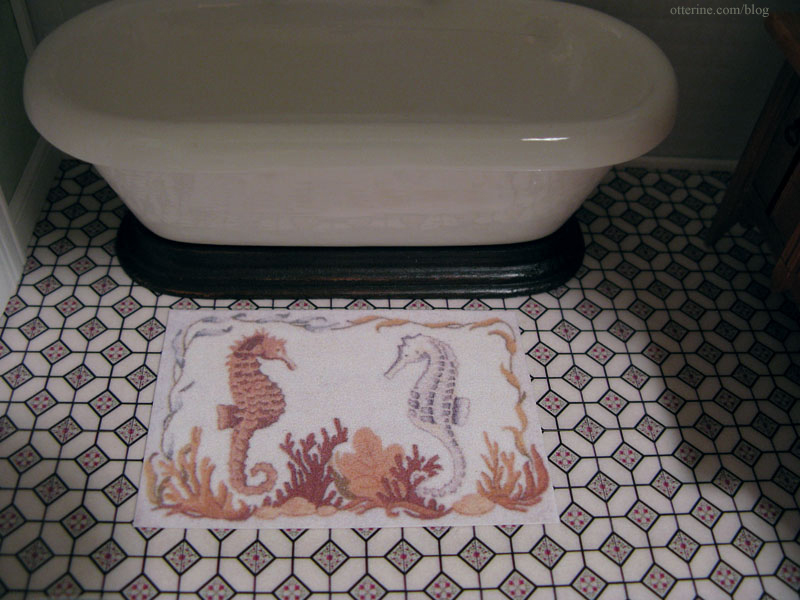
Adjoining the bedroom is a bathroom with a soaking tub under skylights. I love how this room turned out especially! Because the room has a steep angle on the window wall, I built a wall shelf that makes for a more realistic backdrop for the bathtub.
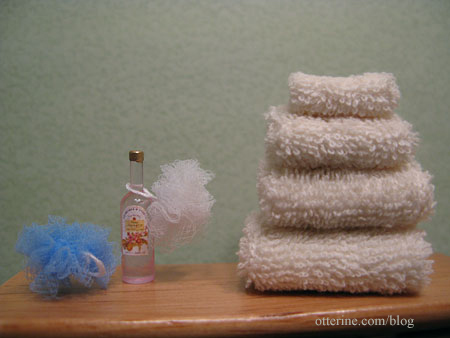
And, it’s the perfect place to keep bath related items. :]
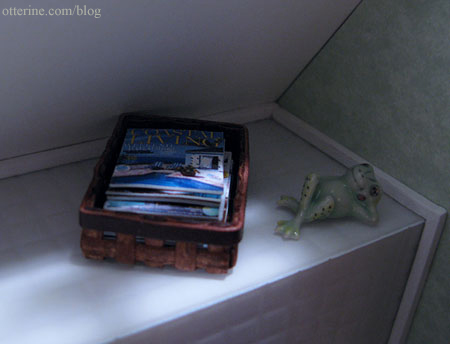
I made the towels, bath products, scrubby and magazines. The basket and frog figurine were purchased.
The bathtub was made from an unfinished EuroMini’s kit.
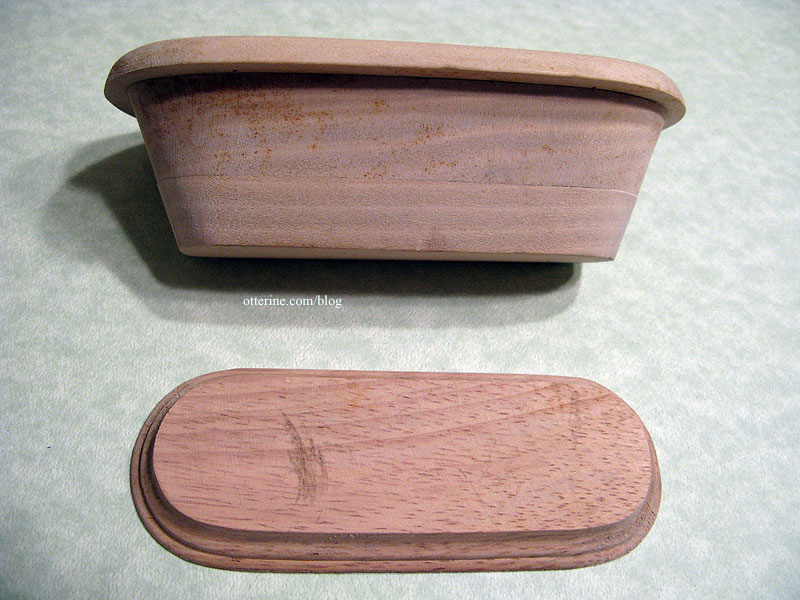
It was not easy to get the final white porcelain finish. The inside is still a little rough since there was only so much I could do with a flat bottom tub, but the outer surface and the overhang turned out as I had hoped.
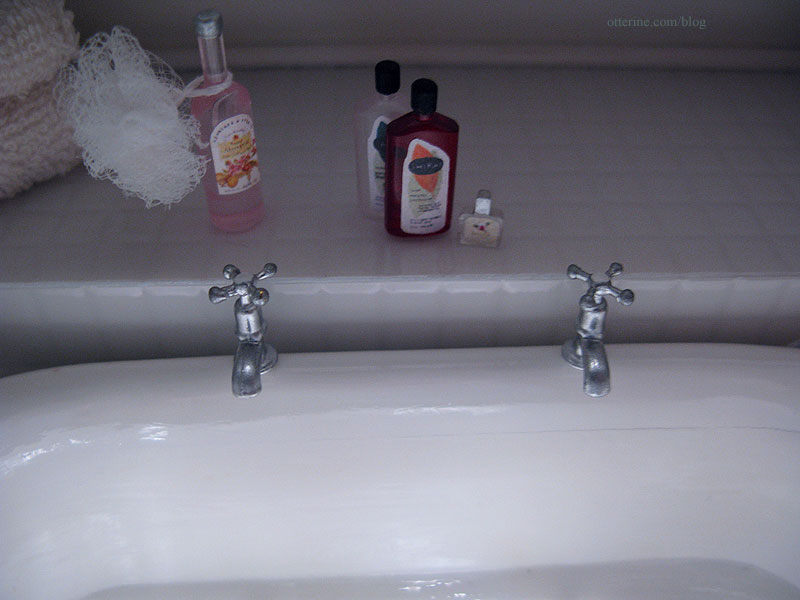
I sprayed two brass taps with Valspar Odds ‘n’ Ends Fast Dry Enamel in Chrome and then dabbed on Testors gloss white on the tops. I like how this photo makes it look as though there’s water in the tub!
Had I not widened the side addition, the original window would have been right over the bathroom vanity. Looking out the window is not helpful when you’re brushing your hair. I would have had to close up the window. But, with the additional piece in place, I was able to turn the one small window into two skinny windows instead.
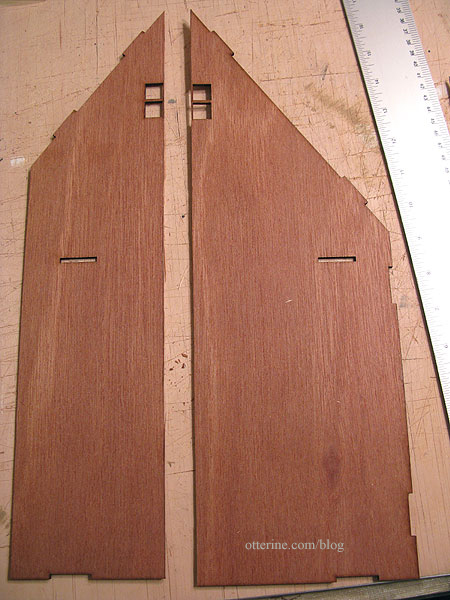
the original wall, cut in half, before the insert was added in the middle I made the vanity mirror from a metal scrapbook frame by K&C Company that fit just perfectly in the open space. I built up the back a bit with strip wood and used plastic mirror sheet by Darice to make the mirror. The vanity is a Mackintosh sideboard and the sink is from ELF Miniatures. I dabbed a bit of black paint on the end of the faucet to make it more realistic. The wall sconce over the sink is by Heidi Ott.
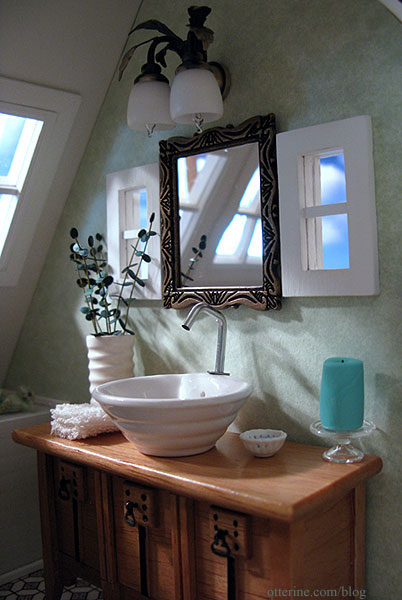
The eucalyptus plants were made from a Bonnie Lavish kit. The vase is by Alex Meiklejohn, purchased at the Bishop Show. The soap and dish were also purchased, but I don’t recall where I got them.
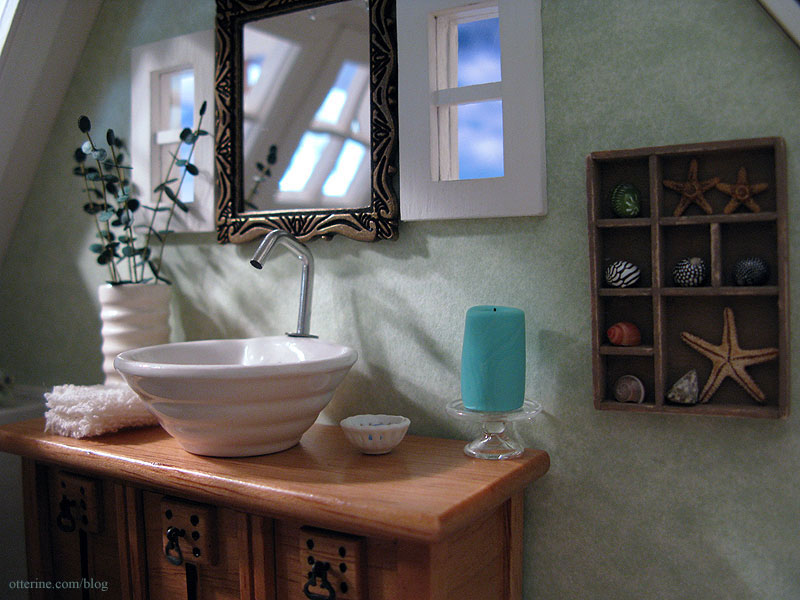
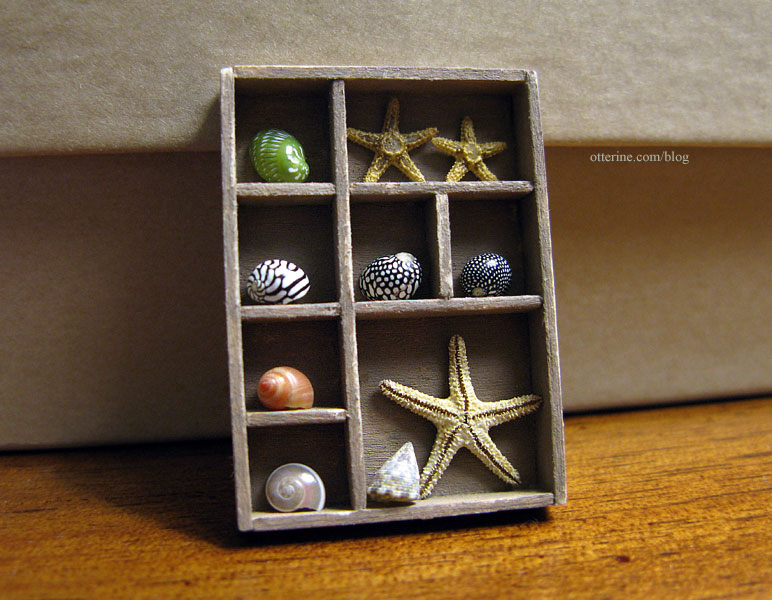
The shell shadowbox was made with bass wood and tiny shells and starfish from Marco Island Shells. The shells are approximately 1/4″ and the largest starfish is about 1/2″ in size. :]
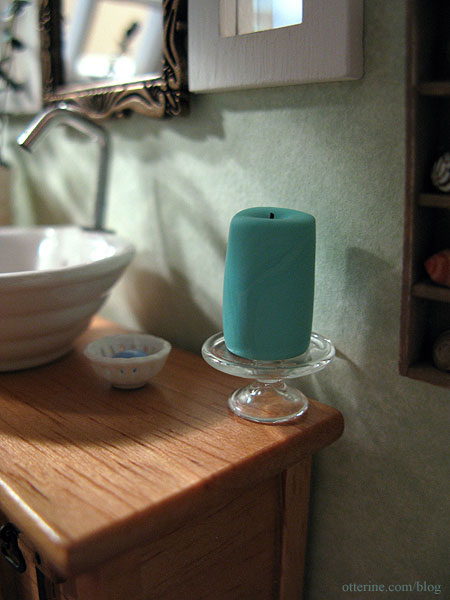
The candle is polymer clay with a sewing thread wick. The candleholder is a half-scale cake stand.
The toilet started out with a wooden seat that I refinished with Testors gloss black spray paint. I like the retro vibe of the gloss black seat. I made the tissue box from a 3/8″ wood block, Martha Stewart self-stick ribbon and a tiny piece of real tissue. I wound some actual toilet paper around the holder as well. The hook and hangers were purchased.
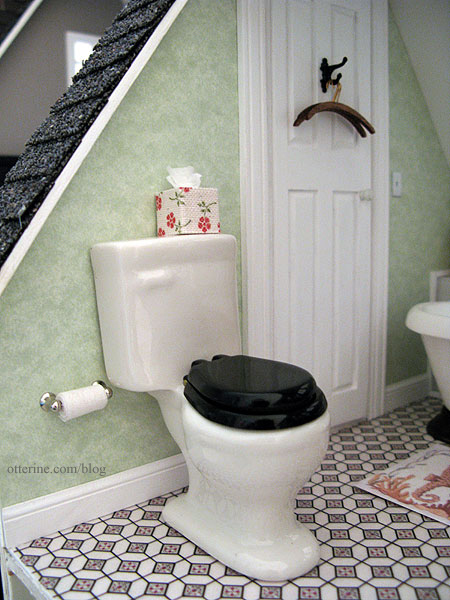
The flooring is by Old World Tile, a high quality printed paper you finished with a sealer. I reviewed this product in an earlier post. I used Triple Thick Gloss Glaze by Americana that ended up giving me a perfect linoleum finish. The rug is Seaside Seahorses by Nantucket Brand, printed Velour Card Stock by The Crafty PC.
The cedar shake exterior with white trim was inspired by Catskill Farms. They have countless beautiful cottages on their blog that are perfect inspirations for miniature homes. I love the way the cedar shake exterior pops with the white trim and grey roof. I was sold!
Once upon a time, I had a Dura-Craft dollhouse that never got built and whose pieces were lost to a flood. Some pieces survived since they were stored elsewhere, and included in those miscellaneous parts was a huge bag of cedar shake shingles (say that phrase ten times fast). So, no need to buy materials for the exterior. I made a sample of the exterior finish on a piece of scrap board and positioned it next to the dry fit structure.
There was a wide array of tones in the shakes, so I sorted them to keep only the dark color. I also felt they were out of proportion to the building. While being technically true to scale, the shakes looked better in proportional scale based on my sample boards.
So, I commenced to splitting 1,700 cedar shakes individually by hand. I first split them lengthwise to a width of 1/2″ with an Easy Cutter, and it was easy. I then split them across the grain to a height of 3/4″ with the Easy Cutter, which was not easy. But, the end result was a better scale match and well worth all the work. This is also one of the most forgiving finishes I’ve worked with so far. Unevenness in application and splits in the wood add to the realism instead of detracting from it.
The roof is shingled with grey asphalt shingles by What’s Next.
I created a parapet on the flat top portion. Inside this wood frame, I painted a piece of cork sheet to simulate the tar and gravel covering. Now, I can’t take credit for even knowing what a parapet was…that was all mom’s influence. I had no idea how to finish this part of the roof until she came up with the idea. Hooray for mom!!! The wind turbine I added later is from ELF Miniatures.
The biggest change I made to the base kit of Baxter Pointe Villa was to replace the upper portion with a taller front wall to create a wraparound deck. To get this porch in front of the second floor bedroom, it took a lot of kit bashing. The original stairs would no longer work with this new plan. I flipped the assembly of the stairs upside down to get the stairs in a different configuration and cut down the deck portion to make room for the chimney.
Here are the original Greenleaf stairs. You can see the original upper room in this photo as well.
I upgraded the front door and eliminated the recessed entryway of the original kit. The color is Robin’s Egg Blue from Jo-Ann Craft Essentials. The planters on either side are from Manor House Minis and were originally pale green (I bought two sets to have matching pairs of each style of planter). The flowers are a mix of Bonnie Lavish kits.
The entry light is a NovaLyte LED. These require a 3/8″ depth for installation, so I glued two 1″ by 1/8″ precut wood circles together. I painted them silver followed by a wash of black to dull down the color and glued them where I wanted my light. I then drilled the hole for the LED in the middle of the circles. Well, it’s not exactly in the center, but we won’t look that closely.
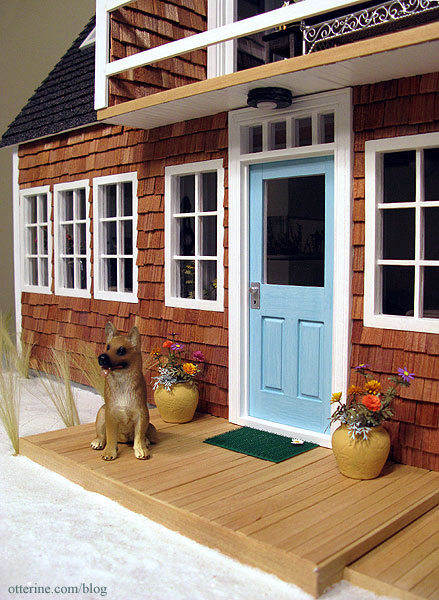
The grass door mat with daisy is from A Little More in Miniatures.

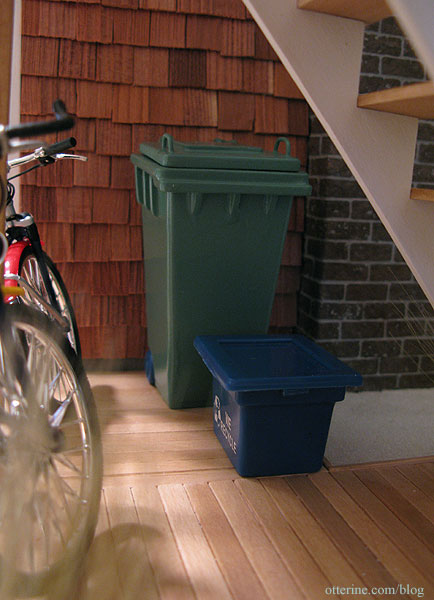
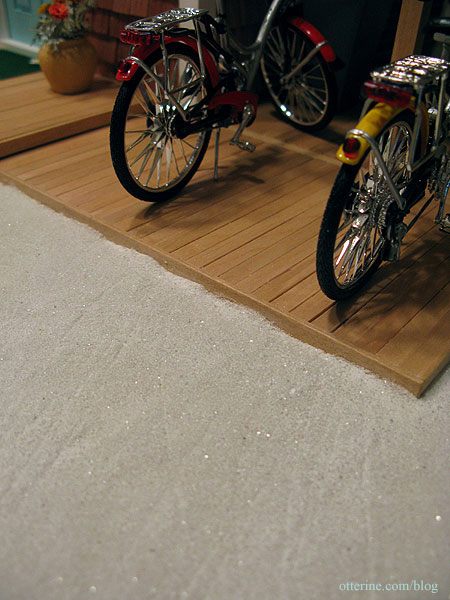
Around the side behind the bicycles, I have a wheelie bin from The Dolls House Emporium and a recycle bin that I’ve had for some time now and don’t remember where I bought it.
The color scheme of the house and deck was inspired by an Amanda Nisbet design. I painted the ceiling Lilac Love and create a similar brown and white fabric based on her design using Illustrator and having it printed by Spoonflower. The journal is by Glenda of Peppercorn Minis. The porch light is a brass fixture I painted silver.
As an aside, you used to be able to resize prints on Spoonflower even if the design wasn’t yours, so you could have any of the fabrics available for sale in mini scale if you wanted. They changed this due to complaints from designers, but to me, it’s a missed opportunity to sell to miniaturists.
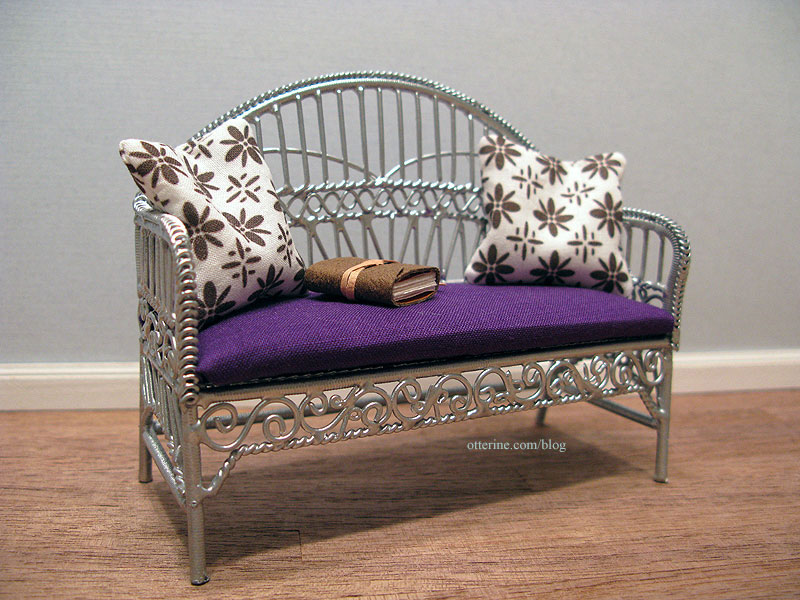
I refurbished a purchased wire settee, and it’s now the perfect place to relax on the upper porch.
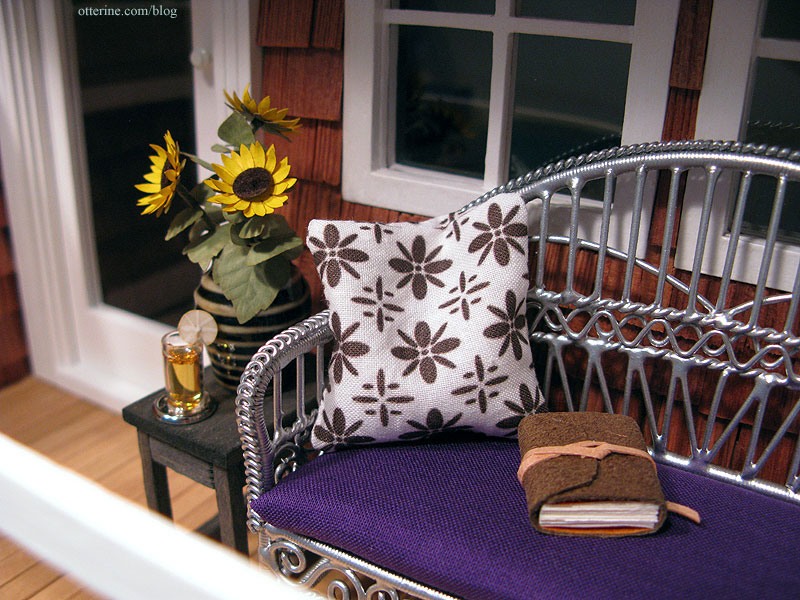
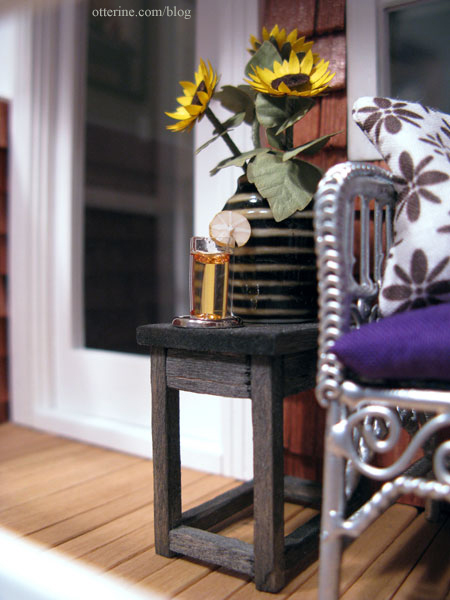
The sunflowers were made from a Bonnie Lavish kit, and the vase is from Manor House Miniatures. I borrowed the stool from Baslow Ranch and used it as a side table. I like it so much here that I’ll likely just reproduce one for this space. The glass of tea was purchased in a lot from craigslist and the metal coaster is a finding from Bindels Ornaments.
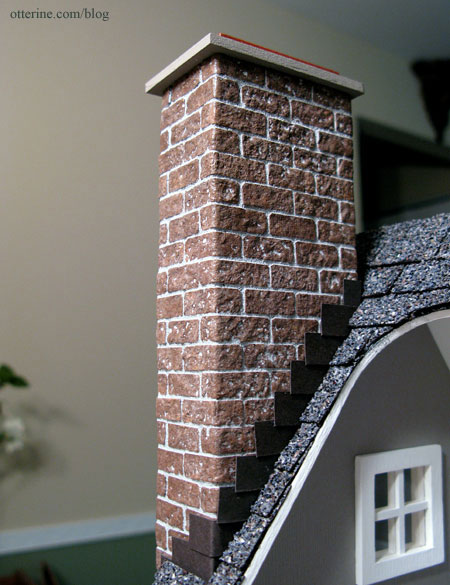
Though I’ve outlined the chimney build in previous posts, I didn’t get to the flashing until I put the roof on. It’s just made of black-brown paper cut to fit. You can also see that my topper came apart (the chimney did a nose dive off the table one too many times). I decided to leave it as is due to time constraints.
I kept the landscaping modest, using white sand from the dollar store mixed with Aleene’s tacky glue that I spread on with a palette knife and a few tufts of sea grass by Woodland Scenics added later. As the glue dried, I used my knuckles to press footprint indentations around the front of the deck and the bottom of the stairs. I also created lines with an awl to simulate bicycle tracks.
Nighttime shots are always wonderful and make the effort of wiring a structure all worthwhile.
First, the living room with the artwork, aquarium and outdoor entryway lights on. I like an aquarium at night in real life, too! I like how the exterior light illuminates the background photo and makes it look like the last light of the day is just over the water.

The kitchen has been cleaned up from the light dinner and now we’re out for a walk on the beach!

The vanity light really illuminates the bathroom quite well for a non-LED fixture.

And, my personal favorite…the entryway. Can you hear the waves lapping?

This was easily a six- to nine-month project crammed into three. Even with all of the things on my idea list left undone, I still think I accomplished a lot in the time I had. Lots of long hours and late nights. :D Thank you to everyone who helped with ideas and support throughout the whole process. Your kind words and friendship mean more to me than you realize.
Update: The results for the Greenleaf 2011 Spring Fling contest are in and Baxter Pointe Villa has taken 3rd place! Be sure to check out the 1st and 2nd place winners, both top notch works of art. Here is a full gallery of the entries. So many wonderful works to be explored. Congrats to the other winners, and thank you to Greenleaf Dollhouses for another fun year of contest excitement.
—–
Update 12/28/13: The Yes paste failed terribly in the kitchen and bath. It was partially the paste and partially due to the dehumidifier that the renovation crew ran in my condo after the lightning strike. It was the one house that had the most damage, but the paste failed in others as well. I now use only Mini Graphics Wallpaper Mucilage. After removing the wallpaper, kitchen trims and aquarium. A rather fun photo given the rather not so fun situation.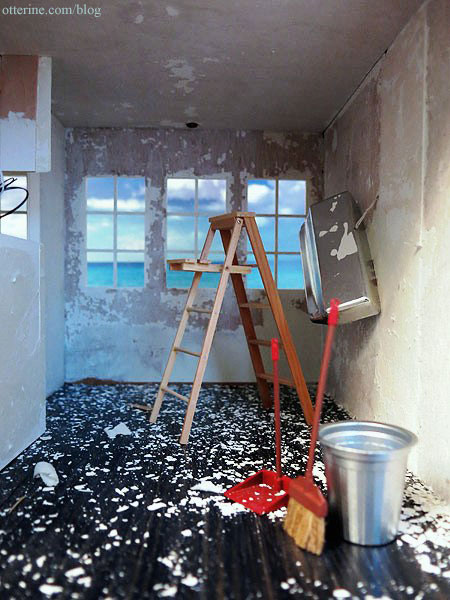
Update 4/20/15: I finished the renovation earlier this month. You can see the full write-up here.
Categories: Baxter Pointe Villa
July 3, 2011 | 0 commentsFlowers and shells
I made some Bonnie Lavish Dahlias in orange. I made red ones previously but this time used Bonnie’s veiner for a much more realistic leaf texture. The vases are from Manor House Minis and were originally pale green.

The second is a shadow box made from strip wood and painted Mushroom by Folk Art. I sanded the edges to make it more rustic. The shells are approximately 1/4″ and the largest starfish is about 1/2″ in size. :] All came from Marco Island Shells.
Categories: Flowers, plants, and trees, Miniatures
June 28, 2011 | 0 comments


NOTE: All content on otterine.com is copyrighted and may not be reproduced in part or in whole. It takes a lot of time and effort to write and photograph for my blog. Please ask permission before reproducing any of my content. Please click for copyright notice and Pinterest use.


