

Mackintosh chair covers
I’ve been checking out books from the library to find ideas for projects and to generally drool over all of the beautiful minis out there. One of the better books I found was Embroidered Projects by Sue Hawkins.
It has rugs, screens and pillows in a nice array of styles. There were a few lovely items worth spending the time stitching, but there was one in particular that caught my eye: the Mackintosh chair cover. I already had the chairs…and the design in the book fit perfectly with my modern living room.
In the past, I’ve done quite a bit of counted cross-stitch but very little needlepoint. The project called for 32-count silk gauze but I had a hard time locating it. I also changed the colors from what was listed in the book because the pinks were just too bright for my taste.
My eyesight has always been good, but wow were these tiny stitches!
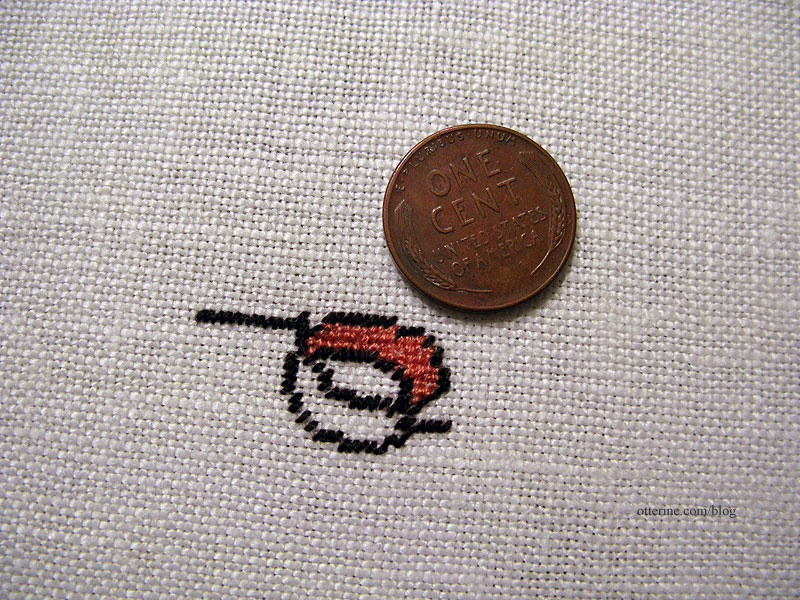
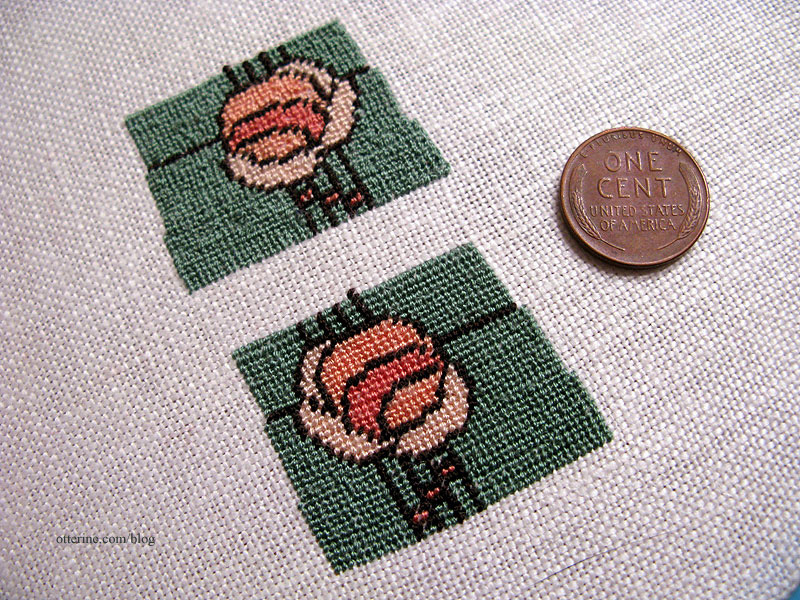
The first one took a little over five and a half hours of work, and I did it without the aid of a magnifier. For the second one, I flipped the design to have a mirror of the first and bought a magnifier with two LEDs. The second one (at the bottom of the photo below) took about the same amount of time but it was much cleaner since I could actually see what I was doing. :D Since I already had enough fabric in the hoop, I decided to make another like the first one; it turned out much better the second time around.
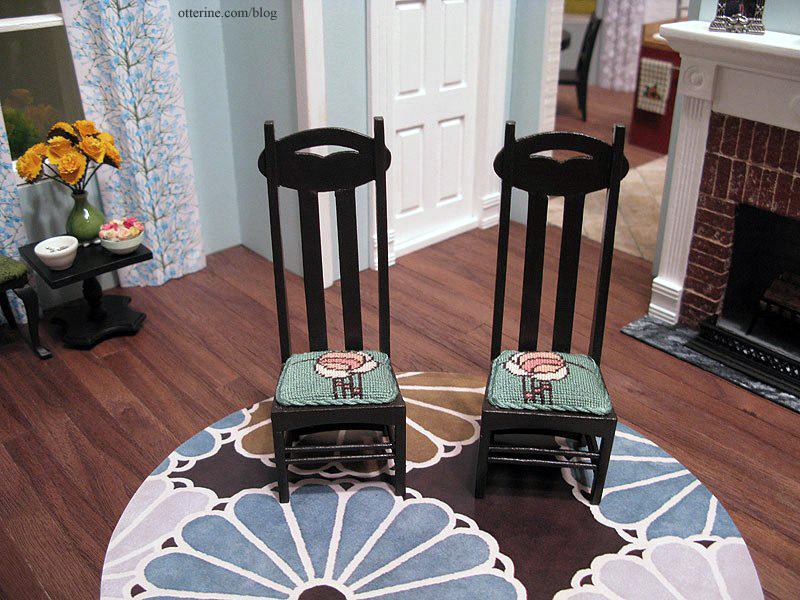
I had to remove the glued-on chair pads, which was a scary task since the chairs were expensive. I popped them into the microwave to loosen the glue, but it still wasn’t easy removing them. While the cushions were off, I gave the chairs a couple of coats of Bittersweet Chocolate paint by Americana. The original finish was uneven and a bit too red. I then sealed them with satin varnish.
I removed the original fabric from the chair pads and used the needlework to upholster the chairs. I finished the edges with twisted embroidery floss. I think they turned out pretty well for my first attempt at miniature needlework and fit in rather well with the modern style and colors in the living room.
Categories: Needlework - French knot rugs
February 24, 2010 | 0 commentsDivan and tray
I had no idea what a divan was, but when I saw one in Dolls’ House Furniture: Easy-to-make projects in 1/12 scale by Freida Gray I knew I had to have one. :D
I used the instructions in the book as a starting point but ended up making my divan a different size and height. I also changed the way it was put together compared to the book’s construction.
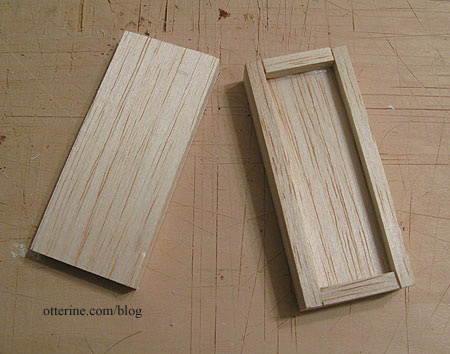
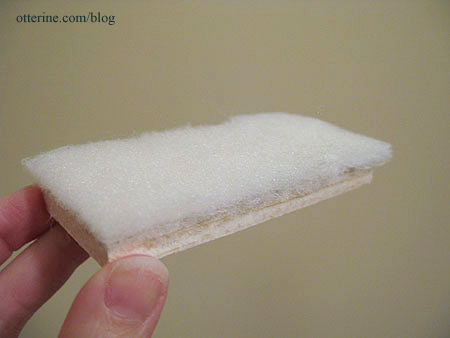
I eyeballed the size I wanted and cut the top and base from 1/2″ balsa. I added a frame of 1/4″ balsa to the base to make it thicker.
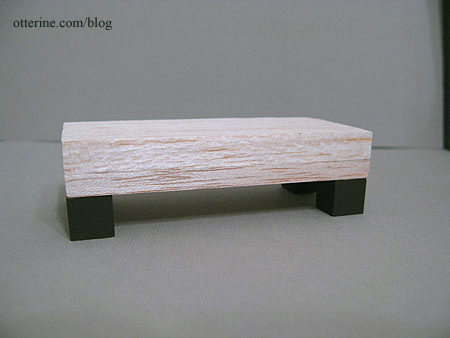
I used 1/2″ wood blocks for the feet, painting them Bittersweet Chocolate by Americana.
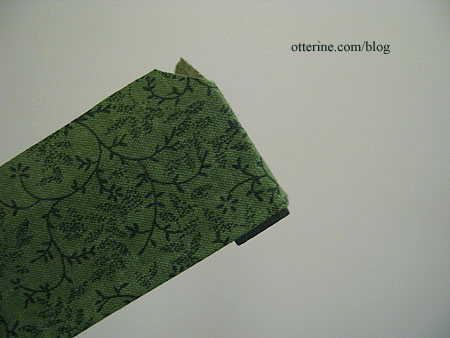
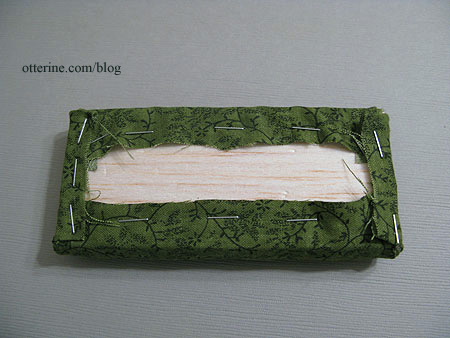
I hemmed a strip of fabric and wrapped it around the base, leaving just a tiny bit of the legs exposed.
This project was made much easier by using Peel-n-Stick Fabric Fuse. It’s an adhesive on a paper backing that you stick on, peel away the backing to expose the other side of the adhesive and then press in place. It comes in different widths; I bought a 5/8″ wide roll. I tacked the excess fabric on top of the base with tacky glue and set it aside.
I put a thin layer of batting on the top piece.
I have a vintage Tot 50 stapler by Swingline, and this is the first time I’ve used it in years. :] It made it very easy to upholster the top and get a taught surface over the batting.
I glued the top to the base with tacky glue and set the assembly aside.
In order to create the band to cover the seam between the top and bottom pieces, I used a strip of crinoline covered by fabric. Crinoline is a stiff fabric that makes it very easy to get a crisp band of fabric with no wrinkles.
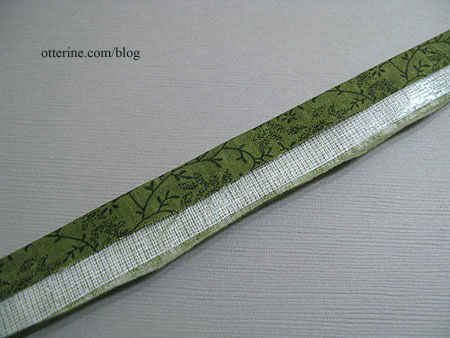
I used the Peel-n-Stick fabric fuse to attach the band. There is a seam for both the bottom fabric and the band, but you would have that on a real life upholstered piece as well.
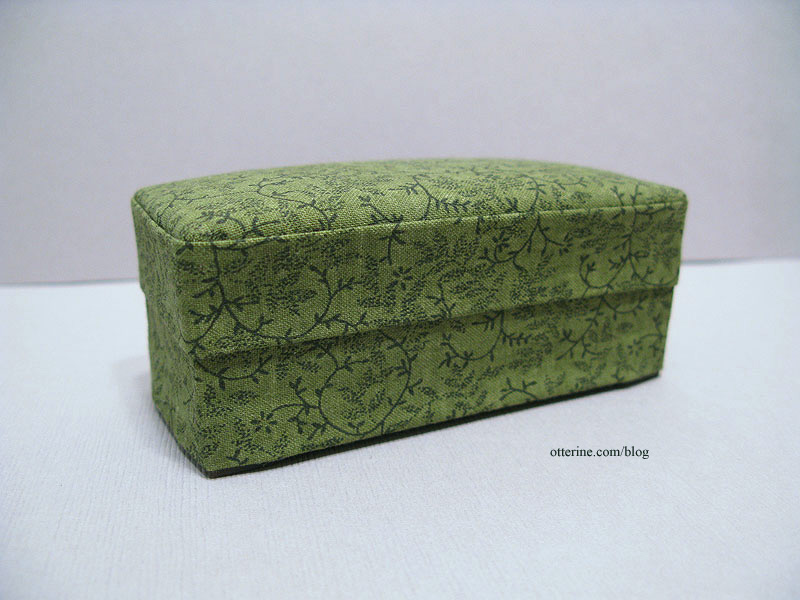
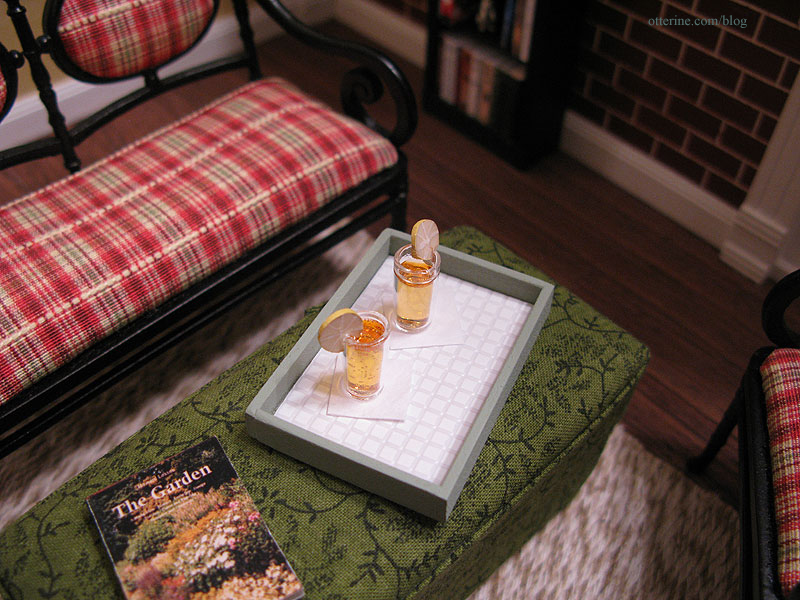
I love it! It now serves as the coffee table for the study.

The green of the divan fabric brings out the green in the Bespaq plaid furniture in the room.
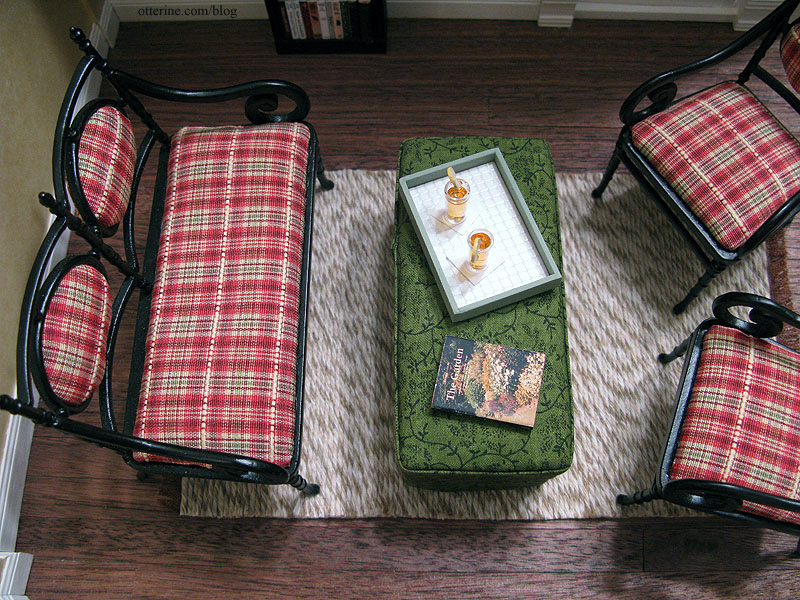
The tray is a replica inspired by the shabby chic trays made by Pei Li, an artisan who makes some absolutely beautiful 1:12 scale miniatures.
Categories: Furniture
February 15, 2010 | 0 commentsScratch built sofa
I borrowed Dollhouse Magic by P. K. Roche from the library, and it turned out to be a rather simplistic book of miniature making, such as using thread spools for tables. But, the instructions on using kitchen sponges to make sofas and chairs inspired an idea. I wanted the living room to be more modern, and I thought using sponges would be a great way to achieve the shape a modern sofa. It would be easier than trying to cut and shape pieces of wood while still being firm enough for structure. I could add thin pieces of wood where I needed extra support and then upholster the piece with batting and fabric.
After scouring (er…nevermind) the internet for ideas, I decided to go with the Dream Velvet Sofa by Graham & Green, a home furnishing company in the UK.
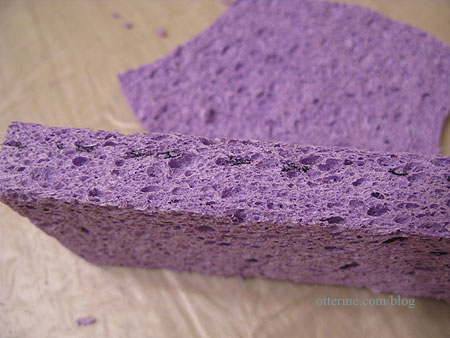
I bought cellulose sponges in different shapes and sizes at Target. I had to leave them out on the counter for a few days to let them dry out. In the process of drying, they shrank a bit so I was glad I hadn’t used right them out of the package.
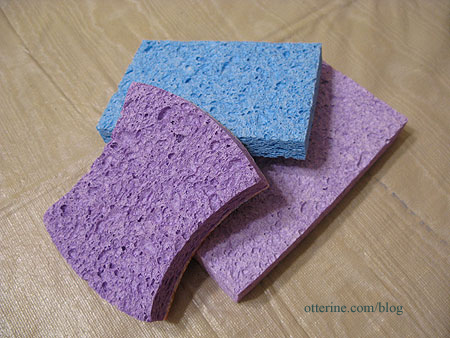
Using the overall real life dimensions as a guide, I started cutting the sponges into thinner pieces. I used the curved sponge to make the arms of the sofa, cutting it into thinner sections using a serrated kitchen knife. It was rather like cutting really stale bread. :D
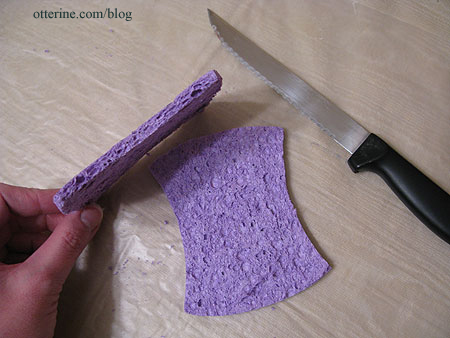
I used a large sponge for the base of the sofa. It had dried to an uneven thickness, so I marked all four sides with a sharpie and used the knife to shave off the excess and shape the base.
Below is my initial basic sponge structure. The cushions are cut small to leave room for batting and fabric. I’ve used some wooden beads to mockup the legs, but I’ll shape some legs from wood during the finishing process.

The back cushions on the original sofa were taller than the back, so I think my side angle is a bit steep. I’ll have to cut that down before upholstering. The coffee table here is just a placeholder; it’s a bit traditional for this modern room.

For the upholstery, I chose chocolate brown micro suede. I’ve been sewing for a long time, but this was my first time upholstering…mini or otherwise. It took me quite some time to figure out the best way to get the fabric on the sponge and wood frame. I sewed some, glued some…swore some. :]
I used batting to smooth out the front edge of the base and the seat cushions. I glued a thin sheet of balsa wood to the back to have a smooth surface under the upholstery. Here it is in mid-assembly.
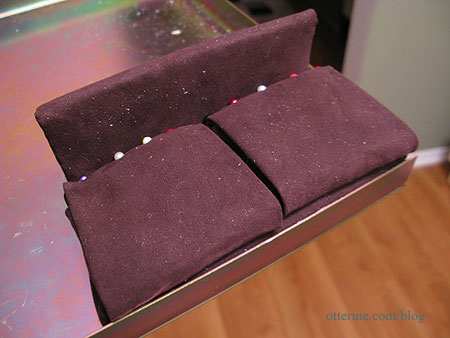
Here it is mostly complete. I need to tweak the fit of the cushions and adjust the legs, but overall I like the way it turned out. :]
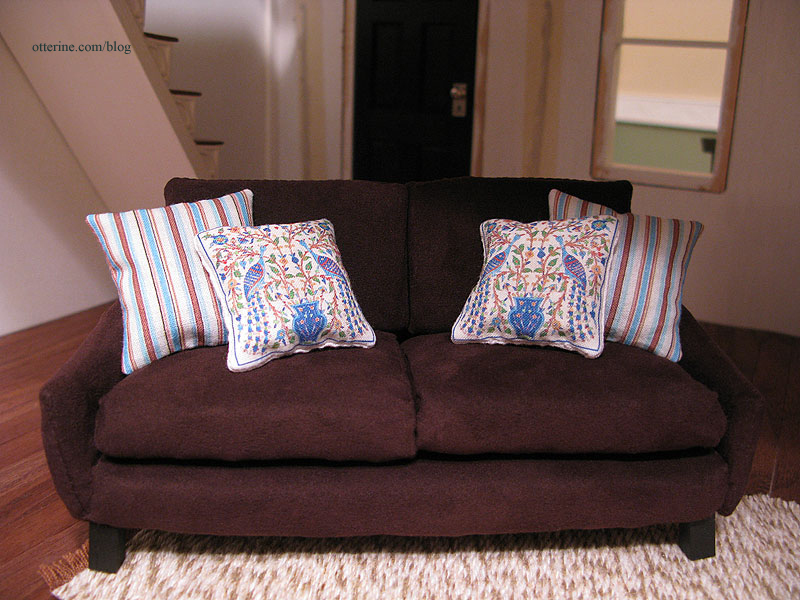
The striped pillows were created by finding designs online, resizing in PhotoShop and printing on fabric. The bird pillows are actually made from a resized image of tiles by Jerusalem Pottery, which I then printed on fabric.
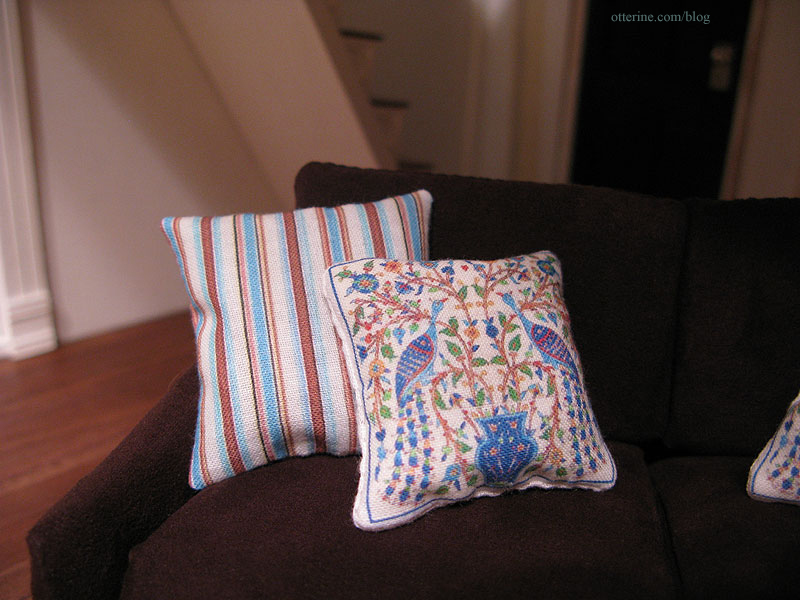
Filling the pillows with beads gave them some weight and made it easier to shape them.
Categories: Furniture
February 12, 2010 | 2 commentsScratch built kitchen pendant lamps
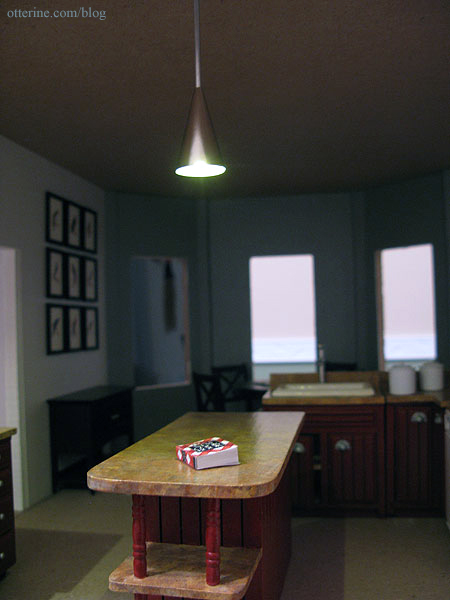
I had been planning to put in can lights in the kitchen ceiling since this is a deep room that will be dark once the ceiling is permanently attached, but I still wanted some sort of fixtures over the island and the dining table. I have a light for the dining area but couldn’t find the type of modern fixture I wanted for the island. So, I decided to attempt making my own.
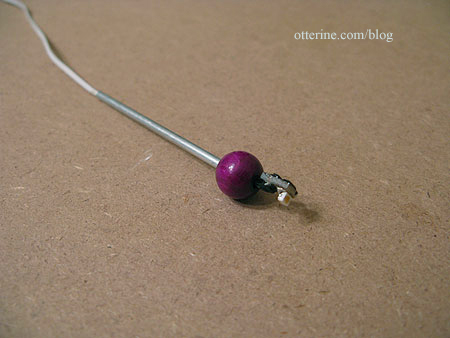
I cut a length of aluminum tubing and fed a Novalyte single LED through it. The bead is to hold the LED in place closer to the bottom opening, allowing for more light.
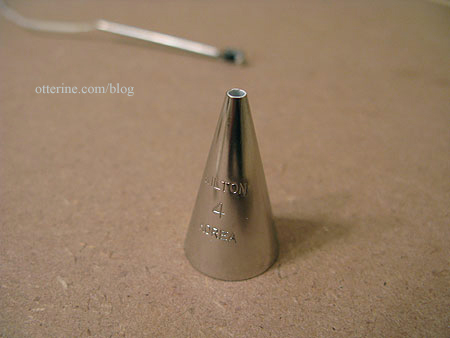
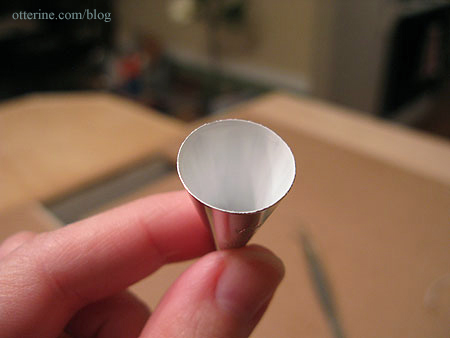
The shade portion of the lamp is made from a Wilton #4 cake decorating tip, which I painted white on the inside to reflect more light.
I fed the aluminum tube through the tip to create a hanging pendant lamp, turning the stamped lettering out of view.
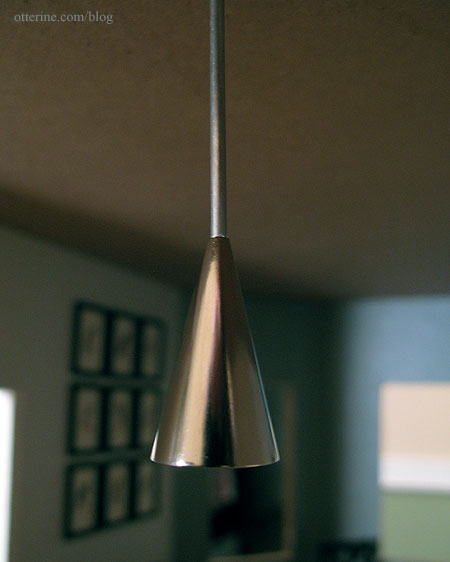
Since my experiment was a success, I plan to make a second one and hang the pair over the island. When I am ready to permanently affix the lamps, I’ll finish the connection to the ceiling with a small block or bead.
Categories: The Newport
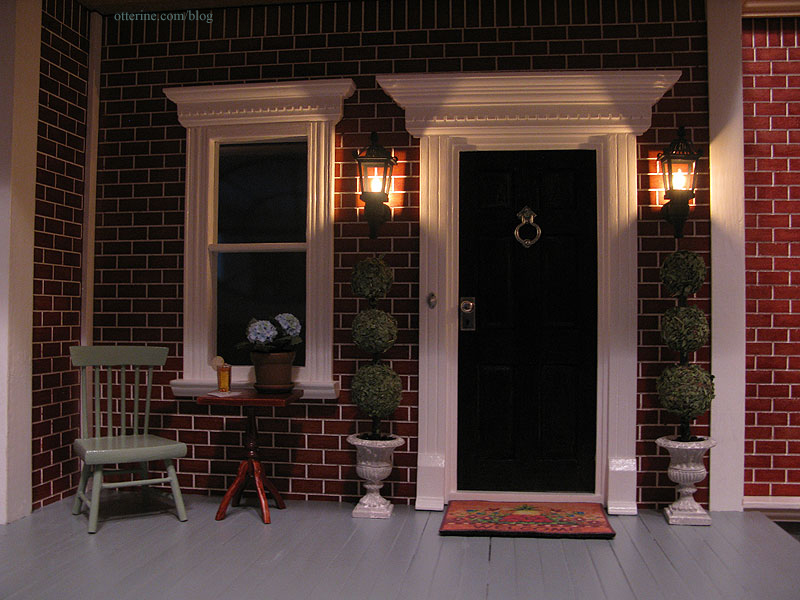
February 7, 2010 | 0 commentsNewport Entrance
I used some leftover IKEA stain for the front door, finishing it and the white doorframe and window with satin varnish. The doorknob and doorplate are by Clare-Bell Brass and came in chrome finish. I wish more minis came in silver and chrome finishes instead of only brass.
The doorknocker is by Olde Mountain Miniatures; the iron was a little dark for the door so I brushed on a light coat of metallic silver paint. I don’t recall where the doorbell came from, but it was brass. I painted it silver with a dab of white on the button. It doesn’t ring, though there are musical doorbell systems for dollhouses on the market.
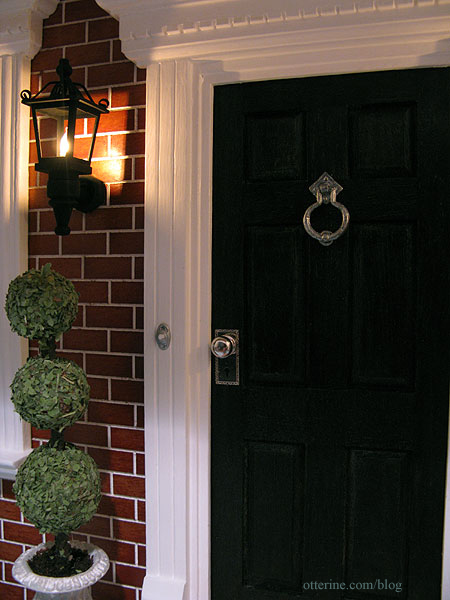
The lights match the ones used on the garage. I made the topiaries, but the hydrangea is by Falcon Miniatures.
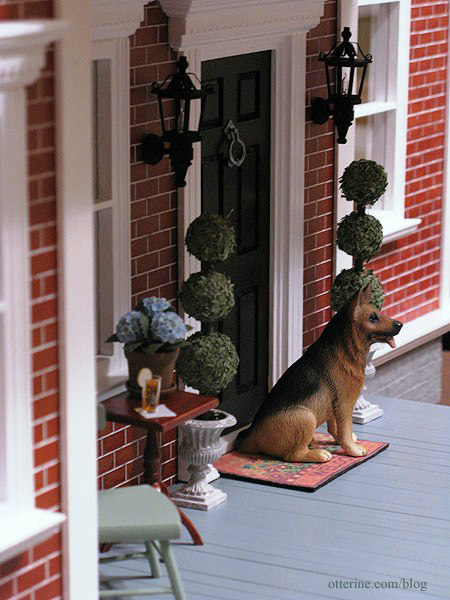
Look who wandered over to the Newport…my first resident. :D His name is Sarge.
Categories: The Newport
February 6, 2010 | 0 comments


NOTE: All content on otterine.com is copyrighted and may not be reproduced in part or in whole. It takes a lot of time and effort to write and photograph for my blog. Please ask permission before reproducing any of my content. Please click for copyright notice and Pinterest use.


