
Newport – upstairs hallway
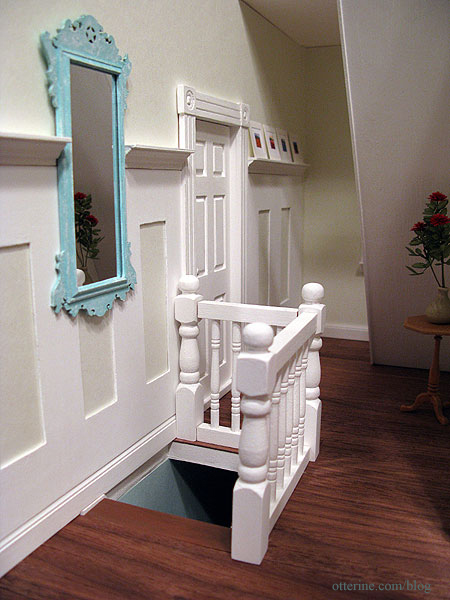
Just because it’s not really a room is no reason to ignore the hallway! In fact, I wanted to do something special with this space, and it was all due to this photo I found online at Coastal Living. This is likely an entryway, but I think it lends itself well to the hallway space in the Newport. Flipping the first floor stairs meant the second floor stairs would have to face the back wall, but it was more the mirror and wainscoting with the art shelf that drew me in.
For the walls, I used the same scrapbook paper as the garage: Swan by Martha Stewart. It’s a very pale green and allows for just enough contrast with the white wood trim. It’s also one of the few papers I’ve found that is larger than 12 inches square; that means no seaming! :D Ah, it’s the little things…. Unfortunately, the store where I got it no longer carries that size.
I used scraps of the Handley House wood flooring sheets for the hallway. It runs the opposite direction of the wood floor on the first floor, but I wanted to use up the leftovers from the first floor so they wouldn’t go to waste. I sealed it with Minwax Water-Based Polycrylic protective finish in clear semi-gloss before installation.
I created the picture rail using 3/8″ corner trim and gluing crown molding into the groove.
After centering the mirror on the left side, I did some math to figure out the best width for the vertical boards and the spacing between them. I first cut full pieces of cardboard the size of the “openings” on either side of the door. I used that template to cut pieces of paper and did my calculations and drawings on those.
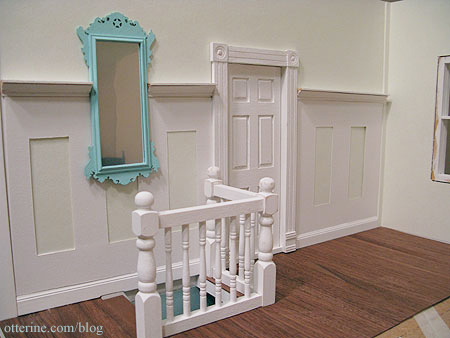
Once I had an acceptable layout, I used the paper pattern to cut a piece of basswood to use for the trim. In real life, this treatment would like be done with planks instead of one continuous piece, but I wanted to eliminate the possibility of seams showing between the pieces.
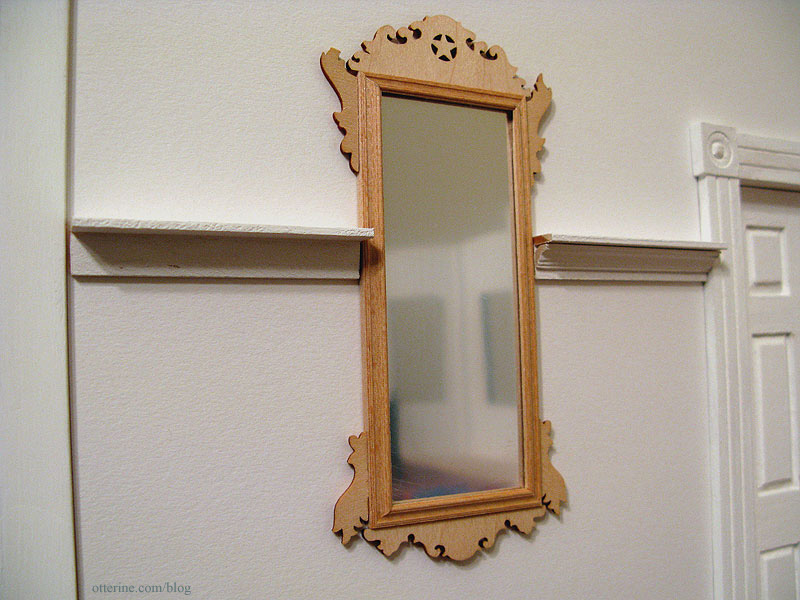
I thought the mirror would be the hardest part to recreate, but I found many potential mirrors online. I ended up going with the House of Miniatures Chippendale Pier Glass kit, omitting the small table as shown in the inspiration photo since there wasn’t enough room at the top of the stairs to add it.
Assembly was a bit of a pain since I had to miter the corners myself, but I’ve had plenty of experience with that! I replaced the glass mirror and cardboard supplied with the kit with plastic mirror sheet backed with balsa. I like the lighter weight without the glass.
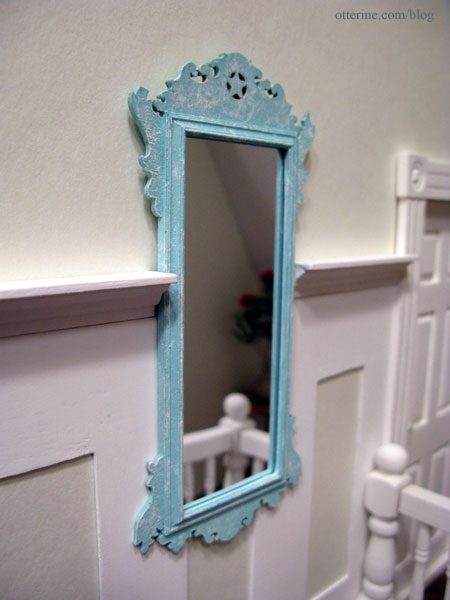
I painted the frame Robin’s Egg Blue by JoAnn Craft Essentials and then dry brushed it with white for accent.
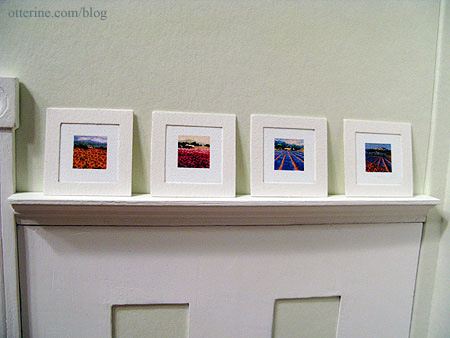
Having worked on multiple prints of the same size before, I knew replicating the art prints would be time consuming. Each frame has to be as precise as possible since size discrepancies show so easily in a setup like this.
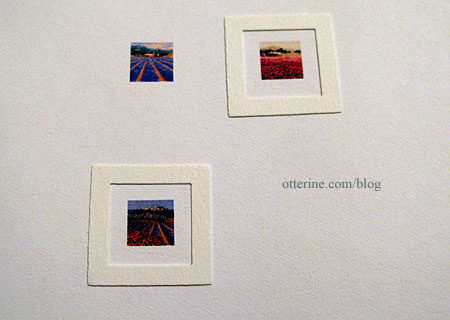
The four pieces of artwork I used are all by Hazel Barker: Casa Girasole, Le Jardin Rouge Provence, Champs de Lavande, and Hill Town Provence. I changed the aspect ratio of two of them to make them all square. During a big sale at Michael’s, I bought two paper punches: a one inch square and one slightly smaller square. This made for super easy mat cutting! :D
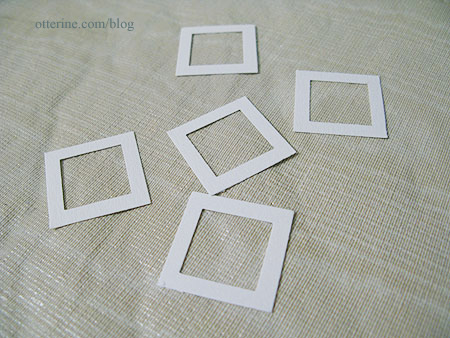
I glued the mats around the artwork before cutting them out.
I am undecided if I need frames around them. I rather like the prints just the way they are.
And, here’s my nearly finished hallway. The railings are not glued in place just yet, and I still need to finish the back stairs and the ceiling, and install an overhead light or two for the space. I love the way it turned out…no more boring hallway! :D
Categories: The Newport
August 4, 2010 | 0 commentsHouse of Miniatures Chippendale Chest of Drawers
I’ve officially decided I love House of Miniatures kits! :D If you finish an antique piece in a more modern color scheme and update the hardware, you end up with something that works well in a contemporary setting. It’s like thrifting in mini!
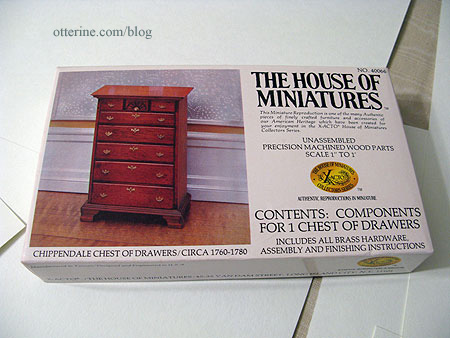
Here’s the box image for the master bedroom dresser. Very traditional.
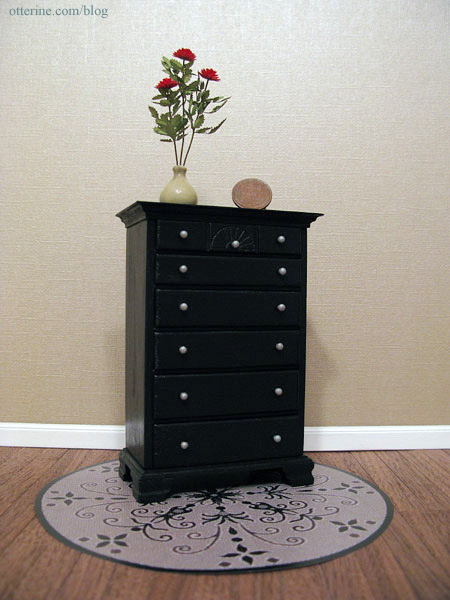
And, here is the kit after finishing. I used black paint followed by a satin varnish and wooden knobs painted silver for the hardware. The flowers are part of the Bonnie Lavish dahlias I made last week.
Categories: Furniture, The Newport
July 31, 2010 | 0 commentsNewport – guest bed, part 2
Continuing work on the guest bed. I had originally planned to follow the same method that I used for the Baslow Ranch bed but decided to make the mattress with foam core board as I had done with the box springs. I tried dressing the mattress I made for Baslow Ranch as a mockup for the guest room, but it didn’t look right. There needed to be more structure under the bed coverings, and foam core board provided that. It also allowed me to use up some of the scraps I had laying around.
I cut three layers of foam core board slightly smaller than the box springs to allow for fabric coverings.
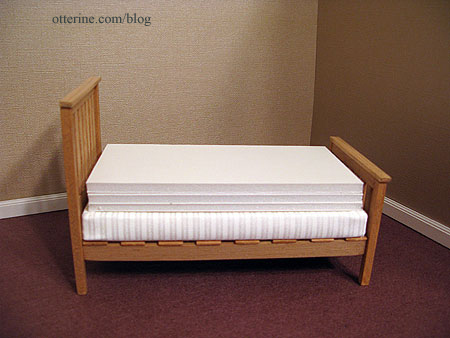
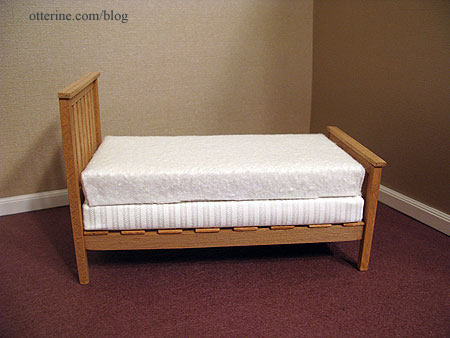
Using the thin batting I had used to stuff the Baslow Ranch bed, I covered the top and sides of the foam core board to give the mattress a softer appearance.
I pinned a scrap of white cotton sateen over the covered mattress and then sewed the corners to make a fitted sheet.
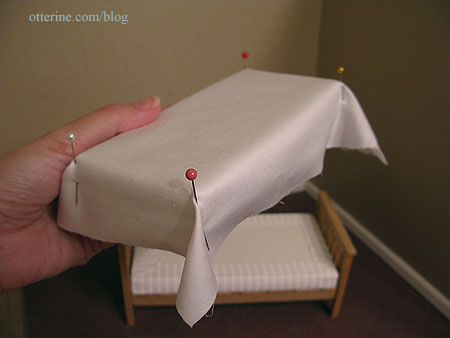
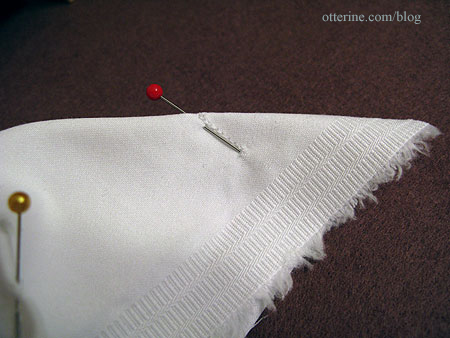
I turned it right side out, stretched it over the mattress and then glued the excess under the mattress.
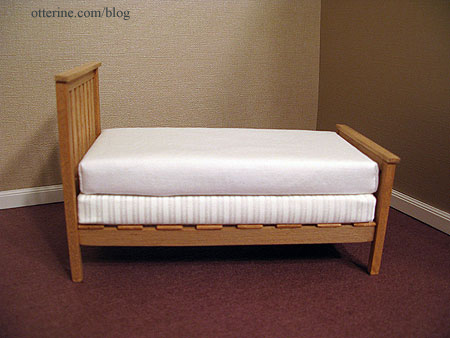
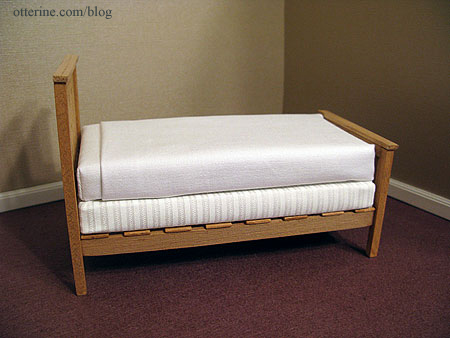
Using the same fabric, I made a flat sheet, turning the edge under near the head of the bed. I didn’t sew the corners on this sheet. Instead, I folded the corners and glued the excess under the mattress.
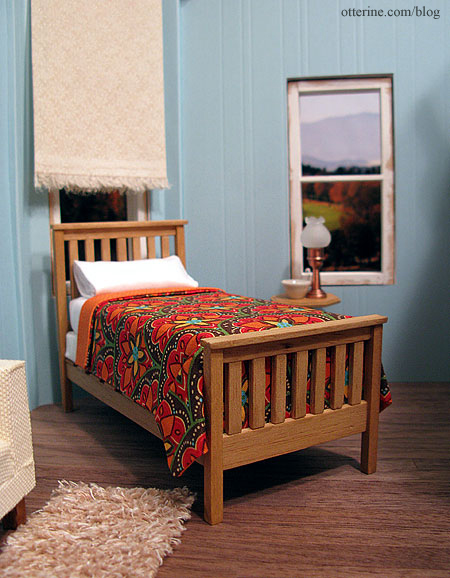
I made a blanket for the bed using two coordinating cotton prints that came in a set from Joann Fabrics. I didn’t use any batting since the double thickness seemed to have enough weight. I pressed it into shape on the bed and dabbed a tiny bit of glue where needed to keep the blanket flat on the bed.
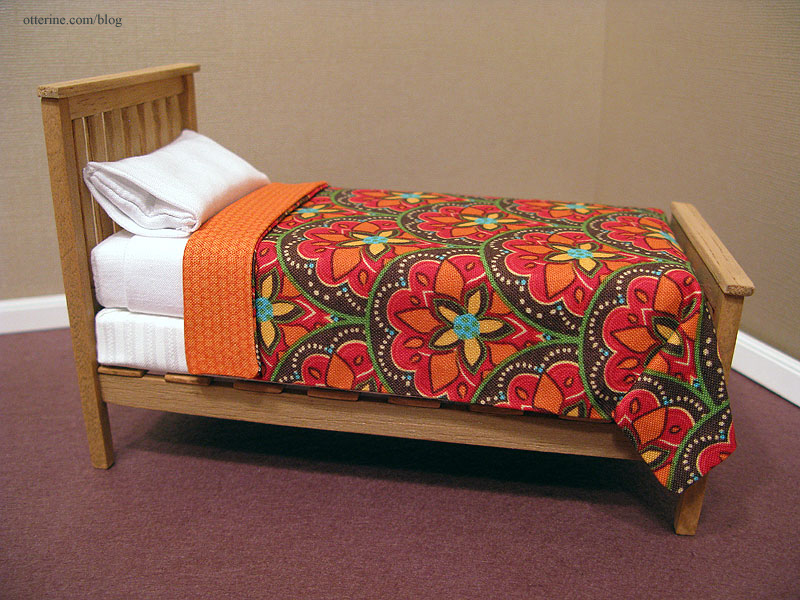
I made a pillow for the bed using the white sateen, filling it with beads. I then sewed a pillowcase out of the same fabric and squeezed the stuffed pillow into it. I like the way the pillow is bowed inside the crisp pillowcase; I think it adds a bit of realism.
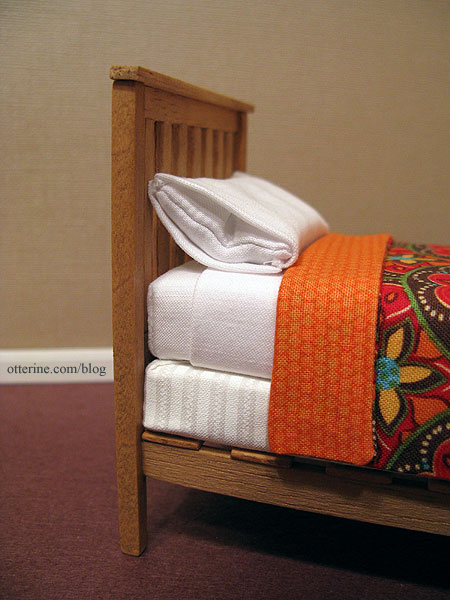
My first dressed bed! Hooray!
Categories: Furniture, The Newport
July 21, 2010 | 0 commentsNewport – master bedroom bed and box springs
I bought a Daisy House full bed kit before I knew I had the knack for scratch building furniture, but I still like it and think it was worth it. :D The wood in the kit was high quality, and it went together beautifully. The kit even comes with sandpaper, toothpicks and cotton swabs to help with assembly and finishing.
Instead of finishing the headboard and footboard with the supplied flat wood, I used the leftover carved post toppers from the House of Miniatures single bed kit I used for Baslow Ranch. I painted the bed black and sealed it with satin varnish by Delta Ceramcoat.

Interestingly enough, it looks a lot like our real life bed! :]

Even though I am mainly working on the guest room for the moment, I wanted to finish the master bed so I could complete some of the same steps needed for both beds at the same time…namely the mattresses and box springs.
For the box springs, I used three layers of foam core board glued together with tacky glue. I cut them smaller than the bed frames to leave room for fabric coverings.

I prepared a long strip of fabric by using HeatnBond (a fabric adhesive) to create a double thickness of material. The fabric would have been too thin to use a single layer.

After gluing one end of the strip to one of the shorter ends of the foam core board stack, I wrapped the strip all the way around the bed without using any glue until I got back to where I started. I didn’t want the sides to look glued down or for the layers of board to show through.

I clipped the corners on the top and bottom edges and then glued the flaps down on either side.

The result is a covered box spring pretty enough to show. The mattresses will cover the tops, so only the pretty fabric sides will show.

Categories: Furniture, The Newport
July 18, 2010 | 0 commentsHouse of Miniatures Chippendale 3-Drawer Chest
I scratch built a mirror from frame strip wood and plastic mirror sheet by Darice. This inexpensive material is awesome…it is thin enough to be cut with scissors to any size or shape and it has a perfect mirror finish. Much easier than using real glass mirrors for minis. The mirror looks scratched and cloudy in the photos since I haven’t removed the protective film yet.

The House of Miniatures dresser is mocked up here without the drawers…or glue for that matter. :]

I finished the pieces with IKEA antique pine stain to match the bed and side table, also shown in the photo.

I sealed the stain with satin varnish by Delta Ceramcoat. It gives the wood a soft, subtle finish that I think looks very realistic in miniature.

The dresser kit went together flawlessly. I’ve used jewelry findings for the knobs.

I just love the finish and details of this dresser…

Categories: Furniture, The Newport
July 17, 2010 | 0 comments
NOTE: All content on otterine.com is copyrighted and may not be reproduced in part or in whole. It takes a lot of time and effort to write and photograph for my blog. Please ask permission before reproducing any of my content. Please click for copyright notice and Pinterest use.


