

The Newport in brick a.k.a. The Beast
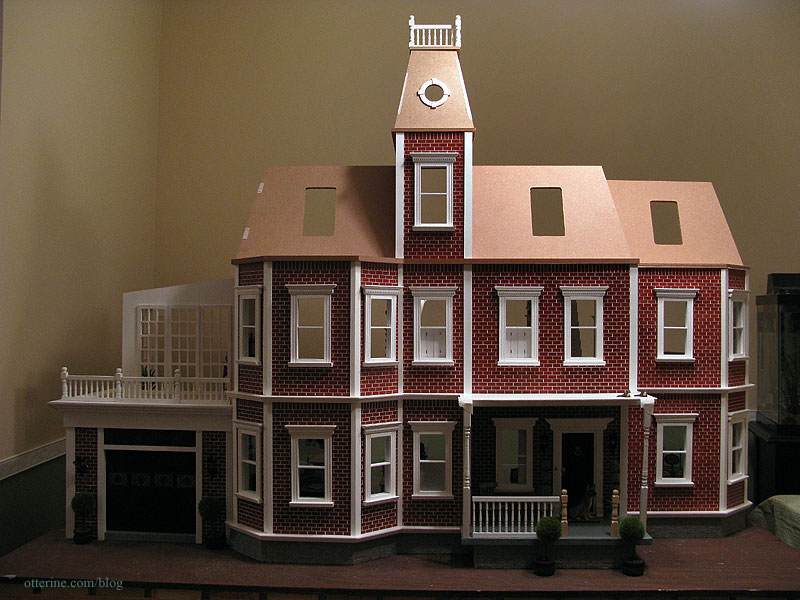
Since I’ve been making some (slow) progress on the second floor, I decided to go ahead and do another dry fit of the third floor. There will be the rooms behind the mansard roof currently planned to be an artist studio, a bathroom, a sewing studio and a secret nook. But, I enjoyed making the guest and master bedrooms so much that I might combine and/or eliminate one of the creative rooms and create another bedroom upstairs.
What a massive house! The rest of the roofline will also have the widow’s walk, though I will figure all that out later. The three open window holes will be dormers, and the conservatory will have a roof as well.
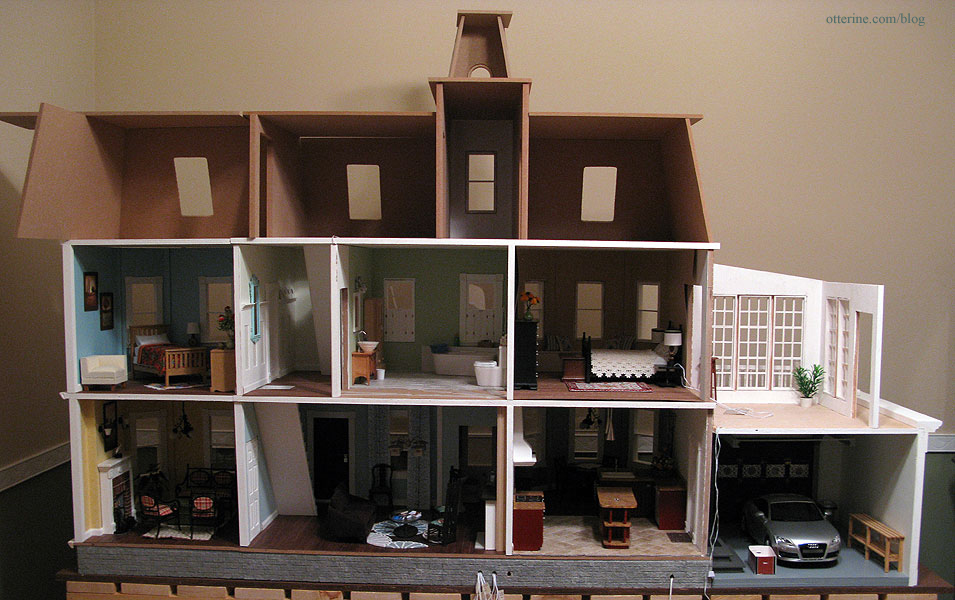
And, from the back. I’ll likely change the layout of the doors in the “tower” section, otherwise everything will be shoved into the house and nothing will be displayed toward the open back.
Just as a refresher, here is the Newport in brick (the base kit only). The two-story addition is made for the left side, but I flipped it and put it on the right side. I also bashed a Foxhall Conservatory kit to make the garage and cut a new conservatory for on top of that garage.

The two-story addition had a flat roof as purchased, so I ordered additional roof parts from the main Newport kit to create an additional rooftop room that will have a dormer matching the rest of the roofline. There will also be a railing on top of the extended front porch I added.
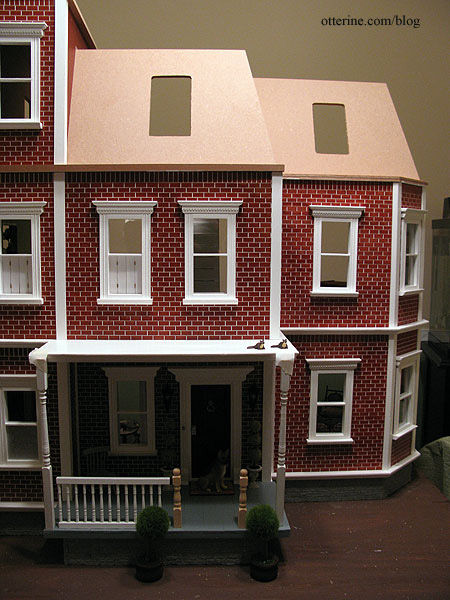
The extra roof pieces will be cut to fit later.
The room created with the extra pieces will be a tiny room that I want to do something special with. What, I have no idea yet. :D
Categories: The Newport
October 12, 2010 | 0 commentsNewport – master bathroom
Though the Newport was sold eventually, I’ve compiled some of the posts I made when I first started building it.
—-
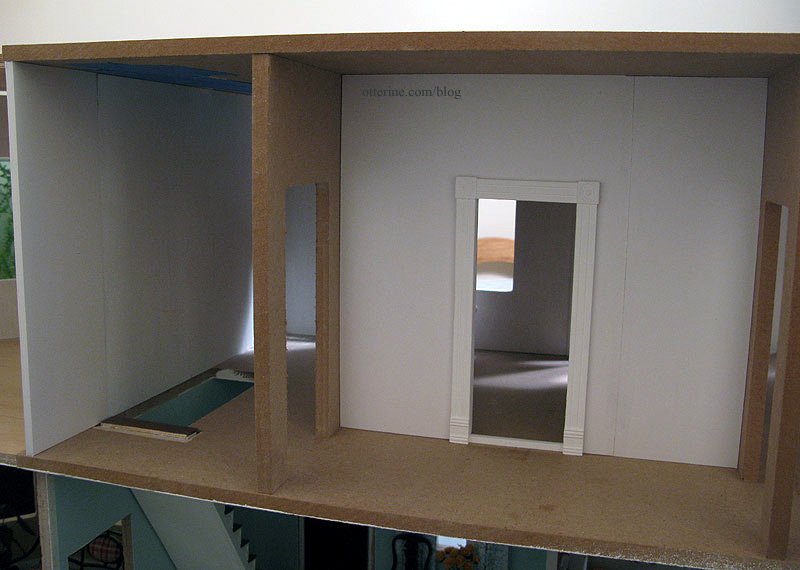
The second floor rooms will be from left to right: the guest room (in the two story addition), the stairway hallway, the master bath (which is technically shared with the guest room), the master bedroom and then the conservatory (over the garage).
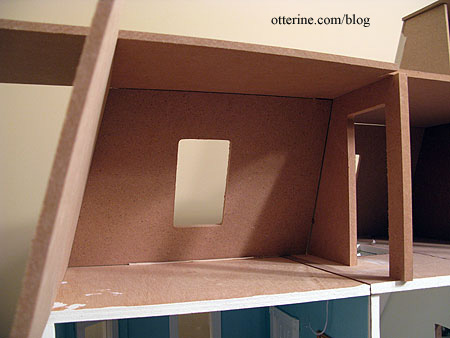
In order to fit the second floor stairs in that position, I had to move the far wall forward over the porch. This gave me more room inside the second floor and eliminated having a huge flat roof over the front porch extension. Adding this extra space made planning the master bath difficult. Can you actually have too large of a bathroom? :D Apparently so.
This gave me the idea of putting in a removable wall, as I had done for the powder room, creating a hallway between the stairs and the master bedroom.
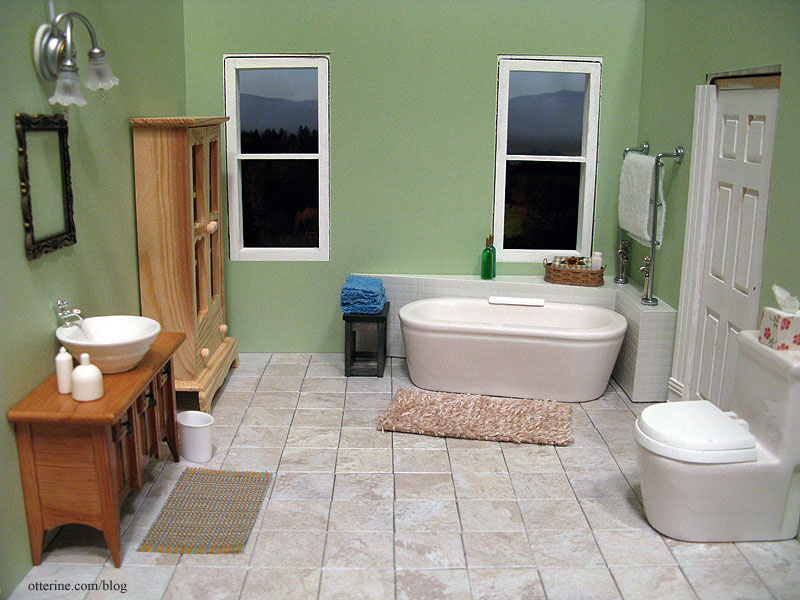
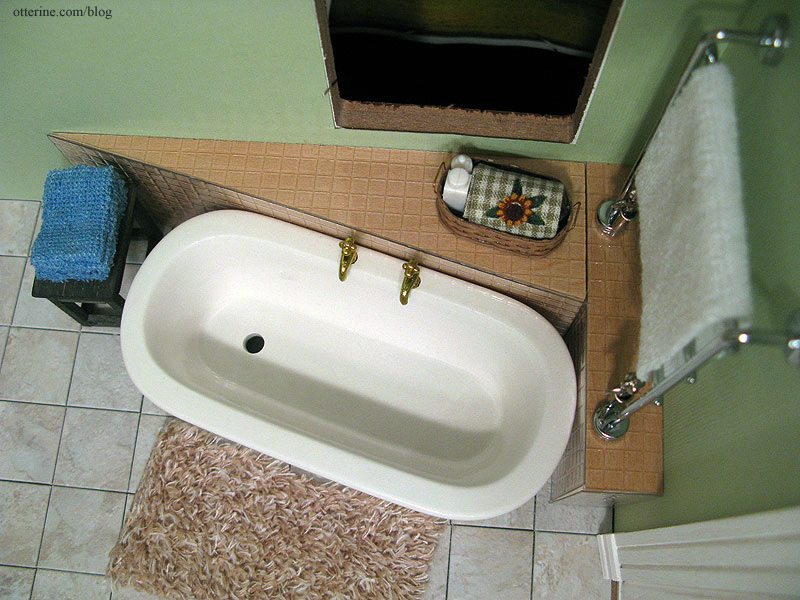
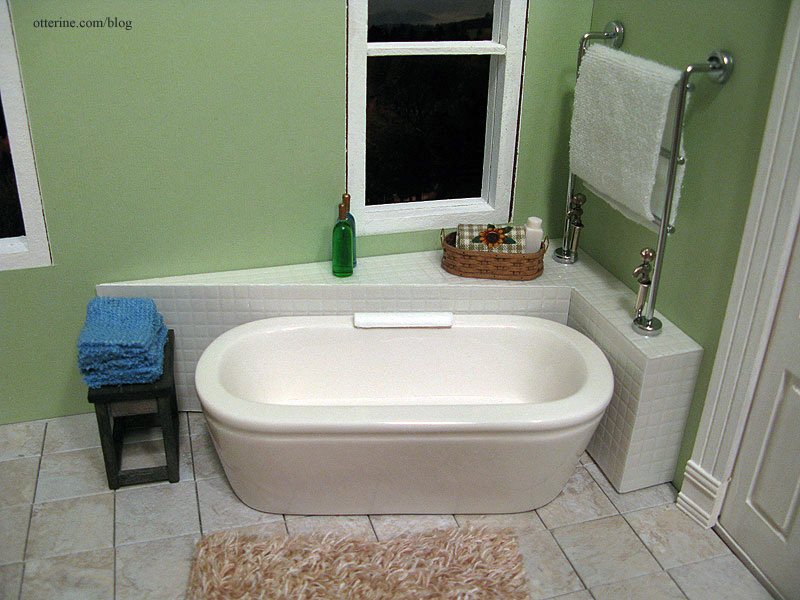
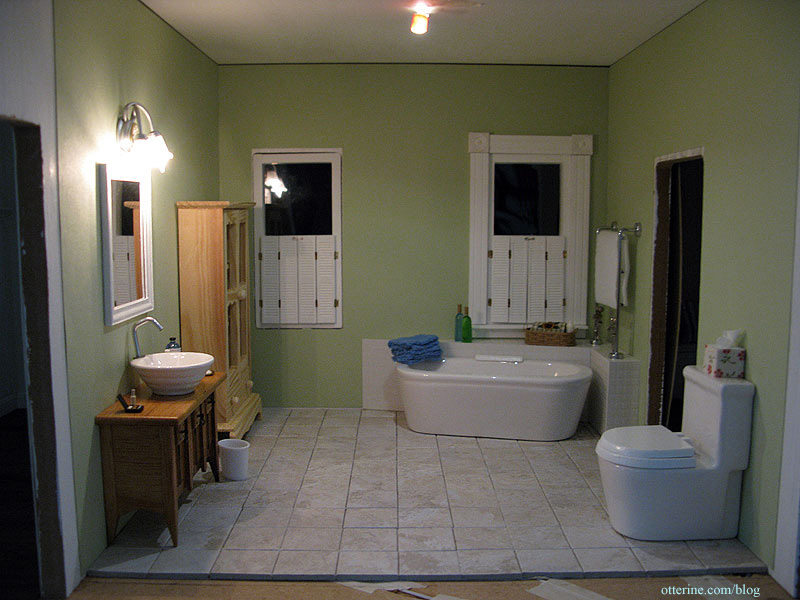
After trying different layouts, this is the final arrangement for the room. The soft green wallpaper is scrapbook paper, and the flooring was made from Greenleaf vinyl tiles (see kitchen post). I am using a modern bathtub and commode from a supplier in the UK. The rya rug was made by Glenda at Peppercorn Minis in New Zealand.
The vessel sink came from Silly Sisters in The Netherlands. The Mackintosh sideboard was supposed to be a stand-in for a kit I still need to make as the vanity, but I really like it as is! Hmm…I might need to think about this a bit more.
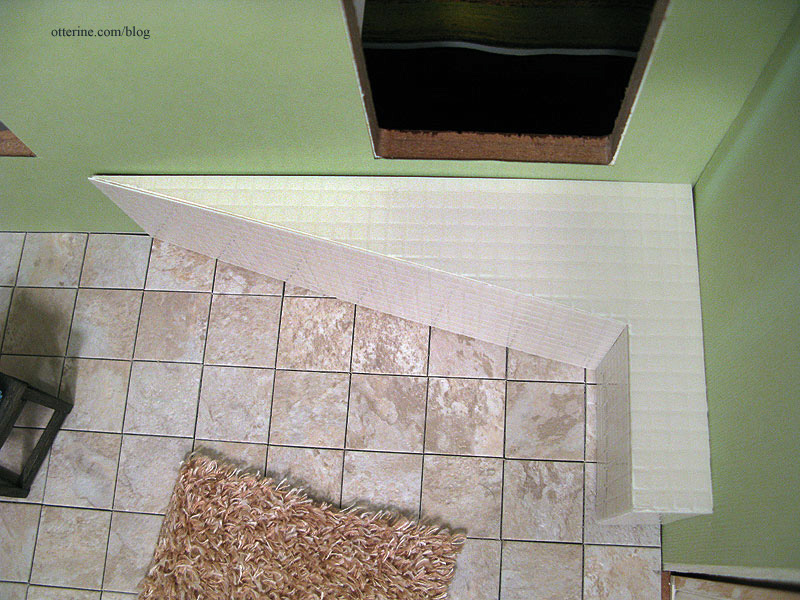
To finish the low wall around the bath, I used a clear plastic sheet embossed with 1/4-inch square tiles from miniatures.com. You paint the underside, and the top side shows as shiny tiles. I like that the surface has a little bit of texture the way real tiles would.
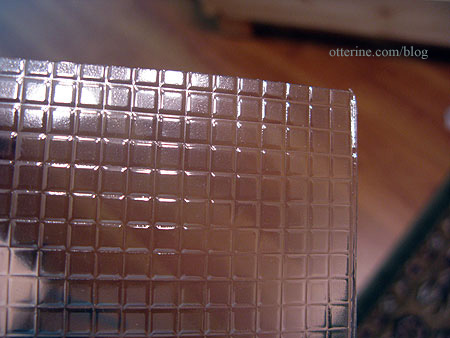
I cut the clear sheet to fit around the scratch-built wood base, trying to line up the tiles on the top with those on the sides. I’ve never done tile work, but it seems neater to align the tiles.
I tried a few different painting treatments on some small scraps to determine which color tiles I wanted. In the end, I decide all white was the way to go. It’s a clean, classic design. I painted the wood base all white with acrylics but used Krylon gloss white spray paint on the back of the tile sheets; it was faster, cleaner and left no brush marks on the tiles. I used regular tacky glue to adhere the tiles to the wood base.
I’ve removed the gold twin faucets from the tub and put a painted cap on the holes for now. I am still working on faucet options. If anyone ever decides to make better miniature faucets, I will be first in line!
The whole assembly is removable at the moment, just sits flush against the corner walls. Once the wallpaper is in permanently, I will glue it in place and finish the bottom edges where it meets the floor.
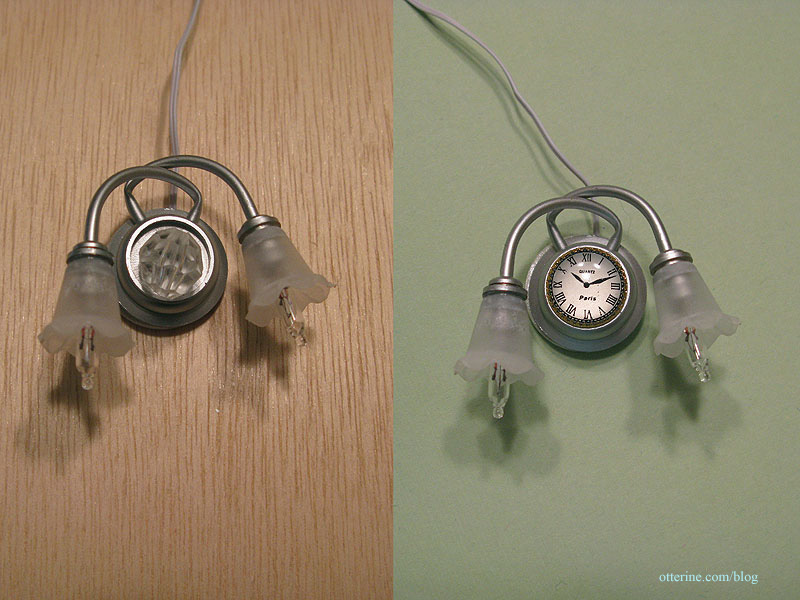
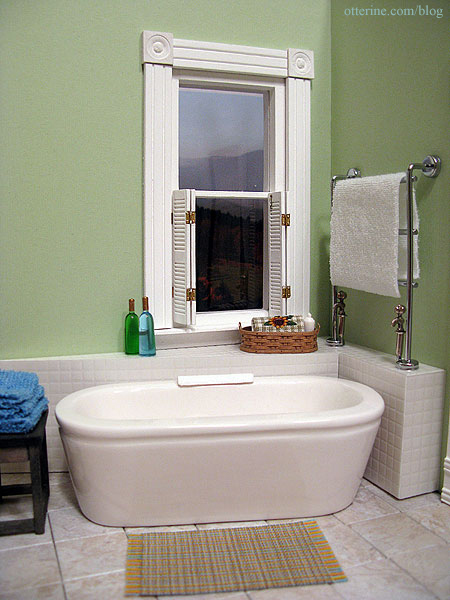
I modified this light from The Dolls House Emporium. It originally had a faceted bead, and I replaced it with a clock face I bought at the Bishop Show in April. I had no purpose for the clock face when I bought it; I just liked it. :D
In the original setup I used a metal scrapbook frame as a stand-in mirror. I liked it, but it was a bit small for the space. I made my own vanity mirror from strip wood framing and plastic mirror sheet by Darice. I also added a modern faucet from ELF Miniatures in the UK (I painted the tip of the faucet black for added realism).

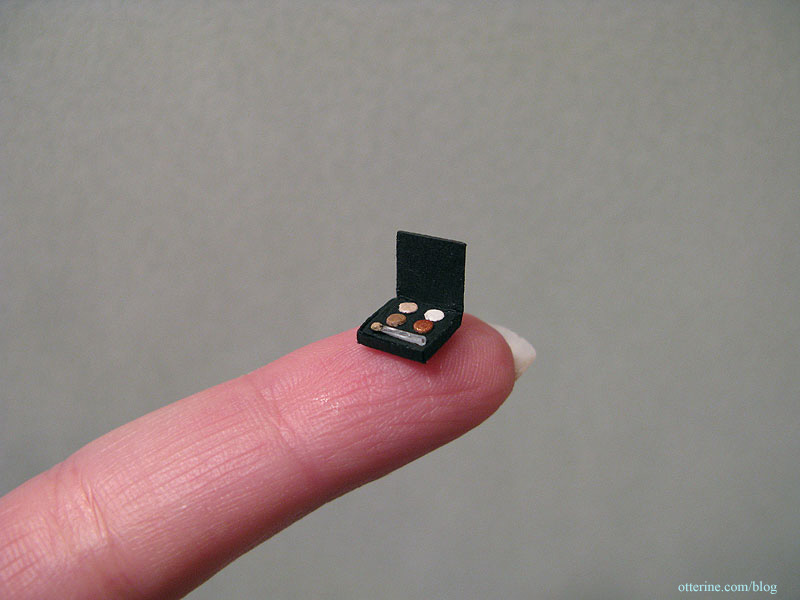
I made the eyeshadow makeup compact.
Since the light above the vanity is pretty bright for a standard dollhouse fixture, I plan to add two NovaLyte LED can lights to spread the light evenly in the room. Here is the room with one taped in place. Not quite enough light over the tub.
The working café shutters are made from half scale shutters and super tiny hinges. My tutorial ran in the September 2010 Greenleaf Gazette.
Categories: The Newport
October 5, 2010 | 0 commentsWilliam Morris rug – completed
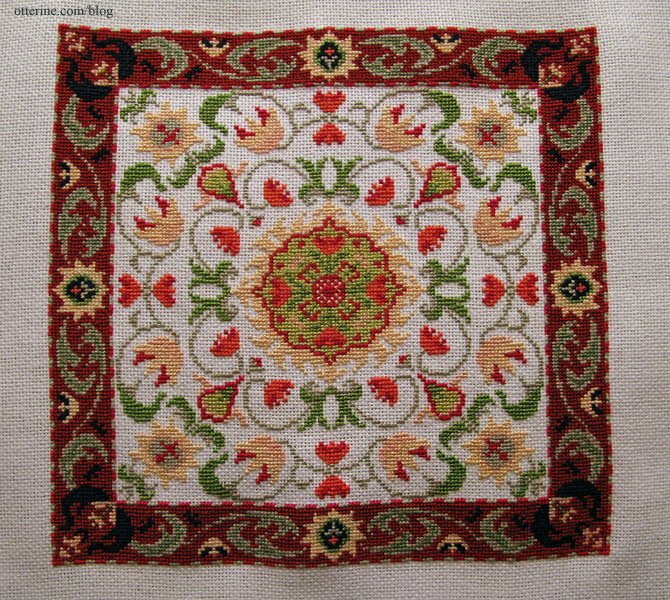
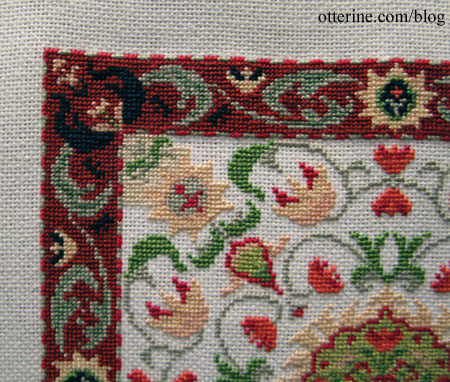
I’ve finished with the red border of the William Morris rug! At 97 hours (29 hours for filling in the red border alone), the rug is really taking shape. The interior color will take a good deal longer and I imagine working in a very light color will be challenging in its own way.
I began filling in the center with DMC 712, which was supposed to be cream. I had barely stitched a full corner when the color went from vanilla cream to flat tan. Bleh! I expected the cream and the peach/pink tones to compete a bit, but the 712 flattened out the pale green, too.
I thought I would have to use white since the 712 cream color was about as light as the colors come. From seeing the design with the white fabric background, it wouldn’t look bad stitching with white floss. When I went through my stash of floss, however, I found DMC 746, the bright creamy tone I was looking for to begin with. Before removing the 712 stitching, I did up the opposite corner with 746 just to make sure. As expected, the peach faded slightly into the background, but the pale green stayed prominent.
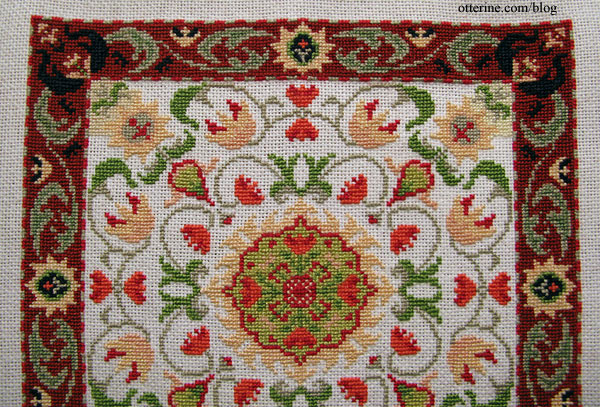
I went through my thread stash and found what I dubbed “secondhand smoke white.” Of course, that’s not the official name on the DMC chart, but that’s the color I’m going with. It was once white, but after years in my grandmother’s home, it became not-so-white. I’ve inherited many of her craft supplies since she’s no longer with us, and I found a whole bunch of this “white” embroidery floss.
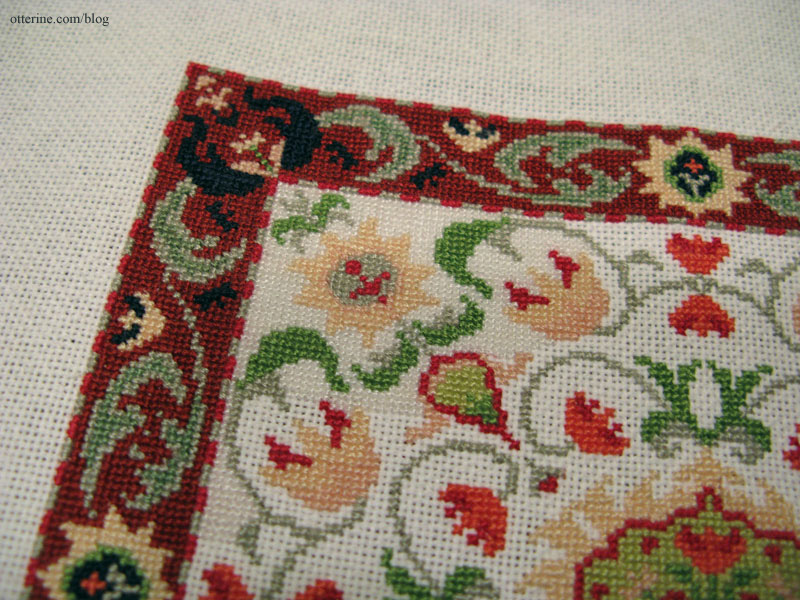
After removing the stitches of the 712 and 746, I needed something a little brighter. I looked at the overdyed, 4150, ecru colorations a few blog readers suggested, but they were all as dark as the initial 712.
Here’s the new white…er…smoky white (upper left corner). It fills in well and doesn’t compete. We had a winner.

Also, strangely enough, it seems thicker than the dyed flosses, so I need only one strand per square instead of the two I had used for the rest of the stitching. This is 4.25 hours of white stitching, 101 hours total stitching.
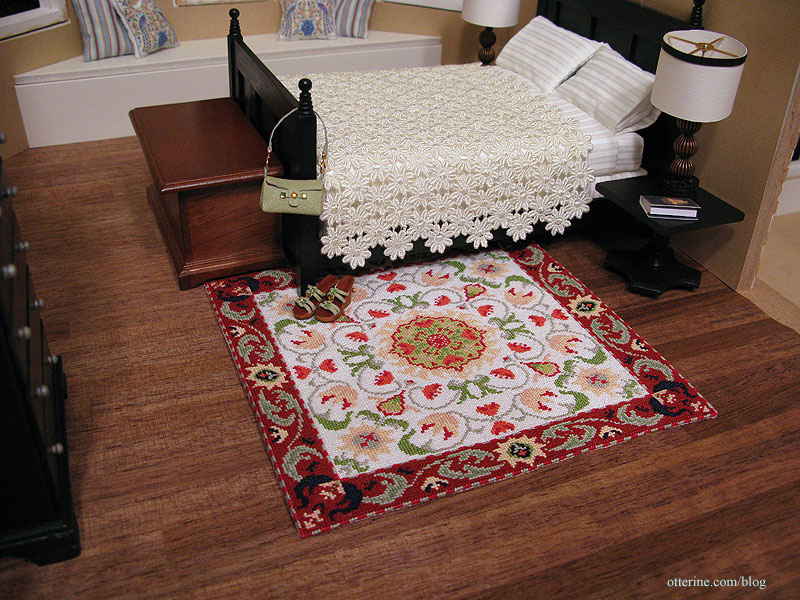
The entire rug consists of 142 hours of stitching time including 29.25 hours for filling in the red border and 42.25 hours for filling in the white background.
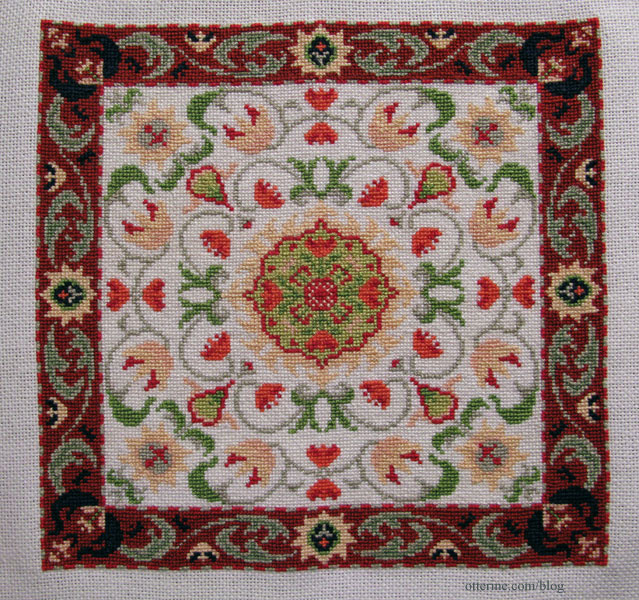
It measures 5 5/8″ square.
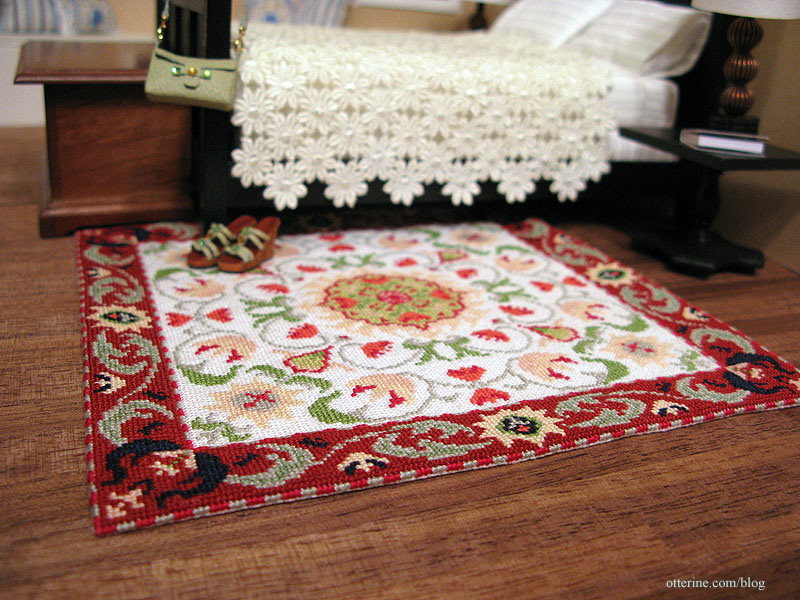
The shoes and purse are by Patrizia Santi. I made the bedspread from venise lace; tutorial is available in my etsy shop.
Categories: Needlework - French knot rugs
October 2, 2010 | 0 commentsNewport – guest room
Though the Newport was sold eventually, I’ve compiled some of the posts I made when I first started building it.
—-
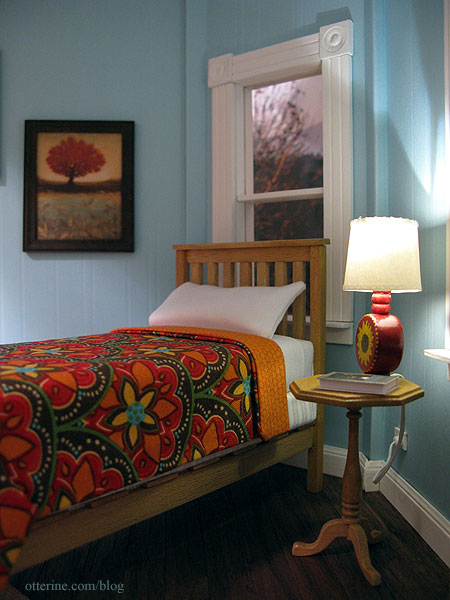
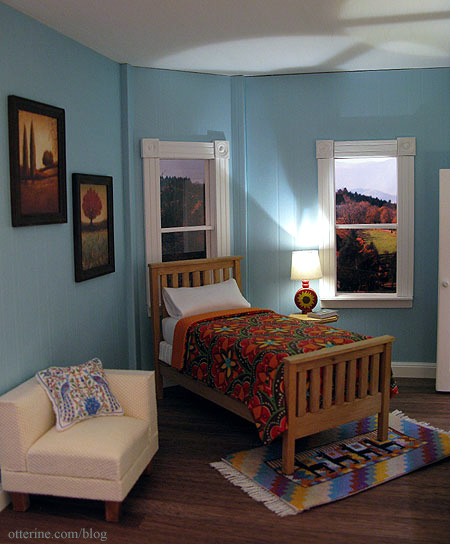
I started building the furniture for the guest room to go with the scratch built bed made from a pattern in Thirties and Forties Miniatures in 1:12 Scale by Jane Harrop and the House of Miniatures dresser. For the bedside table, I used a House of Miniatures candle stand kit. It came from a set of two; the other is in Baslow Ranch.

I like the copper table lamps in here, but I am undecided on the ceiling fixture. I tried a couple of others, and this one seemed to be the best fit for the most part other than the color. Whichever fixture I end up using, I’ll likely paint it copper to match the other two as close as possible.
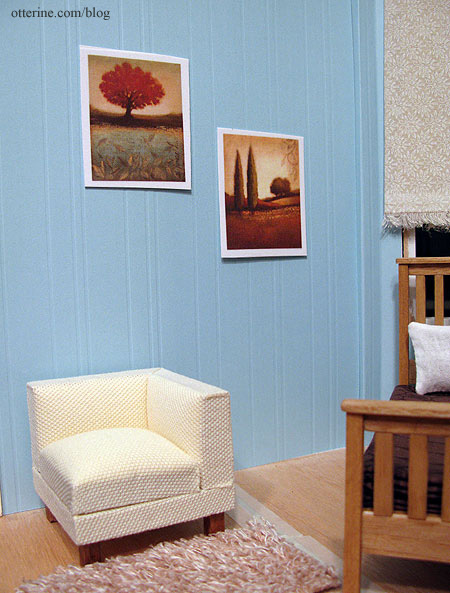
The wall art prints are both by Edward Raymes: Today and Crimson Dusk (left to right). I need to make frames for them.
I find it amazing how the addition of baseboard, windows and trim can turn a dollhouse room into something so seemingly life-sized. The print is Today by Edward Raymes. In a previous post, I showed you how I made the mock outlet and plug for the table lamp. I made both sunflower table lamps.
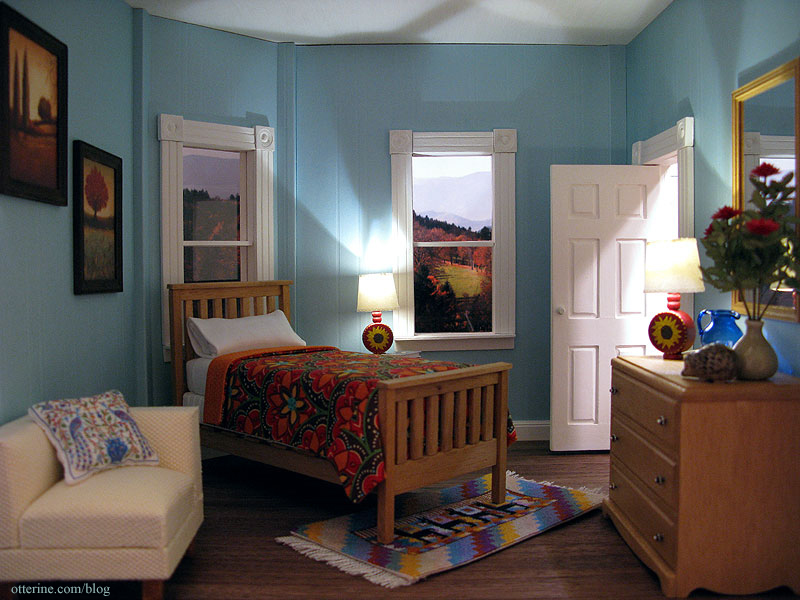
Below you can see the second print by Edward Raymes called Crimson Dusk.
The flowers are Bonnie Lavish dahlias. I made the dresser with mirror, bed (and bedding) and side table as well as the llama rug and the peacock pillow. The only things left for this room are window treatments and a few other accessories.
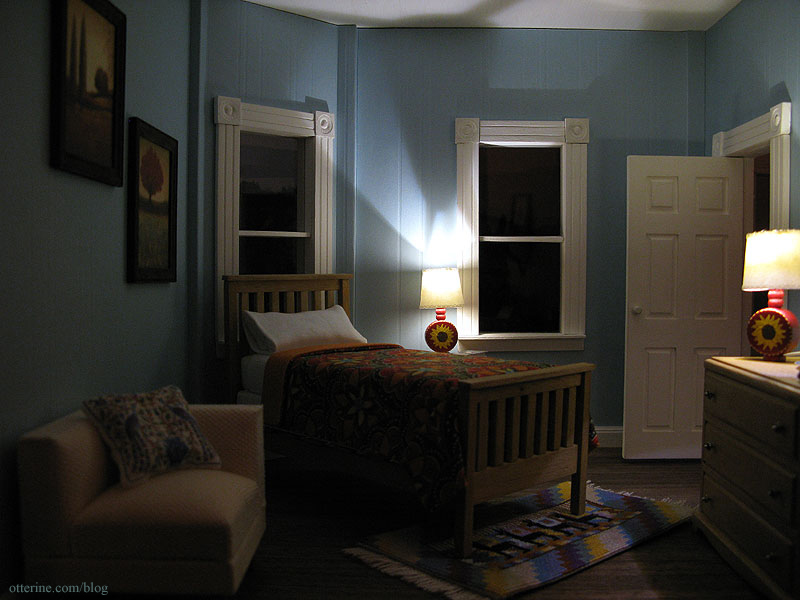
The Novalyte LEDs in the sunflower lamps cast a wonderful light that transforms the room in a nighttime scene.
Categories: The Newport
September 14, 2010 | 0 commentsHard wiring table lamps
For the usual light fixtures — wall lights and ceiling lights — the wires are usually easy to hide. Holes are drilled through boards and channels are made to hide the wires.

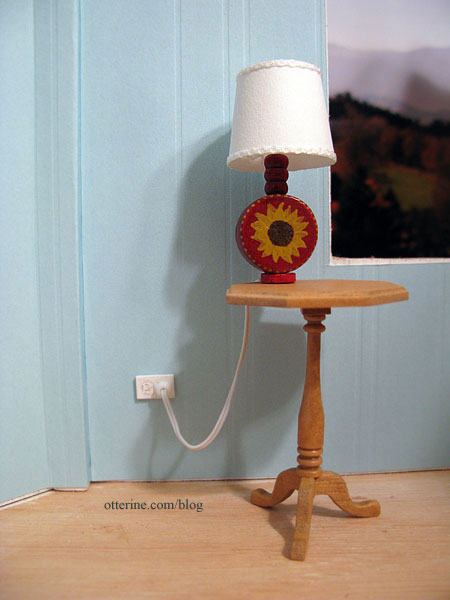
The same thing can be done with table lamps, but what about the times when there isn’t a piece of furniture to hide where the wire enters the wall? In the guest room, I had just this situation; the table next to the bed had a thin base. I could have pulled the wire behind the bed and hid it there, but where’s the fun in that? :D
So, I decided to make a mock outlet. First, I slipped a white bead onto the lamp wire; this will mimic a plug.

I cut a channel in the wall behind the table to feed the wire up the wall and through the ceiling (eventually, when the ceiling is put on).

I cut a small hole in the wallpaper where I want my outlet to be, making sure it was in line with the wire channel.

I used a small piece of bass wood painted gloss white to mimic the outlet cover. For the “open” outlet, I drew on the outline, indented it a bit with an X-Acto knife and then brushed a bit more paint over the drawing. On the other side, I made a hole to feed the lamp wire through.

I slipped the outlet onto the wire behind the bead and then fed the wire through the hole in the wallpaper.

I determined the length of cord I wanted and taped the wire into the channel in the wall.

I glued the wallpaper in place, glued the outlet in position on the wall and then moved the bead to sit flush against the outlet cover.
Categories: Miniatures, The Newport
September 11, 2010 | 0 comments


NOTE: All content on otterine.com is copyrighted and may not be reproduced in part or in whole. It takes a lot of time and effort to write and photograph for my blog. Please ask permission before reproducing any of my content. Please click for copyright notice and Pinterest use.


