

Miss Kitty
Jen bought one of the cutest kitty dolls I had ever seen from PamelaJunkMinis on etsy, and the Heritage absolutely begged for one of its own. Pam made one custom for me since I just wasn’t sure about working on such a tiny doll but I knew what colors and fabrics I wanted. Miss Kitty is simply stunning in person with pretty green eyes to match her sash. I love her!
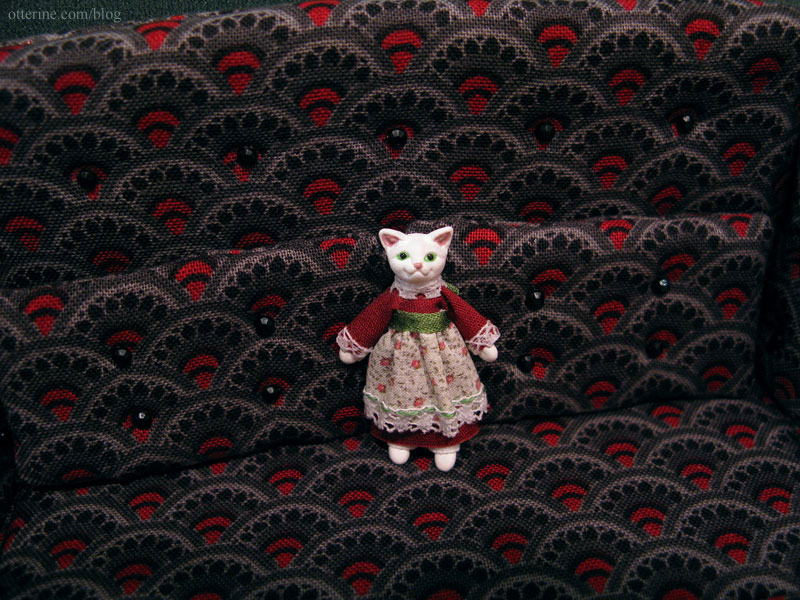
She’s oh so tiny!
Categories: Animals and birds
November 9, 2011 | 0 commentsHaunted Heritage – first floor, two ceiling heights
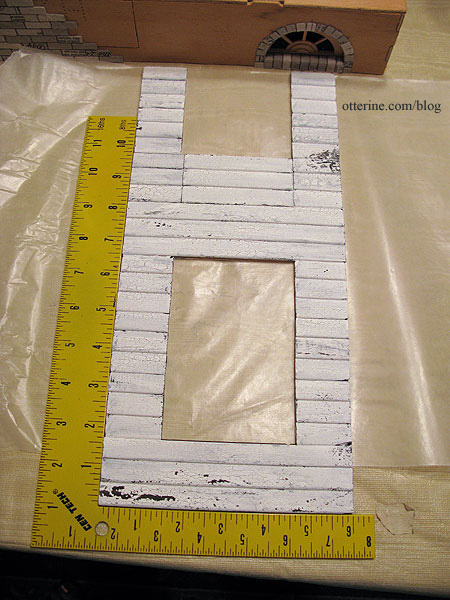
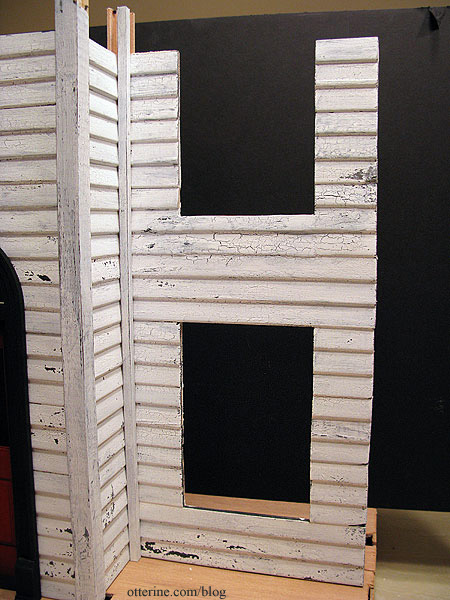
In upgrading the front door and adding a narrow Houseworks staircase, I needed to address the issue of a too-short ceiling for those two items. I couldn’t just raise the whole first floor, since the front bay window ceiling and the swinging window above it are based on the kit’s original ceiling height.
The only workable solution was to raise the parlor ceiling height and leave the kitchen ceiling height as originally intended. Since I had already eliminated the side bay window, there was no issue with raising the ceiling on that side. But, there was still a front window on the second floor that would need to be addressed. The original front side wall had an opening for that window.
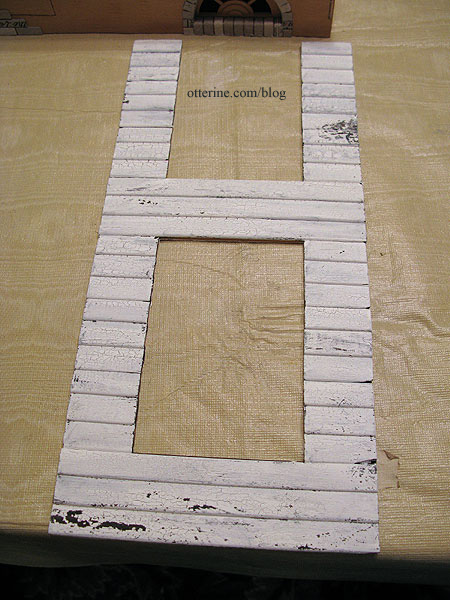
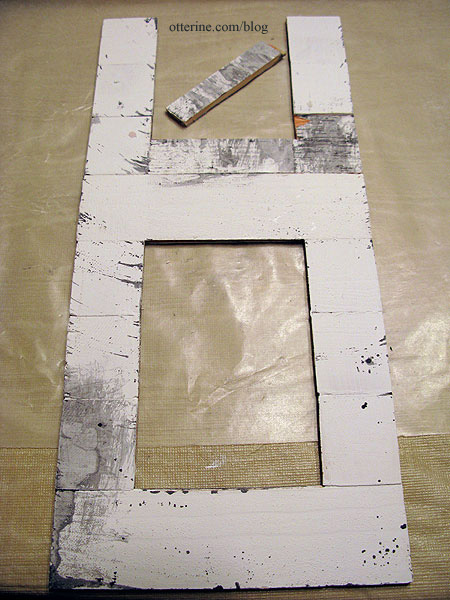
I took the spare pieces from one of the original side walls (eliminated along with the side bay window) and used this to build up the bottom of that opening.
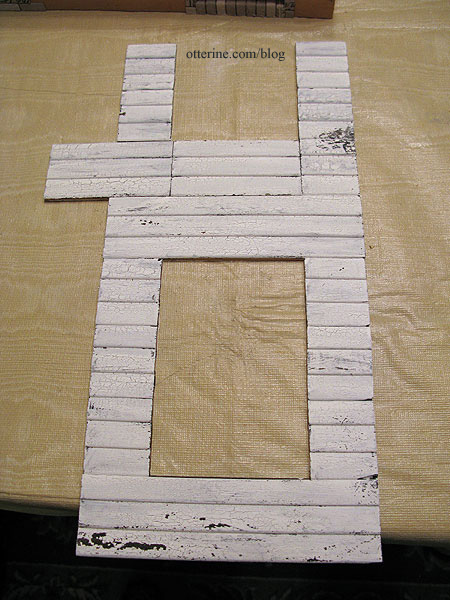
After the glue dried, I cut the new opening.
I then used spackling to fill the joins on the front and touched up the aged paint.
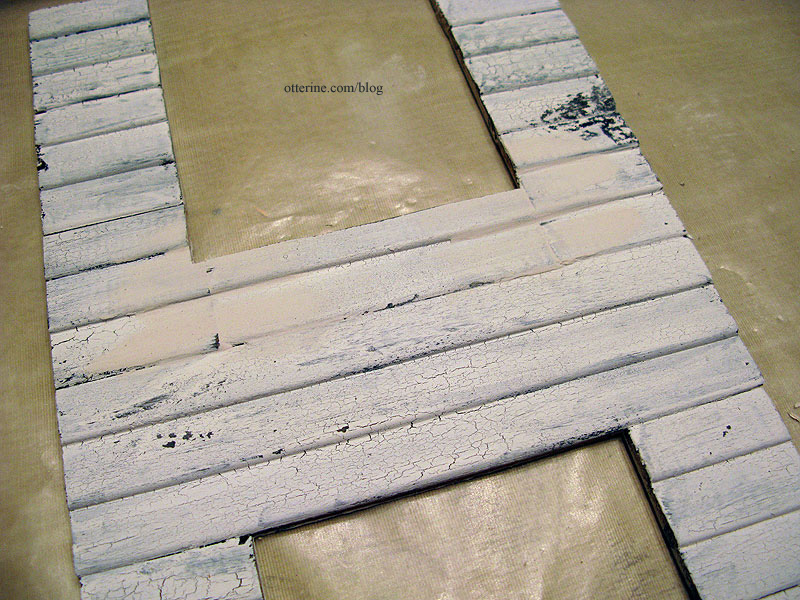
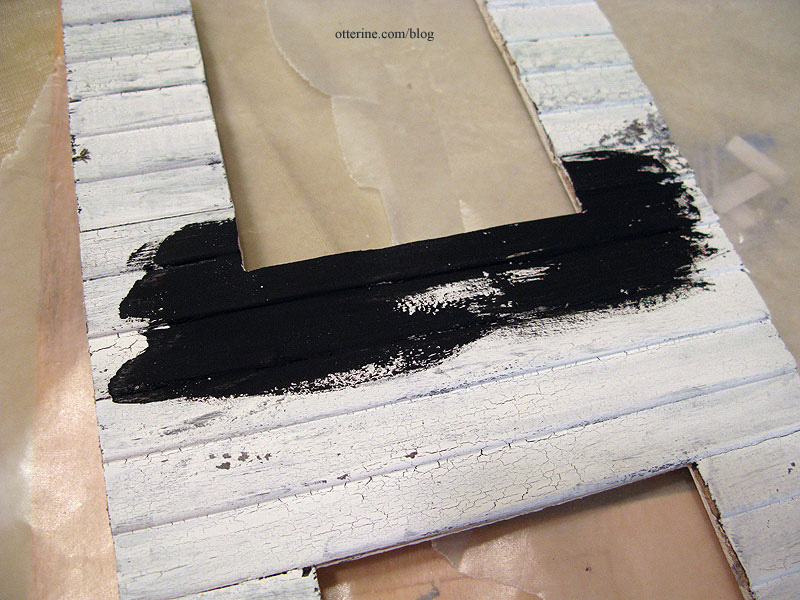
Now the opening is set for the higher second floor, and the patch is invisible.
Categories: The Haunted Heritage
November 9, 2011 | 0 commentsThe Sofa
As you’ve seen before, I bought the beautiful conversation piece known as The Chair made by Kris of 1 Inch Minis. She was kind enough to send me the extra fabric she had and let me know where she bought it. Unfortunately, there wasn’t enough for more than pillows and curtains or maybe an ottoman, and I really wanted to make a sofa to match. The Heritage just would not stand for mismatched furniture in the parlor. What would people say?! ;D
Sarah, a fellow member of the Greenleaf forum, mentioned that she saw the fabric at her local Joann store. I was unable to find any in my area, and she was kind enough to buy some for me during her next visit and sent it to me. Hooray!
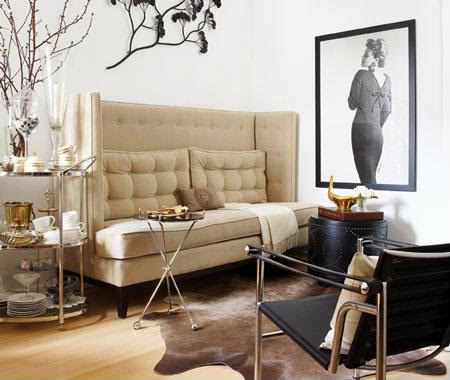
I went back through my idea file to see what would be able to hold its own with The Chair and still have a similar style to it. I found this beautiful high back sofa from AT Design Group.
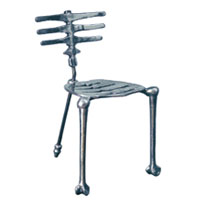
As an aside, check out their skeleton chair! :D I foresee a plastic Halloween decoration becoming a 1:12 scale chair in the future. Ha ha! Creeptastic!
I used my knowledge from the Millie August sofa kit I put together and my initial attempt at an upholstered couch made with dried out (new) kitchen sponges.
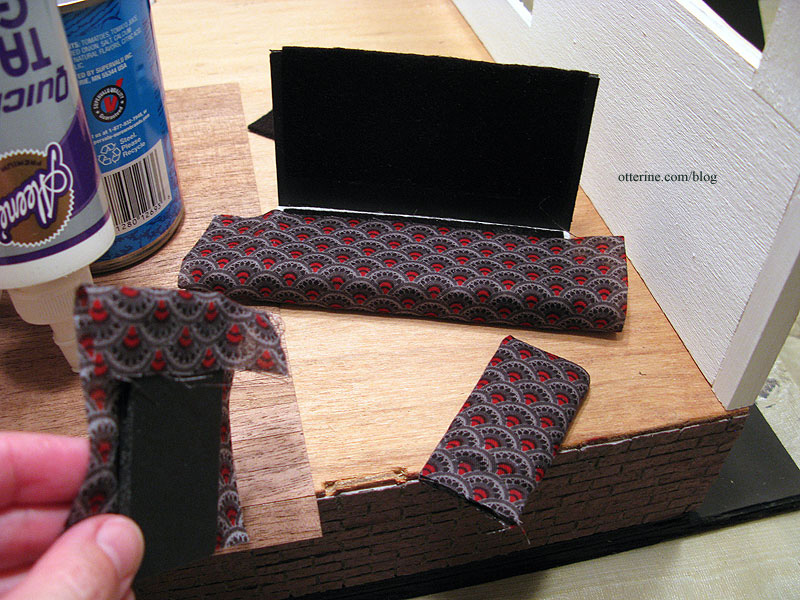
I built a quick mockup in 1/2″ foam core board, 1/8″ foam core board and kitchen sponges (new and dried before using), leaving a bit of wiggle room for batting and fabric upholstery. I used 1/2″ wood cubes for the feet, though I planned to make legs like the original later in the build. I had to piece the sponges since the ones I bought were not long enough, though they were the perfect thickness.
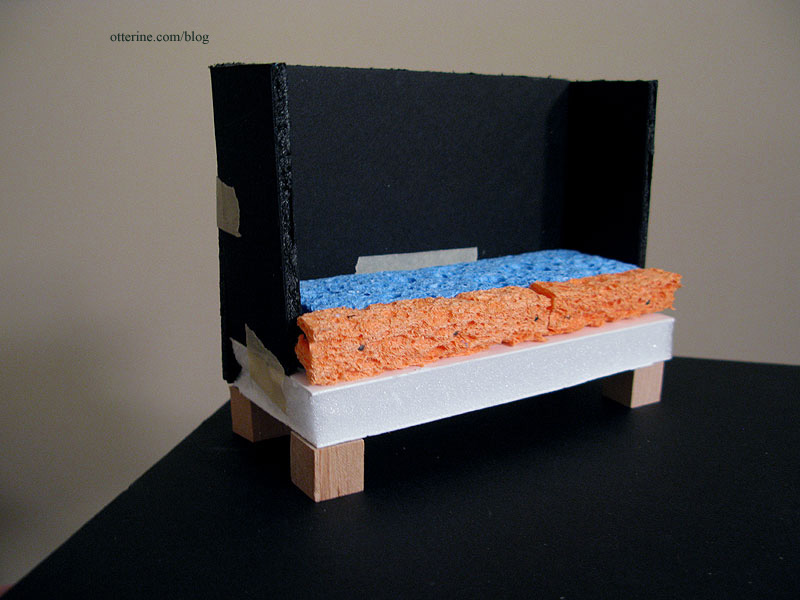
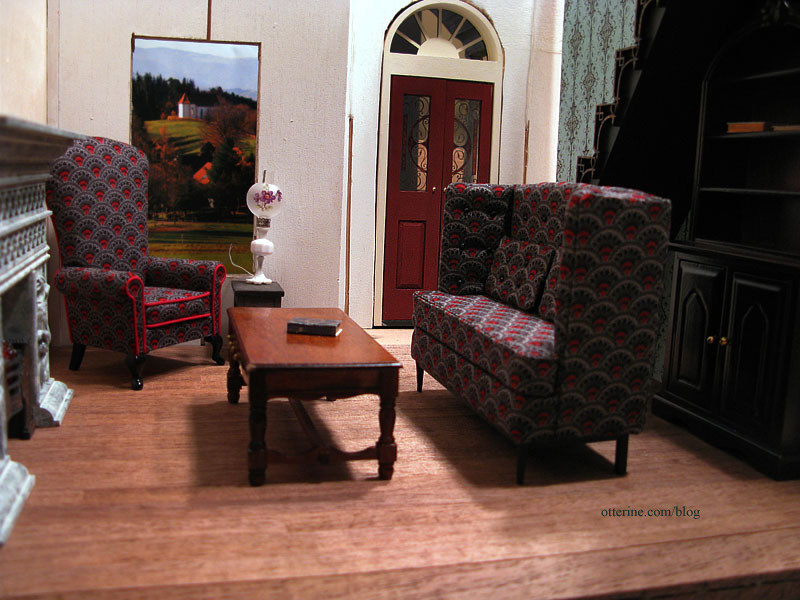
I put the mockup in the parlor to see if the size was good in relation to the chair and for the room itself. I made it shorter than The Chair since it looked off being the same height. As the models show, it works well have a tall chair and a slightly shorter sofa.
I then began putting the sofa together, first by covering most of the pieces with a layer of black felt under the printed fabric. I usually use millinery batting, but since this is a darker fabric I went with a darker under layer. It’s also thin enough cotton that I worried the lighter batting would show through. I didn’t take step by step photos here mainly because I had to work fast with the quick dry glue and parts of the assembly process were rather fiddly. :D
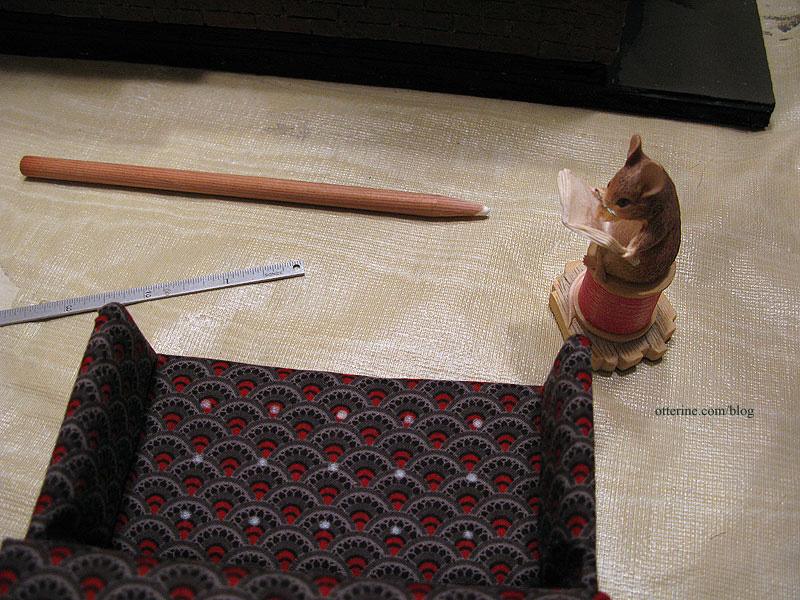
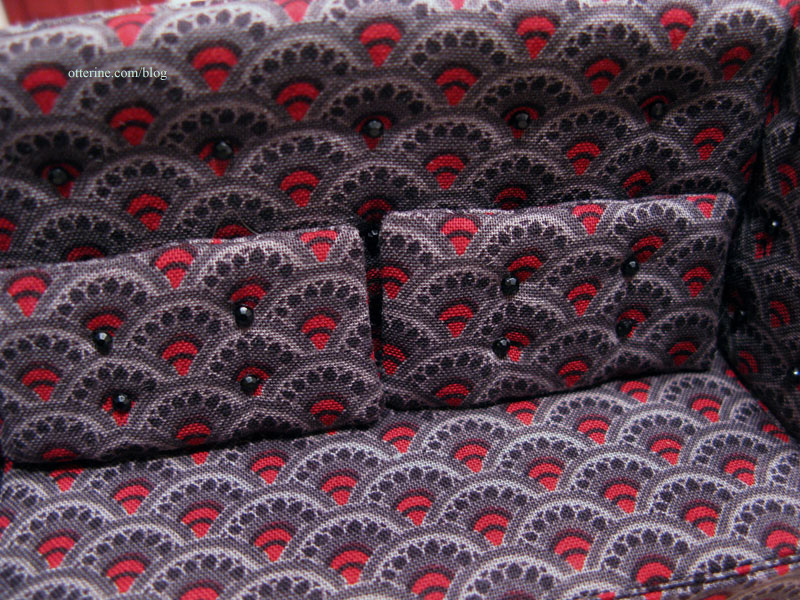
I added three rows of buttons to recreate the tufted appearance of the original by looping thread through the fabric and tying in the back. Shown here is the layout marked with a chalk pencil. Looks like my secret is out, too…I have a mouse tailor for guidance. ;]
The tufting was a lot of work, but it was worth the effort. I just love the effect. I foresee other tufted minis in my future.
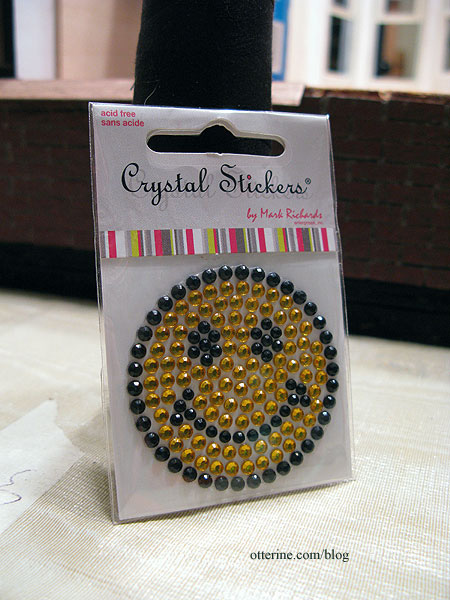
Using a glittery bead smiley face I bought for a dollar, I made buttons to cover the threads creating the tufts by gluing the crystals in place.
I made the tufted cushions using sewn pillows stuffed with flat pieces of felt and tufted with the same thread and buttons I had used for the tall back and sides. I like that they ended up a bit misshapen as though they’ve been used and moved about over the years.
I think the crystal buttons work rather well, though I’ll need to buy another sticker not only because there were not enough to complete all the tufts (the missing ones are hidden behind the pillows) but also in case these pop off as time goes by. I’d never be able to match them otherwise.
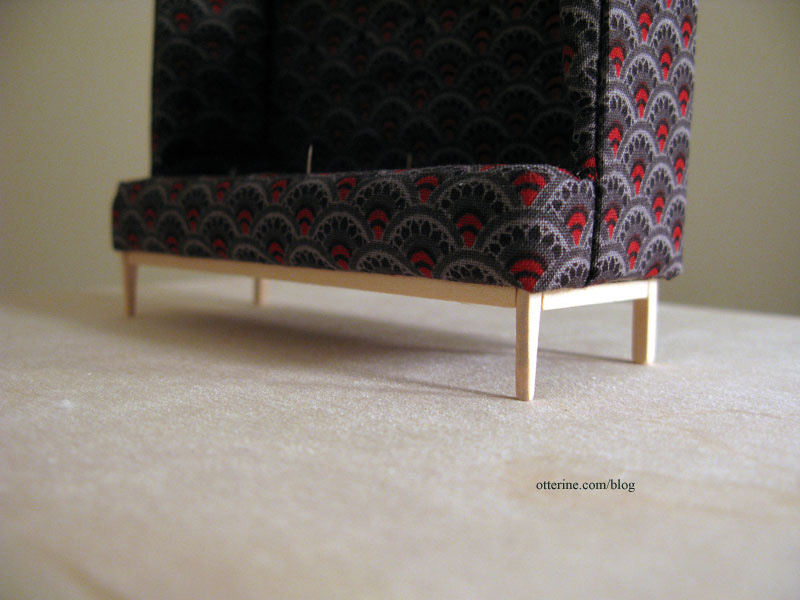
The original appears to have a wood base, and I liked this detail. I built a frame and legs from bass wood and painted the assembly black followed by a satin varnish.
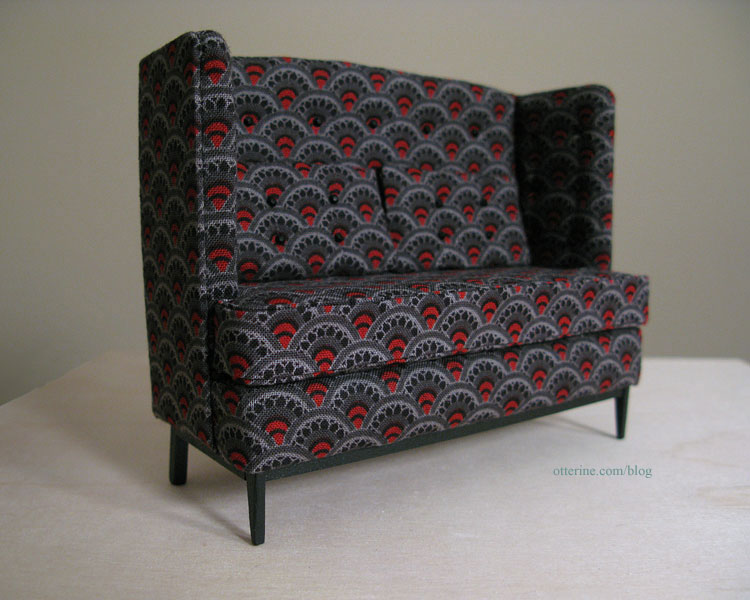
For the main cushion made from the kitchen sponges, I used the method of making cording that I learned from the Millie August kits to add a bit of realism. I opted for self fabric cording instead of red as on The Chair. Not only would it be unlikely to match, but there is so much going on with The Sofa that I worried contrast cording would detract from it. I may add a small red throw pillow or blanket over the back when I get further into the decorating phase to tie it in more with The Chair.
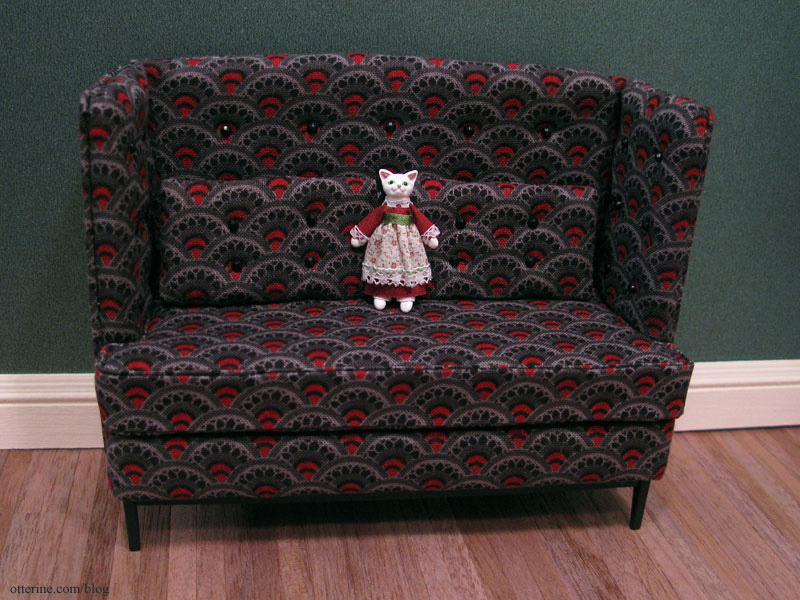
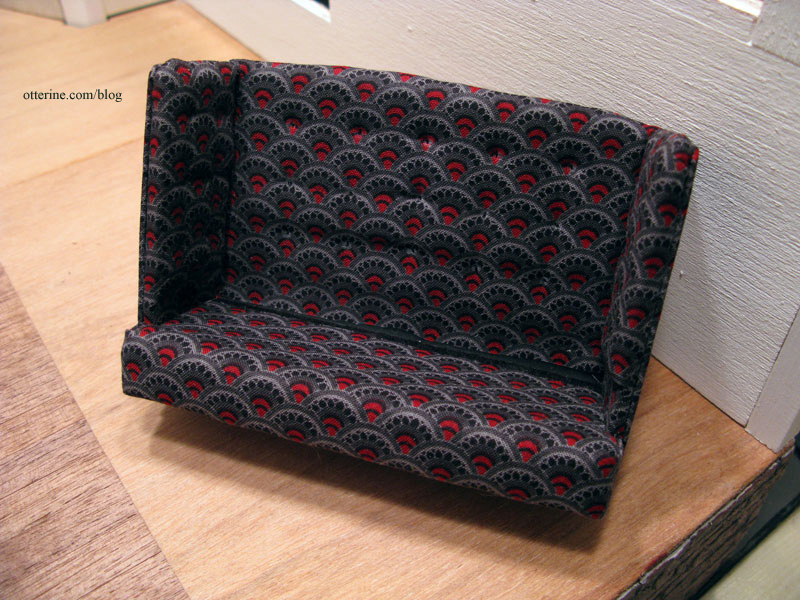
And, here is The Sofa!!! It is my second “from scratch” upholstered piece. :D Love!
And, here it is with The Chair.
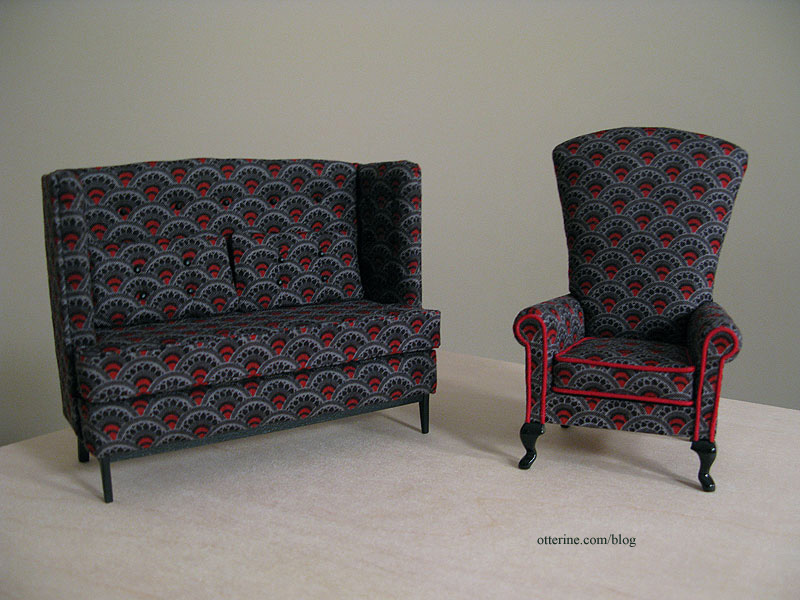
The lack of red in The Sofa is a little glaring with them side by side, but it’s less intrusive when in place in the parlor. Plus, there will be a lot of other things going on in the room as well.
Categories: Furniture, The Haunted Heritage
November 8, 2011 | 0 commentsPreparing for landscaping and moving inside
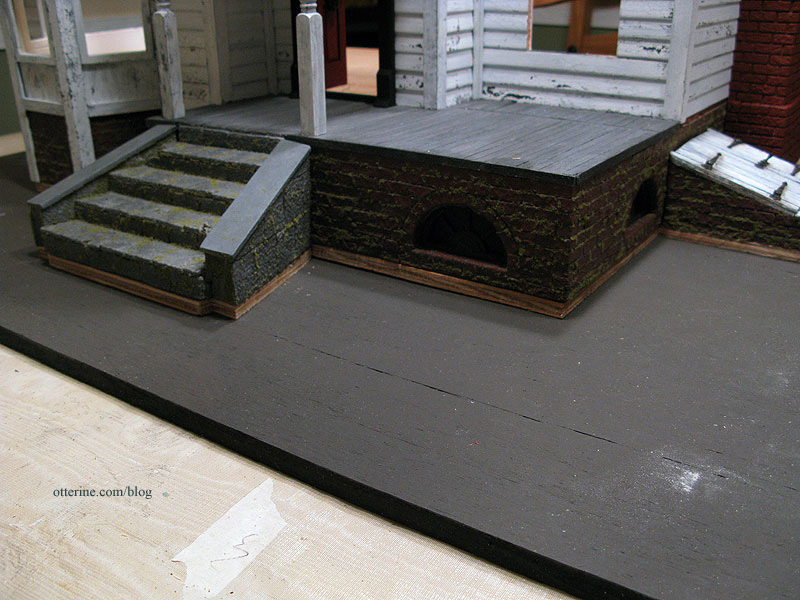
In order to have a “house on the hill” feeling, my friend suggested adding some extra height to the foundation so I could actually landscape and not end up with a completely flat yard. Smart cookie, that one! :D
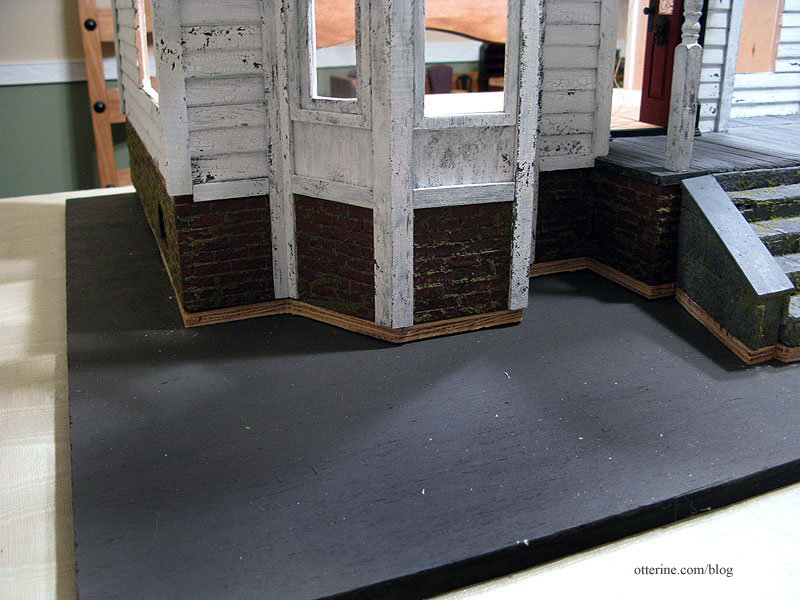
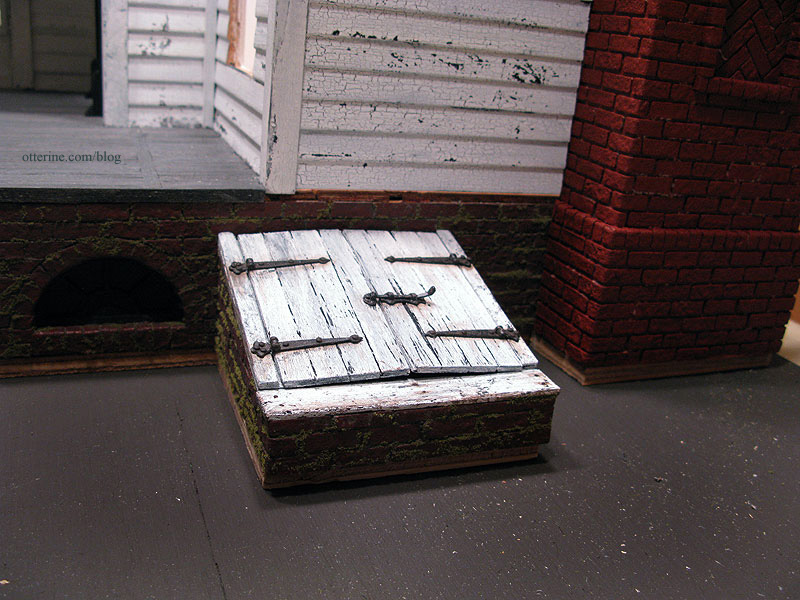
I traced the foundation, stairs, chimney and cellar doors onto a 3/8″ plywood sheet, and he used a jigsaw to cut them out. He cut the component bases separate so I could have the ability to move them as needed.
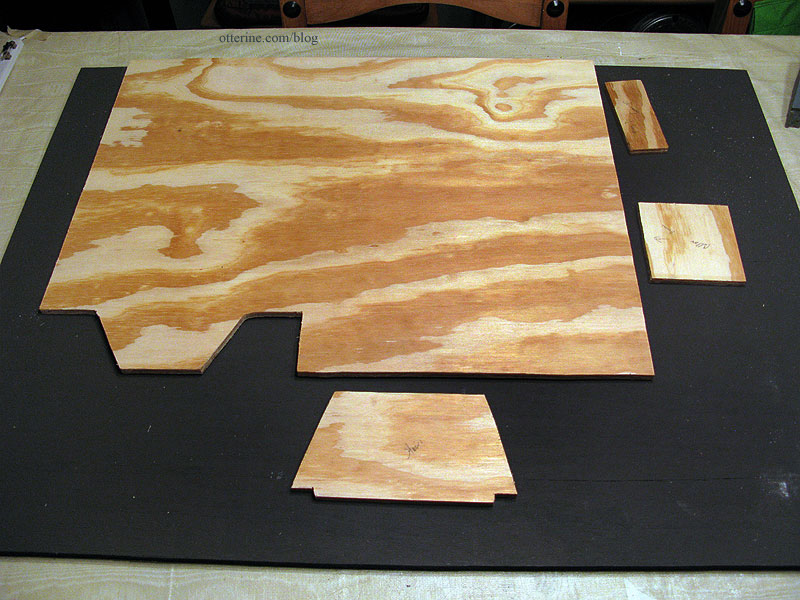
The house and the related components will sit off the ground and I can make the lawn rolling and uneven.
He suggested cutting the cellar and chimney pieces small so I could add holes in the ground around them if I wanted. Another great idea!
One thing I needed to take care of before adding this extra base was to create my main wire channels on the bottom of the main landscape board. Most of the wiring will run through the house and toward the chimney. Some of the first floor wiring will go directly through the floor and open foundation…and the cellar lights are already in the foundation. These cellar lights will be completely inaccessible once the house is built, so I used LEDs with insanely long lifespans.
I drilled three holes under the area where the chimney will stand, though I might need only one or two in the end. Easier to drill them now than to attempt adding more later.
Next came the wide channel for the wiring made using a Dremel. All the wiring will run out toward the back and I’ll add plugs to use with the power strip. I’ll be covering the bottom of the baseboard with felt to protect the wires and to keep the plywood from scratching its display table, but I won’t glue the felt in this corner so I can access the wires if ever needed.

I glued the extra house base to the larger lawn board and will paint the exposed edges once dry. I’m not going to glue the house to its new base right now since I am not quite sure how I’ll address the landscaping anyway. But, I can now move onto the interior, even with the base unattached.
Categories: The Haunted Heritage
November 2, 2011 | 0 commentsThe Money Pit
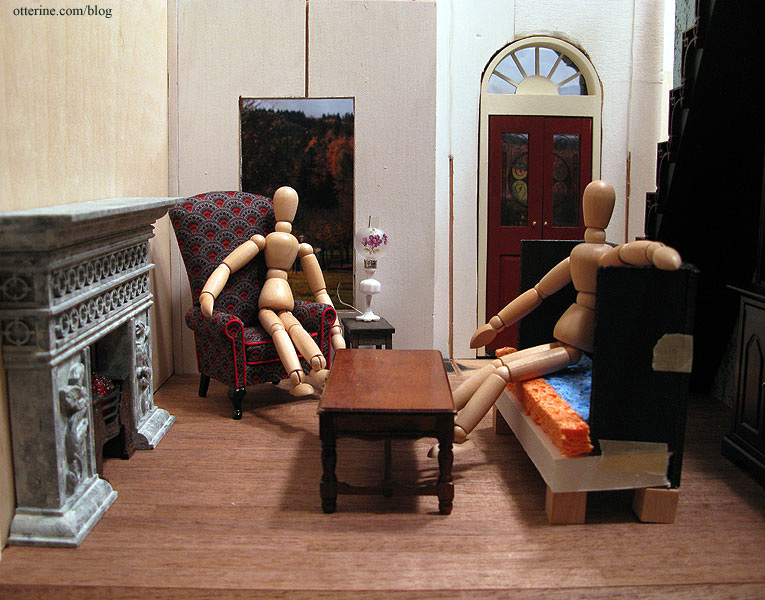
Here are the models after the shoot from Halloween. This photo reminds me a little of the movie The Money Pit. :D
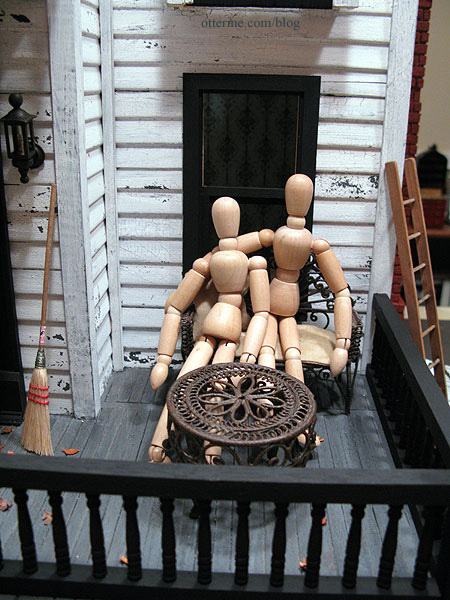
Her: “What did we get ourselves into buying this house?”
Him: “It’s going to be great! All it needs is a little paint and it’ll be just like new.”
Her: <worried sigh>
Categories: The Haunted Heritage
November 2, 2011 | 0 comments


NOTE: All content on otterine.com is copyrighted and may not be reproduced in part or in whole. It takes a lot of time and effort to write and photograph for my blog. Please ask permission before reproducing any of my content. Please click for copyright notice and Pinterest use.


