

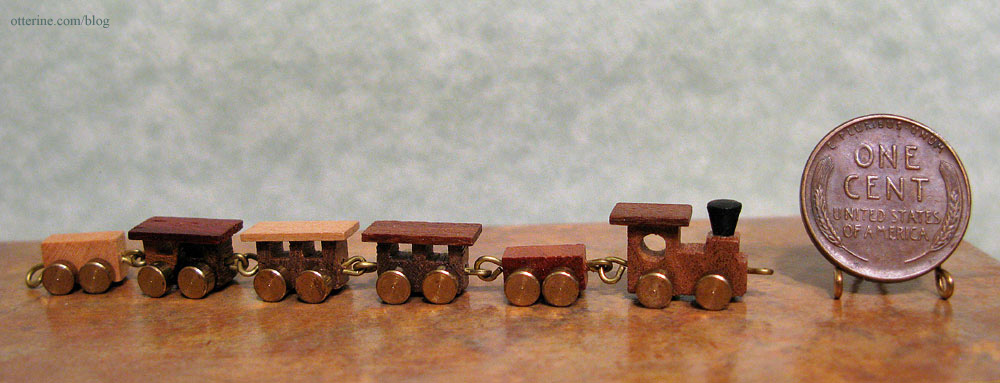
Wood and brass train
In a recent craigslist miniature lot purchase, there was a beautiful wood and brass toy train. The wheels spin and the cars are attached to one another with hooks. Isn’t it wonderful?! So tiny!
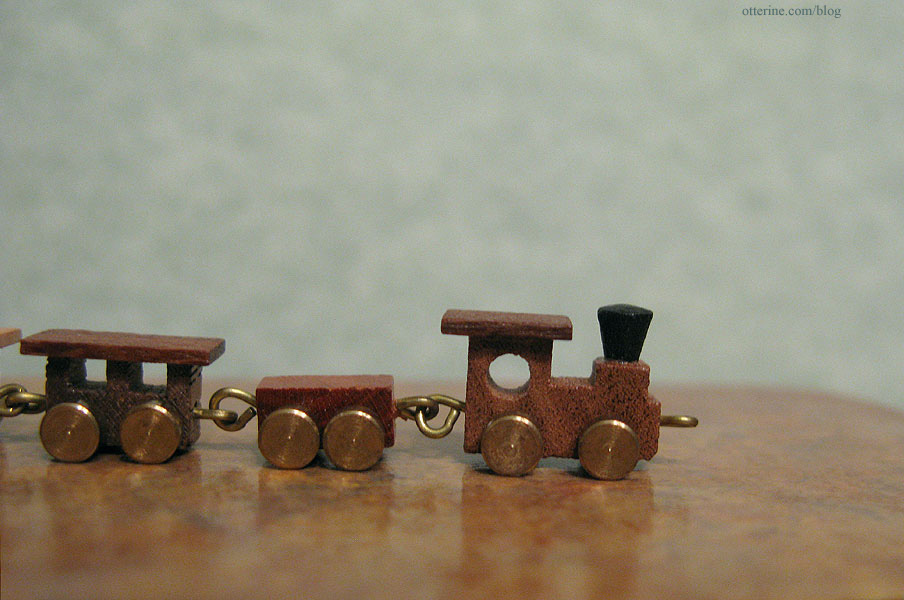
I’m not sure where I’ll display it, but I wanted to share it.
Categories: Miniatures
November 30, 2011 | 0 commentsBeautiful flower in a milk carton planter
I’ve added a little bit of life to the Heritage from a True2Scale kit. It comes with the glossy printed milk carton bottom, clay, synthetic soil, a stem and a little paper sheet with leaves and flower petals you color yourself. I chose to make mine a vibrant red orange, my favorite color. I added a bit of the soil included with the kit to the center of the flower as well as a light sprinkling of the foam I’ve been using as moss on the chimney.
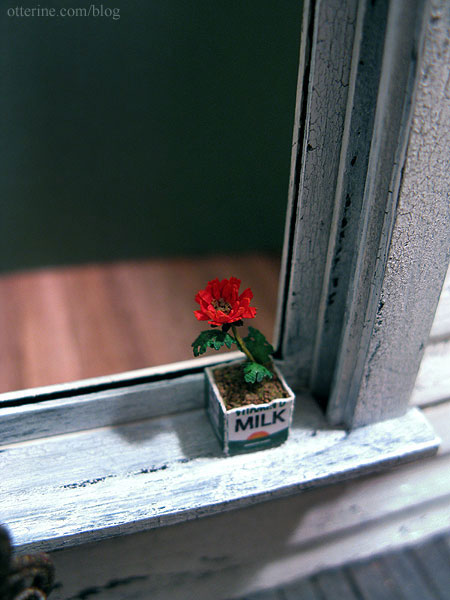
The kit was very simple to put together and the results are so realistic! :D Love!!!!

Categories: Flowers, plants, and trees
November 28, 2011 | 0 commentsHeritage – window upgrade
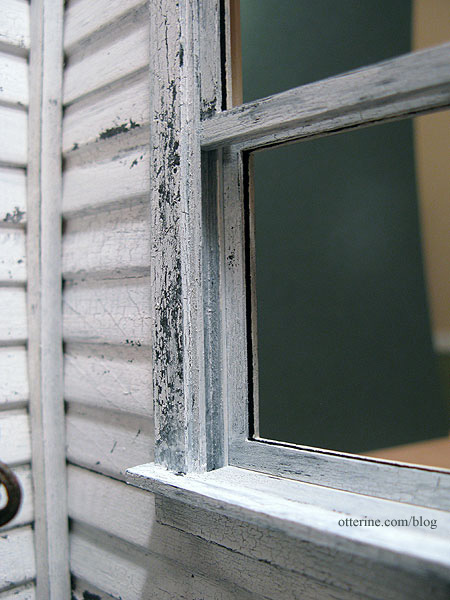
Can you call an old window in need of a paint scraper and some elbow grease a window upgrade? Well, yes, if you are familiar with old splintered die-cut window components. Ha ha. This is a Houseworks working window I am using to replace the original Dura-Craft pieces that just could not be saved. I added wood to the window and to the wall in which it sits to get the proper fit.
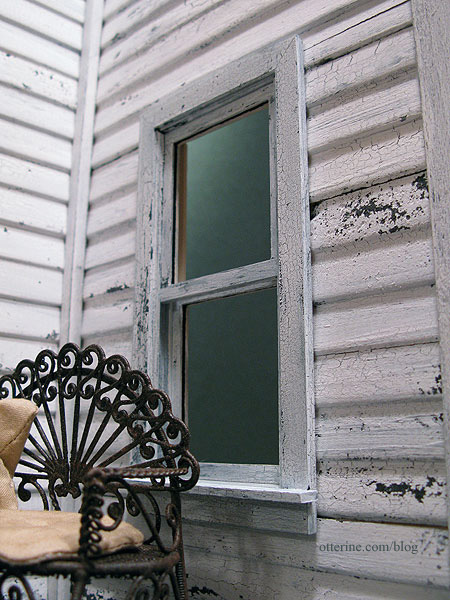
I’ve crackled white paint over a black base for the exterior portions, and the interior has its first coat of Vintage White by Folk Art. I don’t have the glass in yet since I am still working on the interior portion but I popped the main assembly into place to see how the exterior aging worked with the siding. We have a winner! :D
Categories: The Haunted Heritage
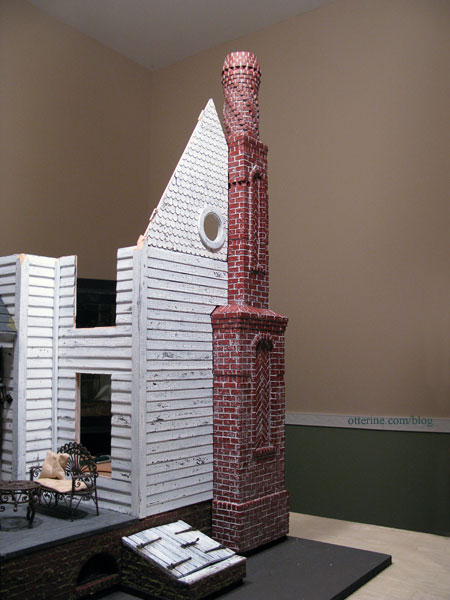
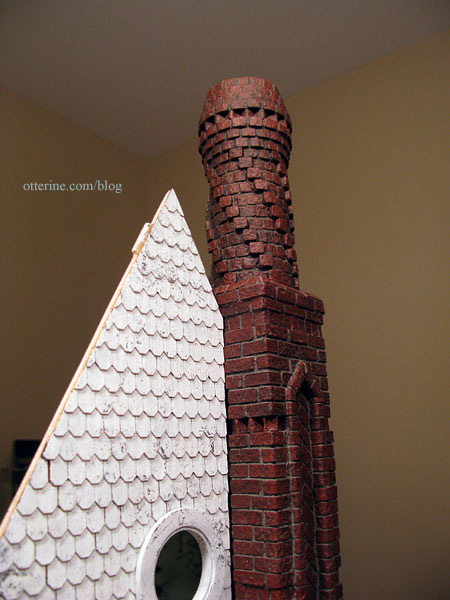
November 27, 2011 | 0 commentsHaunted Heritage chimney, part 8
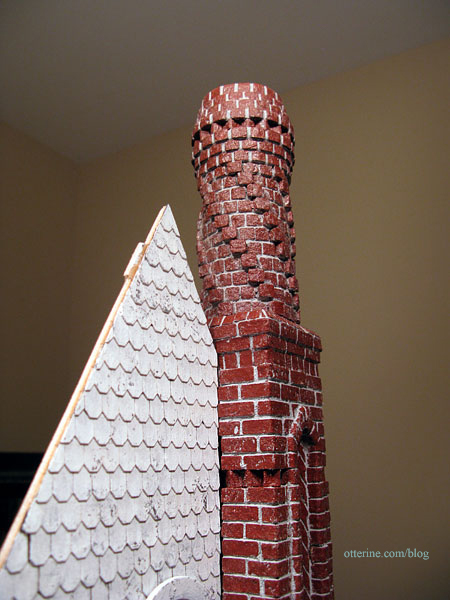
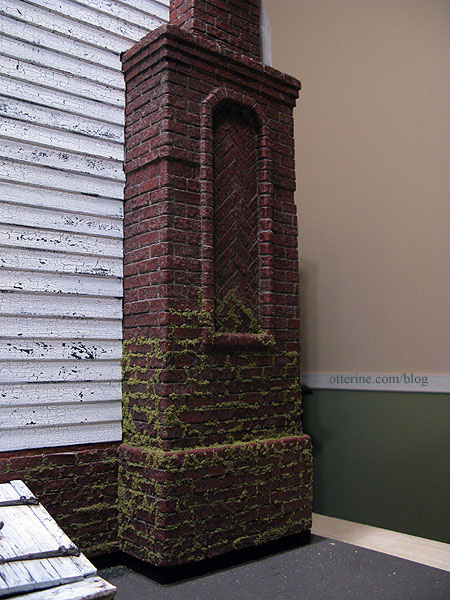
Continuing work on the chimney. After completing the chimney construction, I sealed the bricks with satin varnish to protect the paint. I then used Andi Mini Mortar to grout the chimney in the usual manner. Just this simple step already changes the feel of it and brings out the herringbone patterns and the dimensional portions. :D

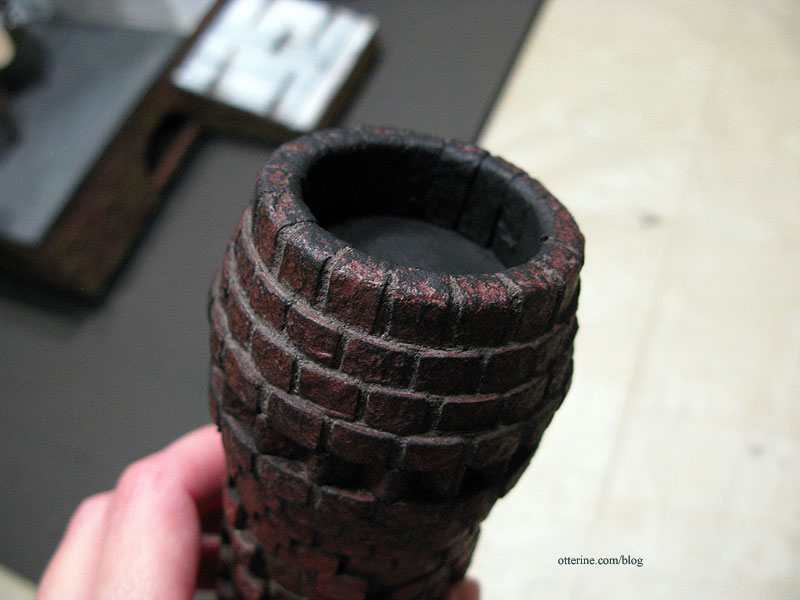
As expected, the topper was more challenging to grout but not as bad as I thought it would be. I rubbed the grout (spackling) into the spaces with my finger on the very top and on the flat surfaces between the spirals. After wiping away the excess, I went back in with a toothpick to remove any excess from the corners around the spiral bricks. I also pushed extra grout into the lines I couldn’t reach with my finger. I used a wet brush to clean the sides of the spiral bricks as well.
All in all, it worked well. There is a bit more excess grout on the topper surfaces but a dark paint wash will significantly tone down the light grey residue.
I love how much solidity the grout adds to the whole structure.
For final finishing, I first aged it with a wash of black, brown and grey paints.
It darkened the grout and gave a more realistic coloration to the brick.
I painted the inside of the topper black and dry brushed black paint on the top lip and over the upper rows of bricks. Grandma needs to call the chimney sweep! :O
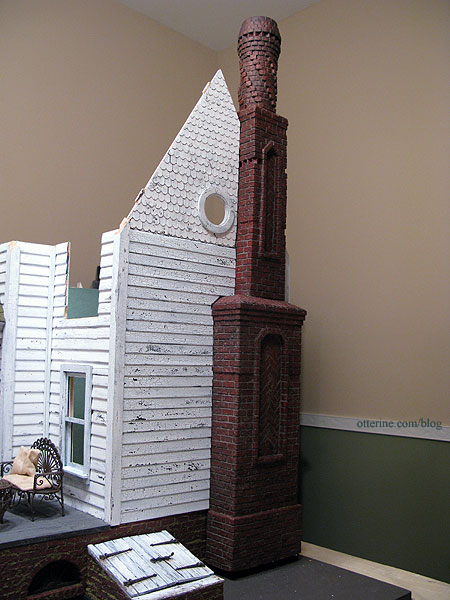
Then it was time to apply the moss: Fine Turf, Burnt Grass by Woodland Scenics. This time I used a glue syringe to apply Aleene’s clear gel tacky glue. It’s faster than applying it with a toothpick, especially when working on a larger area. I don’t apply it to all of the grout lines, just here and there, and on some portions of the face of the bricks. Makes it seem more realistic to me.
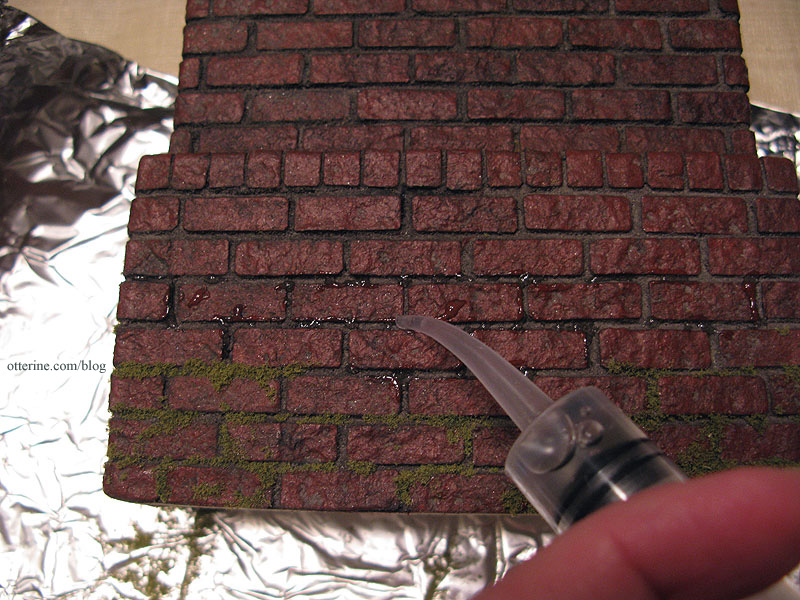
I like to use a plastic container to hold the moss as I work since the bag it comes in can create a lot of static, and you can’t really pour the excess back into the bag without making a huge mess. I also work on a sheet of foil to make it easier to catch the excess and put it in the storage container.
Using my fingers to disperse pinches of foam, I apply a liberal amount over the glue.
I press it in with my fingers and let it sit a few seconds before tipping the chimney and letting the excess fall back into the plastic container. I use a large soft brush to lightly remove the excess.
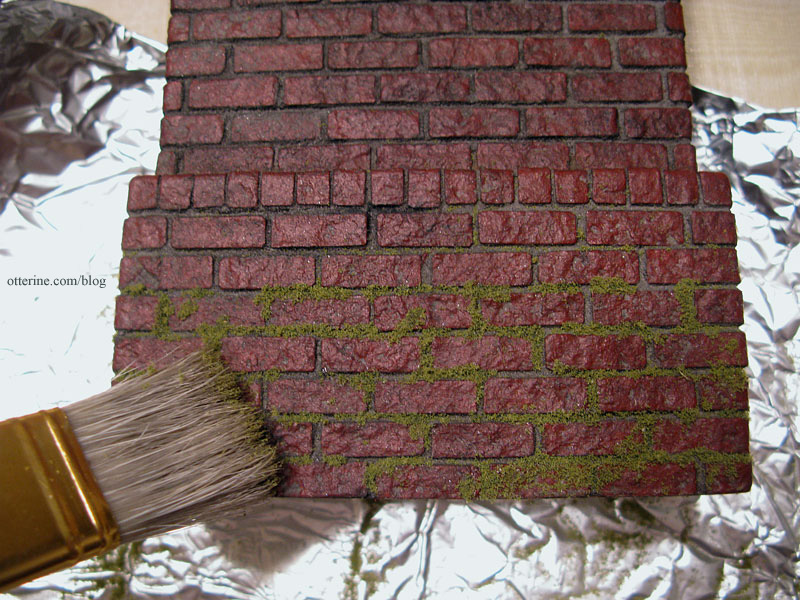
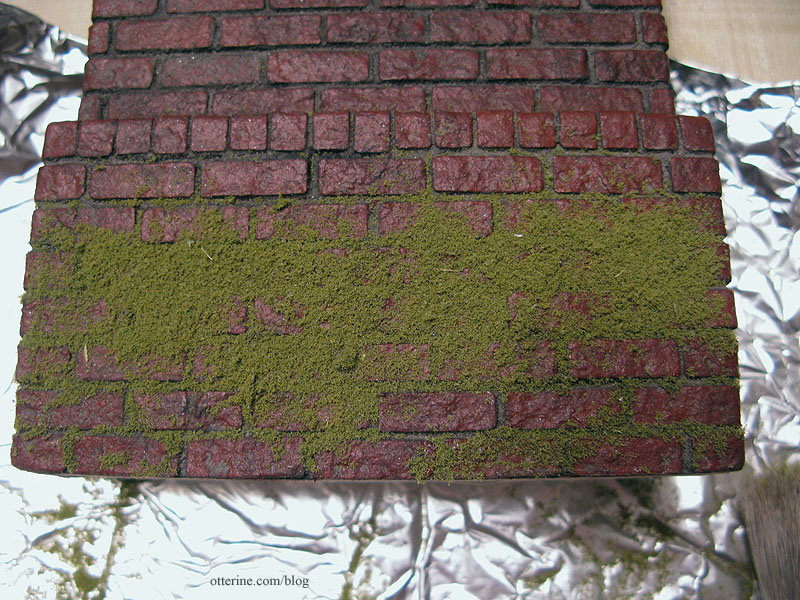
So far so good! Once the glue dries completely, I will brush the chimney more vigorously to remove more of the moss material. The plan is to also taper off the moss toward the top, with only patches here and there. Have to leave some brickwork exposed after all that work!
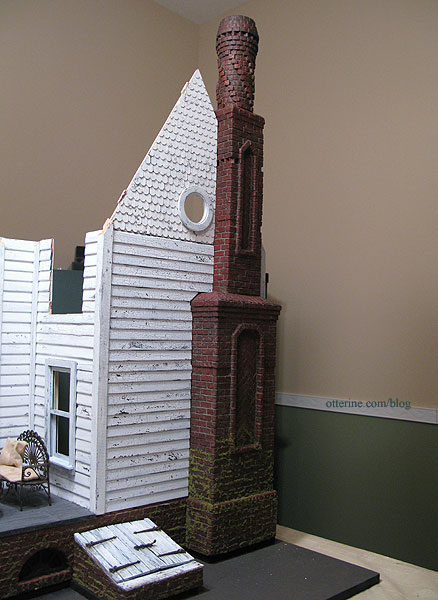
I added more moss along the connection with the house to disguise any minor gaps between the siding and the chimney. Once the chimney is permanently attached, I’ll add a bit more moss in the gaps to fill in. I’m also thinking a dried out old ivy vine would look marvelous!
Categories: The Haunted Heritage
November 26, 2011 | 0 commentsFoyer to kitchen pocket door, part 2
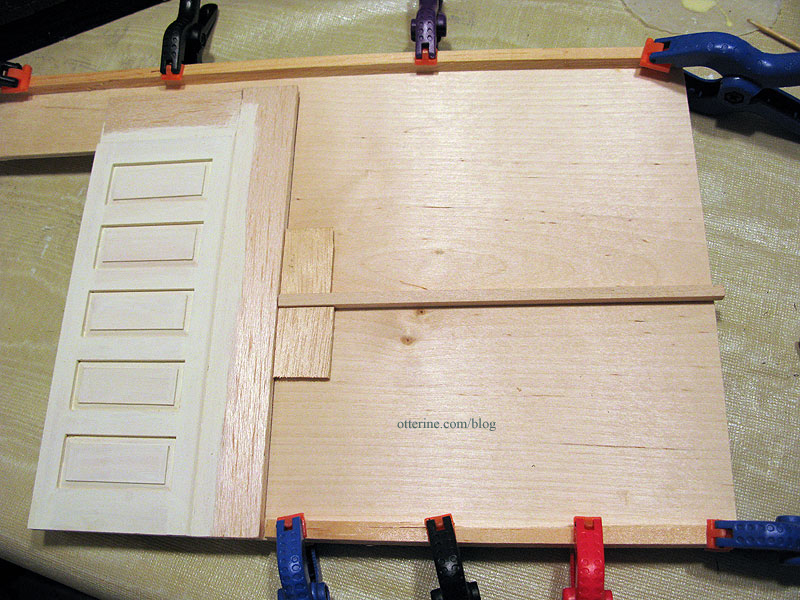
Continuing work on the pocket door. I decided to use 1/4″ thick wood for the inner connectors and pocket door mechanism instead of foam core board, using wood glue to create an especially strong bond. The reason for this is that the wall will serve as a structural wall and I want to cut down on the amount of give and warping it might have. Unlike Kathie’s tab and slot house example, this wall just sits inside the house and will be glued at contact points only, so I need a straight, strong wall.
I asked Kathie what she would have done differently, and she said she wished she had built in a way to open and close the door from the outside, like a string. As it is, she has to reach in to show that it works, and that requires the removal of furniture.
That got me thinking! How about a lever that comes out of an opening in the back of the pocket door wall. You would push the door closed and pull it open like a pop-up book. The lever itself could be hinged to lay flat when the door is open.
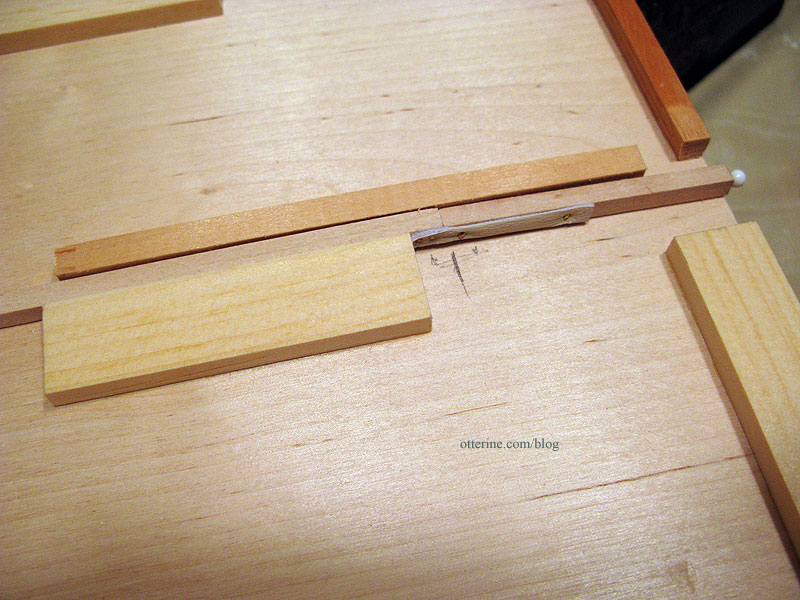
I added a piece of 3/16″ strip wood cut to the distance between the edge of the door assembly and the open back when the pocket door is open, with a little to spare. I added block supports to the end where the lever attaches to the door assembly to strengthen the connection.
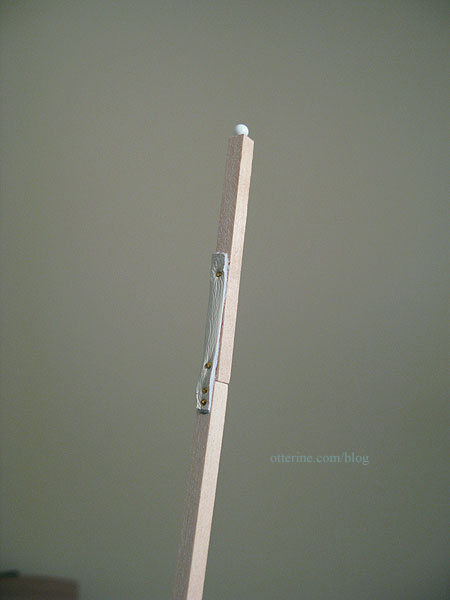
I added a hinge at the end of the lever and added more 3/16″ strip wood cut to the amount needed to make up the difference when the pocket door is closed. Even though there are tiny hinges on the market, I opted for a leather hinge instead. It’s flexible and won’t be damaged with some turning and bending the way a tiny metal hinge might be over time. I used brass brads for additional security after gluing the leather in place. To finish the lever, I added a sewing pin glued into the end.
I used scrap bits of 1/4″ thick wood to create a channel for the door lever, a guide above the door and a stop to keep the door from going too far back into the wall when open. I also finished off the back with 1/4″ thick wood, leaving a larger opening than necessary for the lever. I will cover the back of this wall with a single piece of wood in the end, so these pieces are merely structural and not meant to serve as a clean finish for the back edge of this wall. Before final assembly, I’ll add some more 1/4″ thick wood scraps in the open areas to make sure the parlor wall has enough surface to bond to.
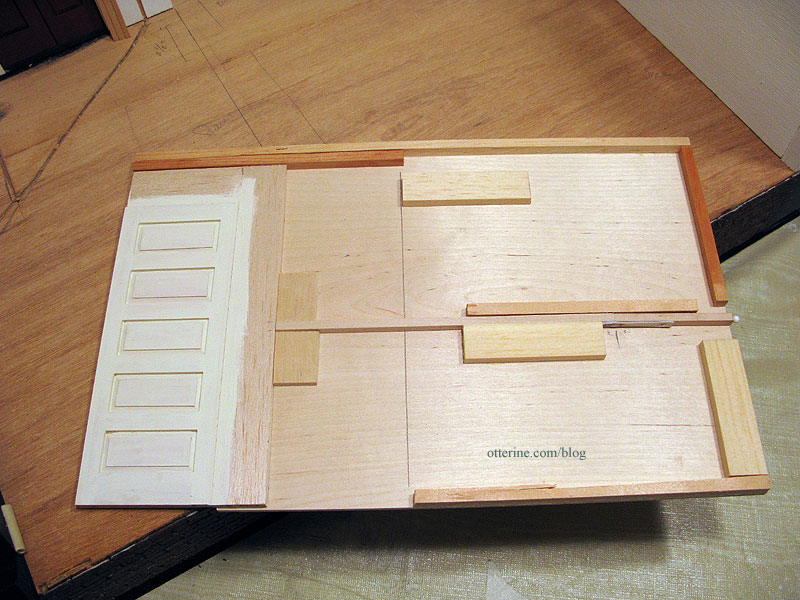
Here are the inner workings with the door closed…
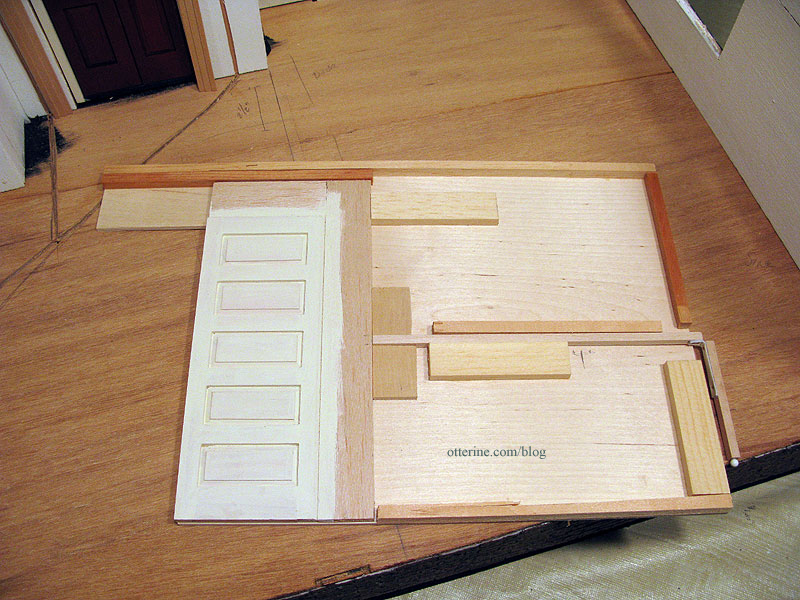
And with the door open…
A close up of the hinge in place.
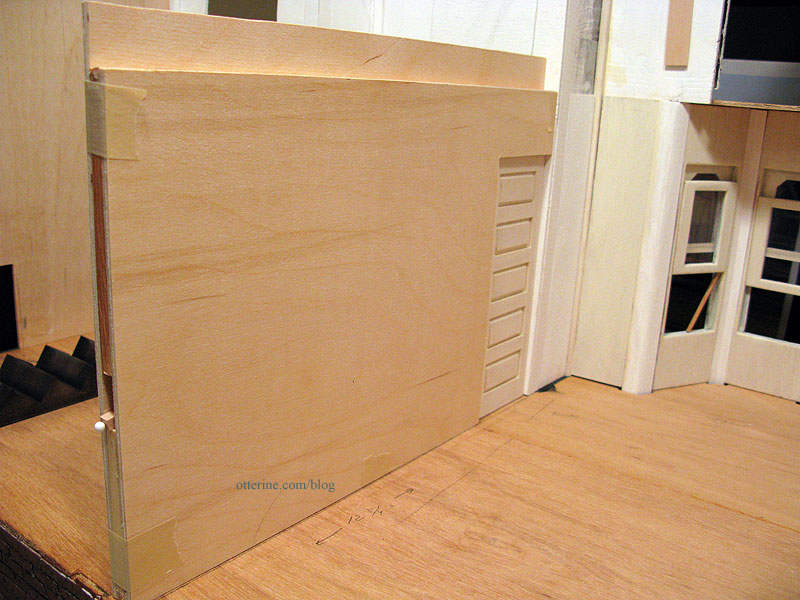
I taped the parlor wall to the assembly and set it in place. The mechanism needs to be treated gently, but it works! :D
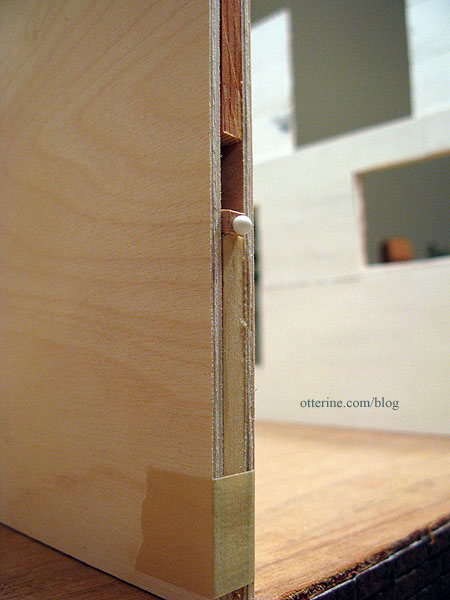
Here is the lever pushed in for the door closed, with the head of the pin showing. It is angled down for now since there is no finishing wood to keep it propped up.
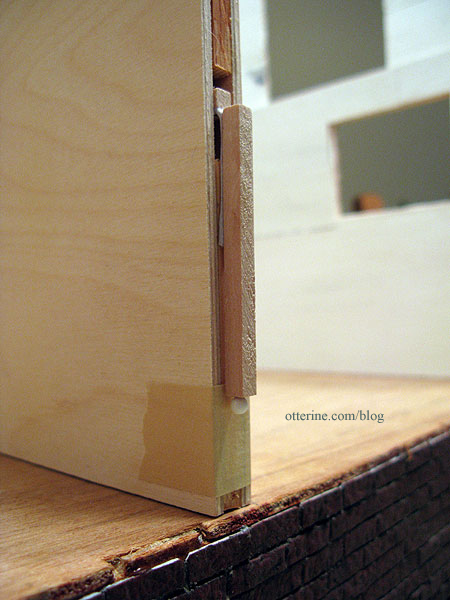
Here is the lever pulled out for the open door, with the hinge allowing the lever to sit flat against the back of the wall. I need to paint the lever, prime the walls and finish the door before I can glue the wall together permanently, but I am so pleased it works!
Fran sent me a suggestion for reinforcing the pocket door hinge: adding a piece of Tyvek to the inner part of the hinge. Tyvek is the strong, waxy paper that tear proof envelopes are made from, and since I work in an office, it is a daily material for me. I snipped a corner from a FedEx envelope and cut a tiny piece for the hinge.
Once glued in place, it keeps the hinge from twisting as it had been doing with the leather on only the one side. And, it’s so thin it doesn’t interfere with the hinge when the lever is straightened. Excellent idea, Fran! Thank you!
Part 3 here.
Categories: The Haunted Heritage
November 25, 2011 | 0 comments


NOTE: All content on otterine.com is copyrighted and may not be reproduced in part or in whole. It takes a lot of time and effort to write and photograph for my blog. Please ask permission before reproducing any of my content. Please click for copyright notice and Pinterest use.


