

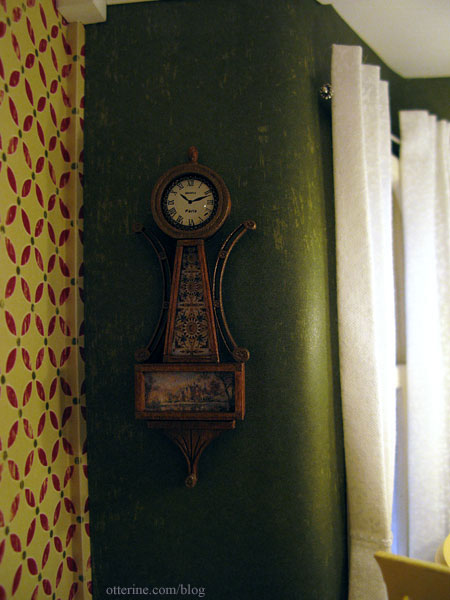
Banjo wall clock
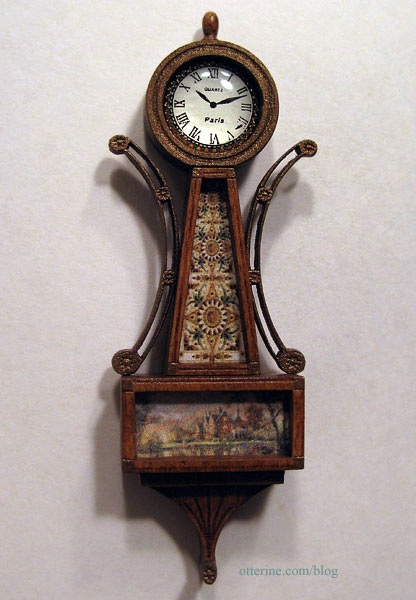
This is the Banjo wall clock from Cynthia Howe Miniatures. It’s a graceful kit with wonderful details.
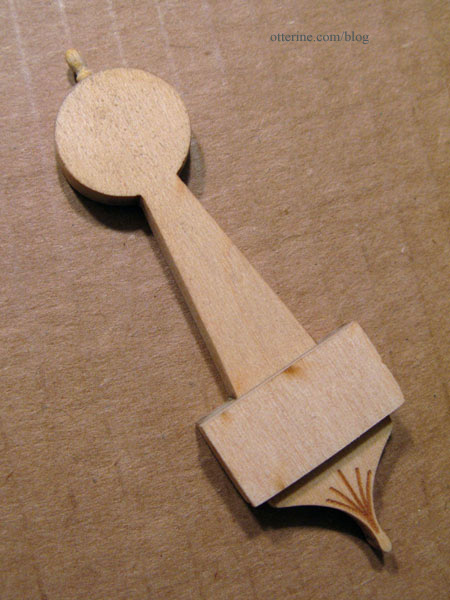
I started by sanding most of the laser cut residue from the sides of the pieces. I also added a belaying pin as a topper after seeing several real life examples with this sort of detail.
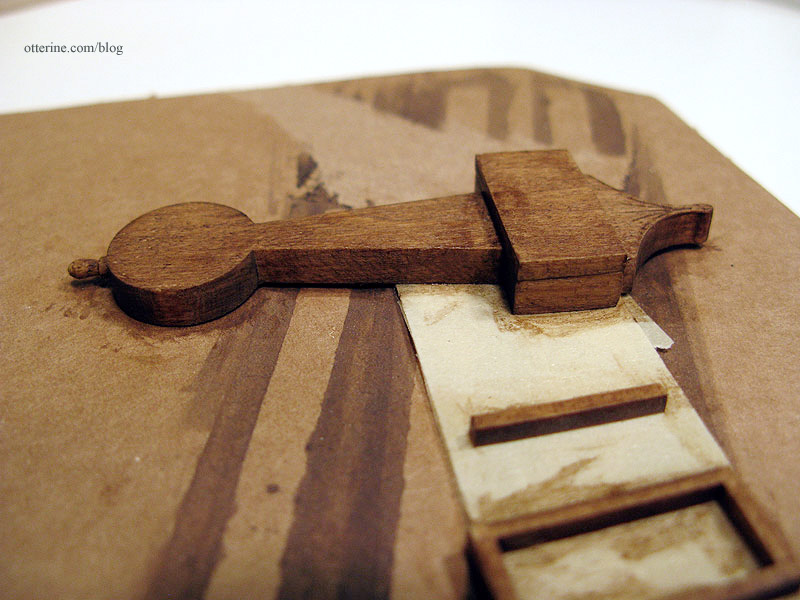
I didn’t want the clock to be lost on the dark green wall, so I used IKEA antique stain, but that was too light. To fix this, I mixed Traditional Burnt Umber acrylic paint with Staining Medium, both by Folk Art. The Staining Medium is gel that makes acrylic paint translucent like a stain. I love the wood grain of these tiny pieces. It will make it look like a real life sized clock.
I used Liquitex Iridescent Bronze paint for the metallic accents and added two light coats of Delta Ceramcoat satin varnish to bring out the beauty of the wood.
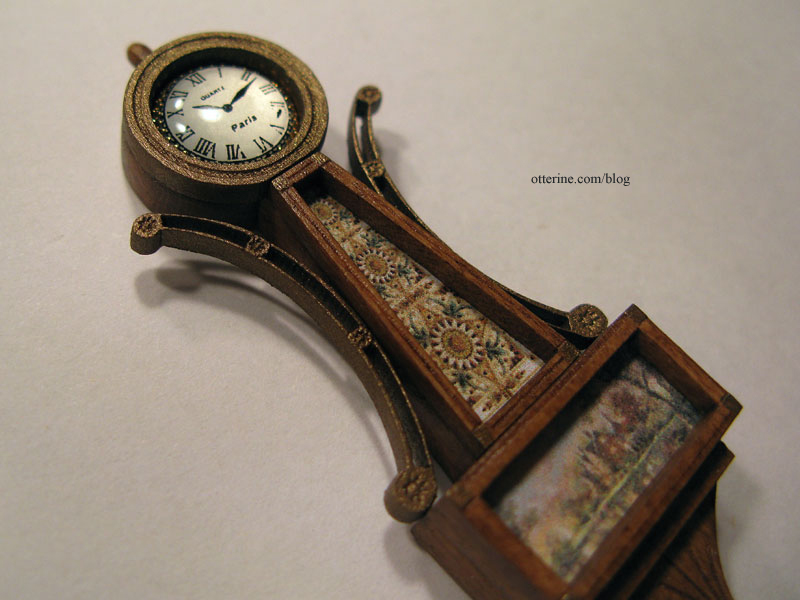
The cabochon clock face is very realistic.
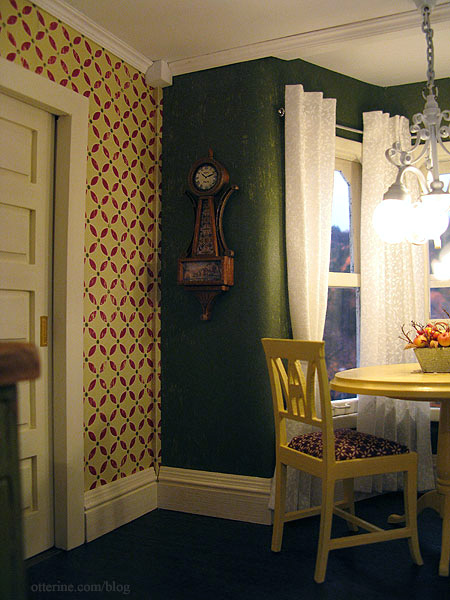
The artwork fits the kitchen décor perfectly.
Love this kit!!!! :D
Categories: The Haunted Heritage
March 27, 2012 | 0 commentsMy old house … or … this place is a dive!
This particular Dura-Craft kit has walls built using strips of pre-milled siding. They are imperfect and therefore the interior surfaces are imperfect. I padded the walls on the first floor for a number of reasons: to allow for the addition of working Houseworks components, to provide a ledge to support the ceiling boards, to eliminate (for the most part) the obvious appearance of the wall connectors, and to smooth out the interior wall surfaces.
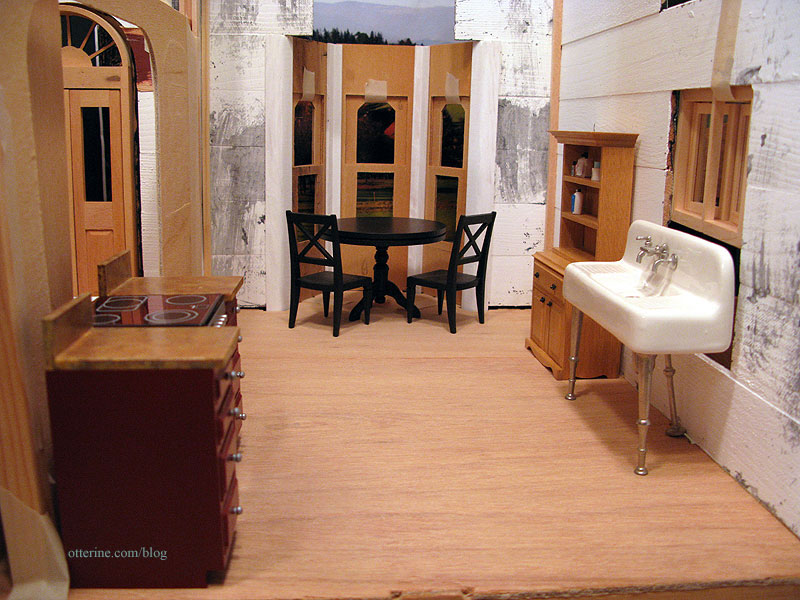
Here’s the kitchen in the beginning of the build where you can see how rough the interior walls are. It’s rather fun to look back and see what it looked like during the planning phase. :D
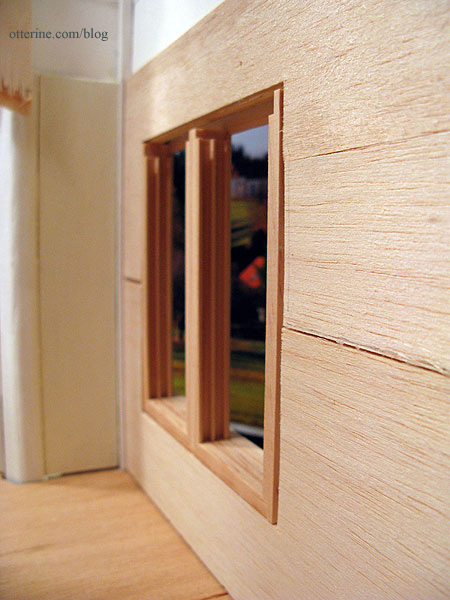
And, after the padding (and enlarging the window opening). Much smoother surface.
Padding won’t work on most the second floor because adding any additional thickness beyond the wallpaper will interfere with the assembly of the swinging windows. Even in the bathroom, where I added a thicker window, there isn’t any give since the added gable shingles make the interior portion of the round window flush with the interior wall.
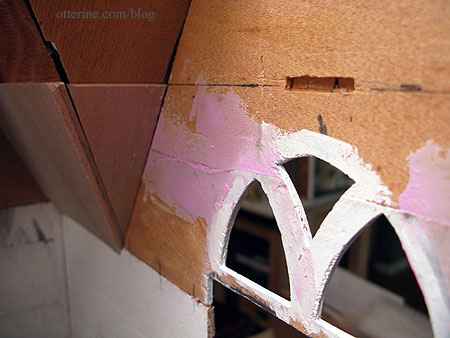
So, out comes the spackling! I did smooth these walls out somewhat beforehand, but this is more for fine-tuning since the two papers I have for the bathroom and bedroom are thin and likely to show the more obvious flaws underneath.
I use the spackling compound that goes on pink and dries white.

It’s easier to see where you’ve put it and you can tell when it’s ready to sand and paint.
I cut the new dividing wall for the bedroom, too. This is a two-part wall: a 1/8″ thick plywood wall that sits atop the kitchen ceiling board and the roughly 1/4″ thick foam core board mockup wall that completes the parlor side of the pocket door wall. (As a reminder, I first fixed the gaps from the roof assembly here.)
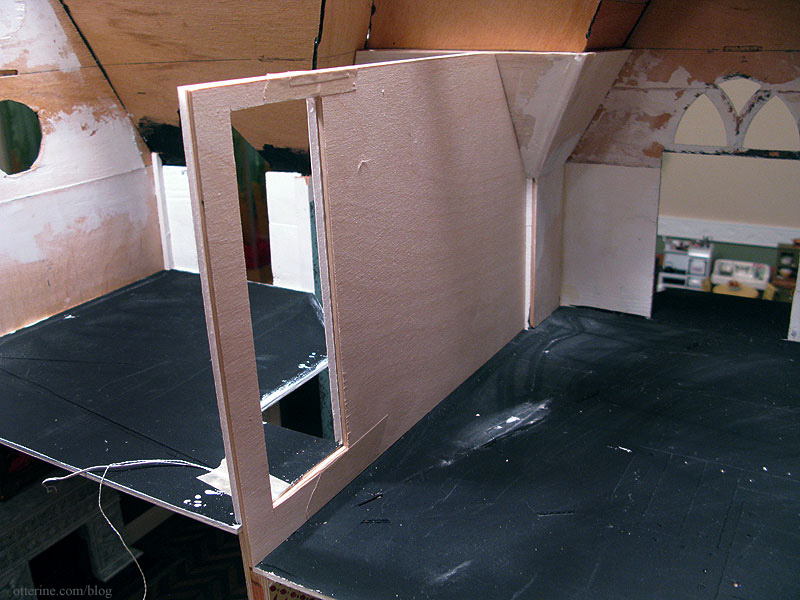
I kept the mockup board and used it as the other half of this wall since the plywood would hold the minimal weight of the attic floor board. In addition, the pocket door wall was slightly warped and I needed the extra thickness to make up the difference.
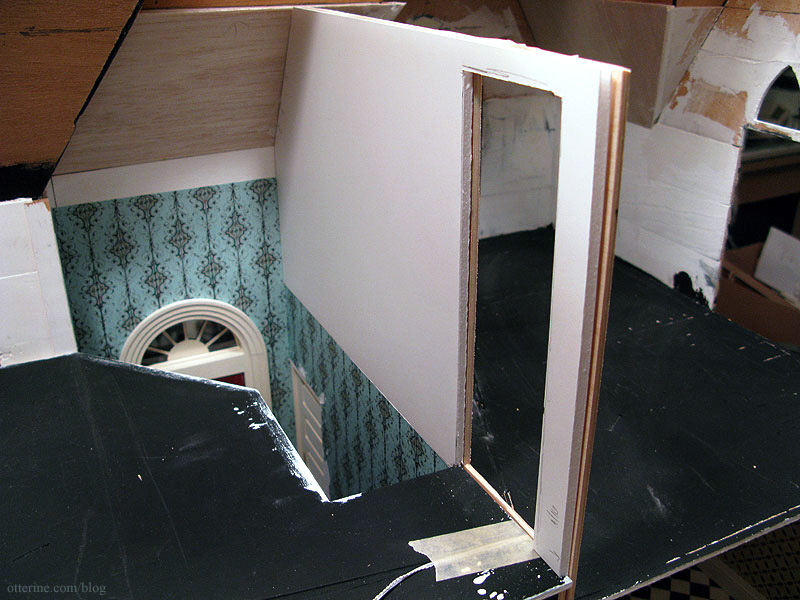
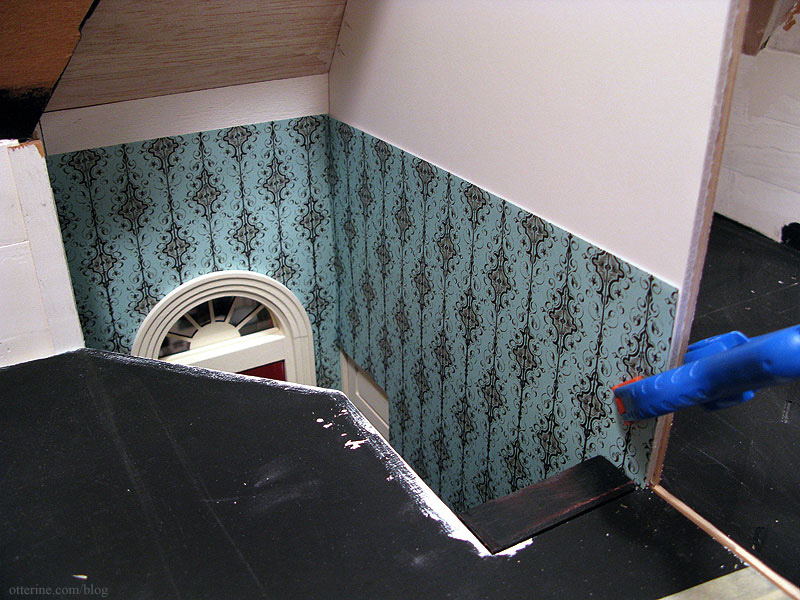
As expected, the line between the cut wallpaper bothered me.
I took off the pocket door trim and plan to wallpaper over the existing foyer paper on this wall, continuing up to the same level as the top of the foyer. I’ll apply this once I glue in the bedroom wall, but I already like it better.
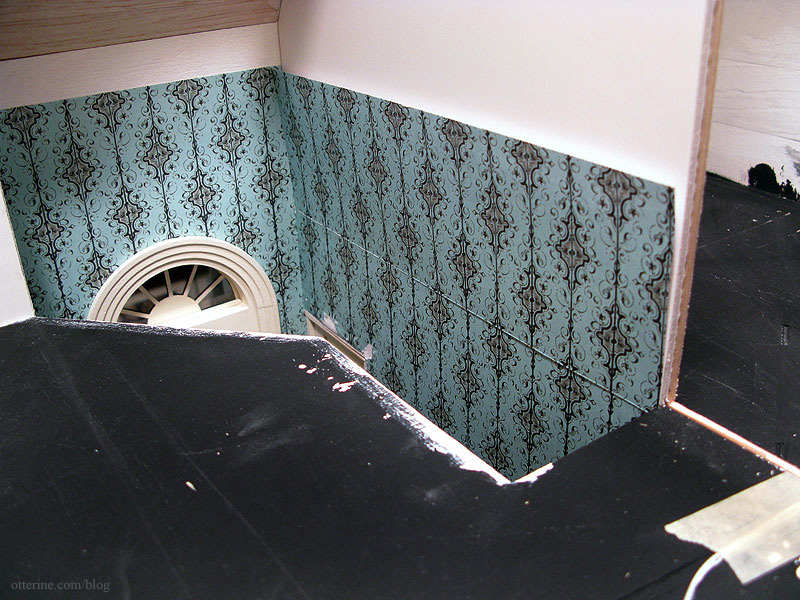
I like the plain wall above, too, so I’m thinking a chair rail height border with a plain off-white wall above the Turquoise Gothic Stripe scrapbook paper.
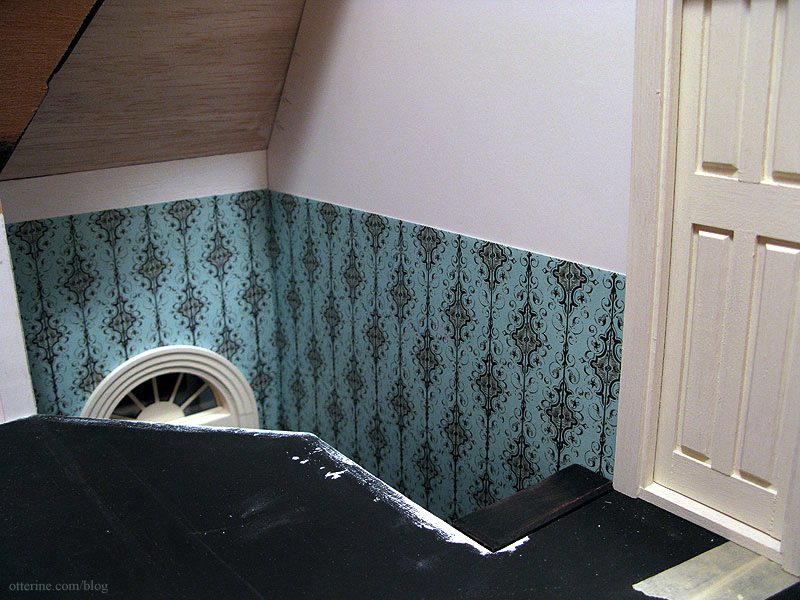
Wallpaper finishing here.
Categories: The Haunted Heritage
March 24, 2012 | 0 commentsHeritage – porch railings
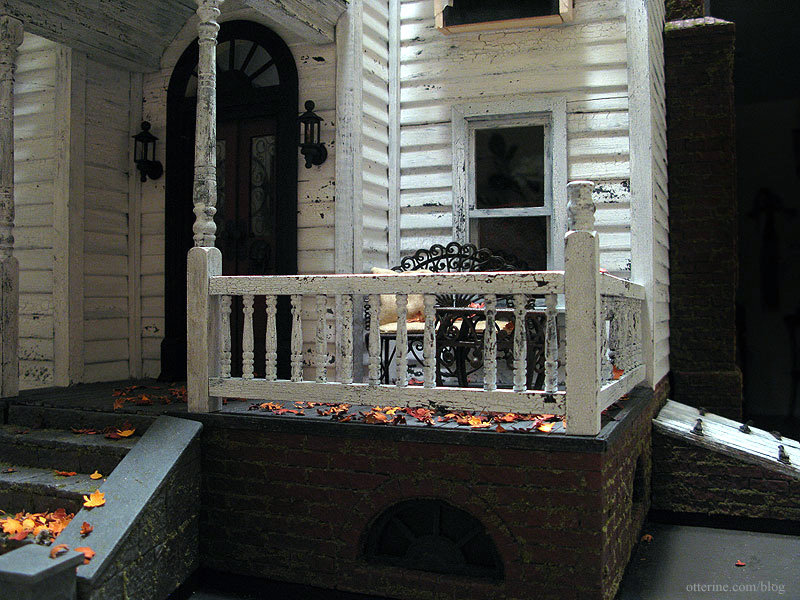
Just a quick side trip back to the exterior. After putting the portico together, I felt the rest of the porch was unfinished. Quite awhile ago, I decided to make the open portion a sun porch. Tonight, I finished up the pieces and installed them.
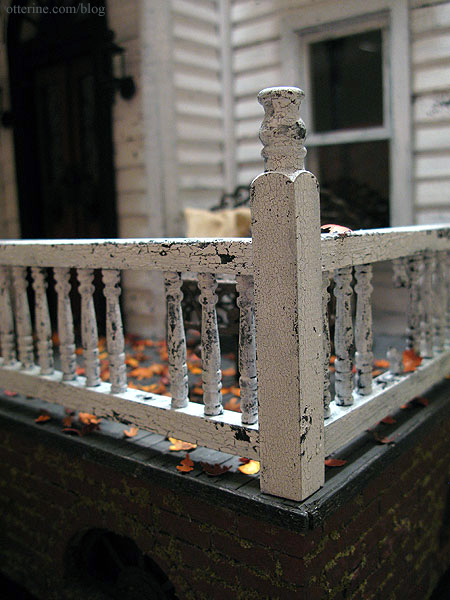
I had previously painted the railings and corner post with an underlayer of black paint. I forgot to round out the edges of the tops, so I went ahead and added that bit of aging before touching up the black paint.
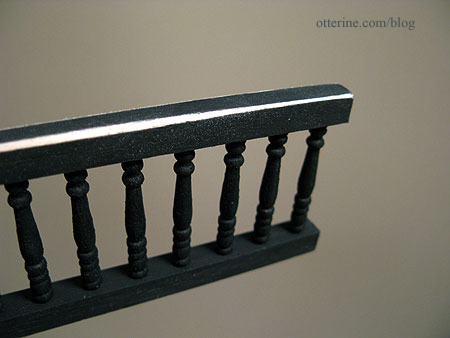
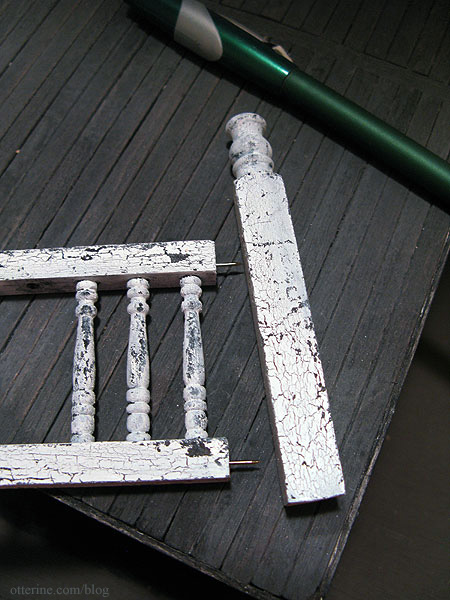
I used crackle medium and followed it up with white paint. I used headless pins instead of glue to hold the railing assembly together and to attach it to the house and portico. This way I can remove it if I need to for roof shingling and other construction. It’s actually sturdy enough that I could skip adding glue completely.
The corner post is the same as the tall railings used in the portico construction. I cut one down to include some of the turned detailing and rounded out the top by sanding.
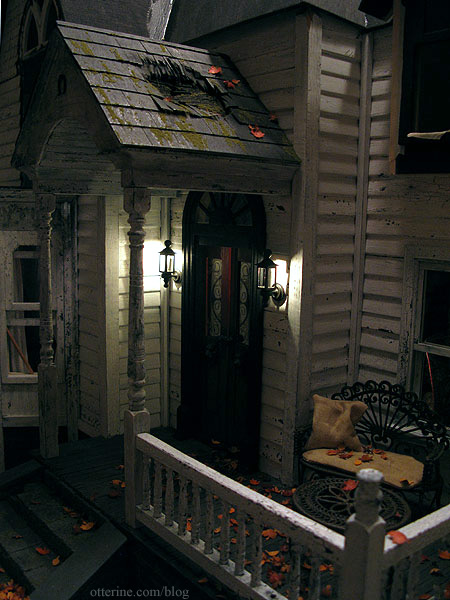
A sprinkling of the leaves I made, and we’re ready for some fun photos!
Even in its worn out condition, that settee looks pretty comfortable.
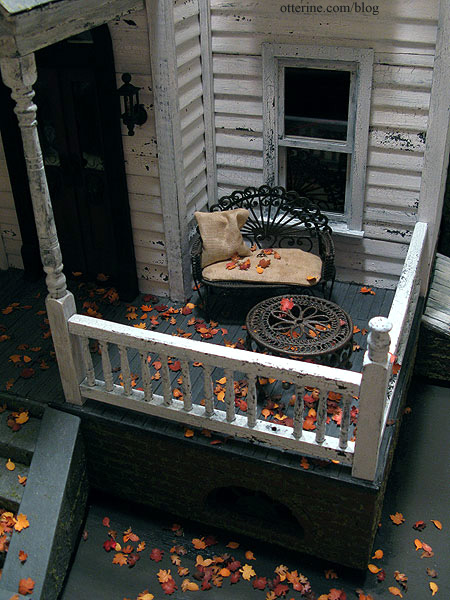
Hmm…what has happened here? Looks like there’s a post or two missing. ;]
Every little detail brings the house to life!
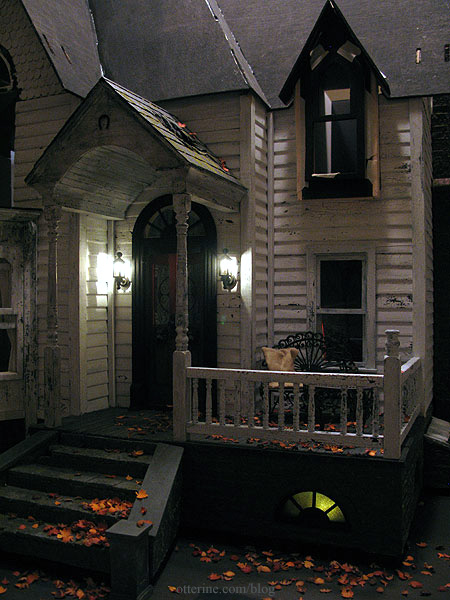
I had fun tonight. :D
Categories: The Haunted Heritage
March 22, 2012 | 0 commentsGrandma’s attic, planning
In my world, grandma is able to navigate those pull down attic stairs easily, walk about the attic without hitting her head and sit comfortably for hours in a space that doesn’t appear to have any airflow for the warmer months or heating for the colder ones. :D To that end, the attic will be a collection of fine (or not so fine) antiques set into vignettes where Grandma can get away from it all.
I recently entered a competition hosted by Minimum World in the UK. Contestants were to submit pictures of their “period” room in any era or design style they wished. I entered the 1920s inspired kitchen from the Heritage. You can see all the contestants and the winner on the Minimum World facebook page.
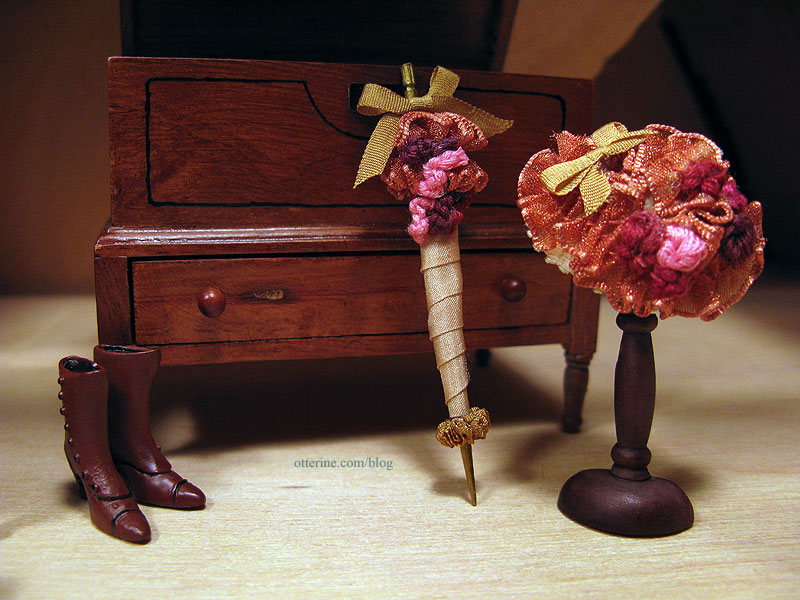
Though I didn’t win the top prize, each contestant was sent a prize for participating. I received my gift today: a lovely set of granny boots, a fancy hat with stand and a parasol by Katy Sue Designs. They are lovely and the perfect addition for grandma’s attic! :D A huge thank you to Minimum World for holding the competition and for the lovely participation prizes!
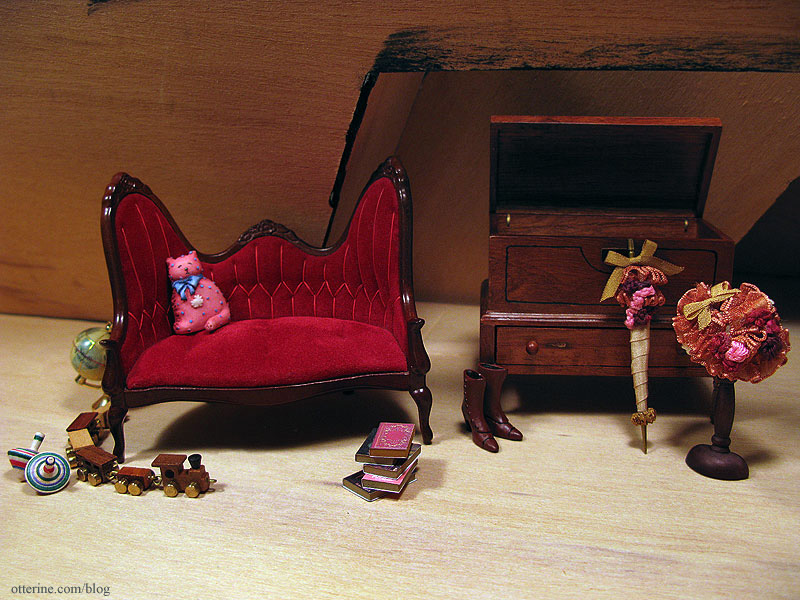
Here are a few other things that might end up in grandma’s attic. I have plenty of ideas up my sleeve, but these are things I already had on hand.
Categories: The Haunted Heritage
March 21, 2012 | 0 commentsRickety persnickety house
Alright, Heritage, I’ve accepted your challenge of rough interior walls, warping and large gaps! :D
I put together the attic floor, though it won’t be glued in for quite some time. I tested the fit against the roof that gave me such trouble. It doesn’t fit in the same places where there are gaps between the walls and the roof. With minor adjustments, I should be able to keep and use most of this board. I know I will have to re-cut the part that fits into the front gable because the gaps are all around and there is no way to attach it to the house.
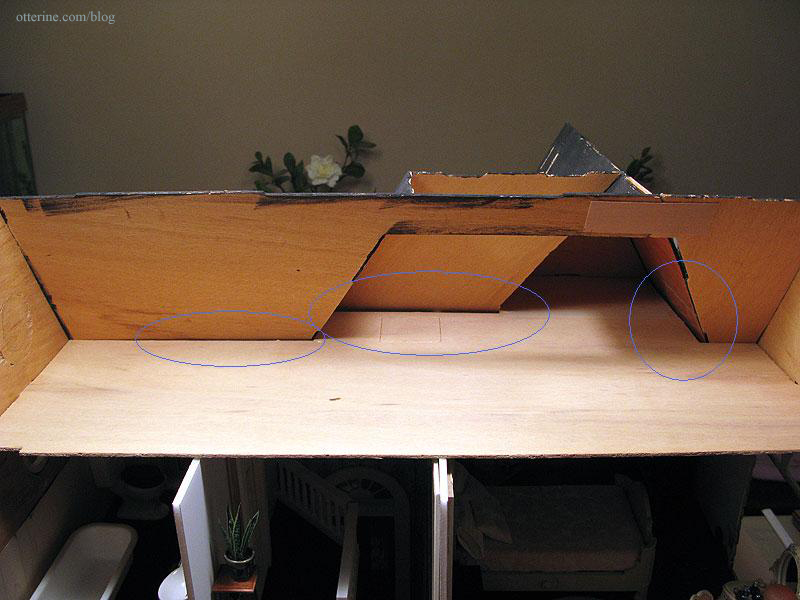
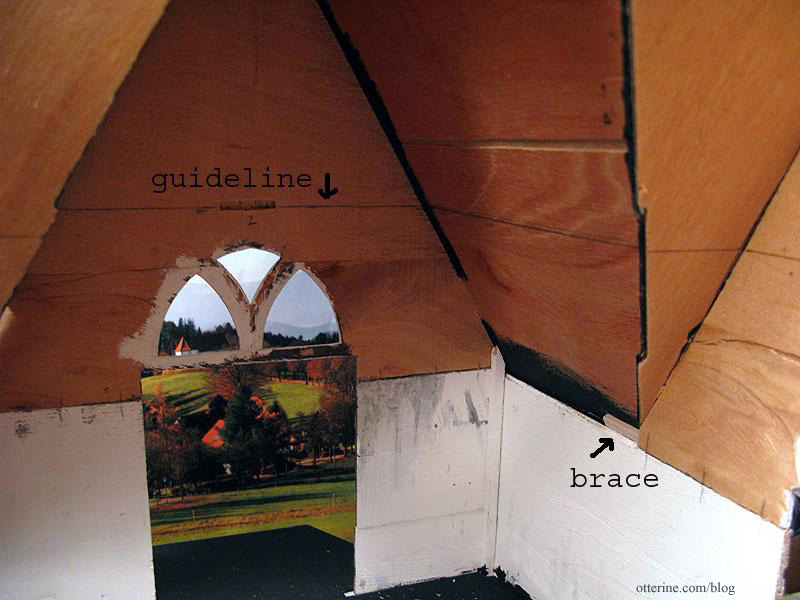
I marked the line around the house where the attic board sits: 7 1/4″ on the bathroom/parlor side and 8 3/16″ on the bedroom/kitchen side. This guideline shows me where the walls end on the second floor.
Now, for the gaps. Even though the two main gaps between the lower edge of the roof and the upper walls don’t show from the outside unless you look for them, light will stream through if they are left uncovered. They also make it difficult to wallpaper since there are uneven surfaces and breaks in the wall.
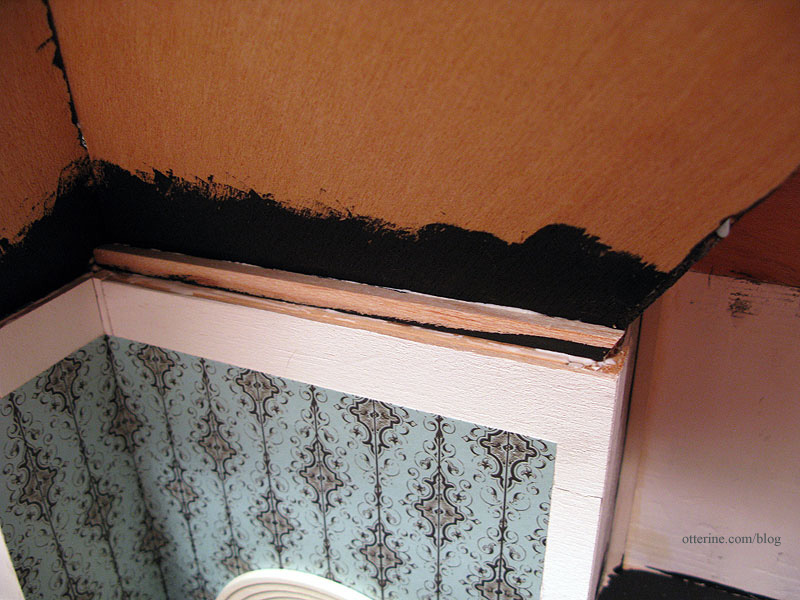
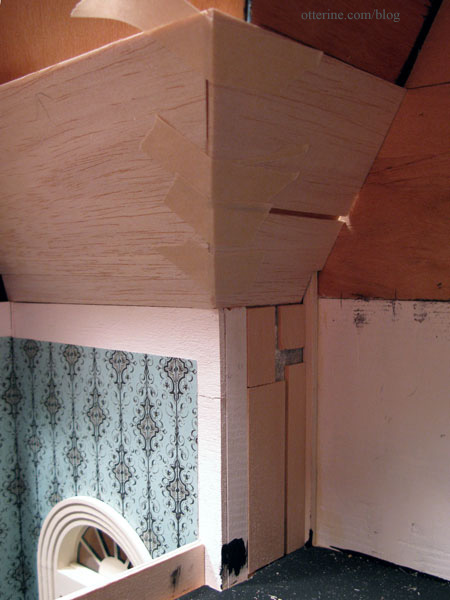
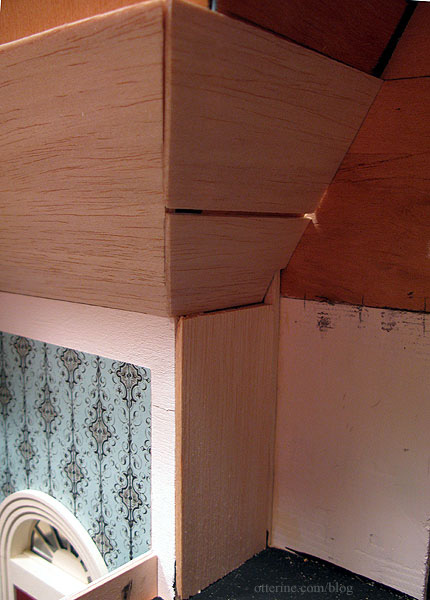
I decided to address the bedroom gap first since it seemed the most straightforward. I needed to join the wall with the ceiling in a fluid manner. I started by adding a scrap wood brace at the top of the wall.
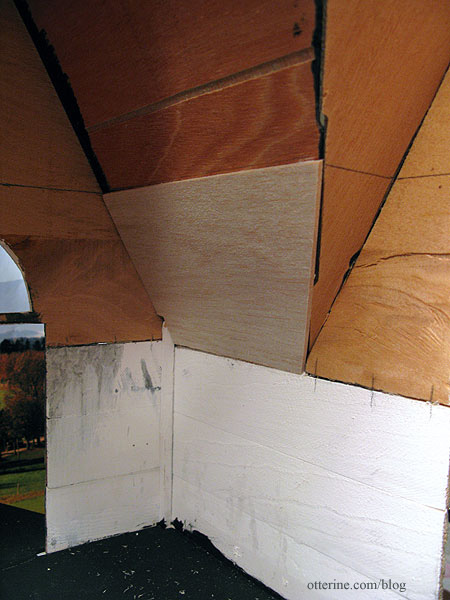
I then covered the surface of the wall with balsa cut to meet the ceiling guideline and the triangular bend in the wall. This minor bit of padding won’t interfere with the fit of the windows and smooths out this entire corner.
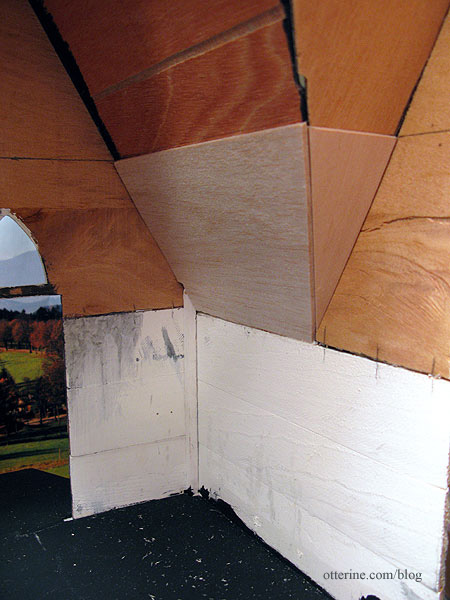
I added a small basswood triangle to finish off the edge. There is now a flat, even surface for the wallpaper.
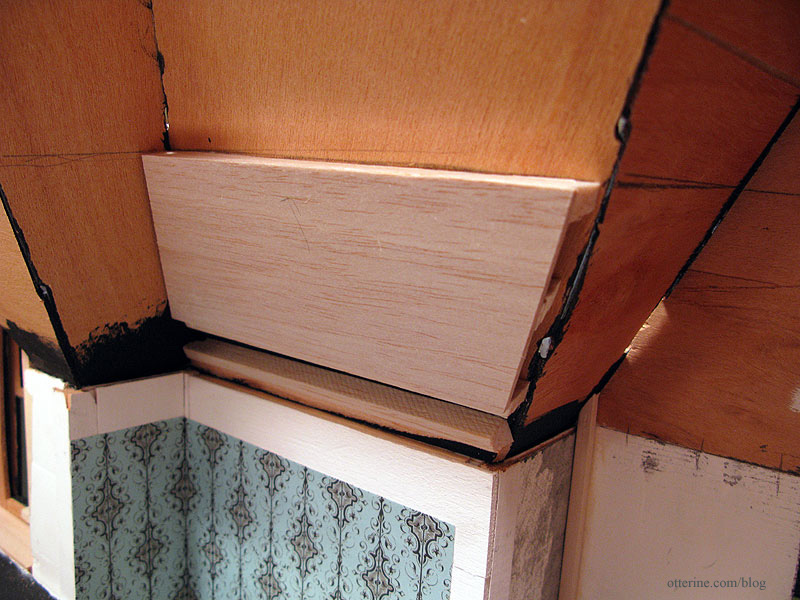
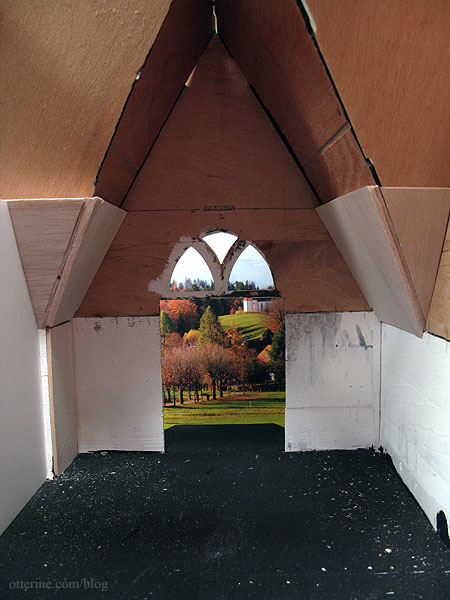
The large front gap in the two-story foyer was at least uniform. I built up the front wall with strip wood and used black paint on the side that might show from the outside (if you were standing on your head and looking where you shouldn’t be looking).
There was more to build up on this wall, so I made makeshift rafters, cutting the top one at an angle to support the attic floor. I’d like to avoid putting in crown molding if possible. If anything, flat decorative trim would be the only thing possible with all the angles and pitch changes in the roof. I also made sure the ends of the rafters followed the angle of the side wall into the bedroom.
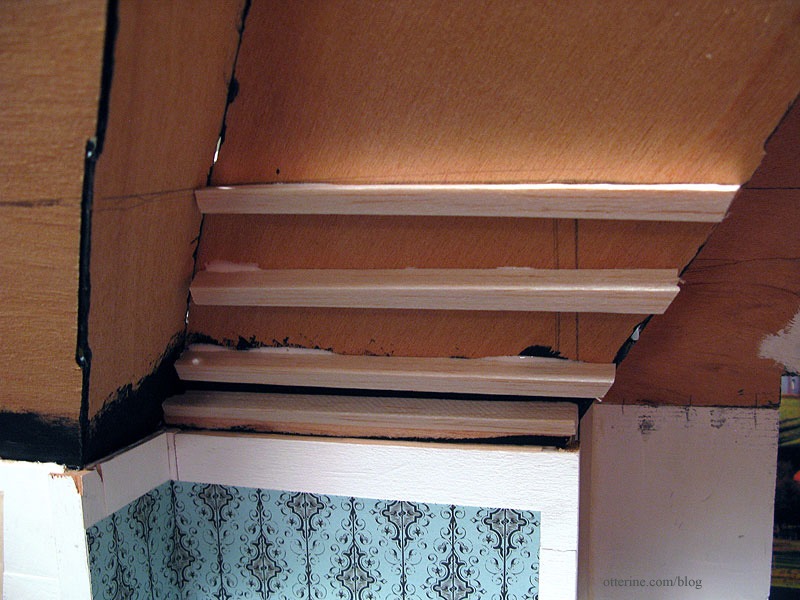
I cut pieces of balsa sheet to cover the rafters, using two layers. The start of the first layer is shown here.
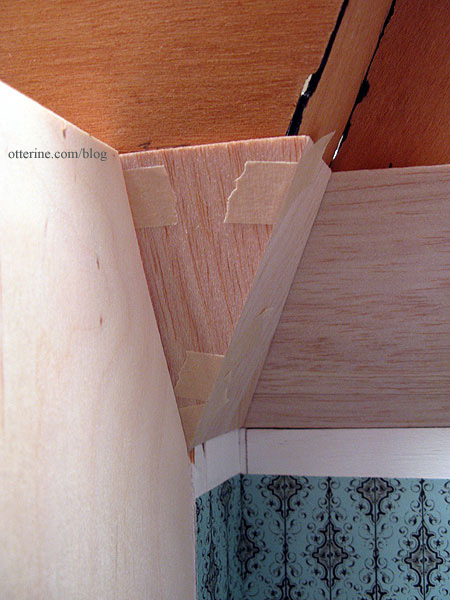
I had to adjust the angle of the bedroom wall template.
On the left side of the bedroom, I finished padding the wall and angled ceiling. I first added scraps of 3/32″ thick wood to fill in to the depth of the inner wall connector.
I then filled in with 1/8″ thick wood to the depth of the outer wall connector. Now I won’t have to wallpaper around those angles.
I finished the angled ceiling with 1/8″ thick balsa to even out the transition between the wall and the ceiling. Since I added more wood to this side than I had to the opposite wall, I added one more layer to that wall to balance out the sides. I have since applied spackling over the few gaps and ends to even out the surfaces further.
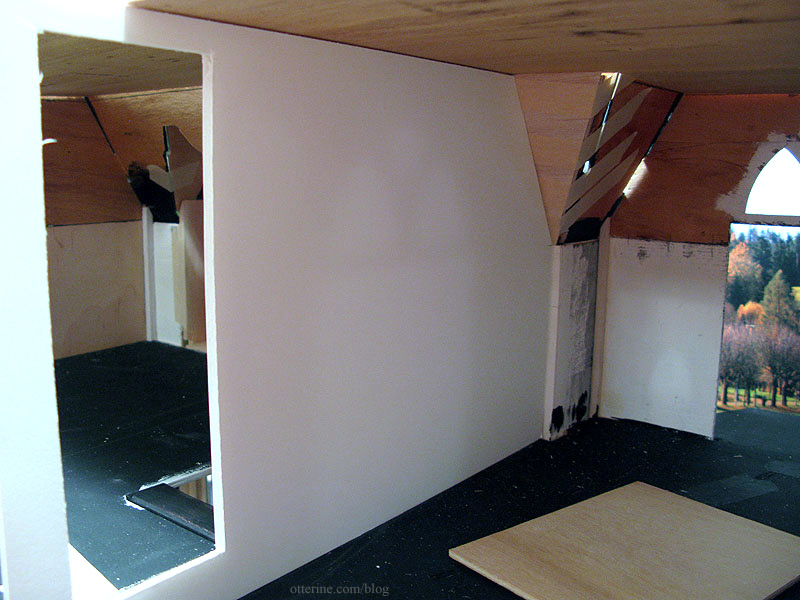
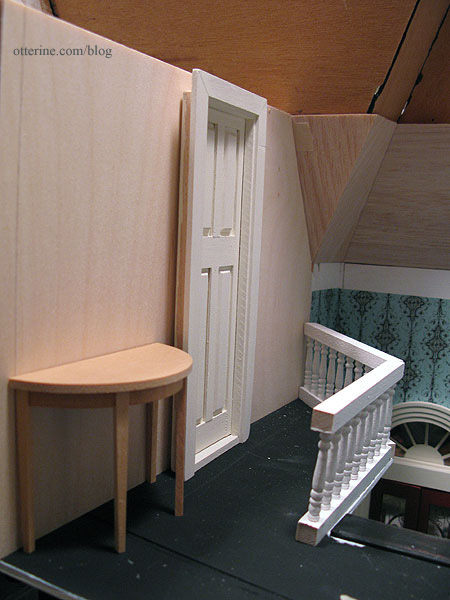
I finished padding the left upper corner in the two story foyer and cut the new bathroom wall from 1/4″ thick plywood.
The wall isn’t yet installed since I need to cut the door opening. I think the House of Miniatures Hepplewhite Side Table will be the perfect addition to this small space.
Categories: The Haunted Heritage
March 20, 2012 | 0 comments


NOTE: All content on otterine.com is copyrighted and may not be reproduced in part or in whole. It takes a lot of time and effort to write and photograph for my blog. Please ask permission before reproducing any of my content. Please click for copyright notice and Pinterest use.


