

Heritage – bathroom finishing, part 1
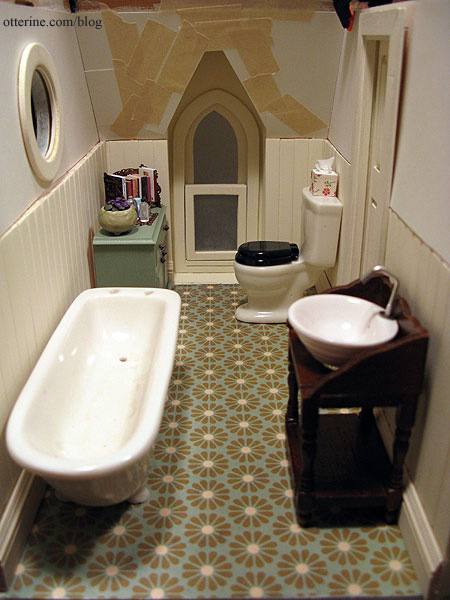
How do you get beadboard to look like it has been painted 50 times? You paint it 50 times. Okay, maybe I didn’t paint the bathroom walls 50 times, but I lost track of how many coats of paint I put on it. At least now it’s relatively smooth.
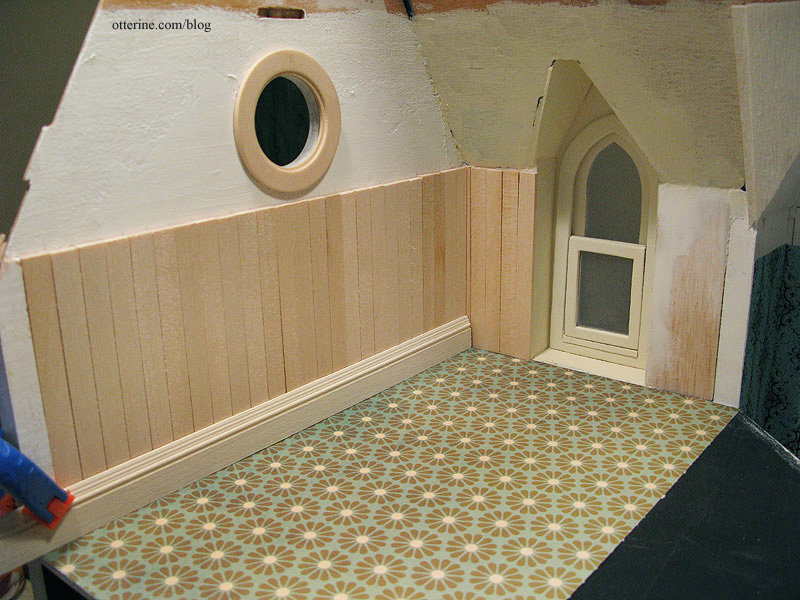
I tackled the flooring next. Using spray adhesive, I mounted the Flower Frenzy paper by We R Memory Keepers onto a sheet of regular drawing paper for stability and then sprayed it with matte sealer. I didn’t want it to be shiny, just a little deeper in color and not so paper-y. I like the way it looks like worn down linoleum.
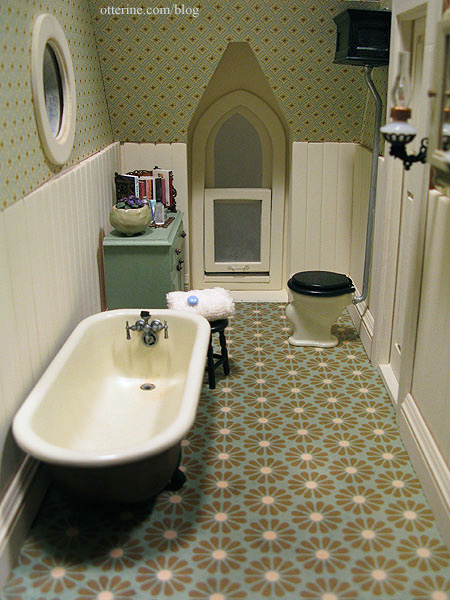
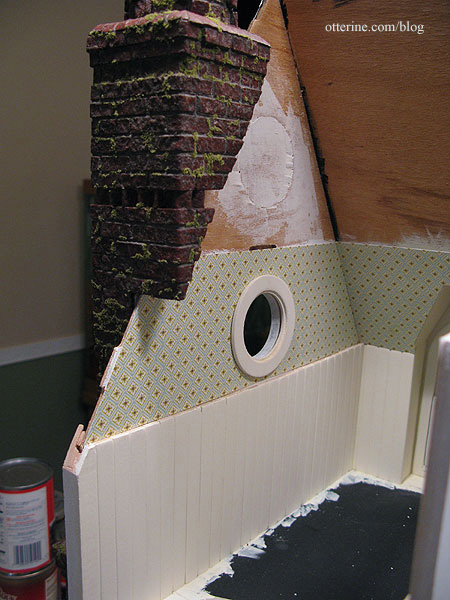
The wallpaper is Cute Little Diamonds paper by The Paper Studio. I don’t have the paper on the front and outer walls installed permanently yet because I need to finish the chimney. I know Keli would have a fit if I didn’t continue the chimney inside the house! ;D
As I mentioned before, I know that the high tank loo isn’t exactly 1920s. But, I’m picking my battles and sticking with the Chrysnbon toilet assembled right out of the box. I used Krylon Gloss Ivory on the loo and flat black on the seat, lid, tank and brackets. I hand brushed Testors Aluminum paint onto the lever and pipe in the tank. I also painted the main pipe even though it was molded with a chrome finish in the original kit. I didn’t want the pipe to look brand new.
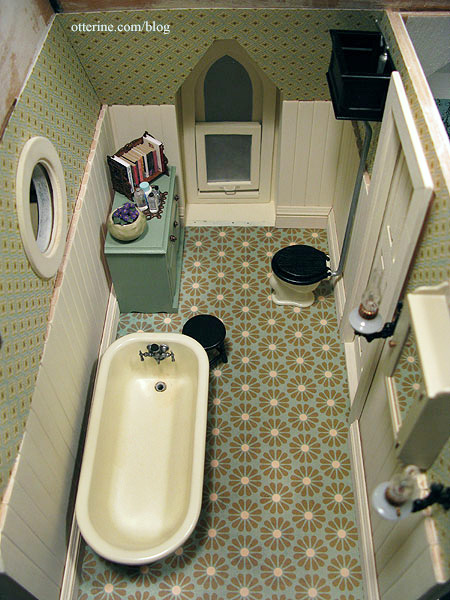
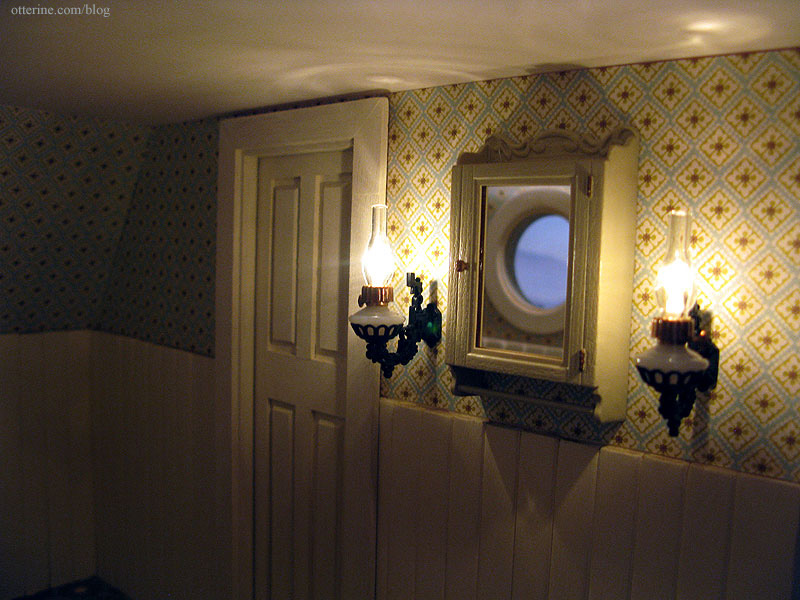
The medicine cabinet is also from the Chrysnbon kit. I painted it with Krylon Almond in satin finish, the same paint I used on the Bespaq bed. I like that it matches somewhat but I didn’t want a glossy finish to compete with the sink. The hinges and knob are painted with Liquitex Iridescent Bronze. I am still working on the Chrysnbon sink.

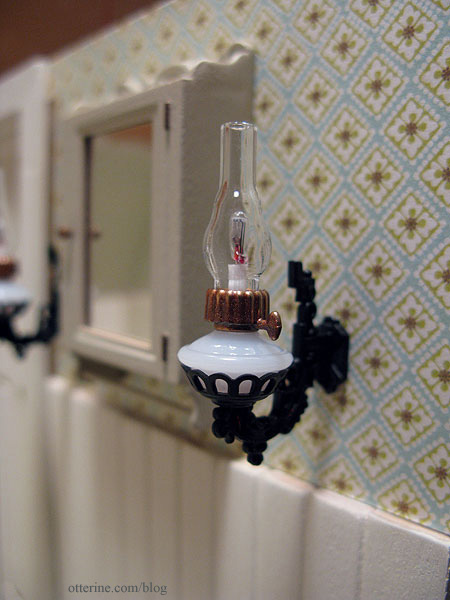
The wall sconces are Chrysolite kits, though I left off the reflectors.
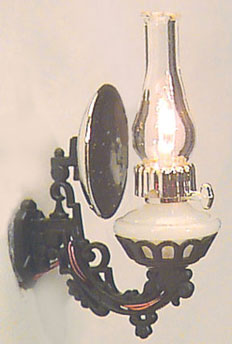
I painted the brass parts copper to match the bathroom colors and switched out the included wires for replaceable bulb sockets. I painted the wires black to make them less obvious.
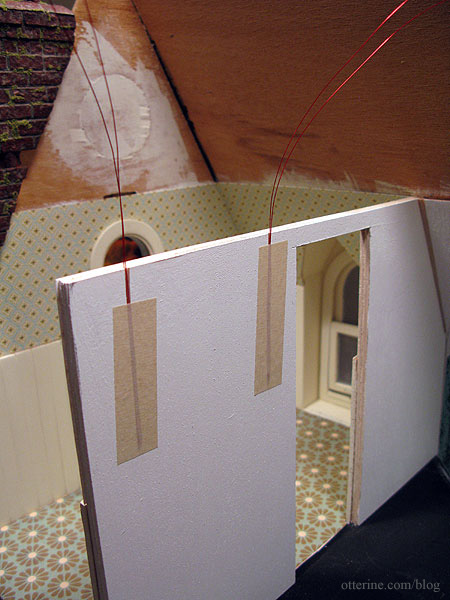
The wires go through the wall toward the hallway. I made thin channels in the wood and taped the wires toward the ceiling. These wires will be directed through channels on the attic floor and out the wall to the space allotted in the chimney.
With a piece of white foam core propped in for the ceiling, I can already tell I am going to love this room when it is enclosed and finished. :D
The door is propped in place backwards (door opening out) for now since it will take some work getting the interior trim in place. The beadboard takes up some of the extra wall thickness, so I’ll need to pad the framing around the top and sides of the opening.
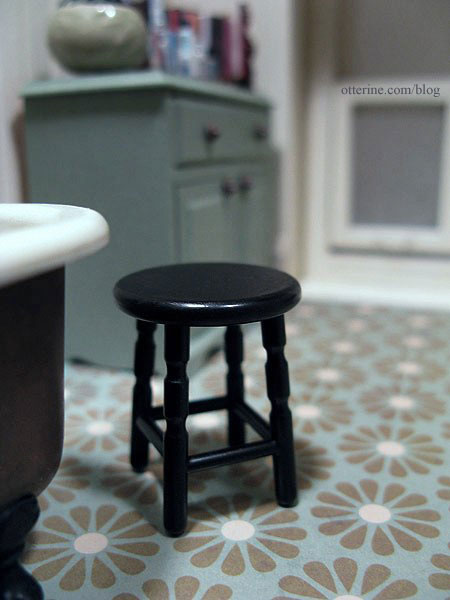
I made the small stool from the bath kit, too. I sprayed it flat black, but the top was rough so I had to follow up with acrylic paint. I topped it off with satin varnish, and now it looks like a vintage piece that’s been painted and painted and painted.
Categories: The Haunted Heritage
April 11, 2012 | 0 commentsHeritage – bathroom beadboard
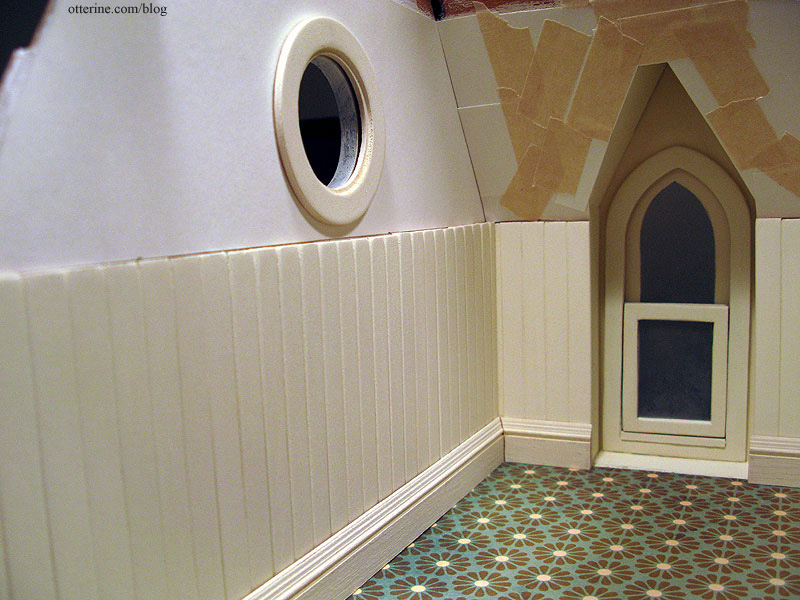
With the window completed, I started cutting strip wood to create a beadboard effect.
The bass wood I’ve been buying lately is in rather rough condition, so it took some work before I could install it. It’s cheaper, and that’s the only positive. I’ve cut the boards the same height as the wall connectors so they blend in.
I sanded each board to remove the majority of the roughness and also sanded the sides while I was at it to make the seams between the board more pronounced. I then painted them Vintage White by Folk Art, taping them onto a painting board for this first coat. I sanded the boards once dry and glued them in place.
I then covered the boards with a second coat of paint. Here you can see the roughness and fuzziness that remains even after all this work.
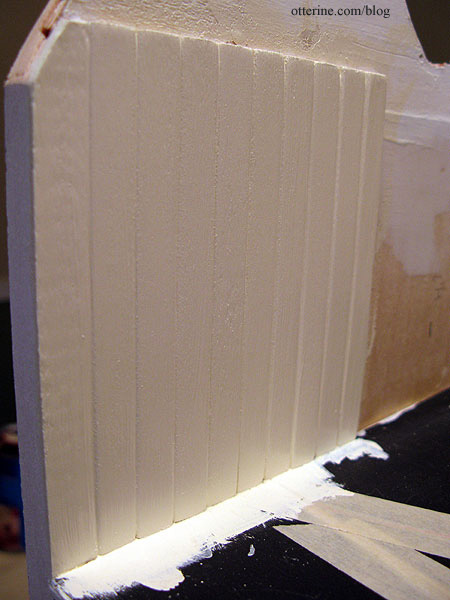
I then sanded again and again in between thin coats of paint. This should not have taken all day! Next time, I’ll spend the extra money for better wood.
I made templates for the wallpaper from regular paper which I’ll use to cut the scrapbook paper. I’ll also add a strip of wood on top of the beadboard to finish the edges. The baseboard trim is cut but not yet finished and glued in place, and the flooring still needs to be sealed and installed.
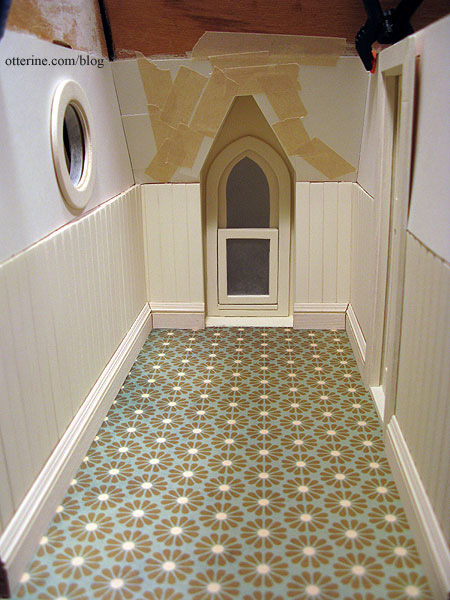
I think the tall beadboard finish adds to the vintage farmhouse look.
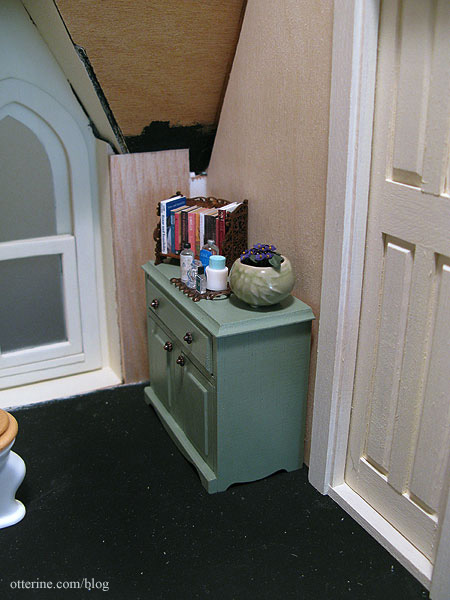
The Chrysnbon bathroom set is being assembled and painted, so I’ve used my mockup pieces again. The cabinet and accessories will be staying as is.
Categories: The Haunted Heritage
April 9, 2012 | 0 commentsHeritage – bathroom padding completed
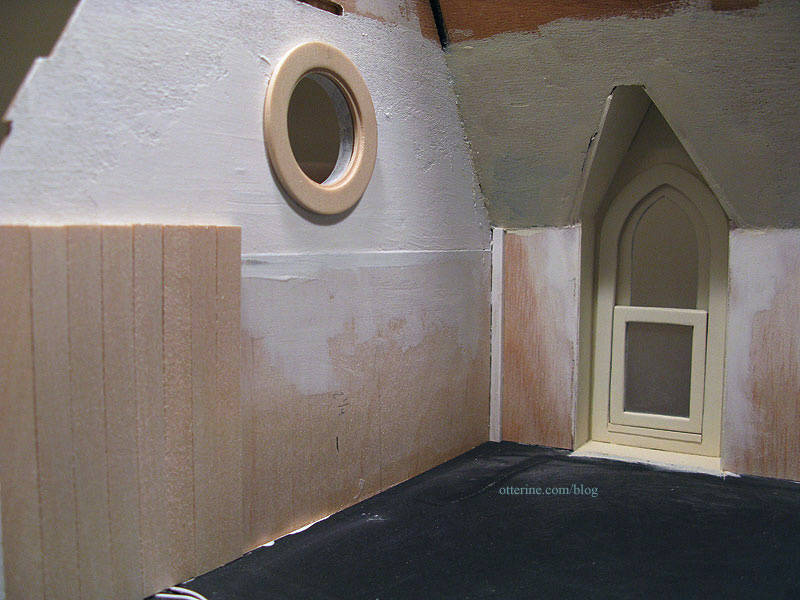
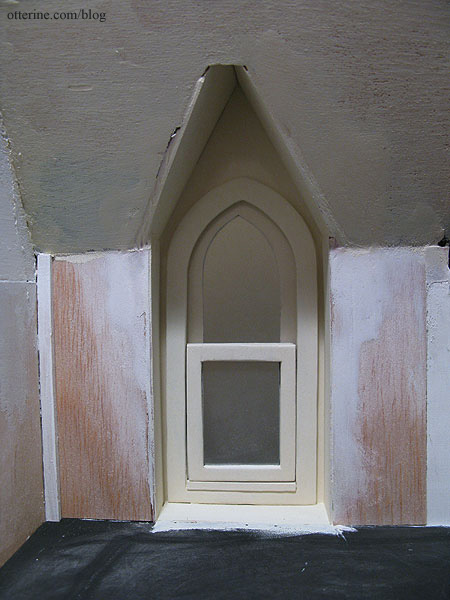
The front dormer window is half kit parts and half scratch build, and as such, it didn’t fit seamlessly. I doubt it would have fit seamlessly even if I had used all kit parts. I padded the lower portion of the front wall to build up the wall for the beadboard treatment I have planned for this room. But, that still left gaps in and around the front dormer window.
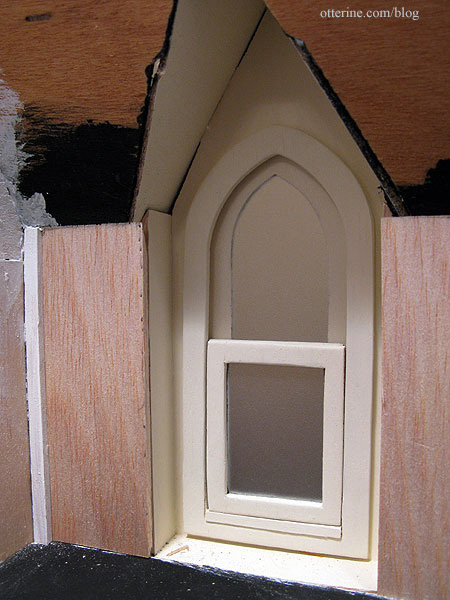
To finish the inside of the dormer window, I decided to add a thin veneer layer to mask the gaps. I first made a paper template of the entire side wall.
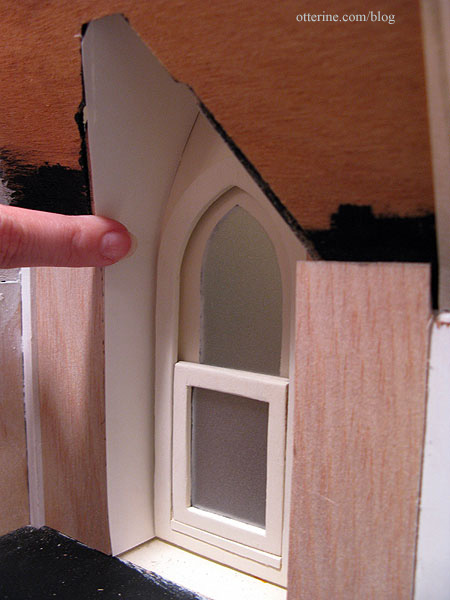
I used that template to cut the pieces of wood veneer.
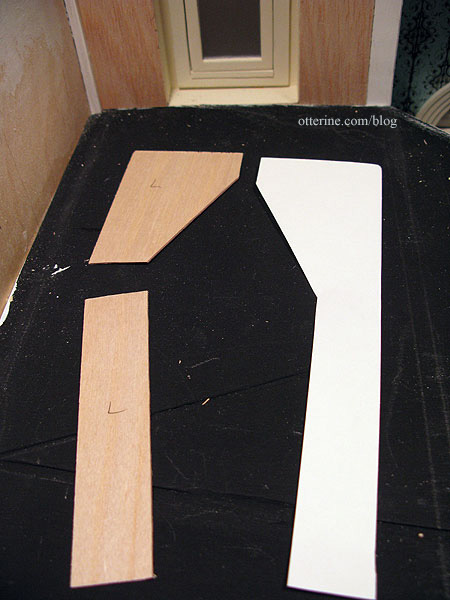

It took a double layer in a few areas, but I was able to even out the walls and eliminate the gaps. I also filled in the floor of the dormer window with a layer of balsa. Since the window is a little crooked, I’ve decided to just paint this area instead of tiling to the outer window wall.

I used spackling to fill in and smooth the joins. It’s roughly done since the main wall will be covered by wallpaper.

I sanded the area, painted the window and primed the remaining front wall. Once this layer dries, I’ll sand again and paint the final layer.
Categories: The Haunted Heritage
April 7, 2012 | 0 commentsHeritage – foyer wallpaper and trim
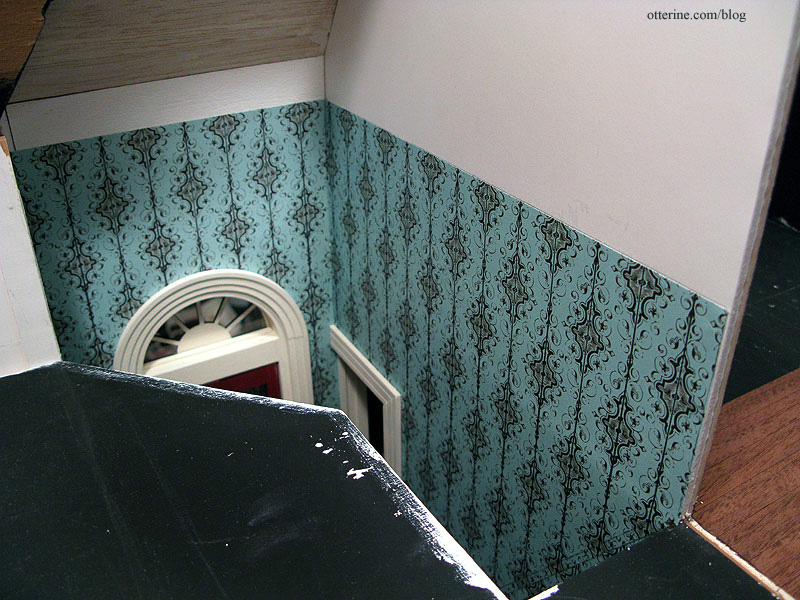
Continuing work on the foyer. I reapplied the wallpaper to the foyer and glued the pocket door trim back in place. You can see a little where the wall has a bump where the upper and lower halves meet, but that actually works for my old, settling house. :D And, once everything is in, I doubt it will even be that noticeable.
I saw a wonderful idea on The Dangerous Mezzo’s blog using what’s called anaglypta – textured wallpaper you can paint. I did some looking around on the internet and found the same one. It was $10 for a roll at the local Lowes.

I used the same cut border portion.
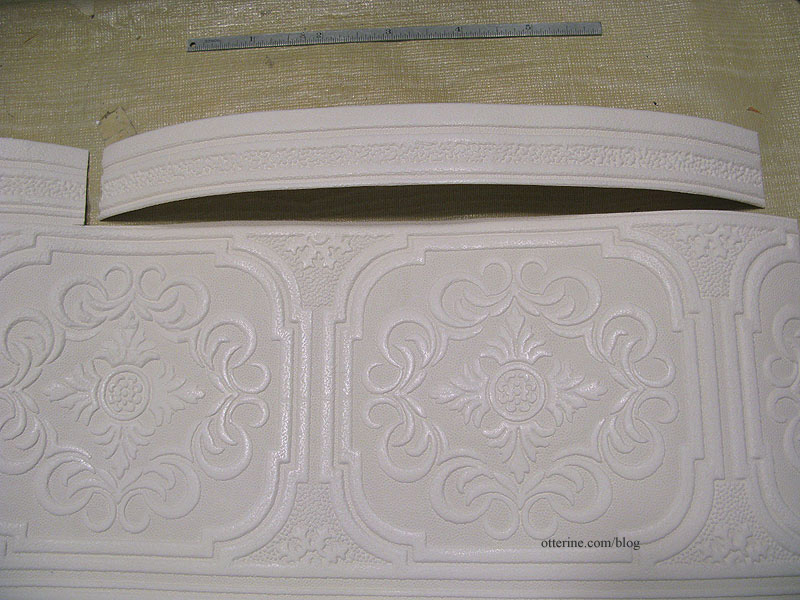
An Easy Cutter helps cut the ends straight.
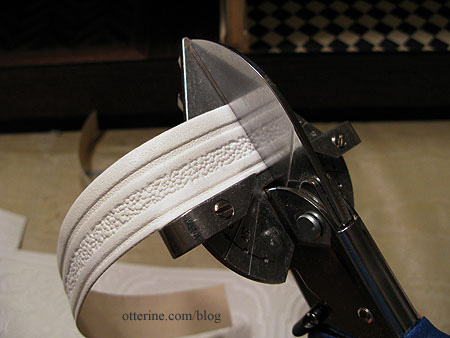
It won’t cut through the material, but it leaves a good crisp line to follow with scissors.
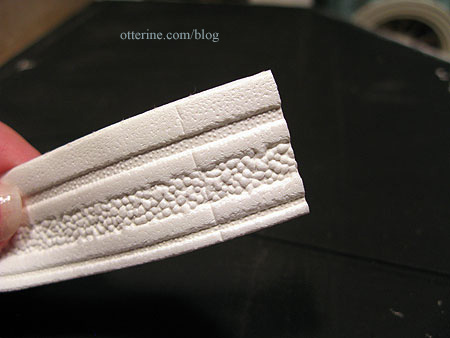
I’m planning to paint this Vintage White by Folk Art to match the rest of the trim, but I’ve put it on the wall with some mini hold wax to see what it will look like. There will be plain off white paper above the border. I think it’s going to look wonderful. It will make the transition between the wall and the ceiling of the foyer blend well and finish off the second floor wall nicely.

From the foyer, it will complement the nice, tall ceiling. :D Love it!
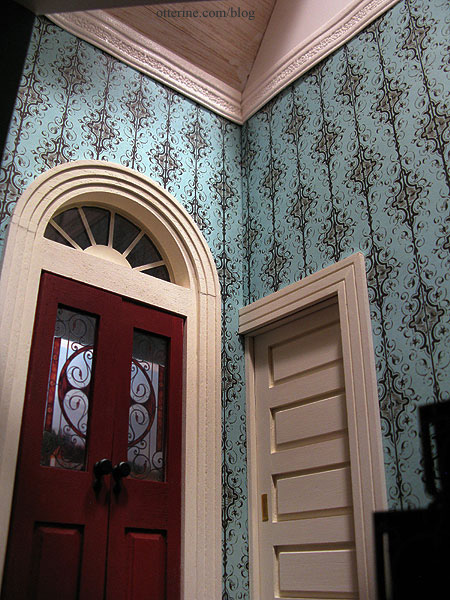
For the upstairs hallway, I opted for a full wall of wallpaper. The only reason I am using the wide anaglypta border in the two story foyer is because the Turquoise Gothic Stripe scrapbook paper has a maximum height of 12 inches and any seam between two sheets of paper would be very obvious. But, there is no reason why I can’t paper the entire hallway-to-bathroom wall with the same pattern. I don’t need to have the anaglypta border on this wall at all since there is no obvious seam to mask.
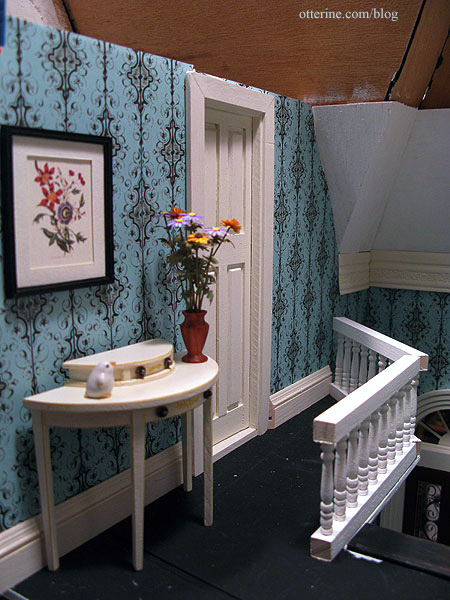
The border will finish off the foyer and terminate where the balcony railing begins on this wall. I won’t be using these railings but building my own. They will be taller and not painted white.
Finishing here.
Categories: The Haunted Heritage
April 7, 2012 | 0 commentsHouse of Miniatures Hutch Cabinet to bath cabinet
love House of Miniatures kits for their adaptability. This can be a quite formal piece, but with some soft Italian Sage paint by Folk Art and some copper knobs made from jewelry headpins it turns into a pretty bathroom cabinet.
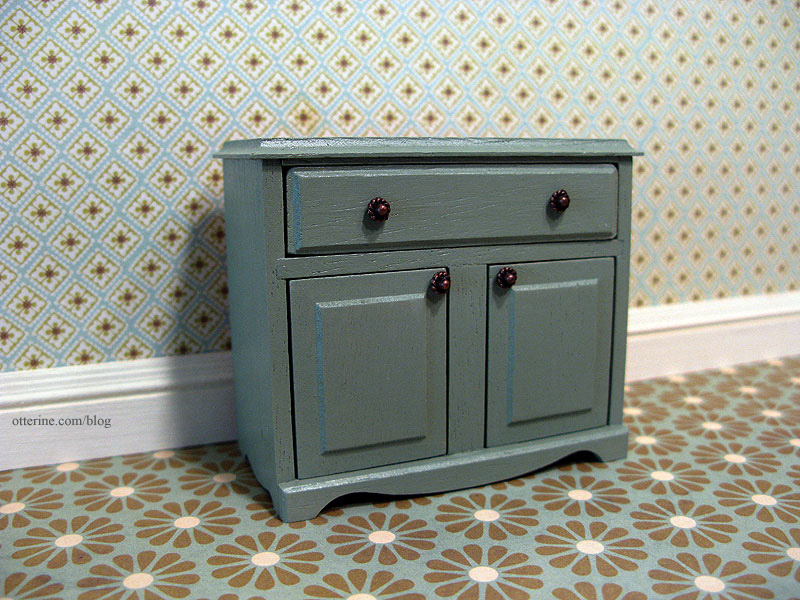
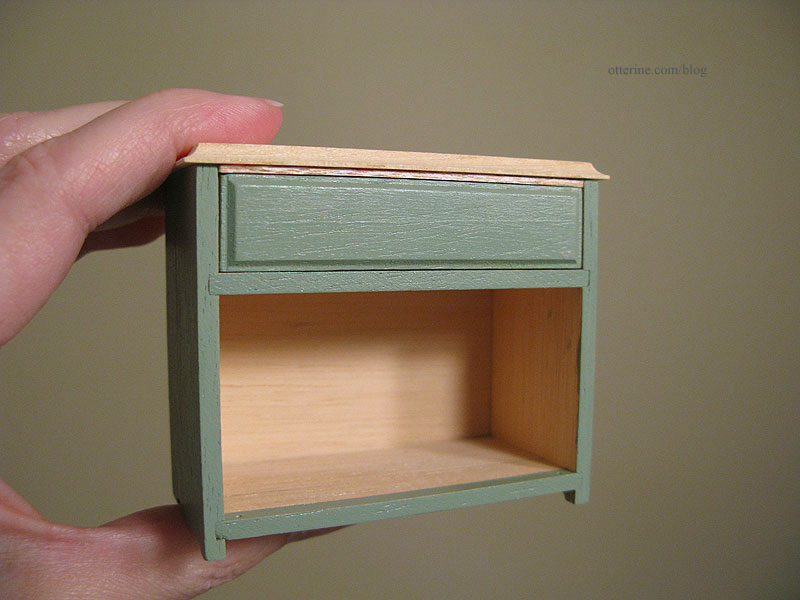
I’ve made one of these cabinets before, for the Newport. As with that cabinet, I added an extra piece of wood to fill in the gap between the drawer and the cabinet top.

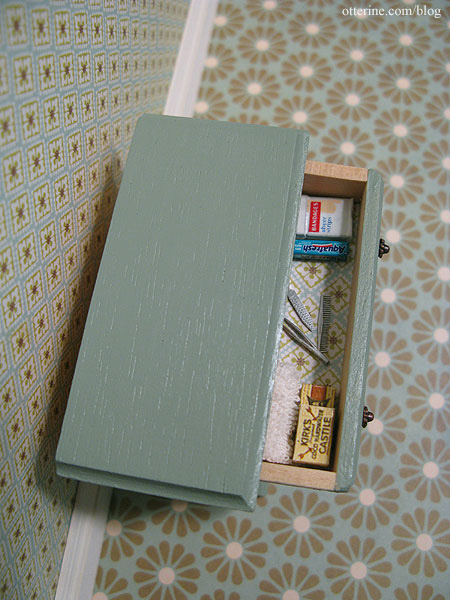
Now grandma has an attractive storage solution for all her necessities. :D I plan to put different items inside the cabinet but had these already on hand. I love hidden details even if they aren’t readily seen.

I lined the drawer with a scrap of Cute Little Diamonds paper by The Paper Studio, the same paper I’ll be using for the wallpaper. Grandma is frugal and has found a use for her leftover wallpaper scraps!
The bookshelf and African violets I made earlier will sit here. I also made up another jewelry finding tray as I had for the bedroom vanity. I will make new bottles specifically for this room but borrowed these from the Newport.
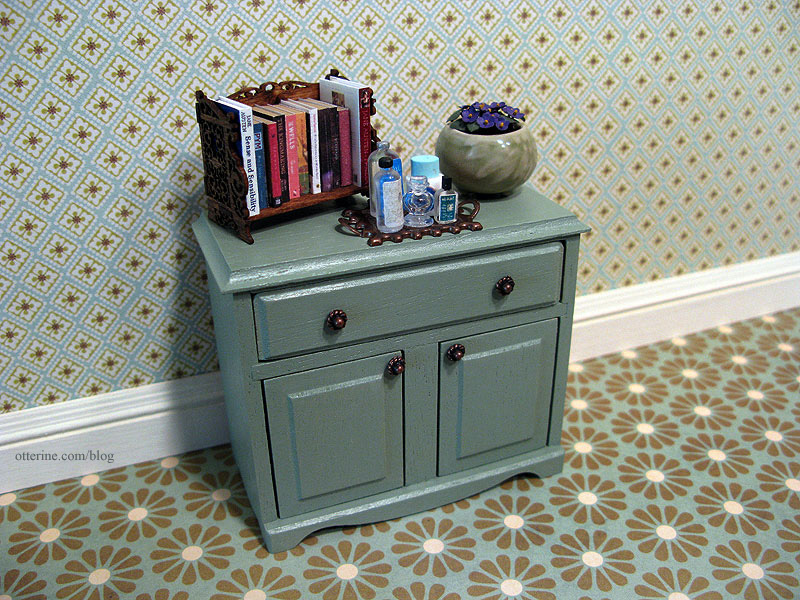
I found that I rather like the loud Flower Frenzy paper by We R Memory Keepers for the flooring. Adding sealer will yellow it a bit, but that will only add to the age of the floor.
I’m not sure if the cabinet will sit next to the door or next to the bathtub on the opposite wall. I’ll have to get the room put together before I make that decision.
Categories: Furniture, The Haunted Heritage
April 6, 2012 | 0 comments


NOTE: All content on otterine.com is copyrighted and may not be reproduced in part or in whole. It takes a lot of time and effort to write and photograph for my blog. Please ask permission before reproducing any of my content. Please click for copyright notice and Pinterest use.


