

Antique drum nightstands, part 1
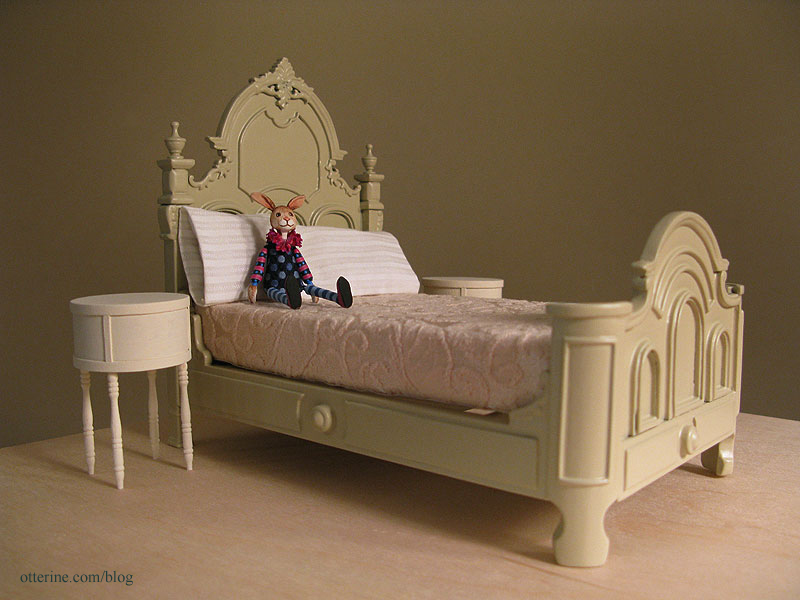
I’ve been thinking awhile on the type of side tables I wanted for the Heritage bedroom. With the ornate bed and feminine vanity and chair, I needed something with antique style while not being overpowering.
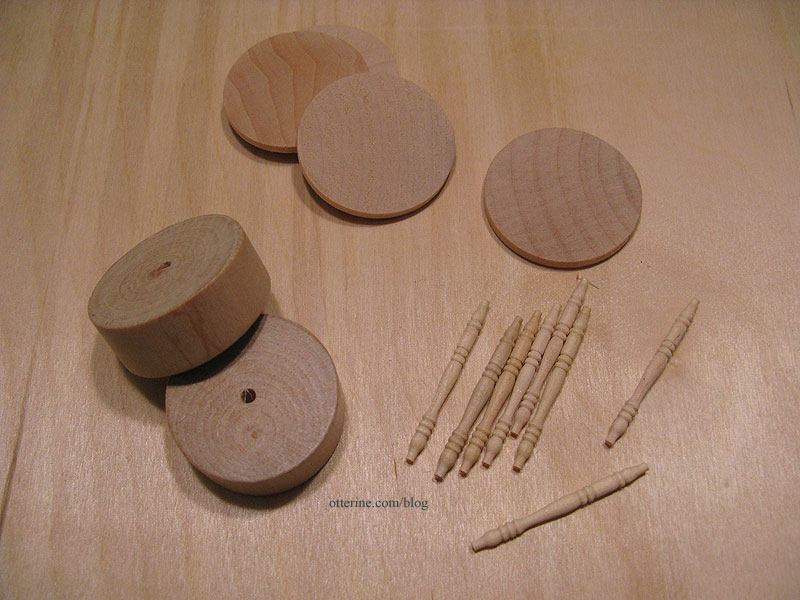
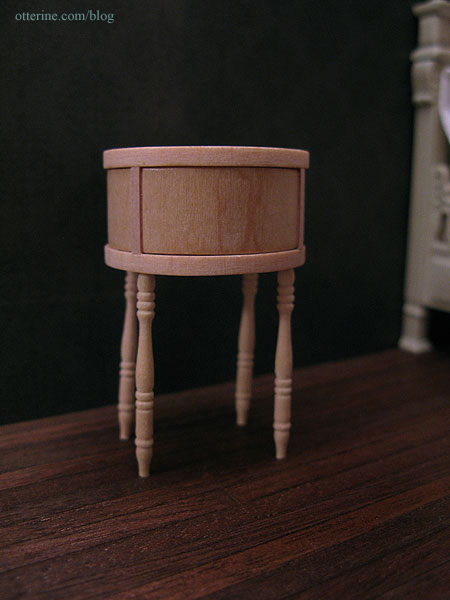
My artist models came with round wood bases and metal pins to hold them up, though they stand on their own just fine. I removed these bases when I first got the models, but I kept them since they were smooth round wood shapes and I knew they would make a fabulous trash to treasure project some day.
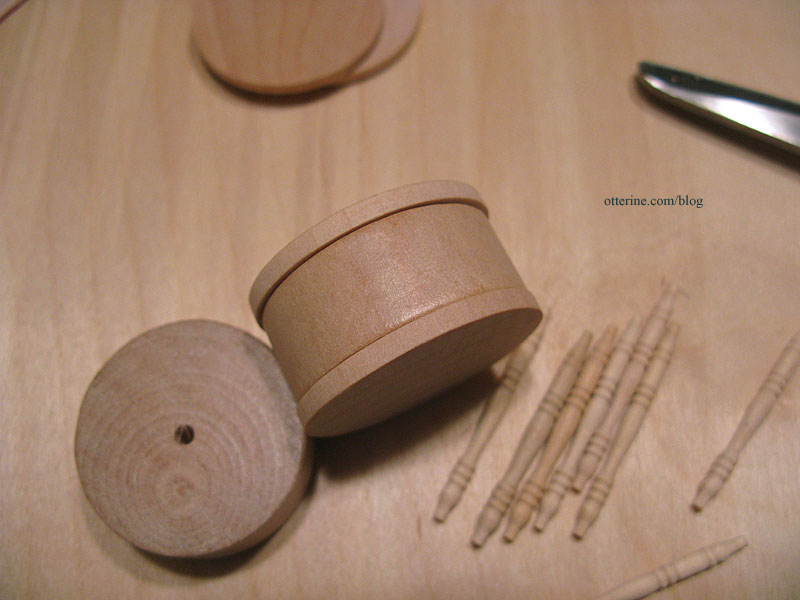
The bases measure 1 3/8″ in diameter and 9/16″ tall. I grouped them with 1 1/2″ x 1/8″ wood circles and Houseworks 1 9/16″ long spindles.
I first glued two circles to the top and bottom of the base.
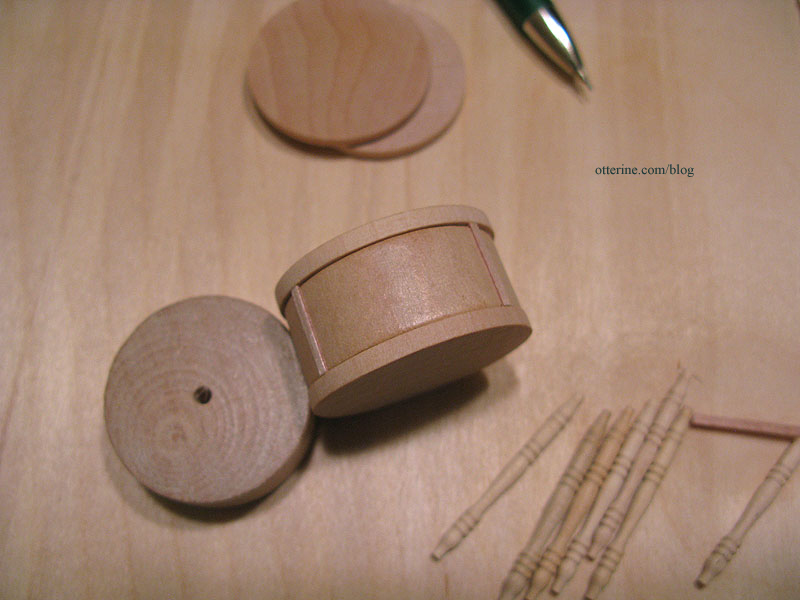
I then added thin veneer strips to delineate a front drawer.
I drilled pilot holes for the four legs.
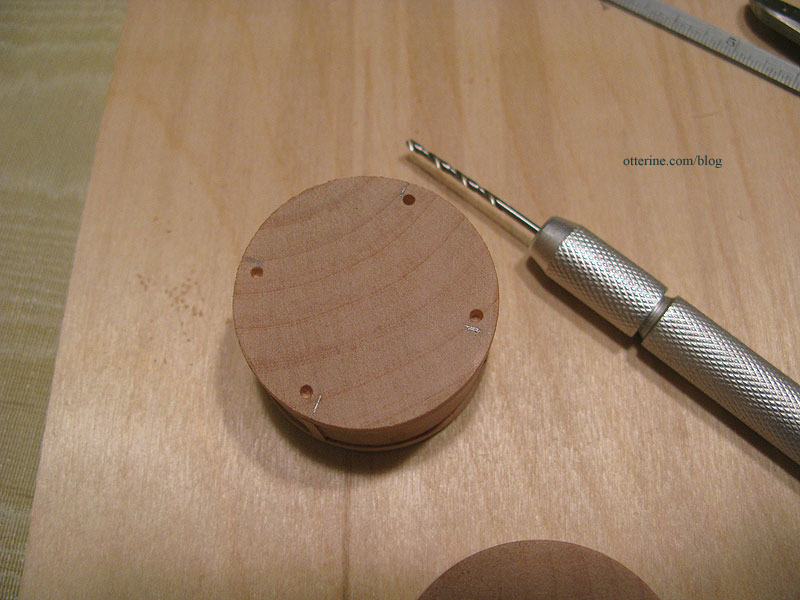
For now, I’ve just pushed the legs into place. I need a clear head and a steady hand to get these glued in straight and even since I like the tables without cross supports.
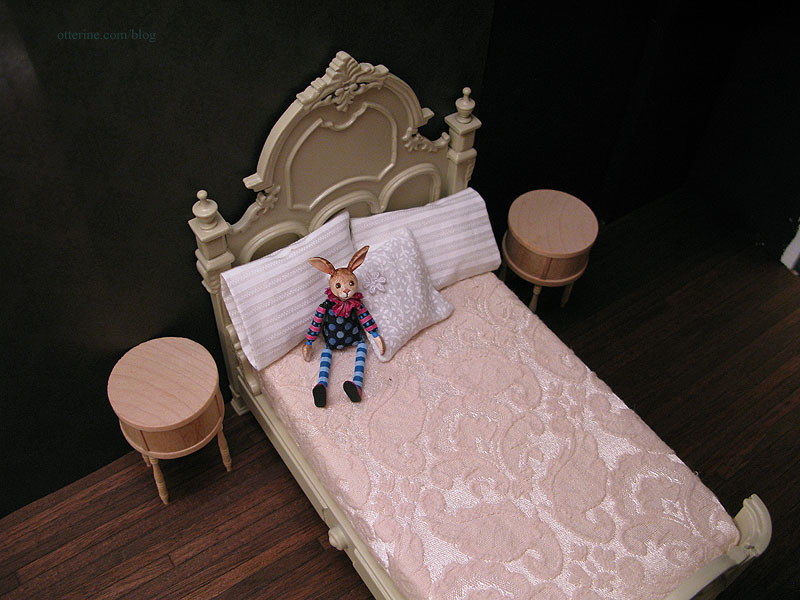
The pillows were made by me, and Mr. Rabbit is by K. Kuti. I still haven’t replaced the stock bedding that came with the Bespaq bed I’m in the process of refinishing.
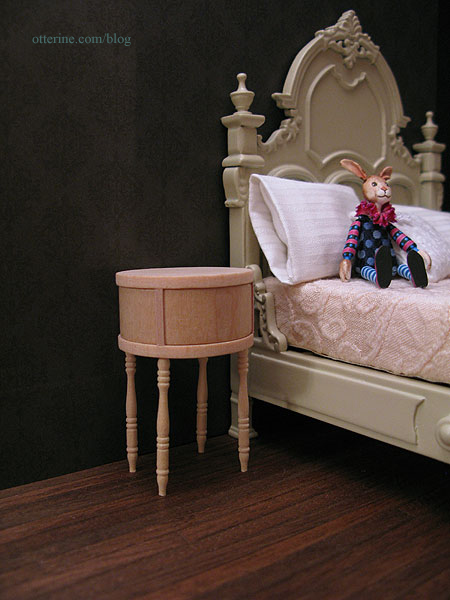
With some fancy painting and antique knobs, the nightstands will fit right in! :D They don’t take up much room but have a nice style.
The nightstands received a light spackling to remove some of the imperfections in the wood pieces as well as the rough grain that was showing through the paint. They will need at least one more coat of paint.
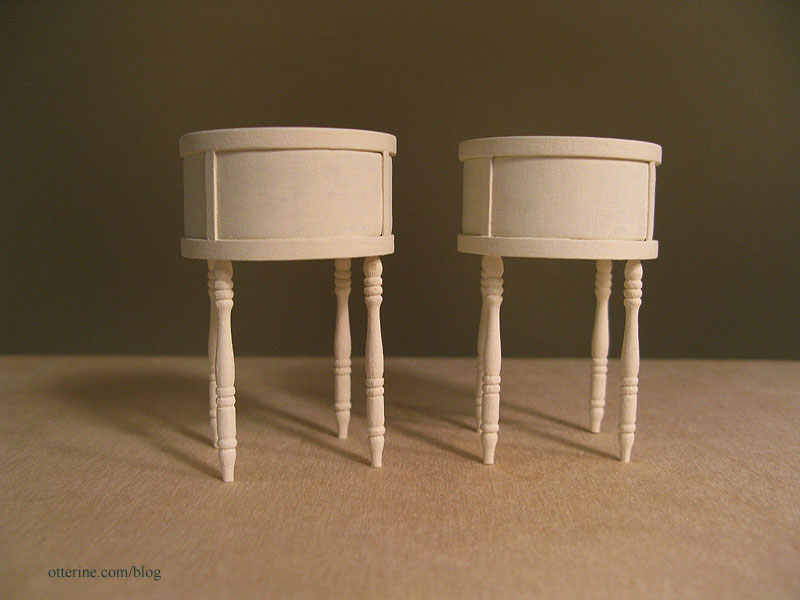
Even though the base coat is lighter than that of the bed, I think the pieces will coordinate well in room. As I mentioned before, I don’t want everything to match but be a collection of well-loved items.
I might give hand painting designs a try for these pieces. They seem to call out for fancying up beyond just pretty hardware, don’t they? I will practice on scraps first, though. I don’t want to have to start all over!
Categories: Furniture, The Haunted Heritage
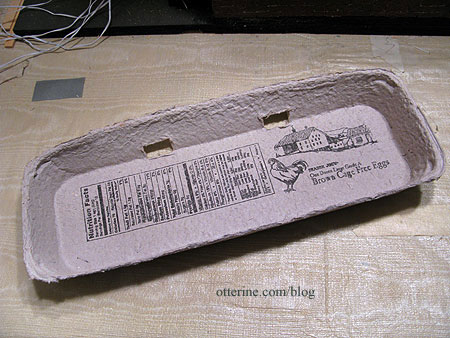
May 22, 2012 | 0 commentsCutting egg carton bricks plus links to finishing
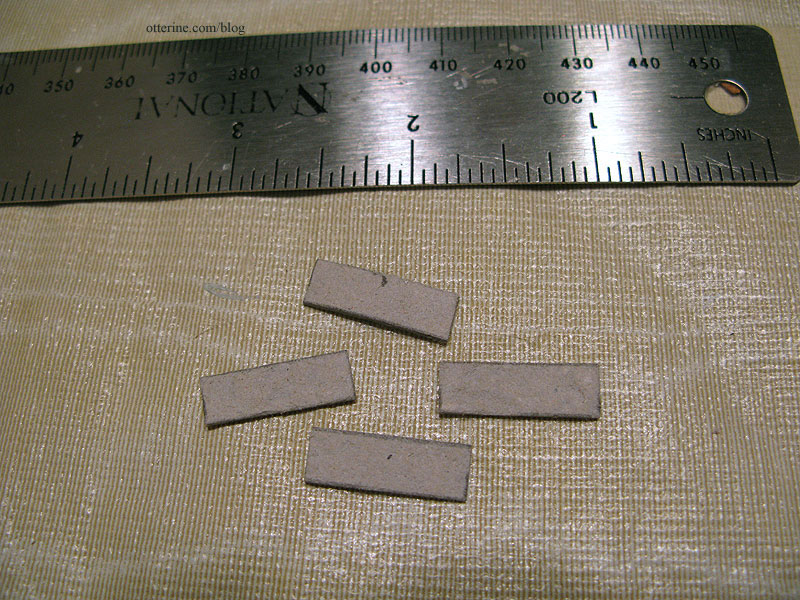
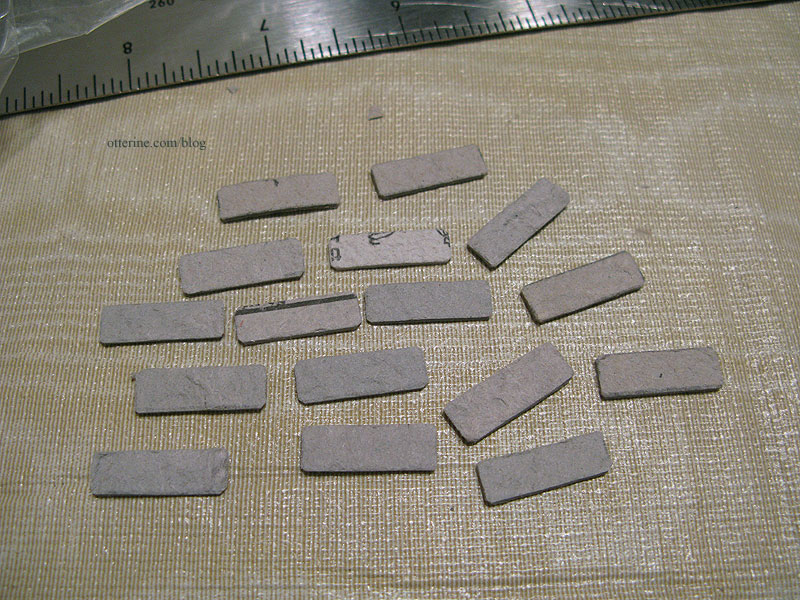
Many people have asked how I get my bricks so uniform, and I can tell you they are close but not exact. The bricks I make are 1/4″ x 3/4″ for most projects. This is a little off from exact 1:12 scale, but they look spot on when finished. Whatever size you use, you do want consistency. Painting and grouting make up for any obvious flaws, and if a brick is too far off from the rest I just don’t use that one.

I first learned of egg carton brickwork from two great sites: Connie Sauve’s The China Doll and Victoria Miniland (both sites are now defunct as of 2024). I use the method from The China Doll.
I obtain egg cartons from various sources: my own household, mom and a local freecycle group I belong to. You can post want ads or reply to offers on that site, and it’s free! I use the flat surfaces of the lid and recycle the bottoms with the egg cups. You could get bricks from the cups, but to me it isn’t worth the extra time and effort. I also use the interior surface as the brick face since it has a nice bumpy texture. Words and images won’t matter after painting.
I cut the pieces into manageable flat sections. The large, flat top is obviously the best source of bricks, but the smaller pieces yield quite a few.

I mark one edge with a ruler and use scissors to cut along that line. If you aren’t good at keeping scissors on a straight line, you can use a sharp X-Acto knife.
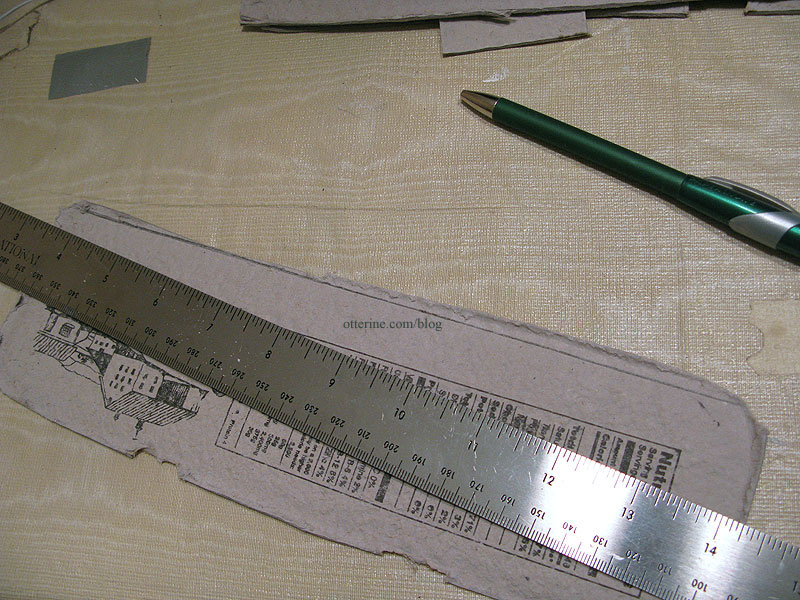
From that clean, straight edge, I mark four 1/4″ increments in several places along the edge.
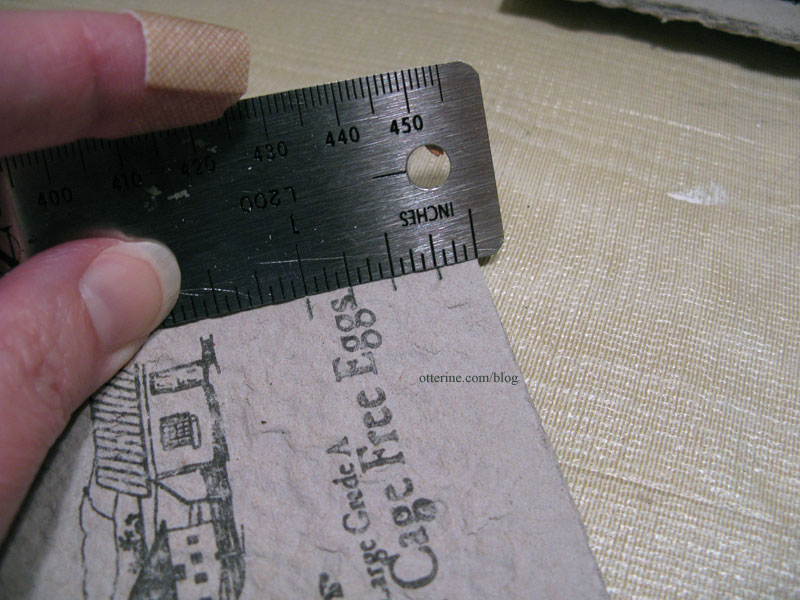
I use my ruler to join those marks and make guidelines.
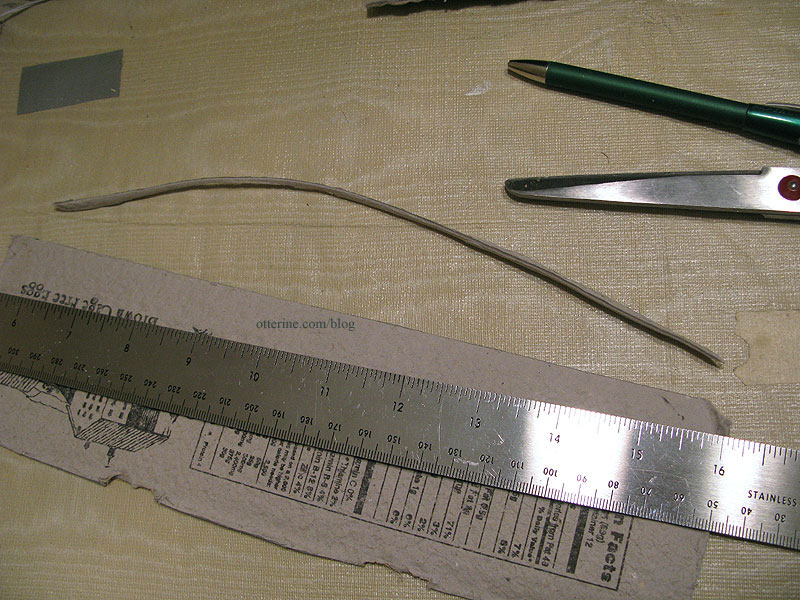
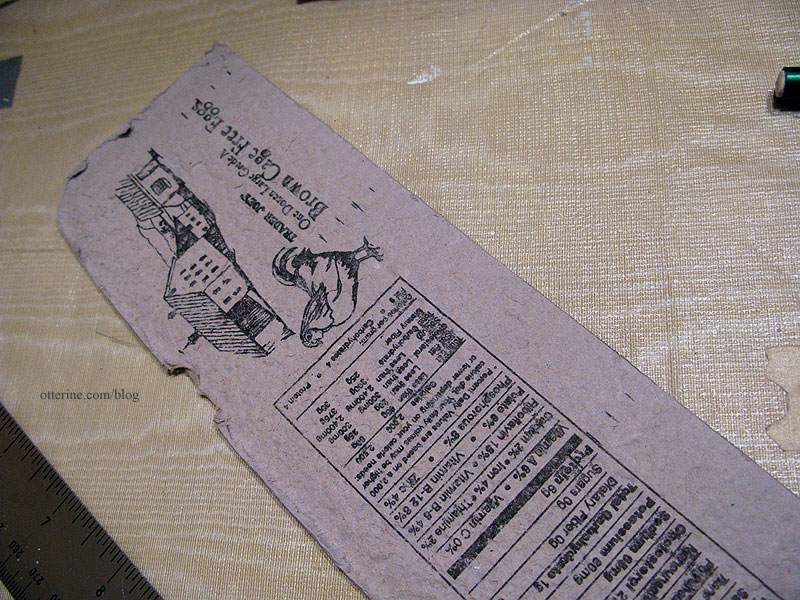
I cut along those guidelines. Again, I use scissors since my sewing experience gives me a steady hand at cutting straight lines with them. You can use an X-Acto blade, too.
After the fourth strip is cut, the edge is usually off a little. I draw a new line across and clean up the edge before repeating the 1/4″ increments until I run out of egg carton.
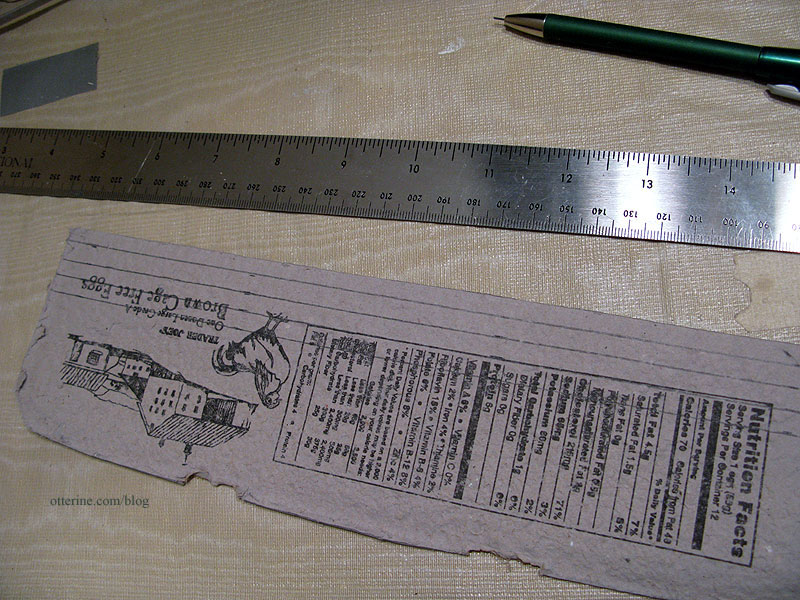
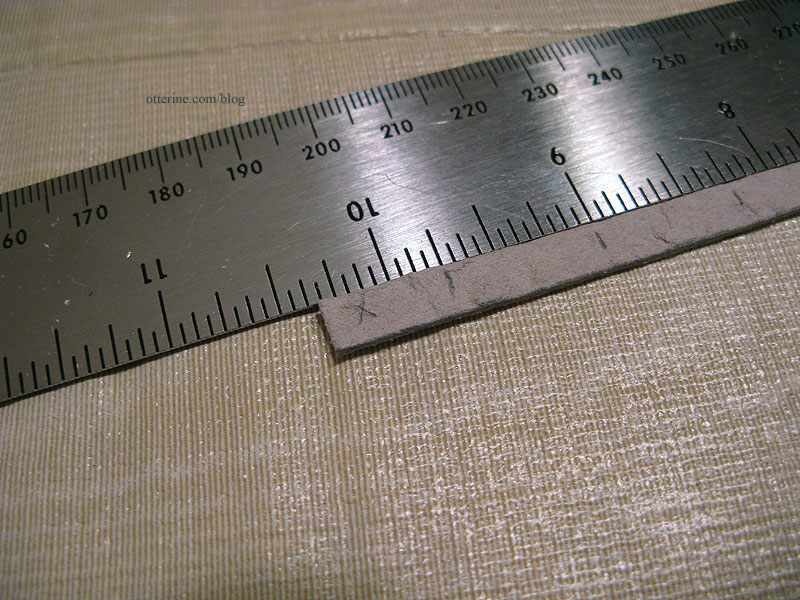
I square up the ends of each strip with scissors and then mark 3/4″ increments along the strip.

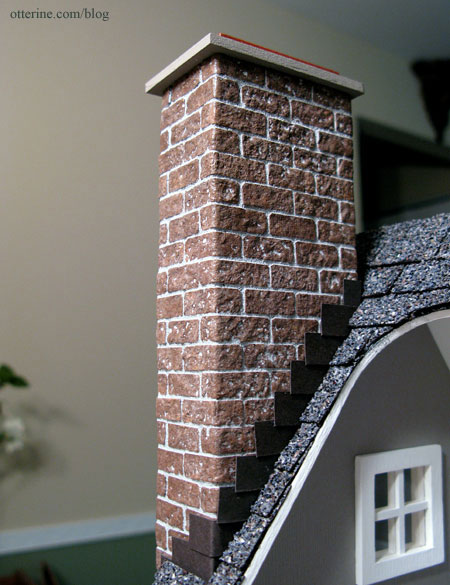
If I am bricking around any corners, I cut them to fit. These will have approximately 3/4″ showing on one side and approximately 1/4″ around the bend, but they do vary depending on how well you place the regular bricks.
Here’s the chimney at Baxter Pointe Villa painted with layers of brown acrylics and grouted in grey. You can see the longer bricks used around the corners.
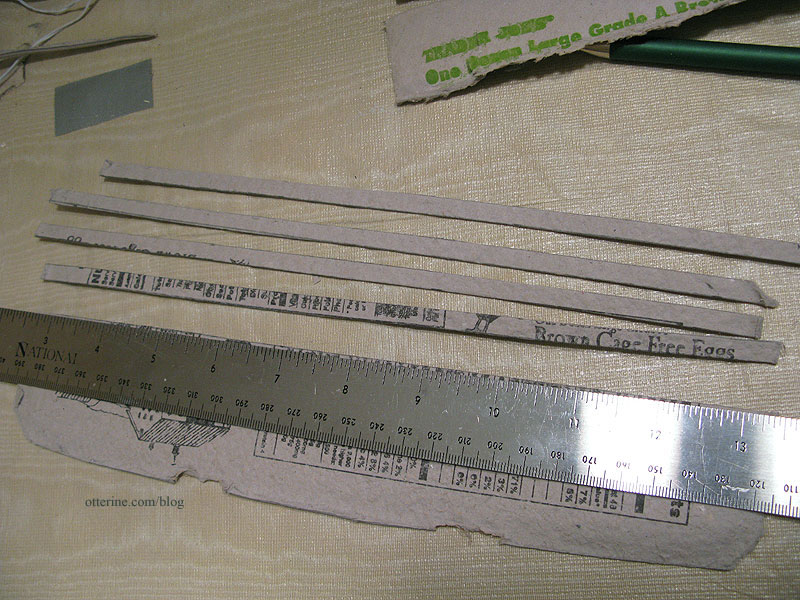
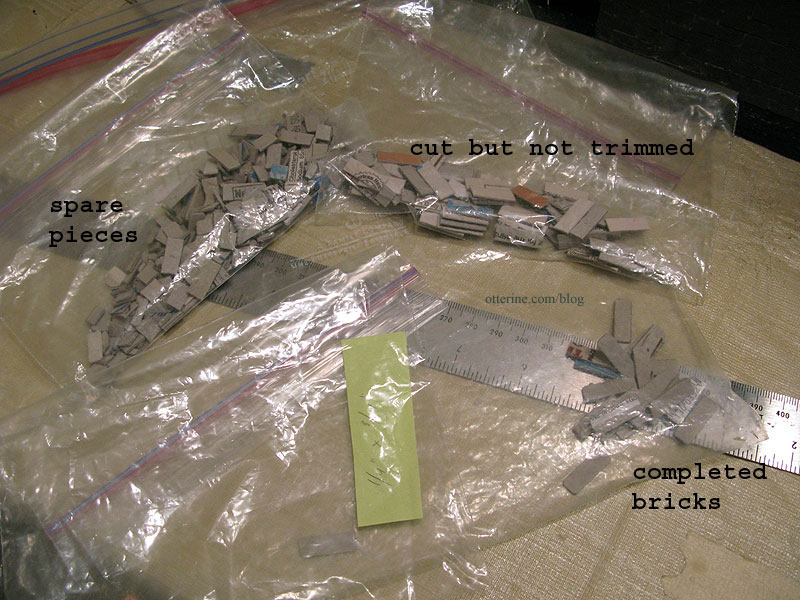
At the end of each strip, there is usually a piece that is too short. I mark that with an X and put it in a separate pile. When you do brickwork, you often need short or angled pieces. These leftovers are already the right height and can be cut to fit those smaller areas without wasting your full sized bricks.
Once I have a pile of bricks, I cut the corners from each one. This gives them a more natural appearance in my opinion.
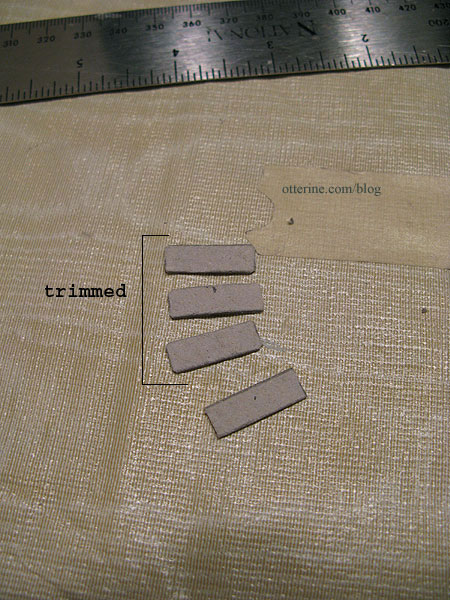
Here are my four new bricks with a bunch I’ve cut previously. They are all close in size and shape but they do vary.
I keep a large ziploc bag for my finished bricks. I keep a smaller bag inside for bricks that have been cut to size but the corners still need to be trimmed. I also have a bag for scraps. If I’ve cut a different sized brick, I use a note inside the bag so I can tell which is which.
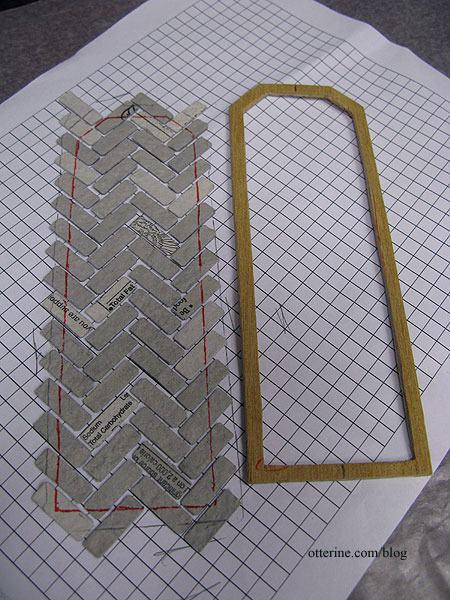
For the Heritage chimney, I used guidelines drawn on my underlying structure to plan the exact number of bricked rows I would need and to keep the structure aligned properly.

For herringbone brickwork, I use graph paper as a guide. You don’t really fill in the squares per se, but the grid helps create a more uniform pattern.
However, I usually don’t bother with guidelines for straight brickwork. I am able to eye measurements well, so I just glue the bricks with a little bit of give in between them and check with a ruler every other row to make sure I haven’t gotten too far off.
I use Aleene’s Quick Dry glue to apply the bricks. Once the bricks are in place and the glue has dried, I paint with acrylics in the color of my choice. I use a stencil brush and stipple the paint on since brushstrokes can ruin the illusion.
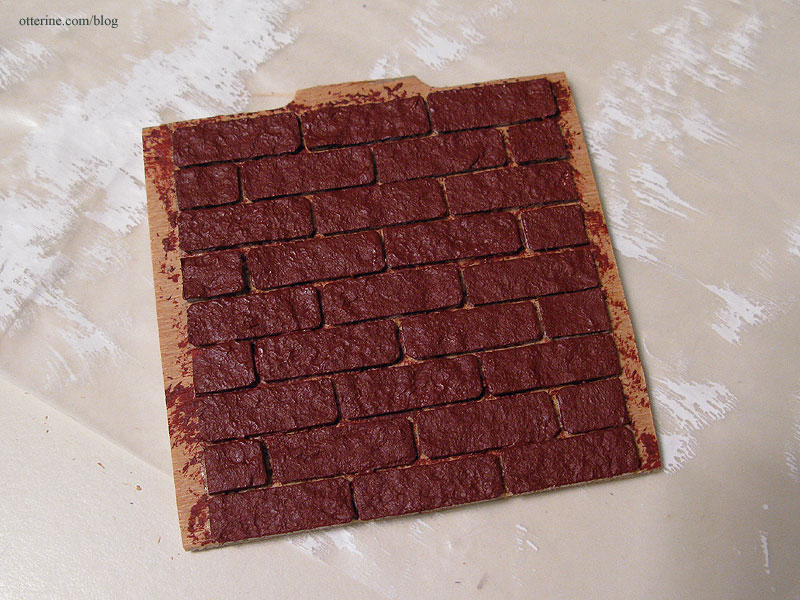
Once I have the color I want, I seal the surface for grouting. The grouting process will change the coloration, so keep that in mind when you paint. You can touch it up later. For instructions on painting, sealing and grouting, see my post on finishing the Heritage foundation. For instructions on aging the brickwork, see my post on adding grime and moss to the Heritage foundation.
Categories: Miniatures
May 17, 2012 | 0 commentsBugs in the light fixtures
I tried out the new lights I recently ordered from miniatures.com. I made the rest of the wire channels in the bathroom ceiling board and touched up the white paint on the underside. I opted for the clear glass ceiling fixture in the bathroom since the wall sconces have clear glass hurricane shades.
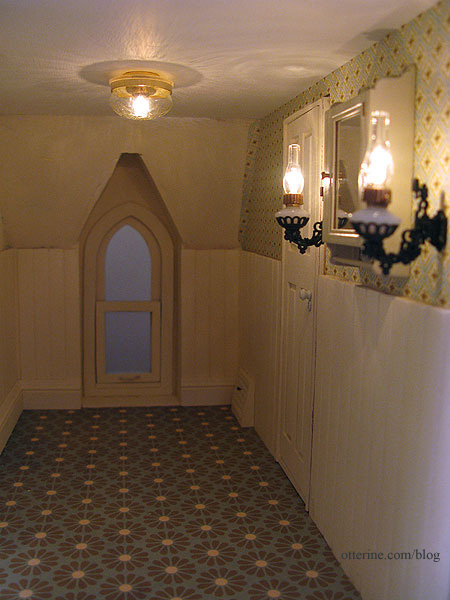
I’m not usually a fan of brass lights, but this works in the Heritage. It’s not an overwhelming amount of brass, and these types of fixtures are about the shallowest you can find on the market, which was important since the ceiling height is low here in the bathroom and in the hallway.
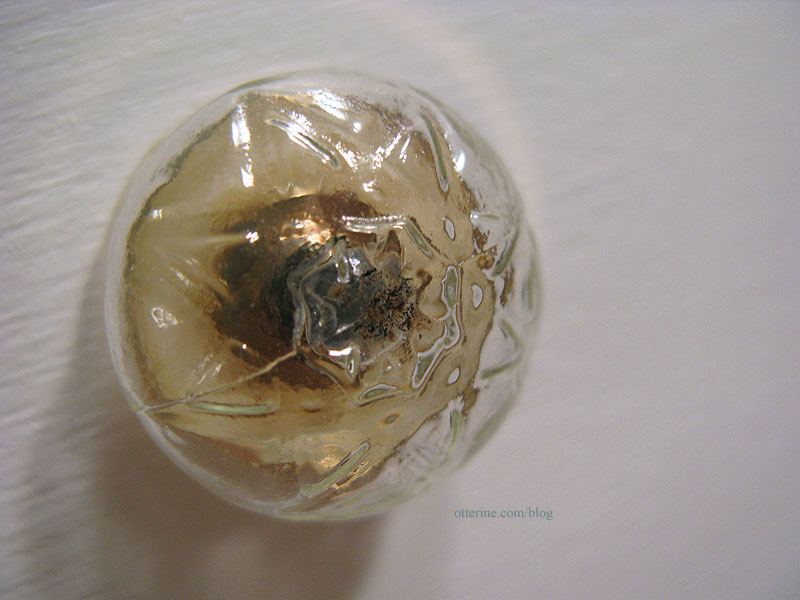
You know me; I am all about the realism. So, I added some 1:12 scale insects inside the globe. :D Lyssa egged me on when I joked about it to her, so she is to blame! It’s just a little dry-brushed brown and black paint, but it’s rather convincing in person. ;]
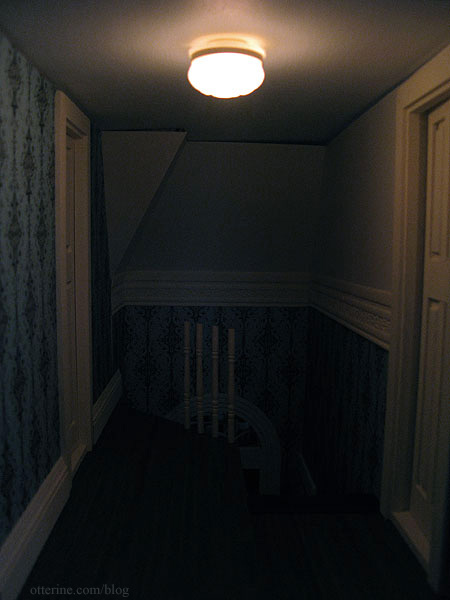
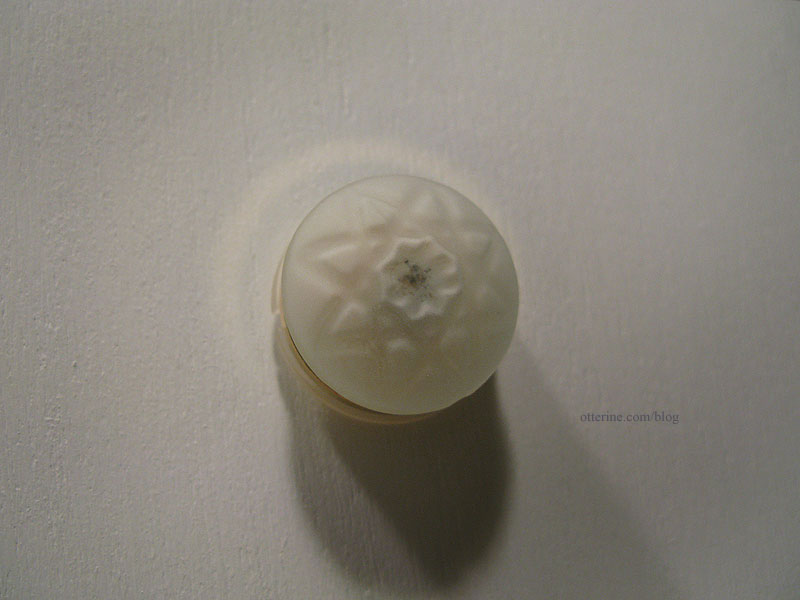
In the upper hallway, I’ve installed the same fixture only this time with a frosted globe. There will be another fixture toward the front for the foyer, but I needed some light here at the top of the stairs. Neither ceiling board is glued in place yet, so there are gaps showing.
More bugs! :D
Categories: The Haunted Heritage
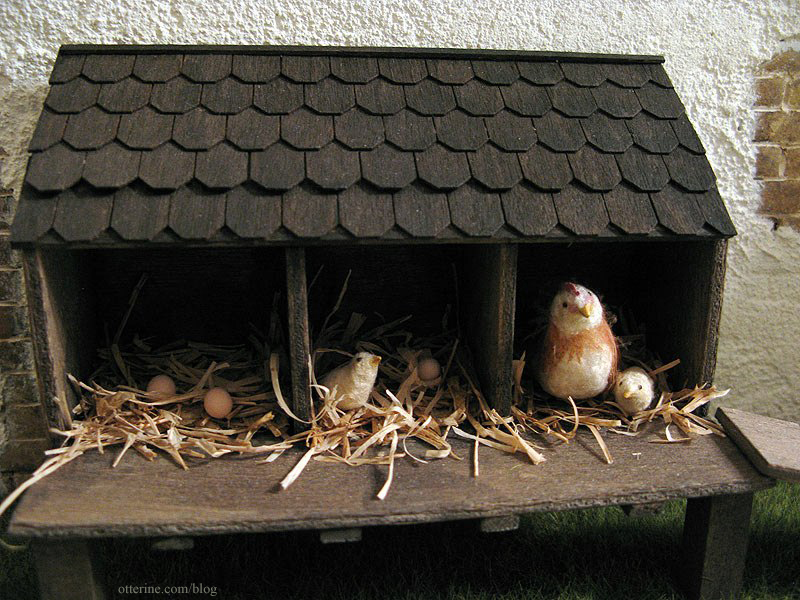
May 5, 2012 | 0 commentsHenhouse
After doing a quick bit of counting, I realized there are four and a half months until the Spring Fling contest deadline. I had planned to work on both the contest kit and the Heritage so my blog wouldn’t go silent, but this realization sent me into a bit of a panic. There are a lot of things I want to do for this build, so I have to get to it…and there may be some days of radio silence.
While the build will be secret as a whole, there are things I am building along the way that I can share without giving any clue as to what the total project is. The first of which is a little scratch built henhouse. Trust me when I say this really gives very little away about my project.
I saw one of these at the Bishop show made by Terry Harville and instantly knew I needed one.
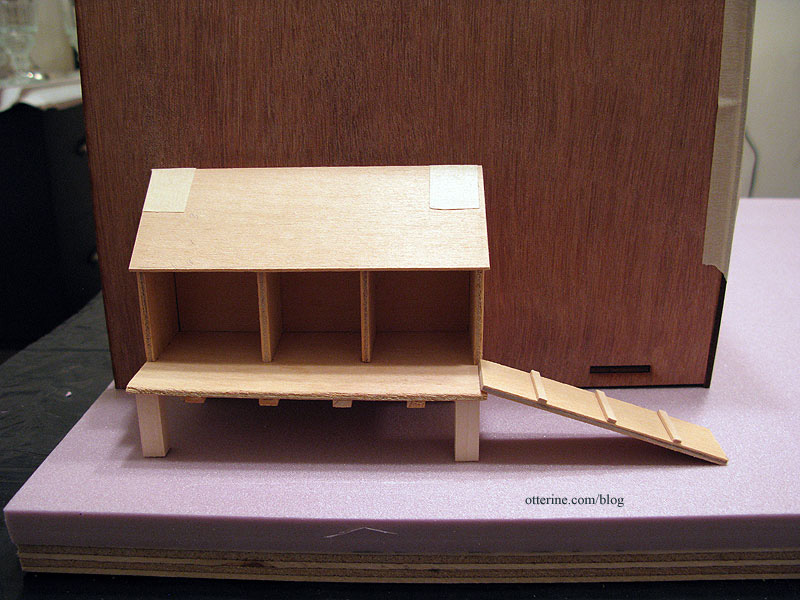
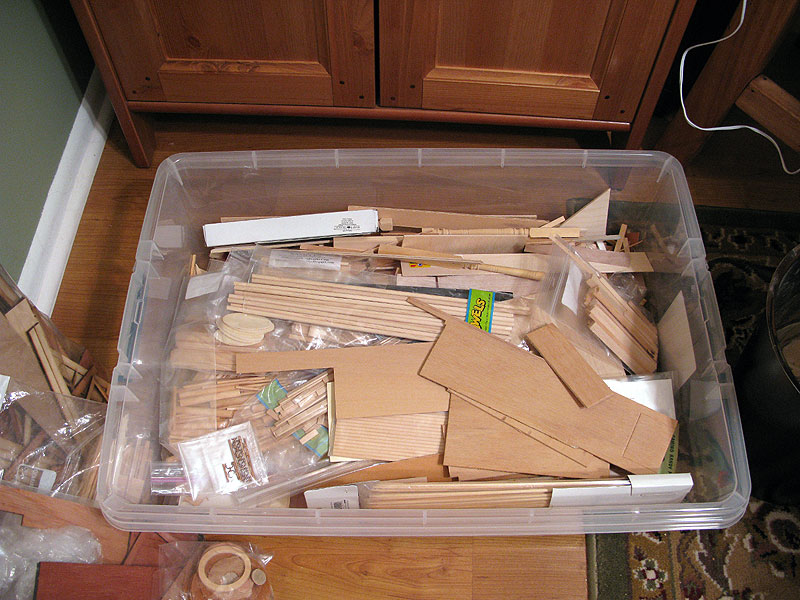
If there’s one thing I have, it’s leftover scrap wood, especially from the Heritage build. I’ve been throwing all my scraps and punched out pieces into a plastic bin that I can rummage through as projects come up. The henhouse was made using only scrap items from this bin.
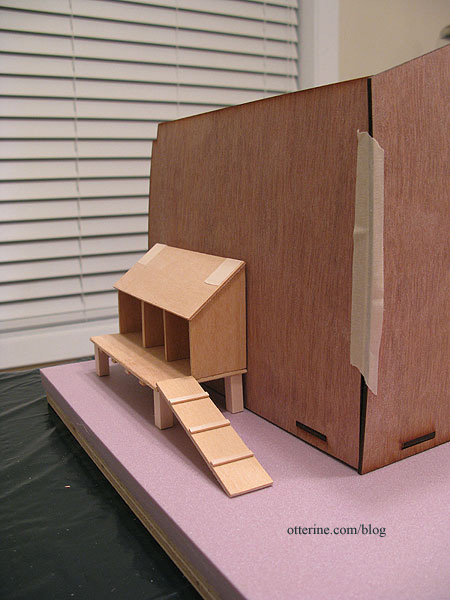
Since this is inspired by someone else’s work, I’m not posting a full tutorial of the construction. But, you can probably see how it is made as it is a very straightforward design. I have it all assembled except for the roof board, which I still need to shingle. I thought it would be easier to keep that piece separate so I can press it flat if need be.
Update: The henhouse is not easily seen in the overall build because of the tower, but I’m glad I included it. The breed of hens I’ve made are Faverolles, a French hen suggested by Teddi. I have a standing hen not yet completed.
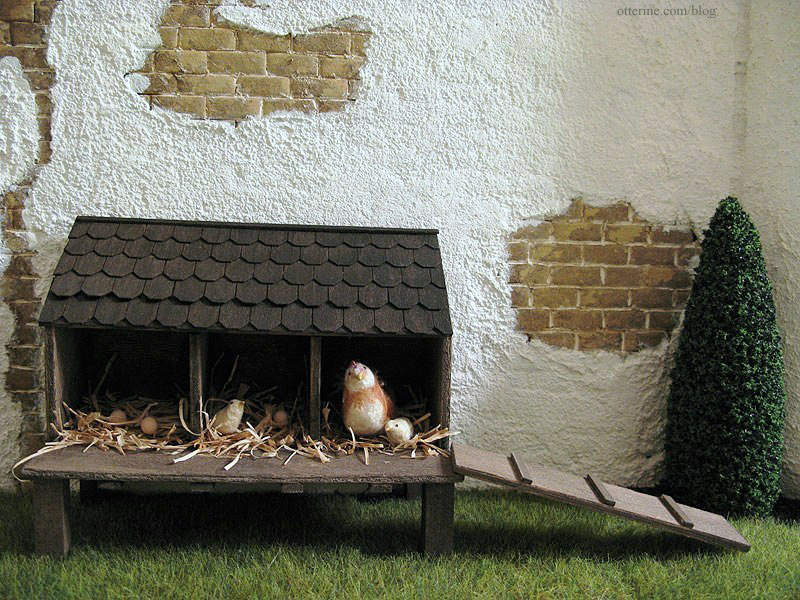
I’ve used a few of the eggs I made, too.
Categories: The Aero Squadron Lounge
April 24, 2012 | 0 commentsHaunted Heritage chimney, part 9
Continuing work on the chimney. Time to work on the interior chimney sections. Only a small portion of the chimney continues through the bathroom with most of the inner portion in the attic. I formed the inside chimney from a double layer of 1/2″ thick foam core board and cut it to align with the outer chimney. The break between the top triangular piece and the bottom rectangular piece is where the ceiling board will sit. I’ll figure out the angled bricks in the attic section later.
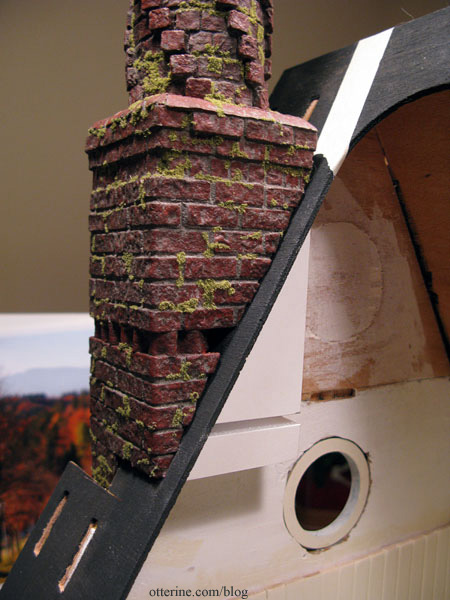
In the bathroom, I’m assuming the exposed brick would be covered, so I’ll cut wallpaper to cover it. In the attic, it will be exposed brick made to match the exterior but without the moss. Since the egg carton brick will add thickness to the attic portion, I added a layer of wood on the side of the bathroom piece to help make up the difference. The tapered bottom is built from scrap wood. This structure will also support the bathroom ceiling board.

It’s just enough to satisfy the realist in me that the chimney isn’t just tacked onto the outside, but it doesn’t obscure the window by being too large. In fact, to me, it looks like a perfectly imperfect vintage architectural detail. :D
Categories: The Haunted Heritage
April 23, 2012 | 0 comments


NOTE: All content on otterine.com is copyrighted and may not be reproduced in part or in whole. It takes a lot of time and effort to write and photograph for my blog. Please ask permission before reproducing any of my content. Please click for copyright notice and Pinterest use.


