

The Aero Squadron Lounge – tower spiral stairs
This post will give you some background on the mockup portion I did and then explain how I made the final set of stairs for the tower.

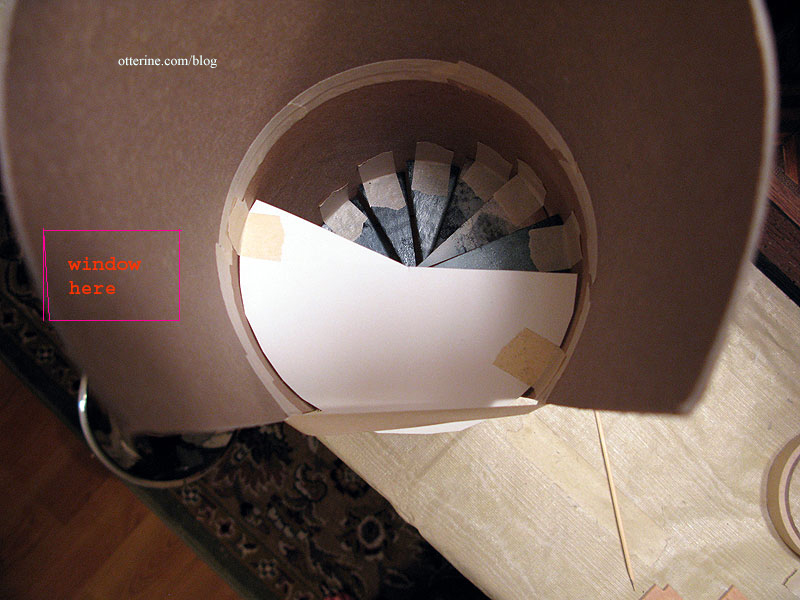
My idea from the beginning was to have spiral stairs leading to a balcony overlooking the main room and a window to see the Sopwith Camel from above.
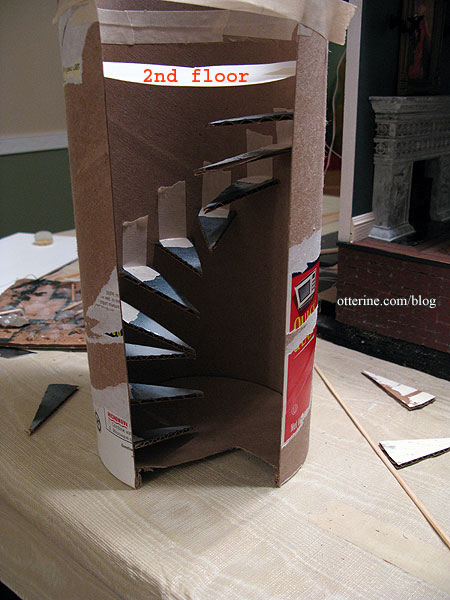
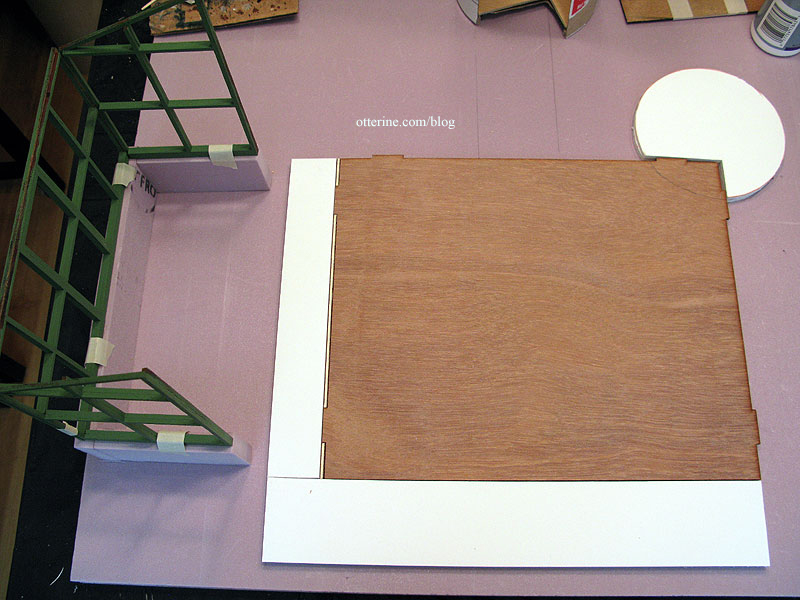
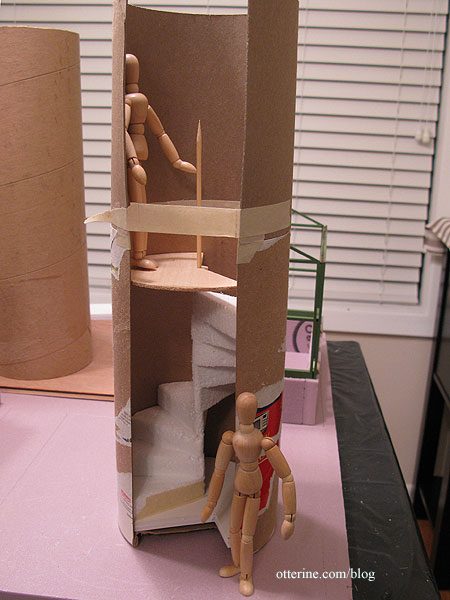
The diameter of the original oatmeal container tower was roughly 5″, so I cut some quick triangle shaped steps from a 5″ diameter cardboard circle. I taped them into the oatmeal container before I cut the 5″ diameter mailing tube that would serve as the final tower. I wanted to make sure I could get the stairs to work before altering the mailing tube. However, I did cut the 31″ tall mailing tube into two pieces each 15 1/2″ tall since anything taller would have looked out of proportion with the single story main building.
The stairs worked great. I haven’t measured here or made the triangles uniform. I just wanted to see the layout in three dimensional form.
Originally, I thought in order for the balcony to bridge the gap in the opening and access the window, it had to be cut in a “greater than half” shape. I later changed this to a semicircle.
The problem with the stairs was that part way up them, my model hits her little head!!!! :O

I couldn’t raise the balcony, because (a) the spiral staircase would have had to cross the arched opening if it were any taller and (b) with a maximum tower height of 15.5″ raising the balcony would have made the second story too short.
I could have cut the balcony to “less than half” so that it only overlooked the main room and didn’t allow access to the window…but I didn’t really care for that idea. As it turned out, the semicircle still worked, though there really isn’t much head clearance to speak of in the final tower.
Anyway, as I was figuring this all out, there were three possible solutions:
- Close up the tower completely, including the roof (no exposed beams in the conical roof) but have a faux door on the inside to look like there is access to the tower. Add windows and interior lighting (but make the windows like the Heritage cellar windows so you can’t really see in). Seemed like cheating, no?
- Make the spiral stairs and the balcony as is, but still close up the tower…except…make a doorway on the inside so you can see the lower stairs. And, leave some of the roof beams exposed so you can see the balcony from the top and through the windows. You won’t see both the stairs and the balcony at the same time so you can’t tell they don’t make sense spatially. That seemed more complicated than it needed to be.
- Lyssa suggested building it as is, adding a WATCH YOUR HEAD sign and leaving the mini people to fend for themselves! :D Winner winner, chicken dinner!
And, it was settled…on to the spiral stairs construction! Warning: lots of math ahead, so WATCH YOUR HEAD! :D I’ve written this out as plainly as possible, but it might not be easy to see what I am getting at without doing your own mockup.
After studying my mockup, I determined that the best layout included nine steps each 3/4″ thick (tall) leading to the balcony 7 1/4″ above the first floor. The nine steps equal a height of 6 3/4″ so the last step up onto the balcony would be 1/2″ tall.
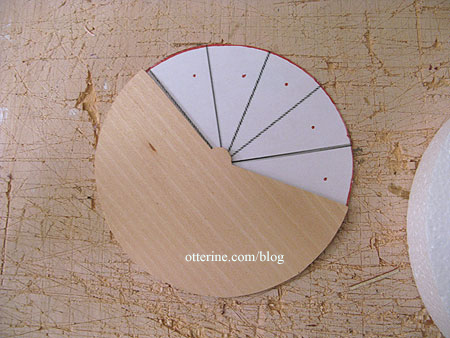
I found two drawings of circles with equal sections online at Enchanted Learning, one with 10 sections and one with 12. I used the 12-section circle for the visible width of each step but cut the steps using the 10-section circle as a template; they will stack on top of one another and I needed added width to glue them together. This will be shown and further detailed in the photos below.
I used the 12-section circle template to determine the best shape for the second floor base. I left a full circle in the middle since I thought I might need it to stabilize the spiral stairs. Remember, I later made this balcony a semicircle instead, but that was near the end right before installation. My construction photos show the “greater than half” balcony.
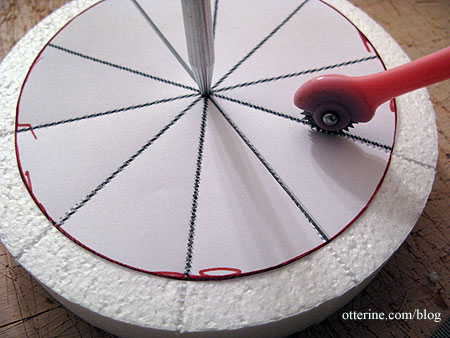
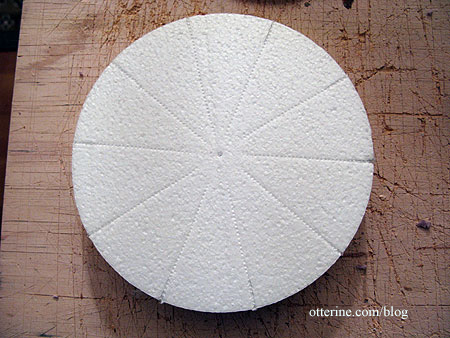
I was able to find a circle of white styrofoam at Michaels that measured 6″ in diameter and was 1″ thick. My mailing tube tower was 5″ in diameter and the steps needed to be 3/4″ thick, but the styrofoam circle was actually the perfect size for the project.
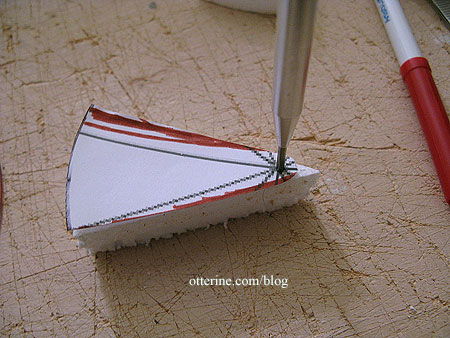
I first attached my 10-section circle template to the styrofoam circle with an awl, matching centers. Using my tracing wheel (a sewing tool), I transferred the lines onto the styrofoam so I could cut out the pieces.
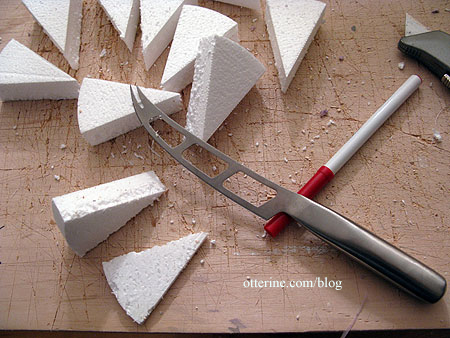
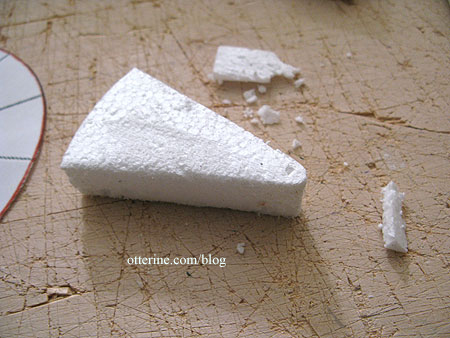
I cut the steps from the circle along the guidelines with a utility blade and then, using a cheese knife I’ve always thought looked like a Klingon blade, I cut off 1/4″ of thickness from each section. I’m good at eyeing measurements freehand, so I didn’t mark them first. I also planned to shape them to look like natural cut stone steps, so they didn’t need to be exact.
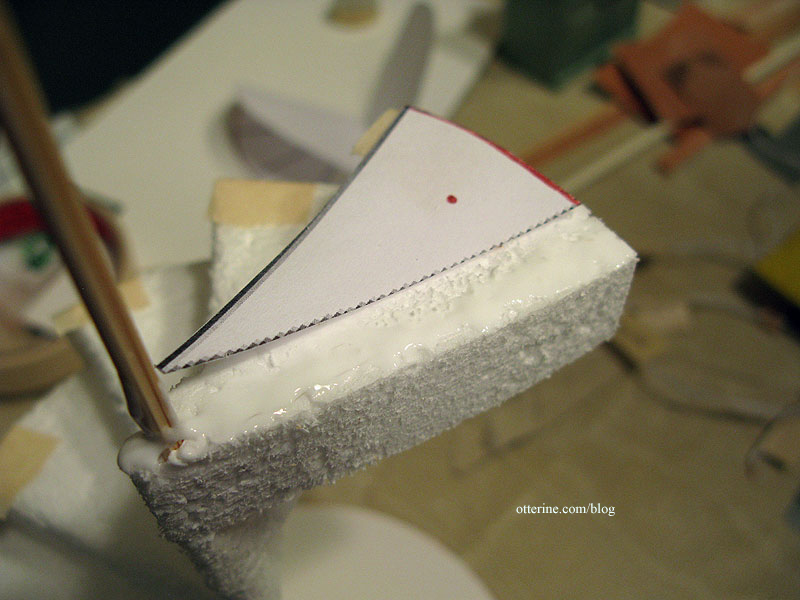
Based on my reference photo, each slice needed to have a rounded hub at one end. These rounded centers would line up and the stairs would pivot around that center point. I cut a template using the 12-section circle as a guide, adding excess to the back edge of the slice as well as the rounded tip.
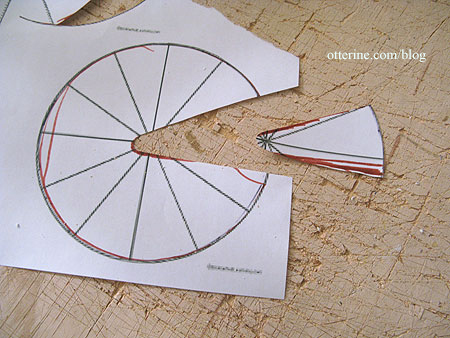
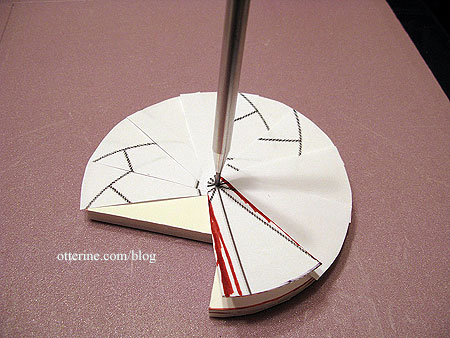
Before altering my styrofoam pieces, I cut nine paper steps, joined them in the middle and tested the fit. This paper mockup indicated I needed to cut the template down just a bit on the outer curved edge.
In the above photo, you can see the floor base I made for the tower from two layers of 1/4″ foam core board. The rectangular notch abuts the kit floor so the tower and main room share the same level surface. Here you can also see the floor space I added (also with double layers of foam core board).
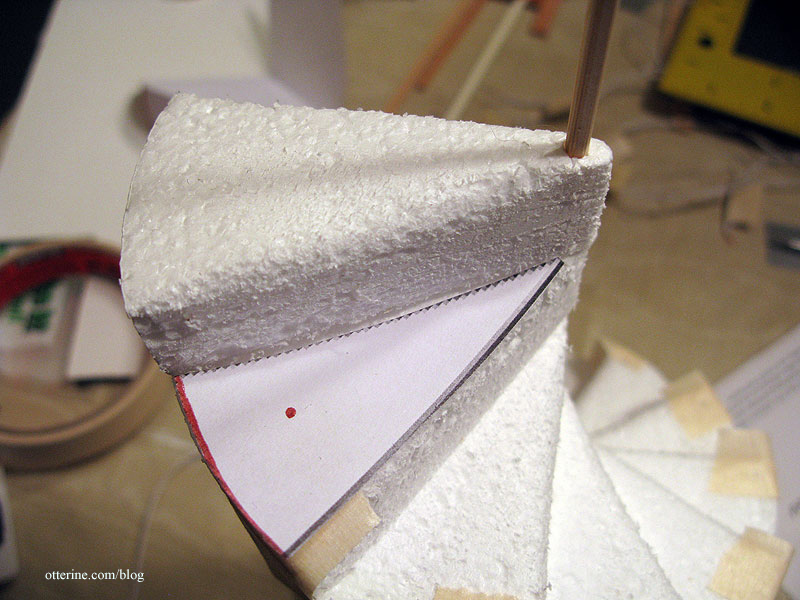
I used the paper template to fine tune the styrofoam pieces. Not much needed to be removed – just a little in the center to make the rounded hub. I used the awl to make a hole in each tip while I was at it.
I sanded the steps to give them a more natural appearance.
I fed the steps onto a bamboo skewer but left them unglued until I could check the final fit of all the steps in place.
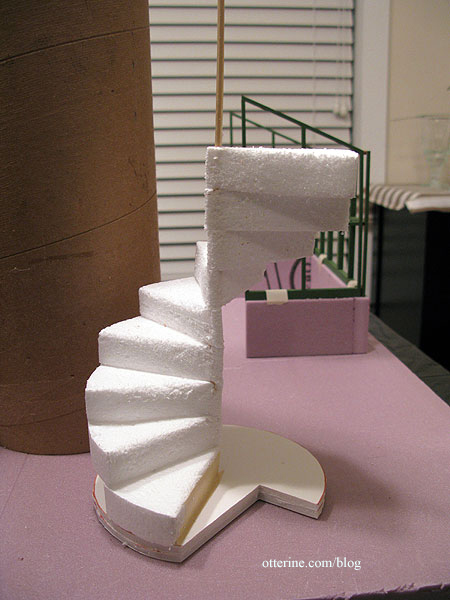
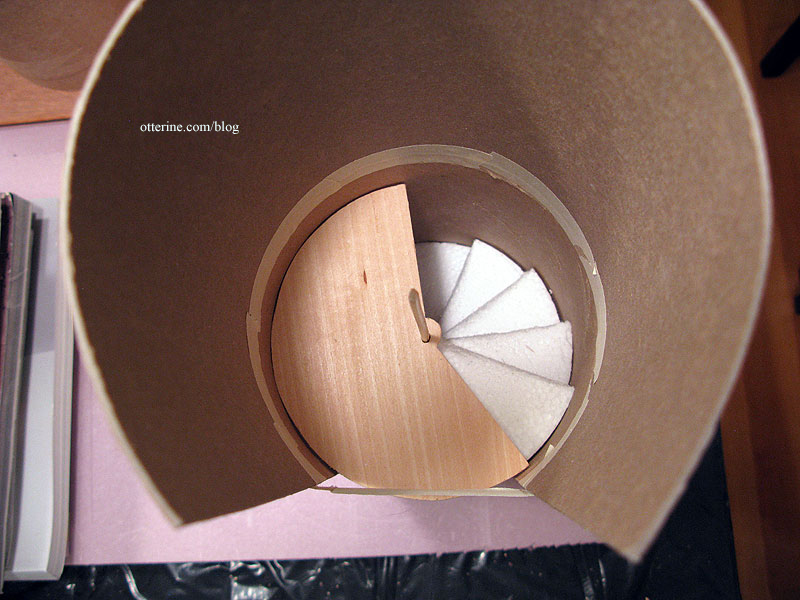
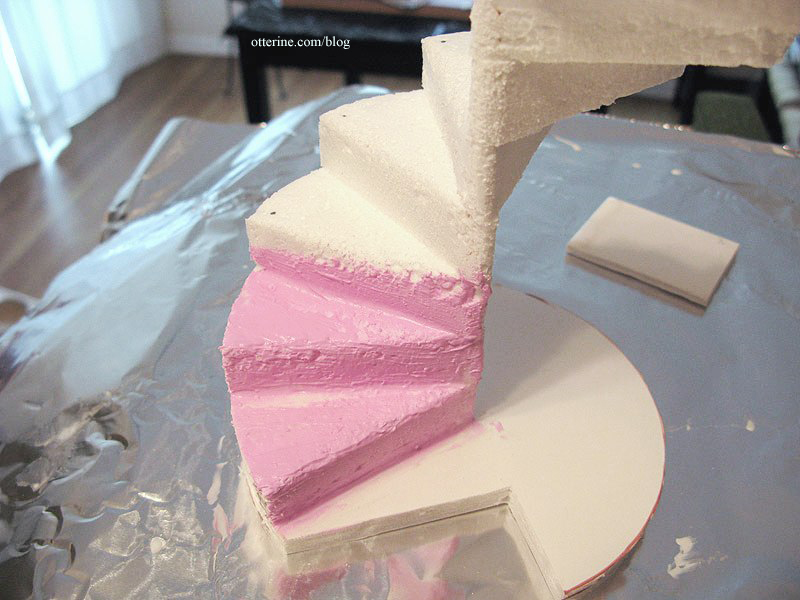
For this photo, I added a bit of builders foam after the ninth step to hold up the second floor balcony though I later added a full wooden riser to keep people from stumbling on the top step and getting their feet and legs caught in the opening. Here’s the styrofoam assembly shown in the oatmeal container mockup.
I love it!
I glued the first step in place on the floor base and then used a template cut from the 12-section circle to determine where to apply glue for all subsequent steps. I taped the stairs to hold them in place while the glue dried.
Once the glue was dry, I spread spackling over the surface with my fingertips. I was heavy handed with it so it would cover any holes in the styrofoam and allow me to sand a smooth “stone” surface once it was dry. Here you can also see the permanent flat head straight pins I added to each outer edge for stability.
The sanding resulted in smooth stone with chips…a nice touch I hadn’t expected. :D Here the lower three steps are sanded; the remaining steps are shown before any sanding was done.
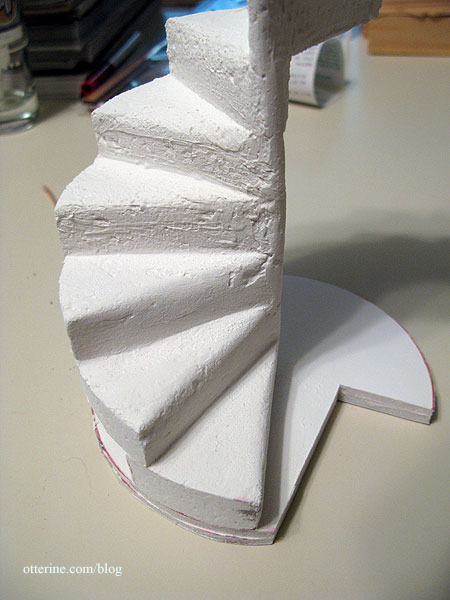
I primed the whole assembly with gesso.
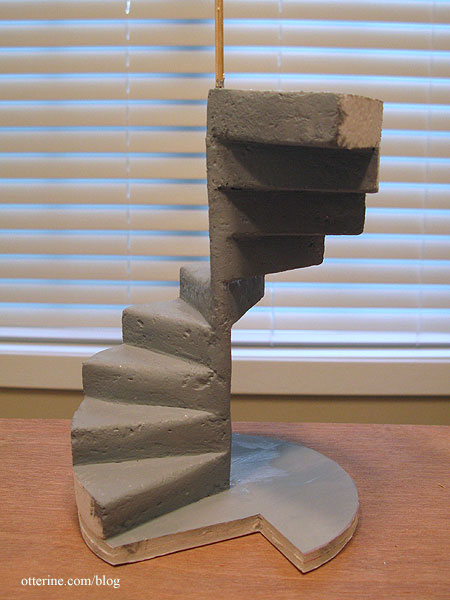
The paint colors I used are first Camel and then Desert Sand, both by Americana. I then just kept adding washes of browns (Coffee Latte, Asphaltum by Folk Art and Traditional Burnt Umber by Americana) and tiny bit of black. I lifted off the excess with a paper towel and just kept adding until I got to the coloration I wanted. Here it is mid-process.
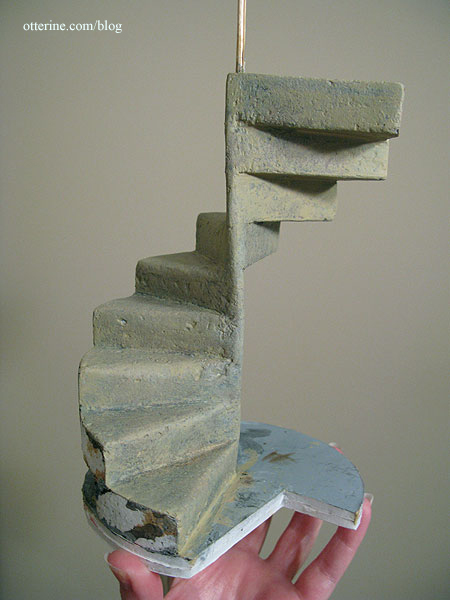
There was a great deal of “chicken or the egg” with the spiral stairs, and I ended up finishing them completely on their base before gluing them next to the main room and then adding the final tower over the top of them at the end. I kept constantly fitting the tower over the stairs to make sure they would still fit.
Here’s how they look in the final layout. From this angle, they look built right into the wall, though there is a very small gap between the stairs and the tower wall. This was so the tower could be lowered over the staircase as the final step in construction.
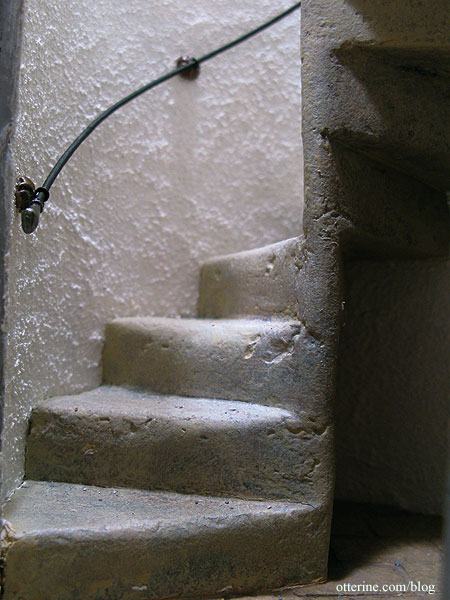
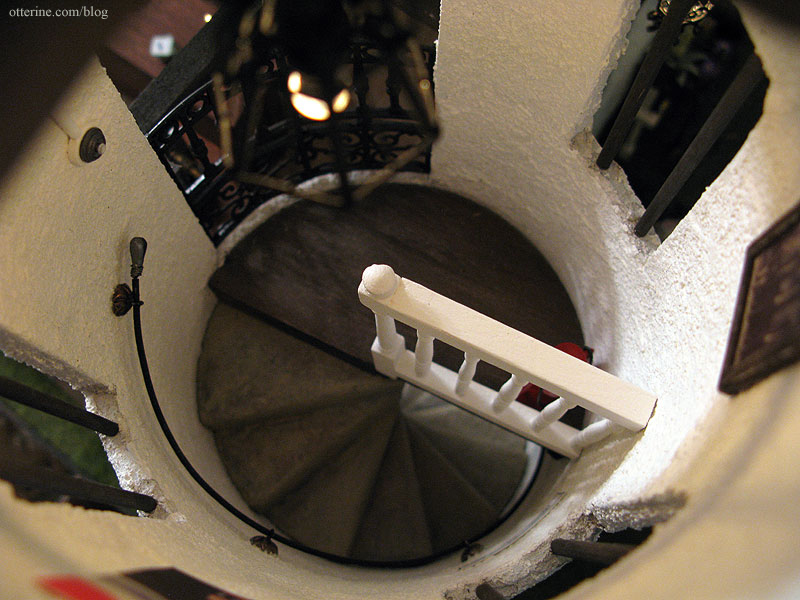
From above, you can somewhat see it. But, I love the way they turned out…just like I had it in my head! :D
I will detail the tower construction, including the balcony and railing, in future posts.
—-
Update: Tower construction, part 1, part 2 and part 3.
Categories: The Aero Squadron Lounge
September 7, 2012 | 0 commentsThe Aero Squadron Lounge – Exterior accessories
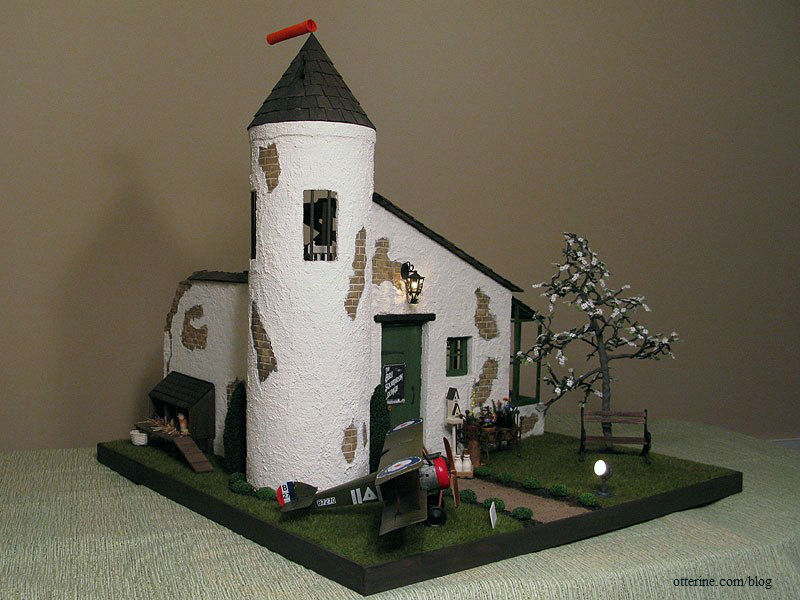
There aren’t a lot of exterior accessories on The Aero Squadron Lounge compared to the interior, but I tried to make what I did add to the outside count for a lot. I’ll detail the landscaping and construction changes separately, but here are some close-ups of the exterior details.
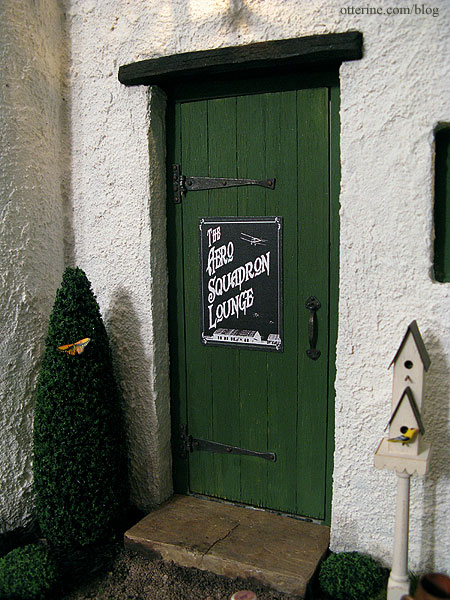
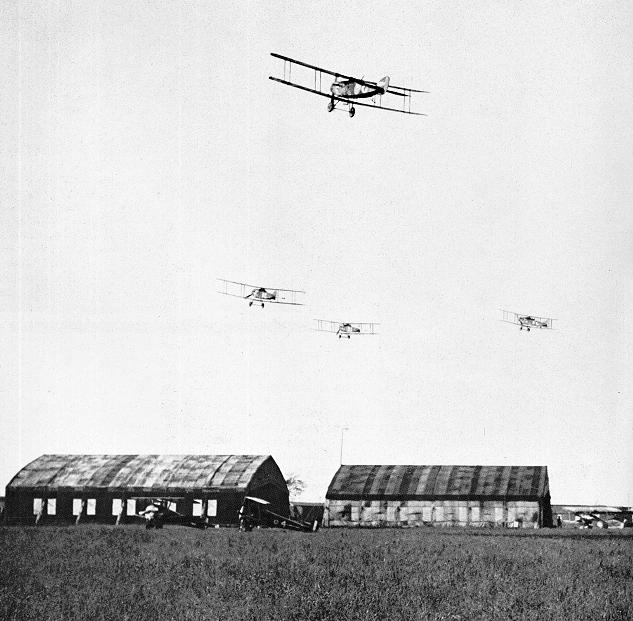
I used a WWI photograph to make the main Lounge sign. I tried out a number of colorations for the background and ended up liking the black and white “negative” version the best. The others seemed to either compete with the color of the front door or be too washed out.
Here is the original photograph from 9thinfdivsociety.org.
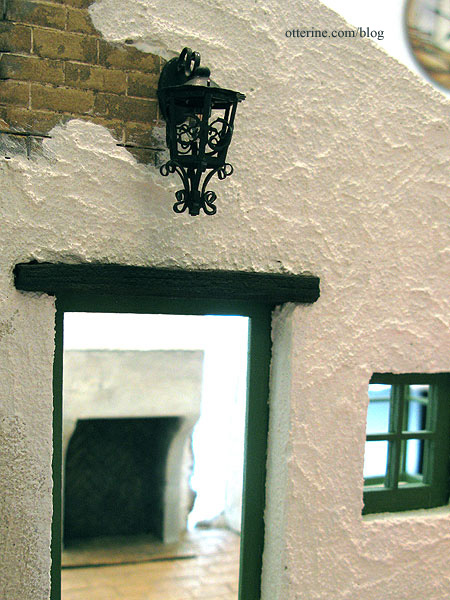
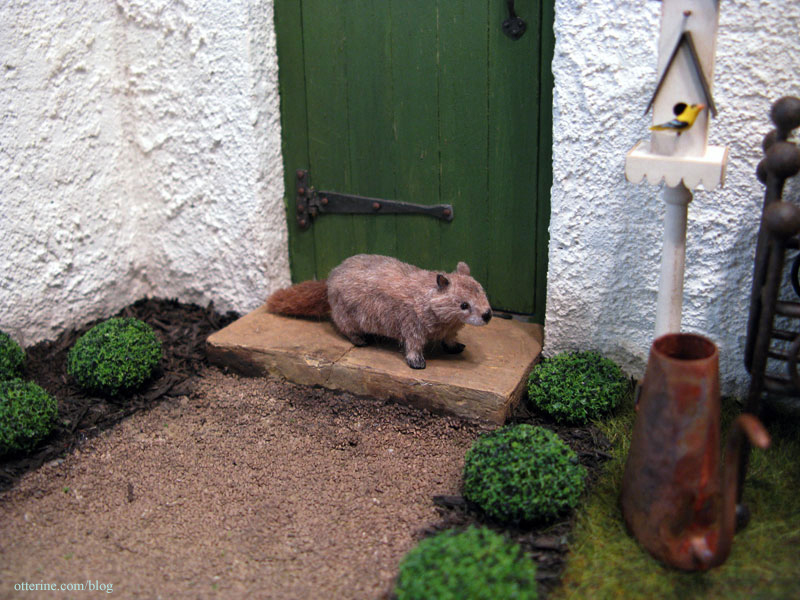
The overhead light is by Heidi Ott. It’s similar to the indoor lighting, but it originally had a shiny finish. I dabbed on black acrylic paint to tone down the shine and removed the plastic “glass” from inside the cage.
This lovely birdhouse was made from a kit by Twilla’s Tiny Treasures, the bird is from A
Little More in Miniatures.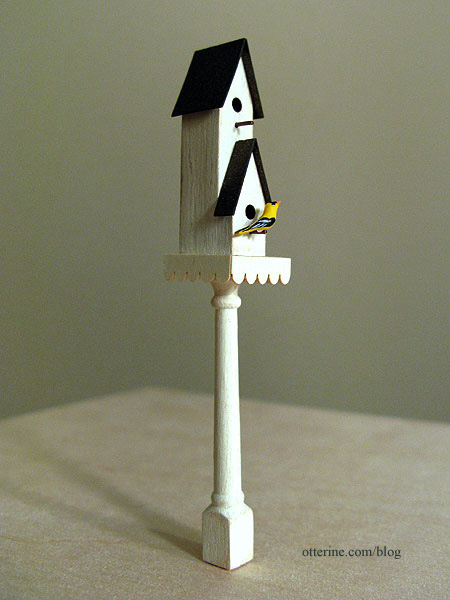
I used a small length of wire glued into the bottom of the post to hold it in place in the builders foam base. Uh, oh! Looks like a kitty has wandered over and spotted the birdie! :O
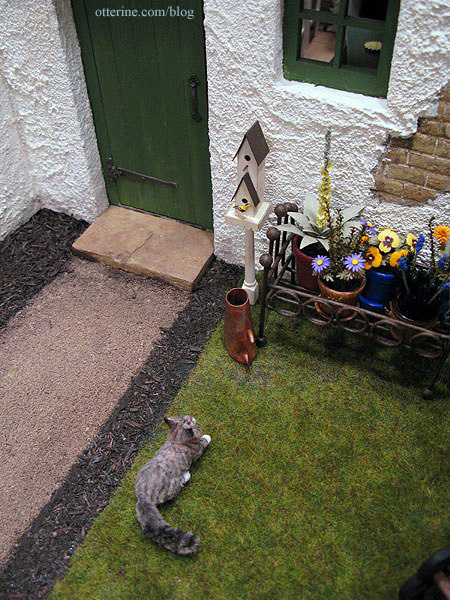
Woodrow also made an appearance as I was building, but neither of these critters will live at the Lounge permanently. :]
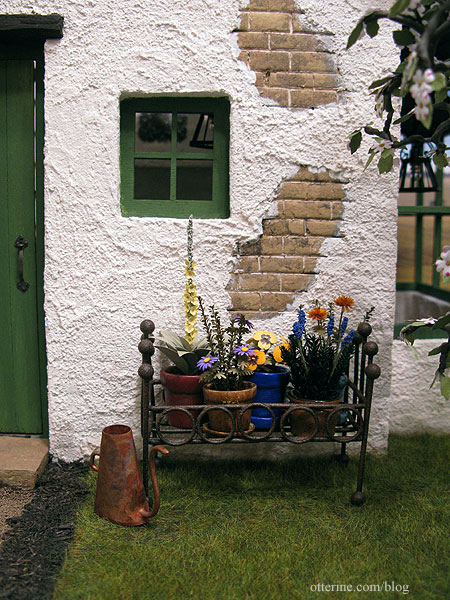
I also showed the planter and plants in earlier post, though I didn’t end up using one of the plants I made. I really like the way this small potted garden fills the space without taking over. The watercan is from Celtic Juju. The plants are made from a combination of kits from The Miniature Garden and Bonnie Lavish with added greenery from A Little More in Miniatures.
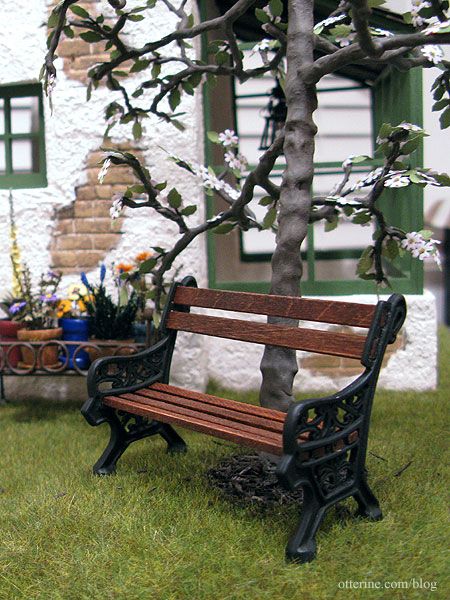
The bench was assembled from a Phoenix Models kit. The “kit” comes with two white metal bench ends that you can paint, and you supply the wood in whatever length you wish. It’s a perfect solution when you need a completely custom size bench. It’s a sturdy little piece once you manage to wrangle all the wood ends into place.
I used some leftover Dura-Craft trim wood for the seat slats and skinny sticks for the back rest, stained with Minwax English Chestnut. I cut the boards 3.25″ in length, so the seat ended up at 3″ wide — a perfect loveseat under a pretty tree. :D
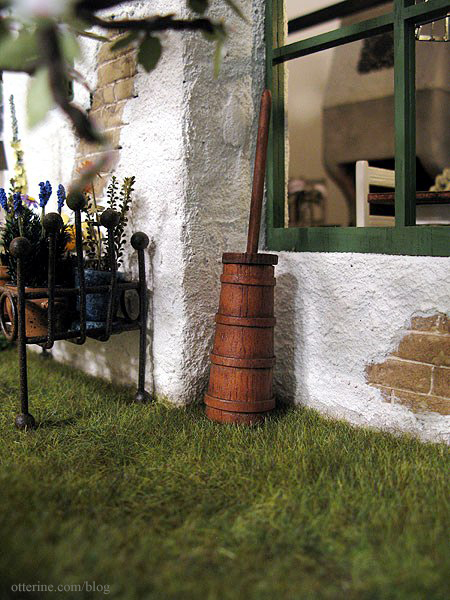
I bought this cheapy butter churn at the Bishop Show and added some black and brown washes to it. That subtle aging made all the difference; it looks like a high quality piece now. :D
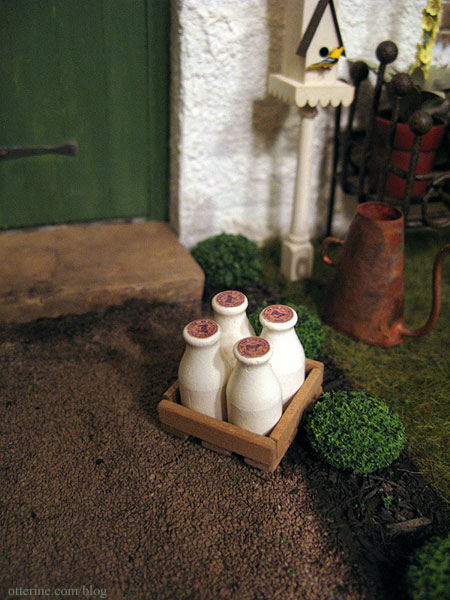
I purchased the milk bottles for I think a quarter each last April at the Bishop Show…or fifty cents each, some small amount. They were wonderfully painted. I added a light grey paint wash to tone down the bright white and printed vintage milk caps for the tops.

I made a quick milk crate from skinny sticks and placed them on the pathway. They would look great on the front stone step other than the fun fact that as soon as you opened the door, the milk would go flying. :\
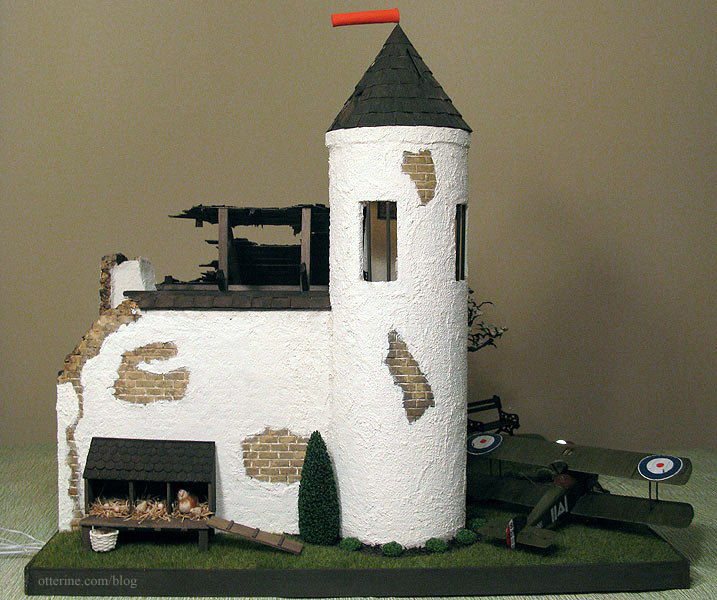
The henhouse is not easily seen in the overall build because of the tower, but I’m glad I included it. The breed of hens I’ve made are Faverolles, a French hen suggested by Teddi. I have a standing hen not yet completed.
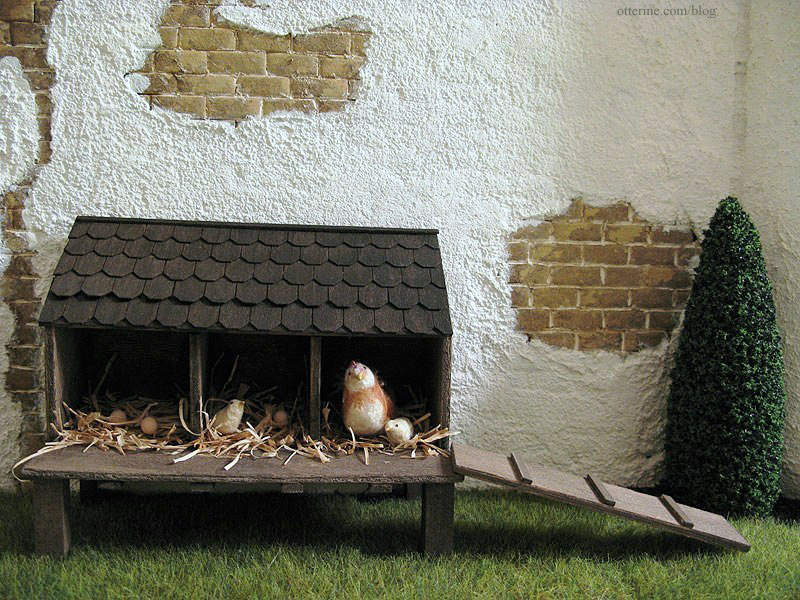
I’ve used a few of the eggs I made, too.
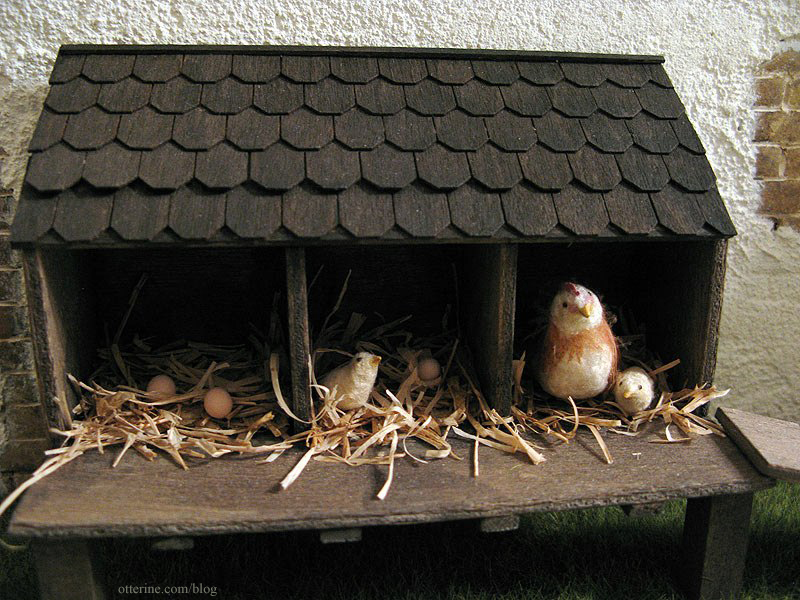
The henhouse is just what was needed to fill the open area on this side.
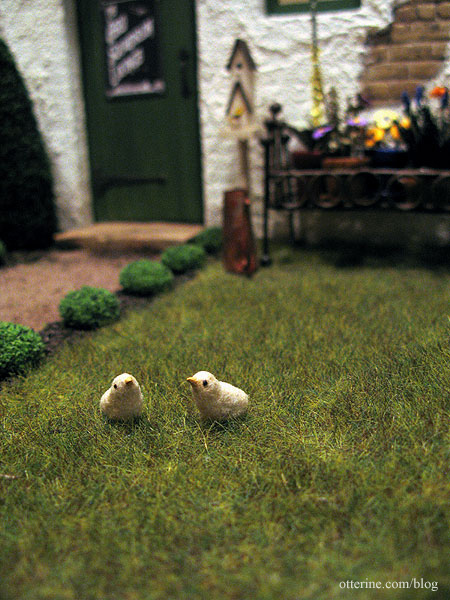
And, speaking of hens…there’s chicks on the lawn.
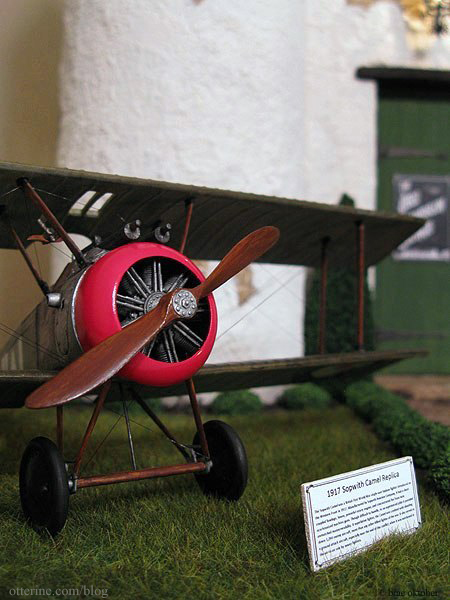
The full post on the 1:32 Scale Academy Sopwith Camel can be found here. The sign verbiage is taken from the Wikipedia article on the Sopwith Camel. I printed it on paper, pasted it onto a primed wood scrap and staked it into the ground with some wire.
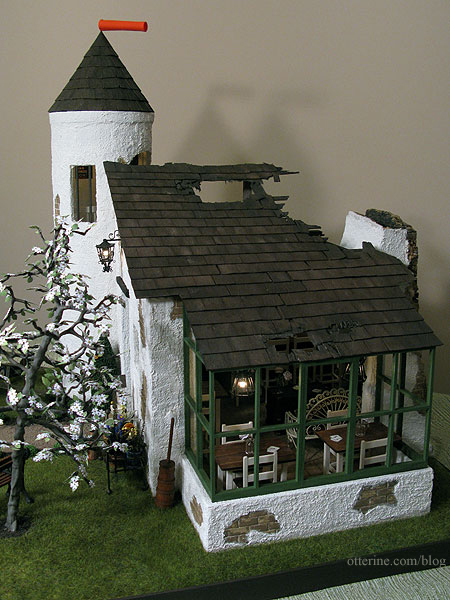
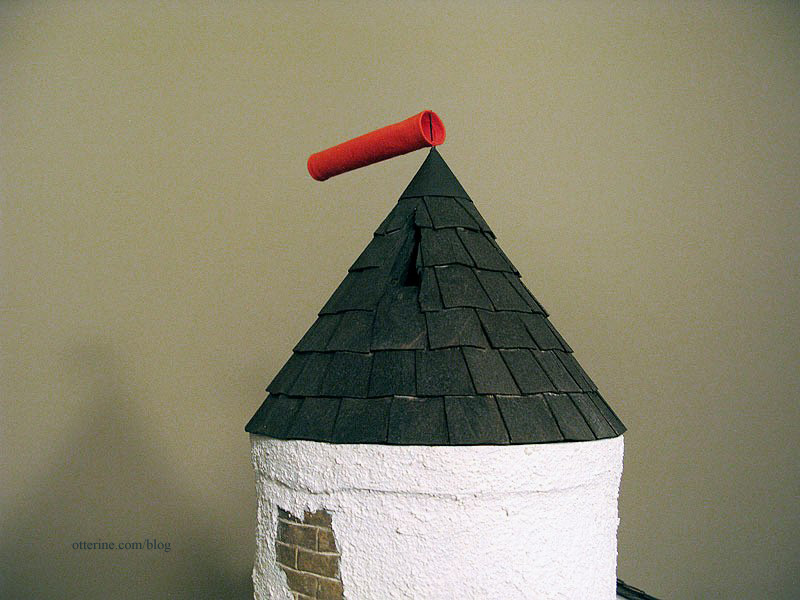
And, of course, the windsock that sits on top of the tower isn’t easily missed. ;D It’s a glued tube of orange cotton held in place with a head pin. Yes, it rotates, though it pretty much always falls back into the same place.
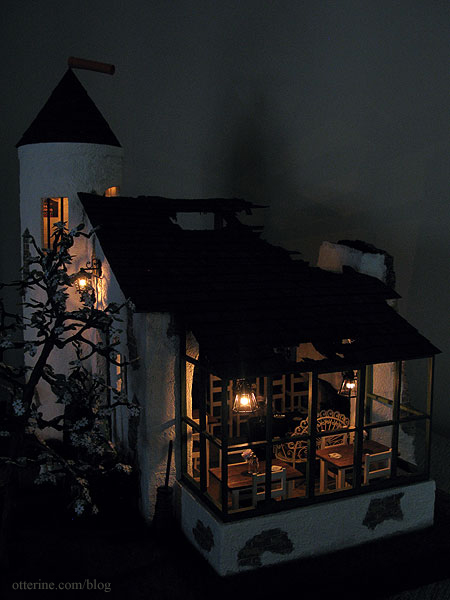
Stop on by for a nightcap.
Categories: The Aero Squadron Lounge
September 6, 2012 | 0 commentsThe Aero Squadron Lounge – Interior accessories
I added a lot of accessories to the interior of The Aero Squadron Lounge. Some are WWI or aviation related, some are bar related and some are just plain fun. :D These are in no particular order. I’ll cover the interior construction portion in a separate post.
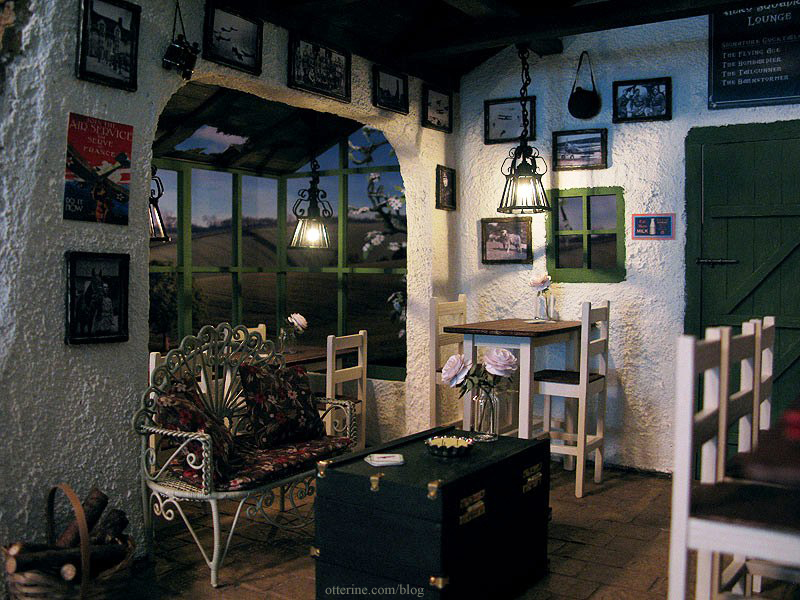
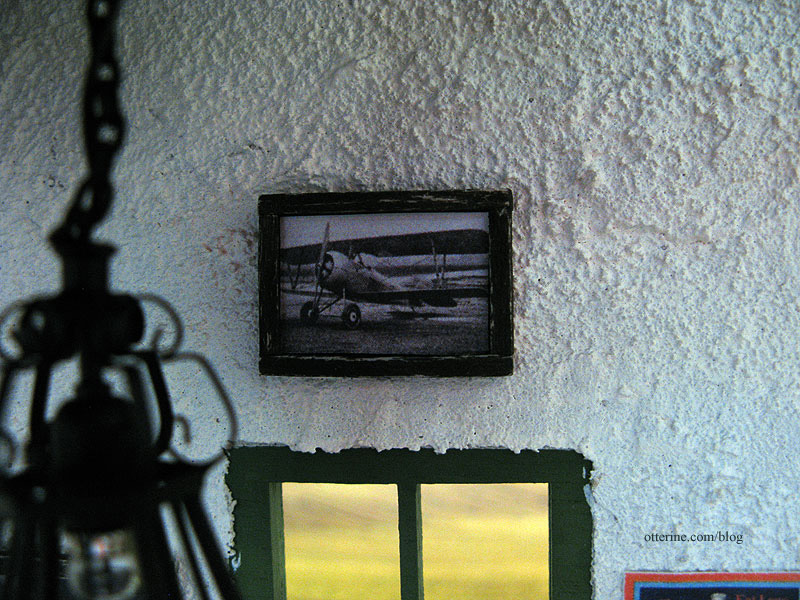
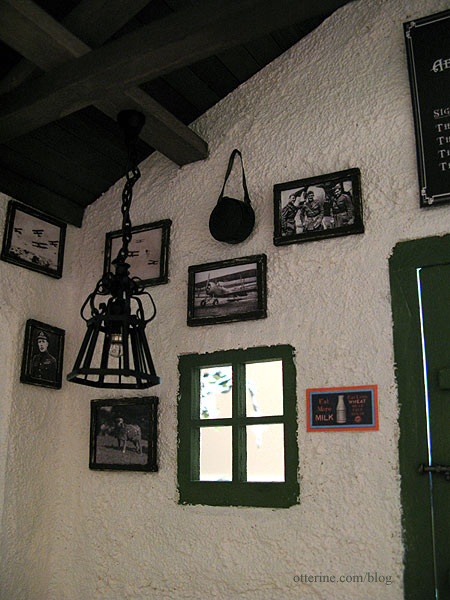
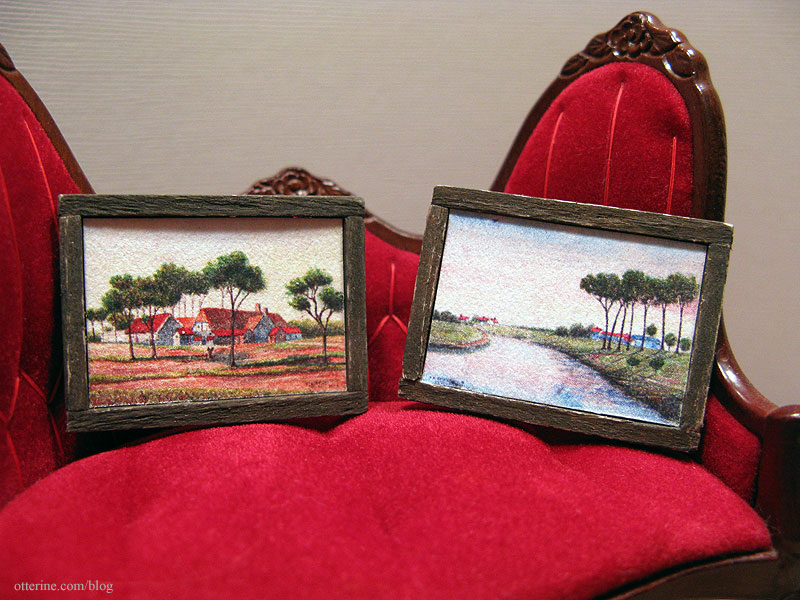
For the artwork, I used all WWI photographs found online and built matchstick frames for each and every one of them.
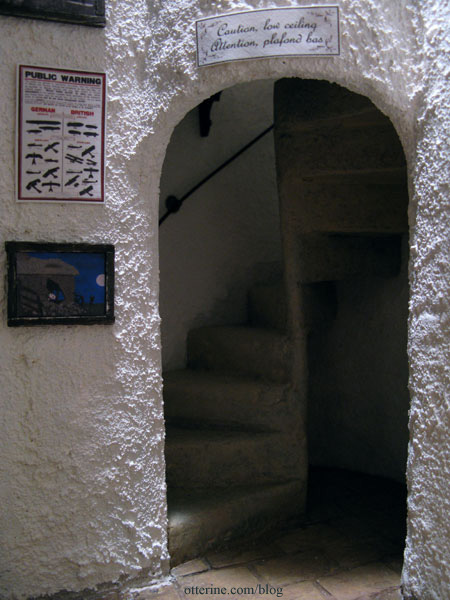
There’s even one of Snoopy in WWI France from It’s the Great Pumpkin, Charlie Brown. The public warning poster shows the difference between German and British aircraft. Thank you to Carole for the French translation on my low ceiling sign.
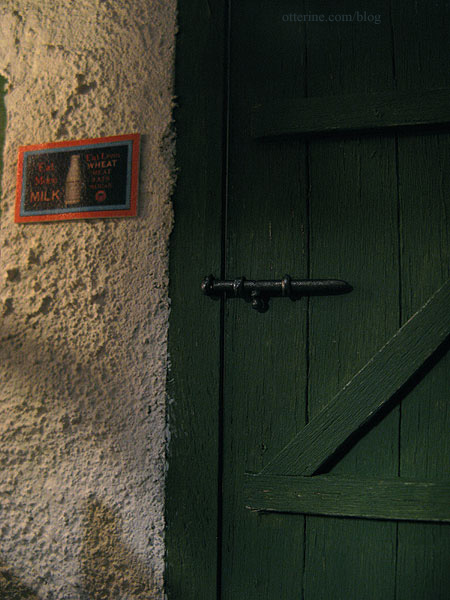
The door has a working latch from Olde Mountain Miniatures. You can also see the flyer reminding you to eat more eggs and milk…to save the meat for the soldiers.
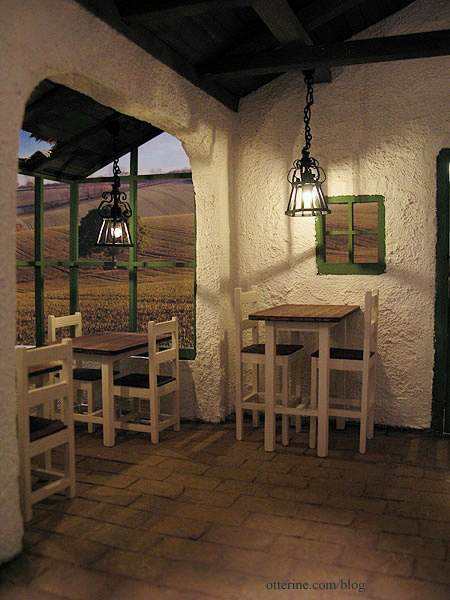
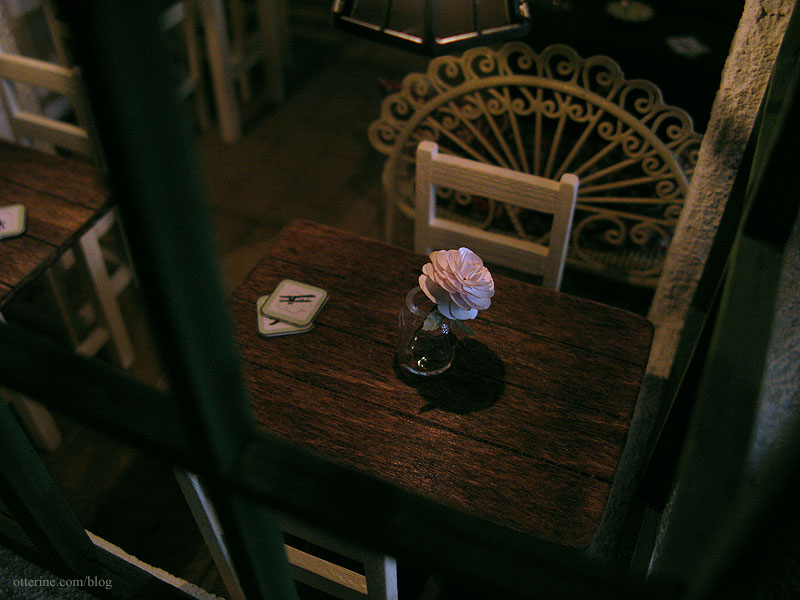
The tables and chairs are made from patterns in the book Finishing Touches by Jane Harrop, though I modified the height measurements for the pub chairs and table. My backdrop is from thundafunda called Oak Tree Countryside. The lights are from miniatures.com.
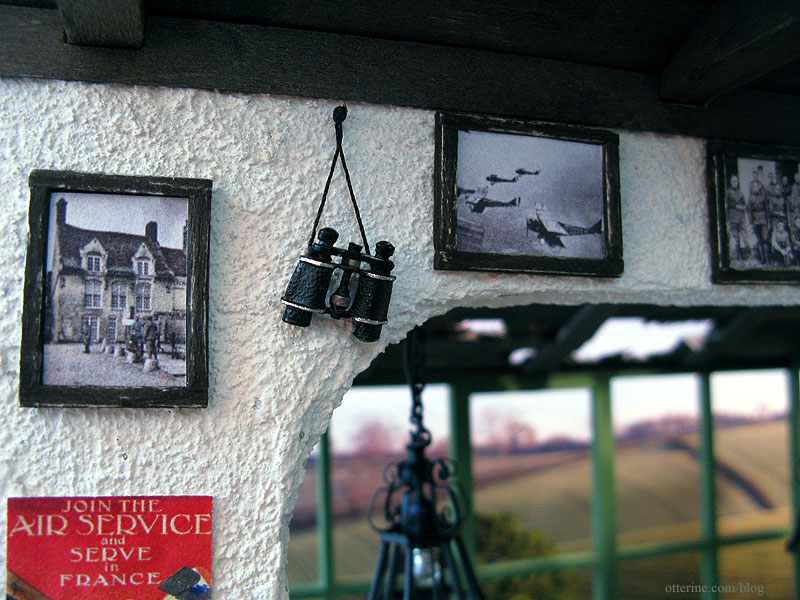
The autumn Bishop Show comes to town in mid August, so I was able to pick up a few things there. Sir Thomas Thumb saved me the trouble of trying to figure out how to make binoculars. :D The image on the upper left is a print from an actual color image from WWI; they are rare but they do exist.
I was unsuccessful in finding a canteen at the show. Yes, you can buy them for about $12 online, but why do that when you can spend 4 hours making one?!!! :D It was made from two self covered buttons, leather scrapbook paper, ribbon, headpins, a wood bead and the tiniest laser cut paper buckles I’ve ever seen. Teeny, tiny buckles!!! (From Dragonfly International.)

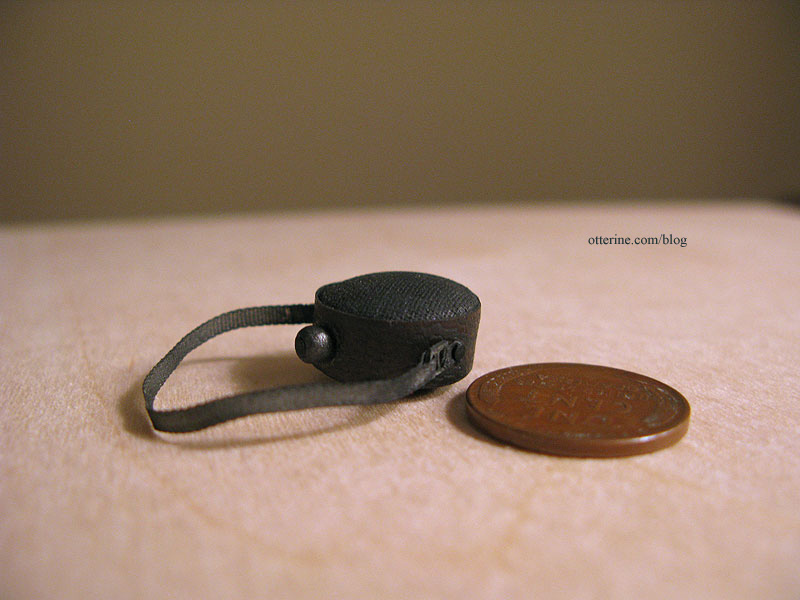
The canteen was originally meant for the display case, but after all that work I placed it prominently on the wall over the pub table.
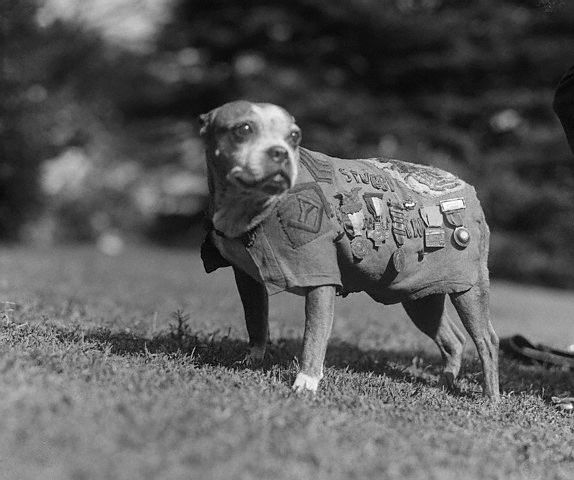
Yes, that’s a dog in uniform in one of the photos. :D Read the story of Sergeant Stubby the pit bull on Wikipedia here.
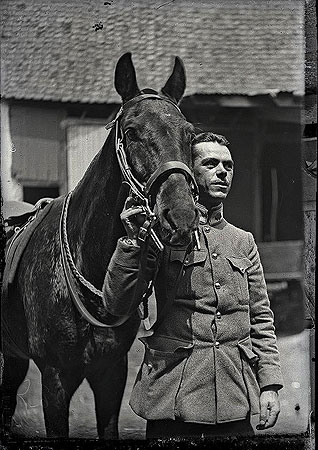
He’s not the only animal featured in the Lounge. I found a story on a wonderful group of photographs that were found in an old French farmhouse. They are called The Lost Diggers, and unfortunately their main site seems to be only on facebook. I’m not a member of facebook, so it’s hard to see them there. You can also find them here. They are remarkable images, some very candid.
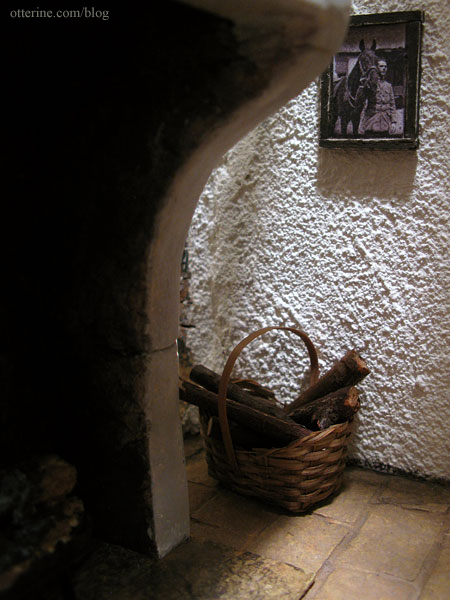
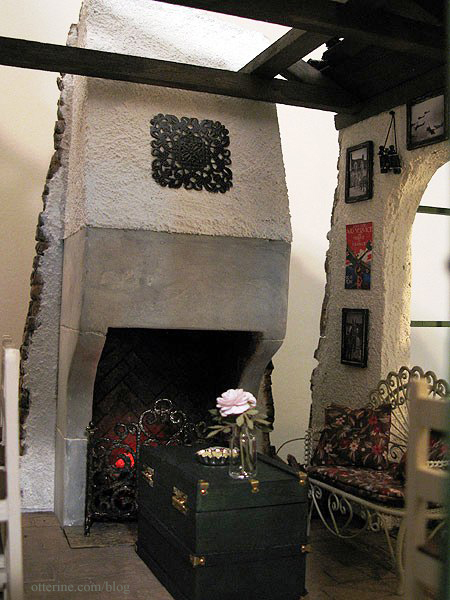
The basket was a free door prize from the 3 Blind Mice show. I aged it with a brown paint wash and added logs from the various fire grates I’ve ordered and then used lighted coals instead. Always pays to save the odds and ends.
The fireplace screen is by Jeannetta Kendall and purchased from lacyhome4boys on eBay. Here’s the shiny new screen in place; it looks like I built the fireplace around it but that’s just coincidence. :D I bought this as a last minute addition.
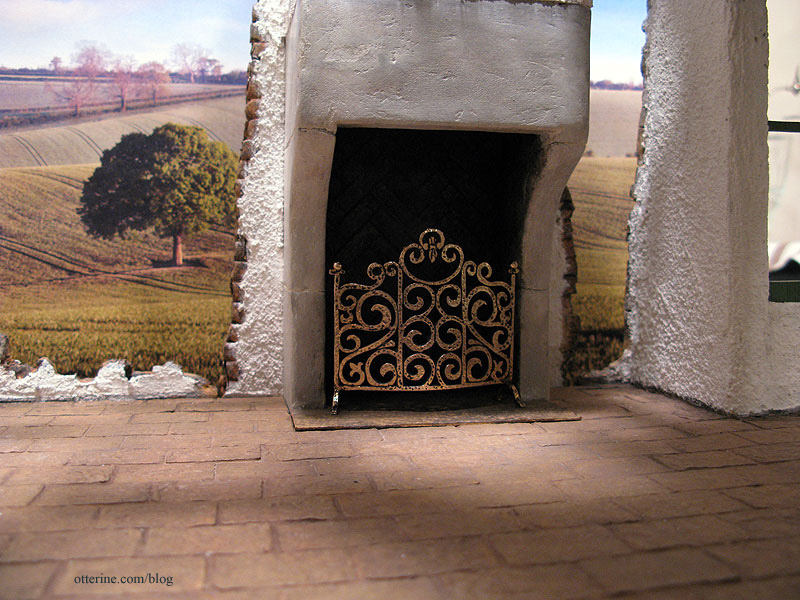
I used black acrylic paint to age it and tone down the shine. Much better.
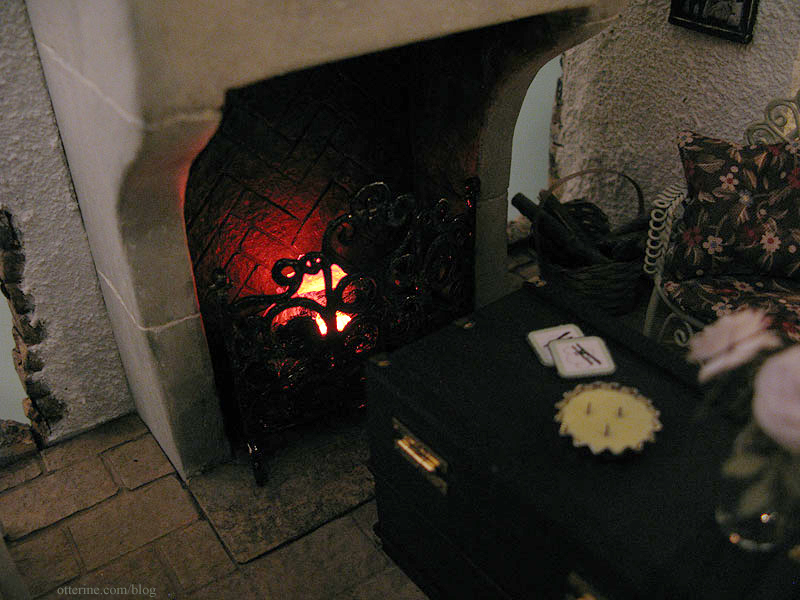
The medallion above the fireplace is a jewelry finding. The metal settee was painted and upholstered. The trunk was made from a kit by Catland (bought from bluebearcountry on eBay), though I didn’t use the artwork included. I also added brass hinges and brad detailing.
The coasters were made in Word from a biplane image from The Graphics Fairy. They were printed on Avery labels, stuck to cardstock and then cut out with scissors.
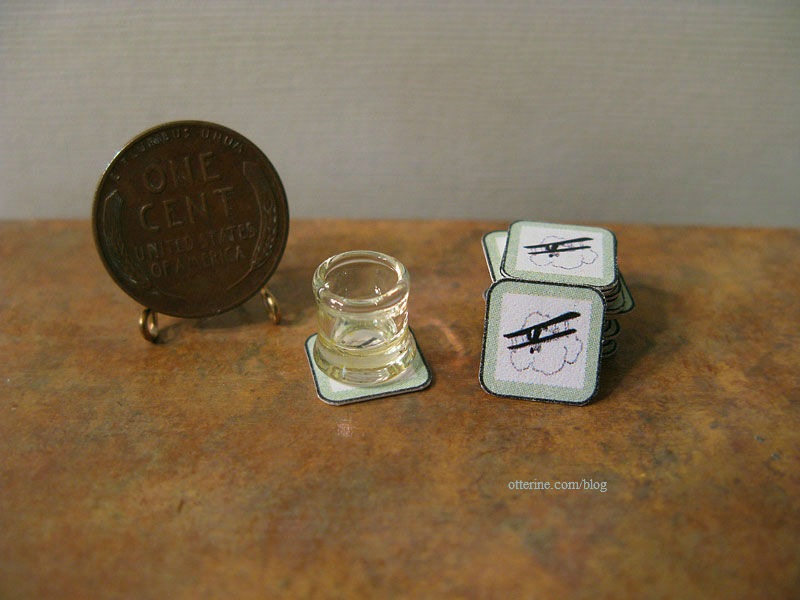
Here are the coasters in place. The rose is one of the Bonnie Lavish grandaflora roses I made.
I purchased the tiny metal plane from A Pocket Full of Wishes at the 3 Blind Mice show last April. The candlestick lamps are from Minimum World.
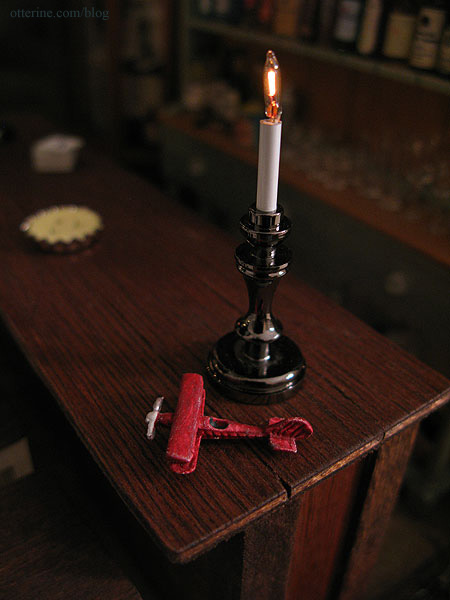
I’ve used two of the citronella candle tins I made awhile back – one on the bar and one on the trunk. (These are in my etsy shop as new and “burned” wick styles.)

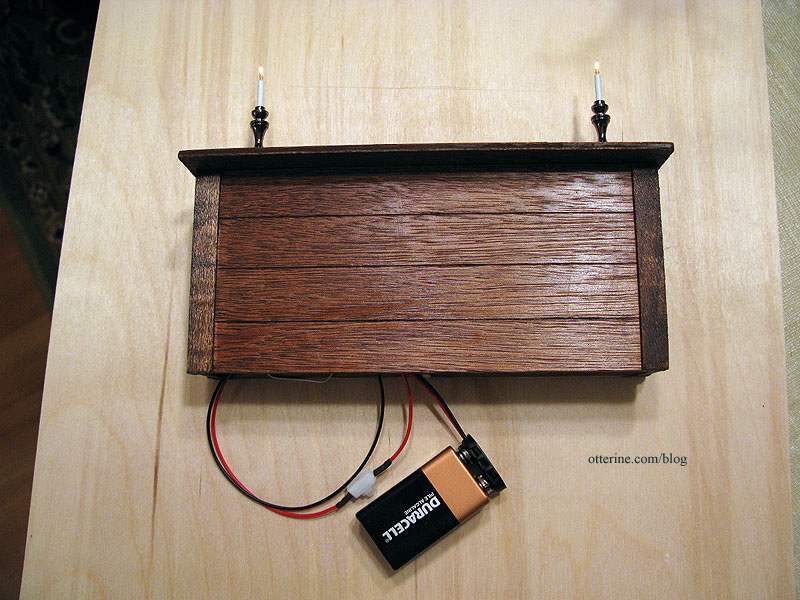
The bar itself is a scratch build using leftover wood from Baxter Pointe Villa stained English Chestnut by Minwax.
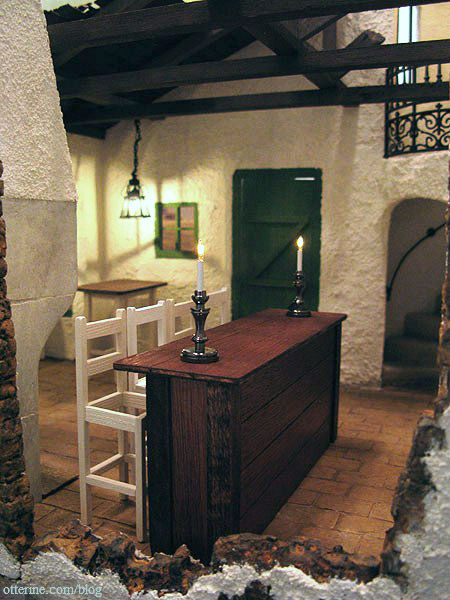
To keep the bar removable, I wired the two lamps to a 9V battery adapter with an on/off switch from Evan Designs. Ingenious, right? Ha! There are two main issues with this idea. First, the bar is definitely removable, but it is hard to get it back into place without the wires sticking out…very fiddly. More importantly, the battery doesn’t last long and the candlesticks are very dim. I tried wiring each lamp to its own battery but the difference in brightness was negligible and it doubled the fiddly nature of trying to get the bar in place with two battery assemblies fighting for freedom. What I should have done was made a plug in the floor.
The reproduction farmhouse hutch I made serves as the back of the bar.
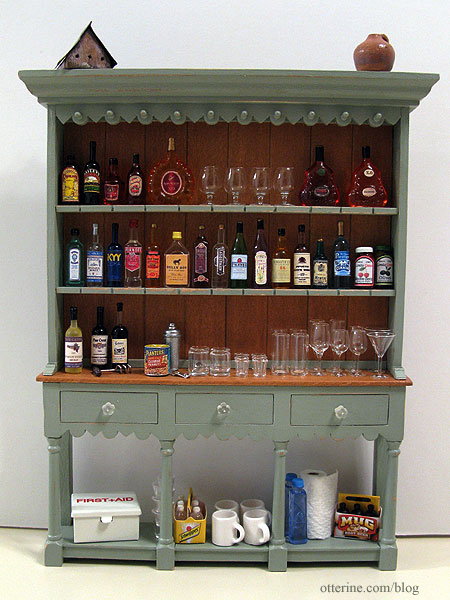
I purchased some of the bottles, and Keli sent me some. I made a number of the labels myself from images found online. I even replaced a few of the labels on the purchased ones with more authentic versions. The glassware is all from The Little Dollhouse Company and is by far the priciest part of the build but looks so realistic. There’s a corkscrew, bottle opener, cocktail shaker and can of peanuts, too. :] The birdhouse on top is from Celtic Juju.
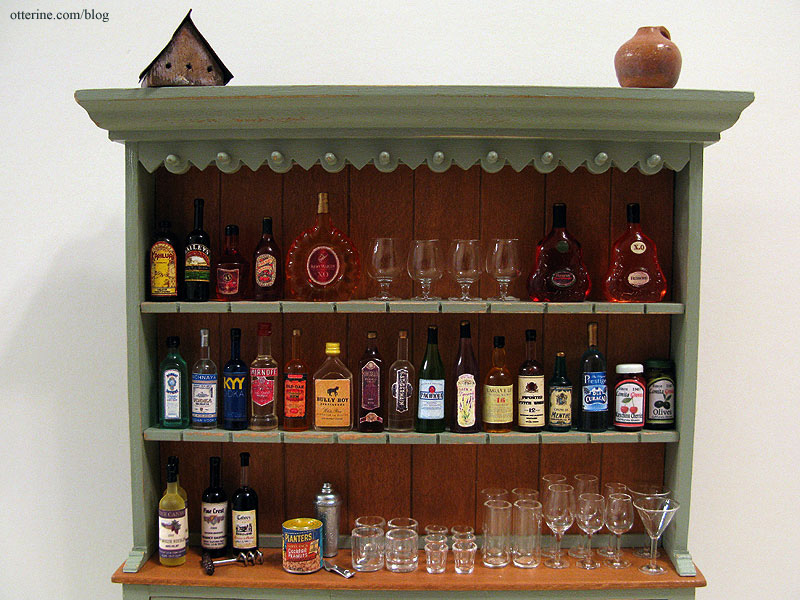
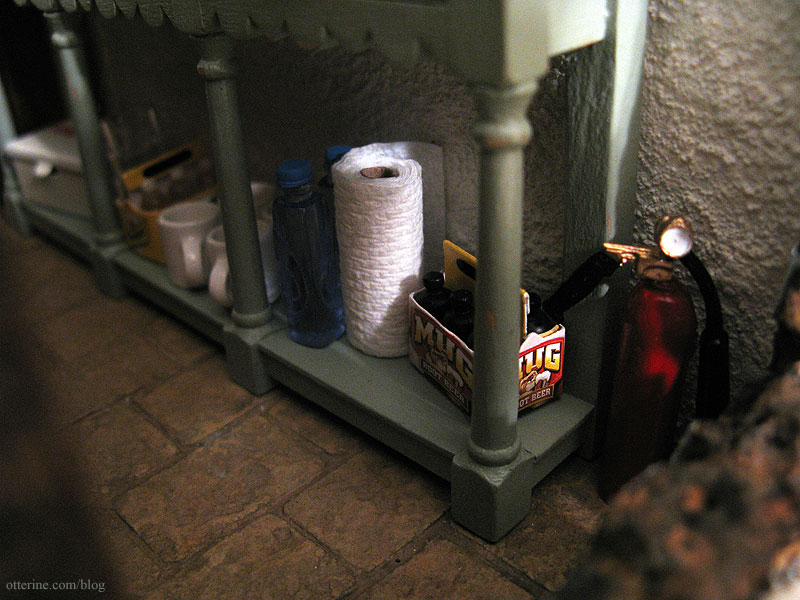
I have to point out the fab paper towels from Lyssa! There’s root beer for Snoopy as well as some Schweppes for mixing. Our safety features include a first aid kit and a fire extinguisher. ;]
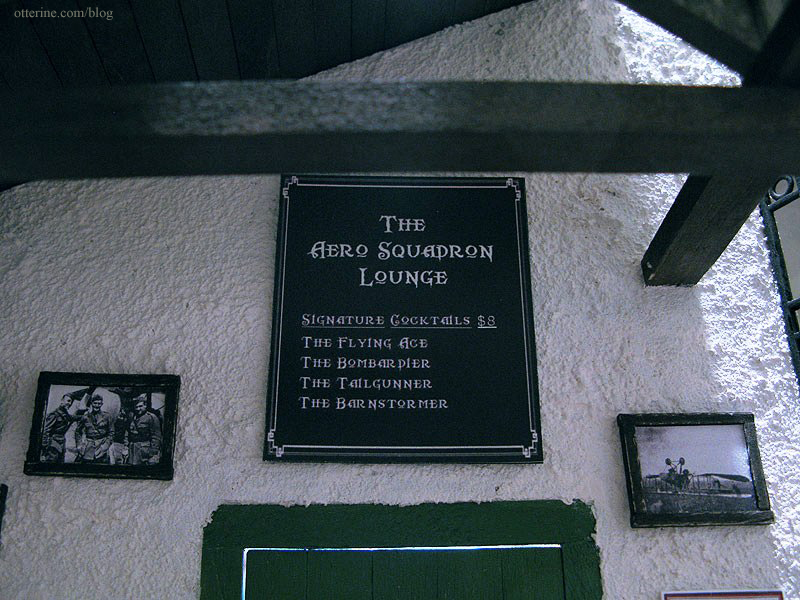
The menu board above the front door listing the signature cocktails. I wanted it to have a chalkboard look to it.
The vintage display cabinet I bought has all WWI and aviation memorabilia. The metal, plastic and leather goods were purchased, though I added labels to the metal bottles and aged the plastic compass. All of the paper items were printed from images found online of actual period items.
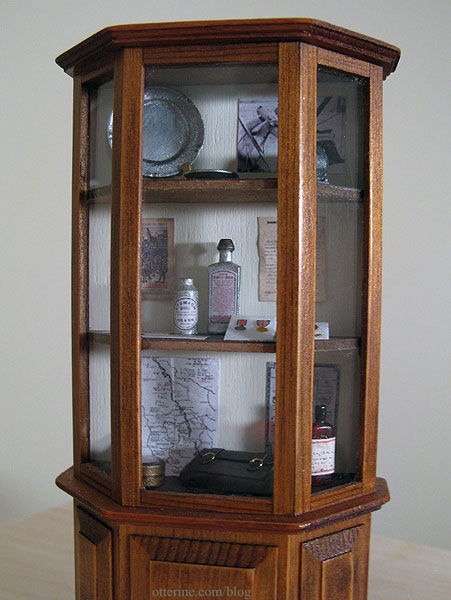
On the top shelf, there’s a photo of a Sopwith Camel cockpit as well as two metal plates and a small motor.
On the second shelf, there’s a magazine page showing an illustration of American troops arriving in France, two postcards, two metal bottles of vintage remedies (I added the labels), an honorable discharge letter for an Army aviation mechanic from Dec 1918, two medals, a pocket watch and two coins. For the magazine page and letter, I crumpled the paper and straightened it back out to add to its age. The British war medal and the WWI Victory medal with aviation band were printed on paper. I dabbed metallic paint on the medal portion to give it depth and shine. The pocket watch was assembled from a tiny laser cut paper kit from Dragonfly International. The coins are laser cut brass from a fret I’ve had awhile – not sure of the vendor.
On the bottom shelf, there is a map of American air service units from Nov 1918 and a vintage medicine advertisement from a shop in London selling remedies. It states: “Remember there are no Chemists’ Shops in the Trenches.” Also on the shelf are a compass (aged with paint), a purchased leather satchel and a purchased medicine bottle (this last piece is from Wright Guide Miniatures).
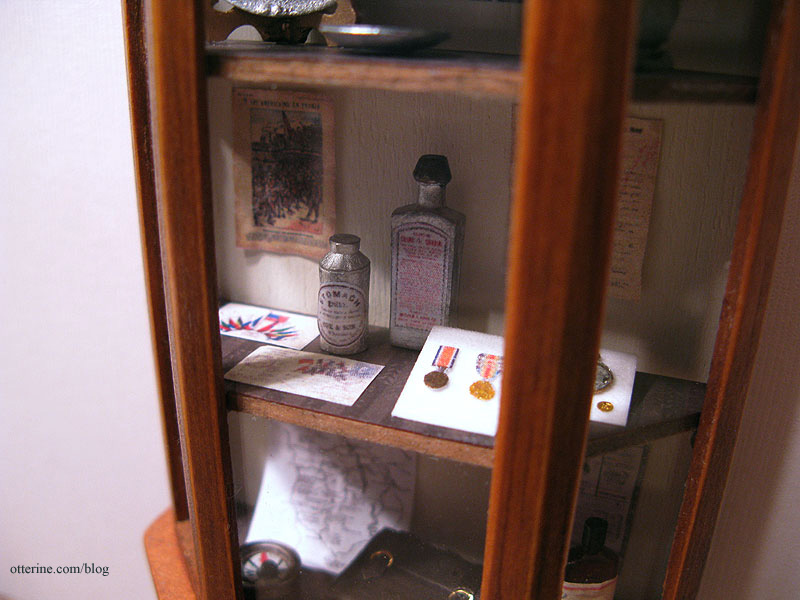
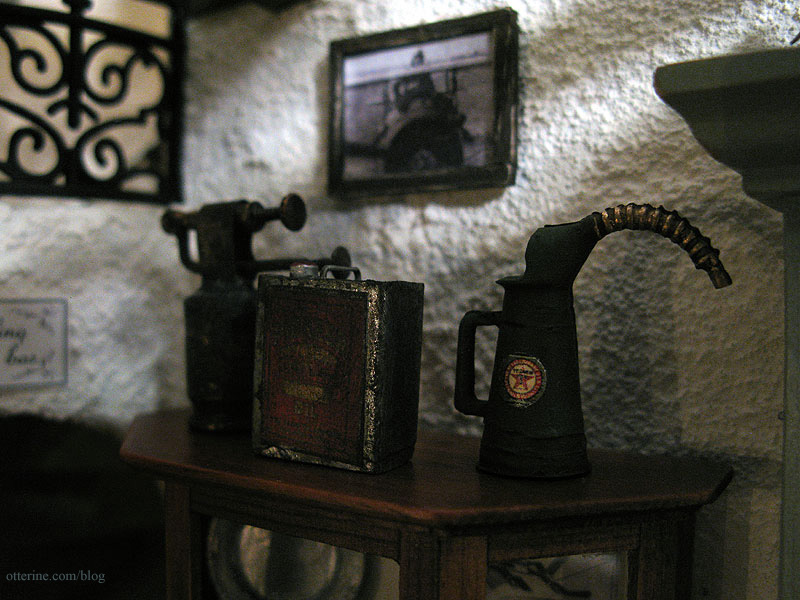
On top of the display case is a blow torch from the mini shows in April (I can’t recall the vendor) and two gas cans from Wright Guide Miniatures.
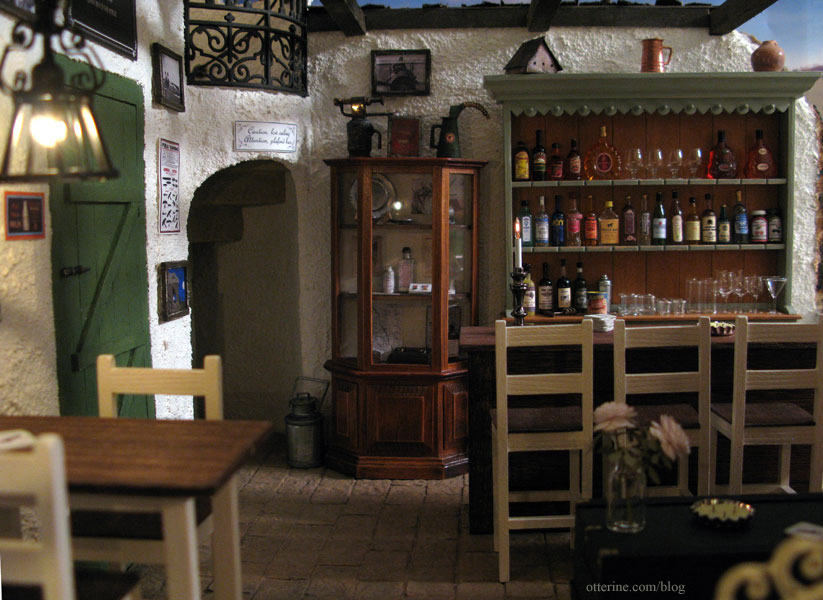
There’s a metal milk can from Minimum World on the floor by the display case, too. I love the way the interior looks through the windows of the greenhouse addition.
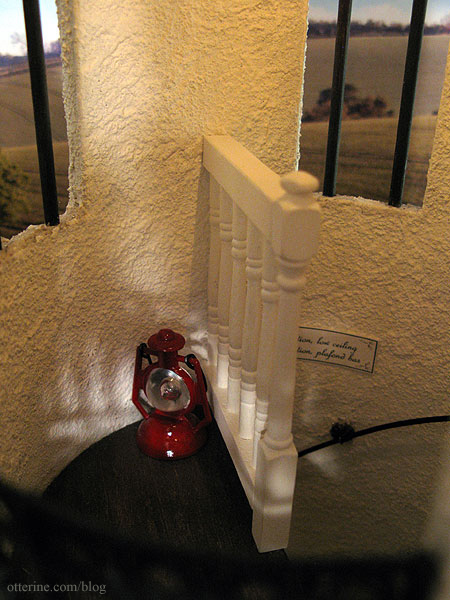
Upstairs in the tower, there’s a small platform so visitors can see outside. There’s artwork here, too, but it is hard to photograph. The tower roof is removable so you can see inside. See that switch on the wall? I’ll tell you about that later. ;D
I have a small lantern from Hobby Lobby up here in case the lights go out. We don’t need people tumbling down the stairs in the dark. There’s the other low ceiling sign on the right.
Update: One of the drawbacks of working on a project in secret is that others can’t pipe in and say, “I have just the thing for your mini scene!” Now that The Aero Squadron Lounge has been revealed, a friend and fellow miniaturist was able to do just that.
Elga inherited two small paintings from a collection belonging to her late Mother-in-Law and offered to send me scans so that I might add these little paintings to The Aero Squadron Lounge. I was overjoyed at the thought, and I fell in love with them when I saw them. I reproduced them in miniature and moved things around in the Lounge to include even more real history. (Full post here.)
Categories: The Aero Squadron Lounge
September 5, 2012 | 0 commentsThe Aero Squadron Lounge – reference material
I like to do a fair amount of research when bringing a build to life, and The Aero Squadron Lounge was no exception. In addition to the online research I did on the Sopwith Camel, I checked out books and watched movies on the subjects of WWI, known at the time as The Great War, and French country design. I am by no means an expert on either, and I didn’t really delve into the politics of the war, but a lot of this material helped me come up with ideas for the look and feel of the build. For any online sources, I have linked (or will link) to them in the various relevant blog posts about the build, so they are not listed specifically here.
I promise there are posts with more pretty pictures coming soon, but I thought you might like to read about where some of the inspiration comes from.
Films:
Wings, 1927
This silent movie was a real treat to watch and I highly recommend it. The plot surrounds two WWI pilots and the people connected to their lives. Being that it was made in 1927, the locales, sets, planes, fashion and other details are all as close to the real thing as possible. The accompanying score and sound effects are great, too! Without dialogue, there is the usual demonstrative acting which is so endearing of silent film. The subject matter is obviously grave, but there was such an innocence to the way it was portrayed without making light of it. There was also some farcical humor, and the action scenes are amazing given the film technology of the times. Just a great movie.Flyboys, 2006
This movie is about American volunteer pilots in the Lafayette Escadrille, and while it isn’t the best or most historically accurate drama around, the settings and planes are well worth seeing.The Red Baron, 2008
Again, not the most thrilling or in-depth movie, but the planes! :DInfluenza 1918, 2005
This PBS documentary details the influenza outbreak in 1918-1919. While not directly related to my build, I ran across it while searching for reference material. What I found remarkable about it is the same as what many say, that I had never heard about it until later in my life and just how “forgotten” the pandemic seems to be. Even in the documentary, people who survived said they wanted to forget, that it was too horrible and too inexplicable. Medical knowledge about the flu was virtually nonexistent at the time, too. Looking back, you can see how so many of the things people did likely increased the spread, most notably all the large public gatherings and parades going on at the time. It’s an interesting documentary to watch with interviews of the people who survived as children being the most moving part.Books:
Diary of a WWI Pilot, 2004
This is the authentic diary of Harvey Conover, a WWI pilot. This book is funny, moving and a real treasure. It is so interesting, for the lack of a better word, to see the experience of it all through the eyes of someone who was there. The tributes Mr. Conover wrote about fallen friends and the epilogue written by his daughter after the diary are wonderfully poignant. I highly recommend this book, even if you have no interest in WWI history, simply for its thoughtfulness and emotion.One caveat is that the daughter edited out some content that was racially charged since she knew her father to no longer hold those feelings later in life. While I understand her reasons for not wanting to show her father in a bad light, it does a certain disservice to the authenticity of the diary.
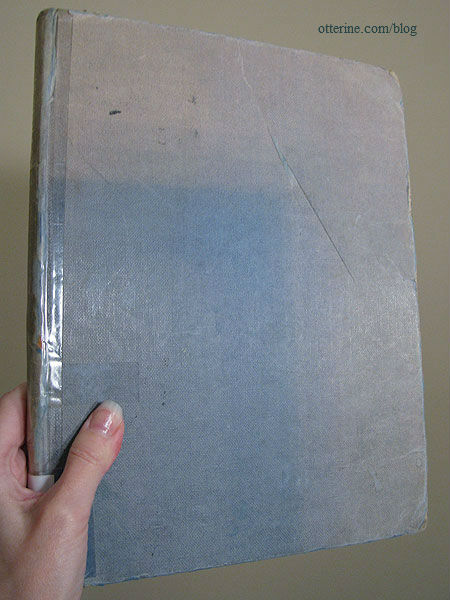
Sopwith Camel – King of Combat by Chaz Bowler, 1978
An excellent source for the airplane build with many great photographs not only of the planes but the pilots as well.As an aside, I often check out books from interlibrary loan when working on a project since I might need the reference but don’t necessarily want to add the books to my own library. This one was a sight! It came from Embry-Riddle Aeronautical University in Daytona Beach, FL and looks like it was first checked out in 1980 with a relatively consistent borrowing pattern with a few gaps here and there. My guess is somewhere along the line it was misplaced in a window. It’s all sun bleached, water stained and frayed on the outside, but the inside is in very good condition. :D Poor book…but now it has been featured on the internet!
Sopwith Fighters in Action by Peter Cooksley, 1991
This is a wonderful little paperback with loads of information on the various versions of Sopwith planes. There was no shortage of photographs and illustrations. This one came through interlibrary loan from the Marine Corps University Library in Quantico, VA.Sopwith Camel Aces of World War 1 by Norman Franks, 2003
This is a great compilation of pilots and planes, including fourteen pages of color plates showing various Camel markings.Sopwith Aircraft by Mick Davis, 1999
This book has a good sized chapter on the Camel along with a lot of photos, including some of the internal framework.French Country Style at Home by Sébastien Siraudeau, 2010
This is a lovely collection of French country interiors – beautiful photographs and lots of inspiration. This is where I found my inspiration for the stone fireplace.The French Country Garden by Louisa Jones, 2000
Wonderful collection of garden photographs, including old stone cottages.French Country Kitchens by Linda Dannenberg, 2008
I found many ideas here for hutches and general kitchen décor.Categories: Books and media, The Aero Squadron Lounge
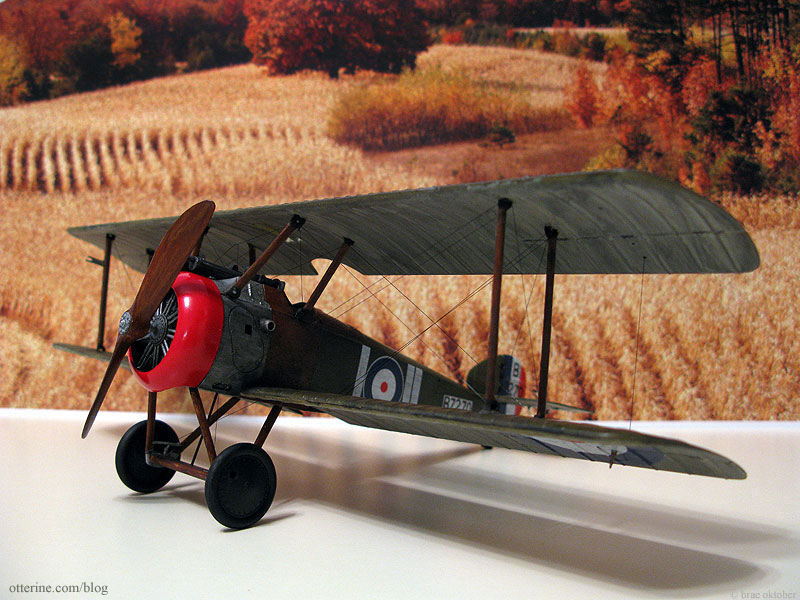
September 4, 2012 | 0 comments1:32 Scale Academy Sopwith Camel
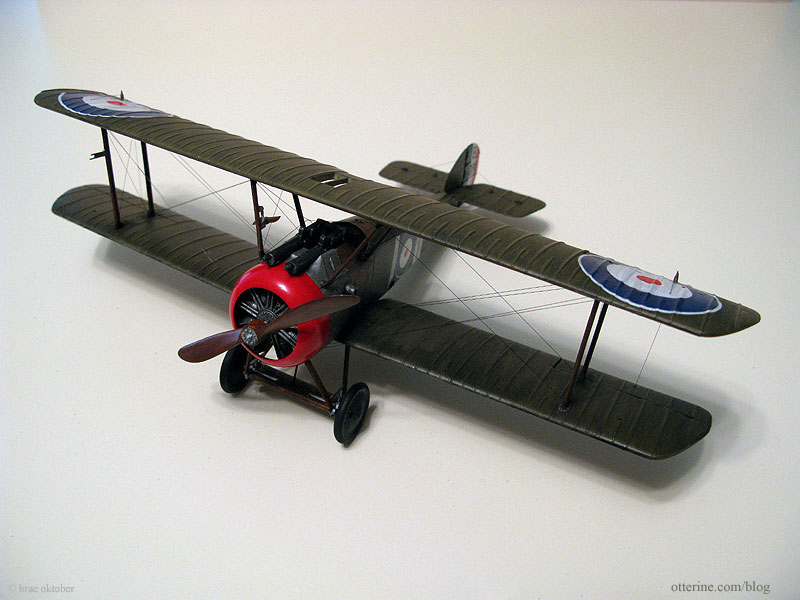
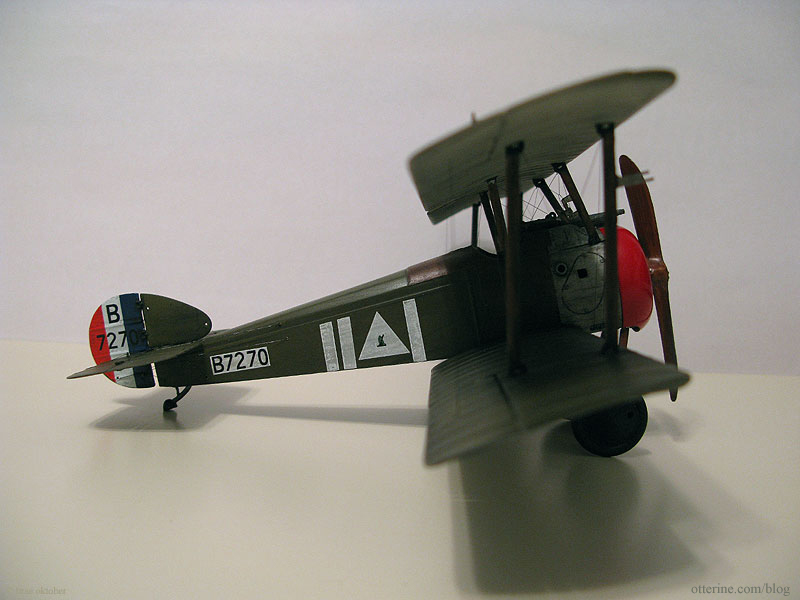
My finished 1917 Sopwith Camel Replica.
It has been a long time since I put together a plastic car model, and I have never done any sort of aircraft before let alone one with rigging. I learned a whole bunch of new vocabulary words during this part of the project, too! No, not new curse words…actual aeroplane terminology. :D
As with scale houses, there is a wealth of information out there on the internet. I found everything from novice builds to finely detailed expert builds. I opted for a 1:32 scale plane since a 1:12 scale replica would have overpowered the building itself as well as my condo. I think the one I chose looks appropriate for scale and enhances the project without taking over completely.
Considering the scope of my project and the fact that the aeroplane was meant to be one element in that larger project instead of a stand-alone piece, I used the base kit as is but put my painting and aging expertise to work! This is your basic plastic model and, as such, some detailing is lost and some is likely historically inaccurate. The kit was inexpensive, but I was able to eek out enough detail to suit my tastes without breaking the bank.
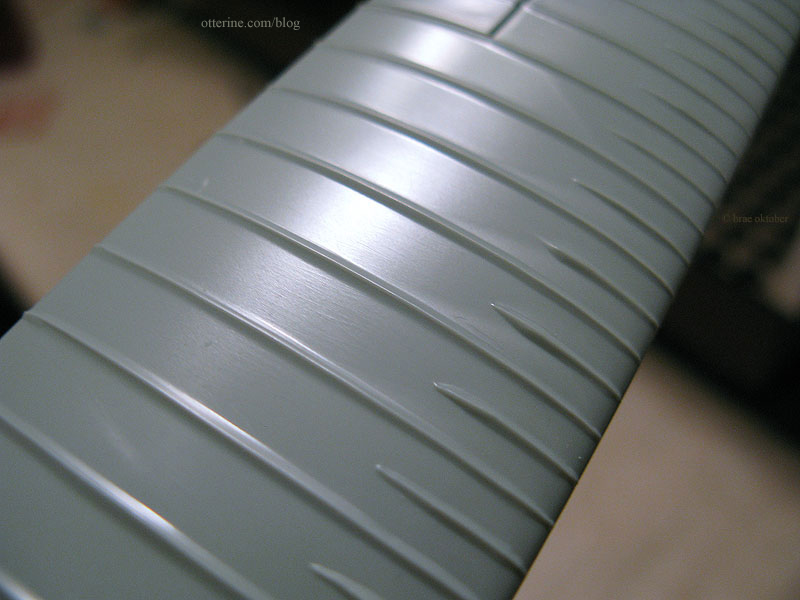
The wings of the original were fabric as were the tail and back portion of the body. After working with the Chrysnbon bathroom in the Heritage, I knew any little mark would show under spray paint. And, I had to fill in many injection marks on the pieces. So, while I was at it, I decided to try an experiment. I sanded the pieces with a linen weave pattern with a sanding stick. I sanded front to back and then perpendicular from side to side to create a very subtle matte cross-weave texture. Since flat paint still often has a sheen when sprayed over shiny plastic, I figured that even if the fabric texture didn’t show up clearly it would at least tone down the shine on the paint finish.
Here is the original shiny plastic.
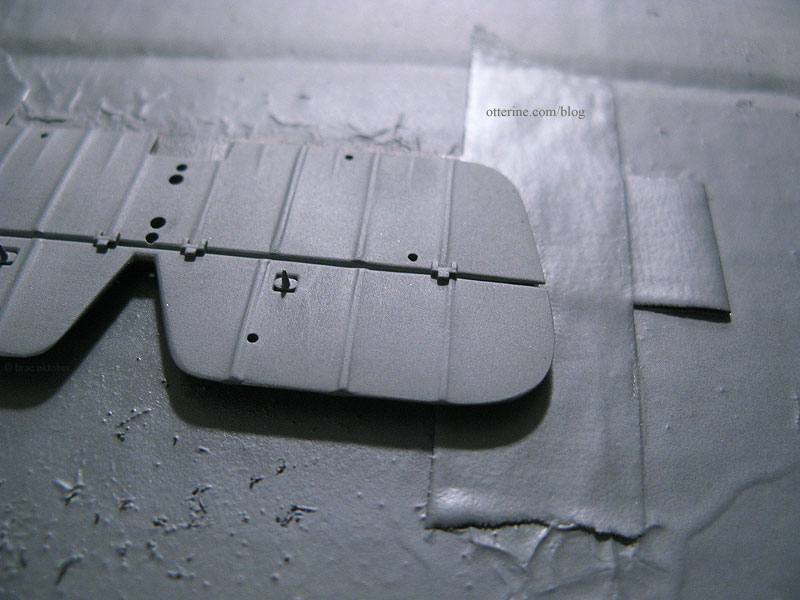
And, after the sanding…

After the spray primer coat, the finish didn’t necessarily register as fabric, but it had a great matte, non-plastic finish. That was a success to me!
After the spray top coat of Testors Flat Light Aircraft Grey for the underside and Testors Flat Olive for the top side, the finish was just as I wanted. Well, I did have a few spray paint mishaps that required sanding and refinishing…but it’s an old replica, right? :D
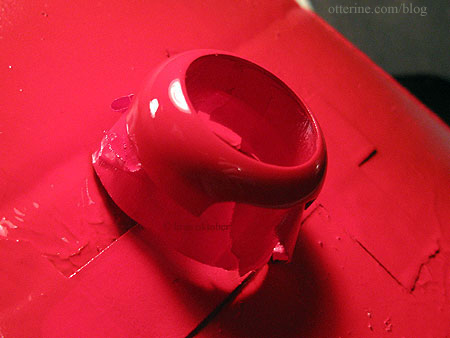
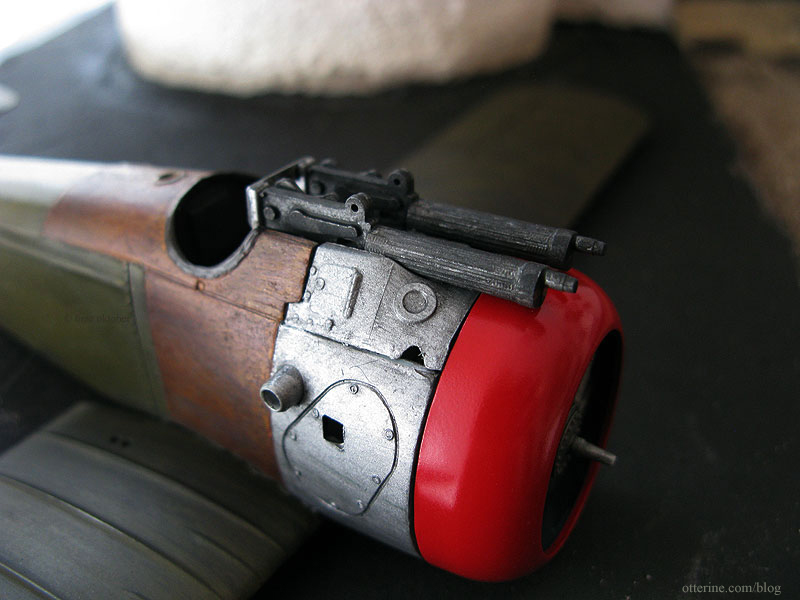
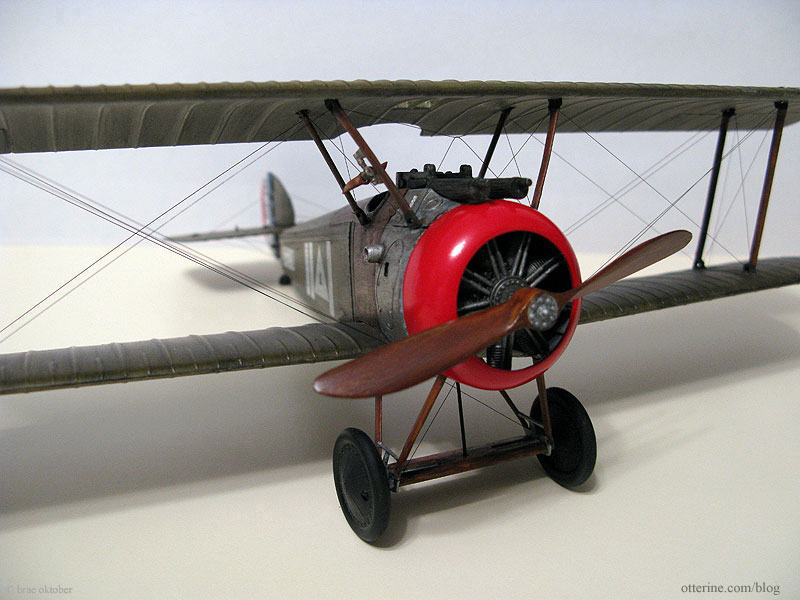
The shiny red nose turned out so well, I couldn’t bring myself to age it or dirty it in any way.
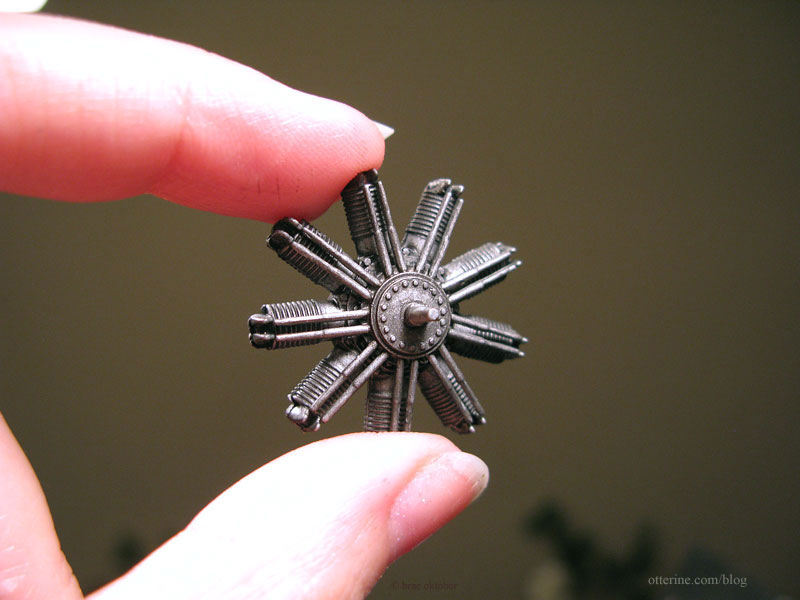
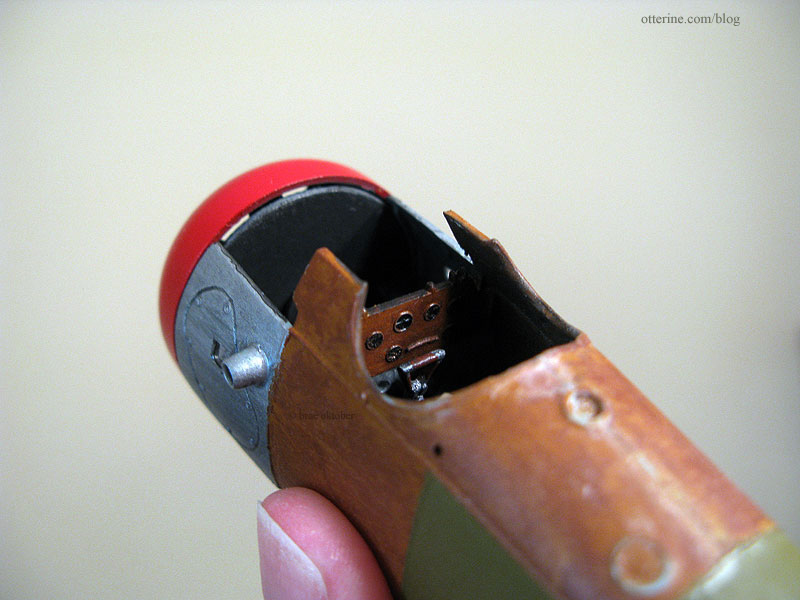
Not much of the engine shows, but I detailed what would be seen. It’s obviously a simplified version of the original, but I figured painting and making it grungy would be detailing enough. I brush painted the four engine parts with Testors Aluminum. Once that was dry I used black and brown acrylic washes to fill in the details, which it did wonderfully. It has the look of an oiled and working machine. :D
The “wood” portions were easier to mimic than I thought they would be. When I read that you were to first paint the base color and then paint on the wood grain, I thought, “Riiiiiiiiiiiight.” But, it works! I used a hand painted base coat of Testors Flat Light Tan followed by Testors Flat Military Brown, also hand painted and then wiped away with a paper towel. Maybe it’s not fine wood grain, but it is remarkably convincing.
There are some fantastic scale cockpit modifications people have done to accurately reflect the original planes, but I ended up using the original kit piece as is. I did the same wood grain finish on the interior walls, floor and dash based on the various models I had seen other modelers build. On the interior, I used black and brown acrylic washes to tone down the shiny new finishes. The instruments were first painted with a toothpick to fill in the black background. I then used a sewing pin to paint the instrument details using Liquitex Iridescent Bronze acrylic paint.
I had read that the guns were molded upside down in this kit, but with my shortened build timeline and the fact that I really didn’t want to start deconstructing parts, I used the guns as is. My model wouldn’t be the most accurate besides, and it would have been a lot of work for a minor payoff. :D
Show of hands…who knew what a turnbuckle was? :D I sure didn’t…but I found out about them in a hurry when researching biplane rigging. I found a tutorial on making these scale miniature approximations, but after seeing just how blasted tiny the materials were, I went with a more simplified approach.
I basically used the kit method, though I used black “transparent” thread instead of the kit supplied black fiber thread. I also waited until after the plane was assembled to add the lines. I didn’t see how you could add the lines during the body assembly, then keep them out of the way and clean during the painting process. This meant a bit more headache in the end, but it worked out well.
I mostly just used super glue gel to hold the wires in place in the pre-drilled kit holes. For the ones in the body, I cut small lengths of brass wire and slipped them into the holes with the wires. This plugged the hole and held the wire more securely. I dabbed black paint on them later to remove the obvious brass shine.
I started with the tail section, and in this photo you can see the brass pins before I painted them.

The decals were not the easiest things to deal with, and I admit to being out of practice using them. But, the end result was pretty good and this was meant to be a weathered replica, so any imperfections actually worked to my advantage.
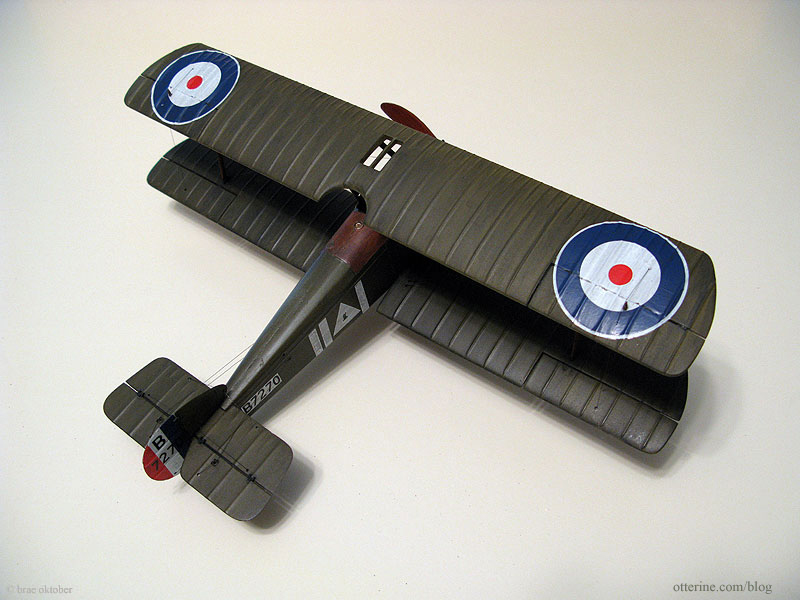
I followed most of the recommended placements and others I made up from the available decals…like the triangle with a logo in it shown below.
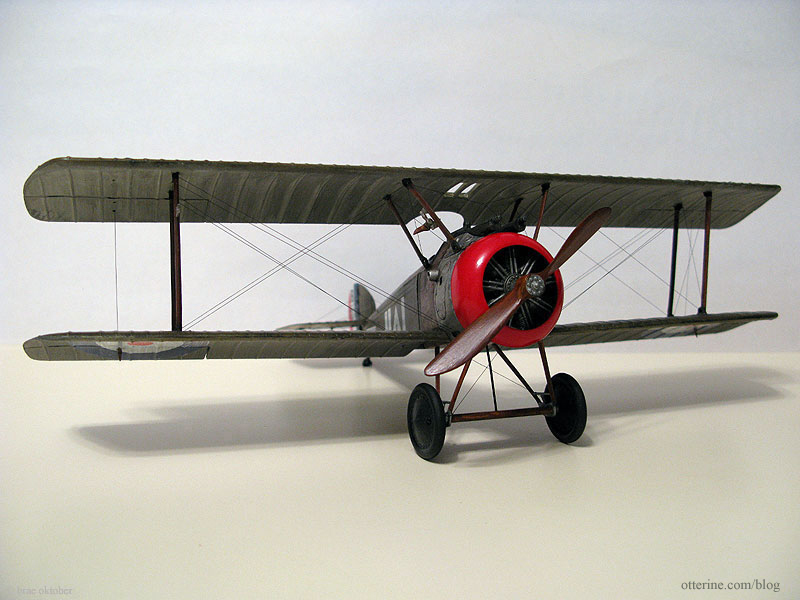
I made one substitution during the rigging process. There was supposed to be a straight wire from the bottom of the plane running perpendicular to the wheel assembly. I knew there would be no way to get the tension correct, so I used a cut off head pin. It doesn’t look like a substitution at first glance and it added stability to wheels besides.
I was terribly out of practice with building plastic models and this was my maiden voyage with rigging, but I love the end result! Overall, I enjoyed the process of putting the model together even if I don’t foresee myself making a whole squadron of these. ;D
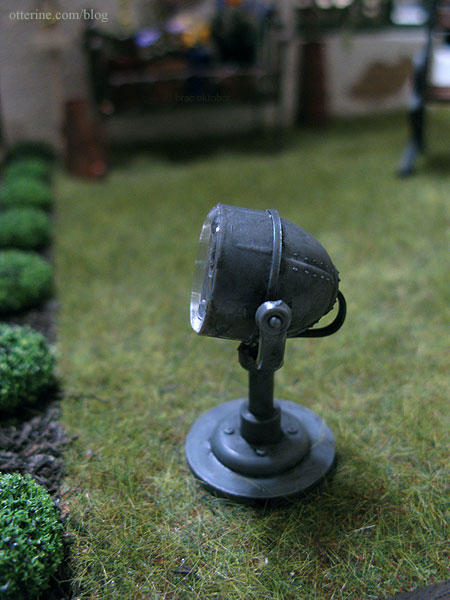
I found these fantastic Scene Master spotlights on amazon.com and instantly knew they would be perfect for lighting up the plane. They have a vintage industrial look about them that complements the plane and building. They are labeled multi-scale, and I think they work wonderfully in my scene. In the final layout, I used only one of the pair that were included in the package.
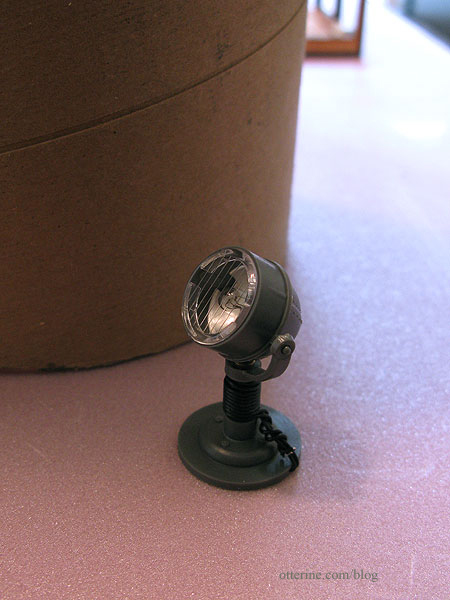
I aged it with brown and black acrylic to remove the plastic sheen.
The sign verbiage is taken from the Wikipedia article on the Sopwith Camel. I printed it on paper, pasted it onto a primed wood scrap and staked it into the ground with some wire.
Be sure to check out these sources and inspirations:
– Excellent video of the same model kit with snappy music
– Beautiful kit model by Des DelatorreCategories: Model Cars, Vehicles, The Aero Squadron Lounge
September 1, 2012 | 0 comments


NOTE: All content on otterine.com is copyrighted and may not be reproduced in part or in whole. It takes a lot of time and effort to write and photograph for my blog. Please ask permission before reproducing any of my content. Please click for copyright notice and Pinterest use.


