

Heritage – Planting The Tree, part 2
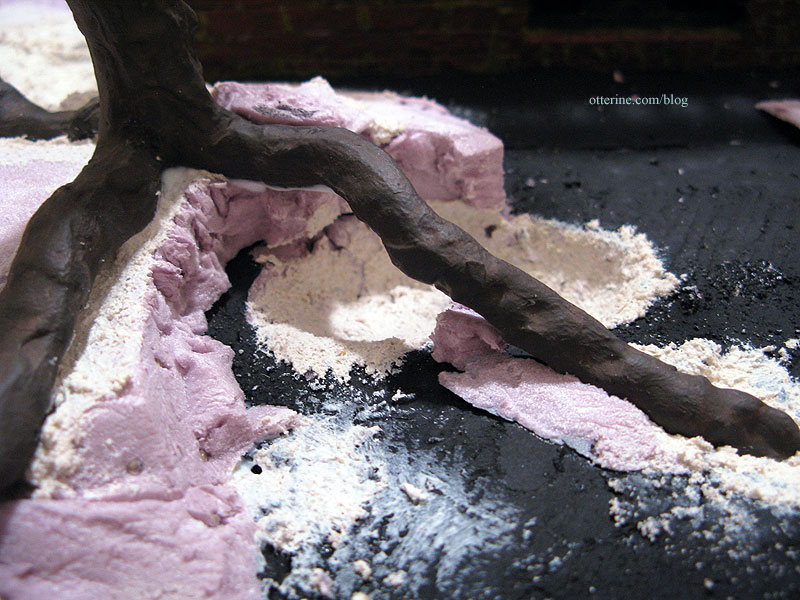
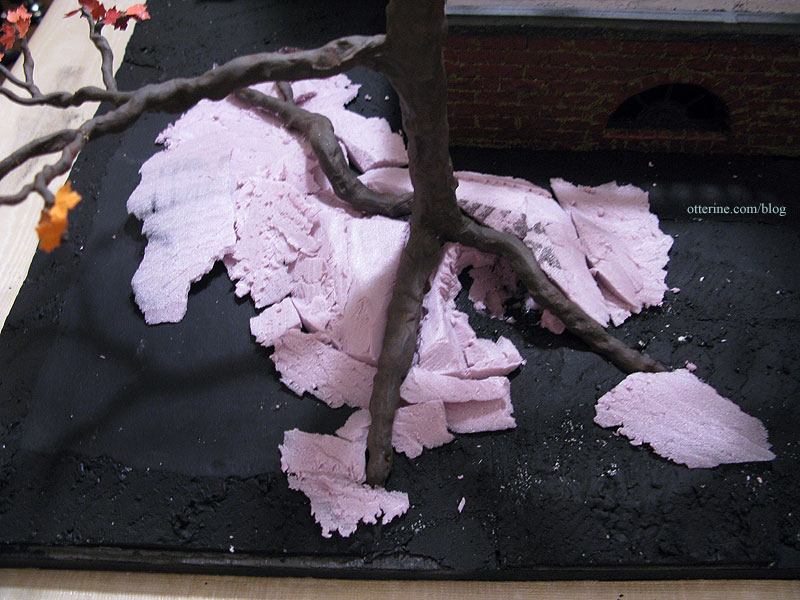
Continuing planting The Tree. I glued the circular tree base onto the landscape base. I used straight pins to hold the foam and will leave them in permanently. Before gluing The Tree in place, I added stucco to the root channels and smoothed the burrow. I’m working with the stucco while it remains pliable.
I added stucco to the holes I made for the root tips.
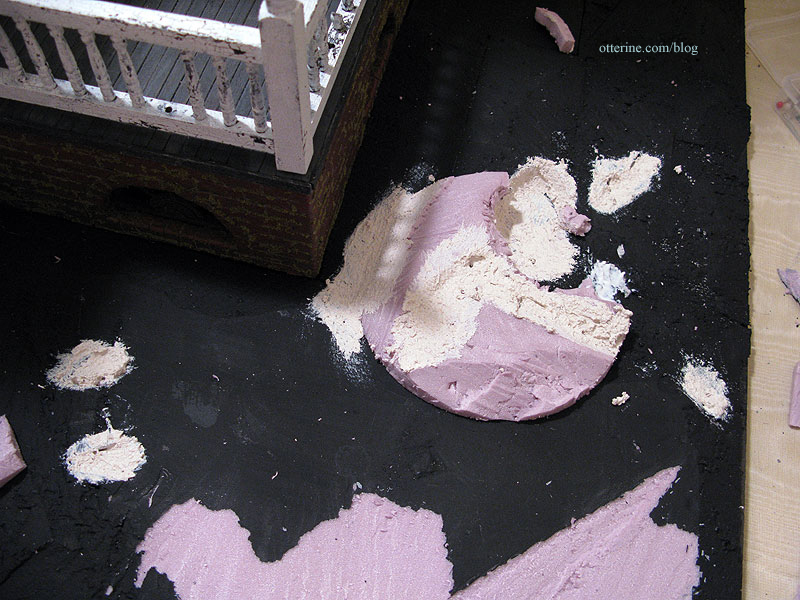
When I glued The Tree into place, the stucco squeezed under the roots and around the root tips for a smooth fit. :]

I used a toothpick to shape the stucco further. I then glued in the foam scraps under and around the roots, again using straight pins to hold the foam in place while the glue dries.
More stucco added, and the surface is relatively even now.
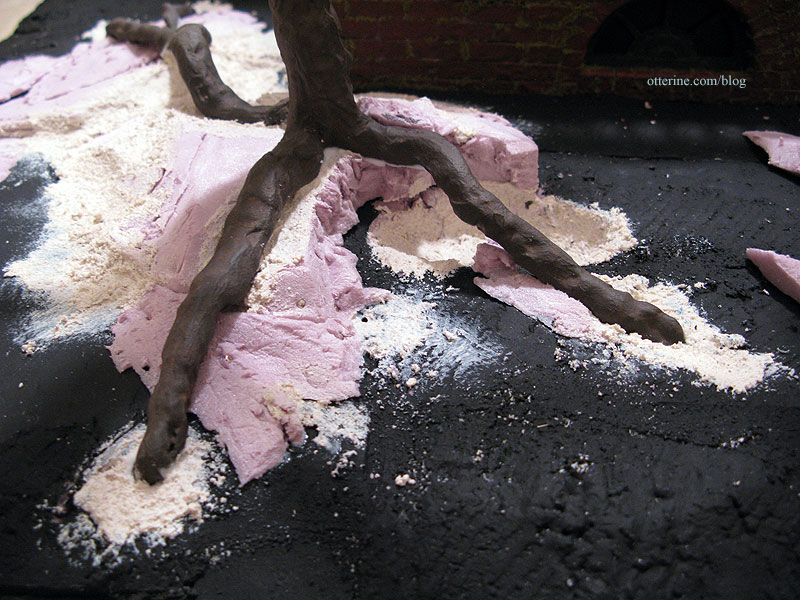
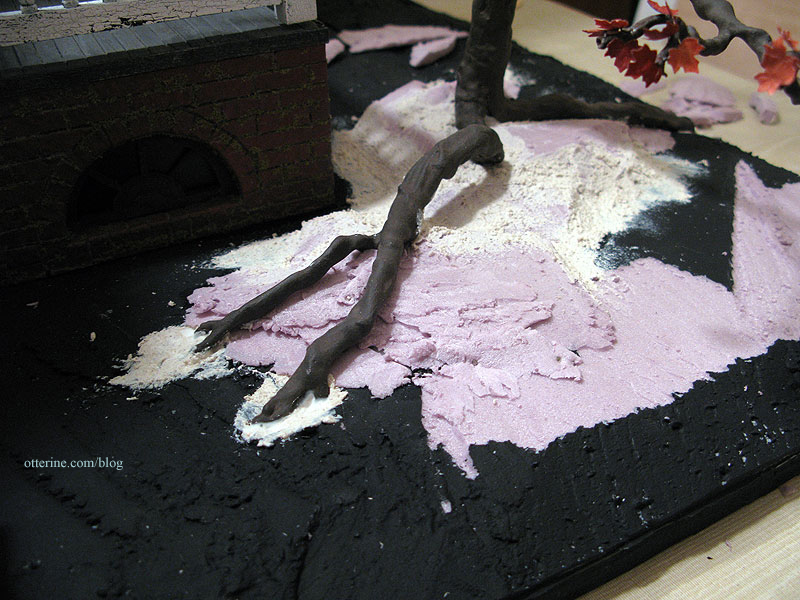
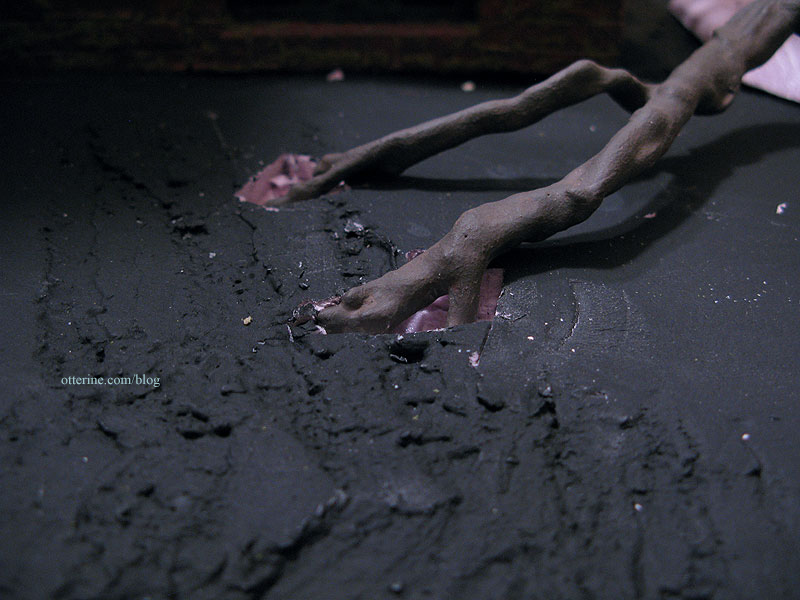
This was as far as I could go tonight. The burrow floor needs to be painted before I can close it up, so I have to wait for the stucco to dry.
Categories: The Haunted Heritage
October 16, 2012 | 0 commentsHeritage – Planting The Tree, part 1
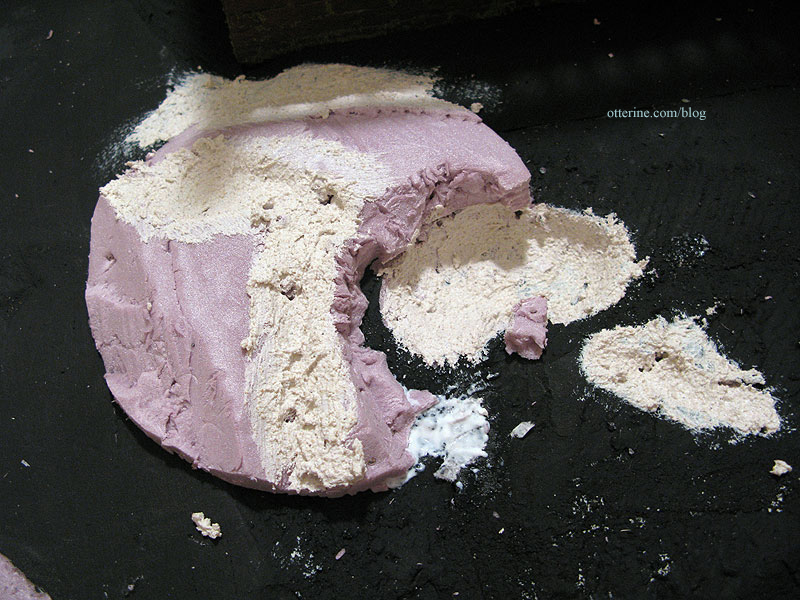
Time to tackle the portion of the landscaping surrounding The Tree. I sculpted the circular base to start, cutting out channels for the roots and making the outer edge of the circle blend into the surrounding areas. I also cut out the area under one of the upward-curving roots in both the circular base and the initial foam base down to the wood base board.
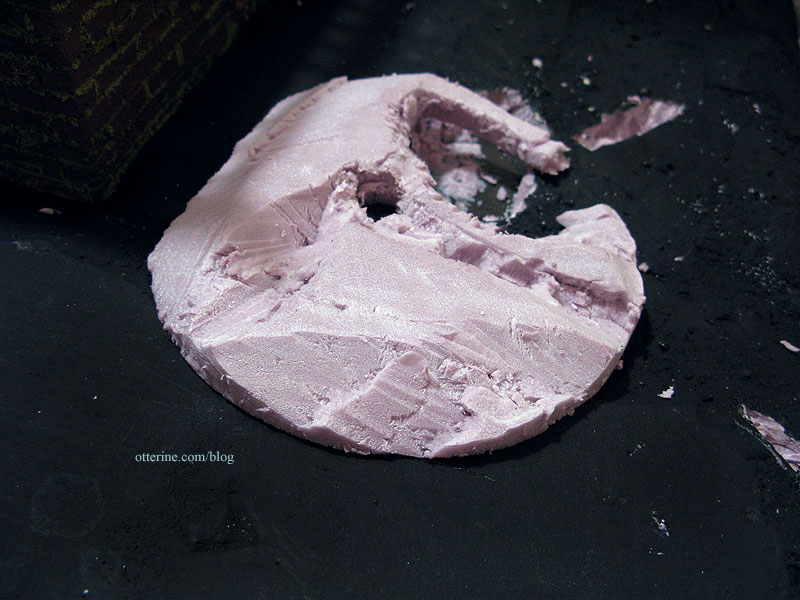
I made divots in initial base to sink the root tips.
Using the slivers of foam cut from the initial foam pieces that make up the lawn, I built up the area under and around the roots though nothing is glued in place just yet. I’ll need to sculpt the flat front corner of the lawn as well. Yes, that big root will stick out of the ground…yet another lawn hazard. :O
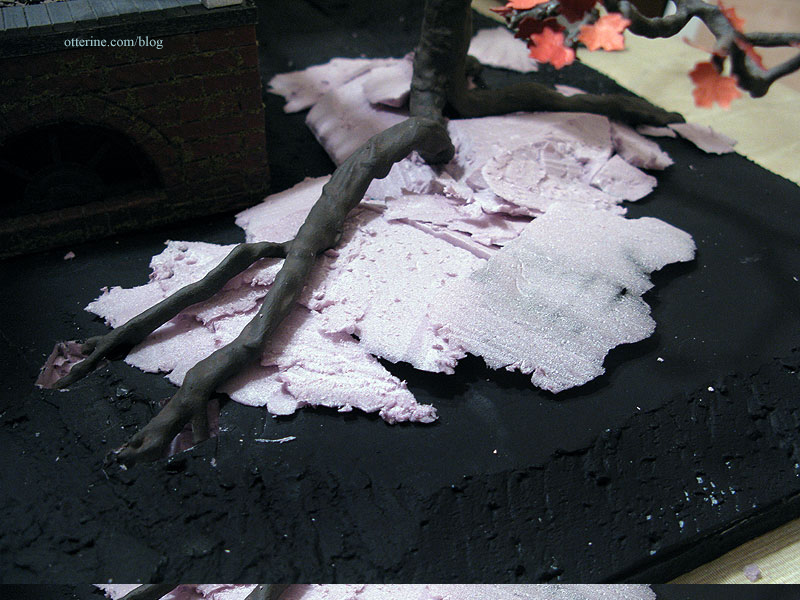
I covered the hole and added foam pieces to abut the back of the root that defines its opening. These are also still loose and not glued in permanently.
So, what’s the hole for? Grahame!!! :D

I won’t make him live in this tiny, cramped burrow full time, but it sure will be cute to take some photos of him peeking out from under The Tree!
Categories: The Haunted Heritage
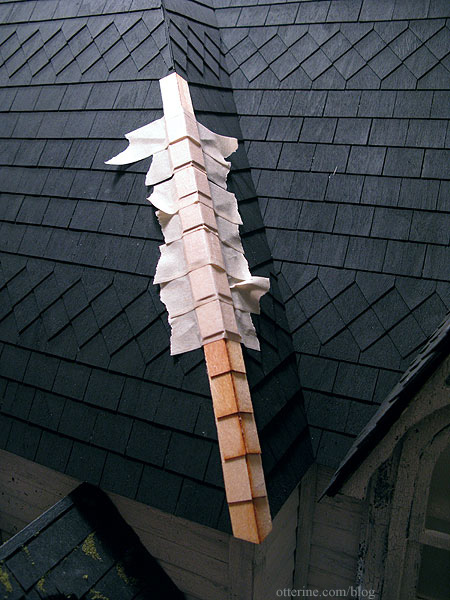
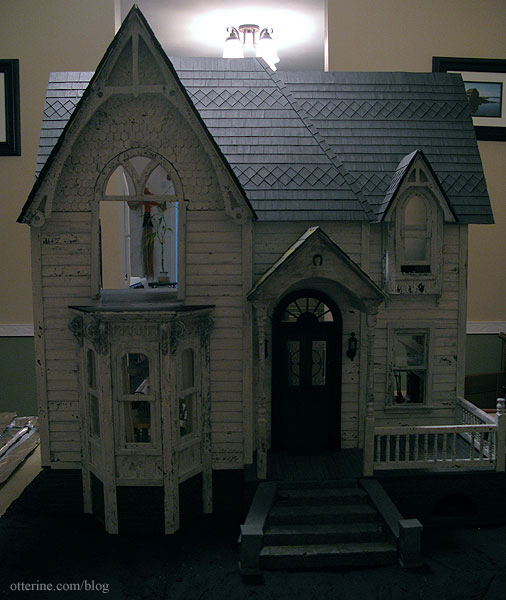
October 15, 2012 | 0 commentsHeritage – mossy roof
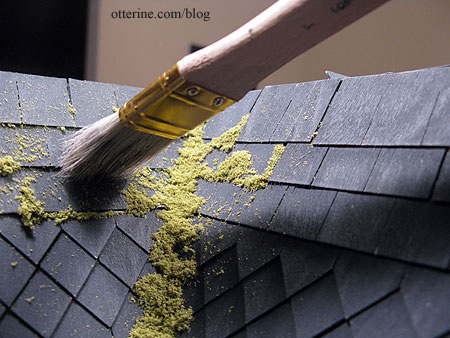
Moss = mess. That is a truism! :D To add moss to the roof, I used the same materials I had used on the mossy front steps – Aleene’s clear gel tacky glue and Fine Turf, Burnt Grass by Woodland Scenics.
I used a glue syringe to apply the glue, focusing the glue on the seams between the shingle rows with a few lines following the vertical lines between the individual shingles. I worked in small areas so the glue wouldn’t have the chance to dry.
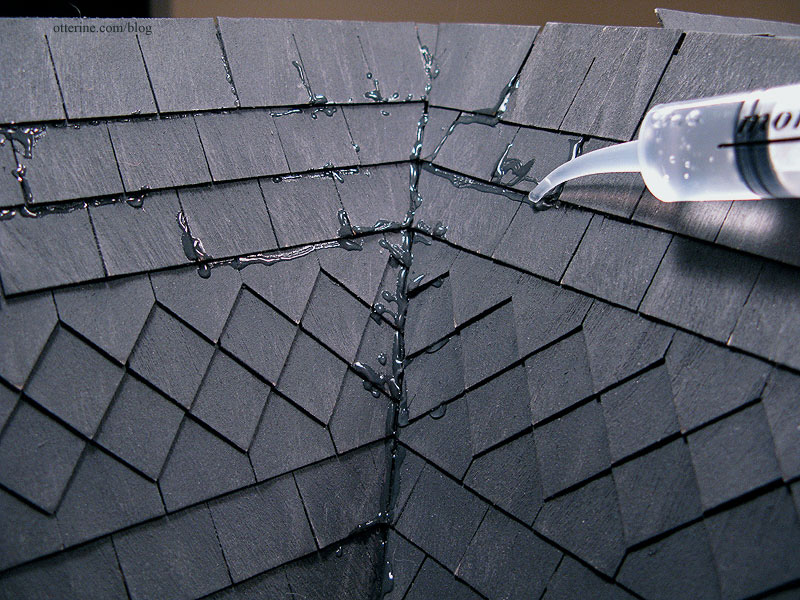
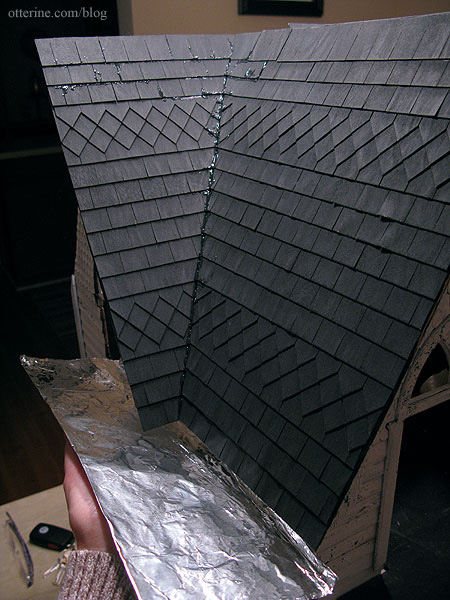
For the portions of the roof that allowed access, I used a foil tray to catch the excess moss as I applied it to the glue.
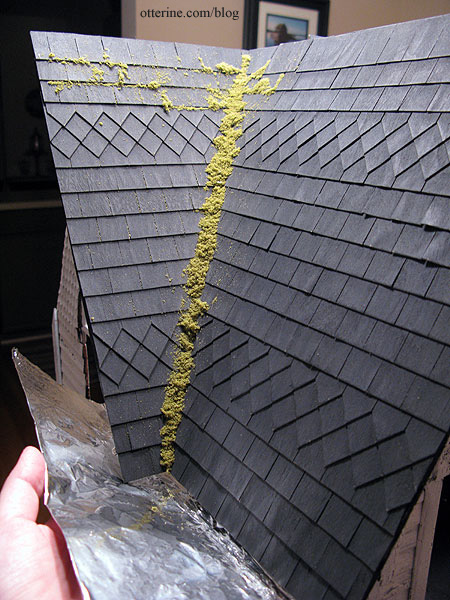
I applied the moss liberally and let it set for a few moments.
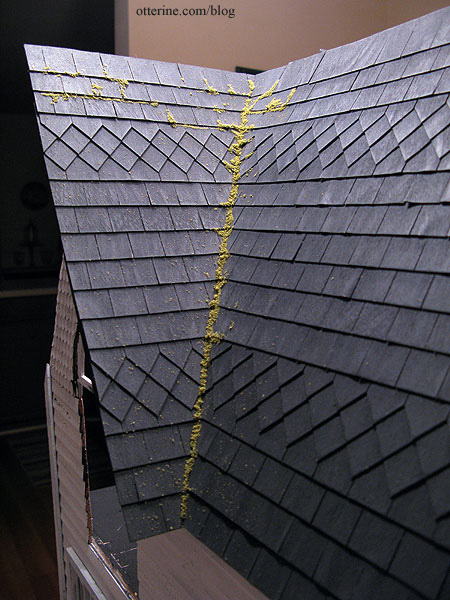
I used a large, soft brush to remove some of the excess. Once the glue has set overnight, I’ll go back and remove more.
I filled that large gap in the left side valley…no need for that trim wood after all. :D
For the especially warped shingles, I worked those in my favor by adding a lot of glue under and around them. This makes them stand out more, but they look more realistic.
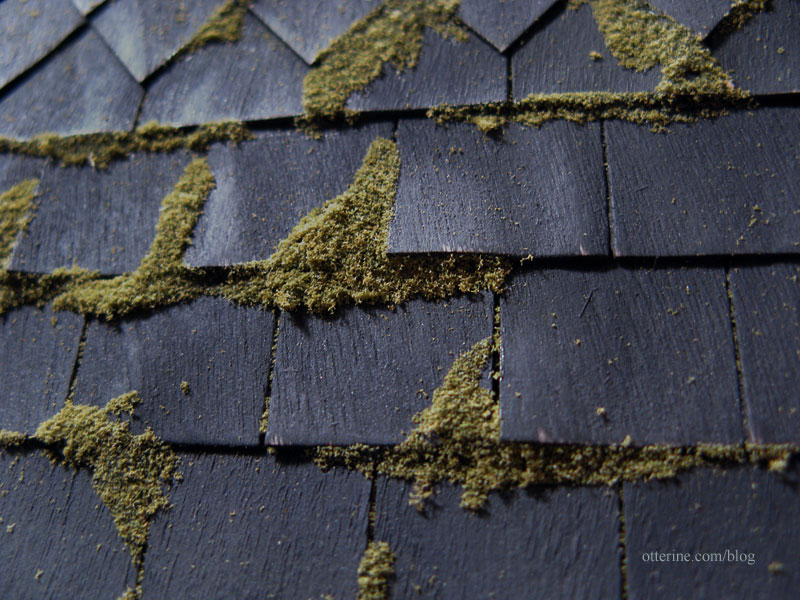
I think grandma might want to look into replacing a few of these before she ends up with water damage.
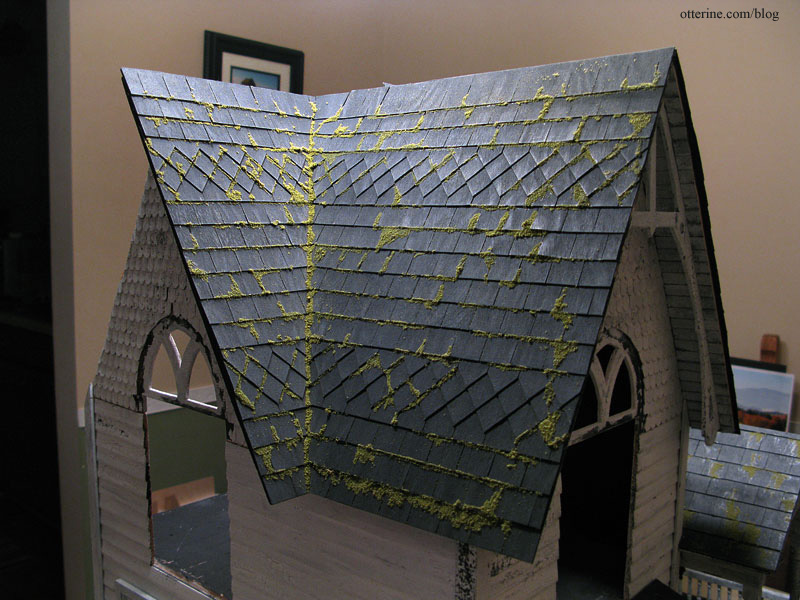
The railing on the sun porch is held in place with only pins, no glue. This means I can remove it as needed. I figured it would be easier to clean up the excess moss material without it.
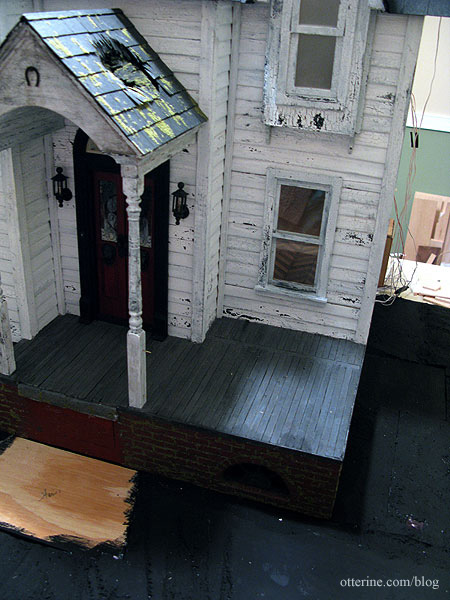
I didn’t go overboard with the moss, and there will actually be less than you see here when I brush away the excess again tomorrow.
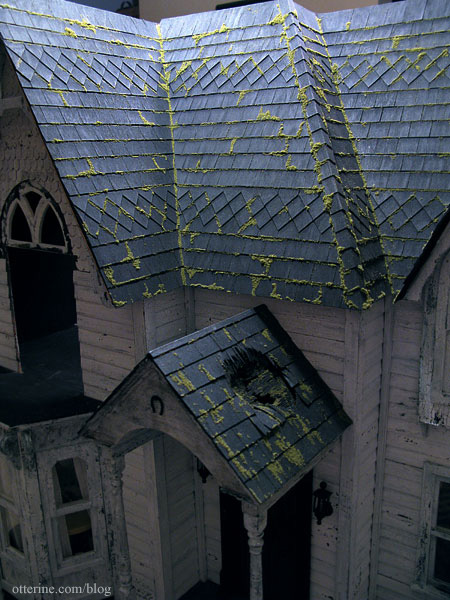
Yay for creepy, mossy house!!! :D
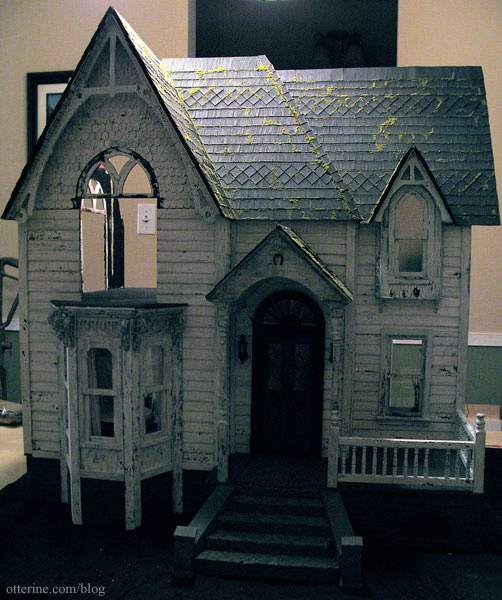
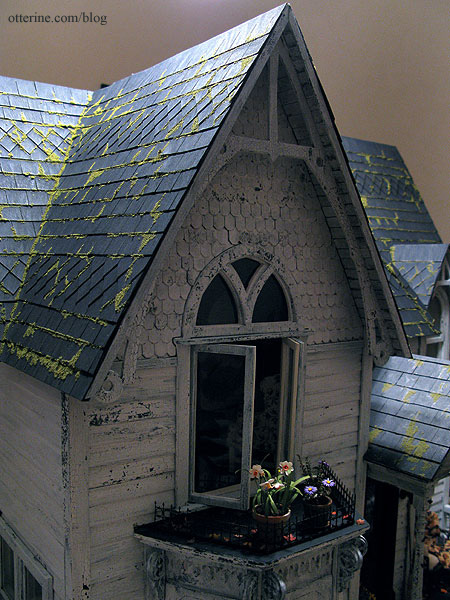
Update: after installing the bedroom swinging window, I added the final trim to the front gable as well as the trim between the main wall and the gable.
Categories: The Haunted Heritage
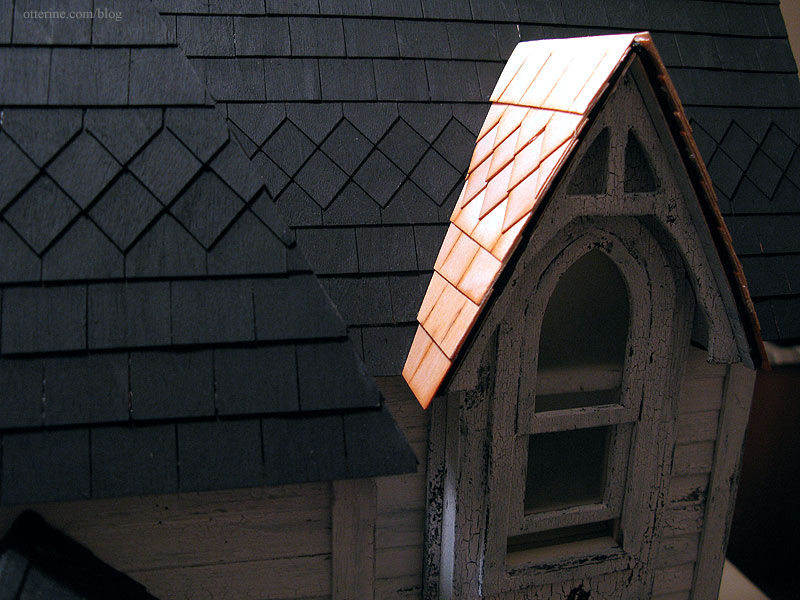
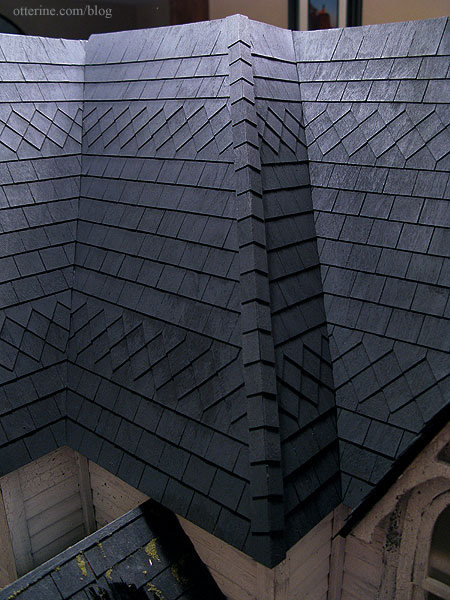
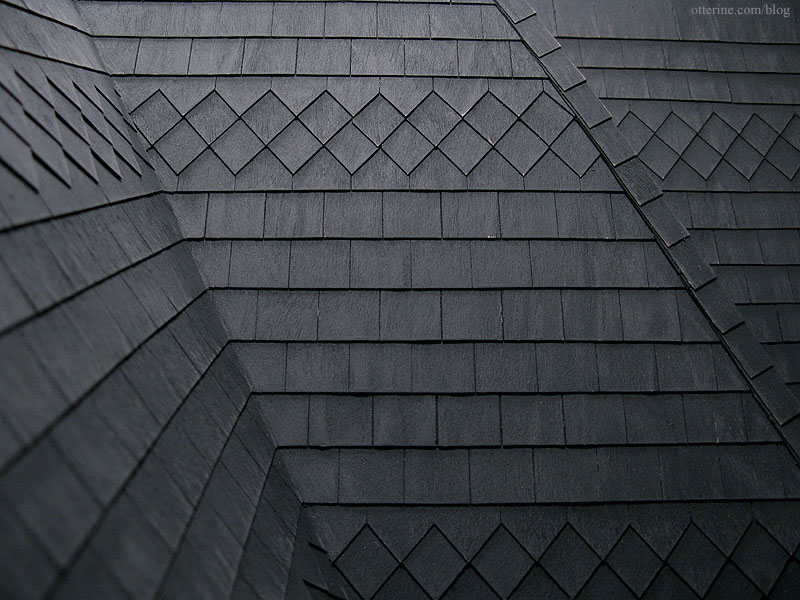
October 14, 2012 | 0 commentsHeritage – roof shingling, part 5
Continuing work on the roof. I cut and adjusted my templates for the two sides of the dormer window roof. The shingles for this portion were quick and easy to cut. The front roof is now completely covered.
I decided against any added strip wood to the gap on the left main roof since no gaps formed on the right main roof. The dormer roof will need to dry a few days to see if gaps occur there. I’ll just pile on the moss for the left side gap.
I shingled over the outer edge of the middle front section, using shingles cut in half lengthwise, with 5/8″ lines marked for consistency. I did this after the initial paint wash on the roof shingles in case those shifted or shrank from the paint treatments.
It finished off the edge very nicely.
I painted the roof with a grey and black mixed glaze to match the main roof to the portico roof. I brushed on the glaze and wiped it away in a downward with a paper towel. I then used sandpaper to lift some of the color before adding another paint wash. Then I did a final sanding. I find doing multiple rounds of paint, washes, glazes and sanding creates a good depth of tone and a more realistic worn appearance.
I love the way it’s turning out!
I probably won’t do the roof ridges on the gable and dormer until I get the back roof on. I’ll need to finish off the top flat portion, too. For now, I’ll add some moss to the roof and concentrate on the landscaping. Halloween is fast approaching, and I want some Heritage Halloween photos this year!
Categories: The Haunted Heritage
October 13, 2012 | 0 commentsHeritage – The Tree, part 3
Continuing work on The Tree. After building the dogwood tree, with its individual leaves and flowers, I didn’t think The Tree would stand for foam foliage. Plus, I will be scattering the realistic leaves I took so much time to make, so the leaves on the ground should match those on The Tree.
Instead of making more right from the start, I filtered out the maple leaves from the bunch I already had. There are 88 branches, so I figured 1-3 leaves per. Mid to late October often sees sparse trees with more leaves on the ground than on the branches.
I colored the stems on these leaves with a brown marker so they would blend in more with the branches. I’ll leave the ones for the ground as is since those look better without the darker stem.
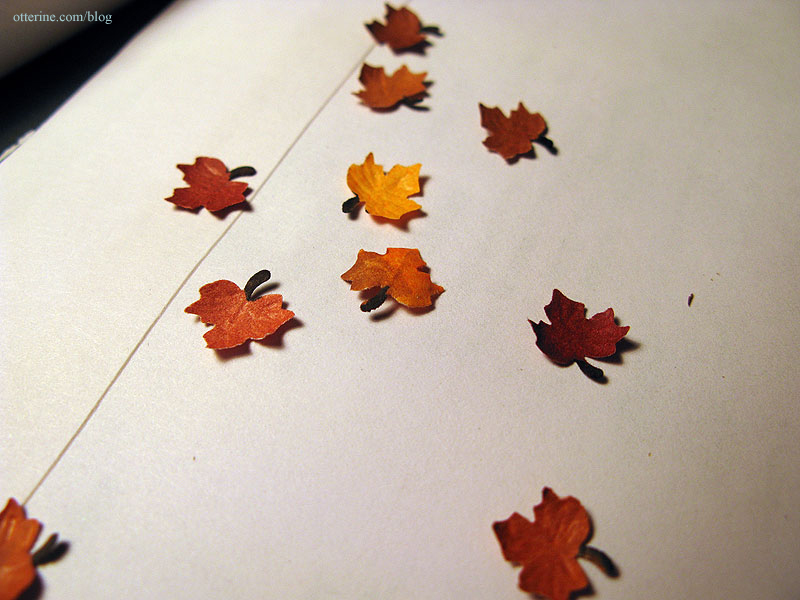
I glued them on individually, just enough to give The Tree a pop of color and some life. Having leaves on the ends of the branches also disguises the non-tapered ends resulting from the water putty process.
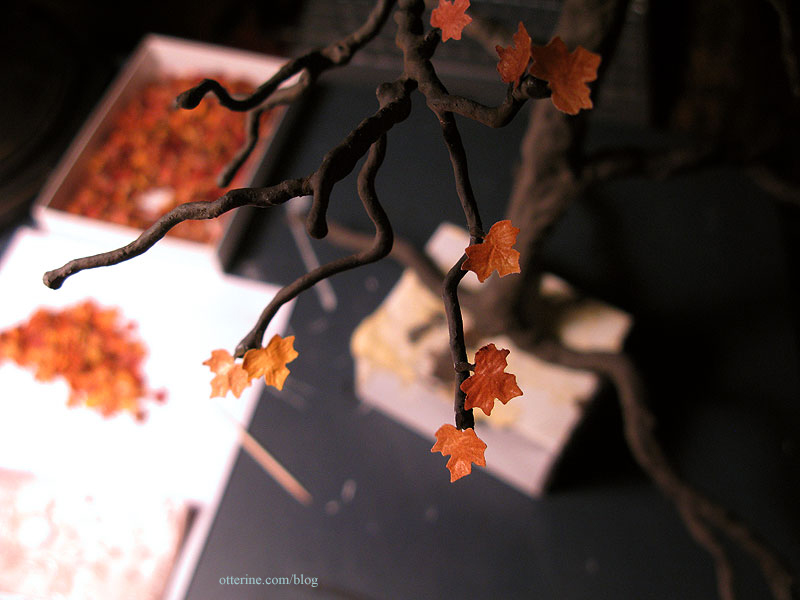
This old tree isn’t dead or dying by any means. It’s just ready for its winter slumber. zzzzzzzzzzzzzzzzz
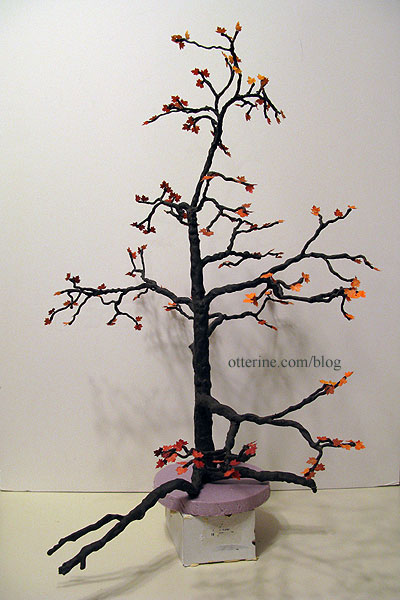
Once I have the roof finished, I’ll plant it and sculpt around the roots. :]
Categories: Flowers, plants, and trees, The Haunted Heritage
October 11, 2012 | 0 comments


NOTE: All content on otterine.com is copyrighted and may not be reproduced in part or in whole. It takes a lot of time and effort to write and photograph for my blog. Please ask permission before reproducing any of my content. Please click for copyright notice and Pinterest use.


