

Heritage – grandma’s neglected lawn, part 4
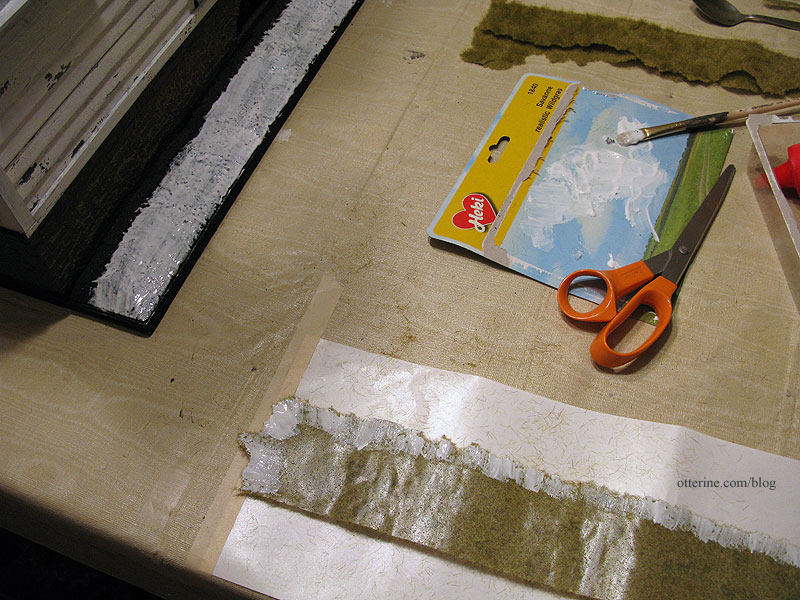
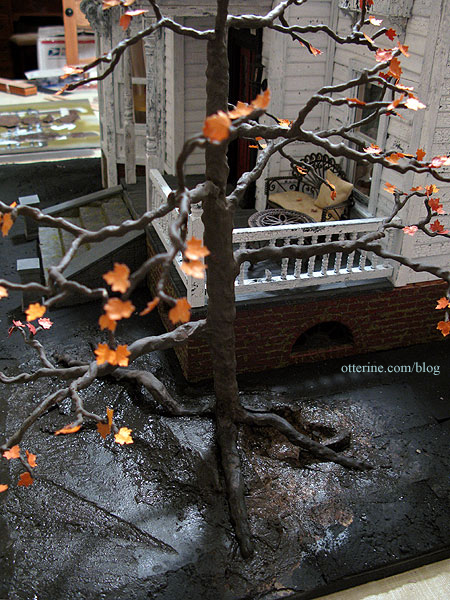
Continuing work on the lawn. The grass mat I will be using is Savannah TuftGrass by Heki from Scenery Express. It has low and high grasses in variegated coloration to simulate a late autumn lawn. It’s pricey, but the look is spot on in scale for a poorly kept lawn with some overgrown and dying spots in the grass. The sheets are only 6″ wide, though they are 17″ long, so there are places on the landscaping board that will need to be pieced. I bought four sheets, which should be plenty.
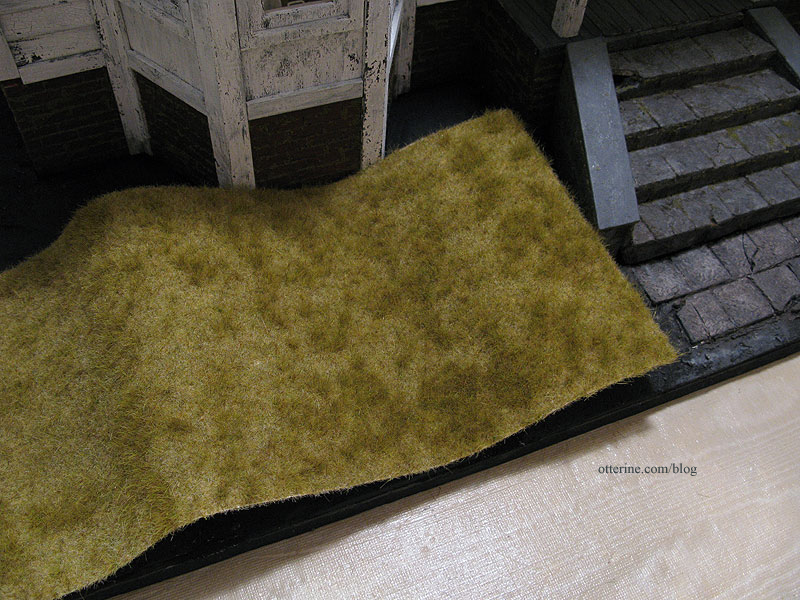
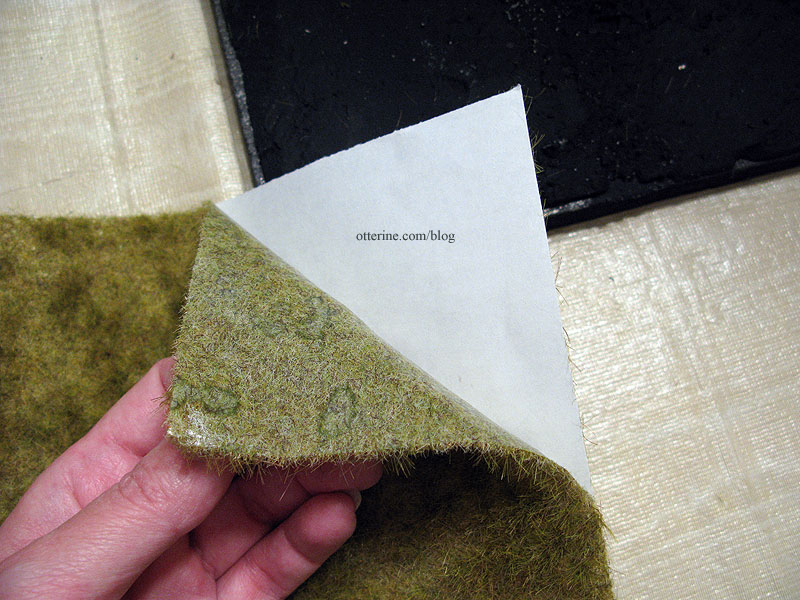
The backing of the grass is a clear, rubbery substance though not sticky. This makes it more flexible than the grass mat I had used for The Aero Squadron Lounge, which will be good for the uneven landscape I need to cover.
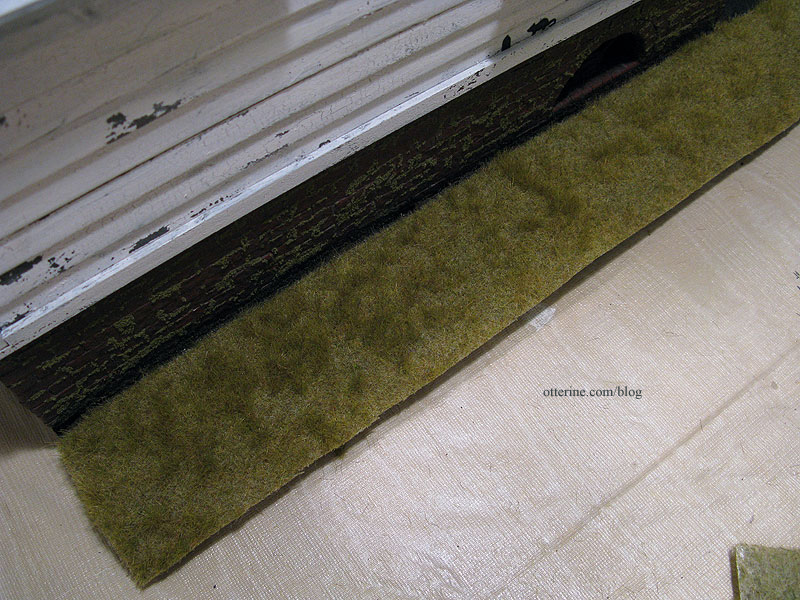
I cut the side piece to fit.
To make the divide between the grass and the dirt look less planned, I tore the grass mat backing along the house edge, removing only the tiniest bit of material.
I spread glue on the base board and on the edges of the grass mat.
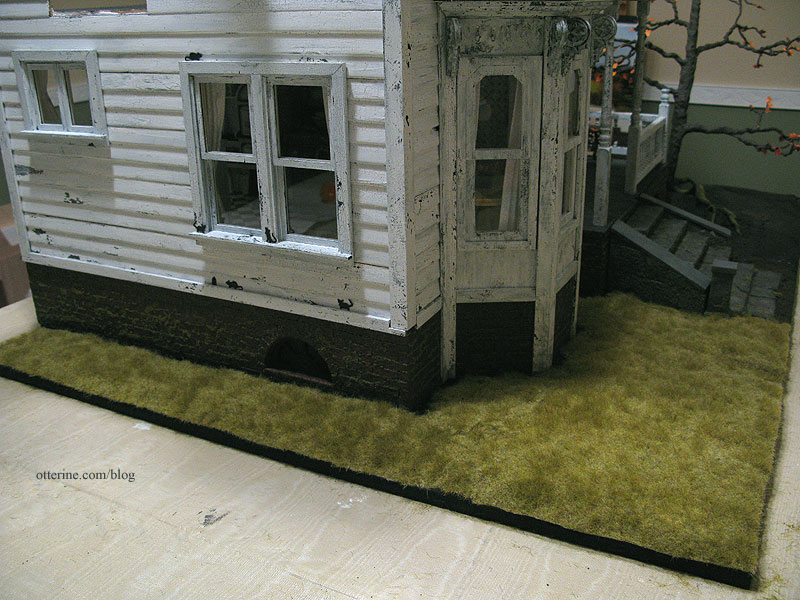
I pressed it into place and then moved on to the front pieces. Here the side and side front are shown mostly filled in. The camera tends to flatten things, so you can’t really see just how well the grass conforms to the uneven ground underneath. There will eventually be finishing trim along the edges of the baseboard (I now do this finishing step from the beginning to make things easier).
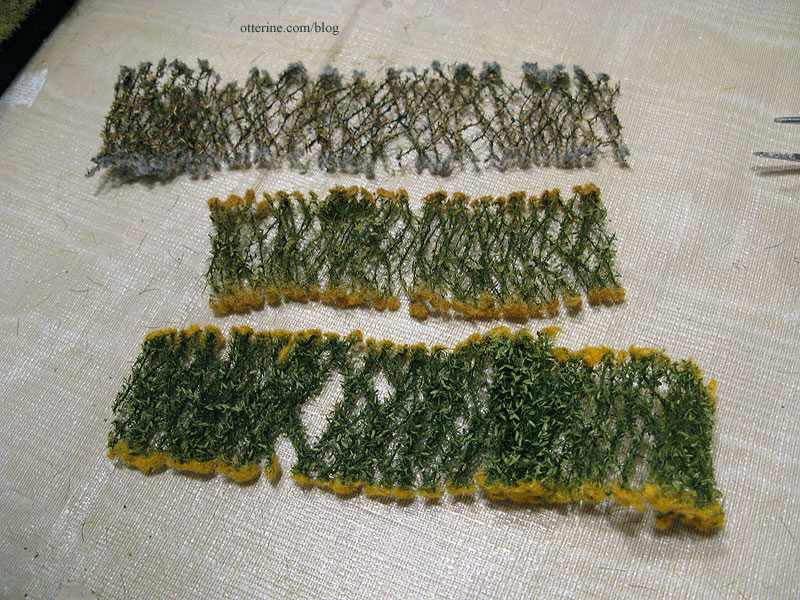
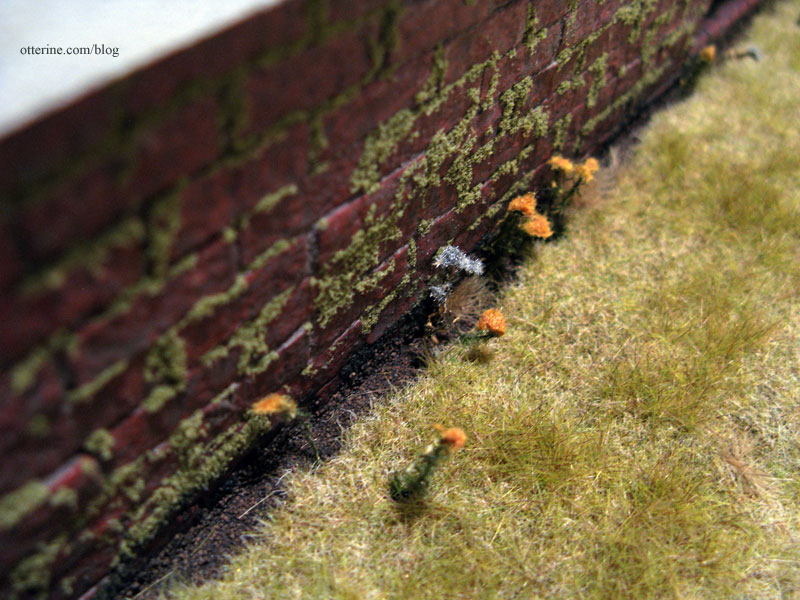
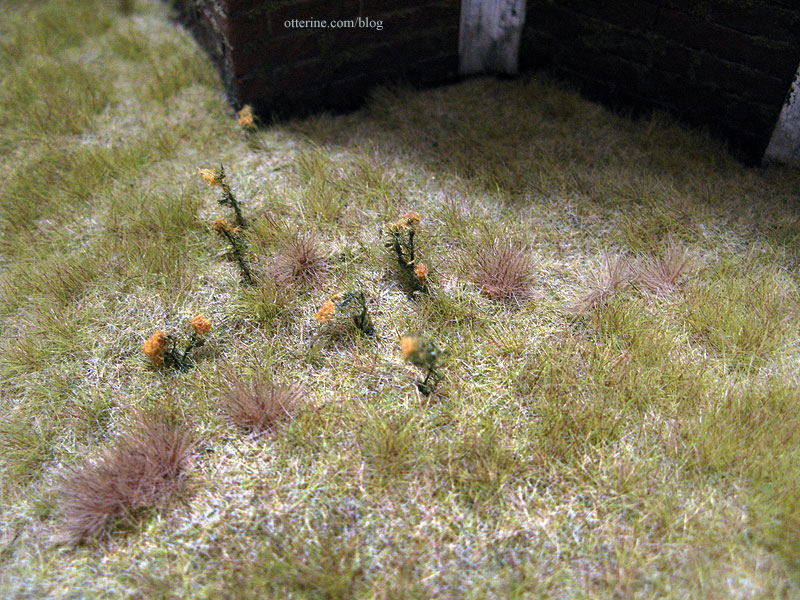
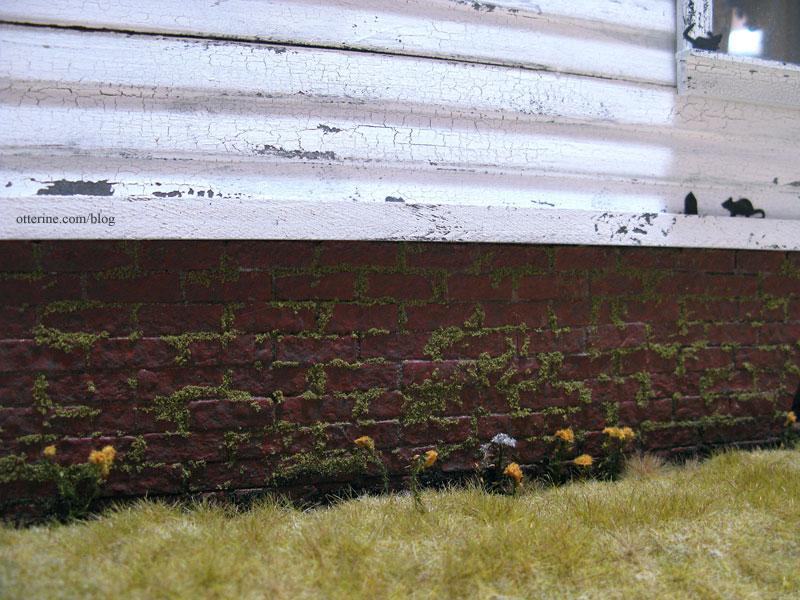
For a bit of non-grass vegetation, I have the Goldenrod Weeds “Silflorettes” by MiniNatur. These come all webbed together, and you cut the stalks off the web to apply individually. I have summer, late summer, and autumn colors but I might not use the summer ones for this particular project. The others have softer, muted tones.
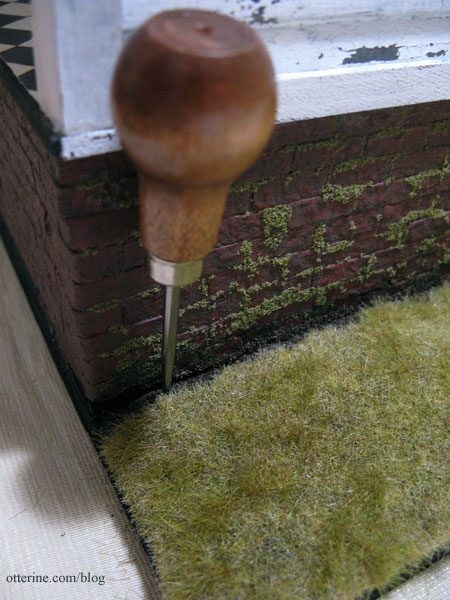
These are obviously not in-scale goldenrod stalks for 1:12 scale, but they do look like little flowering plants. I used an awl to make holes in the ground to plant them. I left the awl in place while I prepped the individual flowers for planting, otherwise I’d lose track of the hole.
I’ll be adding more, but I already love the way they look.
Here you can see the ballast dirt dried to a nice dark color. :]
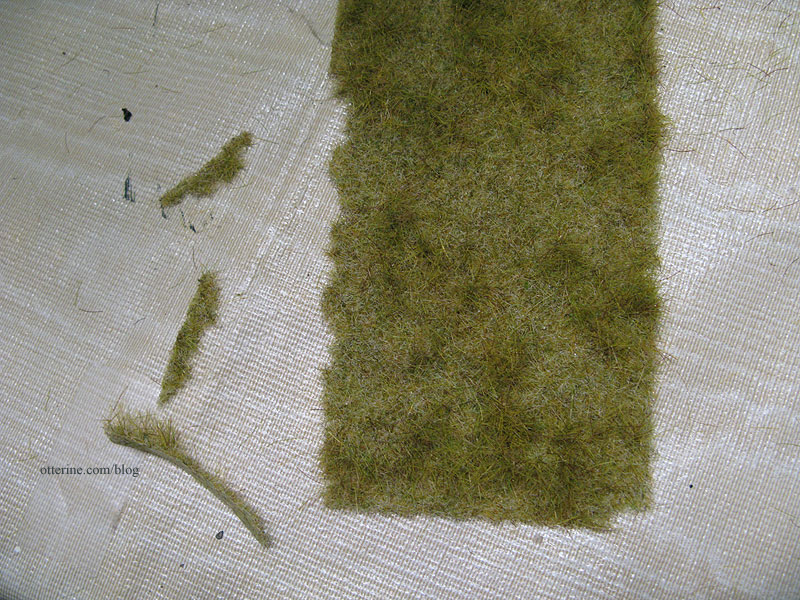
I had to piece the grass mat together in many places, so I saved every corner and edge removed from the larger sheets. I used these scraps to fill in areas where the grass sheets met the house and each other. If you look to the left, you can see it wasn’t always seamless.
If you have something that sticks out and could be mistaken for sloppy work instead of a planned aesthetic, often the best solution is to draw more attention to it. I used the goldenrod flowers as well as Extra Long Autumn Tufts “Silflorettes” by MiniNatur — little clumps of grass material that you apply individually to fill in here and there — to address a few of the problem areas. The autumn tones coordinate perfectly with the grass mat while looking like a different sort of weed grass.
Your eye is now drawn to these plants and not to the bare patches and inconsistent seams between the grass sheets. :D
I have the other side to tackle next and more planned for finishing this side as well, but wow, does a little greenery ever change the look of the house! :D
Categories: The Haunted Heritage
October 21, 2012 | 0 commentsHeritage – grandma’s neglected lawn, part 3
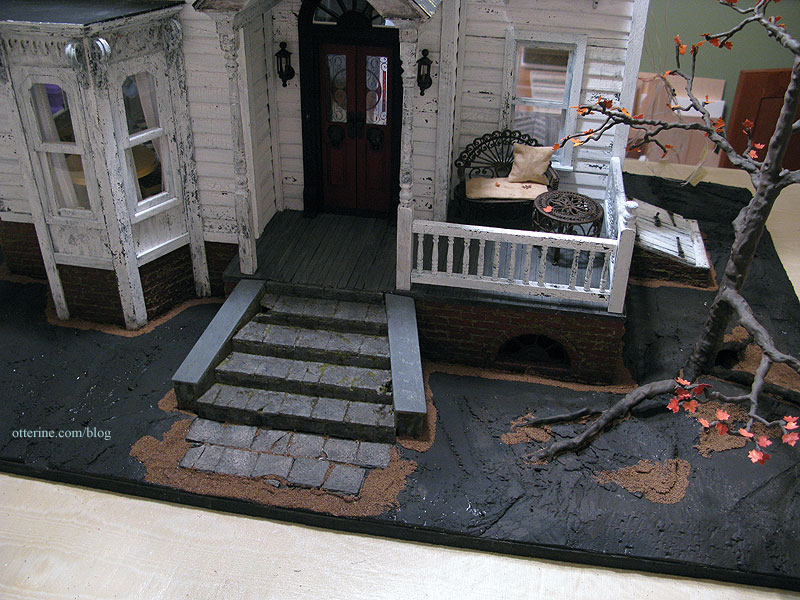
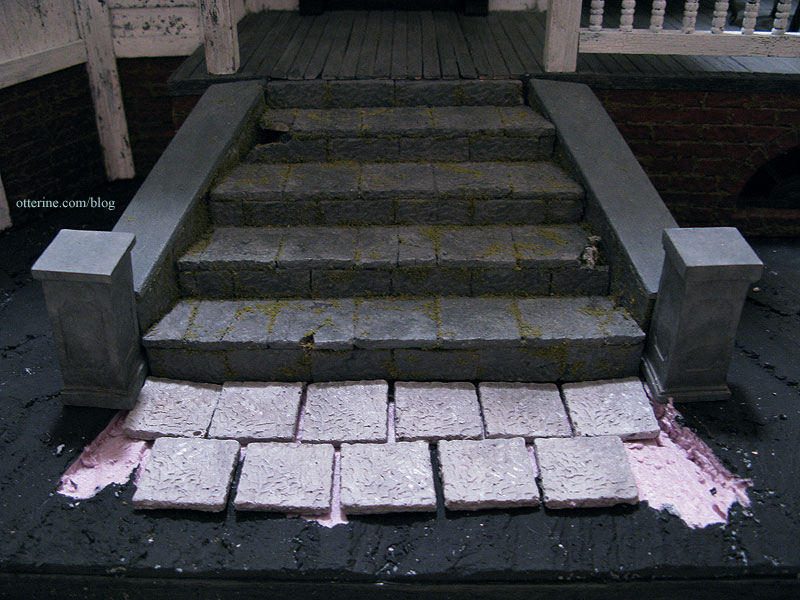
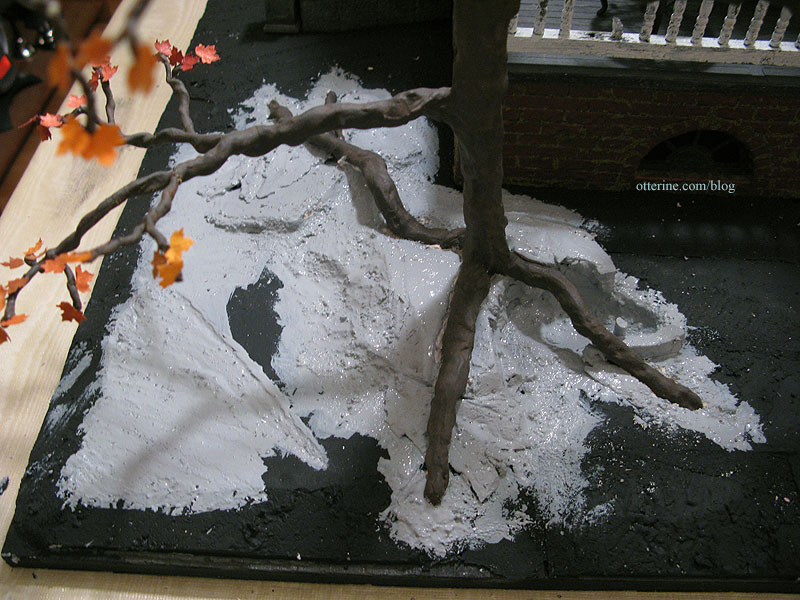
Continuing work on the lawn. Now that The Tree is planted, Grahame’s burrow is in place and the stone walkway is in, I can start landscaping.
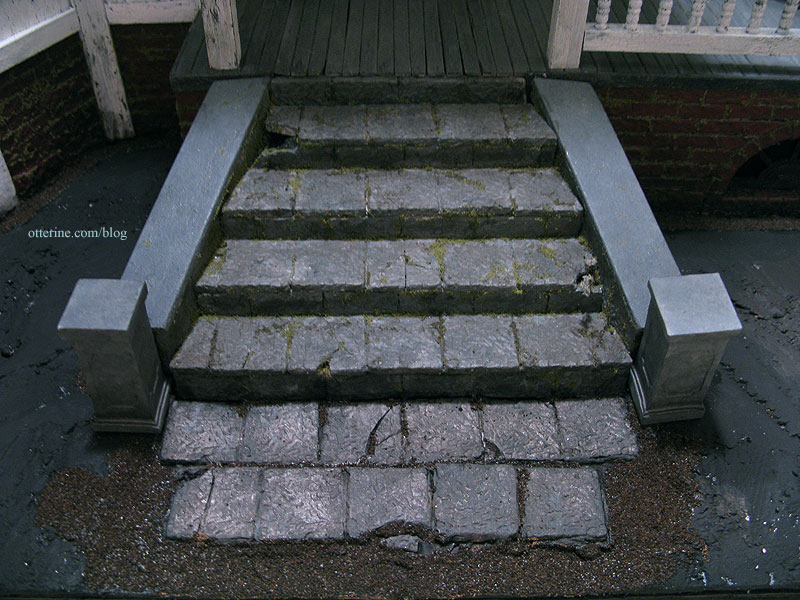
The pavers attached with a mix of spackling and glue held tight! Hooray! In fact, if I had to remove them, I think they might take the foam base with them. :D
I added paint washes to stain the grout and to darken the stones, which also brought out the cracks. Moss will be added later to the walkway pavers so the coloration looks a little off on them at the moment.
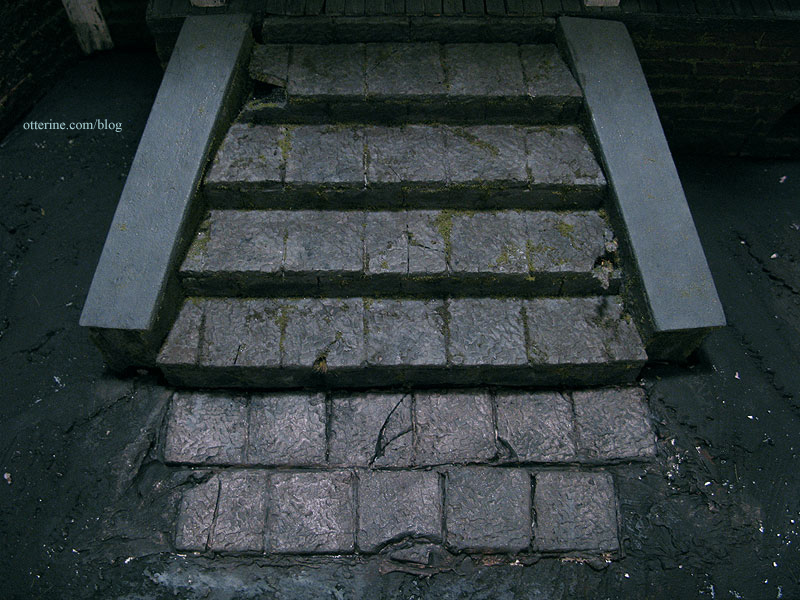
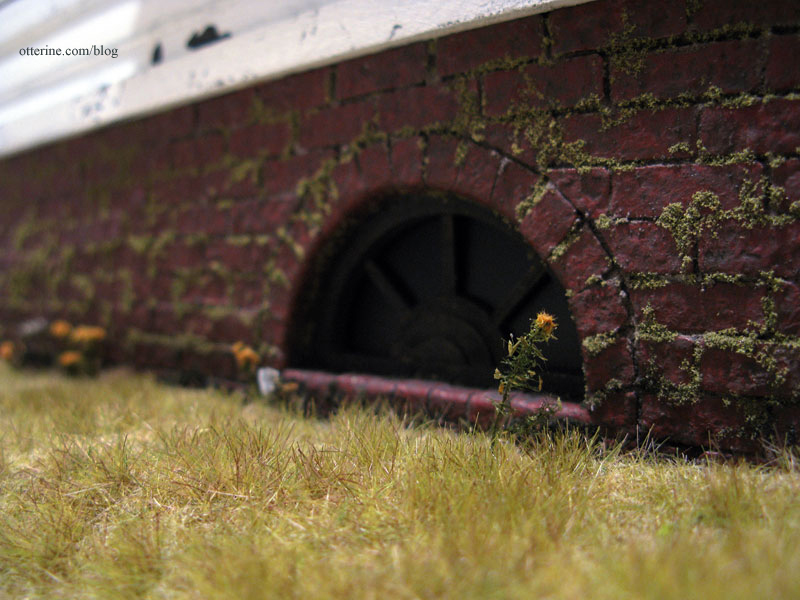
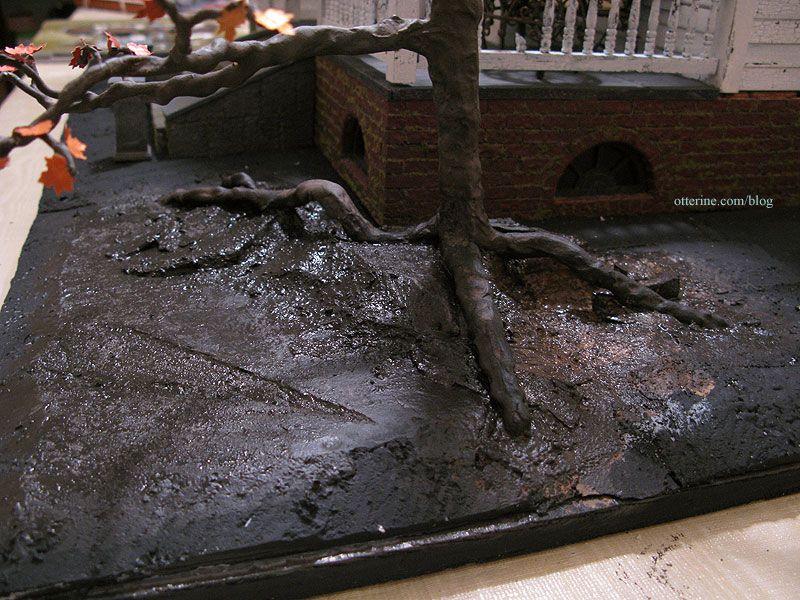
I then dirtied up the lower portion of the brick foundation, the pillars and stairs with a brown and black paint wash.
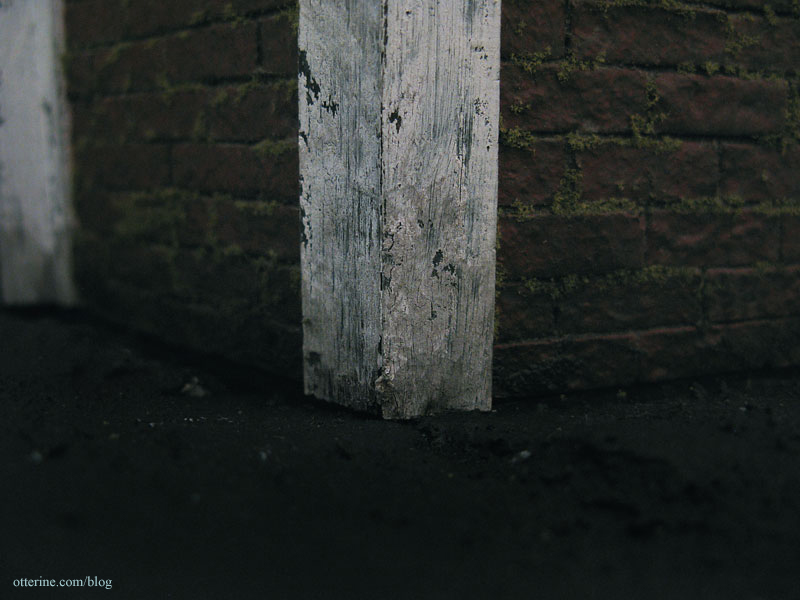
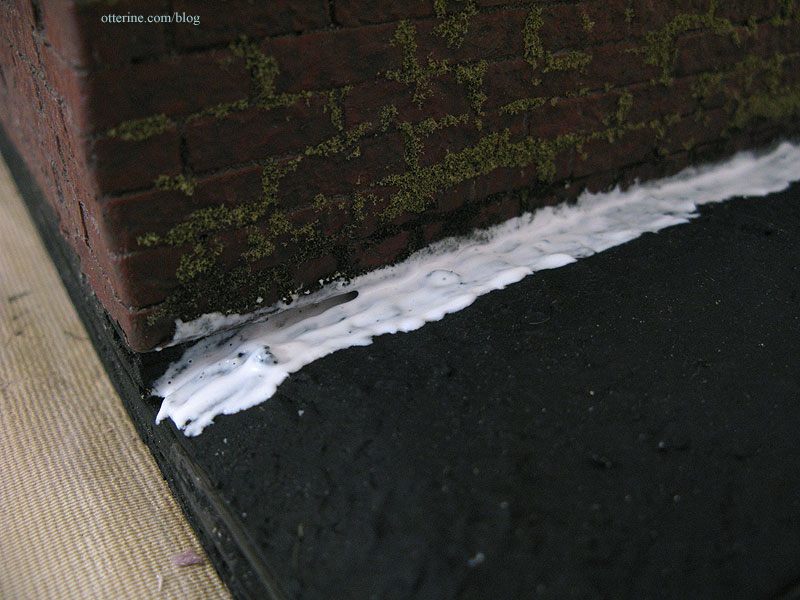
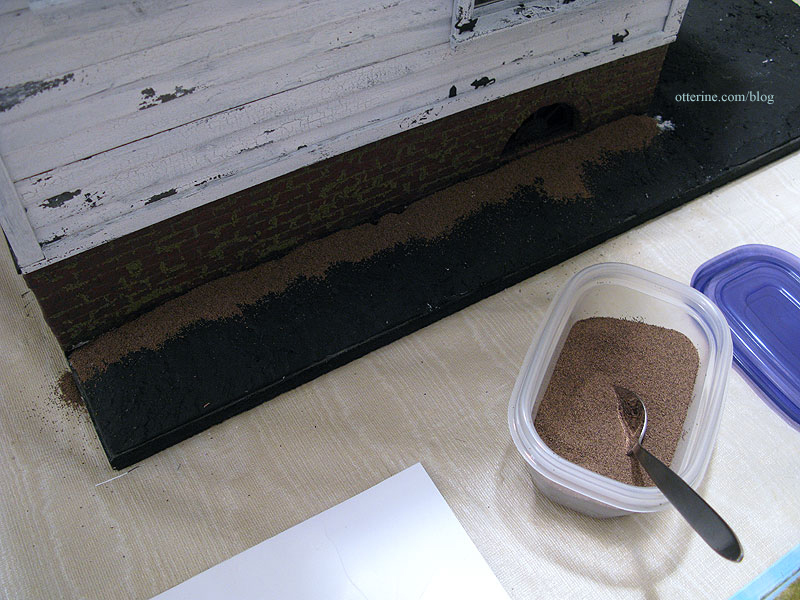
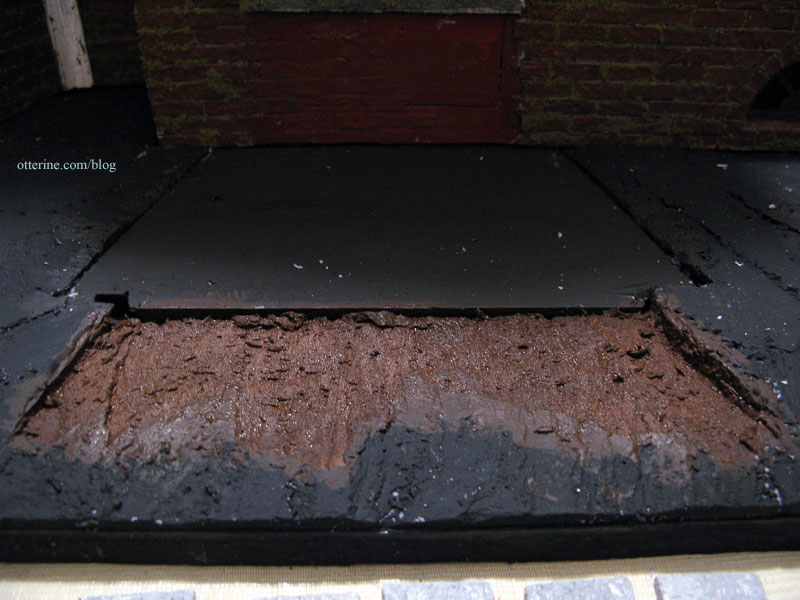
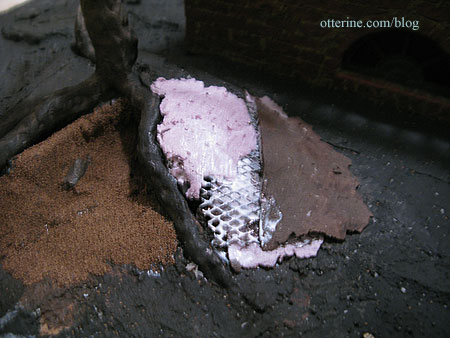
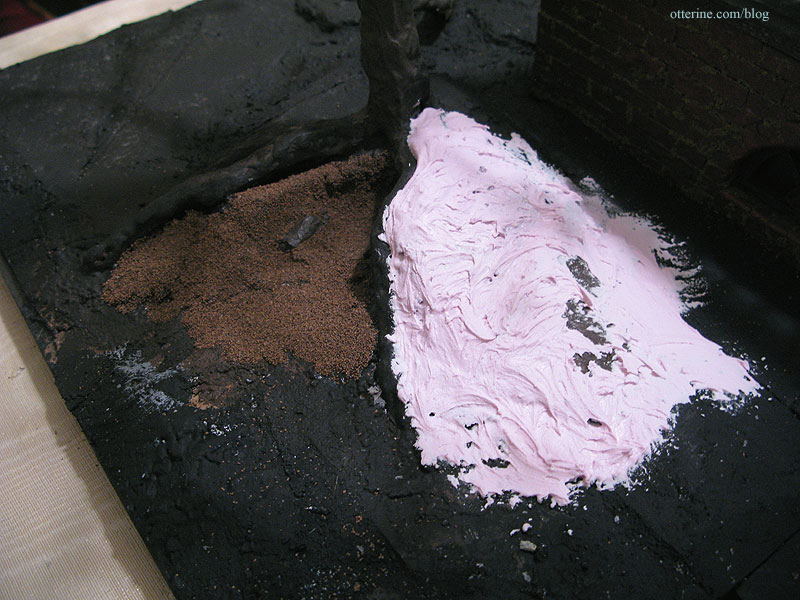
Instead of having the grass go all the way to the house, I decided to have dirt showing along the foundation. After spreading a layer of glue with a brush, I added the Ballast Fine Dark Brown by Woodland Scenics. I worked in small sections so the glue wouldn’t dry out before the ballast could be added. (Note from 2024: I would now use Scenic Cement for projects such as these but didn’t know about it in 2012.)
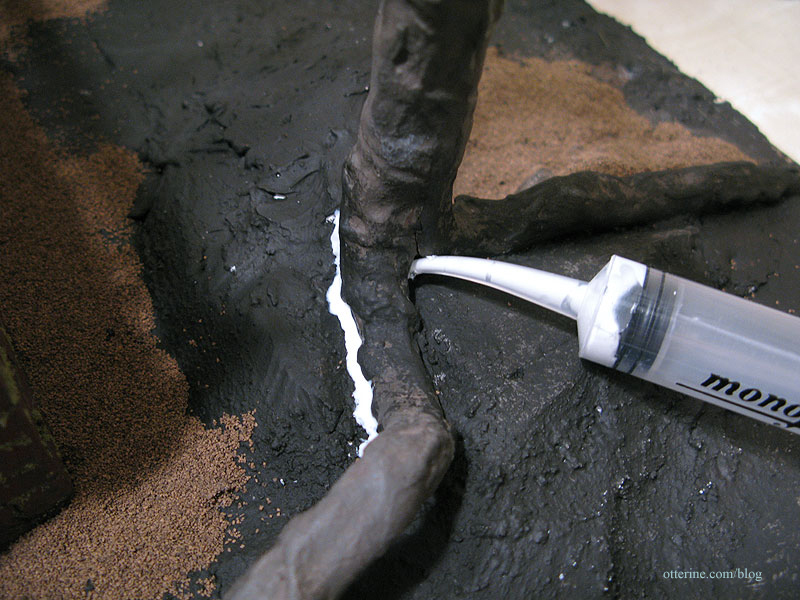
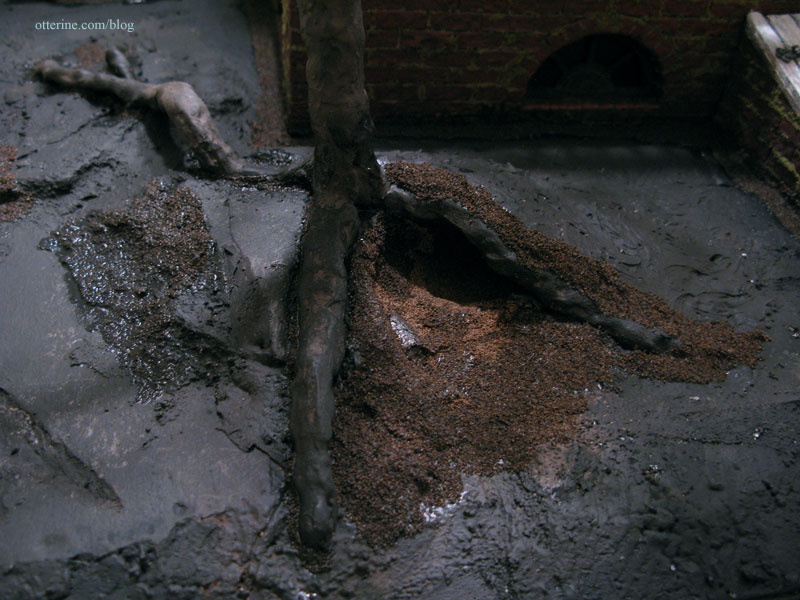
I used a glue syringe to fill part of the lines between the stone pavers.

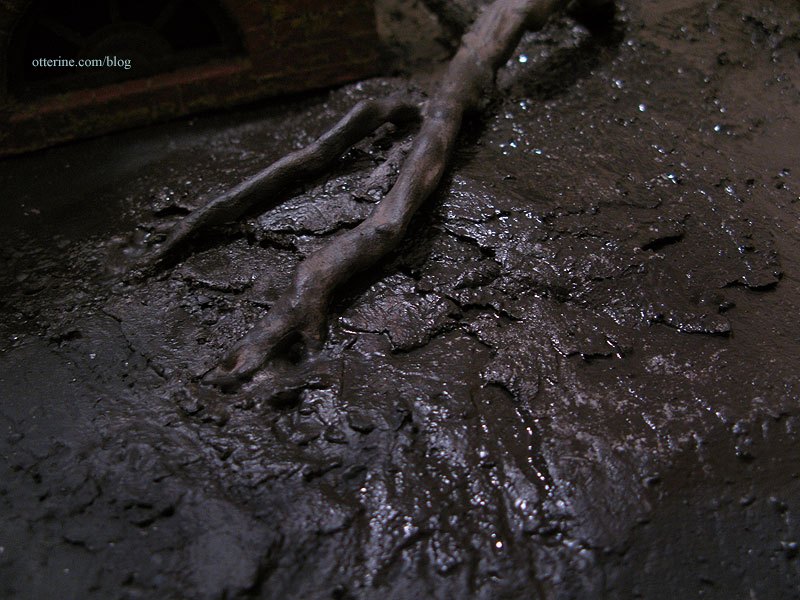
I used the syringe to fill the areas around the roots.
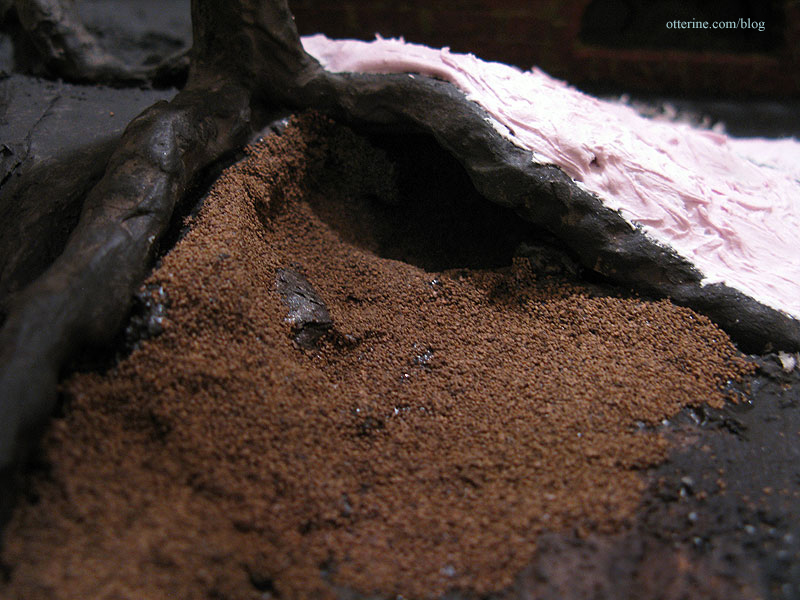
I glued the cellar doors onto the base board but didn’t add the ballast dirt on the main wall behind them. I’ll have to complete this portion of the landscaping after the chimney is installed, which can’t be done until all of the wiring in the house is complete.

I let it set for quite awhile before brushing the excess back into the container, then vacuuming the remainder. I have a good amount of ballast dirt around The Tree and the house, but I can always add more when I get to the grass portion of the lawn.
I added a dark wash of brown and black to the dirt, though this may lighten in color as it dries.

I think the front walkway looks fabulous so far. :D
I left Grahame’s burrow the original lighter color inside so it would remain visible. Besides, that dirt has been dug out and is fresher. :]
I’ll need to let this dry completely before moving on to the lawn.
Categories: The Haunted Heritage
October 20, 2012 | 0 commentsHeritage – stone walkway
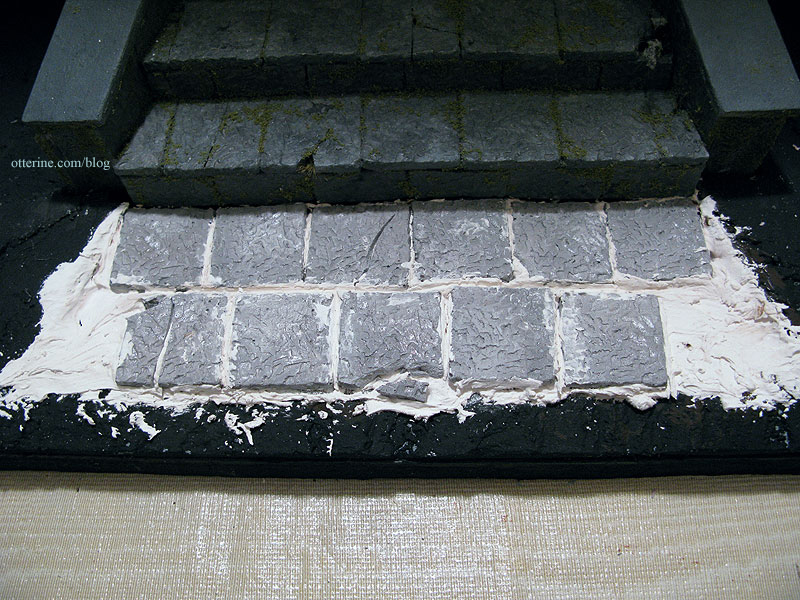
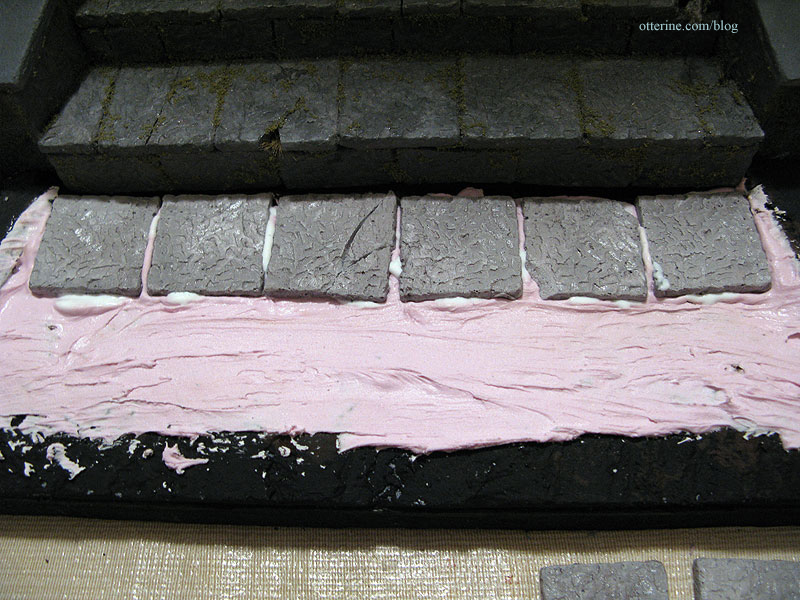
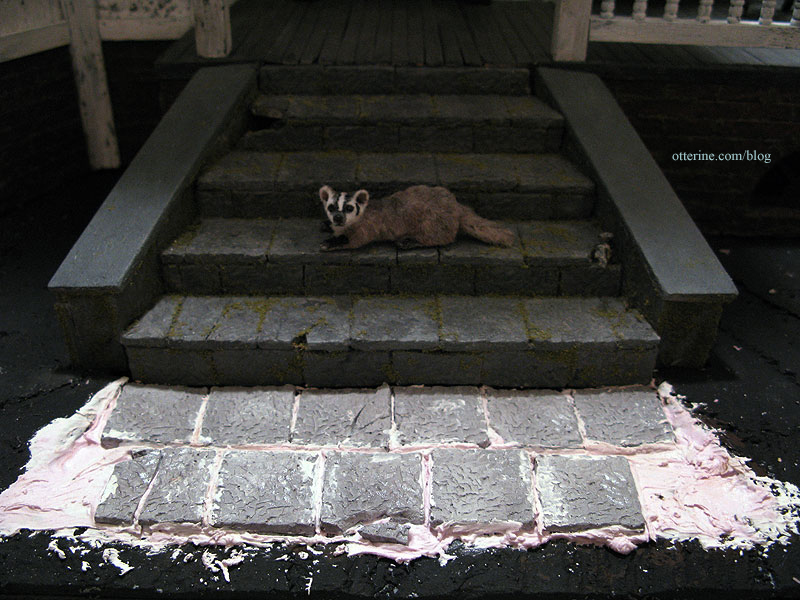
To plan for the walkway at the bottom of the stone steps, I placed loose pavers in a rough layout to see what would look best.
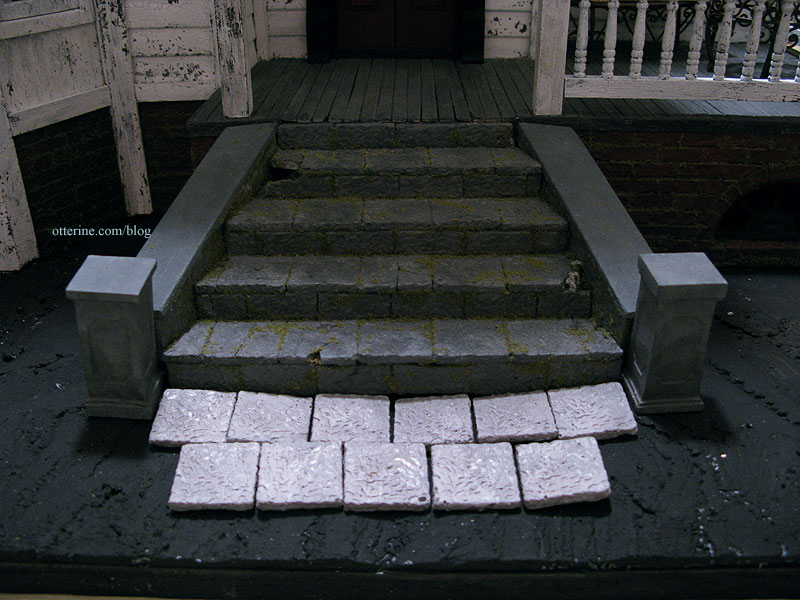
When I cut the foam base for the walkway, it ended up being a little more breakneck than I wanted. :D I used a knife to even out the ground and replaced the stones. Much better.
I primed the newly cut area and the wood base for the stairs.
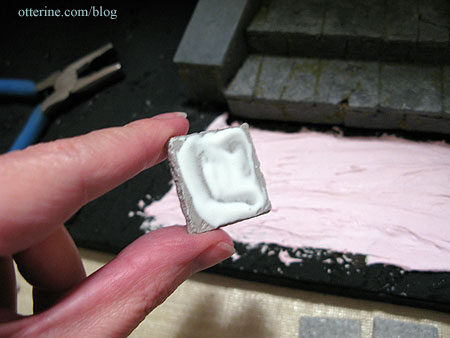
I added some spackling compound to further even out the ground. To save time in grouting, I decided to add the pavers while the spackling was still wet. I added glue to the bottom of each stone and then pressed it into the spackling.
I consulted with Lyssa earlier today, and she agreed my spackle-plus-glue technique should work. We’ll see if we’re both full of beans! :O Of course, if they do pop out, I can just glue them back in place.
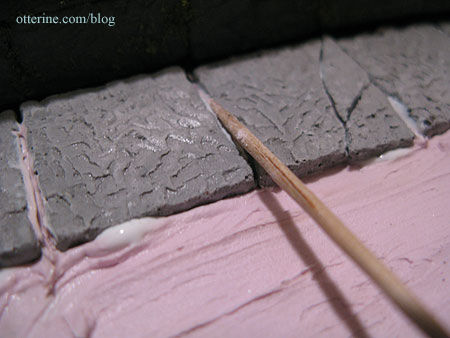
I used a toothpick to smooth the excess spackling and glue into the grooves between the pavers.
Grahame has come to inspect.
As you can see, I broke a few pavers to match the steps.

Categories: The Haunted Heritage
October 19, 2012 | 0 commentsHeritage – Planting The Tree, part 4
Continuing planting The Tree. I apologize for the few blurry pictures. :\ I was trying to work quickly and still take photos.
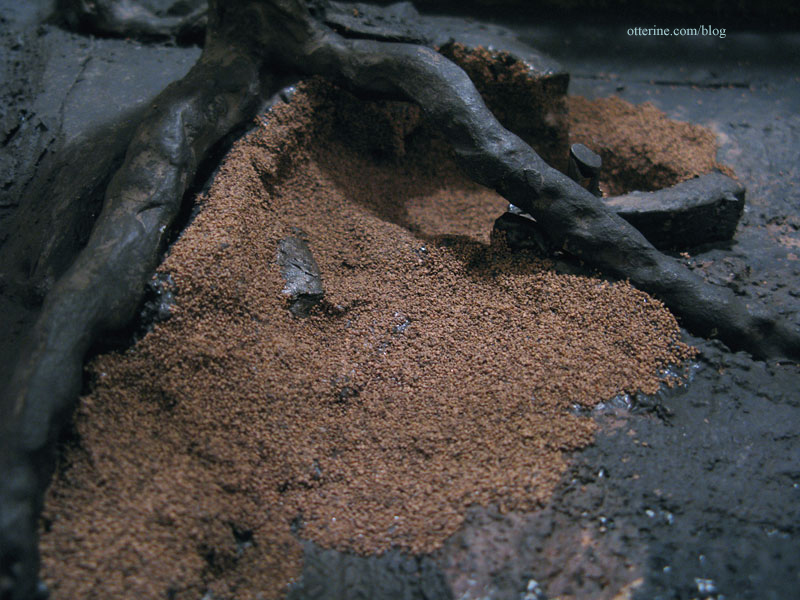
I used Ballast Fine Dark Brown by Woodland Scenics for the earth portion of the landscaping. I’ll add more later in other areas, but I mainly needed to finish the interior of the burrow. I probably should have used a finer material for good scale approximation, but it was important that the landscaping materials not be “dirty” or have the ability to rub off easily for the simple fact that I would be placing Grahame inside the burrow and didn’t want anything to stain or mar his fur. I was afraid anything with a powdery texture would do just that. During the painting and finishing portion, I had him far away from the mess.
I started with Aleene’s Quick Dry glue put on with a brush.
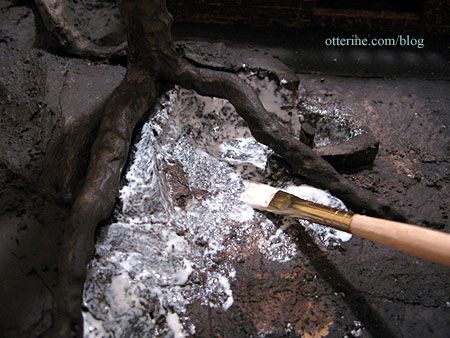
Using a spoon, I added the ballast to the glue.
And, it didn’t work at all! Hahahahaha. Quick Draw McGraw glue is right! Hardly any ballast stuck and I was left with shiny dirt. Well, I guess I now know how to create slippery waterfront rock.
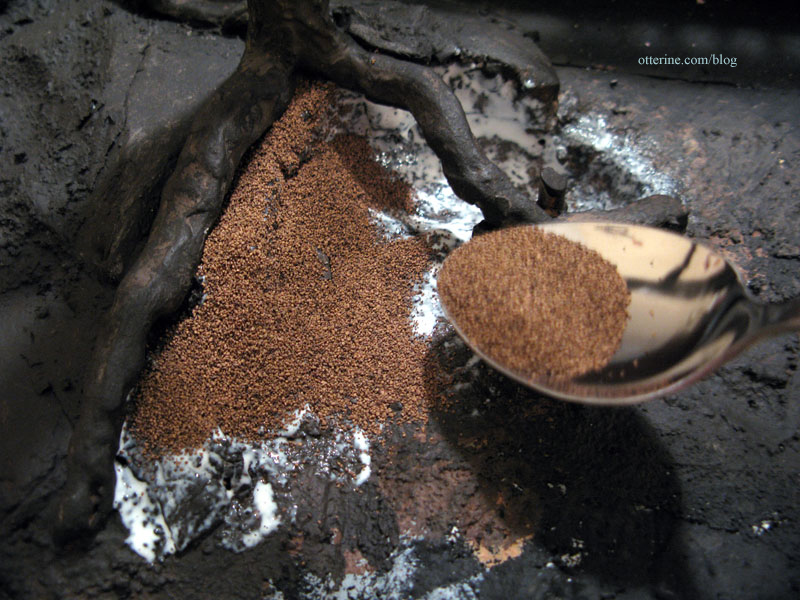
I applied Weldbond this time, and in smaller sections, and spooned more ballast over the areas. After letting it set while I had a snack, I brushed away the excess and vacuumed what the brush couldn’t remove. Success!!! I had left one ledge of foam bare, because I thought it looked like a rock. (Note from 2024: I would now use Scenic Cement for projects such as these but didn’t know about it in 2012.)
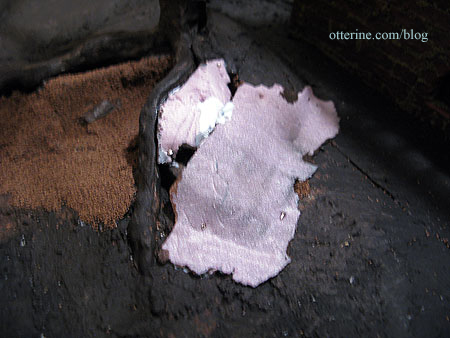
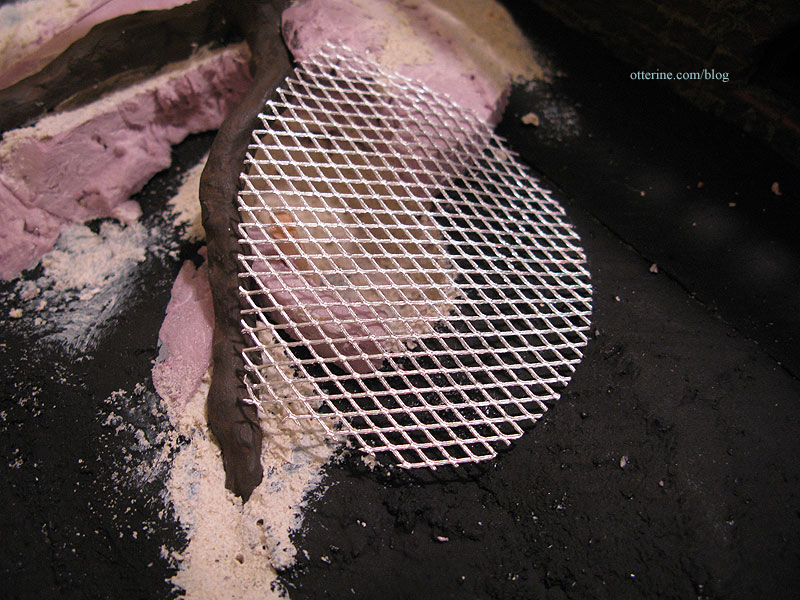
Prior to gluing them in place, I had painted the mesh and some foam pieces to be used to complete the upper portion of the burrow. I don’t think the interior of the burrow will be readily seen, but this will keep any silver metal or purple foam from showing on the off chance you can see inside once it’s complete. I painted more foam than I needed since I wasn’t sure of the configuration I would need.
I glued the piece of foam that contoured to the tree root first and then added a very thin piece of foam to enclose the back. The painted sides are facing down over the burrow.
I adjusted the shape of the mesh and glued it in place, again painted side down. I used straight pins throughout this whole process.
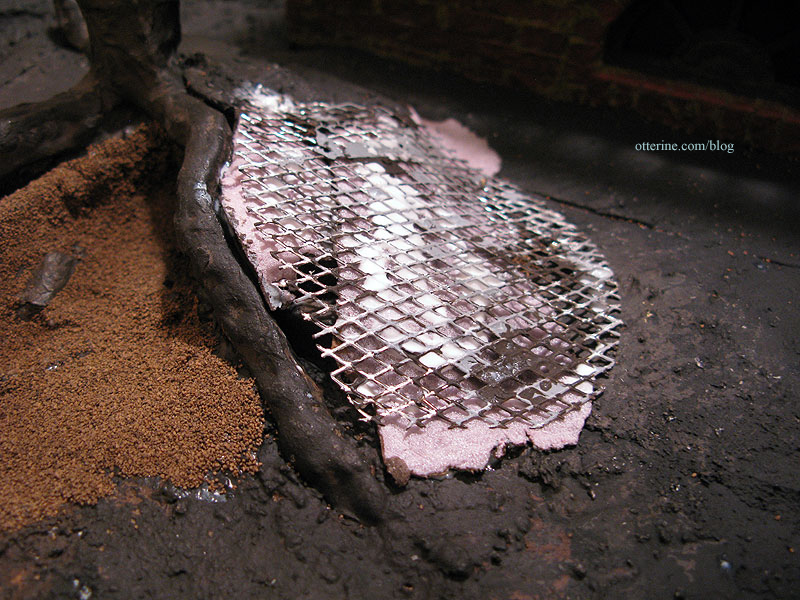
I glued the remaining foam on top of the mesh then stuck my finger into the burrow to make sure there was nothing sharp or intrusive sticking out. :]
There was no more stucco left, so I spread spackling compound to even out the edges and gaps for this final portion of the landscaping.
I am really resisting the urge to put Grahame in that burrow!!! But, I don’t want to risk getting any wet glue or stucco on him.
After letting this all dry completely, I primed and painted the spackling. He certainly does look right at home.
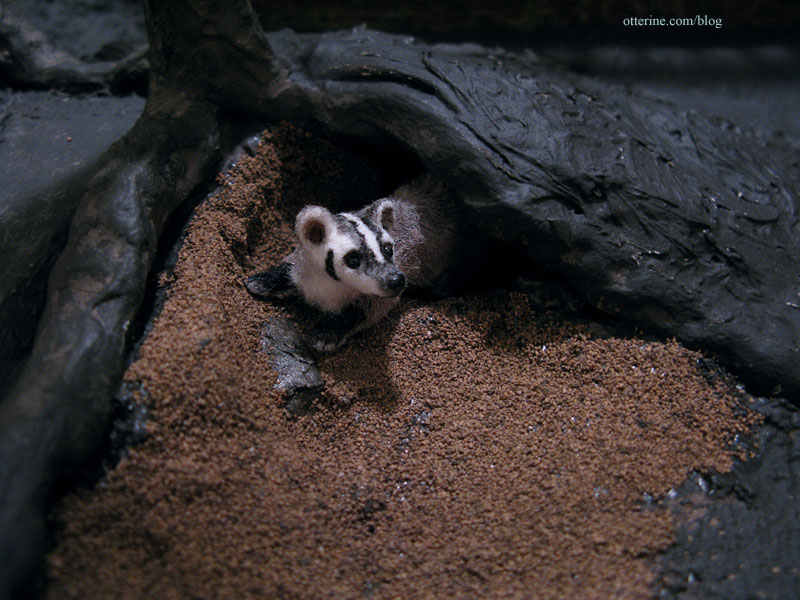
And, he goes way back in there! :D I love it so far!
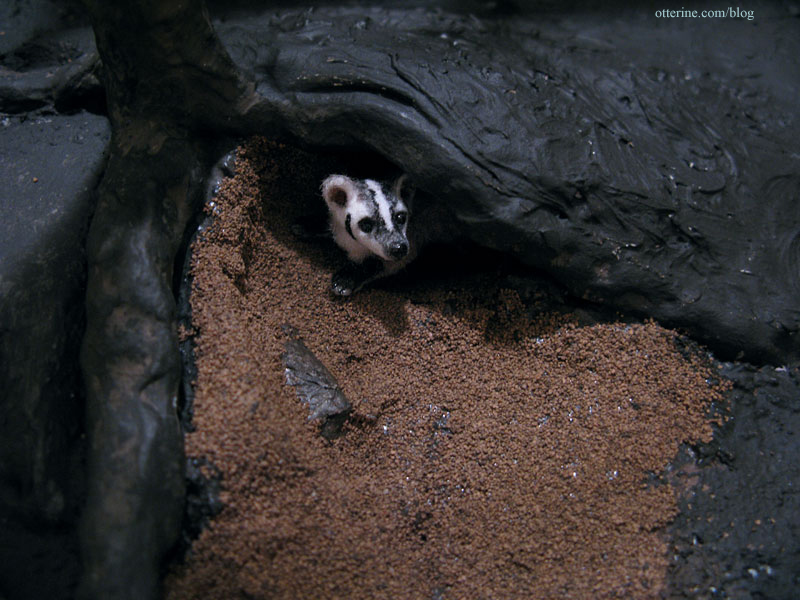
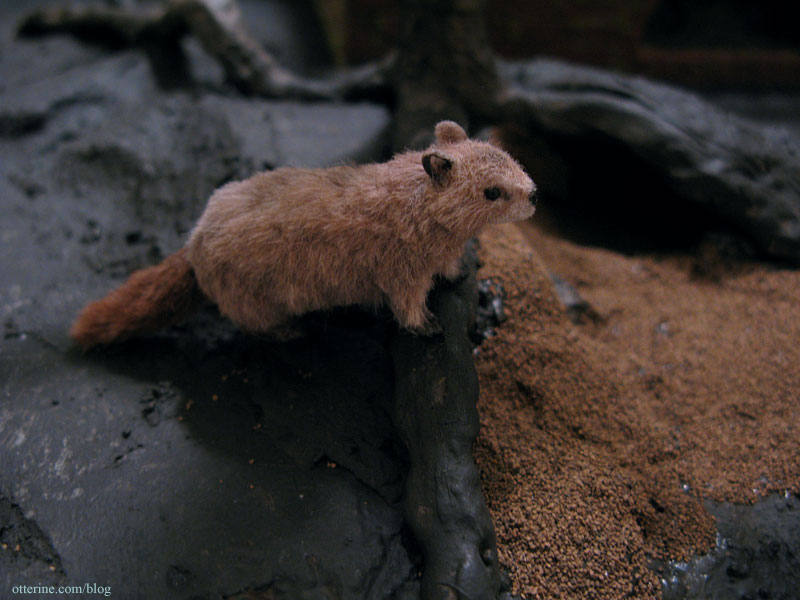
Woodrow came to check things out, but that is a Grahame-sized burrow. It’s too short for Woodrow. Good thing he’ll have his own home elsewhere.
Categories: The Haunted Heritage
October 18, 2012 | 0 commentsHeritage – Planting The Tree, part 3
Continuing planting The Tree. To keep the burrow ceiling from collapsing during the landscaping process, I cut a dome of Activ-Wire Mesh supported by a wood pole. Grahame has a degree in structural engineering, apparently. :D Here the pole is glued in place though the mesh is still loose so I can paint inside the burrow.
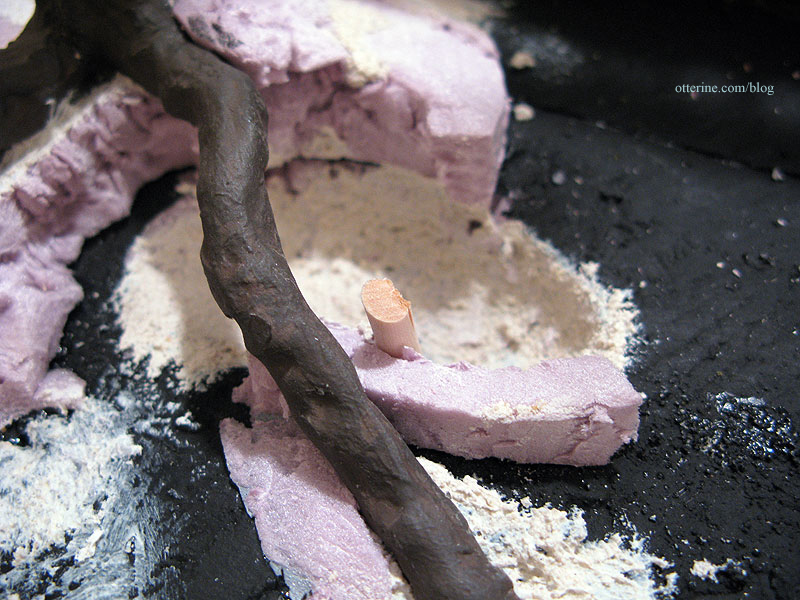
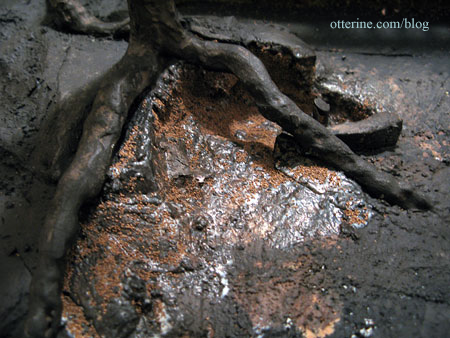
I primed the foam and stucco with gesso. I did try to keep the amount of gesso on the roots to a minimum, but it wasn’t especially important. There would be more layers of paint as well as landscaping materials to cover any wayward marks.
The burrow for Grahame needed some preliminary finishing before creating the top and sealing off access to it. I stippled on layers of brown paints inside and around the burrow until I achieved a good base color. I painted the rest of the area with a mix of brown and black, wiping the excess from the roots as I worked. The paint is thick and will need to dry overnight.
The foam slivers under the front roots look like rock. Something to keep in mind for future landscaped settings.
The Tree looks well planted but somewhat precarious, as though it might uproot and chase after trespassers. :O
Categories: The Haunted Heritage
October 17, 2012 | 0 comments


NOTE: All content on otterine.com is copyrighted and may not be reproduced in part or in whole. It takes a lot of time and effort to write and photograph for my blog. Please ask permission before reproducing any of my content. Please click for copyright notice and Pinterest use.


