

Heritage – back roof dormer, part 5
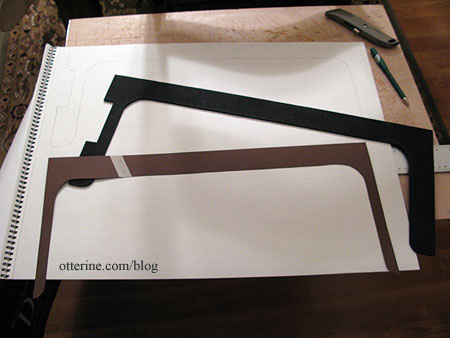
Continuing work on the back roof dormer. I glued on the flat roof and while that was drying, I cut the shingles for the new back roof using a paper template. I had to work from the top down so the shingles would align correctly over the open back and along each side section.
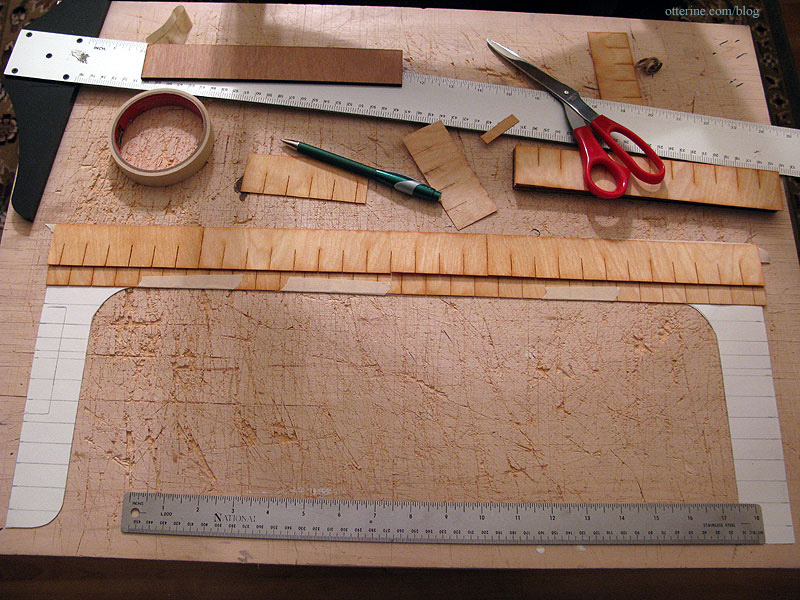
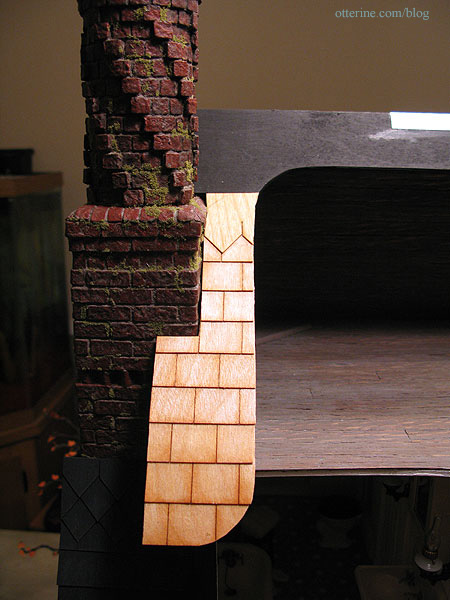
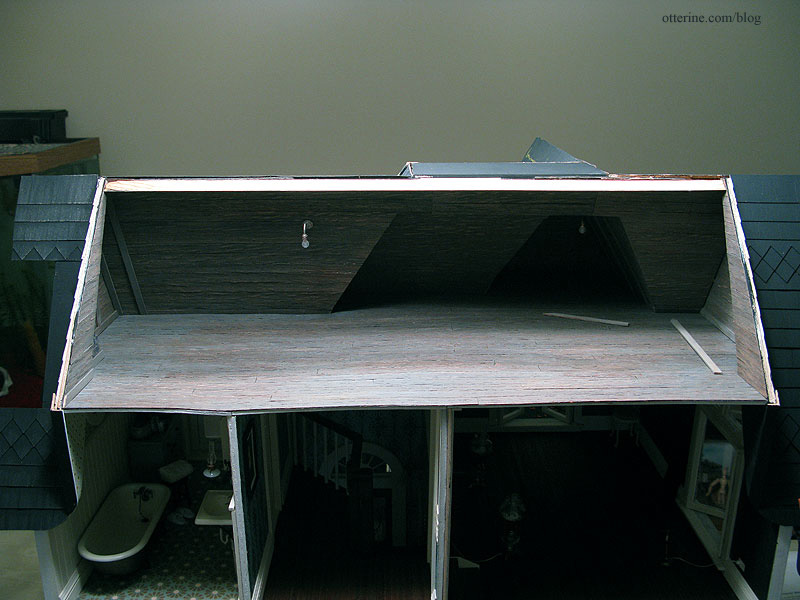
I taped the completed template onto the house to see if the layout works well. The back roof isn’t as long top to bottom as the other roof pieces, so the shingle pattern had to be adjusted slightly as well. I omitted the bottom diamond section but kept the top one. The chimney notch will be adjusted when I shingle the final roof piece, but I’ve left those pieces long for now.
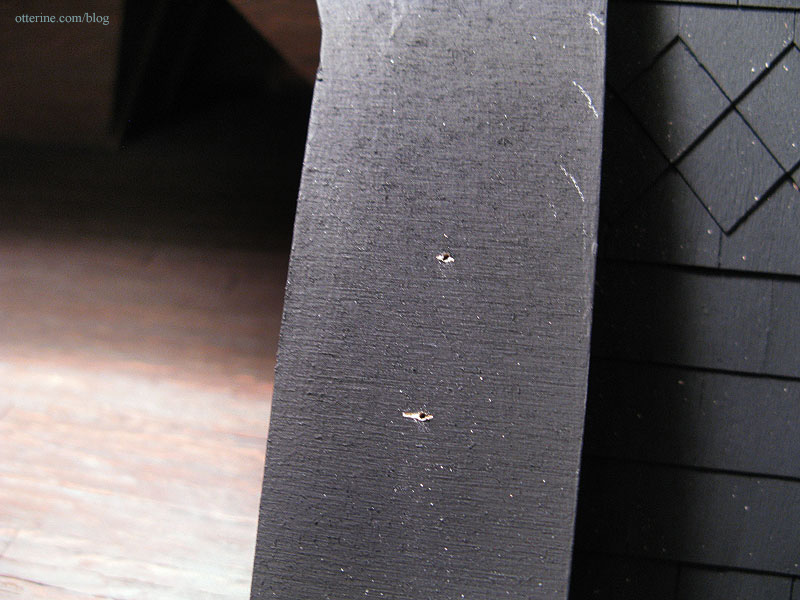
Before gluing on the new back roof, I drilled pilot holes for pins to reinforce the joins.
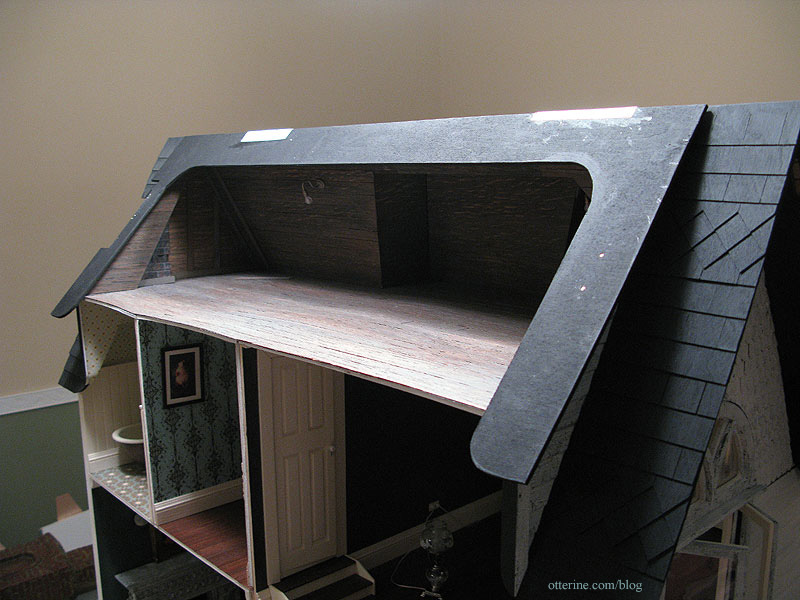
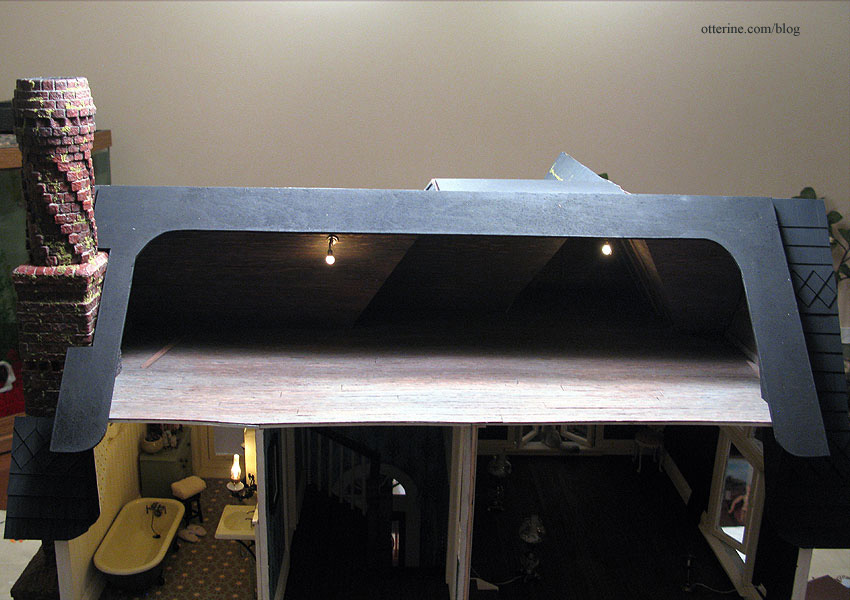
I glued on the new back roof, adding Tyvek reinforcement over the roof ridge. The final finishing of the roof ridge will cover it.
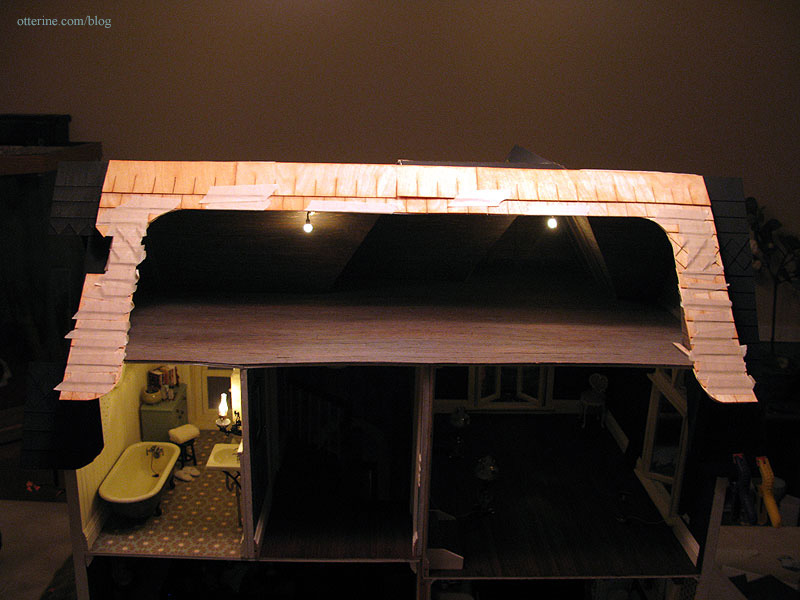
I shingled the new back roof, adjusting the shingles I had cut using the template. Here is the right side.

And, the left side. The chimney is still removable.
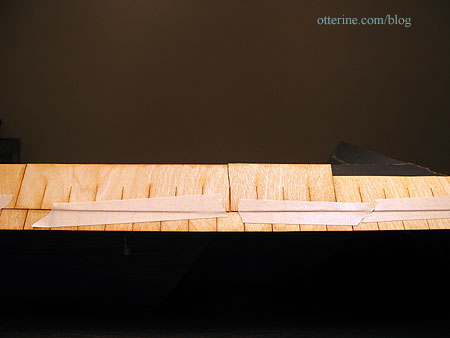
There are two long rows of shingles to complete the top. Before gluing on the top row, I taped it in place and marked where the roof ridge hit behind them. I cut the shingle strips along that line and glued them in place.
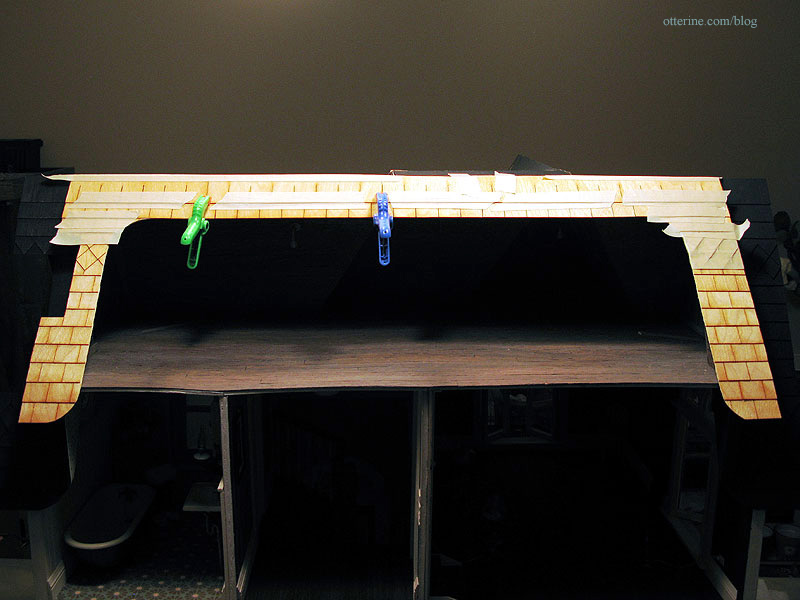
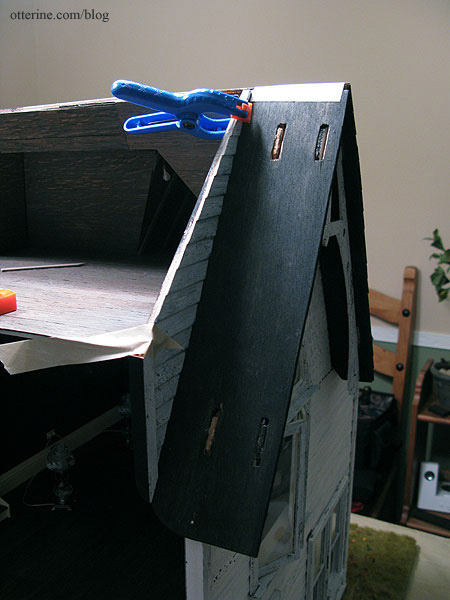
I taped and clamped the shingles to dry overnight.
Categories: The Haunted Heritage
January 21, 2013 | 0 commentsGrandma’s attic – faux slats and rafters, part 3
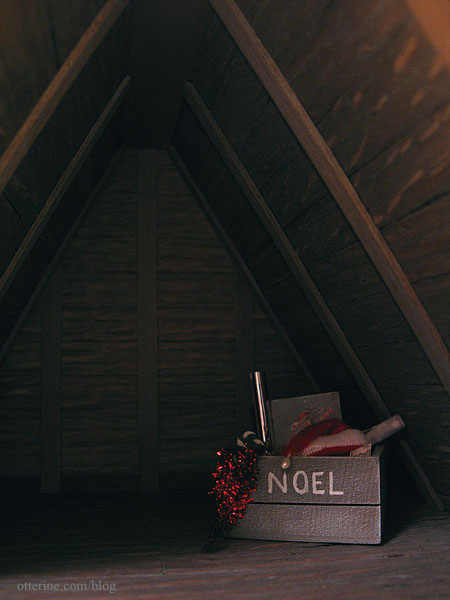
I continued working on the faux slats and rafters for the attic. After getting the attic flooring done and installed, I cut the rafters to fit the forward gable and glued them in place.
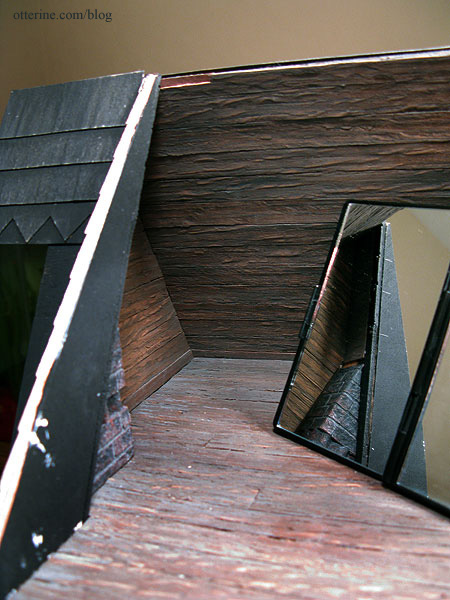
After adding the remaining roof pieces to finish off the back of the house and attaching the chimney to the house, I was able to work on finishing those portions of the attic walls. Had to use a mirror to work in some tight spots.
I glued in the beams and rafters in the two side gables and cut rough rafter lengths for the adjacent walls that will be trimmed to the correct length during final installation. I trimmed around the chimney as well.
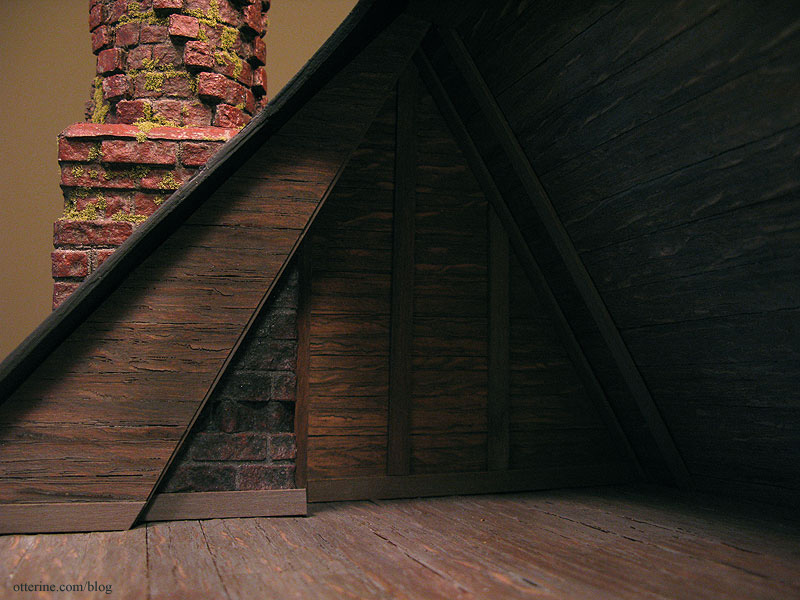
I installed the main long beam made from the triangular strip wood used in the forward gable. Because the angle of the roof changes with the added back dormer, the triangular beam spans only between the two new roof side addition walls. The unpainted portion will be covered by the new roof back piece. It is secured mostly by tension with a spot of glue and tape in the middle.
Categories: The Haunted Heritage
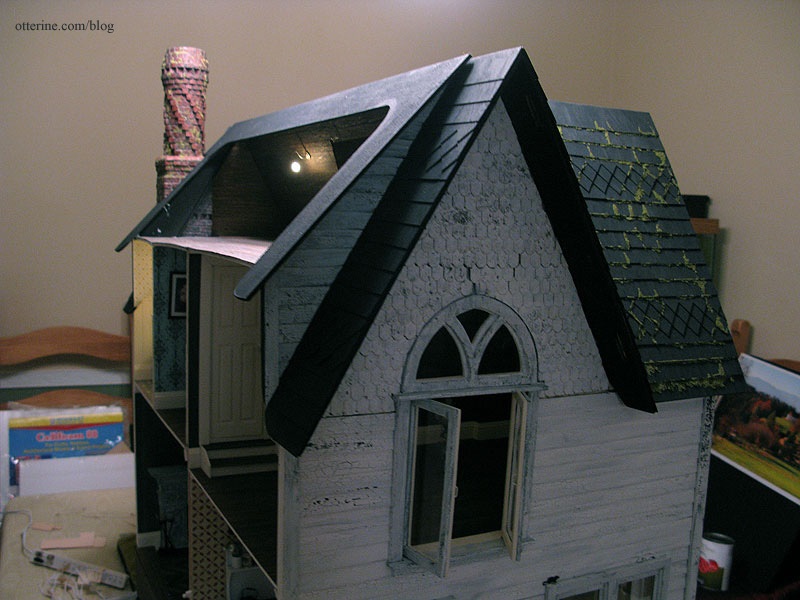
January 20, 2013 | 0 commentsHeritage – back roof dormer, part 4
Continuing work on the back roof dormer. I added the remaining side roof piece and its roof addition wall. I used the same pin technique used for the opposite side to help counteract any warping in the attic floor. I added some Tyvek reinforcements to the attic interior and over the roof ridge. The roof ridge finishing will cover this patch.
I shingled the back roof piece, first by making a template and then shingling directly onto the house before painting the new shingles to match.
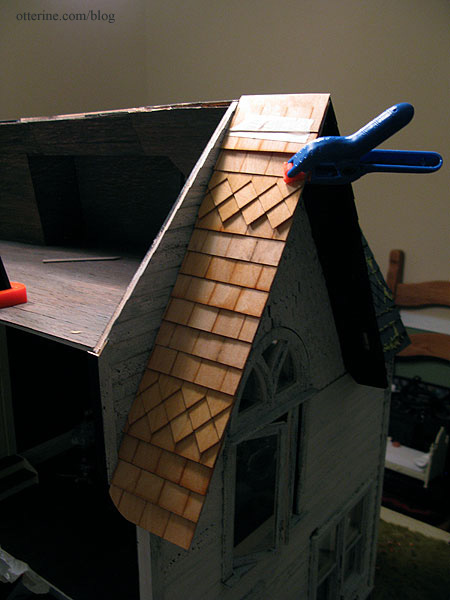
Moss will come later.
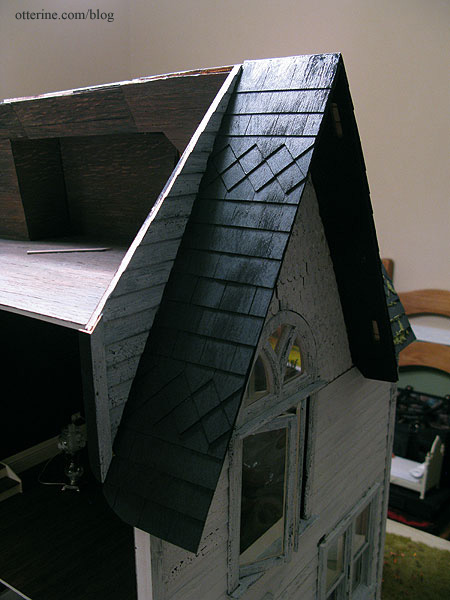
I cut the new back roof piece from 1/8″ thick plywood using my foam template as a guide and then primed both sides with black acrylic paint. I finished the top of the flat roof with sandpaper and painted it black, too. Both final roof pieces remain unattached at this point.
I cut a paper template for the interior attic slats and rafters treatment as well as a template for the exterior roof shingles for the new back roof piece.
Next, I have a whole bunch of trim to add to the house, and most of it needed to have white paint crackled over black. Figuring it would be easiest to paint first and then add touch-ups to any clipped ends, I painted all of the long strips of wood whole. Those are drying right now.
Categories: The Haunted Heritage
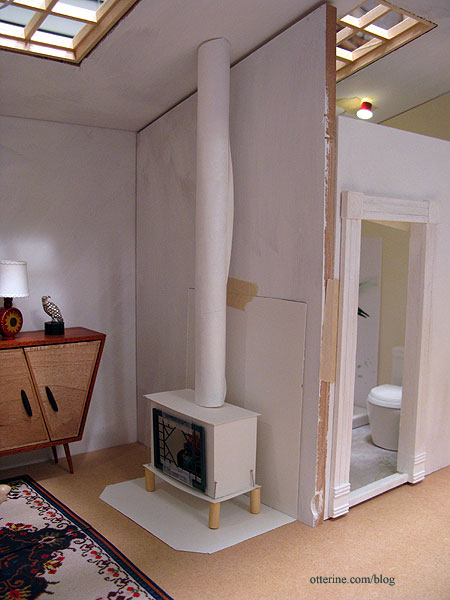
January 19, 2013 | 0 commentsThe Artist’s Studio – Wood stove – introduction
The Artist’s Studio is small but it needs a method of heating. I thought about simple radiators, but where’s the fun in that? Here’s my paper mockup of the wood stove for the living area. The bathroom will have a simple radiator.
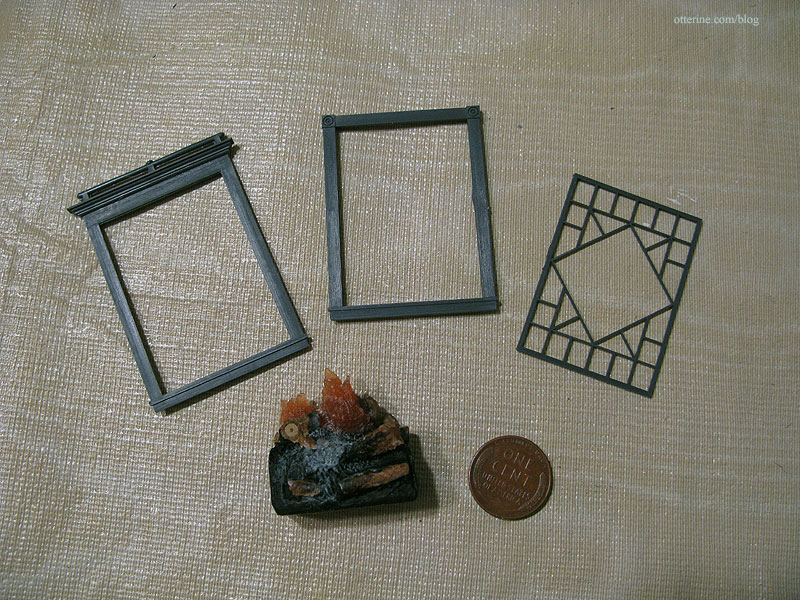
When I first started looking at wood stoves online, I liked the ones with decorative doors the best. I bought a Grandt Line O scale diamond pattern window (3743) to serve as the door. It comes in three parts, and I used two of the three to make the door. I also bought a small resin fire from Mainly Minis.
I made a quick paper mockup to test the overall stove size to fit the door and fire. I have the wood dowel from the original HBS Loft kit to serve as the stove pipe, but I rolled up a piece of paper for the mockup. I pinned on wood beads for the legs.
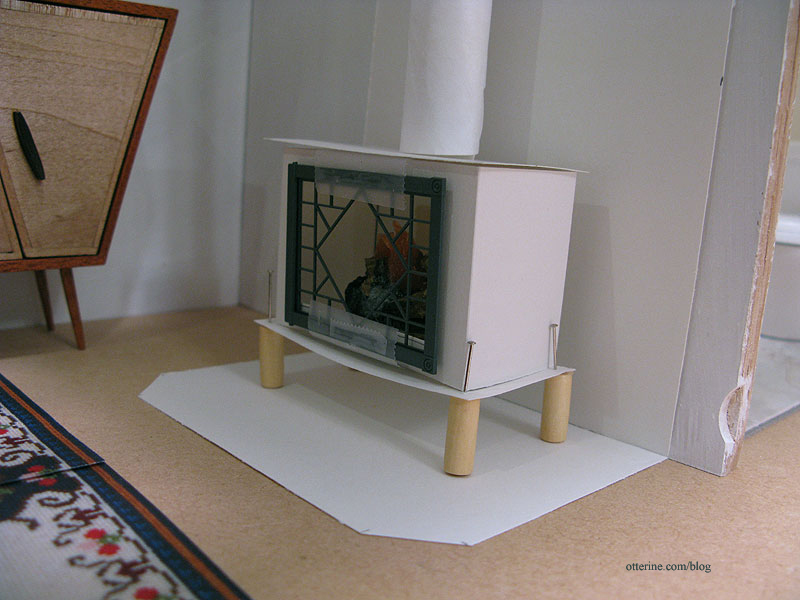
I think it’s a little short overall, so I plan to add a base for wood storage like this one from Charnwood.
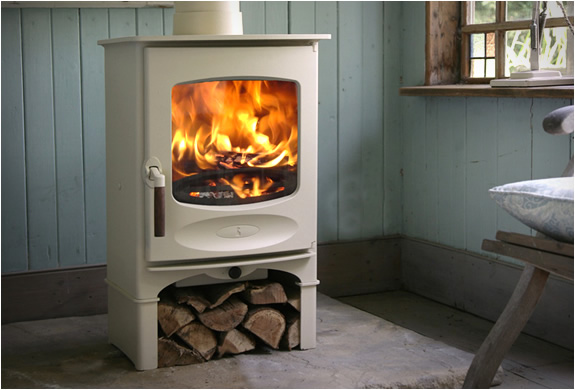
I like a the basic elements of the Charnwood stove, so I made this sketch for mine. I believe mat board will be the best material for the final stove. Kris at 1 Inch Minis does amazing things with mat board, and I’ve enjoyed working with it using her tutorials.

I had originally thought about bricking all the way up the wall in addition to the base under the stove, but then I saw this photo from hearth.com showing a partial brick wall. Love it!

The stove rounds out the rest of the furnishings for the living area….nice and cozy! :D
I also made a photocopy of the blue medallion rug I’ve been stitching to see if it will work in the space. I took two copies of the finished half and taped them together. I think there should be enough room for it here. No way would I put a white base rug in front of a wood stove or in a painting studio in real life, but in mini-land…it’s all good!
Categories: The Artist's Studio
January 15, 2013 | 0 commentsThe Artist’s Studio – lighting plan
With the new Dremel Trio in my possession, I can now cut wiring channels more precisely and quickly than by hand. I doubt I’ve seen the last of my handcut channels, mainly because plans change once a build starts. However, I am trying to put in the main channels I’ll need before assembly.
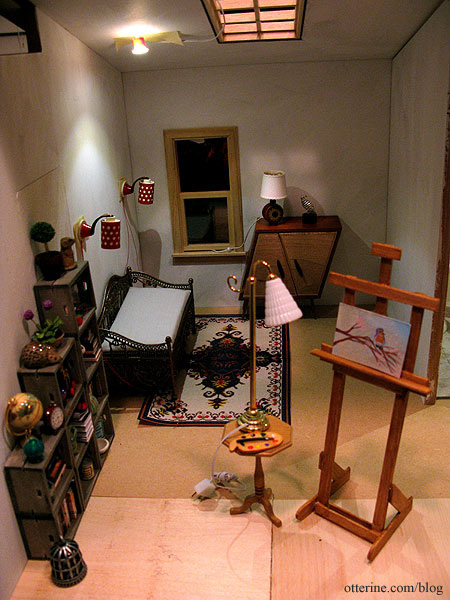
I plan to have two sconces by the daybed. As noted before, I rewired these Lundby lamps with non-replaceable bulbs.
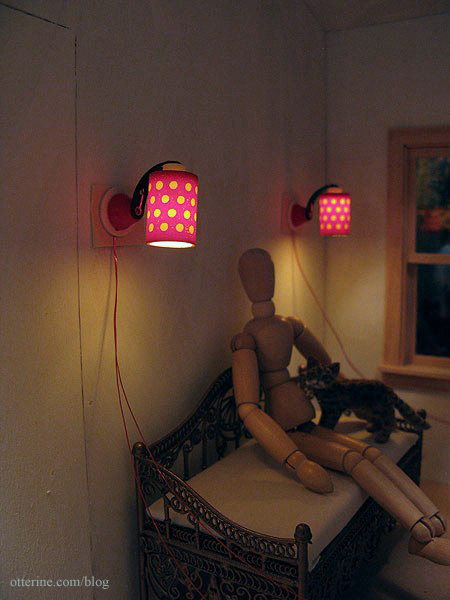
Since I’ll be using non-replaceable bulbs, I need a backup plan in case I ever need to rewire these lamps. I’ll rout out an area on the outside of this wall to curl excess wires as needed and will not cover this area with siding. I will disguise the bare patch with a wall fountain.
There will be a table lamp on the whimsical cabinet by minisx2. I have this sunflower lamp I made that might be a fun addition to the room.
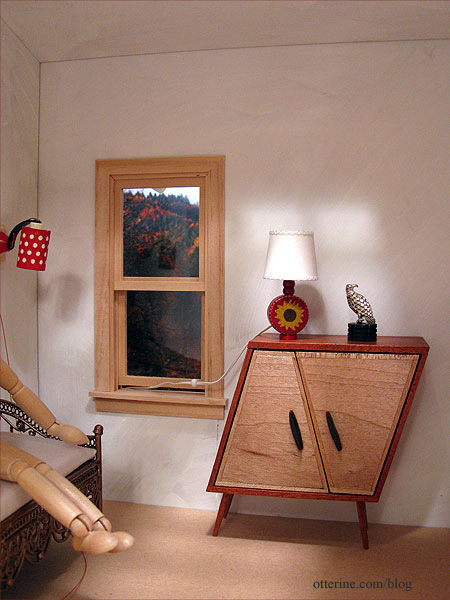
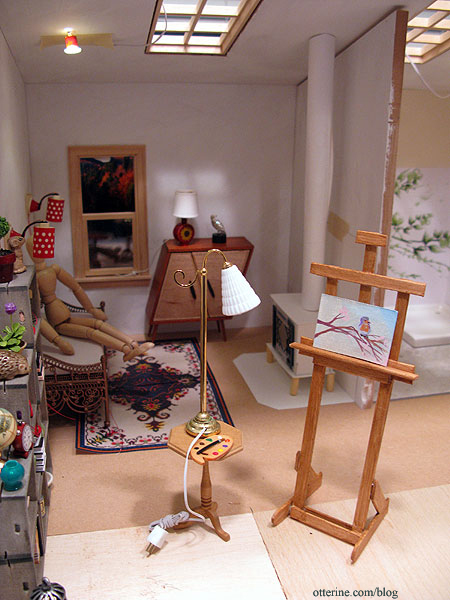
There will be either a floor lamp or table lamp for the easel area. This one is from The Dolls House Emporium. Painting and easel by Lyssa.
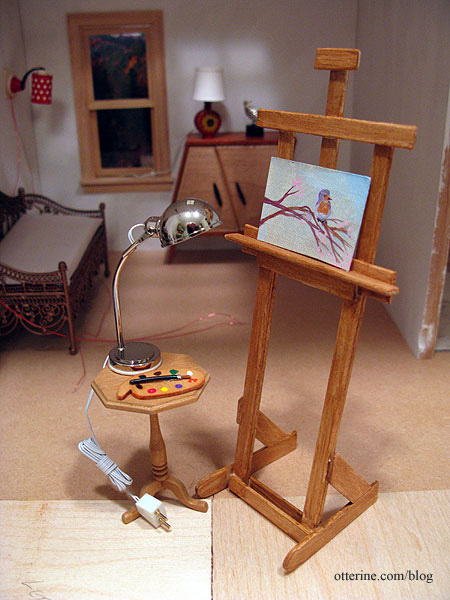
This one is from Dolls House Suppliers. You’ll notice that even though it is a floor lamp, I’ve still placed it on the table where it serves as an easel work light. It will need a new finish, though. :]
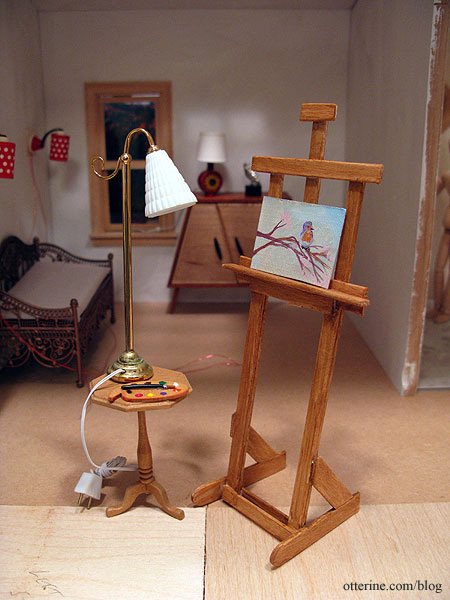
I bought this floor lamp before Monique wrote to tell me that she had found the other lamp I had been seeking. Once that one arrives, I’ll try it out, too. Whichever lamp I choose, it will need a wiring channel.
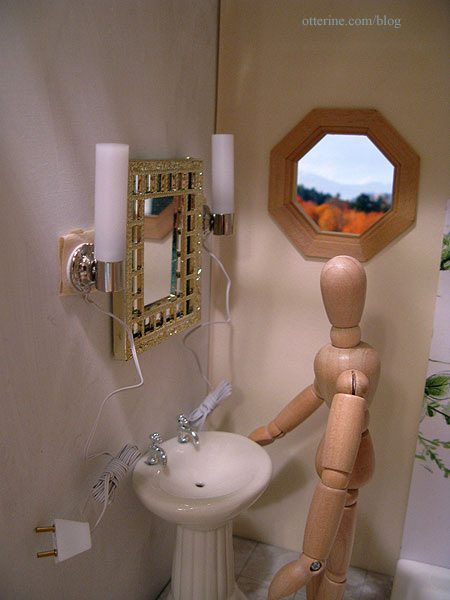
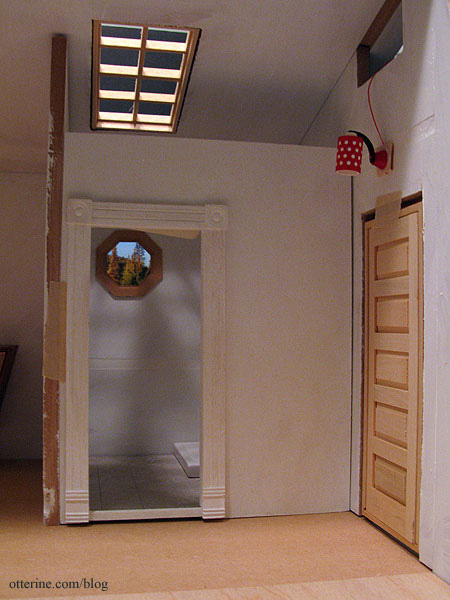
For the bathroom, I bought a pair of modern vanity lights from The DollsHouse Emporium. Their channels will merge into one on the living room side so they can operate as a set. The mirror is vintage Lundby, though I replaced the reflective glass with Darice mirror sheet. The mirror and pedestal sink are placeholders and won’t be in the final layout.
There will be another Lundby wall sconce with non-replaceable bulb above the front door. This channel is also on the outside, and I will add another fun feature to cover that hole.
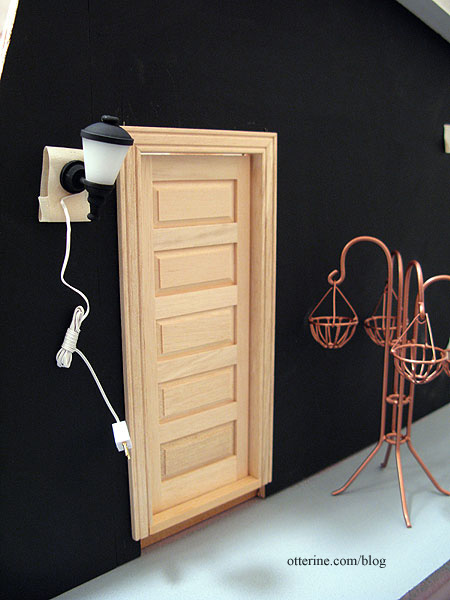
There will be at least one light on the outside, namely this modern coach lamp from Dolls House Suppliers by the front door. I might switch it to the other side of the door, though. Any other landscaping lights can be added later since the entire base is builders foam and channels can be cut easily at any time.
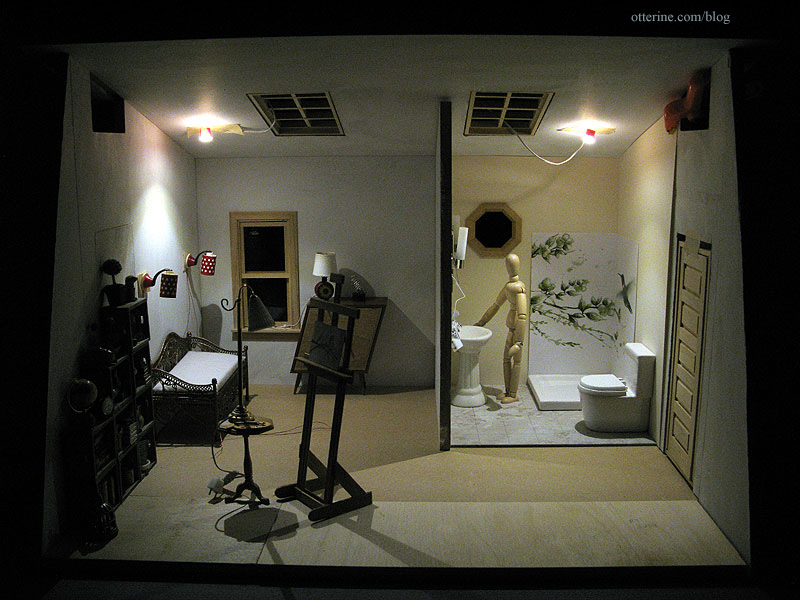
To finish off the build, there will be NovaLyte recessed can lights in the ceiling. They illuminate the whole build so well and complement the softer tones of the non-LED lamps.
Categories: The Artist's Studio
January 14, 2013 | 0 comments


NOTE: All content on otterine.com is copyrighted and may not be reproduced in part or in whole. It takes a lot of time and effort to write and photograph for my blog. Please ask permission before reproducing any of my content. Please click for copyright notice and Pinterest use.


