

Heritage – chimney side gable finishing
I finished the gable eave and trim for the chimney gable and the new back roof addition.
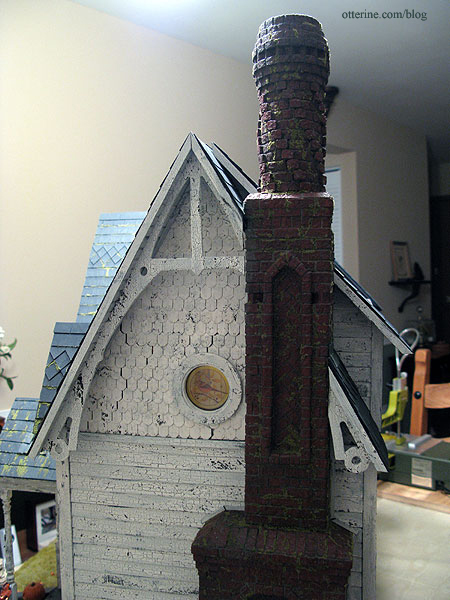
I trimmed the chimney with thin strip wood, and it looks a little awkward in places. But, I plan to cover it with ivy, so that will all work out in the end.
I finished the eaves on the new back roof and added finishing trim on the opposite side as well.
Categories: The Haunted Heritage
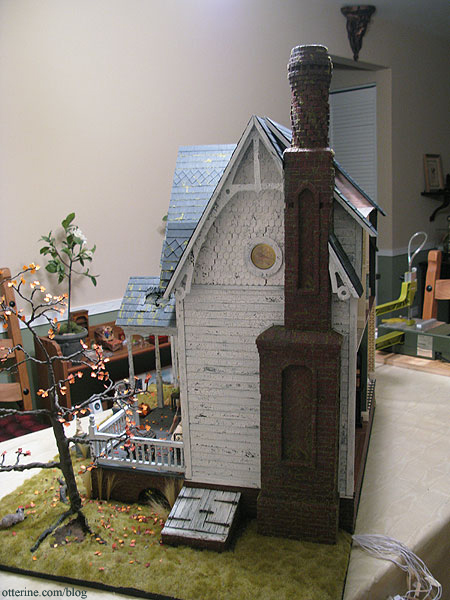
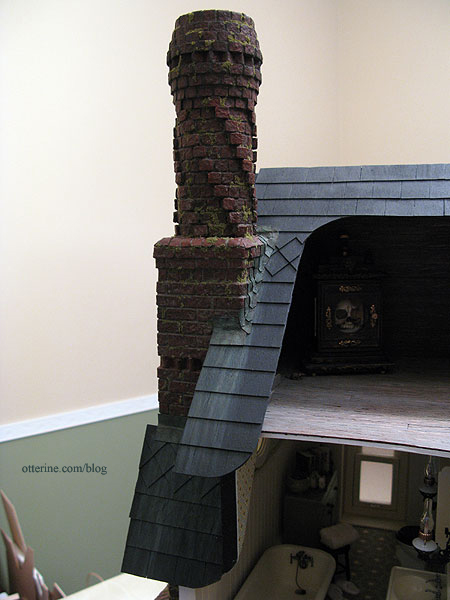
January 28, 2013 | 0 commentsHaunted Heritage chimney, part 11
Continuing work on the chimney. I traced the chimney outline onto a sheet of drawing paper to guide me in cutting the trim that will surround it. I didn’t end up using it as a guide, but it was worth taking the time just in case.
The chimney fits well against the house without additional adhesive, but that’s not to say it will stay removable. In theory, I can remove it in case of a major wiring disaster, but it would still require some deconstruction in that case. I just won’t weld it to the house.
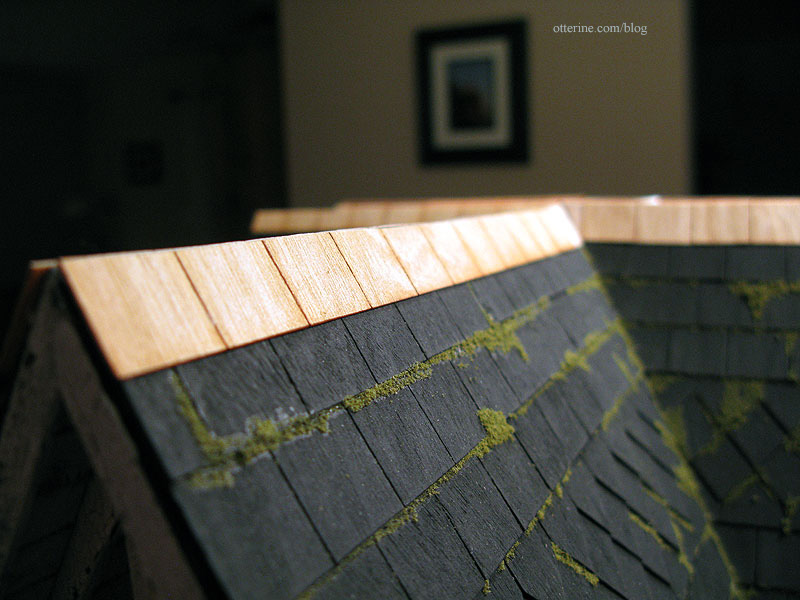
I added flashing to the chimney using brown cardstock. I crinkled the paper to make it look worn and to help it form to the contours of the brickwork.
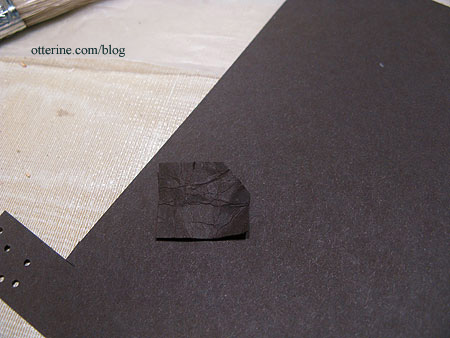
From my limited research, I believe chimney flashing is usually under the shingles on the sides, but we’ll just ignore that. :D
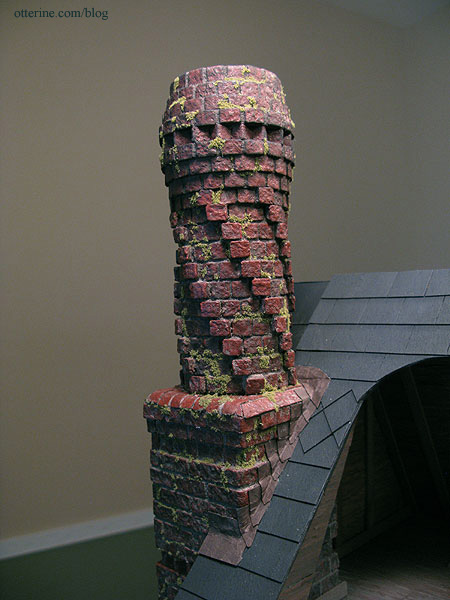
Next came the process of turning paper into old copper using paint. I dry-brushed each paint color over the paper flashing to age it. The final color of Bittersweet Chocolate toned down the other brighter and lighter colors.
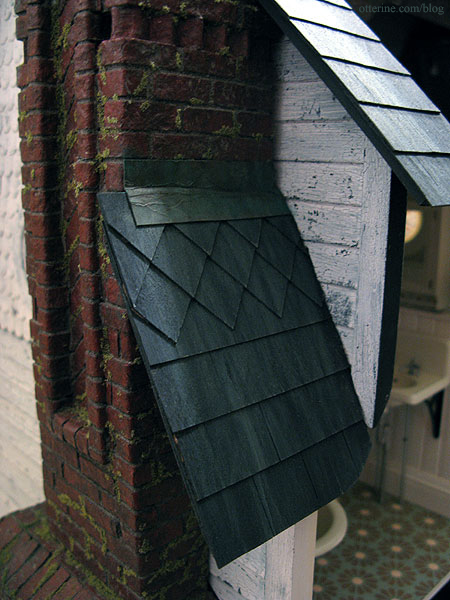
Once I had that done, I added water to my palette and began streaking the same colors down the shingles to give the impression of mineral deposits building up over time.
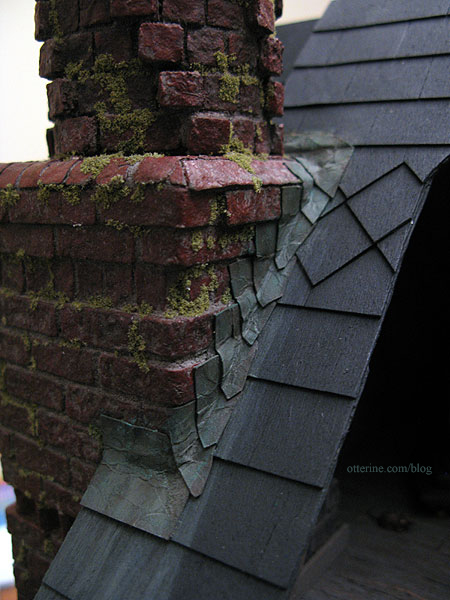
It’s hard to capture in photos, but I love the way it turned out.
Categories: The Haunted Heritage
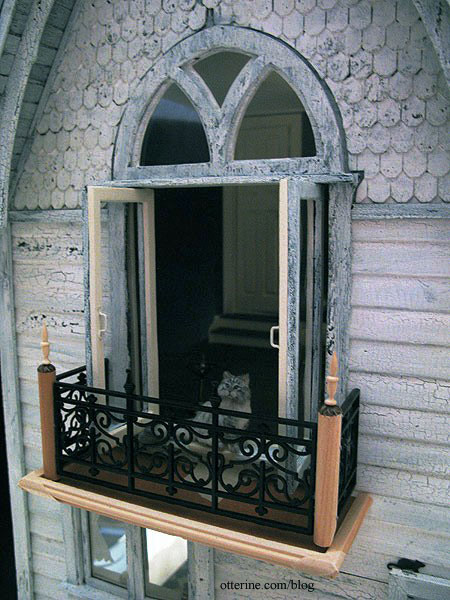
January 27, 2013 | 0 commentsHeritage – Juliet balcony, part 1
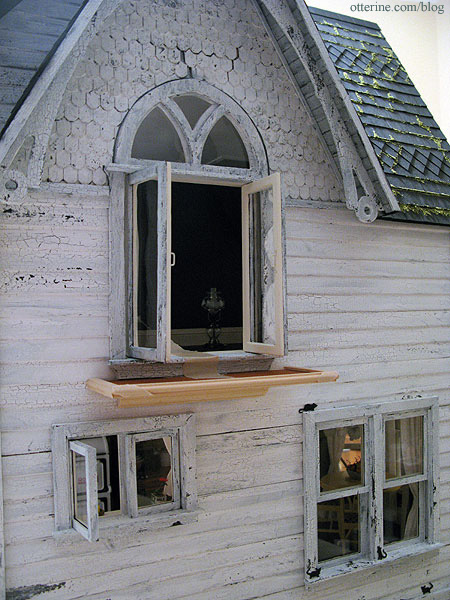
Since the swinging windows are floor-to-ceiling openings and we don’t want grandma toppling out the side window, I decided to add a Juliet balcony. Here’s the rough mockup I had made back in March 2012 that shows the general idea.
There isn’t a whole lot of room for the necessary support structure due to the first floor casement window if the bedroom windows are to swing out but it’s workable. Adding the balcony won’t detract from the interior view and it seems the most realistic and interesting to me.
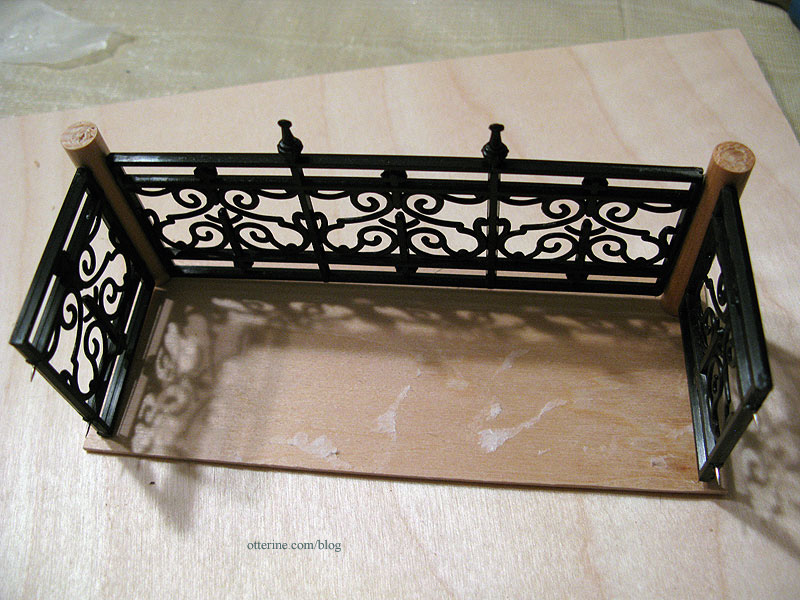
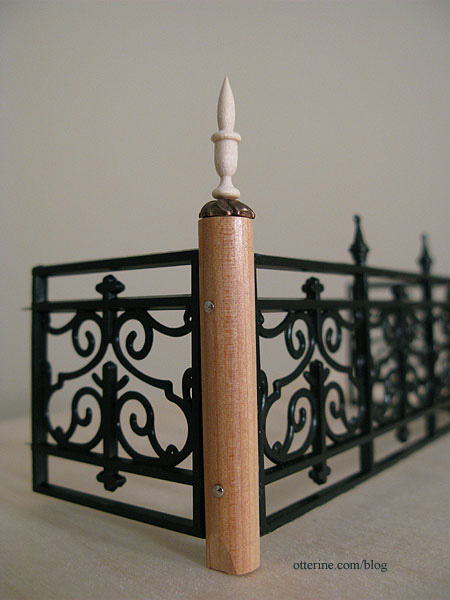
The tiny widow’s walk railing I used on the bay balcony doesn’t provide much in the way of safety, so I used plastic railings from The Dolls House Emporium. I used a large piece of fencing to make the longer span in the middle.
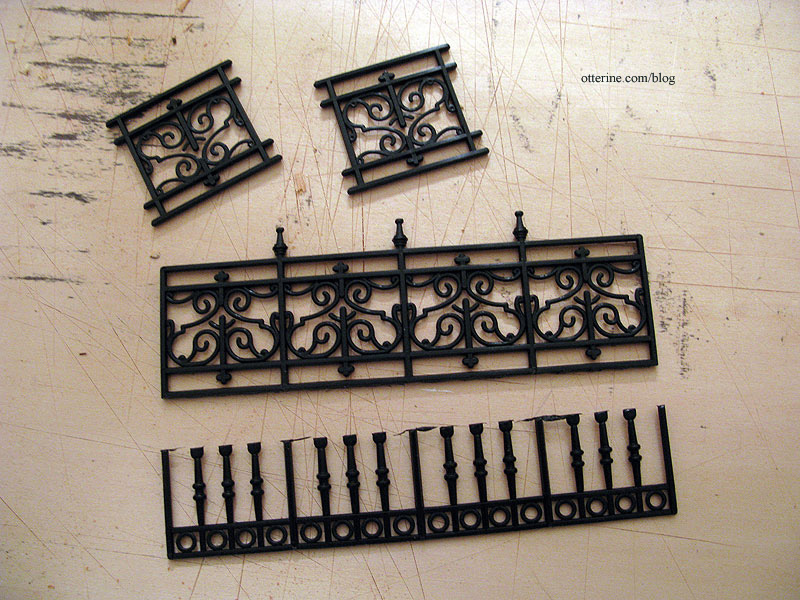
For the posts in between, I used 5/16″ diameter rods cut to 2″ in length. These were in a bag of random Dura-Craft parts from my long lost kit from the late 80s. I cut the tips from the ends of the plastic railings and drilled holes for pins.
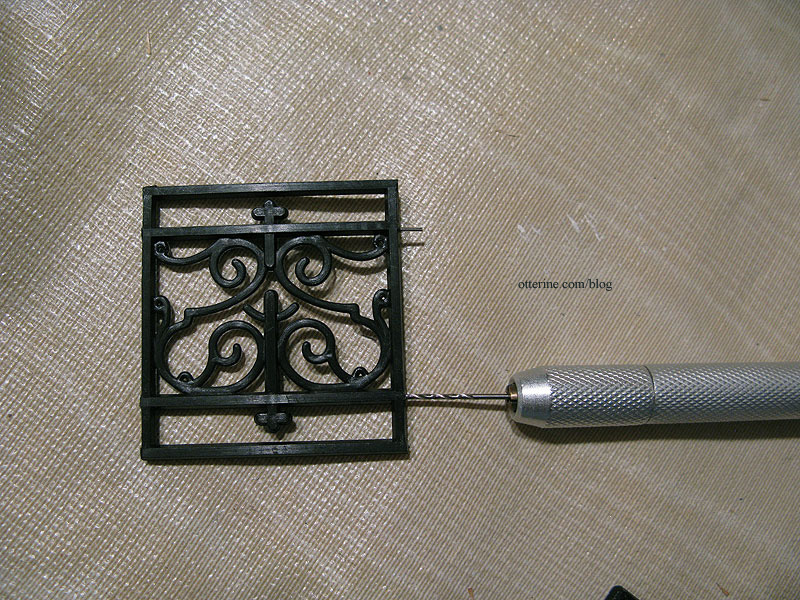
I drilled coordinating holes into the dowels.
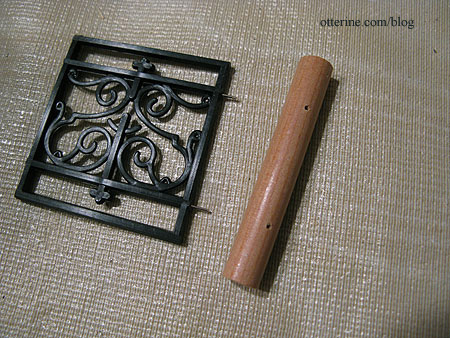
I glued the railings to the dowels using the pins for stability.
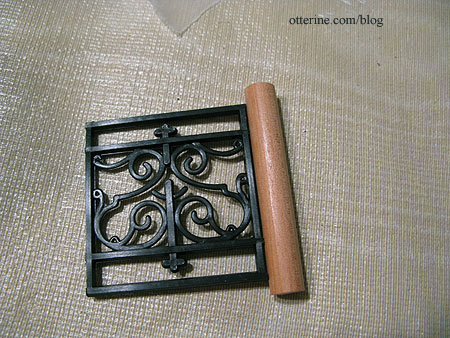
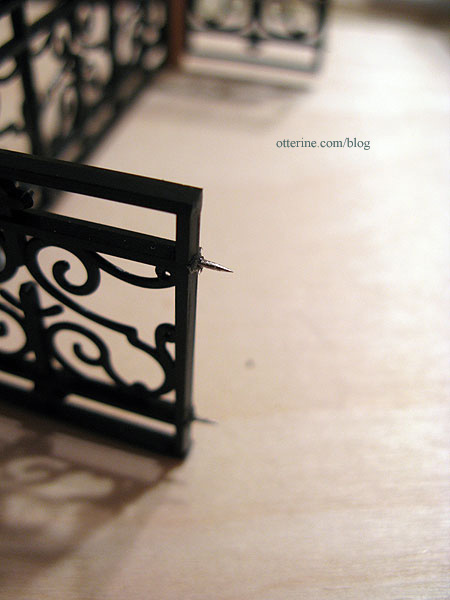
I added pins to the back sides of the plastic railings. These will attach to the house siding.
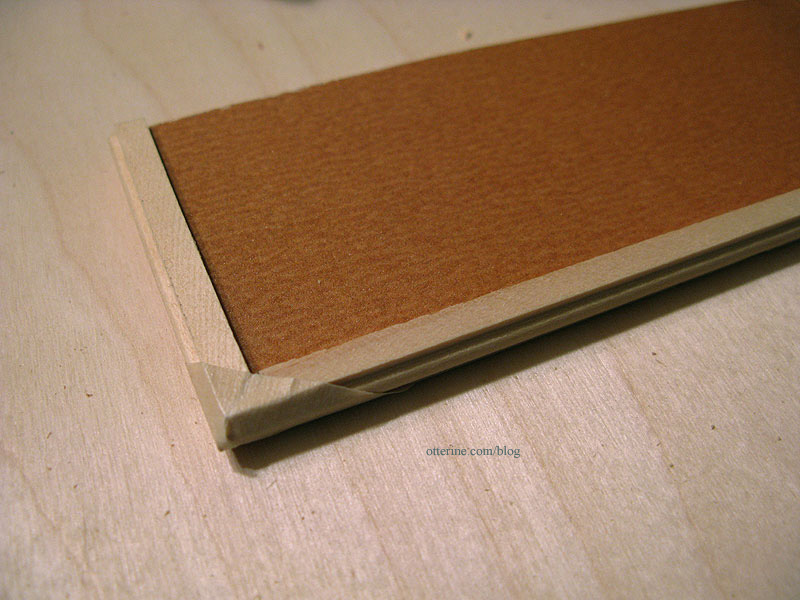
Next, a wood base from 1/16″ thick basswood. Anyone else hate the stickers they put on sheet wood? :\
I was concerned with warping on such a relatively thin piece of wood, and I wanted to finish the edges in a way that made it seemed like a decorative and planned part of the house. A quick search through my stash of trims produced the unused stair railings from the narrow staircase kit. I had replaced the railing stock when I replaced the spindles.
Here on the balcony, the railing serves as both channel molding to keep the structure square and as decorative trim for a fancy edge treatment. A thin layer of sandpaper will cover the sticker residue and finish the upper surface of the balcony.
At this point, I would normally fill in any gaps with spackling and sand smooth. It’s an old house, so I left the gaps.
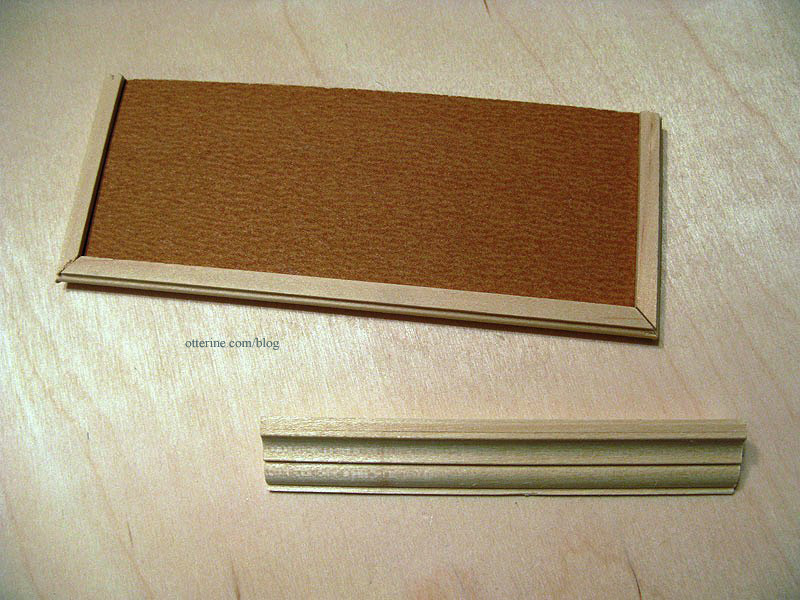
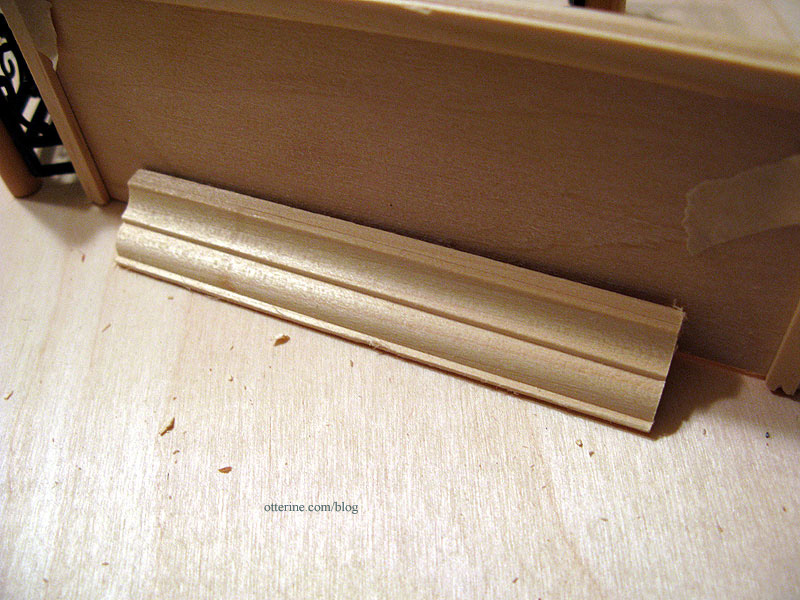
I used a sample piece of molding from Manchester Woodworks as a lower support.
I checked the fit on the side of the house…all good! :D
I topped the posts with copper bead caps and added Houseworks finials. I used flat head pins to decorate the outer edges of the dowels. I had to shave a little from the bottom of the dowels for fitting since my measurements were a little off. Once it’s all painted, you’ll never notice.
I need to wait for a decent weather day to spray paint the assembly. I will spray it flat black and then age it with acrylic paints.
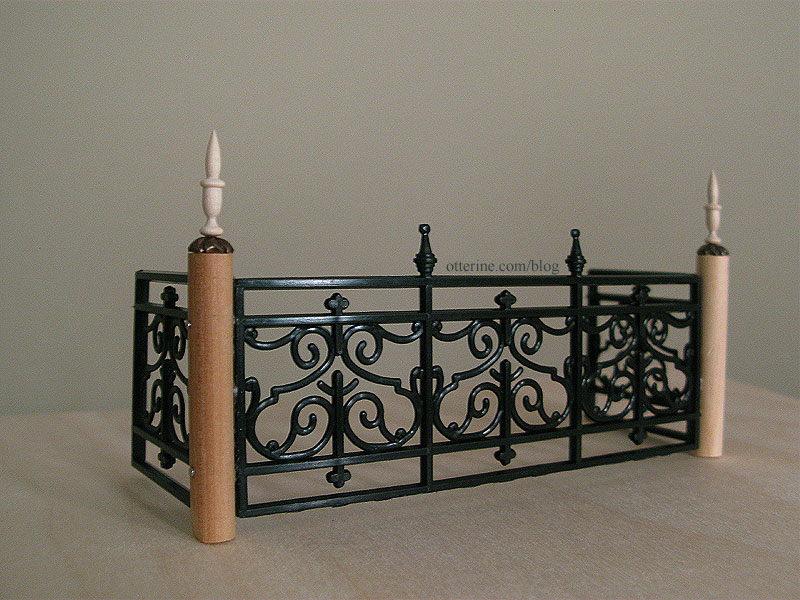
I finished the dry fit to see how it will look overall. It’s leaning a little because tape can only do so much. The base and support bracket will be painted to match the house. The sandpaper will be painted black and aged to match the front bay window roof.
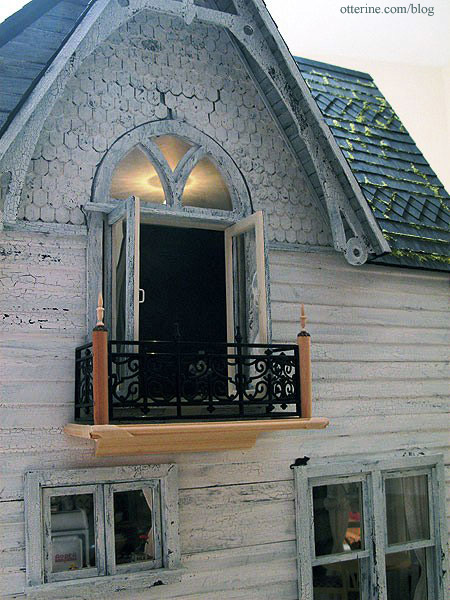
I think Ophelia likes it! :D
Categories: The Haunted Heritage
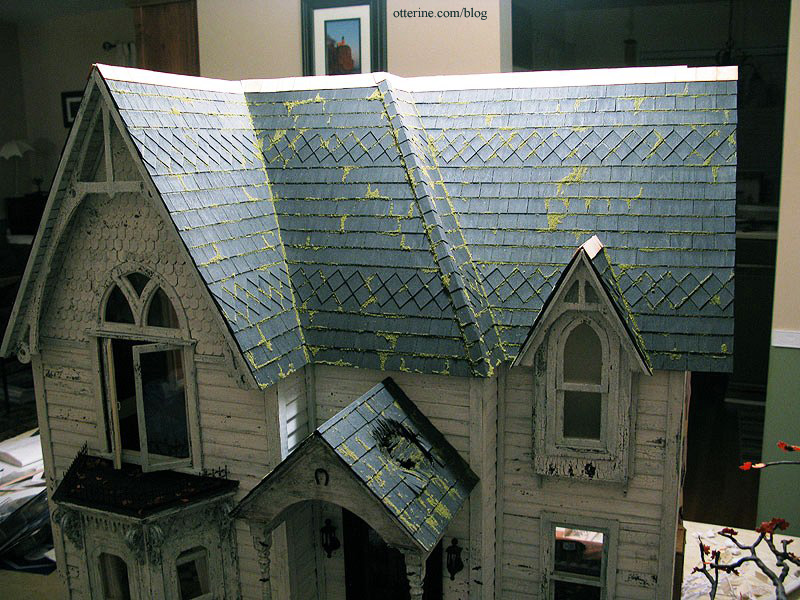
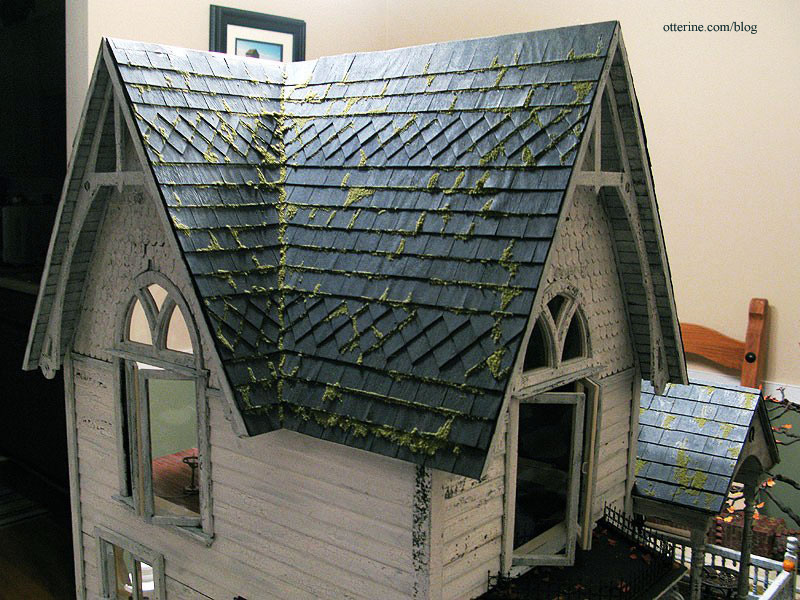
January 26, 2013 | 0 commentsHeritage – roof finishing, part 1
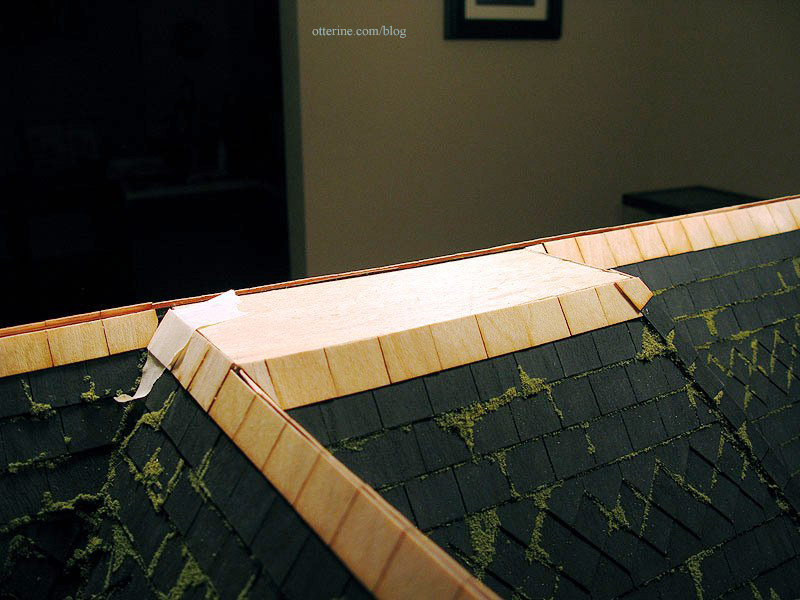
This merges the front roof and the back dormer roof. Now that I have the original back roof pieces attached on the sides and the new roof piece attached in the middle, I can address the roof ridges. The flat roof is now lower than the back roof, however, so I added a new 1/8″ thick plywood layer to it.

I added a new partial row of shingles at the top around the entire roof.
By partial, I mean that the full height of the shingle strips wouldn’t fit at the top so I marked and cut each shingle strip down to fit.
This includes the back.
The new row of partial shingles finishes off the flat top portion of the roof as well.
I had to reapply the sandpaper surface to the flat roof since I had added more wood on the previously finished surface.
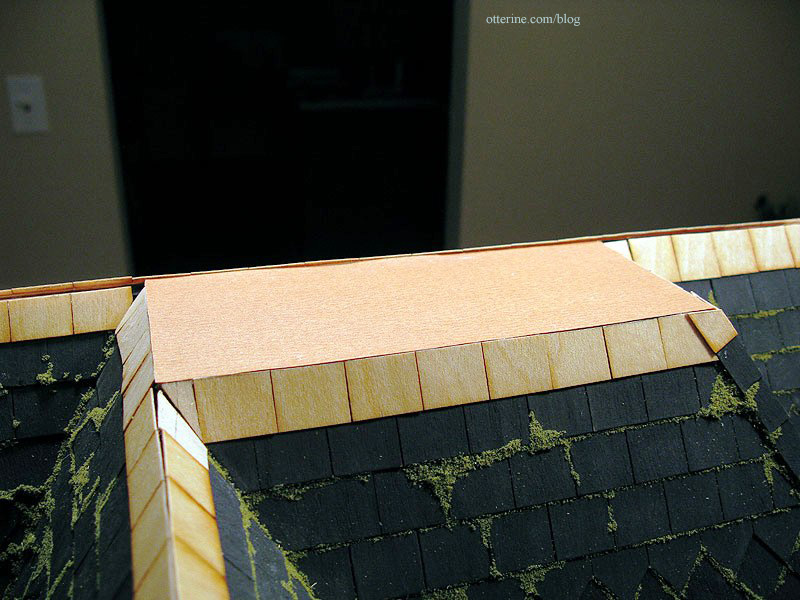
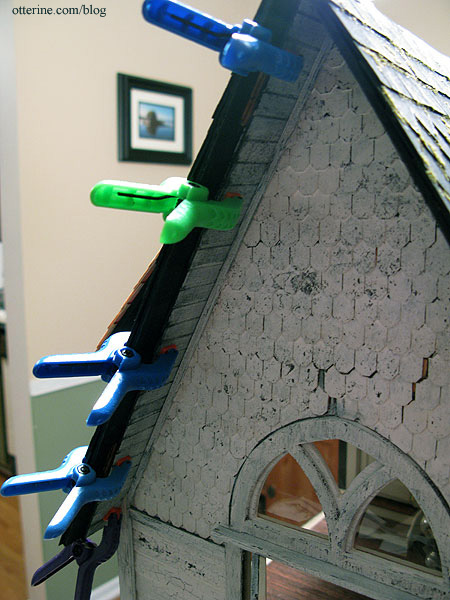
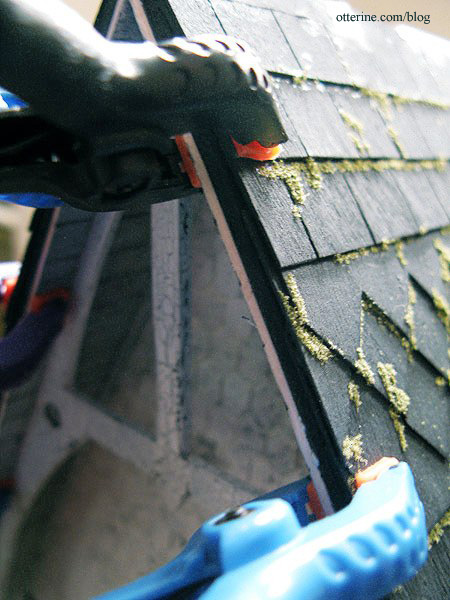
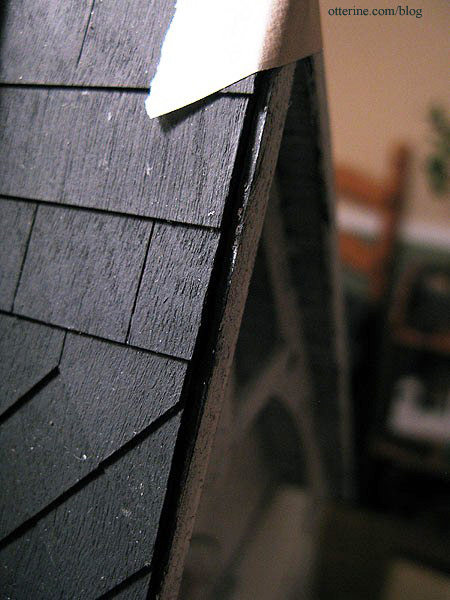
I lapped cut shingles over the ridge for the front roof edge, but I want to see if corner trim will create nicer finish for the ridges. I have some lengths of various corner trim widths on order, so the ridges will stay unfinished for now. But, so I can keep working on the structure, I painted the new shingles and flat roof to match the rest of the roof.
I’ll do a quick sanding once the paint dries, and then I’ll be ready to work on the chimney side. :D
Categories: The Haunted Heritage
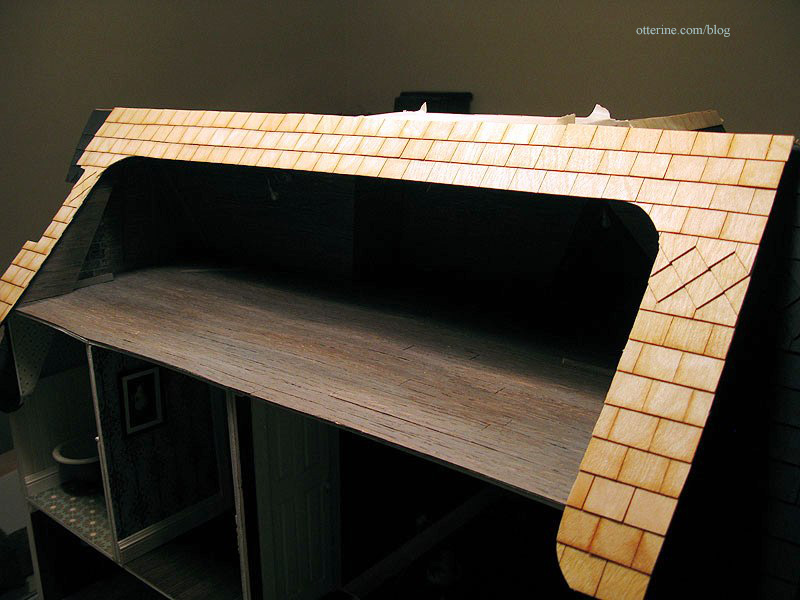
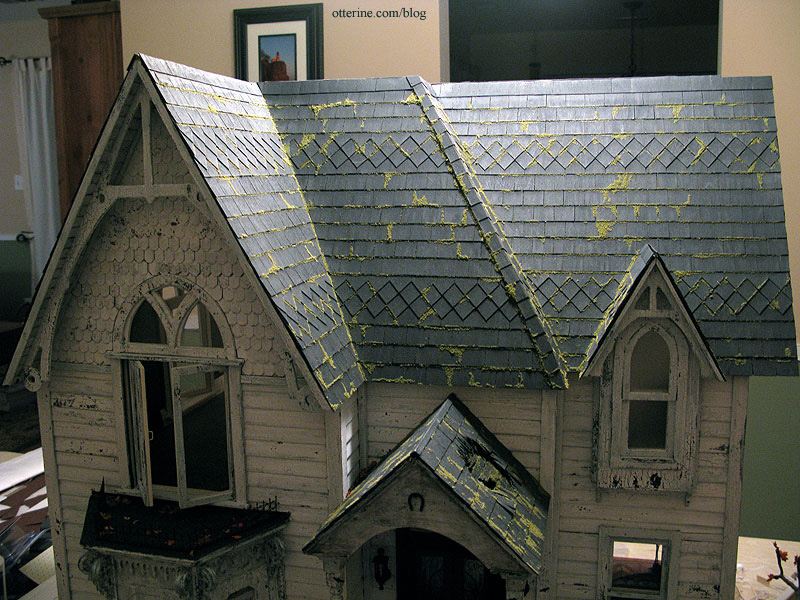
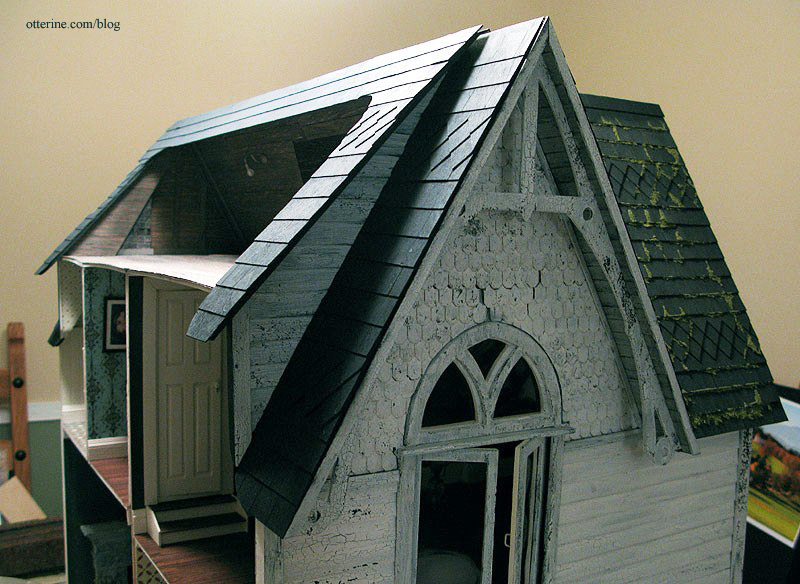
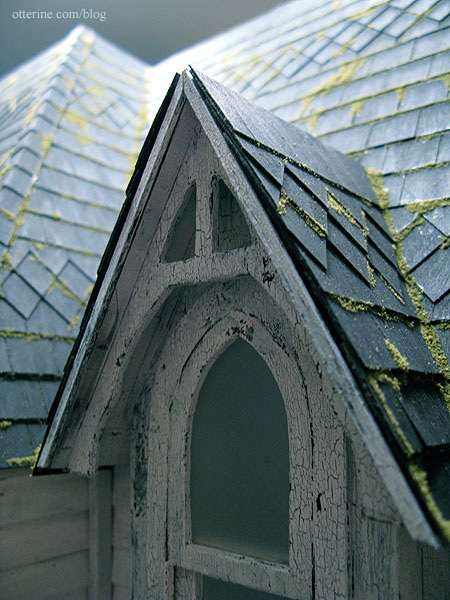
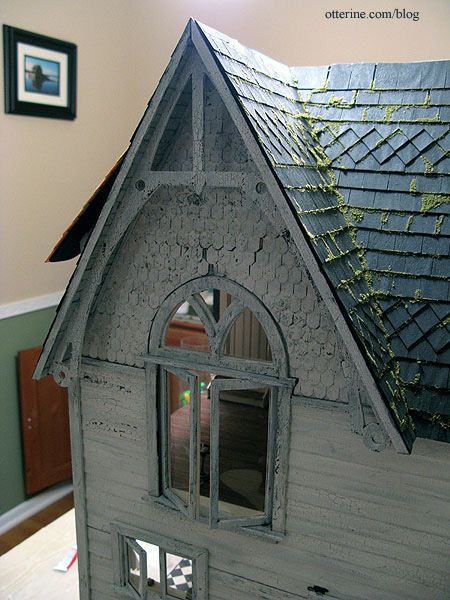
January 25, 2013 | 0 commentsHeritage – gable and eave finishing
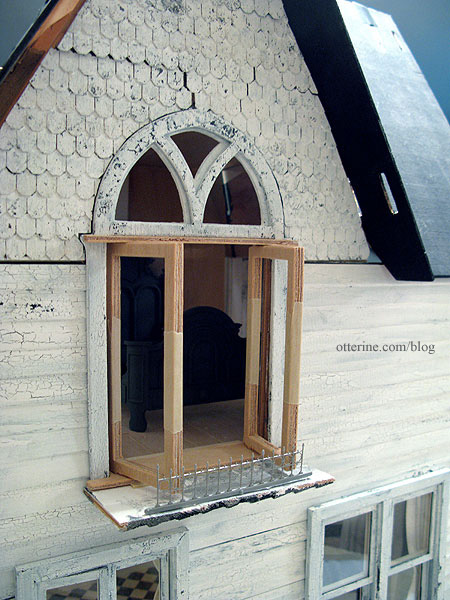
I added the final trim for the front gable between the eave and the house. I find that the more trim I add, the more realistic the house seems. (Note to April: if you plan on adding finishing trim like this, do it before adding the fancy gable gingerbread…trying to get my fingers in this space was interesting.) Yes, I am aware I need a wasp’s nest or hanging bat here. :D
I added the final trim for the front dormer on the outer edges and at the inner eave. I had to use tweezers to glue the inner trim in place. All that’s left for the dormer is the roof ridge finishing.
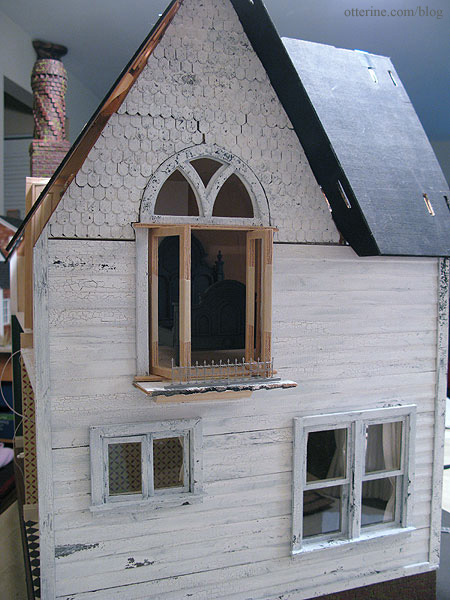
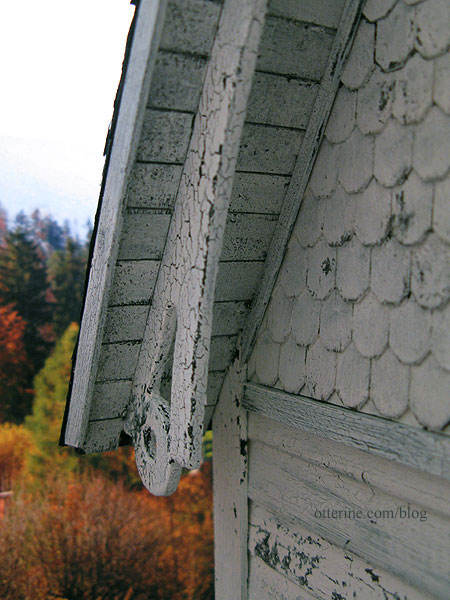
I completed the gable eaves and trims for the open side gable as I had done for the front gable. This time, I added the finishing trim between the eave and the house before adding the gingerbread.
Before adding the outer edge trim, I checked the fit and cut any excess from the forward edge. The photo is a little blurry, but you can see the unpainted portion where I cut away the excess.
When I shingled the edges of both side gables, the shingles didn’t protrude over the edge as much as they had for the front gable and front dormer. The trim here sticks out just a little farther than the shingles, so I painted the top edge of the trim to match the roof to make it blend more. Again, it was hard to photograph with the way the house is sitting under the lights.
Some of the half scale shingles on the gable shrank away from the arch window and in the middle. This didn’t happen on the front gable, and I used the same glue and paint processes on each. Who knows? It works, though, for my falling apart manor. ;]
I like the way the two finished gables look together. :]
For the chimney gable, see part 1 and part 2.
Categories: The Haunted Heritage
January 24, 2013 | 0 comments


NOTE: All content on otterine.com is copyrighted and may not be reproduced in part or in whole. It takes a lot of time and effort to write and photograph for my blog. Please ask permission before reproducing any of my content. Please click for copyright notice and Pinterest use.


