

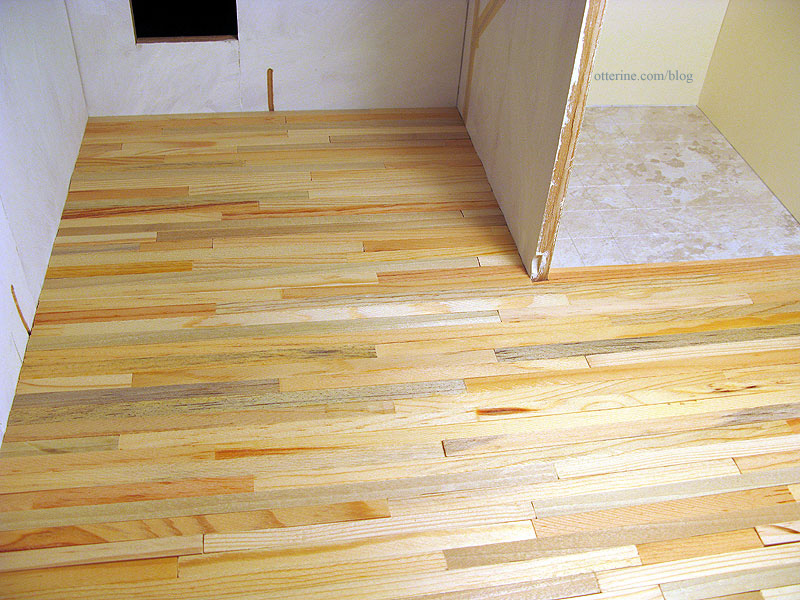
The Artist’s Studio – Rustic wood floor, completed
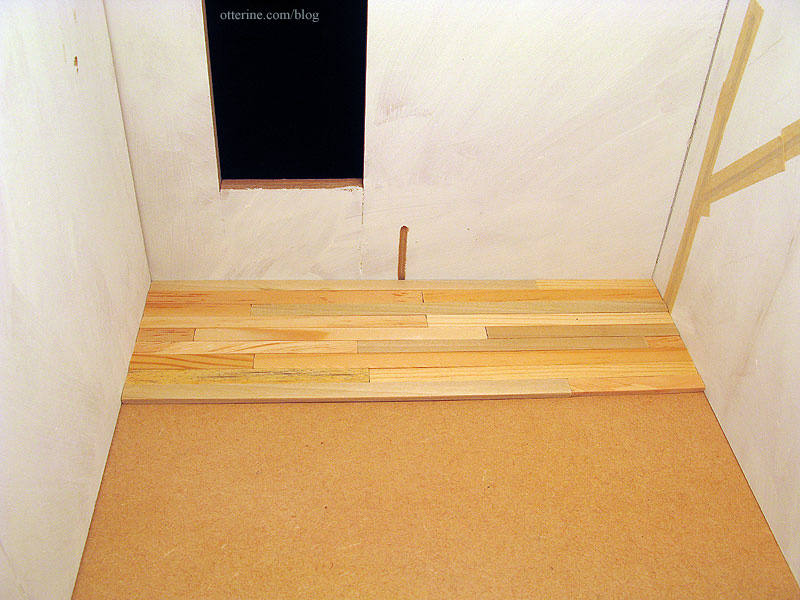
Lucille suggested using a template, so that is where I started with the rustic wood floor. I moved the boards I cut previously onto the kitchen counter.
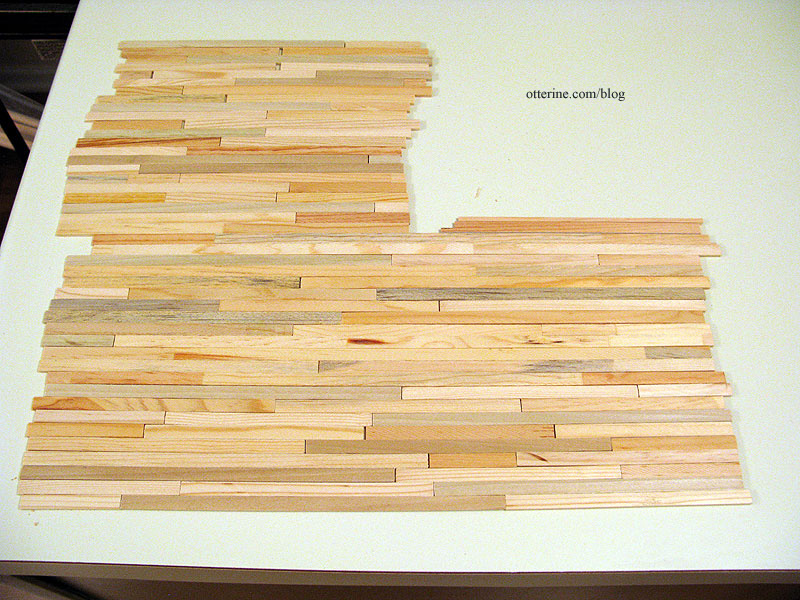
I cut a template from regular drawing paper. I had used a darker color for the Heritage attic, but I didn’t feel like running to the store just for a piece of paper. I didn’t think much of the white paper would show ultimately.

I glued the boards in place with the template inside the Studio. I hoped it would make for a better fit. It was such a great fit that I had a hard time taking the assembled floor back out of the structure. :D

I sanded the boards with my Dremel Multi-Max oscillating tool, first using a medium grit paper followed by a fine grit paper.

The end result was a smoother surface, but I took Mike’s advice and left it a little uneven to keep the rustic beauty.

For finishing, I brushed on two coats of Delta Ceramcoat satin varnish. It warmed the wood slightly and gave it a subtle sheen.

I used a modest amount of glue to install the flooring since the thicker boards were relatively flat. Love it!

Categories: The Artist's Studio
February 15, 2013 | 0 commentsThe Artist’s Studio – Rustic wood ceiling
My idea for the ceiling in The Artist’s Studio was to have a wood plank surface here as well as on the floor. This is a mockup with a sheet of Southern Pine flooring propped in place. I would need to have finishing trim around the edges since it is just a fraction too short. I couldn’t use the same wood as the floor, because I didn’t have enough and I thought it was too variegated for a ceiling.
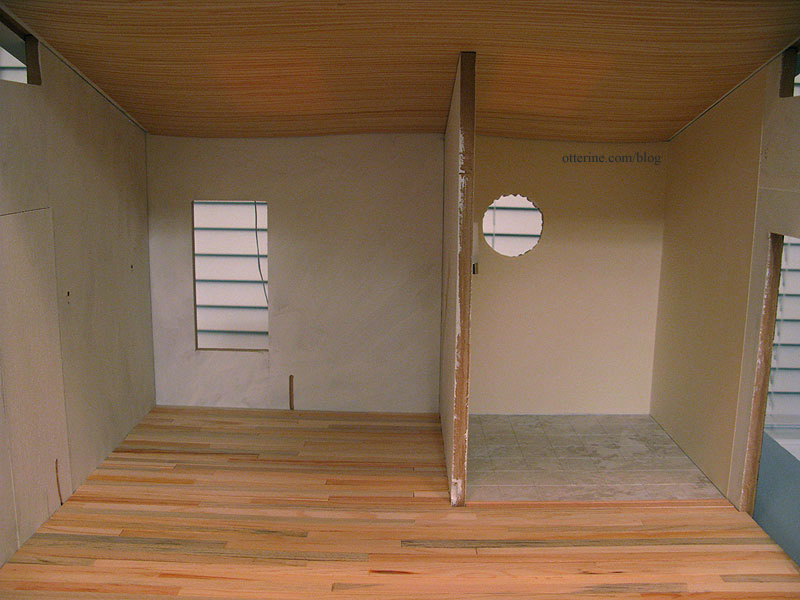
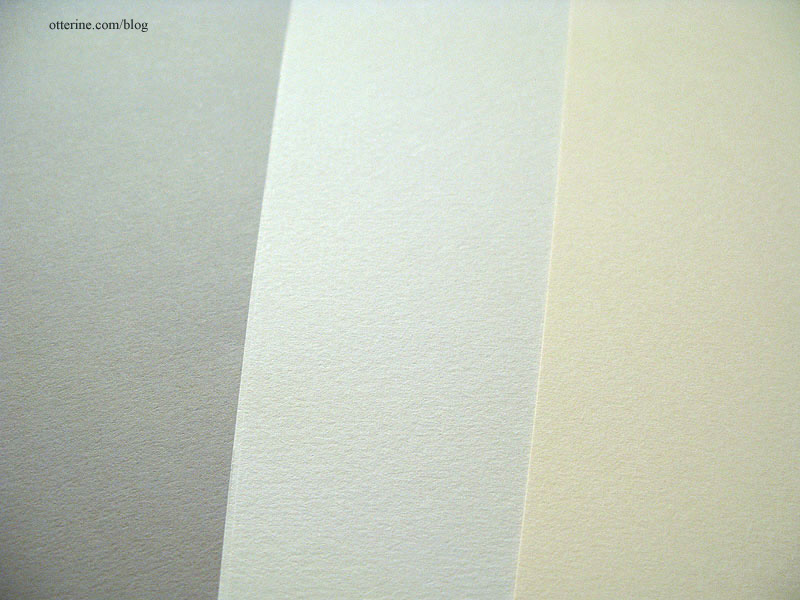
The walls in the living area will be grey – possibly two tones of grey: Daler-Rowney Dreadnought Grey and Canson Pearl Grey (shown here with Canson Ivory used in the bathroom).
I swear to you I am not making things up! There is such a thing as a natural wood ceiling in an art studio.

Here is a link to one that is more modern – by Olson Kundig Architects.
And, here is one that is more rustic – by rememberthewindow.wordpress.com.
Categories: The Artist's Studio
February 14, 2013 | 0 commentsThe Artist’s Studio – Rustic wood floor, part 1
Now I can tell you why I had been searching for shoddy Dura-Craft trim wood. To make a rustic floor in The Artist’s Studio, of course! :D I love the variation in colors and texture.
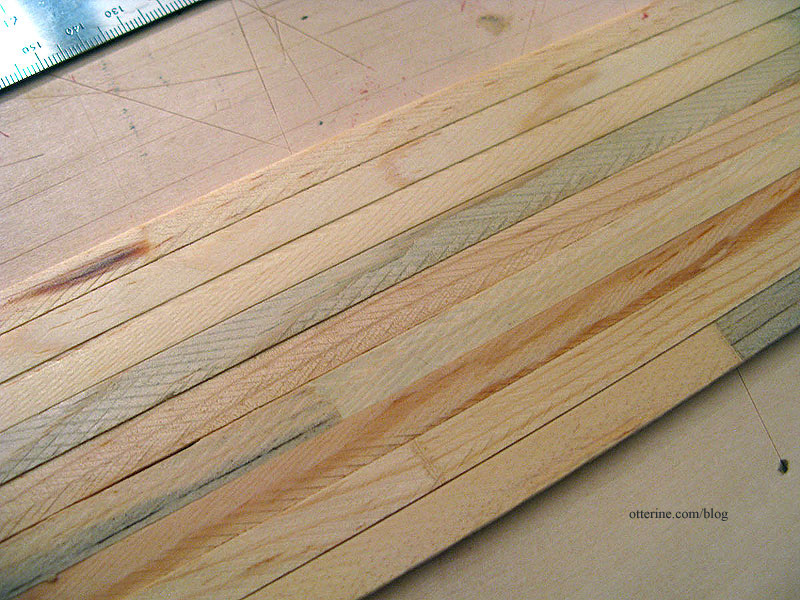
Alas, the Studio was too big for the minimal amount I was able to gather. A few people sent me some scraps, but it still was not enough. But, fear not!!! Mike has come to the rescue! I sent him some samples of the original wood, and he cut a whole bunch of random planks of poplar and pine for me using the originals for size reference.
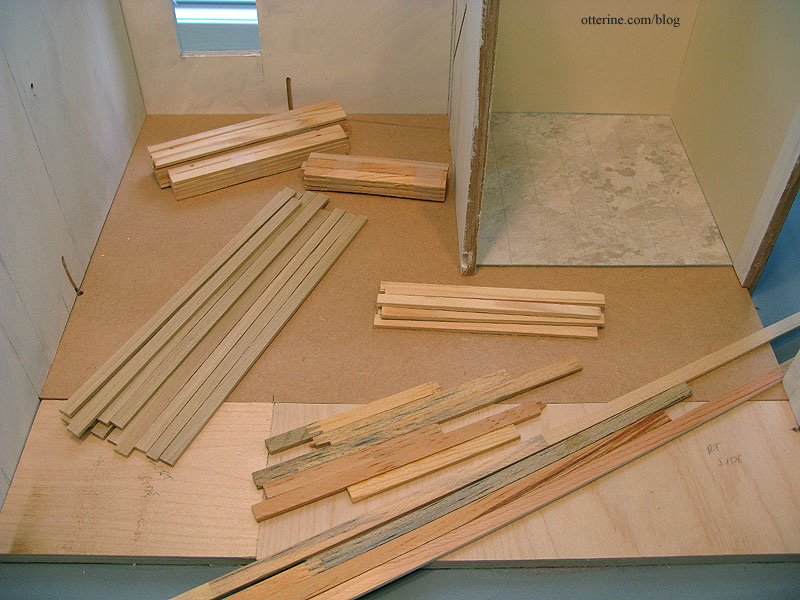
I will use my Dura-Craft boards mixed with his planks to blend the various colors. Most of the floor will be covered in the back left portion of the room, either with the stove platform, rug or furnishings, so most of the fancier Dura-Craft boards will be used toward the front. Here’s a quick random layout. I think it will be wonderful!
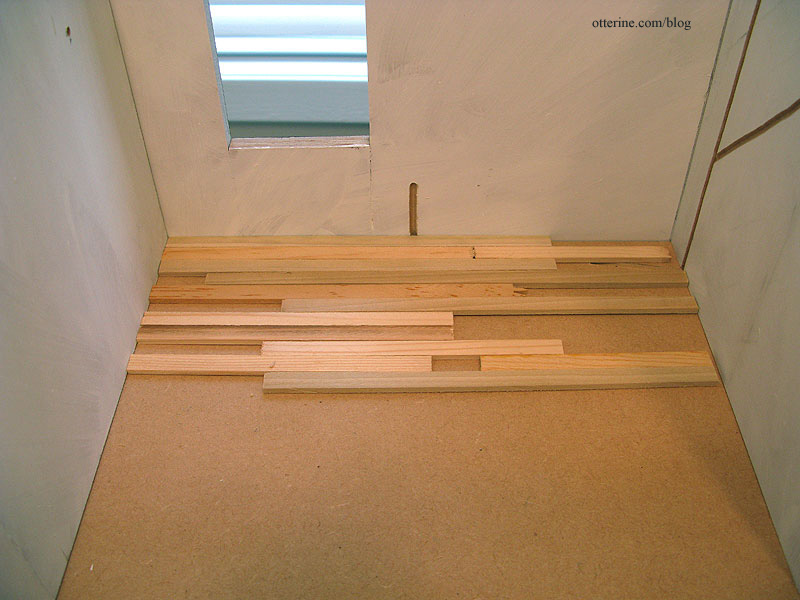
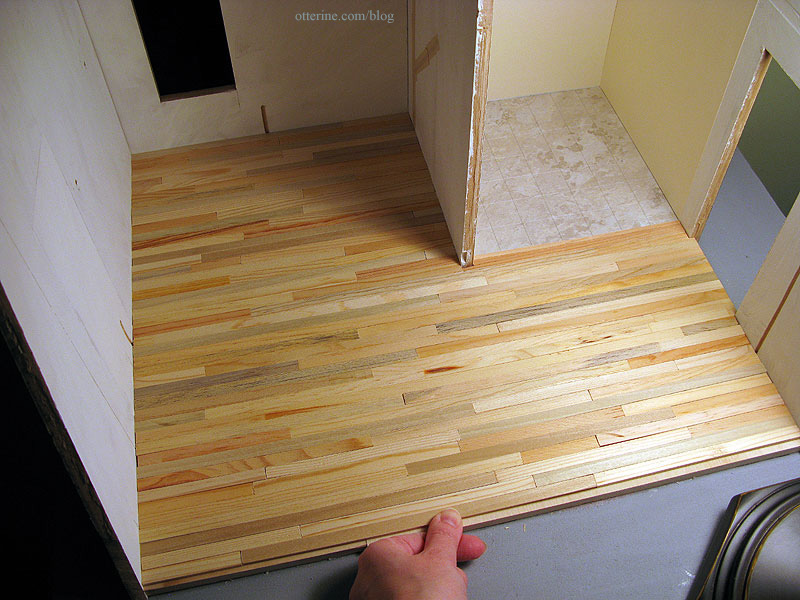
My scroll saw and I are getting acquainted quickly. I started cutting and placing the wood boards for the rustic floor. I’m doing my best to make it a random plank floor by using the various lengths Mike cut for me and then piecing end boards to finish each row.
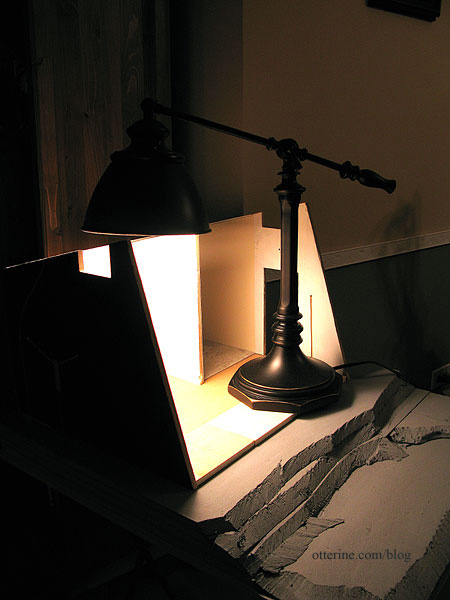
My scroll saw is clamped to the end of the dining room table (I just had an image of carving a Thanksgiving turkey with it…haaaa!). The Artist’s Studio, however, is set up in the breakfast nook in my kitchen. That setup seemed like a lot of back and forth work. I moved the Studio to the dining room, but the light isn’t the best in that area. So, I’m using my sewing lamp as a work light. Not quite to scale, is it?
I decided to cut and place the entire floor without glue. I’m positive Mike sent me plenty of wood, but I wanted to see it whole before installing it permanently. Love it!
Toward the front, I interspersed the Dura-Craft wood I had at the start. I’ve left the very front edge uncovered and will finish that row once the whole floor is glued in place.
Categories: The Artist's Studio
February 11, 2013 | 0 commentsHeritage – roof finishing, part 2
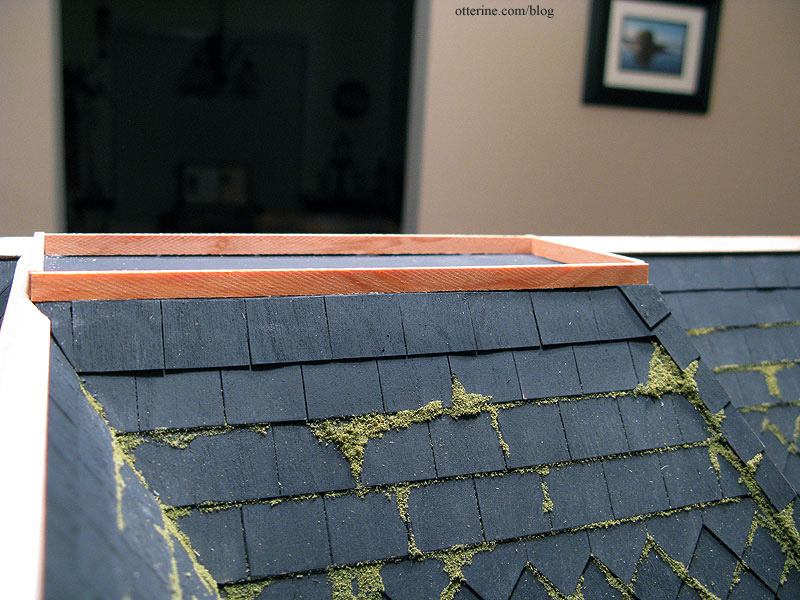
Continuing work on the roof finishing. With the roof shingles applied and painted, the only thing left was to finish the roof ridges. I thought about doing lapped shingles but didn’t like the way it looked on the dormer when I tried it. It doesn’t look terrible here in this photo, but there were a lot of gaps on the top and it just looked off.
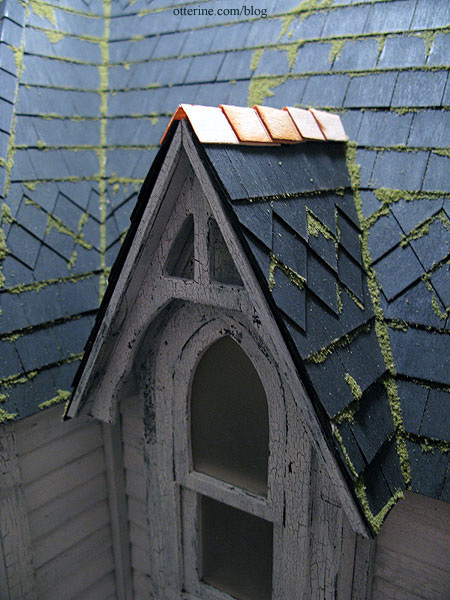
I decided to go with 1/4″ corner trim from Manchester Woodworks, which is also an easier solution. I used my new scroll saw to make the cuts; it’s a wonderful machine!

I used old Dura-Craft strip wood to enclose the flat roof portion. I didn’t trim around the bottom edge, because I didn’t like the way it looked.
I painted the new pieces to match the roof.
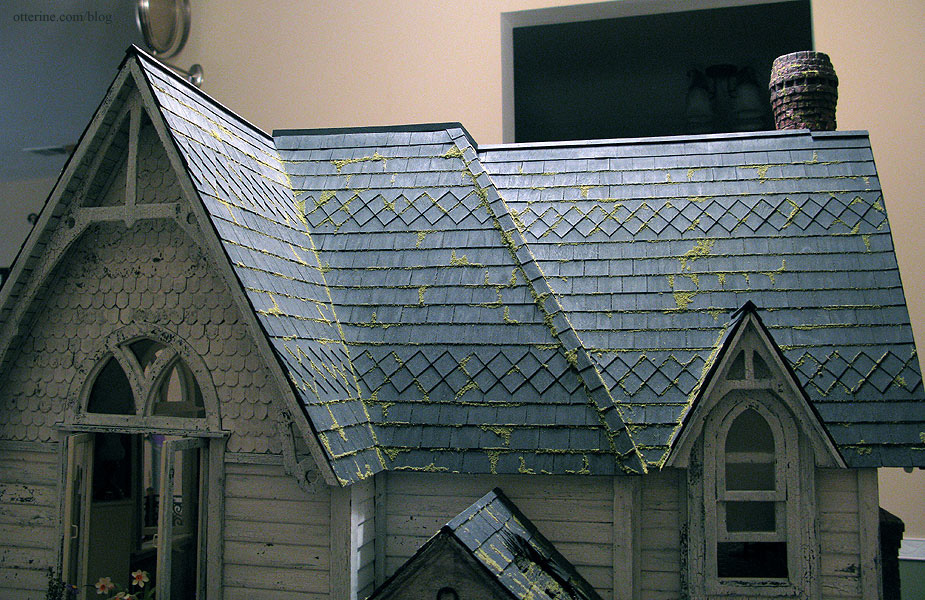
It already looks more finished, but once the moss is on it will blend better.
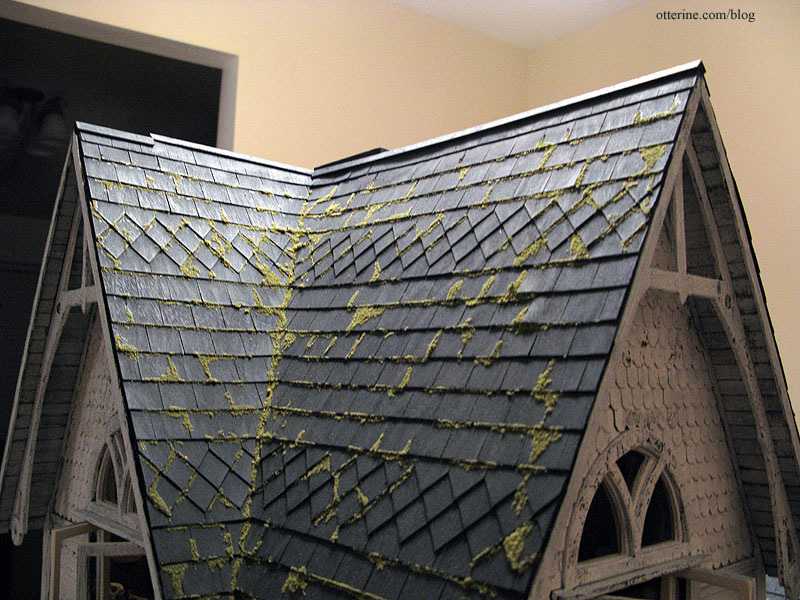
Final roof touches here.
Categories: The Haunted Heritage
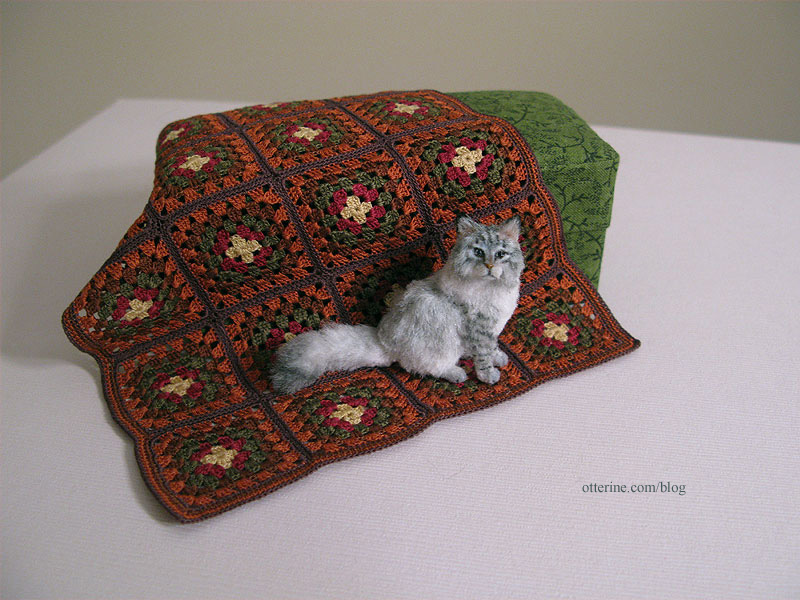
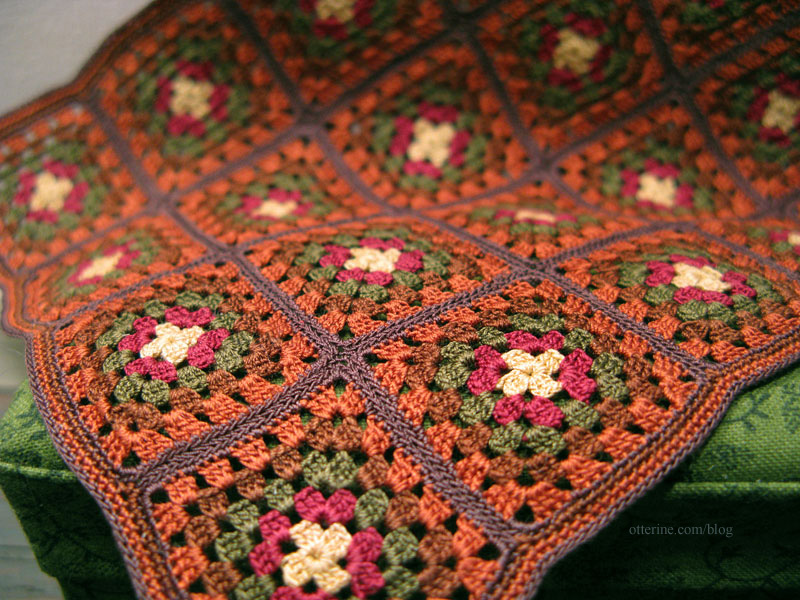
February 10, 2013 | 0 commentsAutumn Throw Blanket in mini
I have another beautiful creation by Mary of Roslyn Treasures.
This is the previous blanket she made.
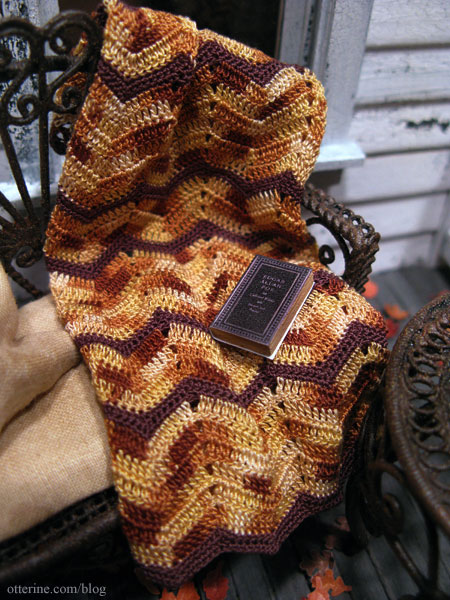
Some time ago, I found this real life sized pattern on favecrafts.com and thought it would be perfect in miniature. I contacted Mary since her workmanship is flawless. Mary adapted the real life pattern into a perfect miniature interpretation.
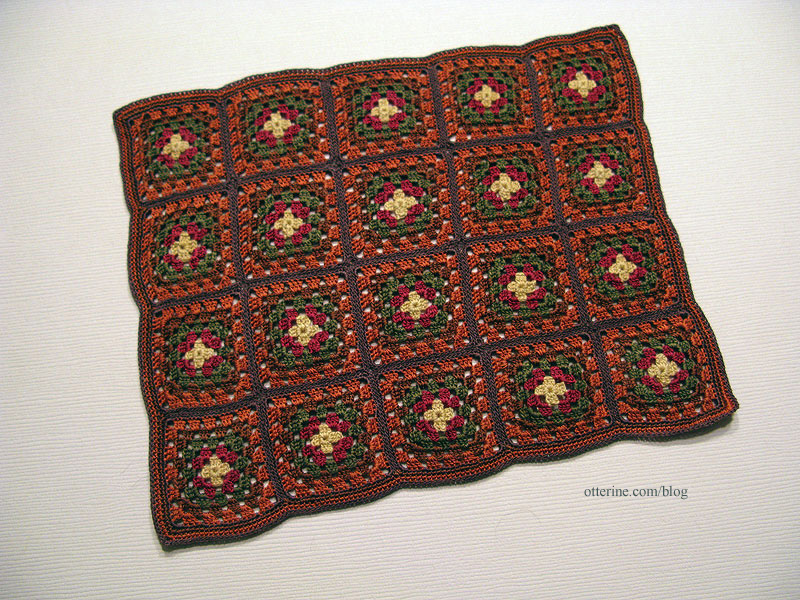
She works with sewing thread and I have to tell you, the level of detail in her stitches is just amazing. As someone who crochets in real life size, I am in awe of her ability to do the same craft in miniature.
Categories: Miniatures
February 5, 2013 | 0 comments


NOTE: All content on otterine.com is copyrighted and may not be reproduced in part or in whole. It takes a lot of time and effort to write and photograph for my blog. Please ask permission before reproducing any of my content. Please click for copyright notice and Pinterest use.


