

The Artist’s Studio – The Deck, part 3
Continuing work on The Deck. To finish the outer edges of the side deck, I used dark trim wood from my stash. This is definitely Dura-Craft wood, but I am not sure from which kit or if it is walnut (I think it is). It’s close in color to the wood I plan to use for the leaf portions of the deck and using existing materials will keep the cost down.

I love the play of light and dark, and it was such a simple design element. I didn’t trim the main deck yet, since I want to finish the leaf sections first.
The leaves. After a lot of deliberation, I decided to use the same reverse approach I did with the main and side decks. I would form the surface boards first and then work on a supporting framework. Beyond that, I thought developing the walnut outlines and center veins, then cutting the individual boards for the interior portions would be the simplest approach.
I started by redrawing my leaf shapes. My mockup had used rough sketches and cutouts. I used a 5 7/8″ diameter lid, which was close to my original mockup size, to make one end of the leaf.

I marked a point the length of my original mockup (9 1/4″). Digging into my art supplies for a flexible curve, I created a gentle curve first on one side and then the other.

I cut the leaf out and made two more leaves from this one.

I marked the outline 3/8″ inside the outer edge. Since my deck is smaller in proportion to the original and this will be my first major scroll saw endeavor, I kept the center veins soft — just enough to give a sense of movement without overly complicating matters. :D They are also 3/8″ wide.

On a new sheet of paper, I measured from the bottom and marked 7/16″ intervals. I was planning on 3/8″ boards for this portion as well, and 7/16″ allows for some room between each plank. I drew lines to make a base guide.

I positioned the leaf template over the lines so there would be a good layout of whole board widths.

I taped the leaf in place and traced the lines onto the template.

I did the same for the other side, varying the angle of the lines.

I darkened the boards that would be walnut, repeated the process for the other two leaves and tested the fit again.

Hooray! :D

The pencil makes these very messy, so I will make photocopies to work with going forward.

Categories: The Artist's Studio
March 9, 2013 | 0 commentsThe Artist’s Studio – The Deck, part 2
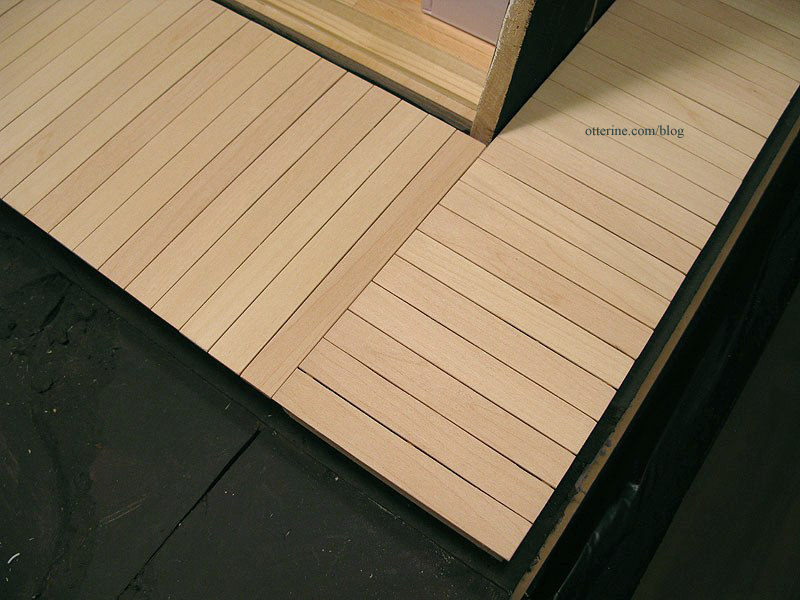
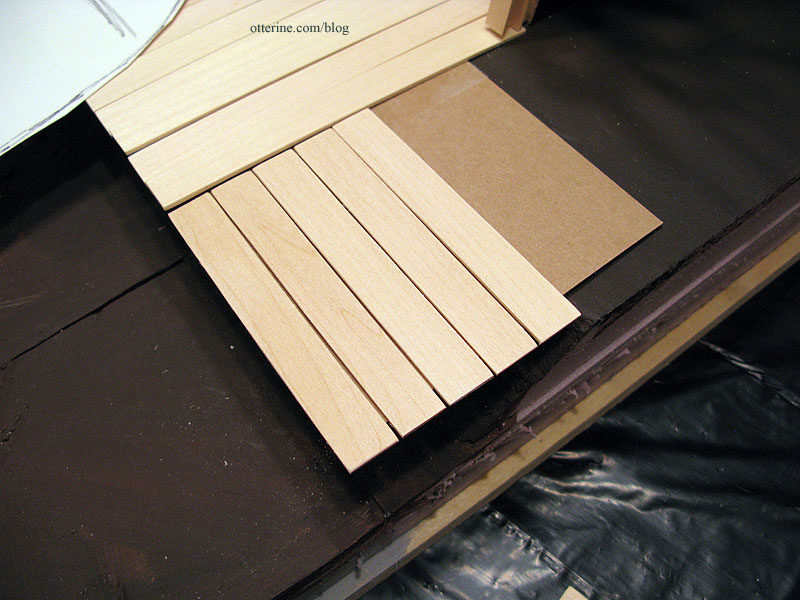
The framing under the main deck and side deck won’t show much, so I used some leftover Dura-Craft 3/16″ x 1/4″ strip wood to keep costs down. The wood isn’t nice enough to use for building or finishing anyway.
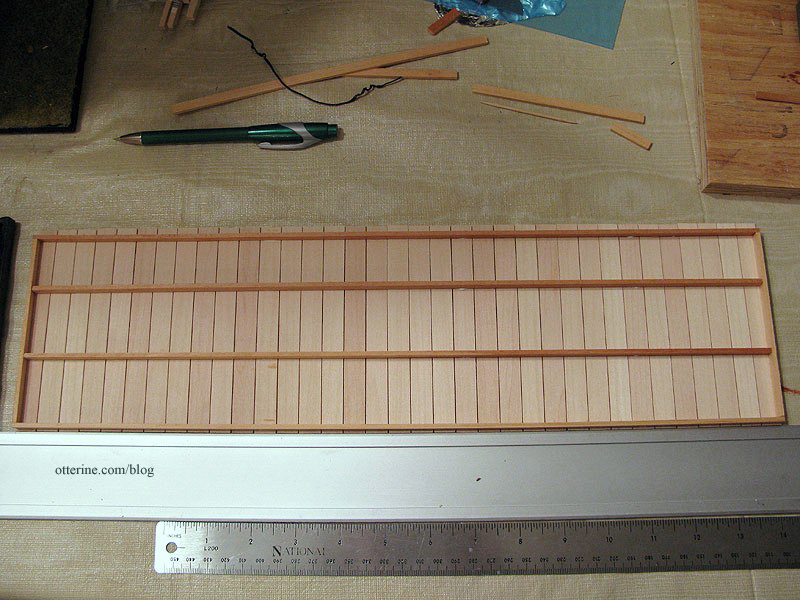
I started with the side deck since it requires the longest part of the framework. I transferred the top boards to a work surface, this time keeping the back side facing up and lining up the ends using a T-square. I used double sided tape again to keep everything in line.
I cut two long pieces and two short pieces of the Dura-Craft trim, gluing them to the flat boards and to each other at the corners. I cut one additional long piece for the center of this box and glued it in place. I had to use the glue sparingly so it wouldn’t bleed through between the boards. I left more leeway on the uneven side, which I’ll explain in a moment.
But, when I lifted it off the tape, some of the boards separated. :\
Ah, well, it wasn’t a total loss. I glued the boards back in place. A good, solid assembly. :]
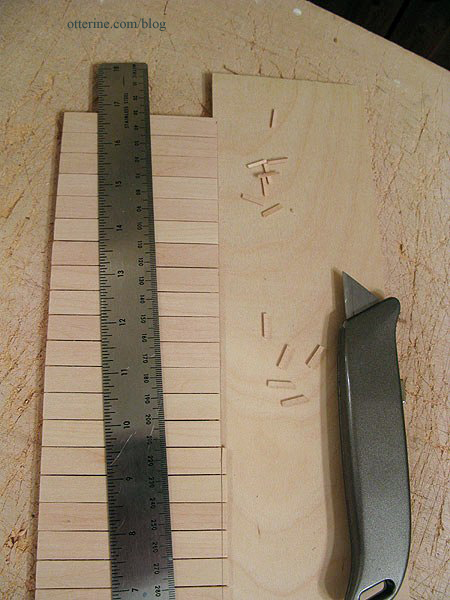
As mentioned above, since one side had been aligned with the T-square, that left the other side uneven. I marked the boards 3 3/8″ across (down from the original 3 1/2″).
I slid a piece of plywood under the edge and cut off the excess.
I repeated the process for the main deck, adding two inner lengths for support. This time, after putting the double sided tape on my work surface, I tapped it with my fingers to reduce the hold it would have on the flat boards. I had only two boards come loose when I flipped the assembly over.
I also cut the boards down to 4 7/8″ from their original 5″ to align the uneven edge. I will keep the two portions separate so there is no strain at the corner.
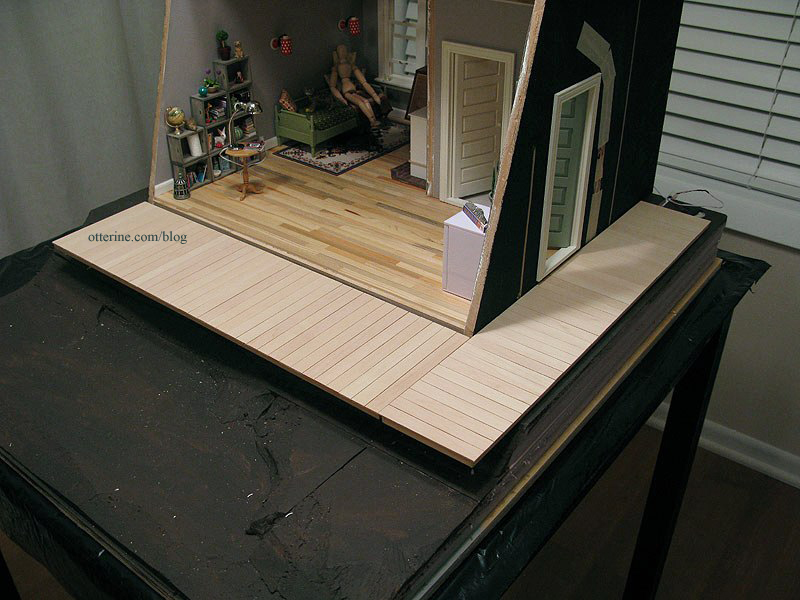
It’s a clean fit. :D
So far, it’s working! :D
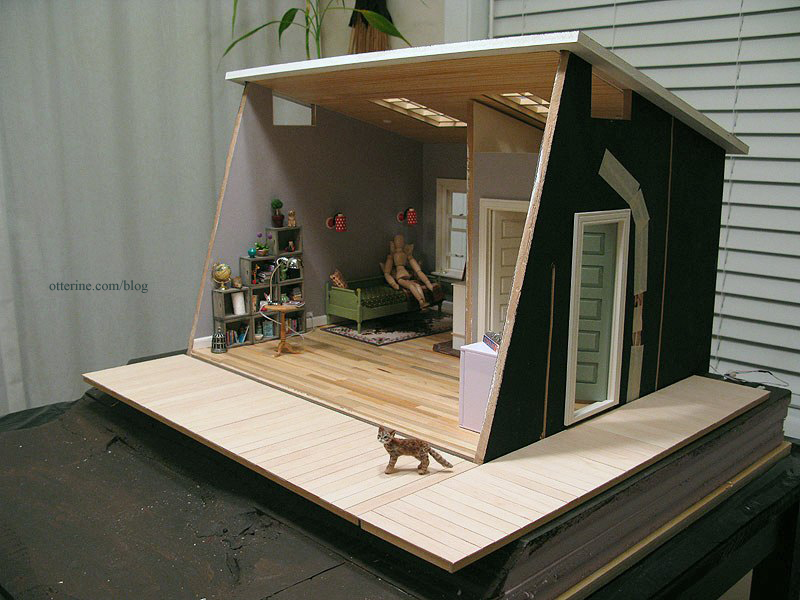
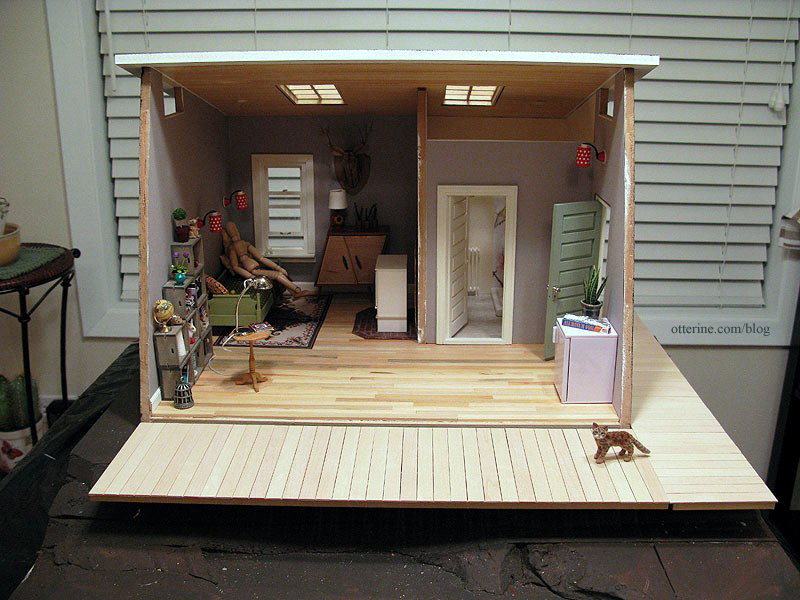
There is enough of a gap under the door to require a step.
I think Cora likes it.
Categories: The Artist's Studio
March 8, 2013 | 0 commentsThe Artist’s Studio – Walnut firewood box
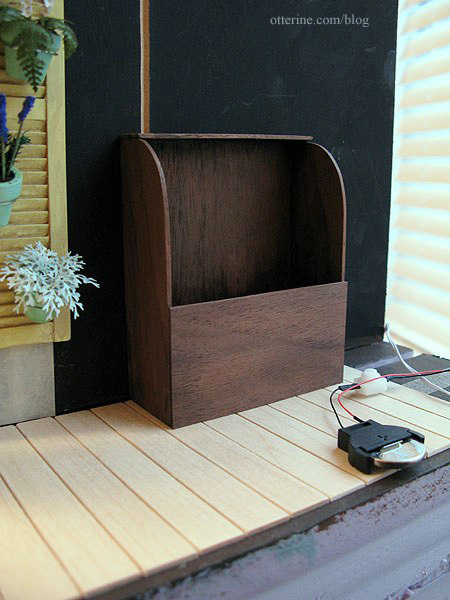
Building a firewood box for the Studio served two purposes. It will hold the wood stove switch so I don’t have to reach into the structure to operate the flickering LED fire, and it gave me the opportunity to work with walnut using my scroll saw.
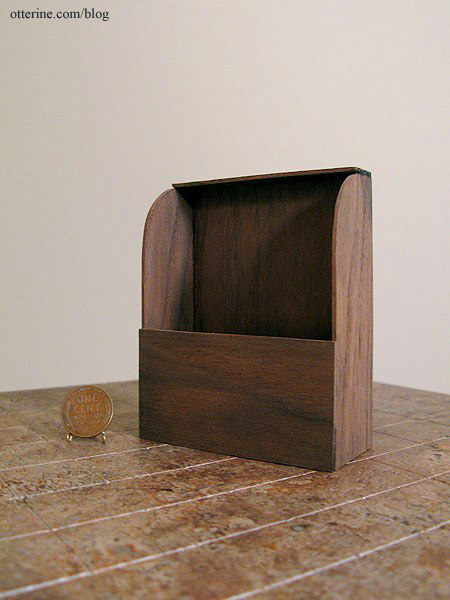
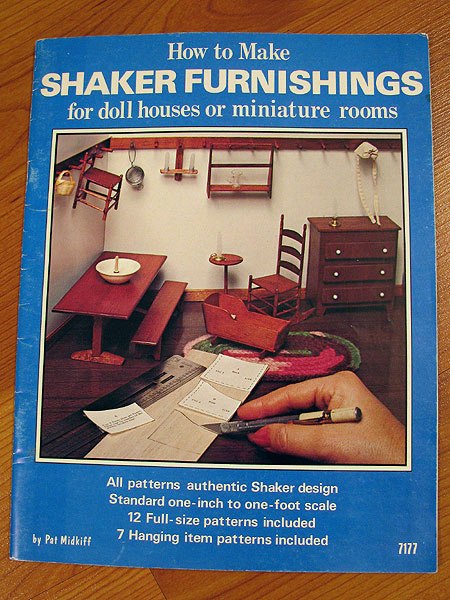
I followed a pattern in the book How to Make Shaker Furnishings for Doll Houses or Miniature Rooms by Pat Midkiff. What a long title! :D
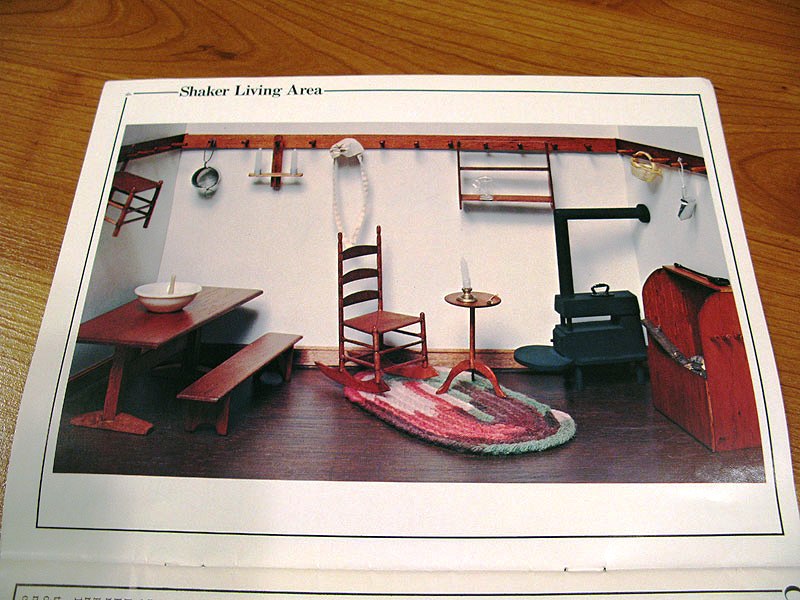
Here’s the living area photo from the book. Unfortunately, there is no pattern for the stove included. There are three pegs on the side of the firebox in the photo. I didn’t add them to the one I built since I didn’t have a walnut dowel.
The pattern was very simple to follow, and my two cut curves came out very close! :D I did change the dimensions slightly, because the sheets of walnut I had on hand were narrower than the largest pattern piece. I finished the box with one coat of Delta Ceramcoat Satin Varnish to bring out the beautiful color and grain. I added a light wash of black and brown to make it less shiny and new.
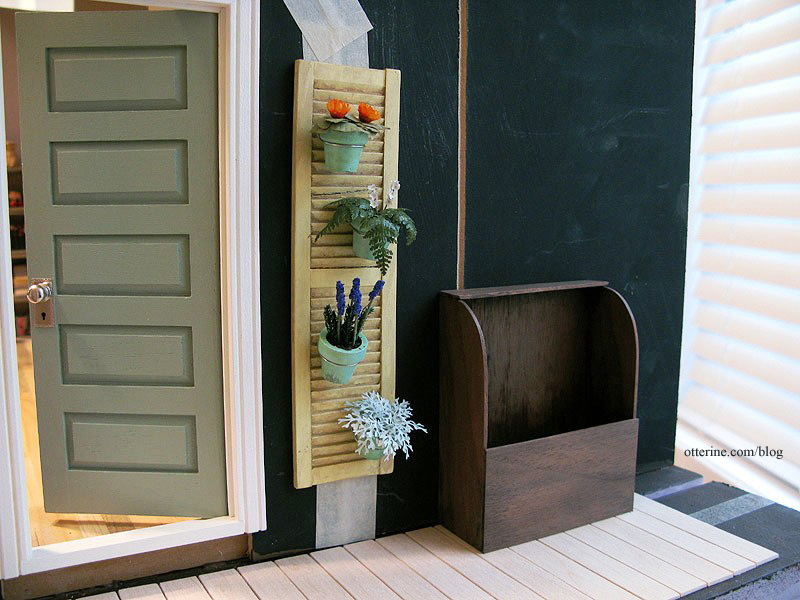
I will finish the side deck before drilling the hole in the bottom for the battery and switch.
Categories: The Artist's Studio
March 7, 2013 | 0 commentsThe Artist’s Studio – The Deck, part 1
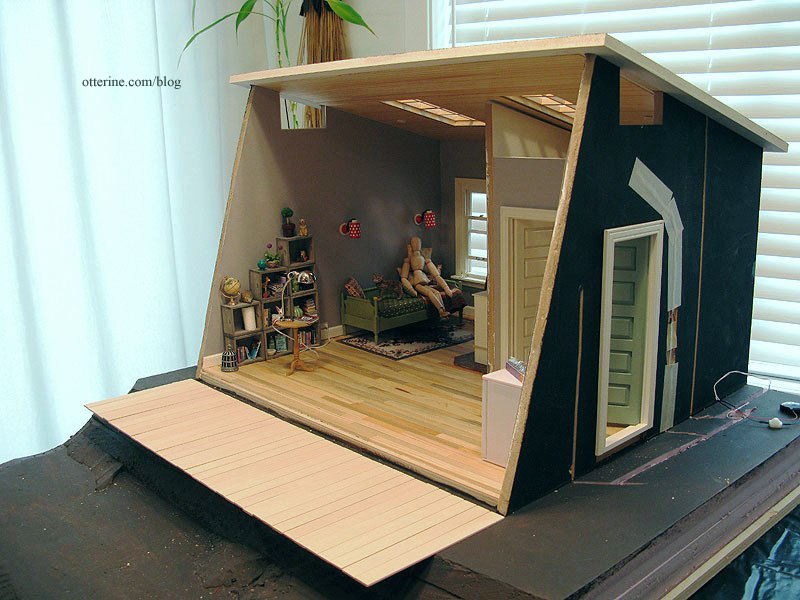
Before I can work on the front wall of windows, I need to work on The Deck. This is going to take some serious engineering. The deck will fit into the slope of the landscape and be only partially supported by firm ground around the building itself. You might recall my previous mockup.
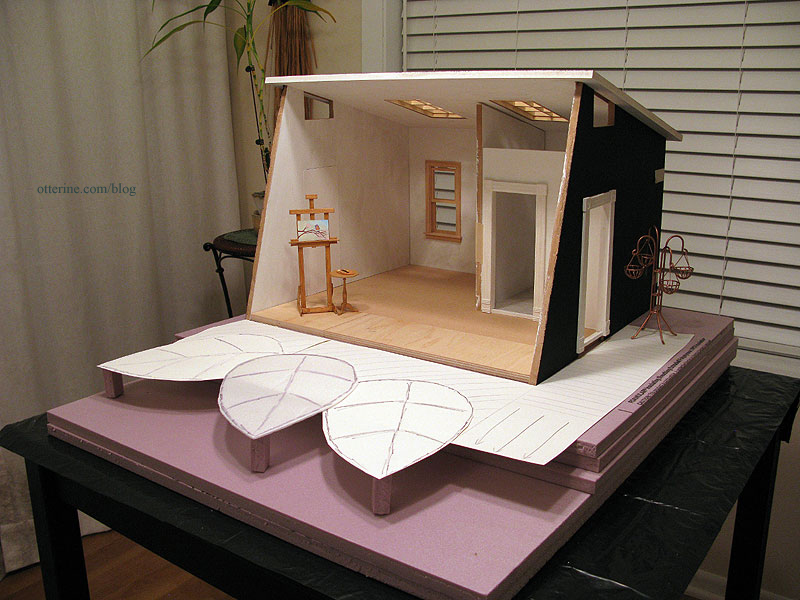
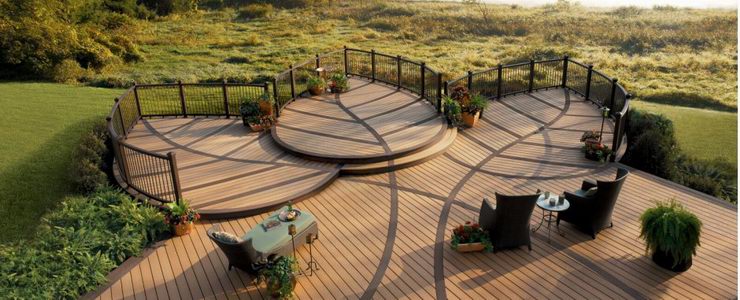
Image from Trex I’m going to do a bit of reverse engineering here since while the deck needs to be solid, it doesn’t have to support actual weight other than a mini chaise or easel. I figured the simplest approach would be to build the surface of the main and side portions first and then create the framing that would support this surface. From there, I would create each leaf separately and attach those to the main deck.
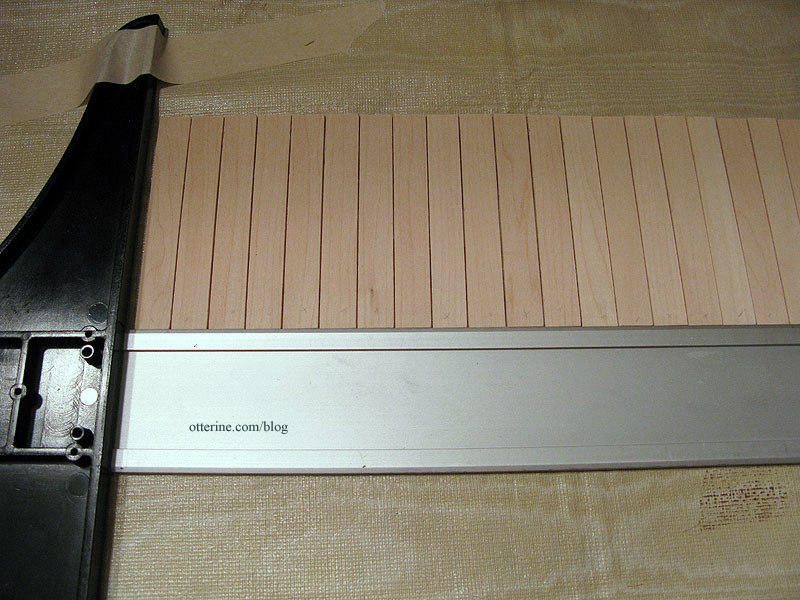
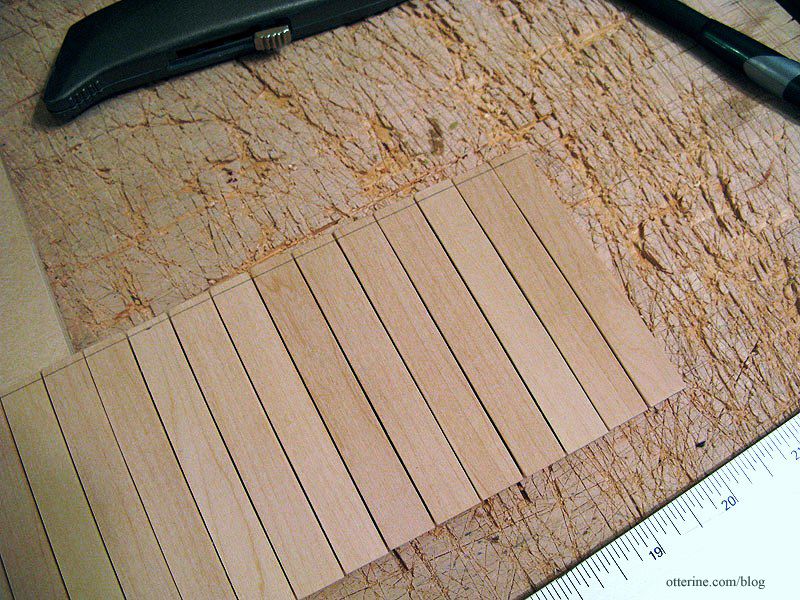
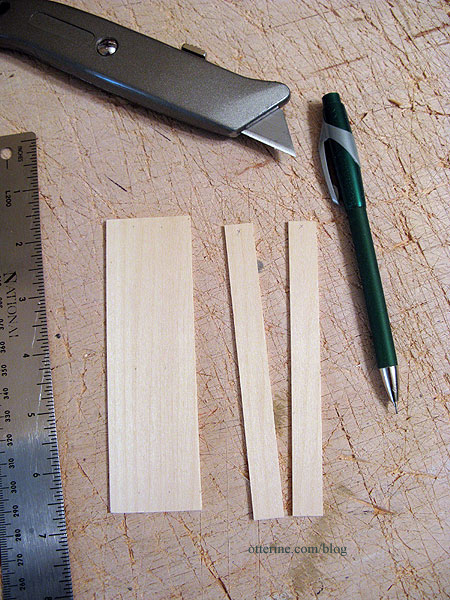
I bought five sheets of basswood by Revell measuring 1/16″ x 3″ x 24″ for the lighter boards. I will use walnut for the vein detailing and outer accent. I bought the sheets to cut my own boards instead of the precut strips because I find that the brand of basswood the stores around here carry is always so fuzzy. These sheets by Revell are less so and easily sanded smooth. And, I have a good eye for measurement when cutting by hand.
I cut lengths of 5″ and then measured 1/2″ intervals. I put an X on the back so I would know which side to face up. These Revell stickers came off the wood easily, but I didn’t want to risk having future finishes react differently due to any glue residue.
I applied a length of double sided tape to the landscaping board for planning purposes. Without some sort of adhesive, one small bump would lead to resetting every board. Uh…no. Using a T-square, I lined up my individual boards and pressed them to the tape.
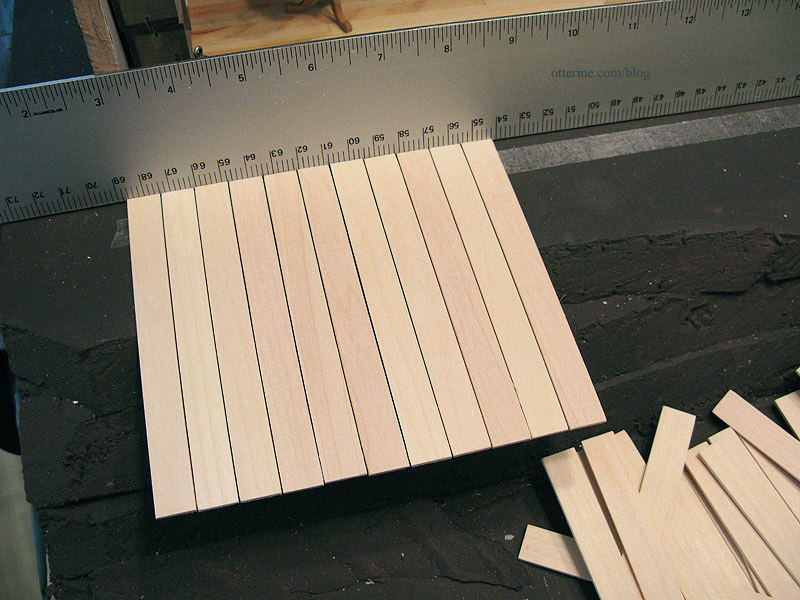
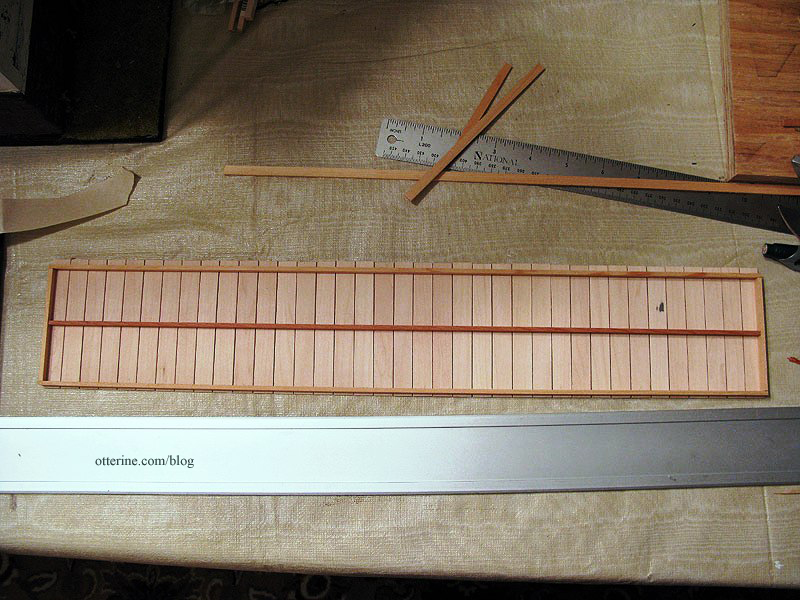
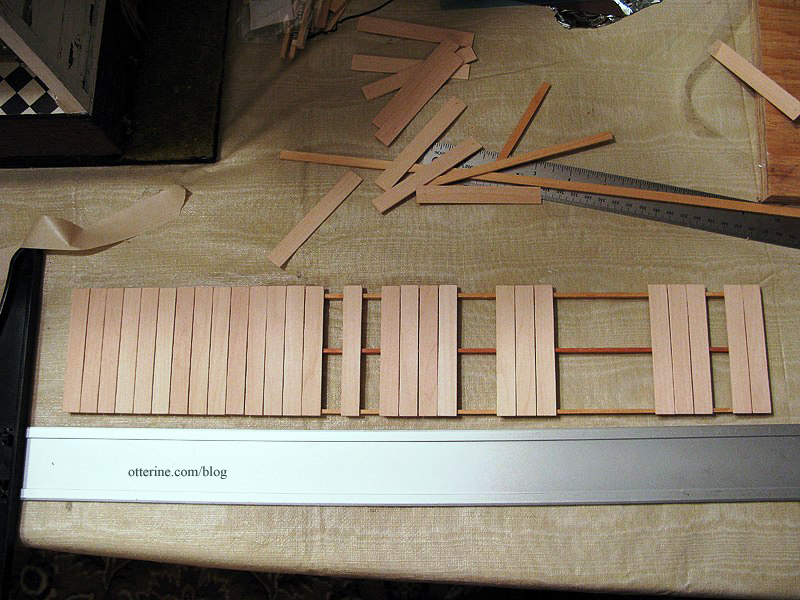
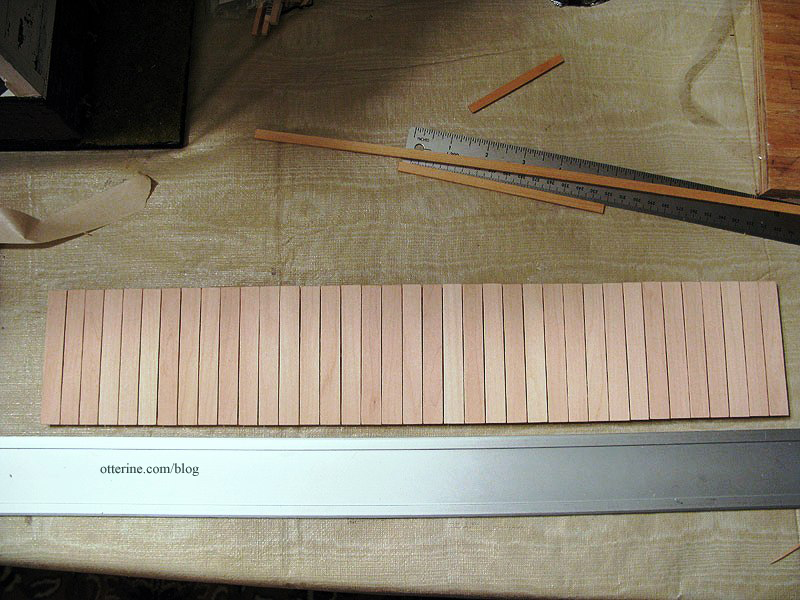
There are 35 boards for the main deck.
The main deck can be shifted to the side in either direction depending on the fit needed to join the side deck.
For the side deck, I had to add a small piece of cardboard to support the boards during the mockup phase. It won’t be part of the final framework.
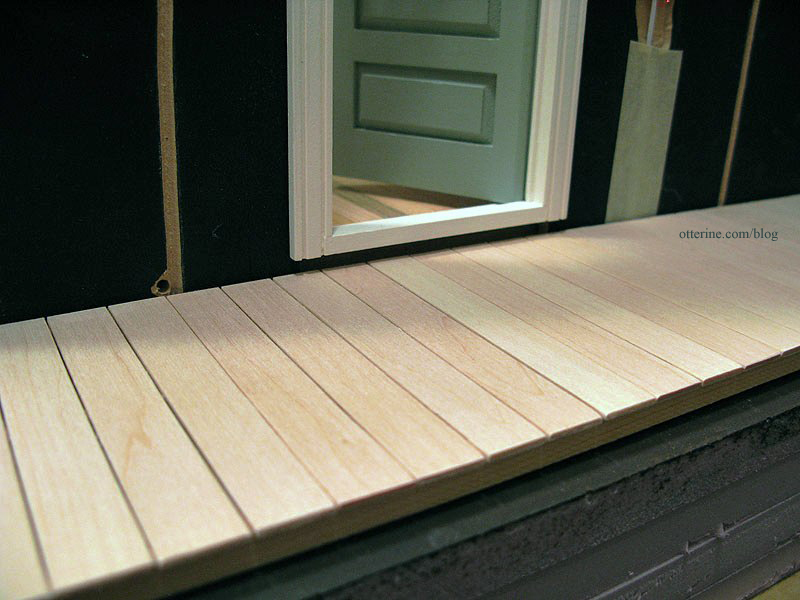
These pieces measure 1/2″ x 3 1/2″ and begin at the forward edge of the main deck. There are 37 of these boards. I continued them far past the door so there is room for the firewood box that will hold the wood stove switch. Plus, that means I can use scraps of landscaping materials instead of buying new.
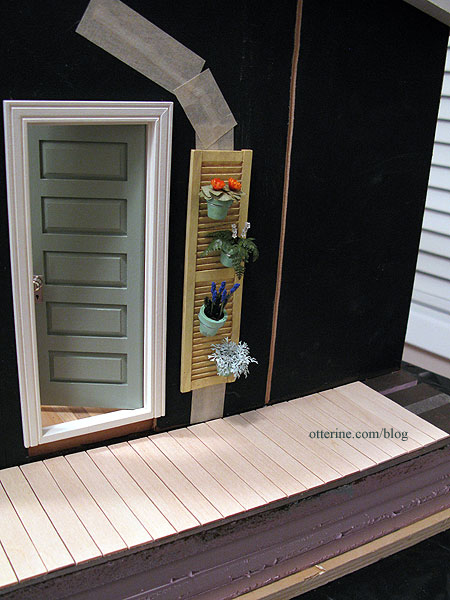
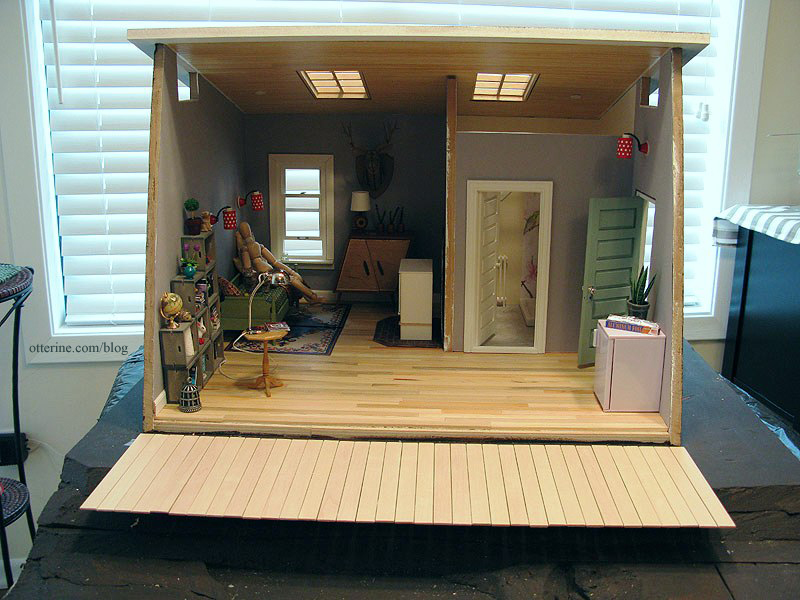
You can see the space between the top of the boards and the lower edge of the door. This will allow plenty of room for the framework, and I may or may not need a front step under the door. We shall see.
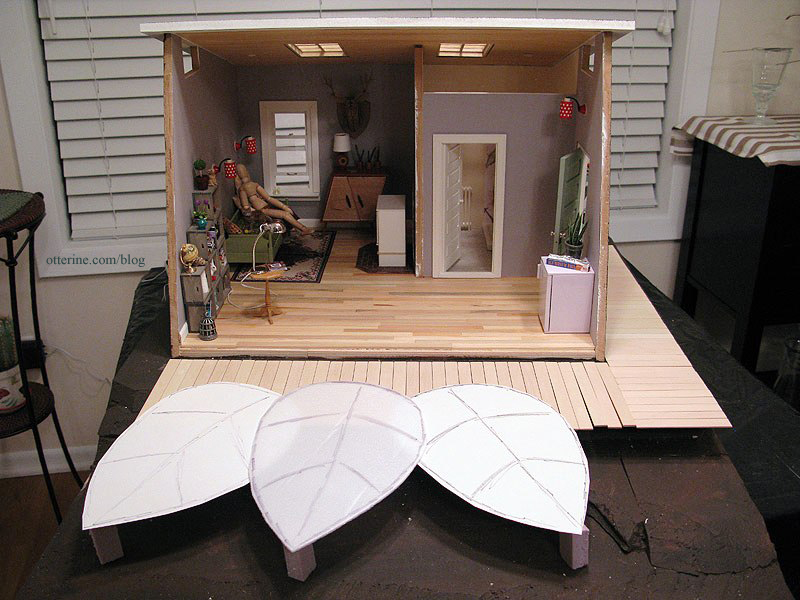
With the leaf mockups in place, it’s starting to look like something.

There will be steps in the open area in front of the side deck.
Next up, building the frame for the main and side decks. In the meantime, I’m still trying to wrap my head around the framework for the leaves. :O
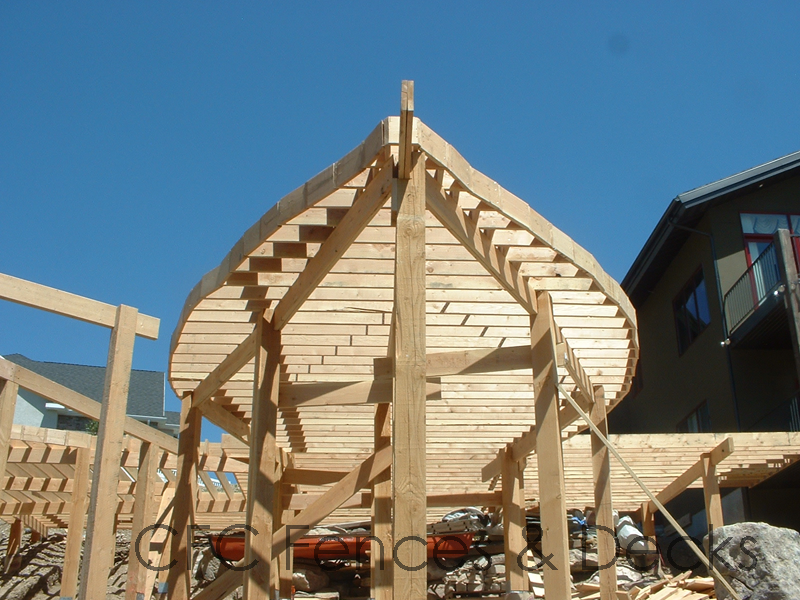
image from CFC Fences & Decks Categories: The Artist's Studio
March 5, 2013 | 0 commentsWho wants freshly baked cookies?!!
I suppose that is a bit of a silly question. Who doesn’t want freshly baked cookies?!! :D Grandma knows this and has been hard at work.
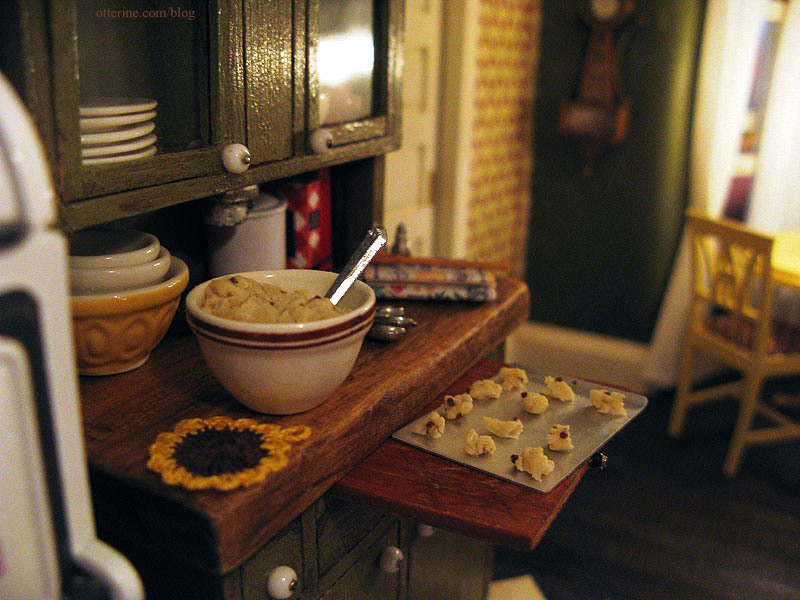
I won this lovely cookie baking set from Creating Dollhouse Miniatures. The pieces are so well made and realistic.
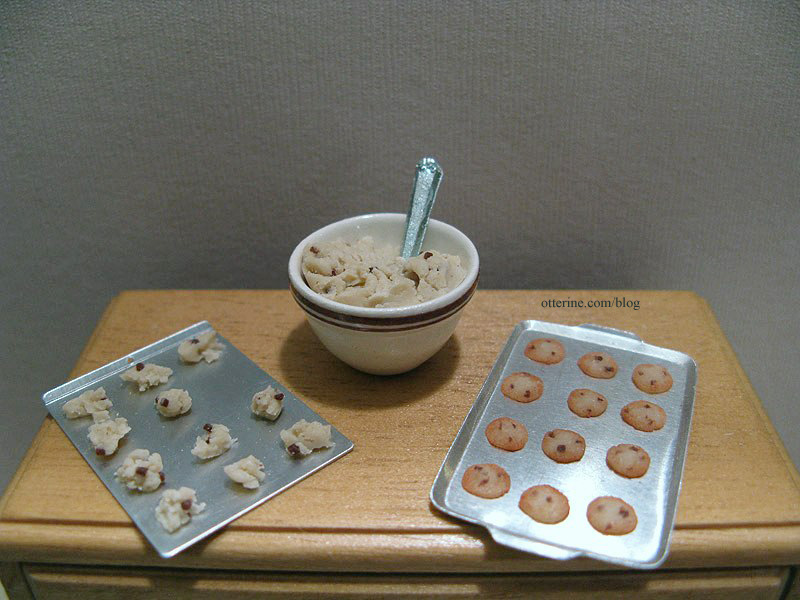
My mom makes the best chocolate chip cookies. No kidding. Every family gathering has people hoarding the cookies she brings, even though she brings dozens! I know chocolate chip cookies, and these minis are just like hers! :D
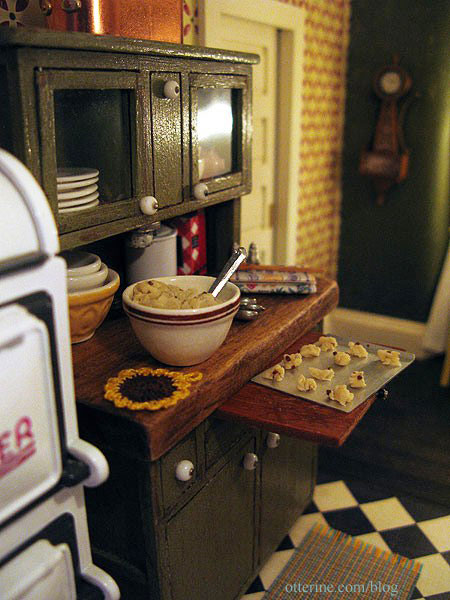
Cookies in progress certainly warm up a kitchen, don’t they? :D
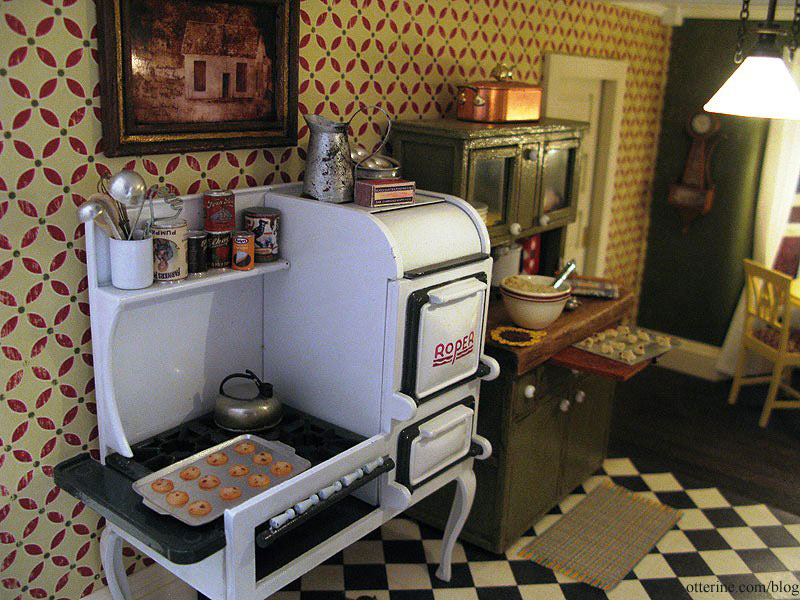
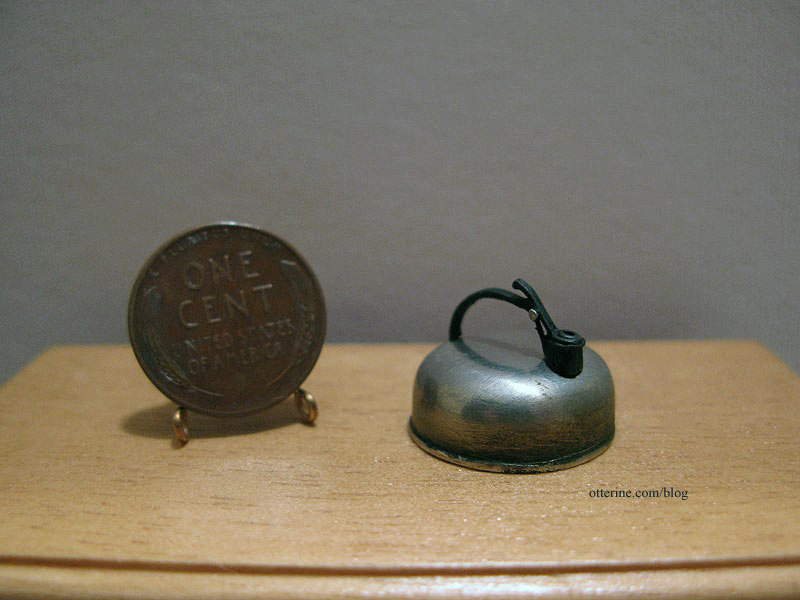
Another recent acquisition is the whistling tea kettle by Ulus Miniaturas – purchased from Mainly Minis when I replaced the fire in the wood stove.
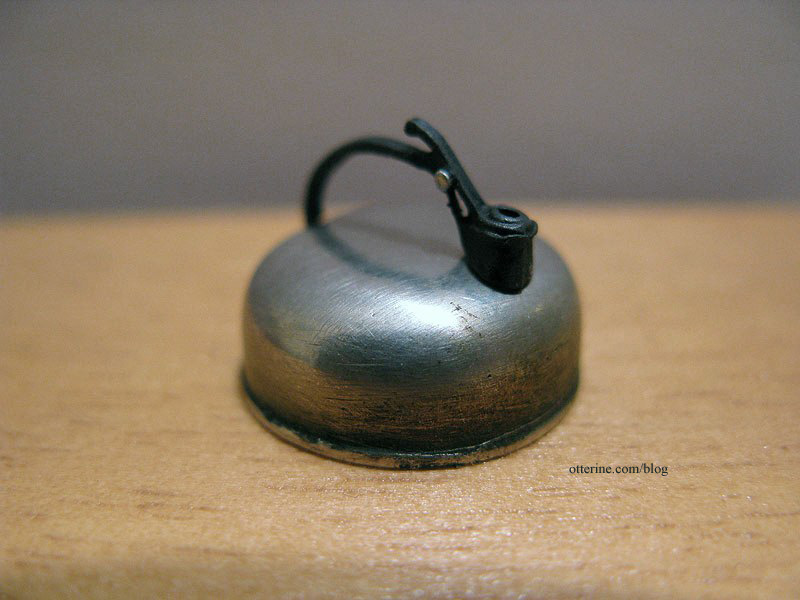
We had one of these in real life at my childhood farmhouse. Mom still has it and uses it, too! Next time I’m over at her house, I will snap a photo of it.
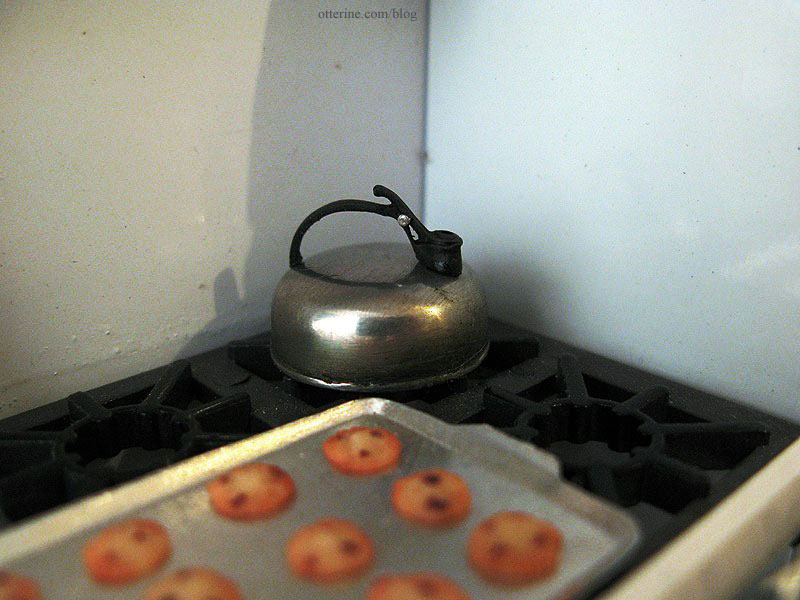
The mini version is just as well made and quite heavy.
Categories: Miniatures, The Haunted Heritage
March 4, 2013 | 0 comments


NOTE: All content on otterine.com is copyrighted and may not be reproduced in part or in whole. It takes a lot of time and effort to write and photograph for my blog. Please ask permission before reproducing any of my content. Please click for copyright notice and Pinterest use.


