

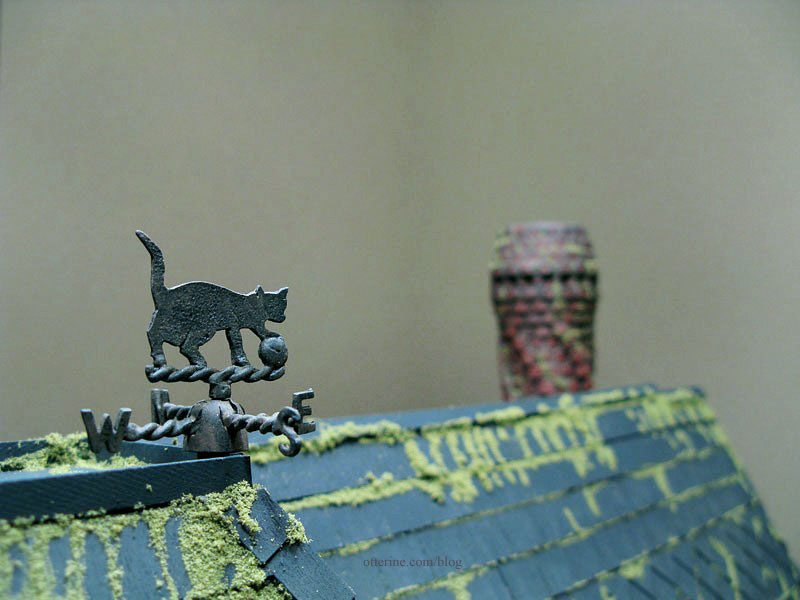
Black cat weathervane, moss and lawn care
What’s a haunted house without a black cat? Boring and unfinished, that’s what it is.
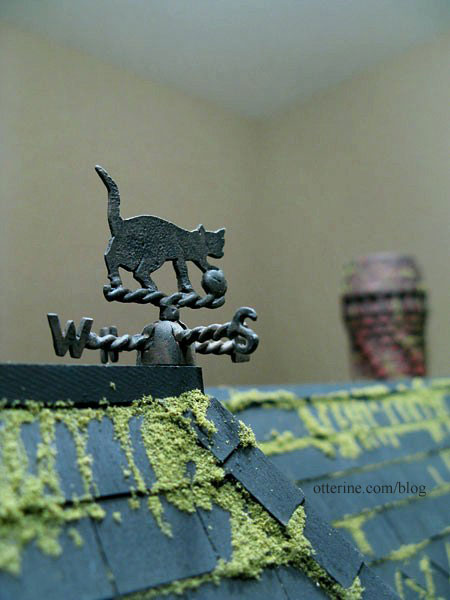
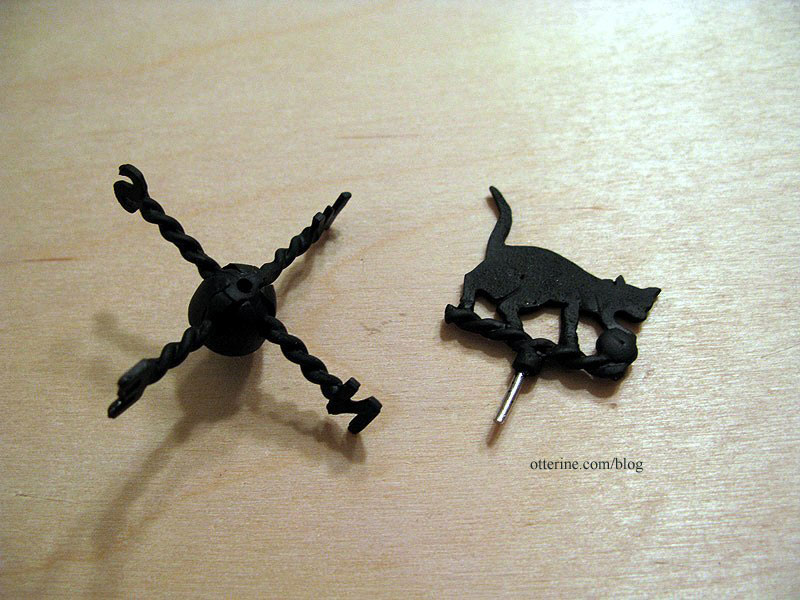
I bought this delightful weathervane from Minimum World. It’s made from silver metal, so you can paint it any color you like, but not brass, please. No additional brass is needed in the miniature world. I sprayed the pieces flat black and cut off the bottom from the mounting bracket. The bottom pin I left unpainted. The pin sits in the base and allows the cat portion to spin.
I then applied the same weathering technique I had used for the Juliet balcony.
There was no screw included, so I faked a bolt with glue. I added more glue than necessary and let it ooze out the hole when attached to the flat roof trim.
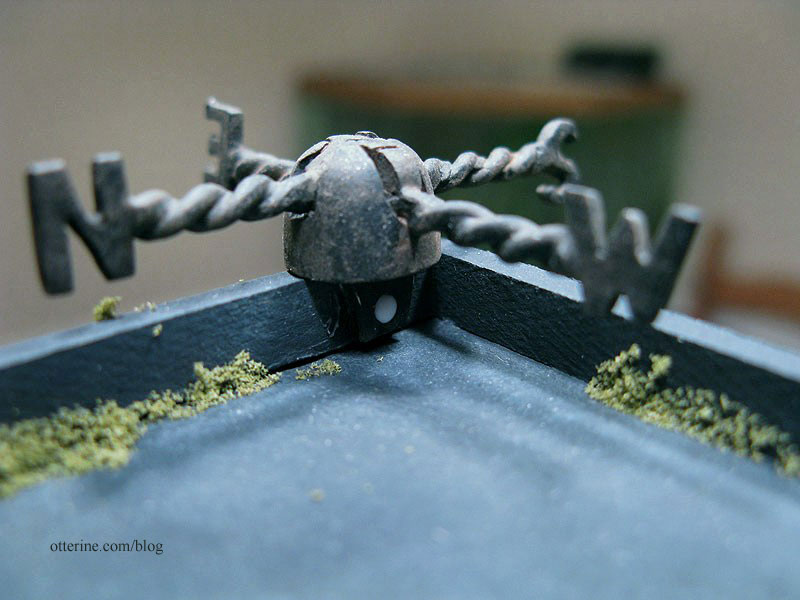
Once dry, I painted it to match.
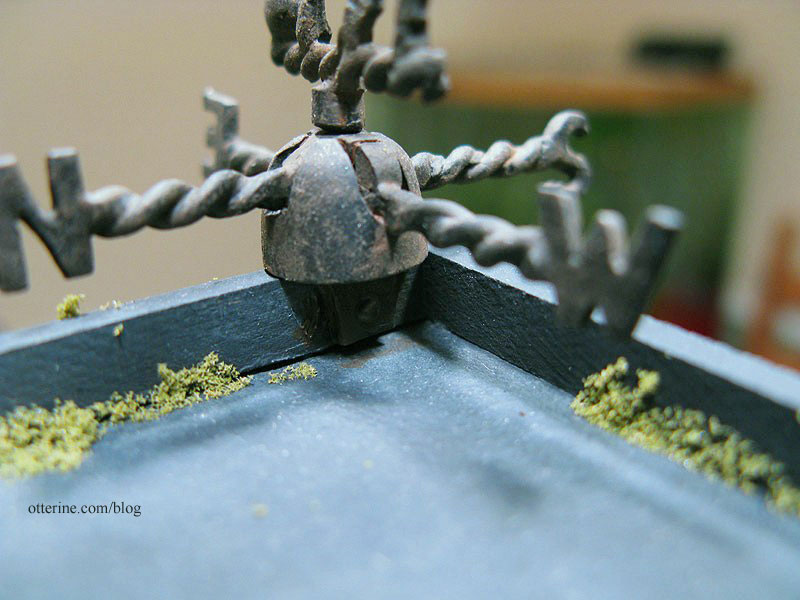
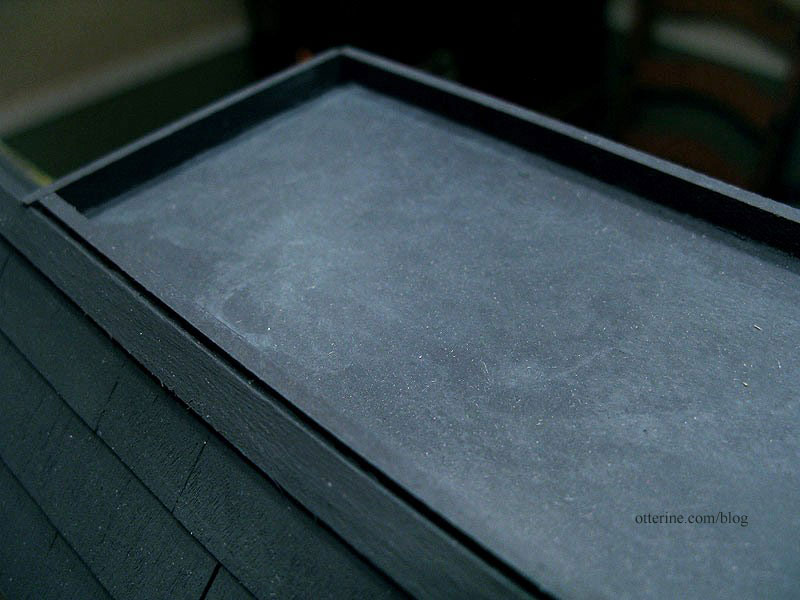
While I was up on the roof, I decided to apply a grey wash to the flat roof portion. This gives it a slight age and weathered appearance.
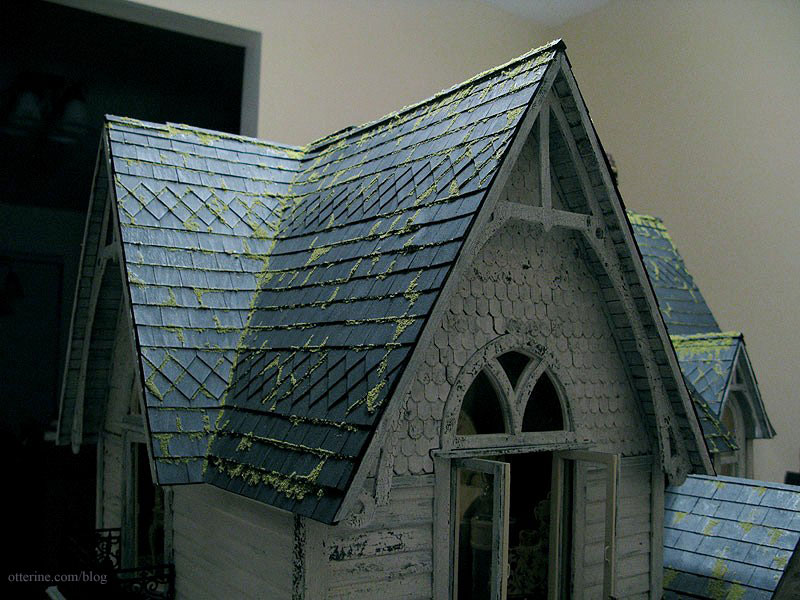
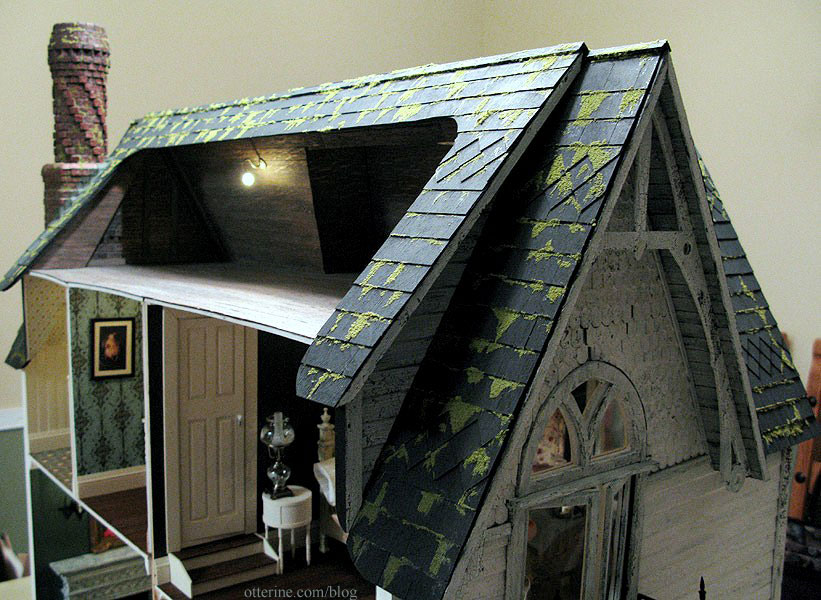
I also finished the moss on the roof.
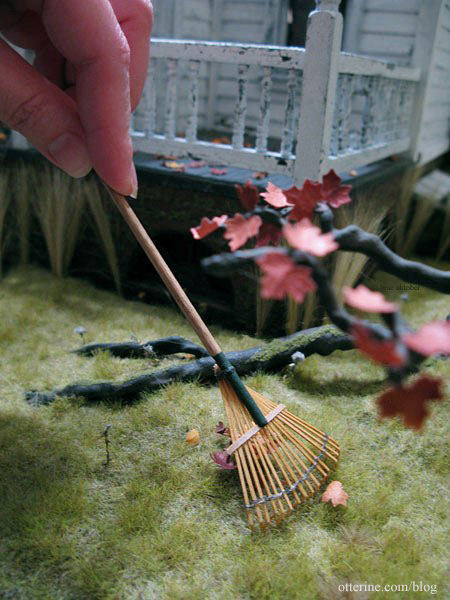
It was a large job only because I had to clear out the attic and rake up the leaves before working. Otherwise, it would have been impossible to clean up the excess foam that gets everywhere.
Now, I’ve never raked a lawn in real life, but here I am happily doing it in mini! This little rake from Sir Thomas Thumb really works! :D No, I’m not left-handed, but I can’t photograph my right hand all that easily.
Categories: The Haunted Heritage
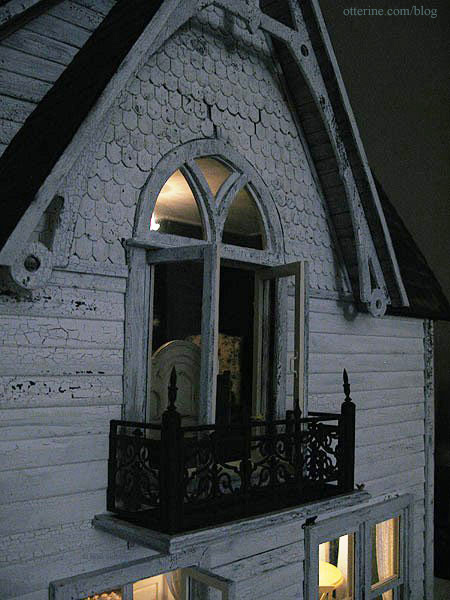
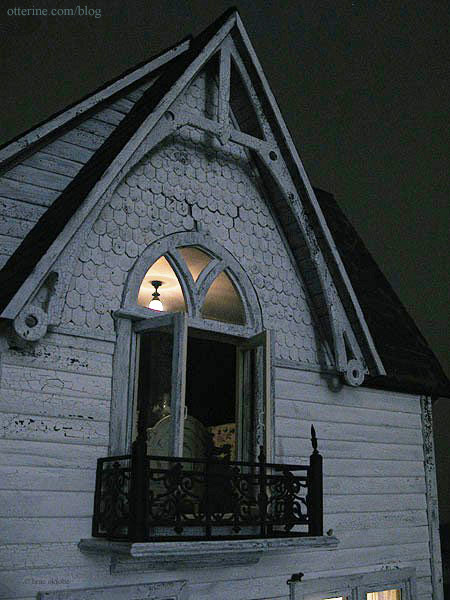
March 14, 2013 | 0 commentsHeritage – Juliet balcony, part 2
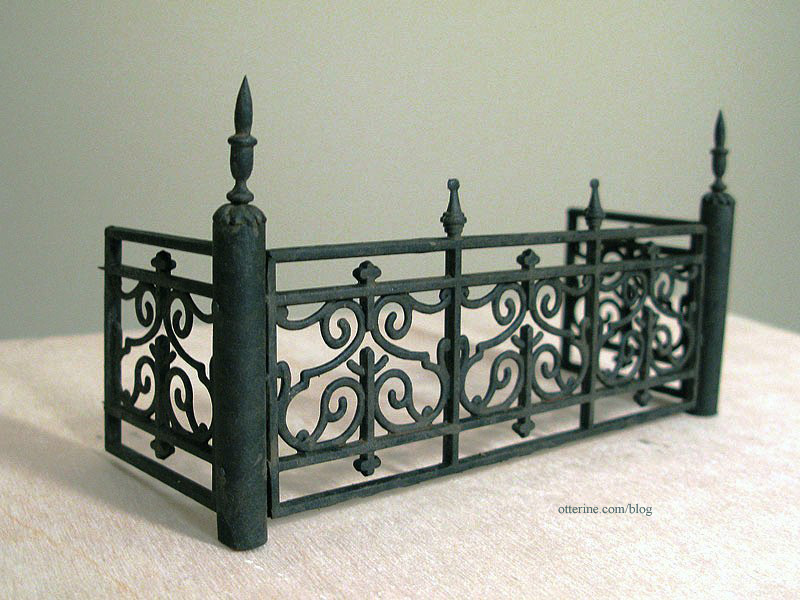
Completed work on the Juliet balcony. It has been glued in place outside the bedroom swinging window.
Here’s a reminder of what the basic structure looked like last time.
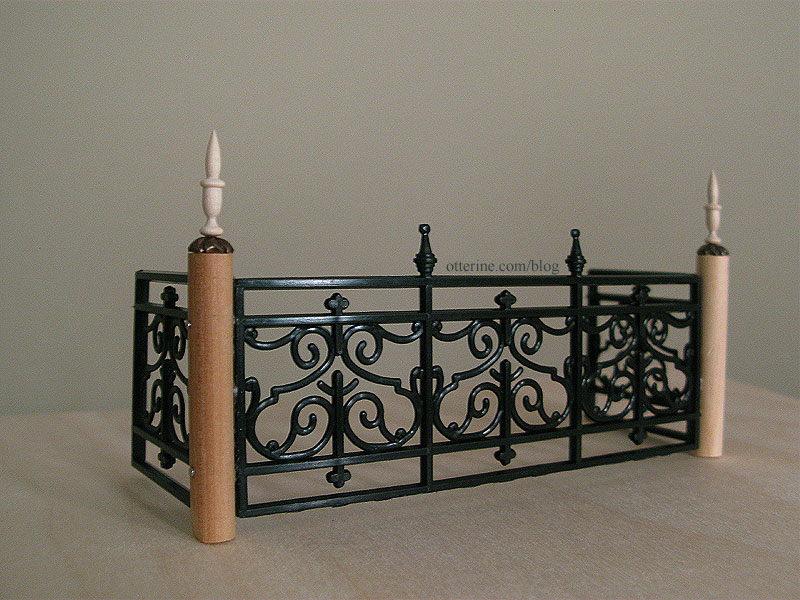
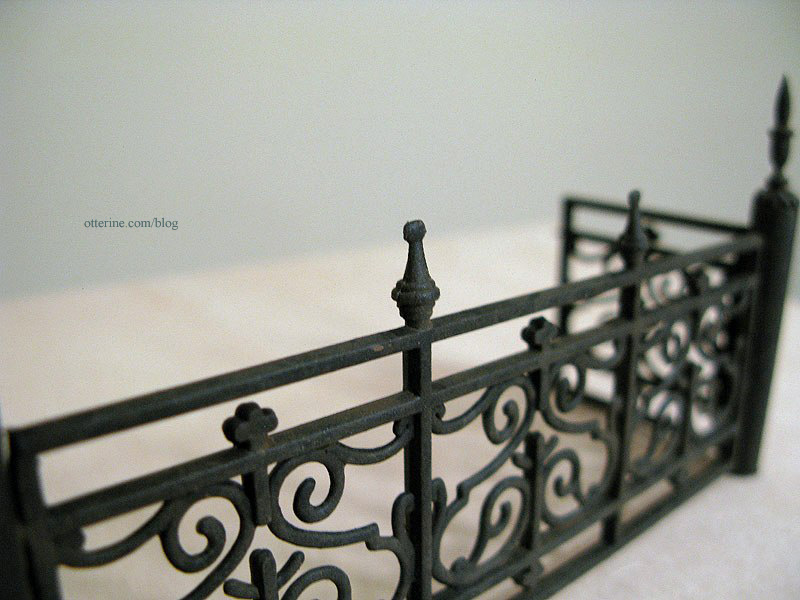
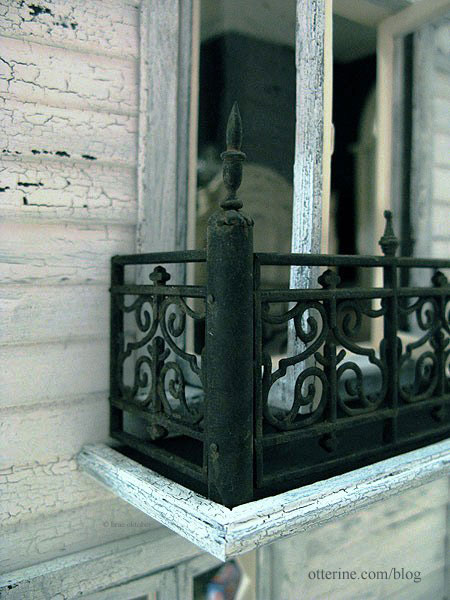
I spray painted the “wrought iron” assembly flat black, which instantly changed the entire look. The finials are a little bent, but I like that for an old house.
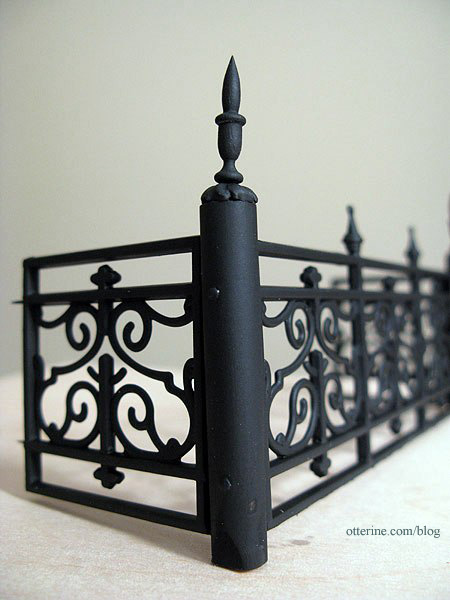
To age the iron, I dabbed on Bittersweet Chocolate by Americana, followed by a light wash of Terra Cotta, also by Americana.
Doesn’t look like plastic anymore.
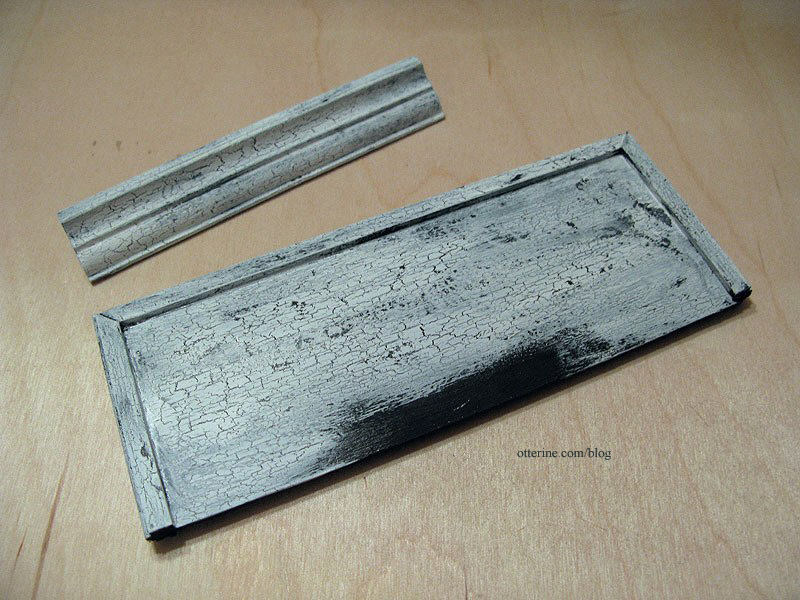
I painted the balcony floor with the charcoal grey mix I had used for the main roof and painted the wood trim and underside plain black. I also painted the support piece black. I crackled white over the wood trim and underside of the balcony as well as the support piece. I added a grey wash to the balcony floor to give the charcoal grey paint some depth and age.

With all these layers of glue and paint, the wood bowed on the bottom of the balcony – a happy accident I couldn’t have planned for if I tried.
I widened the nail holes that attach the balcony railing to the house, careful not to poke through the walls into the bedroom. It wasn’t until after I did this that I realized the balcony was not centered around the window. But, you know what? Maybe the miniature carpenters who built this house didn’t measure twice drill once and just left it. Who am I to argue? :D
I glued the balcony railing to the balcony floor and then glued the whole balcony to the side of the house. I added the bottom support right away to keep the balcony from falling off the house. :O
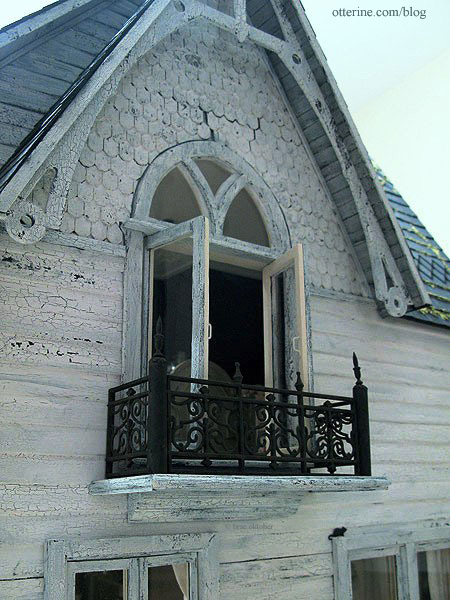
Love this rickety old balcony!
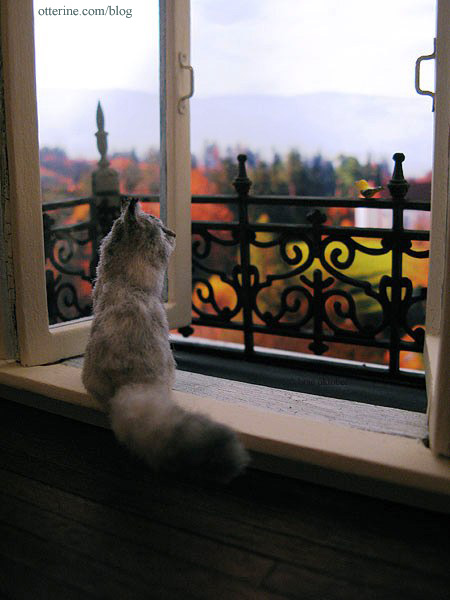
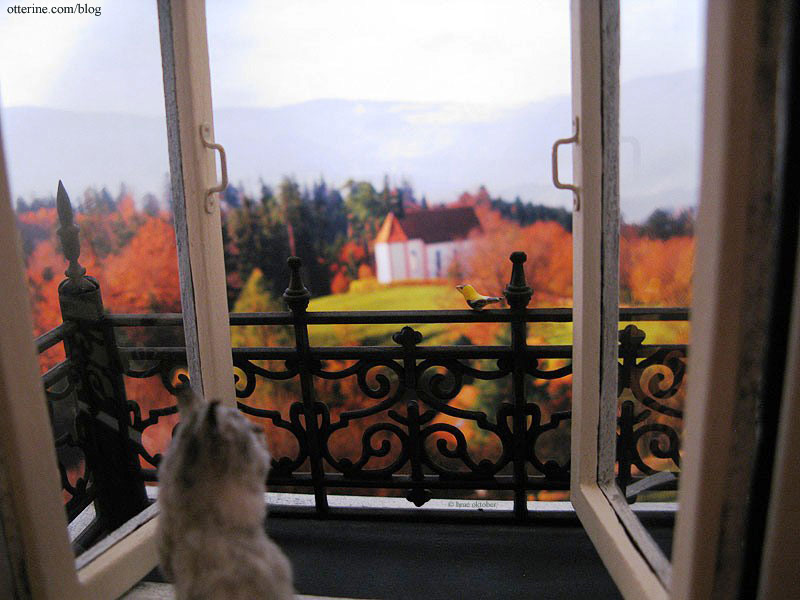
Ophelia couldn’t care less about chasing birds. How beneath her. But, she’ll sit and watch them. :D
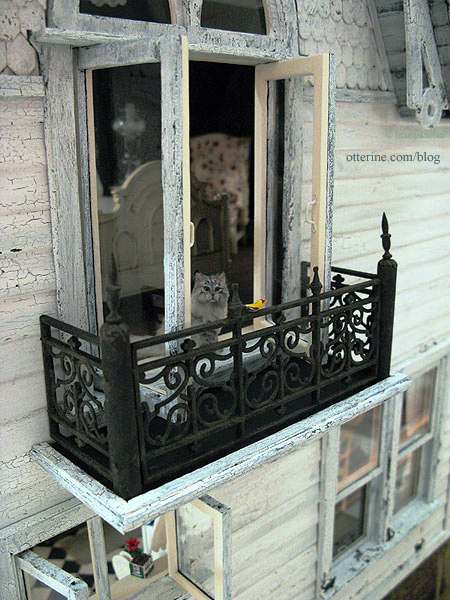
Or, she’ll just enjoy the fresh air and beautiful view.
And, grandma won’t risk falling out the window.
A little later in the evening…
Categories: The Haunted Heritage
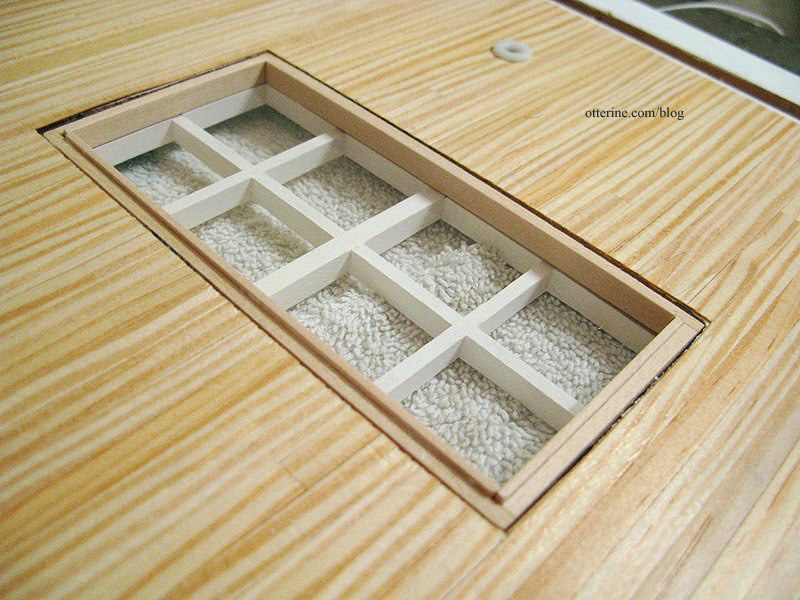
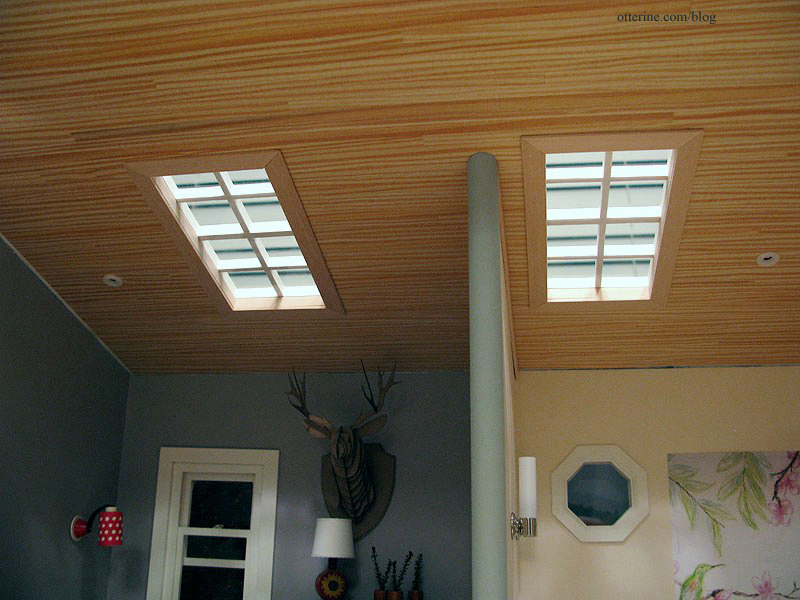
March 13, 2013 | 0 commentsThe Artist’s Studio – Skylights
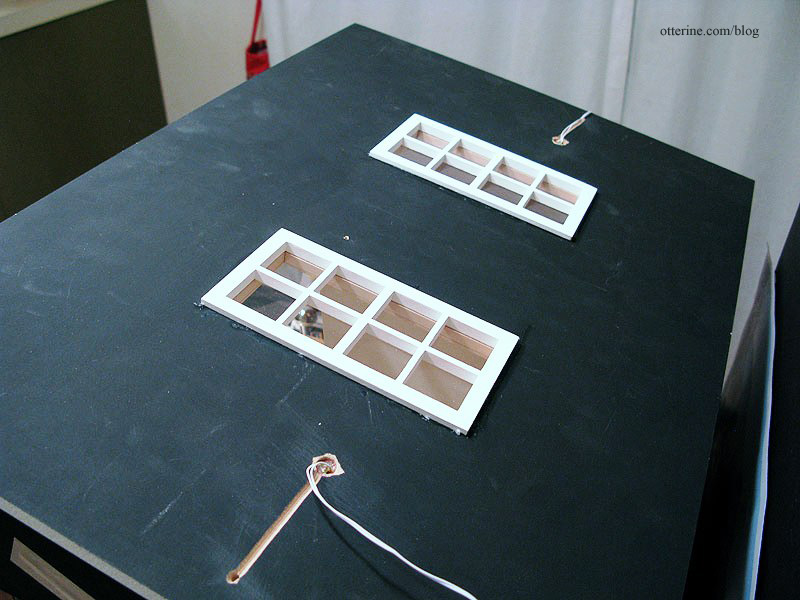
I used two Houseworks 8-light windows for the Studio skylights, though I had to widen the original openings in the ceiling to fit them. I painted the exterior portion Warm White by Americana. I put the board on a towel to keep the painted windows and wood ceiling from being scuffed as I worked.
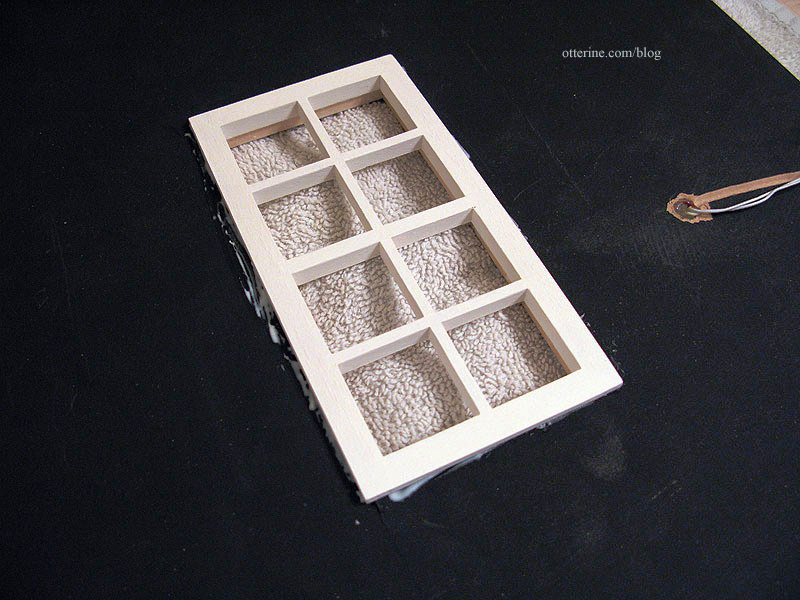
The windows don’t come with window inserts, so I cut inserts from acrylic sheet.
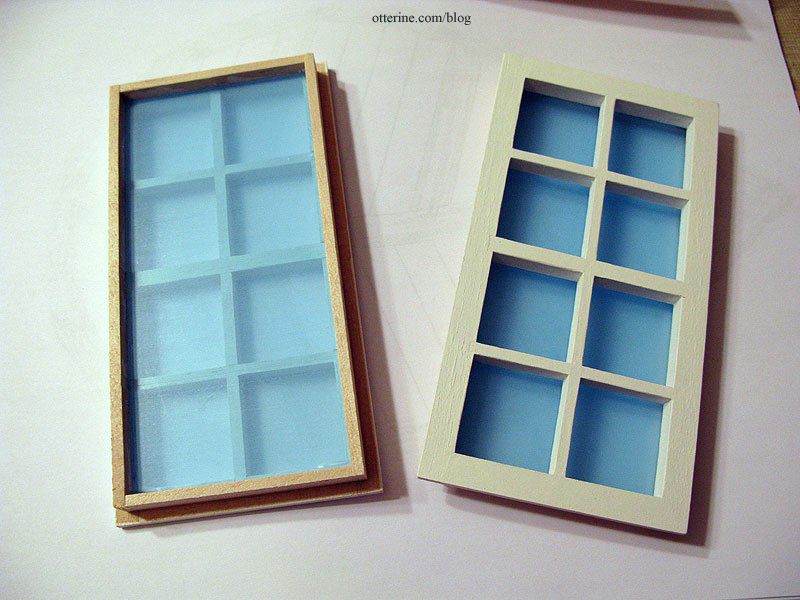
To hold the window insert in place, I framed the interior with strip wood. This was easiest to do before installing the ceiling board permanently. I left it natural to blend with the ceiling treatment. I sanded the wood smooth and sealed with satin varnish before cutting the pieces to fit.
I then added flat trim around the window openings, also natural with satin varnish. I tried to cut them as best as I could with the Easy-Cutter. Being that there is no paint to disguise the slight gaps at the corners, I’ll just have to live with it. I suppose a little wood filler might help…I’ll have to pick some up next time I’m at the hardware store.
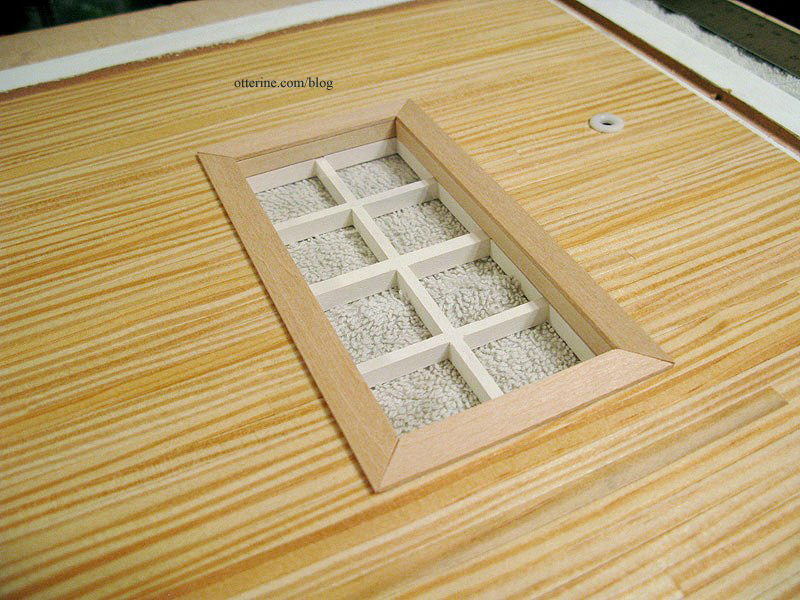
From the outside…
And, from the inside.
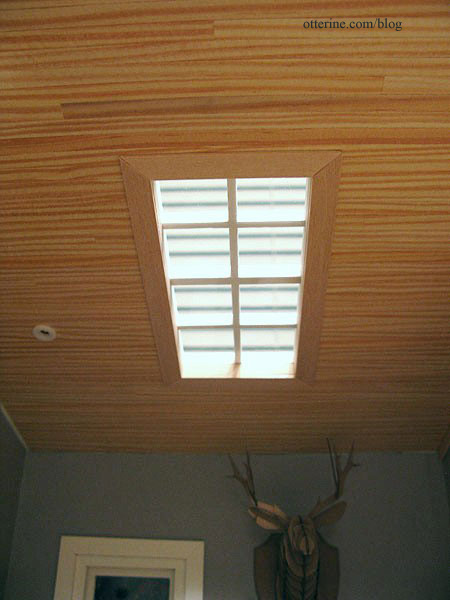
I have the half round trim for the dividing wall cut and painted; the trim that will hide the gap above the wall is also cut and sealed. Neither is installed yet.
Categories: The Artist's Studio
March 12, 2013 | 0 comments1908 Miniature Underwood Typewriter
I received a nice bonus this year, so I decided to spoil myself a little. For some time now, I’ve had my eye on this 1908 Miniature Underwood Typewriter by Ken Byers of Shaker Works West.

It fits wonderfully in grandma’s attic for now, though I foresee this piece making the rounds in my various builds just as Mary’s afghans tend to do.
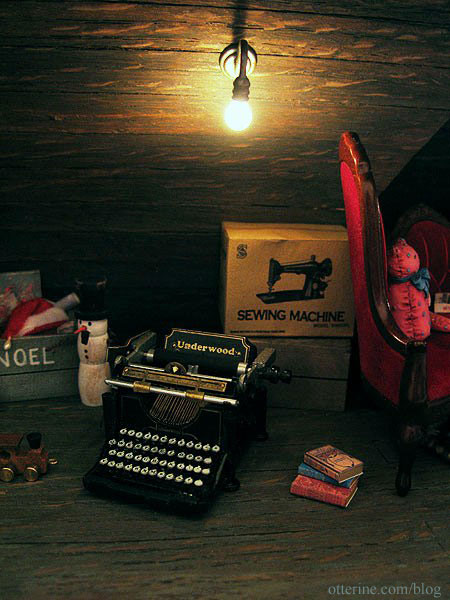
Lots of wonderful minis are making their way to grandma’s attic.
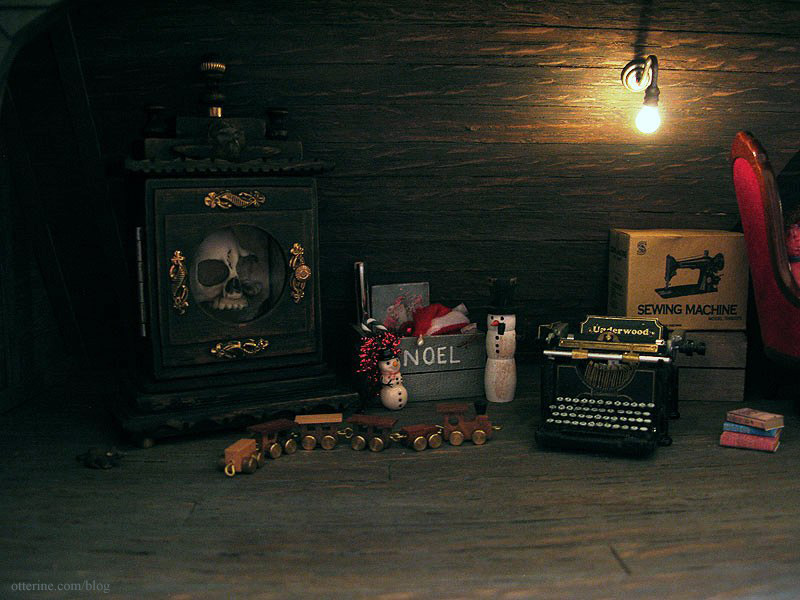
From the left, there is a mouse from Sussex Crafts next to Tony‘s catacombs case clock. The wood and brass train is from a vintage lot of miniatures I bought on craigslist. The Christmas box is from M Carmen for Caterina’s holiday swap. I purchased the two snowmen. The sewing machine box is from Four Little Walls. It’s sitting on a crate with some random books I made in front. :]
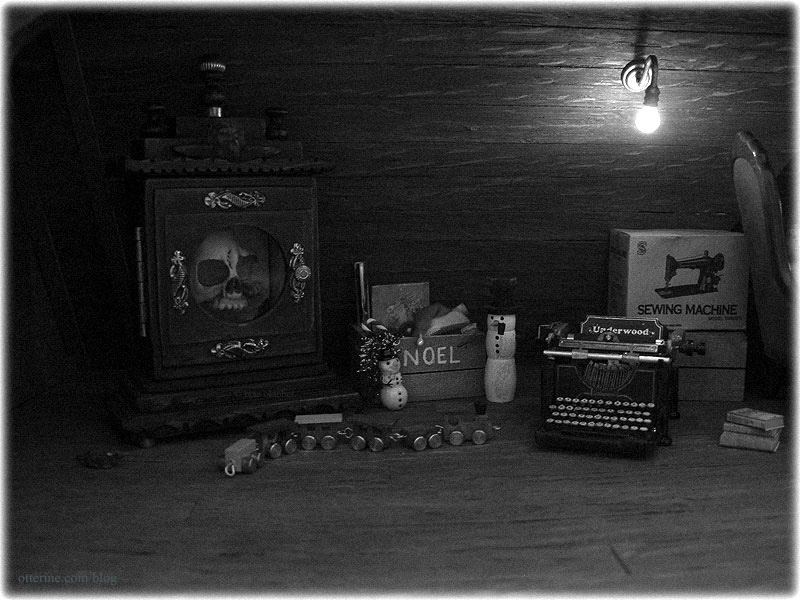
In black and white, it looks even more vintage!
There’s an interesting story about the taller snowman. A week ago, I noticed he was facing backwards. I thought this was odd of me to do, but I just shrugged and turned him around. When I set up this scene, he was facing backwards again!!!! :O Haunted attic indeed! I was seriously disturbed by this because I knew I had turned him around days earlier. Later that day, I was using the scroll saw and something fell out of the Heritage (the saw is attached to the same table). After picking up the wayward mini, I checked the attic and sure enough, that snowman had walked forward! Mystery solved…or was it? Hmm….
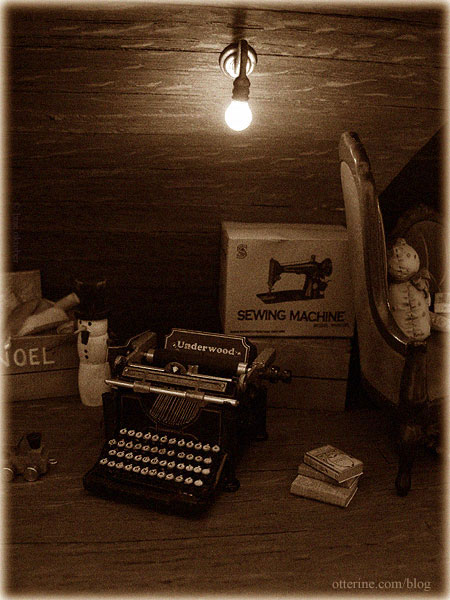
And, have you seen this baby from Uncommon Goods? Nothing like blending vintage and modern! :D
Categories: Miniatures, The Haunted Heritage
March 11, 2013 | 0 commentsThe Artist’s Studio – Wood stove, part 5
Continuing work on the wood stove. For the stove pipe, I used the wooden dowel that came with the HBS Loft kit. I measured against the outside wall to get the precise angle the pipe would hit the ceiling and used my scroll saw to make the cut. The scroll saw has a nifty angle guide for just these types of cuts.

I tested the fit in the Studio to determine where the pipe would rest on the top of the stove. I made this cut with the scroll saw as well. There’s another guide that can be tightened anywhere along the surface for straight cuts.

Looks like it worked! :D

Using 1/4″ art tape, I made a lower collar for the pipe. This will add a little visual interest to the top of the stove.


I put cardboard to block the door opening for painting, curling some excess behind the scrap to hold it in place.

I cut another piece for the top. It doesn’t have to be precise since I will paint the interior by hand.

I sprayed all pieces primer grey.

I had attempted to start with an undercoat of flat white, but it didn’t really take. It bled through the grey in some areas, but this is just the first coat of primer anyway. Once this dries, I will do a fine sanding and await another suitable day for spray painting the final color.

I’ve also painted the Chrysnbon radiator for the bathroom. I first sprayed it primer grey and then covered that with Krylon Satin Almond. It’s a not a perfect finish, which is actually pretty great for a radiator. I’ll do a bit more aging once this paint dries, too.

My plan is to have the stove Satin Almond as well. But, if all else fails, there’s always powder-coated black to mask the imperfections!
Categories: The Artist's Studio
March 10, 2013 | 0 comments


NOTE: All content on otterine.com is copyrighted and may not be reproduced in part or in whole. It takes a lot of time and effort to write and photograph for my blog. Please ask permission before reproducing any of my content. Please click for copyright notice and Pinterest use.


