

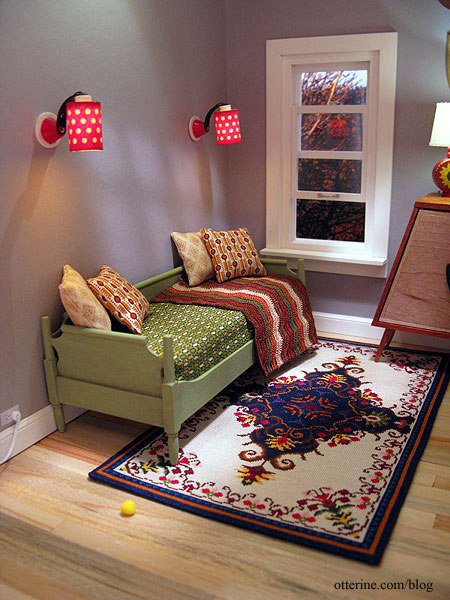
Blue medallion rug – completed
I have finished binding the blue medallion rug, and it is ready to take its place in The Artist’s Studio.
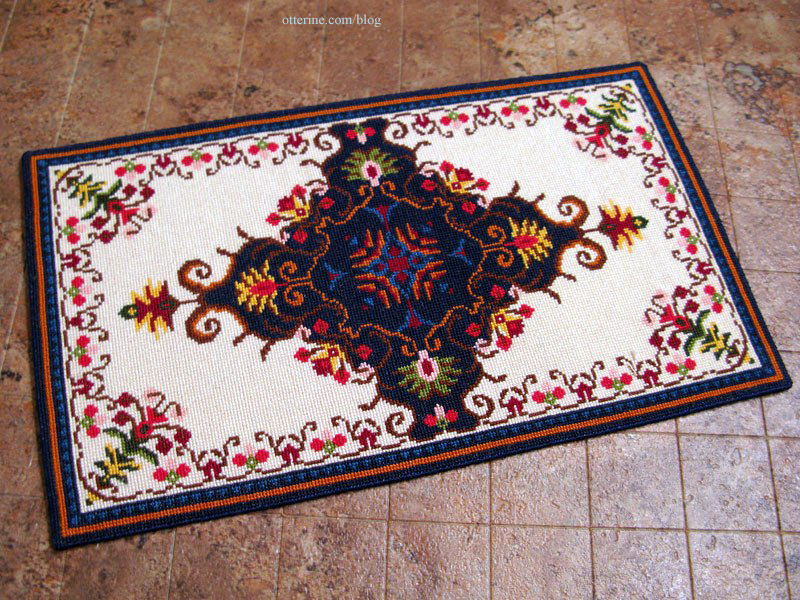
Cross-stitching time was 154.5 hours on 32 count Jobelan.
Final finishing took only a couple of hours. The final measurements are 7 7/8″ long by 4 5/8″ wide.
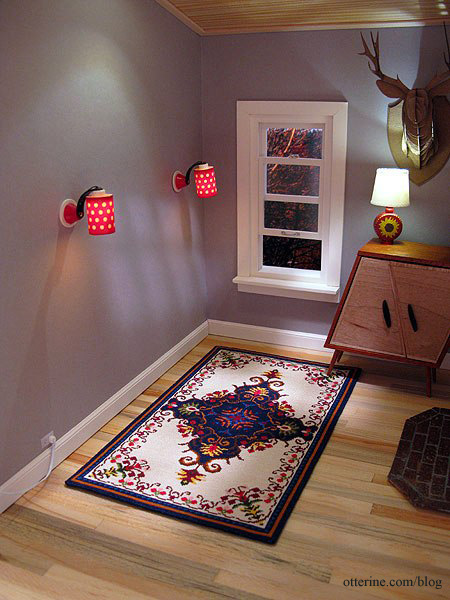
It fits well with the furnishings, though I will need to add feet to the daybed and whimsical cabinet to make them level.
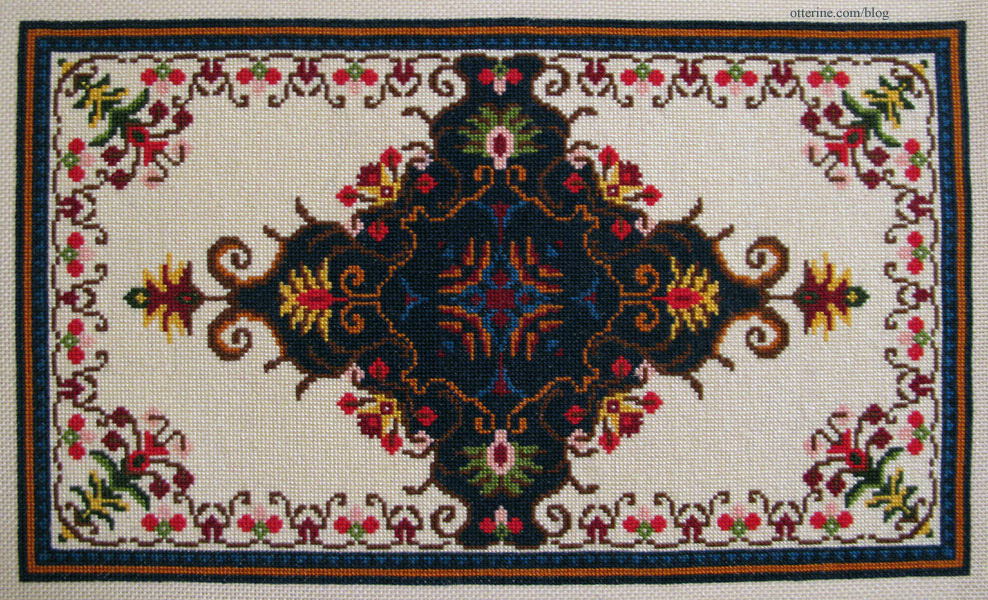
It’s such a striking design, which is what drew me in when I first saw it. The chart came from Jorge Cubells’s blog, though if you plan to make one for yourself, please write to Jorge for the half chart since the one listed on his blog is missing a column in the pattern. My final rug has this error, but it’s not noticeable.
Categories: Needlework - French knot rugs, The Artist's Studio
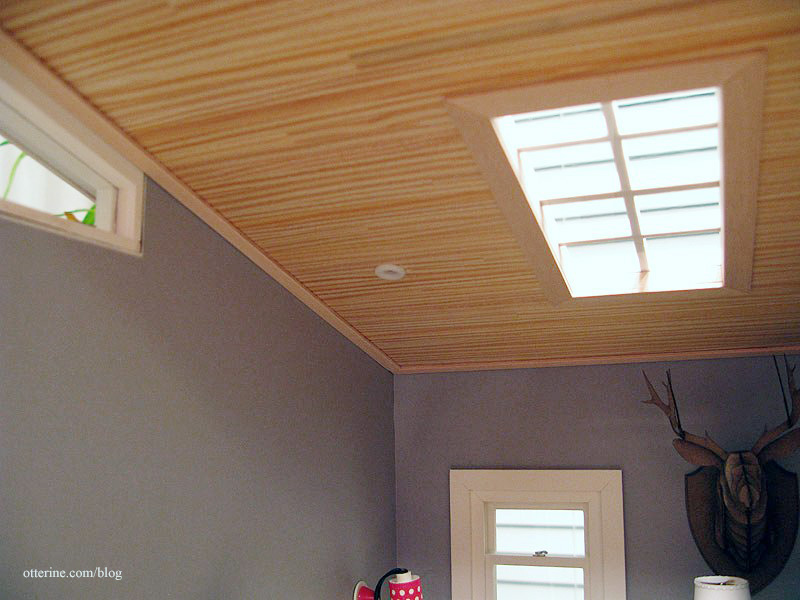
April 12, 2013 | 0 commentsThe Artist’s Studio – Clerestory windows
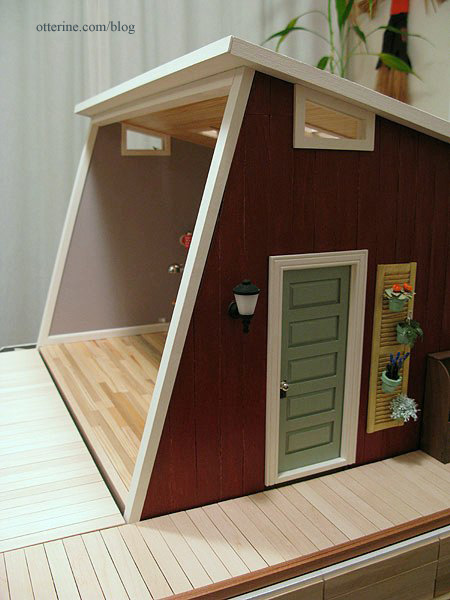
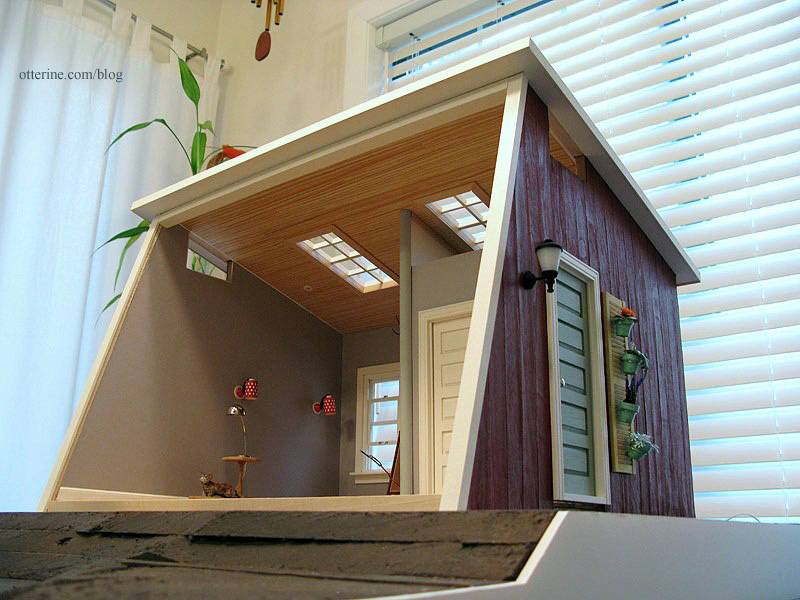
When I lowered the ceiling height of The Artist’s Studio, I had originally thought to fill in the lower portion of the original side windows. After a dry fitting of the roof in place, however, I decided I liked the odd shaped windows. A happy accident. :]
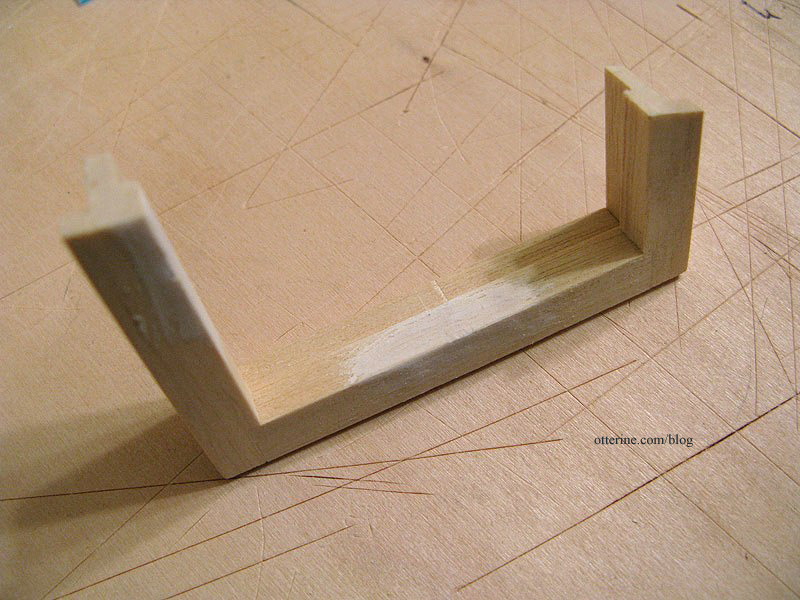
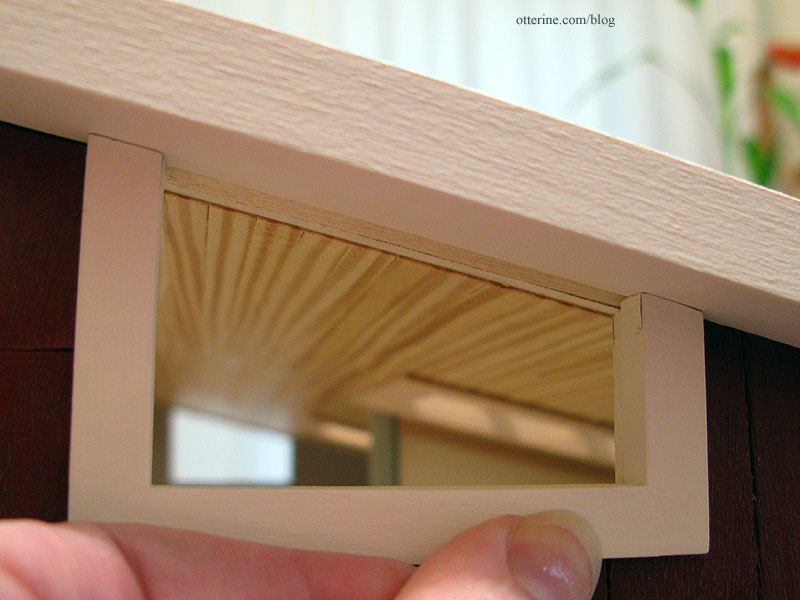
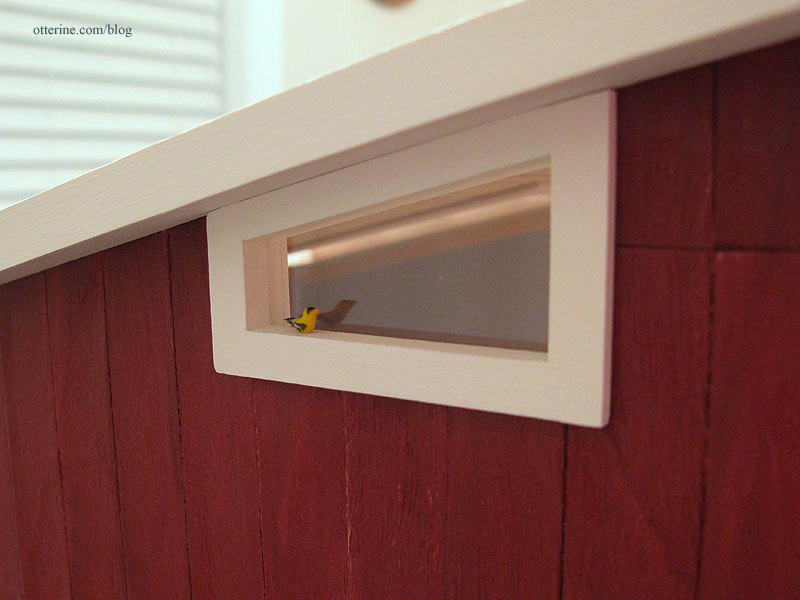
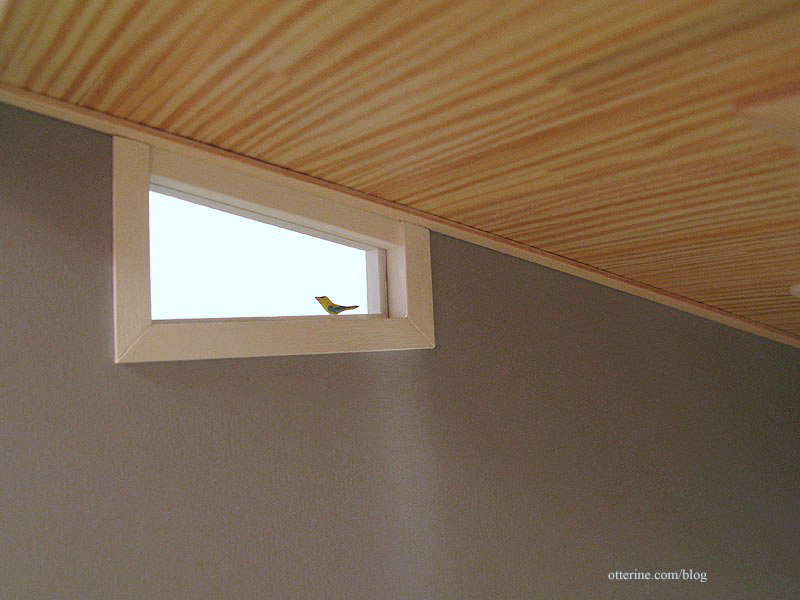
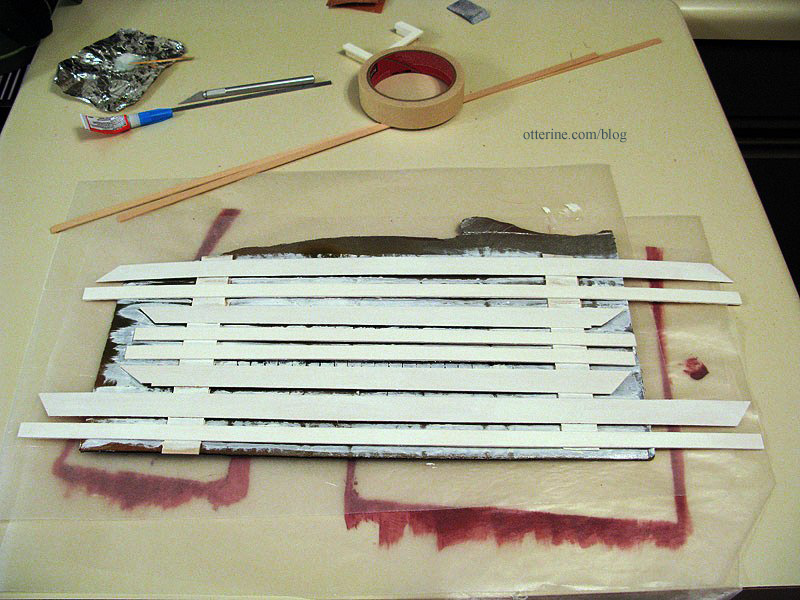
Of course, there are no readymade windows in this particular shape, so I would have to improvise. I had extra Houseworks 8-light windows, and they fit well in the existing hole. These are the same windows I’ll be using for the skylights. I marked where the window should be cut, leaving a little give for proper fitting.
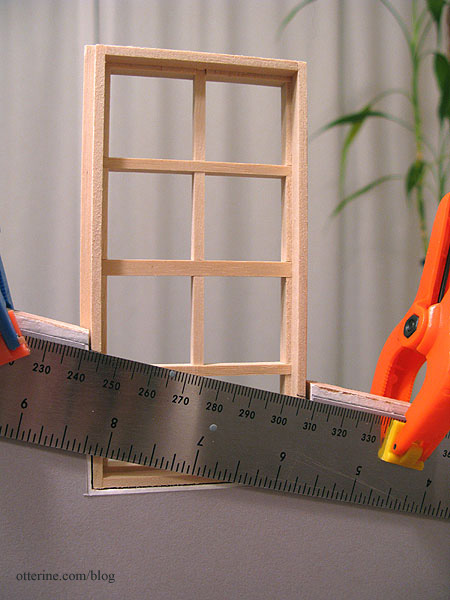
I used my scroll saw to cut along the lines and removed the interior pieces. I was able to cut both clerestory windows from one 8-light window.
I tested the fit. You can see the pieces of strip wood I cut to fill in the groove in the ceiling over the window opening. This groove is what allows the roof board to attach to the walls. They aren’t glued yet, which is good since I need to adjust this one. :D
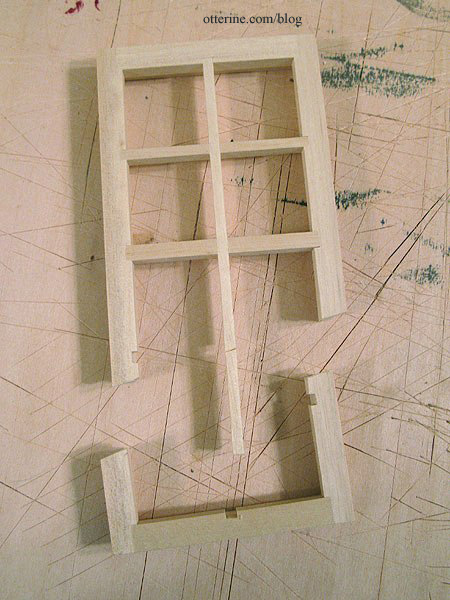
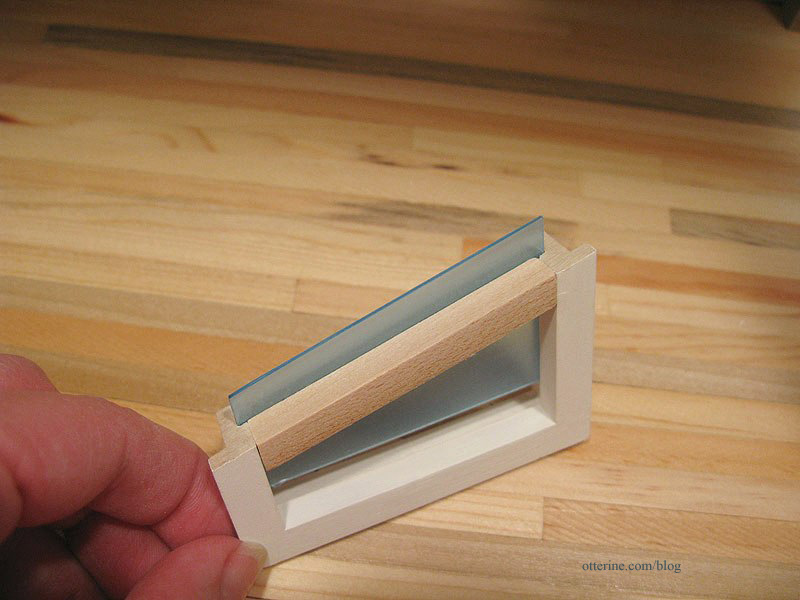
The removed interior pieces left cutouts in the outer frame. I used strip wood to make patches.
A little spackling added will give a smooth surface under the paint.
The acrylic sheet allows you to cut any shape or size window. These particular windows don’t come with acrylic inserts. I’ll leave the protective film on until I’m ready to install the windows.
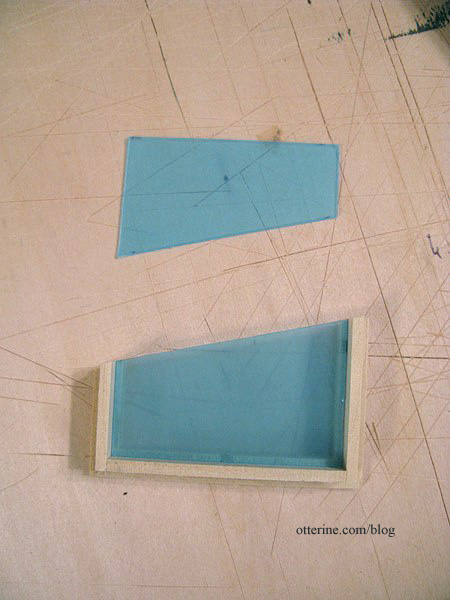
I tested the fit again.
All good! :]
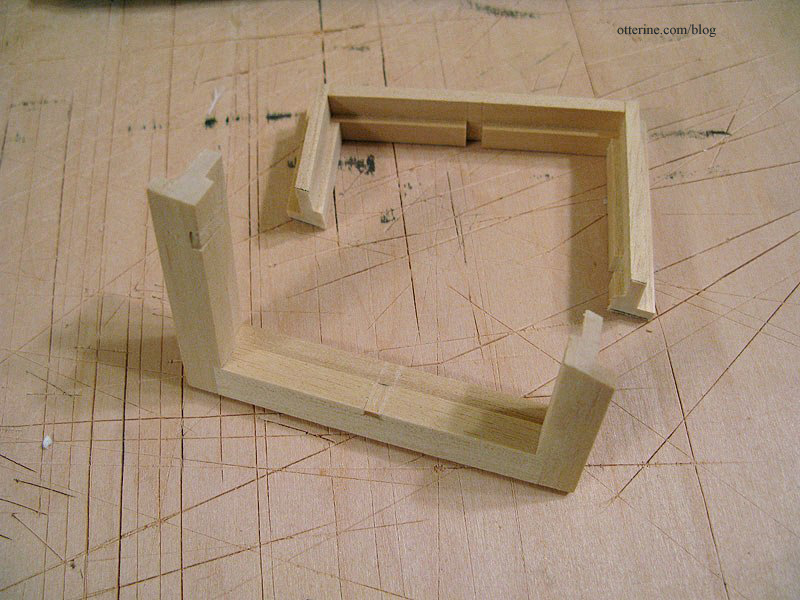
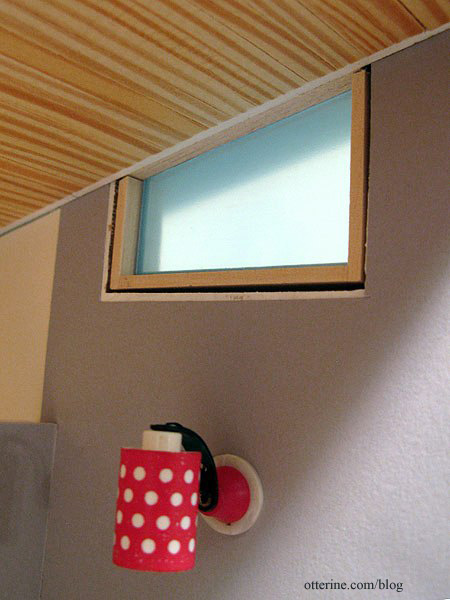
Once the eaves were finished, it was time to complete the windows and install them. I tested the fit with the eaves in place to see if any adjustments needed to be made. A little sanding, and the fit was snug.
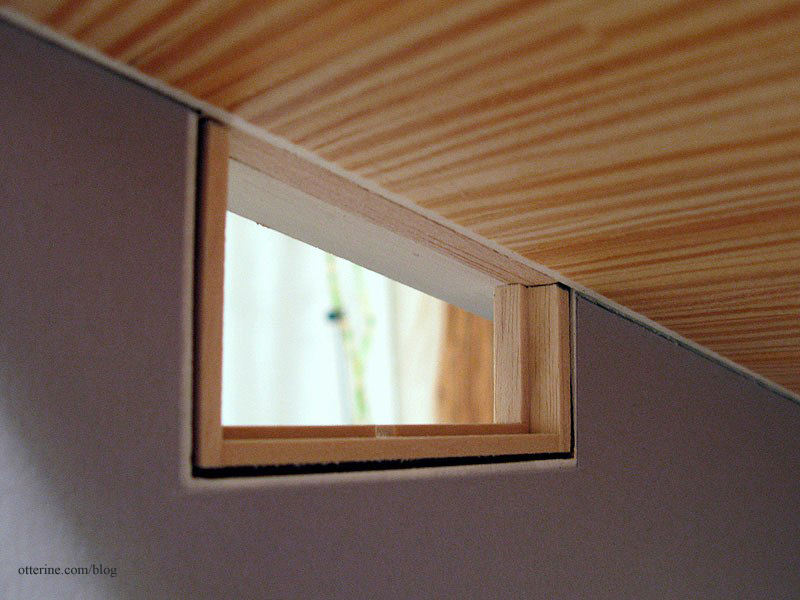
I cut 1/4″ strip wood to seal the top of the outer window and glued it in place. I cut another piece of 1/4″ strip wood to seal the top of the inner portion and glued it in place, making sure the acrylic could still slip out easily.
I checked the fit again…good. The reason for the overhang on the inside is that with the added siding on the exterior, the window is slightly inset when put in place.
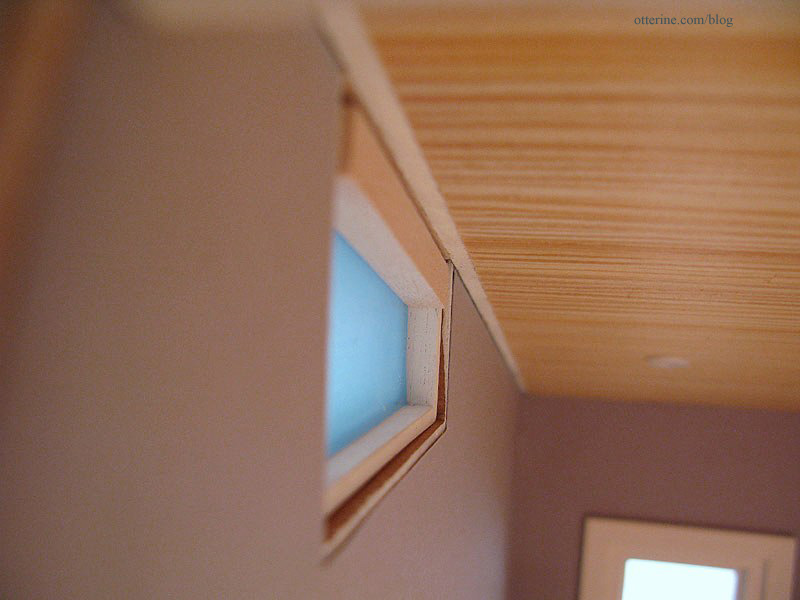
I added 1/16″ strip wood around the interior portion to make up the rest of the difference.
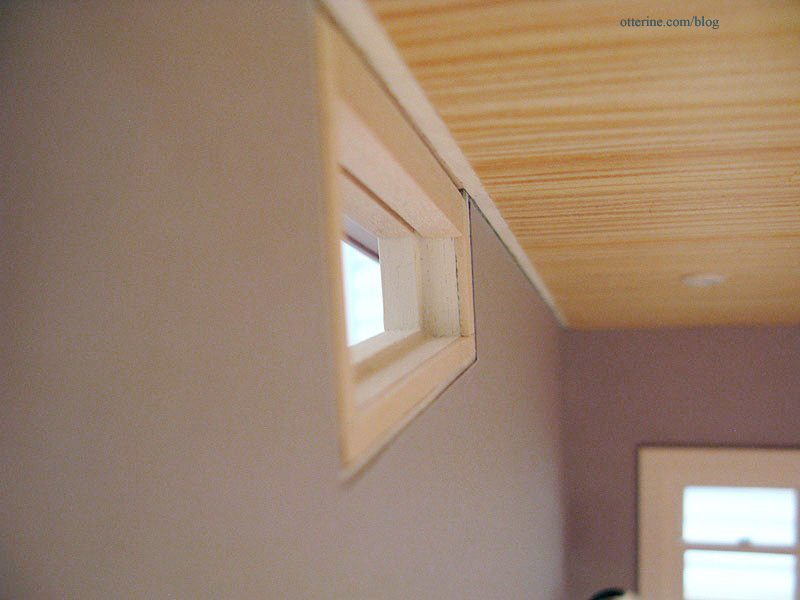
I painted the new parts then put the window inserts back in before gluing the windows in place, making sure they were snug against the eaves.
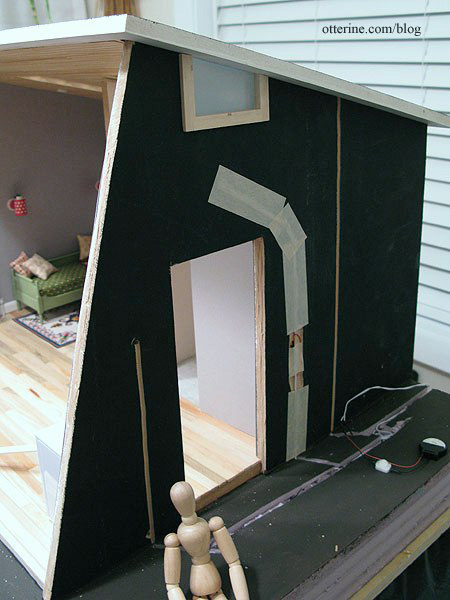
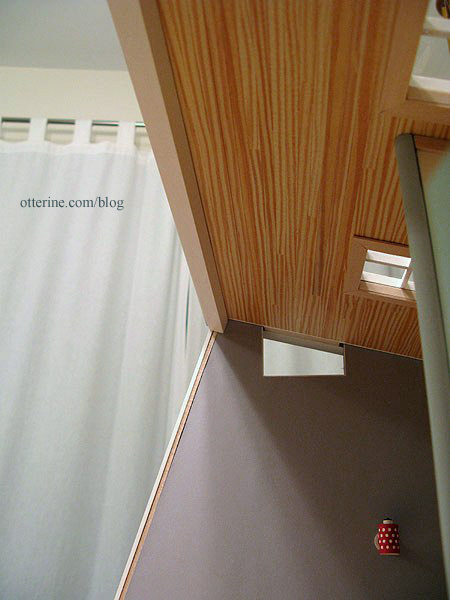
On the inside, I added plain bass wood trim sealed with varnish to finish the edges of the ceiling.
I cut interior trim for the clerestory windows and painted it Warm White.
I also cut the front opening interior trim and painted it Warm White.
Trim takes a long time to finish, but it adds so much.
Categories: The Artist's Studio
April 10, 2013 | 0 commentsThe Artist’s Studio – Retaining wall, part 2
As noted in a previous post, the main part of the retaining wall will be made from Woodsies popsicle sticks that measure 6″ x 3/4″ x 1/16″. The back width of the base is 24″ so I marked the foam core board base in 4″ intervals.

Mike again came to the rescue! I needed 1/4″ x 1/2″ x 36″ strip wood, but the local stores carry only balsa in that length. It is too soft for base trim, so he sent me cut strips of poplar to finish the plywood edge. Unfortunately, I failed to tell him the amount needed so he sent only one board. While I awaited the rest, I used the single board to align the horizontal planks around the foam core base. I’ll add the base boards once they arrive.

I cut the Woodsies sticks to 4″ lengths and glued them to the foam core board base using the guidelines, starting in the middle. I used the Easy Cutter for the horizontal planks since the ends would be covered by the vertical posts.

I used a length of corner trim to align the tops as well. I’m awaiting my supply of this trim as well.

I made a small hole for the wires.

For the lead edges where the land descends, I kept the boards even, cutting the lines with a utility blade. I will build up the land to fill in the adjacent areas during landscaping.

I like the look of it so far.

Categories: The Artist's Studio
April 7, 2013 | 0 commentsThe Artist’s Studio – Eaves
Since I added some trim to the front of the Studio, the roof seemed off balance. I added a 3/8″ x 3/8″ strip of bass wood along the front edge of the roof board to make it more prominent in front.

To finish the eaves, I cut pieces of veneer to fit along the underside of the roof board. Instead of making board lines as I had done for the Heritage eaves, I opted for smooth soffits for the eaves. I think this makes for a more modern feel.
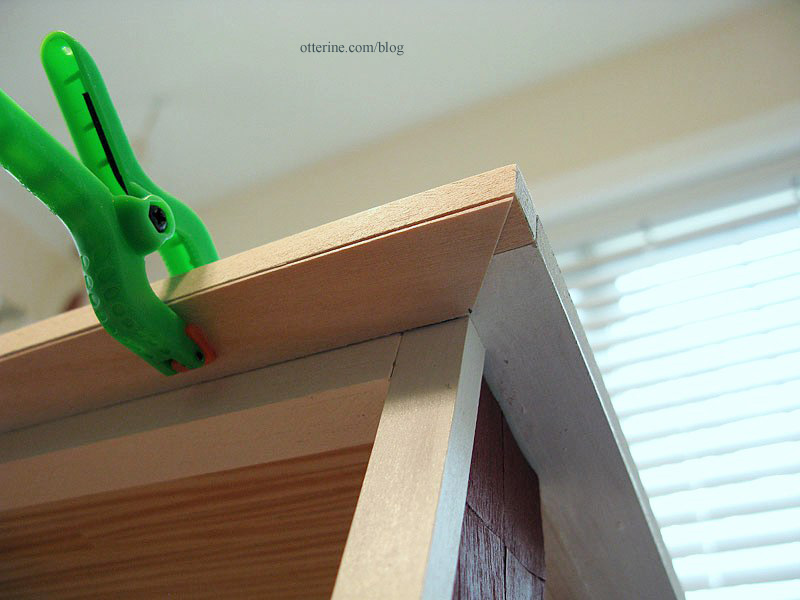
I cut angles at the corners to fit the pieces together.
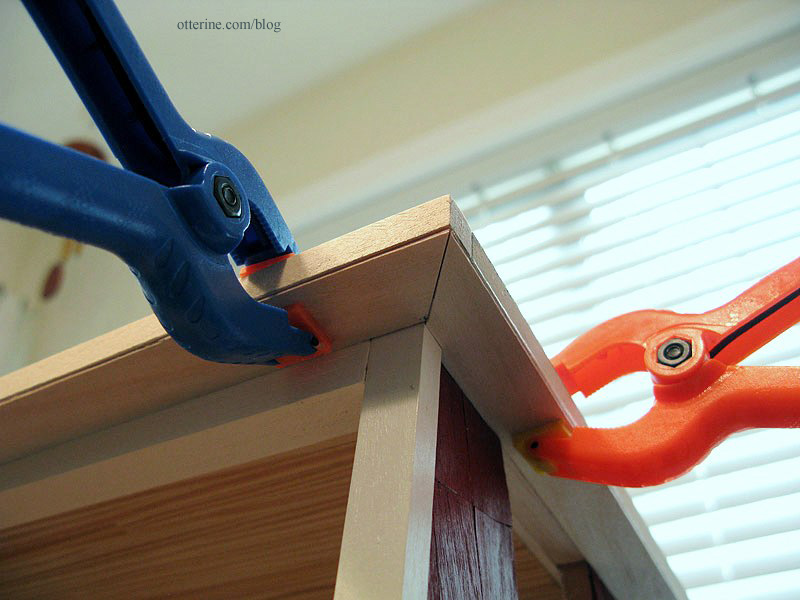
I cut bass wood strips to finish the outer edges of the roof board.
These eight boards create a good clean finish for the edges of the roof.
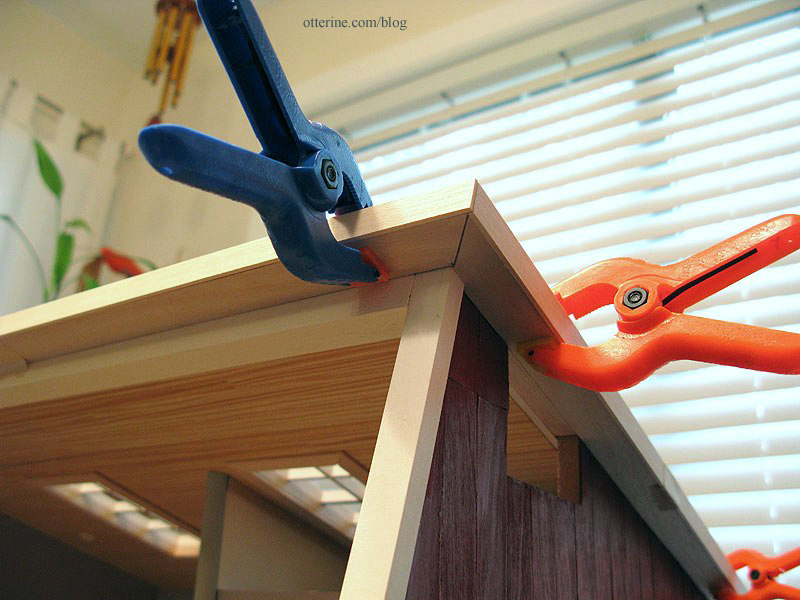
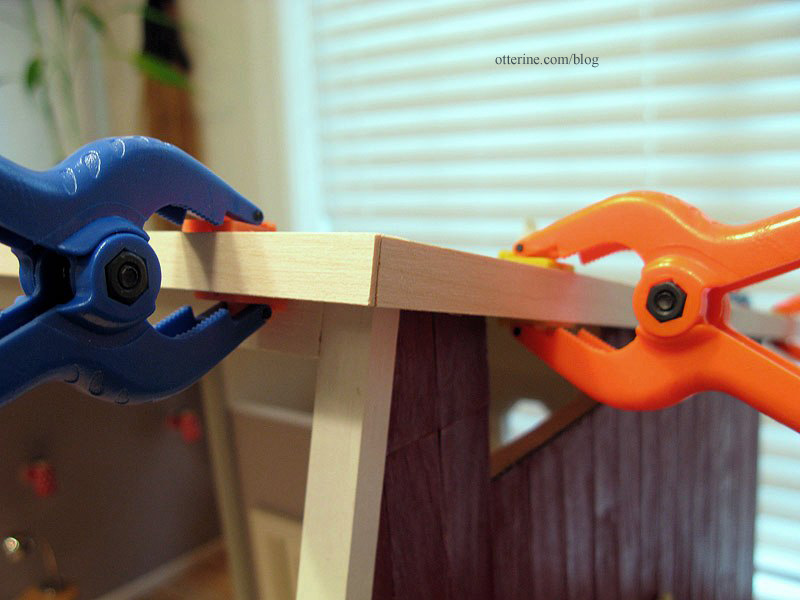
I painted the pieces with two coats of Warm White by Americana, a light sanding between coats. When I paint a grouping of boards, I tape them to a scrap of cardboard for easier painting.
I then glued them in place and touched up any gaps with small dabs of paint.
Categories: The Artist's Studio
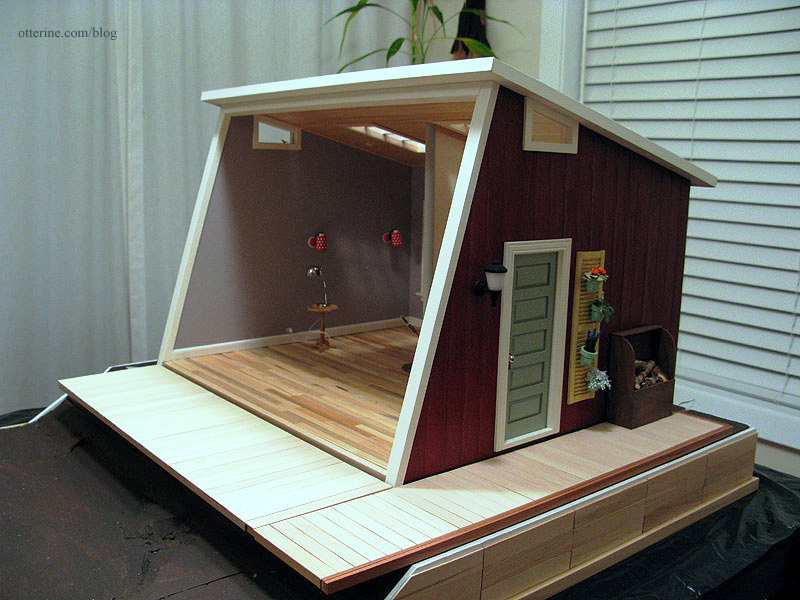
April 6, 2013 | 0 commentsThe Artist’s Studio – Siding and trims
I finished the second right siding piece since the first attempt was so warped. I glued it in place, then sanded and varnished the surface.
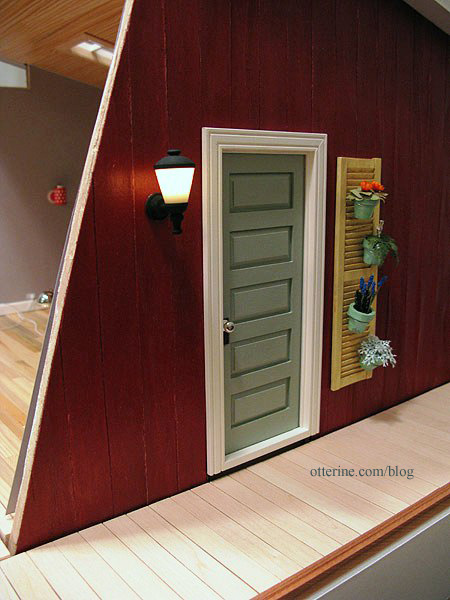
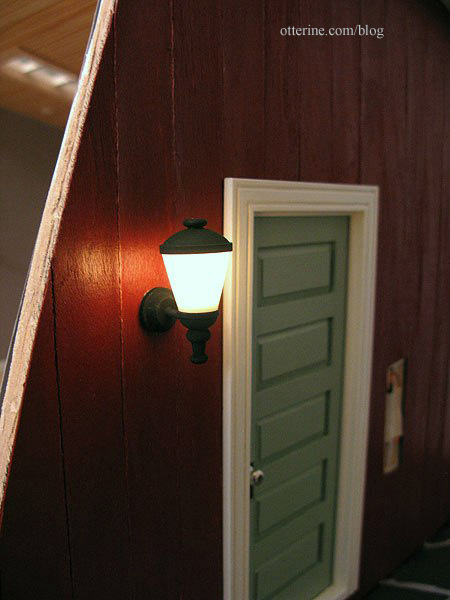
I added the coach lamp (the main door is still removable).
After finishing the wiring, I was able to glue the remaining piece of wallpaper on the interior.

I glued on the front edge molding and the large cross beam. These are painted Warm White with a finishing coat of satin varnish.
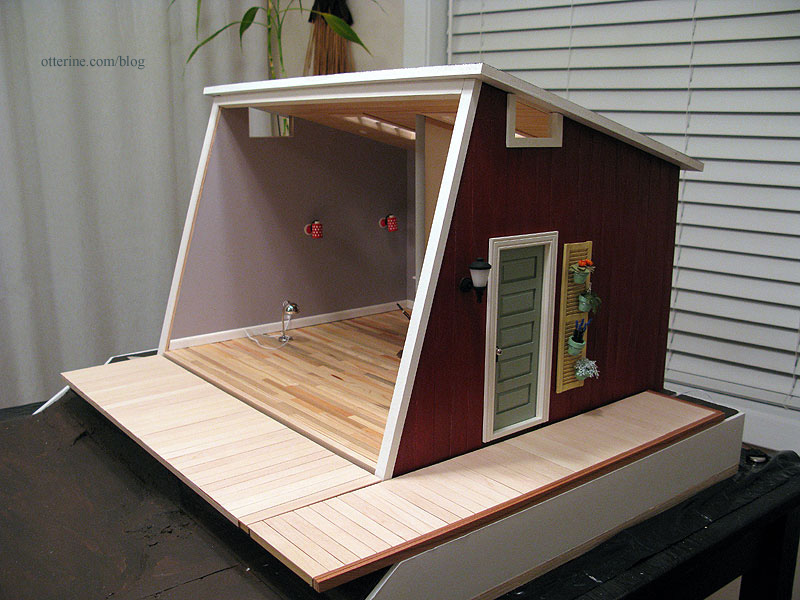
It creates a nice frame for the interior when viewed with an open front.

The cross beam creates a clean finish on the interior and will serve as a base for the front window wall
Categories: The Artist's Studio
April 1, 2013 | 0 comments


NOTE: All content on otterine.com is copyrighted and may not be reproduced in part or in whole. It takes a lot of time and effort to write and photograph for my blog. Please ask permission before reproducing any of my content. Please click for copyright notice and Pinterest use.


