

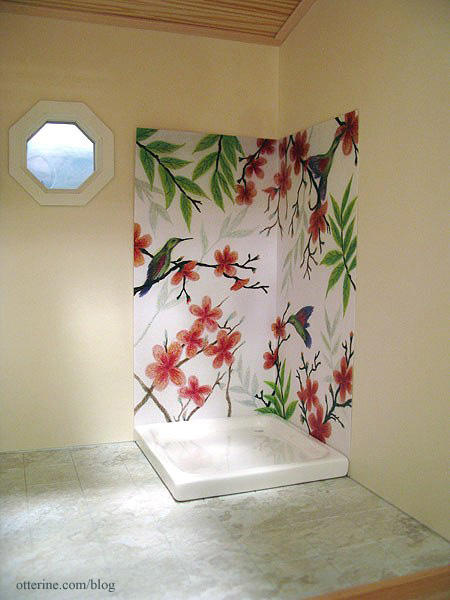
The Artist’s Studio – Hummingbird shower part 3
I did a little prep work and sampling before forging ahead with the tile mural. First, I photographed my original hummingbird and flower drawing and then manipulated it in PhotoShop to lighten and sharpen since some color loss and blurring occurs in printing.
There are a few ways I figured I could make the tiles. I could cut out individual tiles and paste them to a board with “grout lines” in between. The problem I foresaw with this method was matching the precise lines of the drawing and getting the grout lines even. Also, I would have to cut my tiles slightly smaller since the overall dimensions of the drawing were exact to the shower stall size I wanted.
I opted for an easier and just as effective method: making gridlines in PhotoShop. I made my gridlines the lightest of greys, just to make them fall into the background slightly. Plus, even white tile grout isn’t bright white in real life. I also made sure there was a gridline in the very center where the mural would break at the corner of the shower.
I made three test prints, the first of which had 14 half-inch tiles across with grout lines 10 pixels wide.
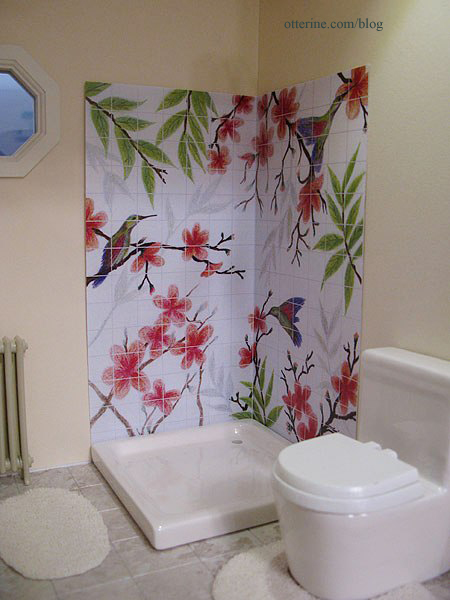
The second has the same half-inch tiles but with 5 pixel-width grout lines.
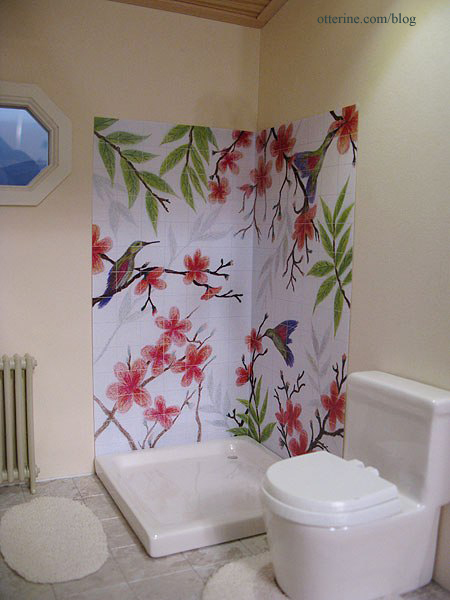
The third is done with quarter-inch tiles and 5 pixel-width grout lines.
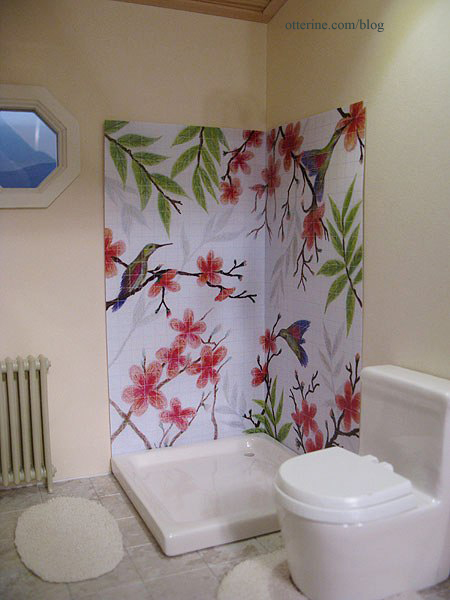
The half-inch tiles are the clear winner to me since they achieve the tile look in a realistic manner without detracting from the image the way the busier quarter-inch tiles do. The 5-pixel lines for the half-inch tiles seem better in print (in person anyway), but I will do a trial run of the next step using both samples to see which works better in the end. I don’t want to go through the whole process just to have the lines disappear for being too thin.
Categories: The Artist's Studio
April 16, 2013 | 0 commentsThe Artist’s Studio – Wood stove, part 6
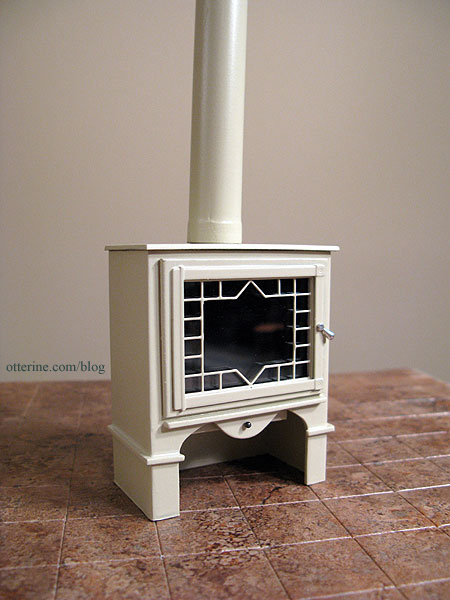
I finished up the wood stove, and I am ecstatic about how it turned out! :D When I last wrote about it, I had cut the stove pipe and primed the pieces.
I sanded the pieces once the primer was dry and sprayed them Krylon Satin Almond. I sanded once between the final color coats as well. I didn’t go with high gloss since that often looks unrealistic in mini.
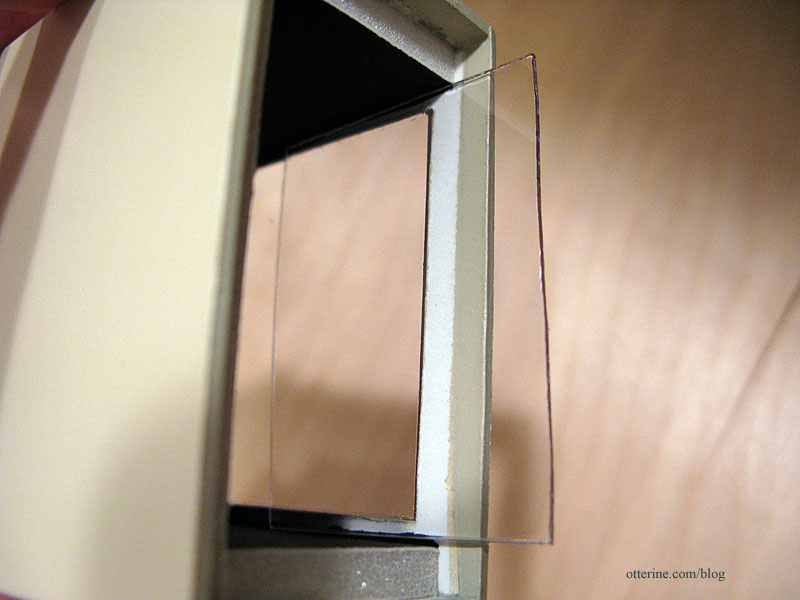
I cut a piece of acrylic sheet to fit the front opening.
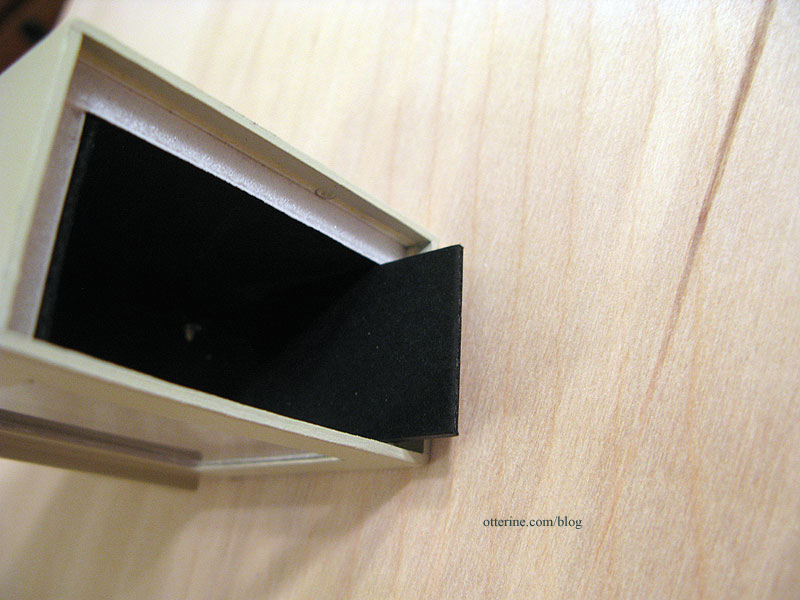
This fits using only tension, but I didn’t want to risk it coming loose. I cut a larger piece of acrylic to fit behind this piece.
It is held in place with two pieces of black mat board glued inside.
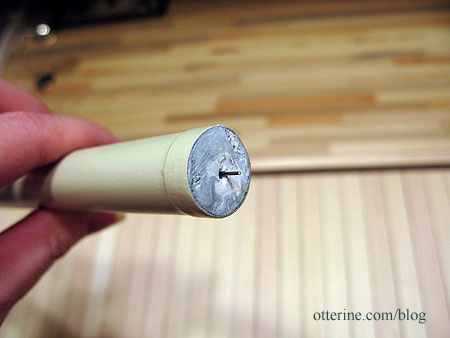
I then glued the door in place, added a round head pin for the bottom tray latch and fashioned a knob from a jewelry finding and flat head pin. While I was painting, the delicate parts of the door grille broke. I cut part of the design away to salvage the piece. It still looks like a planned design. Crisis averted! The stove pipe has a pin in the bottom that holds it in place on the stove.
It’s a little crooked here since there’s nothing to hold it straight.
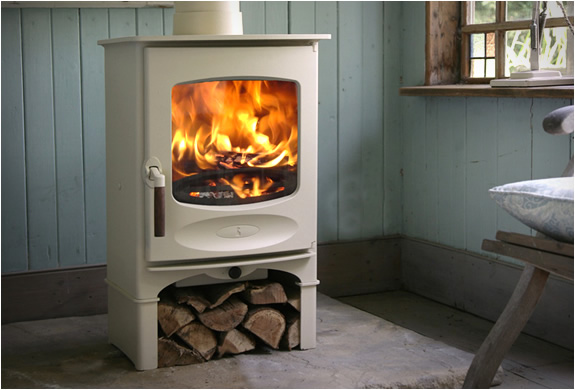
As a reminder, here is my inspiration piece from Charnwood.
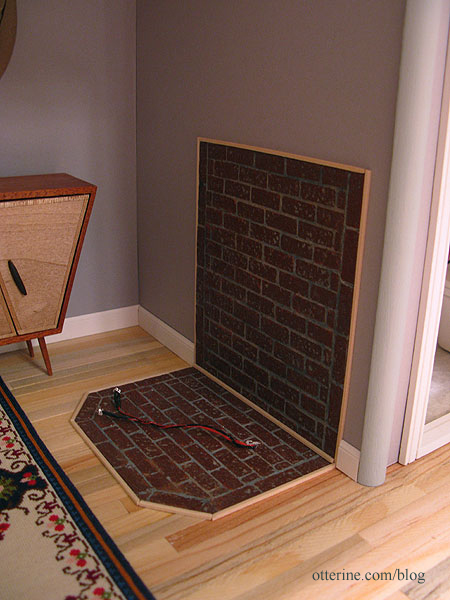
Inside the Studio, I glued in the brick hearth and trimmed it with 1/16″ x 1/16″ bass wood. I was able to add in the surrounding baseboards as well.
Here is my inspiration from hearth.com showing a partial brick wall.

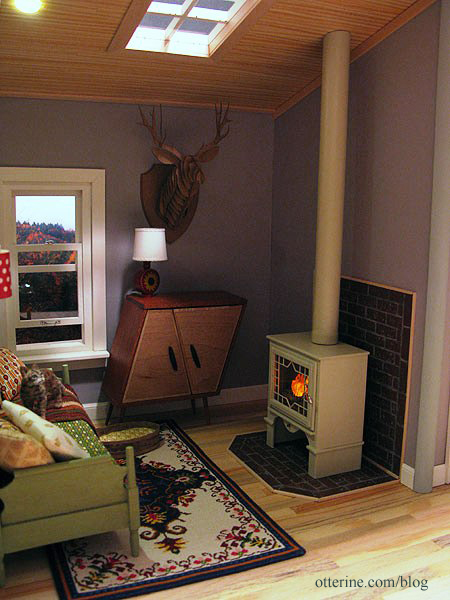
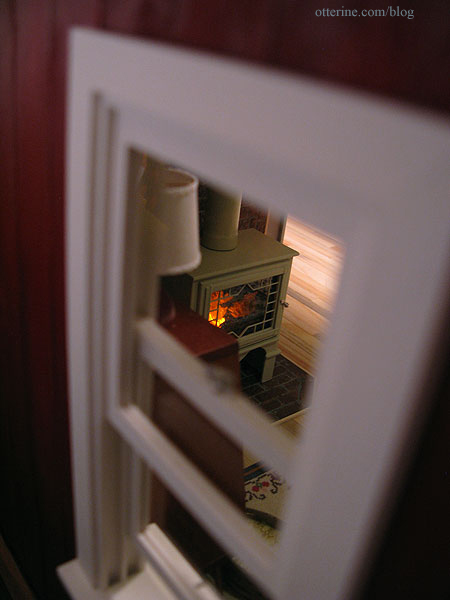
I fed the flickering LEDs into the stove and then into the resin fire. I put on the lid and set the stove in place. The stove pipe fits against the ceiling and holds the stove in place with tension alone. This is good in case I ever need to take it back out. :]
And, here it is! Love! As much as I adore red stoves, I’m so glad I went with the almond.
The firewood under the stove is one of my favorite details.
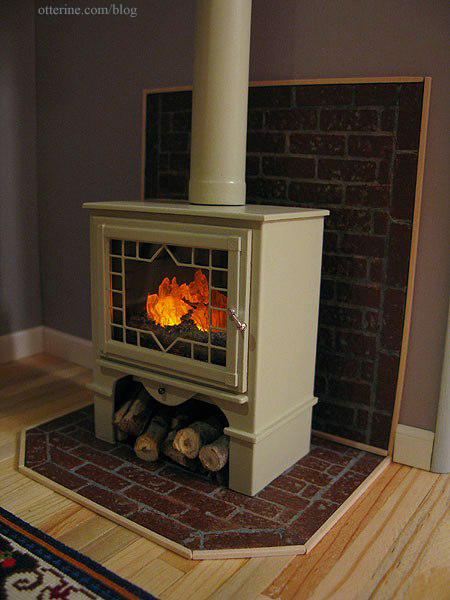
Looks cozy inside. :D
Categories: The Artist's Studio
April 15, 2013 | 0 commentsThe Artist’s Studio – Retaining wall, part 3
With the horizontal boards in place on the retaining wall, I glued the surrounding base boards from Mike. The next step was adding trim wood to finish the sides and back. I added 1/4″ x 1/16″ strip wood above the horizontal Woodsies planks. I then added various widths of trim around the top edge. For the back, I used some old Dura-Craft trim since it was the only wood I had on hand that fit in the space. It’s slightly different in color than the rest, but it won’t show in the end.
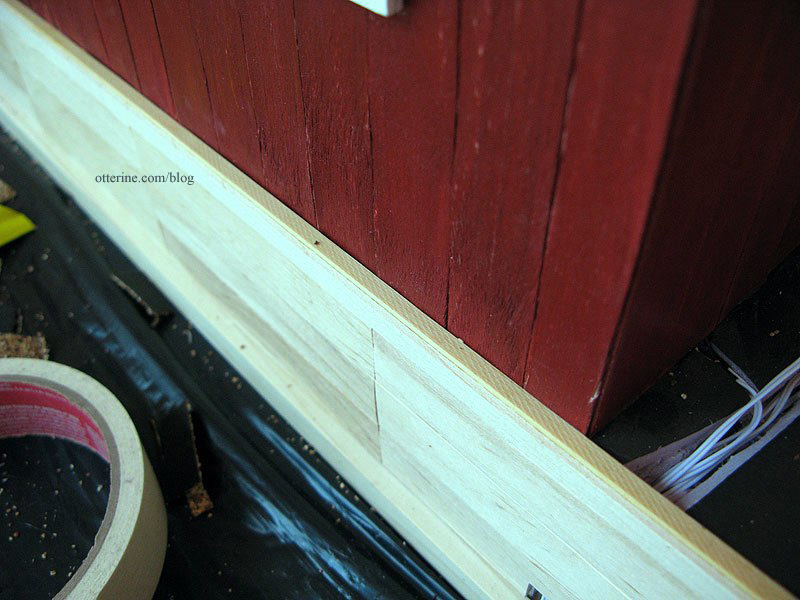
For the right and left sides, I used 1/8″ x 1/8″ trim up to the front drop of the retaining wall.
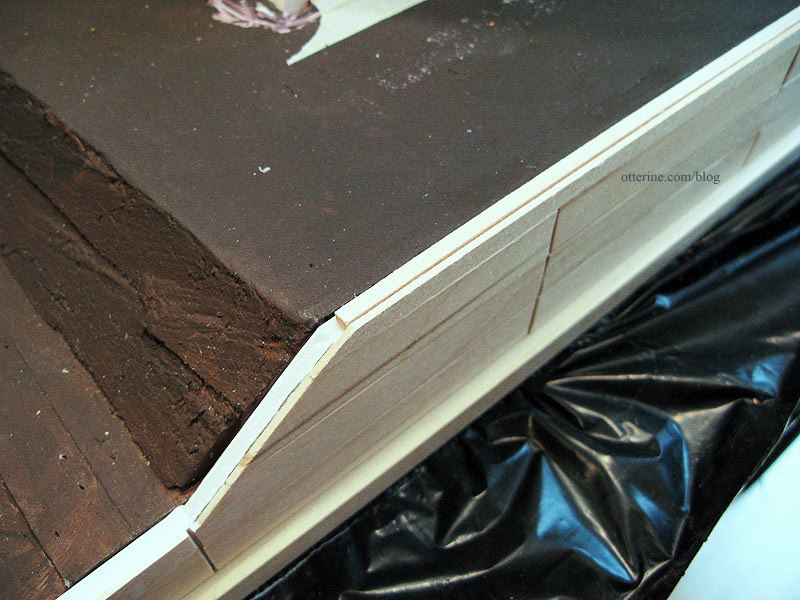
Over these edges, I added corner trim. I continued down the front of the retaining wall, cutting the angles with my scroll saw. They aren’t the cleanest joins, but they won’t be obvious once stained.
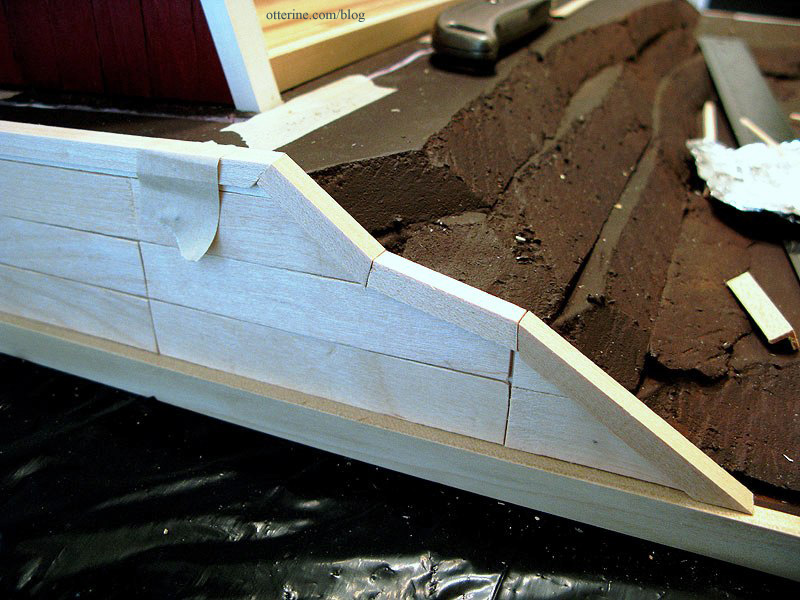
For the two rear corners, I added corner trim to finish the edges. I’ll add something decorative to finish the top corner later.
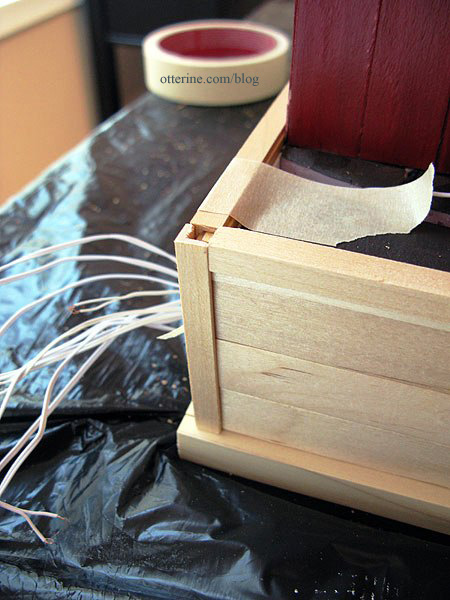
I cut vertical posts from 1/4″ x 1/16″ strip wood and glued them over the seams between the horizontal boards at 4″ on center intervals.
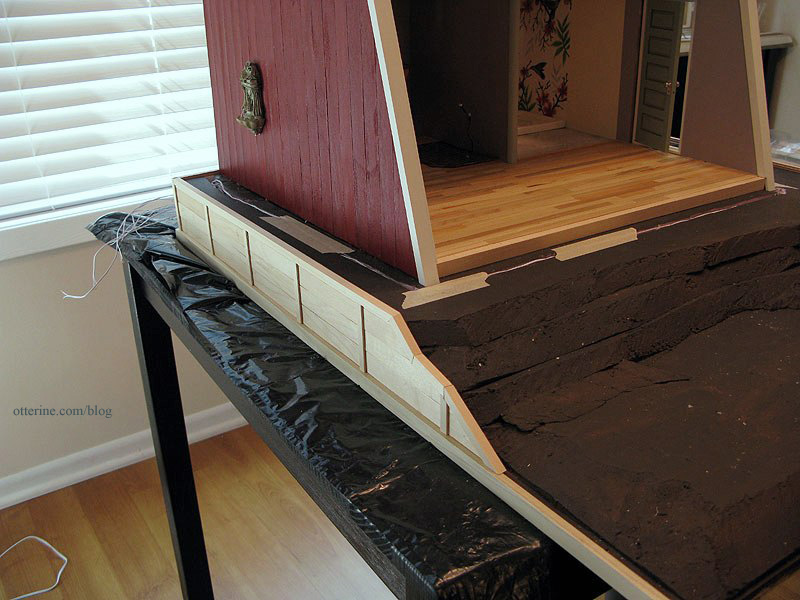
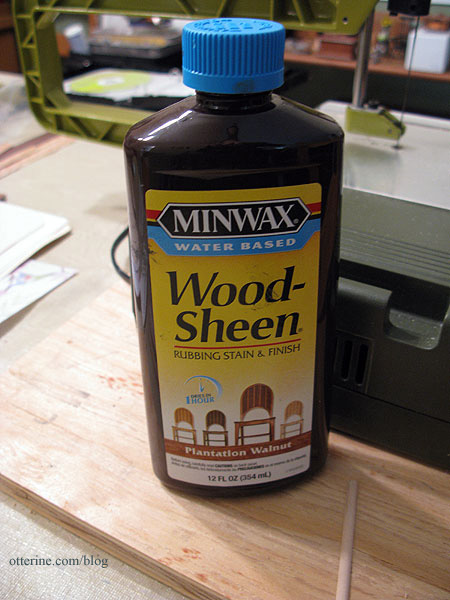
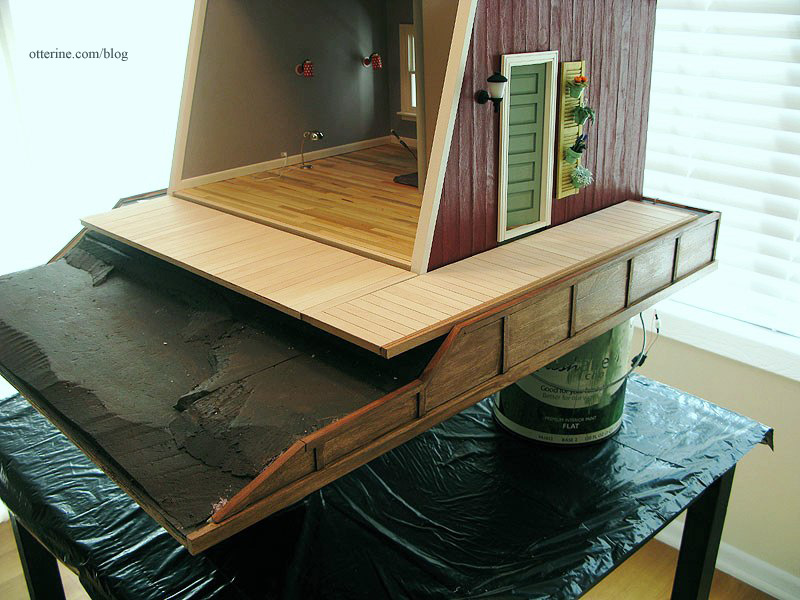
I stained the retaining wall with Minwax Wood-Sheen rubbing stain and finish in Plantation Walnut. I had purchased this on clearance awhile ago, and it works well. :]
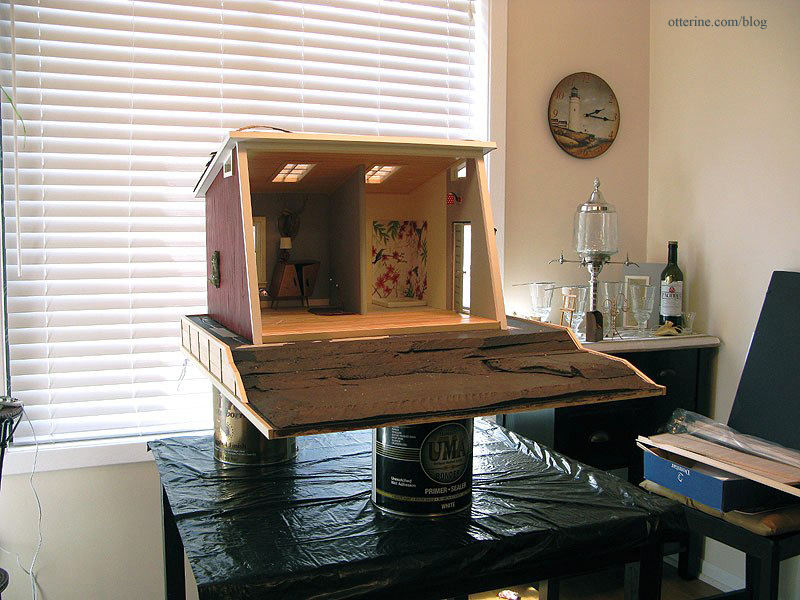
I propped the Studio up on paint cans so I could apply the stain evenly around the base. The front board will be stained separately and added after landscaping.
I taped off the wires in the back to keep from getting stain on them.
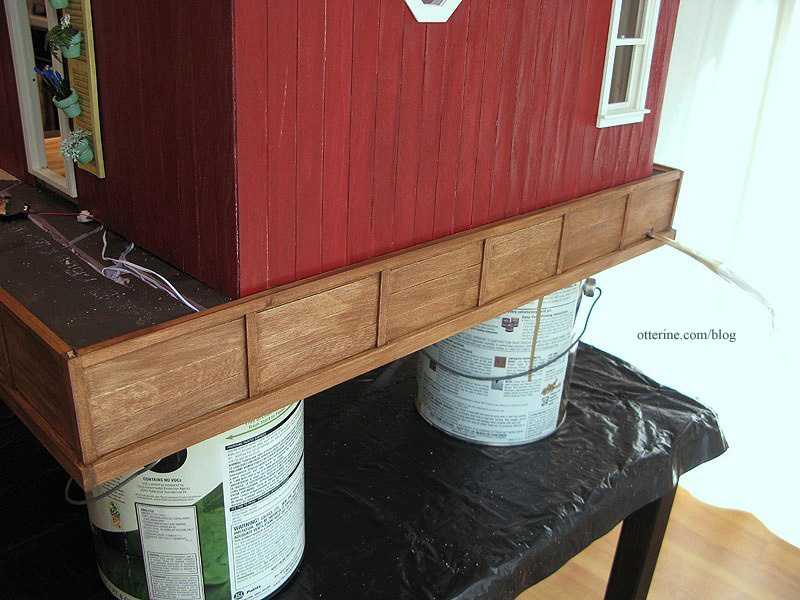
The walnut is a great color with the red. (Yes, I’ve started shingling the roof.)

And, it will coordinate well with the walnut trim around the deck.
Categories: The Artist's Studio
April 14, 2013 | 0 commentsThe Artist’s Studio – Hummingbird shower part 2
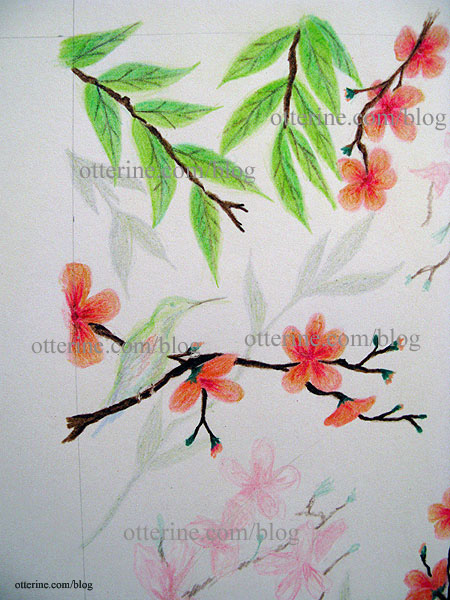
Since my initial sketch worked well for concept and composition, I’ve started filling in the final colors. I started with the leaves since I’m rather out of practice for drawing and they are the simplest part of the design.
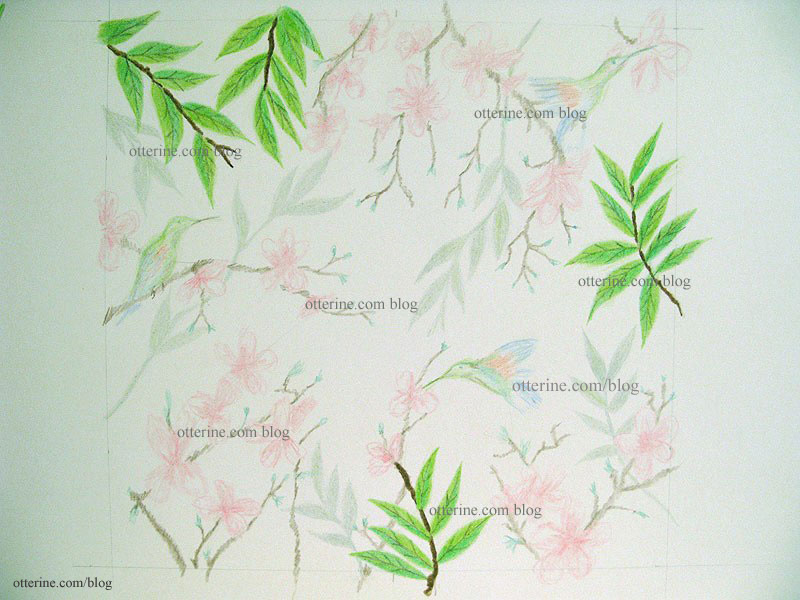
Here’s the initial sketch for comparison. I’m coloring right over the previously drawn areas.
I did all of the leaves, including the shadowy branches, at the same time. This gave me a better chance of having them turn out similarly. If I did a portion of the drawing in one sitting and then another later, my technique, pressure or lighting might be different. Once I have the drawing filled in completely, I can go back and make shading adjustments.
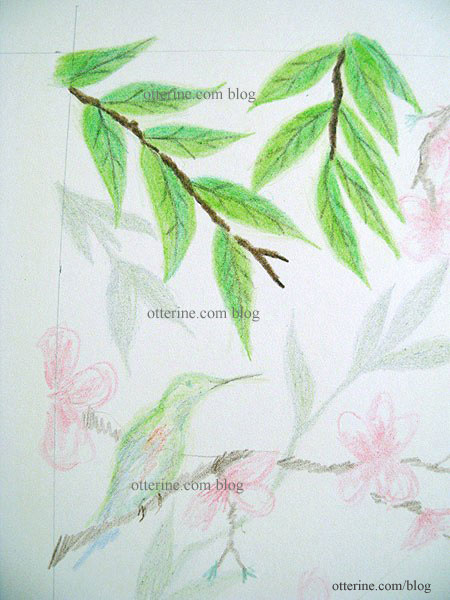
I started working on the flowering branches. Since I knew I wouldn’t be able to draw them all in one sitting, I decided to move around the drawing. If the remaining flowers end up looking a little different, at least they won’t be concentrated in one part of the drawing.
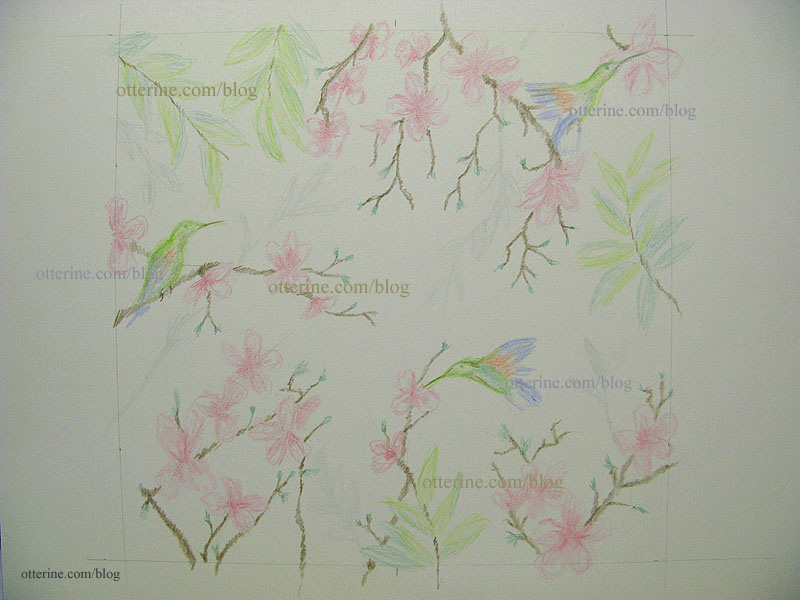
My flowers are more orange-pink than pure red pink like the inspiration art. I like that, though. Besides, once this drawing is scanned, printed and manipulated to look like tile, the colors will likely be more subdued than the original drawing. See I left room for tiny bird feet?
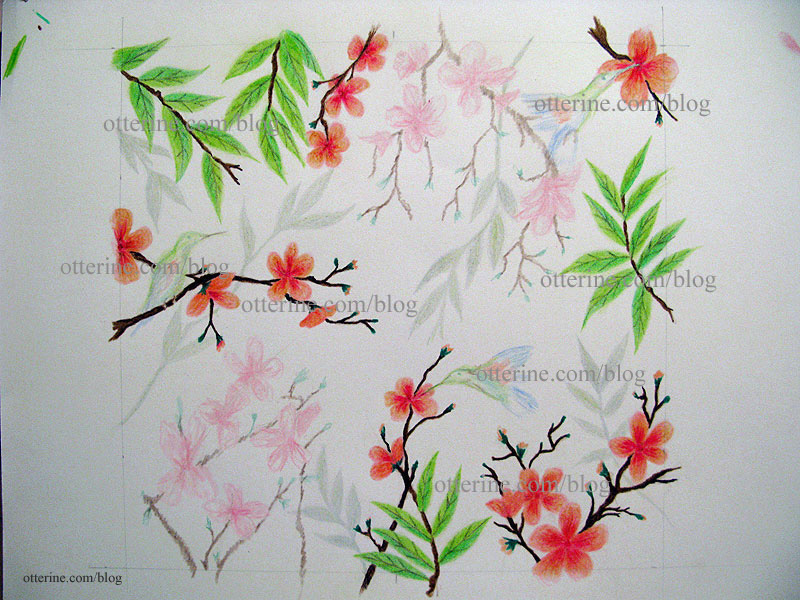
I finished the remaining flowers, though this time I went with a lighter touch. This brings the first flowering branches forward and gives some depth to the drawing.
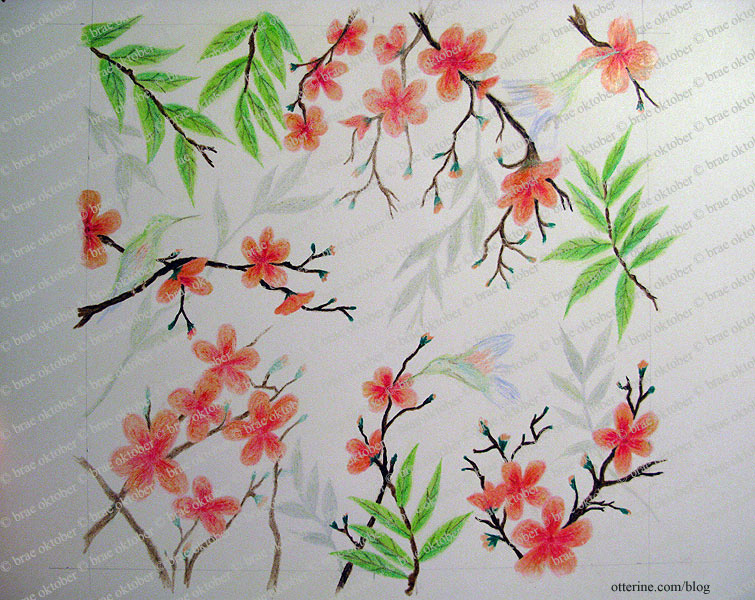
I decided to just wing it (ha) and draw the birds right on the drawing without a practice run. The drawing for the mural is now complete.
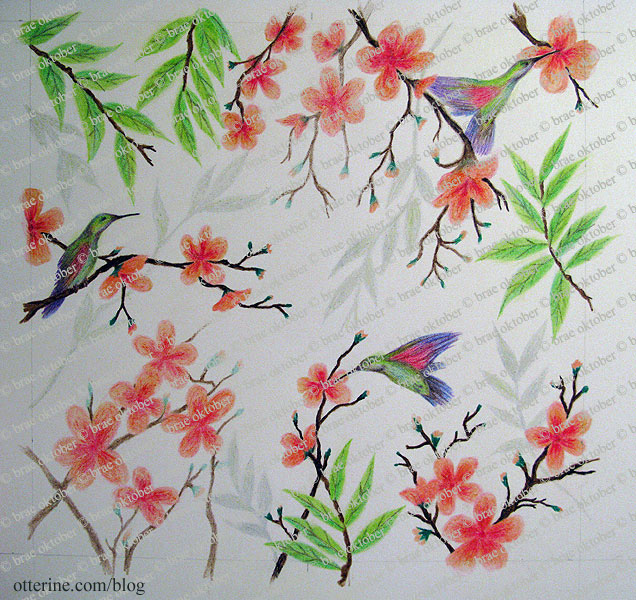
I did look at real life hummingbird pictures but continued the soft artistic feeling of the flowers and leaves in drawing the birds. They are colorful and turned out better than I had expected.
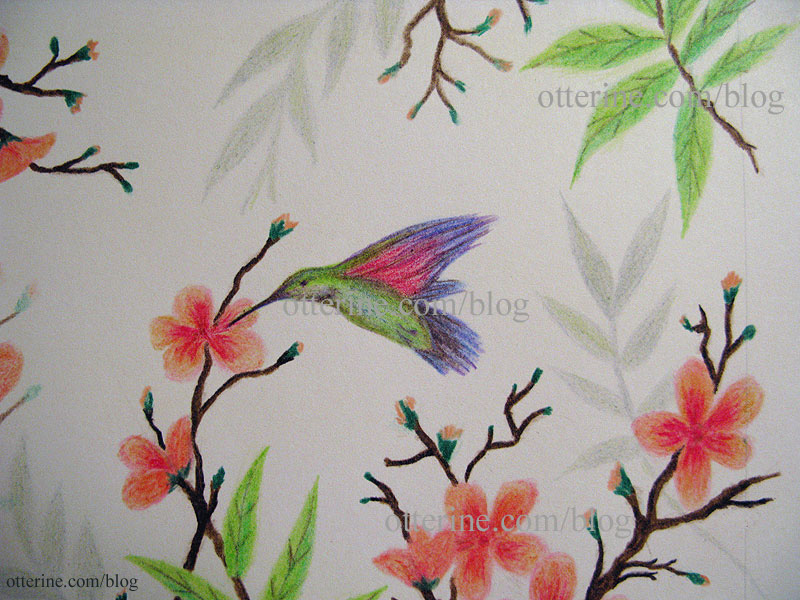
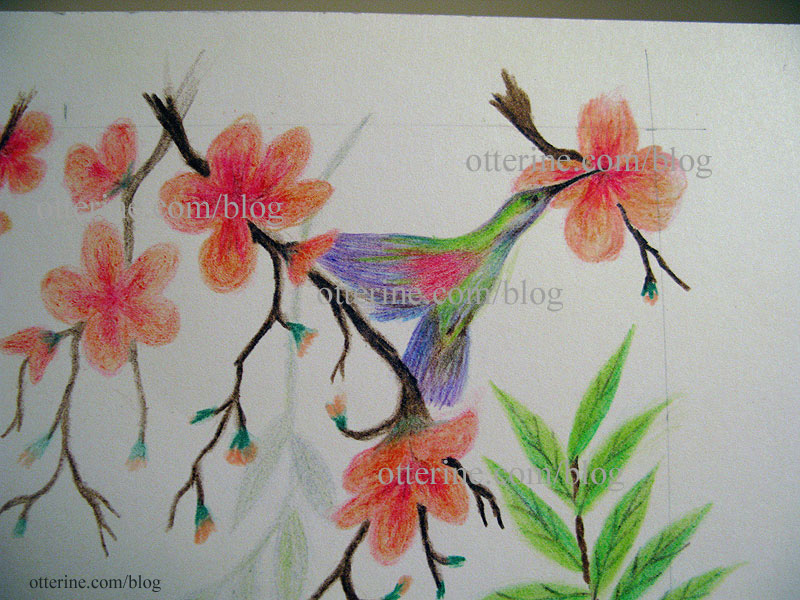
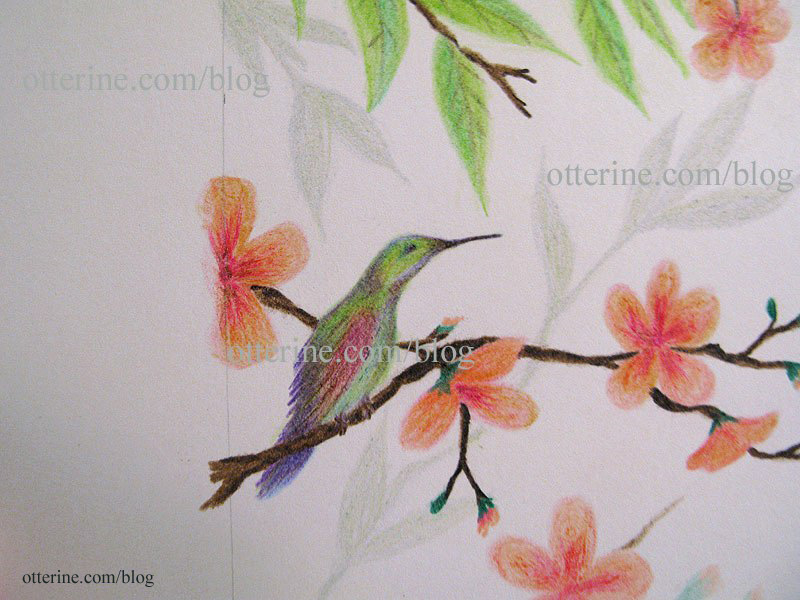
I made a quick scan and printout for mockup purposes. The end print will be softer than this one, but I love it!
Next up — turning it into tile.
Categories: The Artist's Studio
April 13, 2013 | 0 commentsFrom the sea, over the sea…all for me!!!
Look at the adorable sea otter plush Marion sent to me!!! :D He’s so well made and soft, standing at 2 7/8″ tall.

He’s poseable, too!

Here he is admiring his snazzy tie in the mirror. Of course I’ve named him Seymour.

He makes me smile. He was meant for the Heritage attic, but he might have to get his own abode some day. :D
I’m so overjoyed, Marion!!! Thank you so much for your beautiful gift and your wonderful friendship! Be sure to check out Marion’s miniature rooms, though she’s had to put them on hold for awhile.
Categories: Animals and birds
April 13, 2013 | 0 comments


NOTE: All content on otterine.com is copyrighted and may not be reproduced in part or in whole. It takes a lot of time and effort to write and photograph for my blog. Please ask permission before reproducing any of my content. Please click for copyright notice and Pinterest use.


