
Sailboat and starfish planter
The inspiration pieces for these two tiny accessories I’ve just made were found from links on Completely Coastal. If you love anything beachy, that is the place to go!
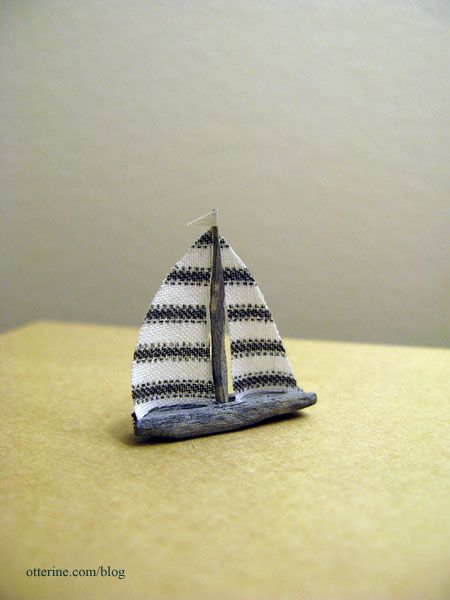
The first is a 1:12 scale replica of a driftwood sailboat made from scraps from my wood bin. The fabric is a ticking stripe pattern that I had attempted to recreate by printing on fabric, but my scale was too large for what I envisioned so I didn’t end up using it. But, for this project, I thought it fit wonderfully.
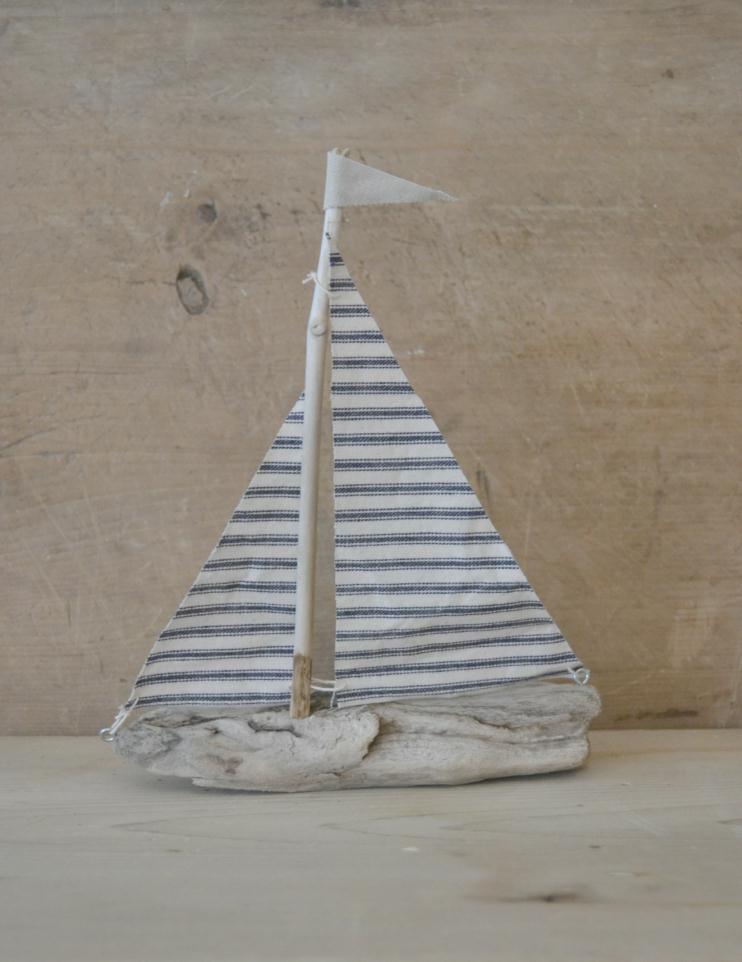
I first saw this on The Lettered Cottage, and the real life size one is from White Flower Farmhouse.
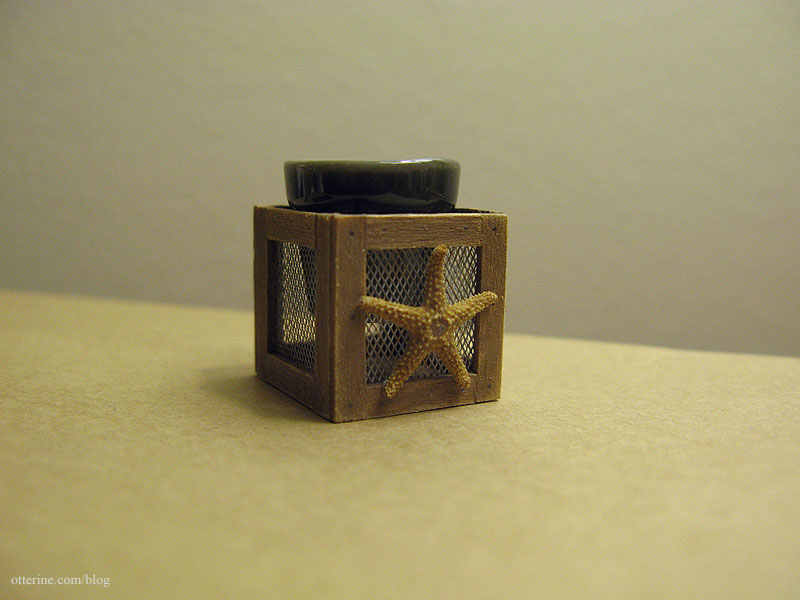
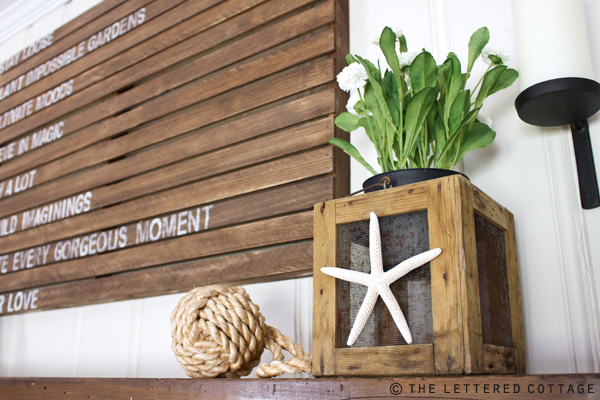
the original inspiration The other item was inspired by a starfish planter I also saw on The Lettered Cottage (see more on the original here) made from a vintage cricket cage. I made mine out of 1/32″ thick bass wood, wire mesh and a ceramic planter from Manor House Minis. My cage measures 3/4″ square. That’s an actual tiny starfish from Marco Island Shells. I chose to leave the starfish unpainted to preserve its natural beauty.
I love the creativity of the original.
the original inspiration Categories: Baxter Pointe Villa, Miniatures
June 20, 2011 | 0 commentsIs it drafty in here?
I love how the front door turned out! I primed the whole assembly with white acrylic and then painted the front of the door with Robin’s Egg Blue from Jo-Ann Craft Essentials (left over from the mirror in the Newport hallway). The interior I left white.
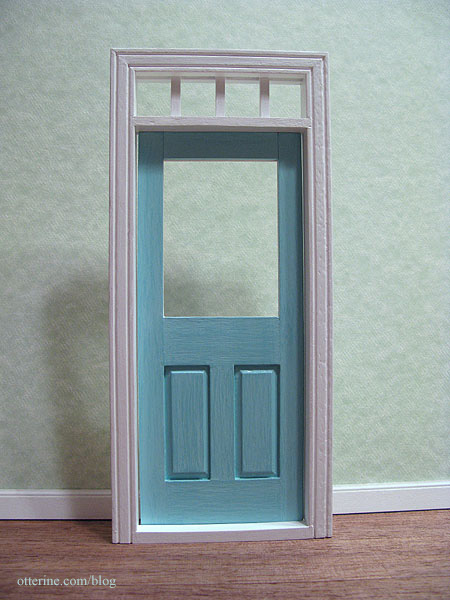
But something seemed off to me…then I noticed the gaps all around the door.
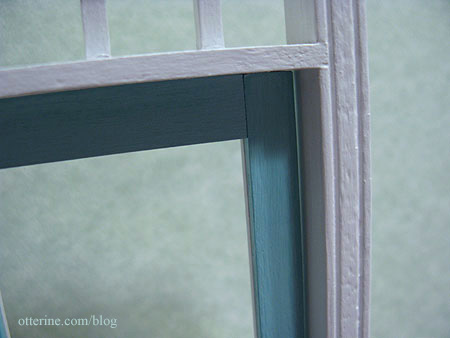
To fix this problem, I cut strips of 1/16″ x 3/32″ bass wood to create an inner frame.
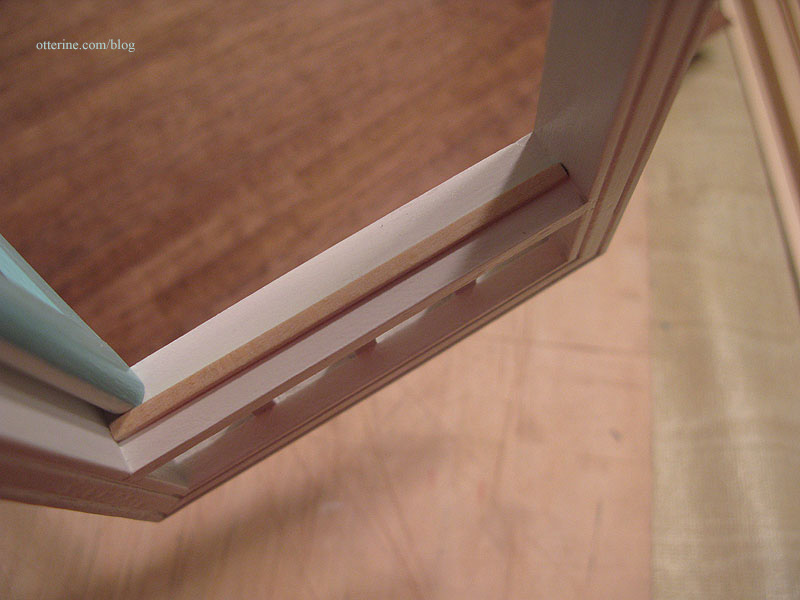
Could I have noticed this before I had the whole thing painted and sealed? No, that would have interfered with my master plan to do things the hard way. :D
I painted the inner frame white to match the rest of the door frame. Ah, much better…
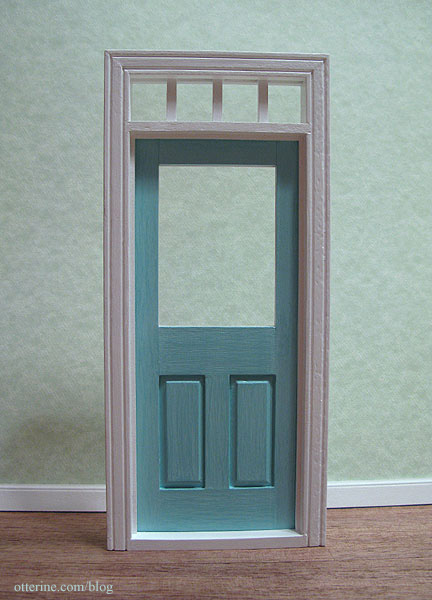
For the record, this door was a bit damaged and rough when I bought it…but I didn’t repair it past sanding a bit. I wanted it to look weathered but in reasonably good shape as though it gets a fair amount of wear but the homeowners try to keep up with the painting. :]
Categories: Miniatures
May 21, 2011 | 0 commentsDollhouse miniature ice cubes
There are so many creative people out there who are incredibly generous to share their ideas on homemade and often inexpensive minis. The first time I saw mini ice cubes made from suction cups on My Small Obsession, I was amazed at how realistic they looked.
So, I went to the dollar store and bought a pack of suction cups. I cut them into strips and then into tiny cubes. I didn’t measure or try to make them perfect. In fact, I used all but the thinnest edge of the cups and tried to vary the size and shape. I wanted them to look like full cubes, broken cubes and shards. This is the amount of ice two 1 5/8″ diameter suction cups made.

The ones I bought were a bit bluish in tone, and my ice cubes also turned out to be on the blue side. I worried that this might detract from their realism until I added a couple of mini beer bottles to a tub full of them. :D I think they look wonderful!

Categories: Miniatures
April 12, 2011 | 0 commentsVintage crochet throw blanket
I am ever in awe of those who can crochet in miniature. I have the patience for needlework, but I don’t think I could wrap my mind around using sewing thread as yarn with a tiny crochet hook well enough to produce anything close to resembling the works of art Mary of Roslyn Treasures makes.
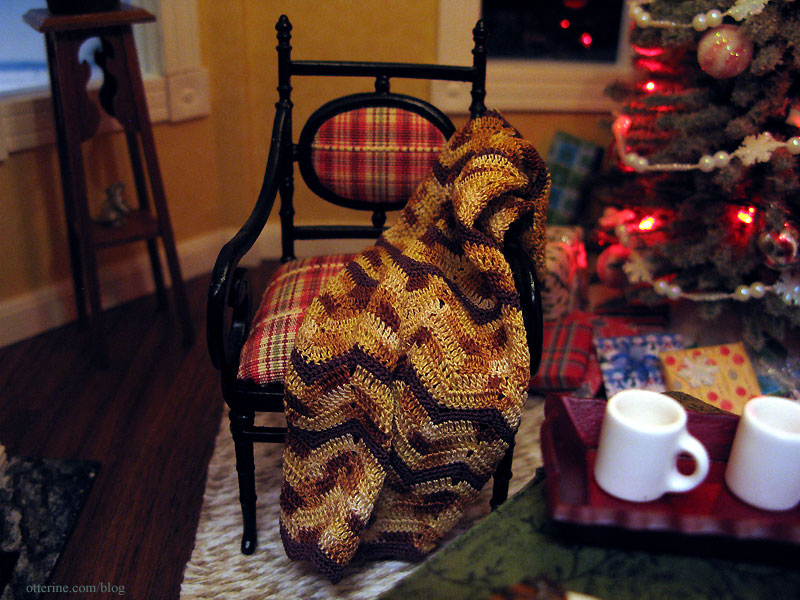
After admiring her work for close to a year, I bought myself an early Christmas present…one of her fabulous miniature crochet blankets, just like the ones my grandma and great grandma used to make (mom still has one of the life sized ones).
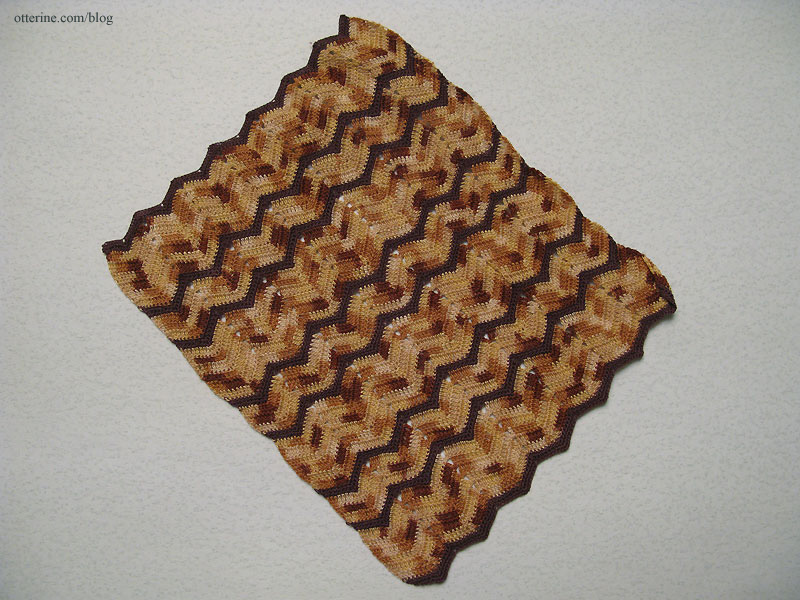
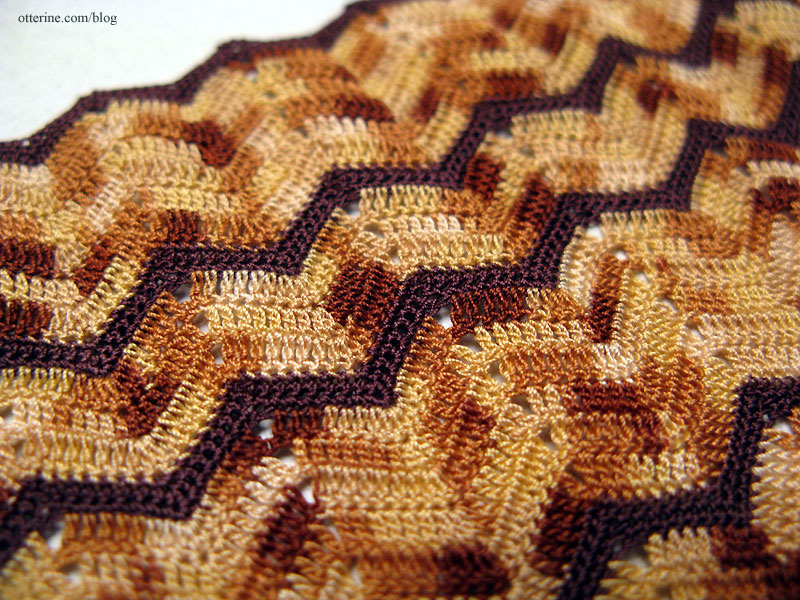
Mary does flawless work. Magnified, the stitches are indiscernible from a real life sized blanket.
And, her creations drape so realistically.
Categories: Miniatures
December 14, 2010 | 0 commentsCafé shutters
This tutorial ran in the September 2010 Greenleaf Gazette. :D For those who missed it, here it is in its entirety.
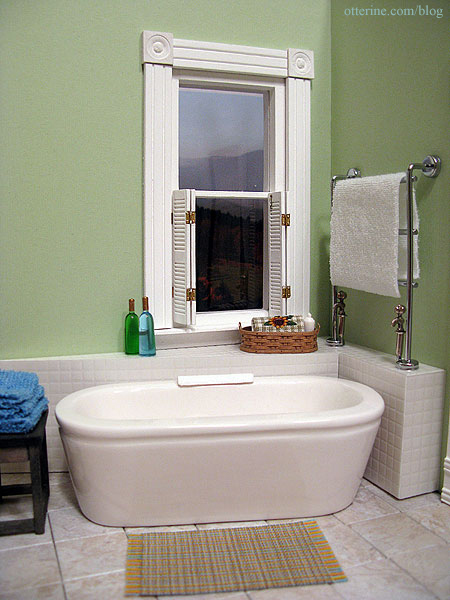
For the master bathroom, the need for privacy while bathing was a must. In order to stick with the clean lines of the room so far, I decided to make some café shutters for the bottom halves of the windows.
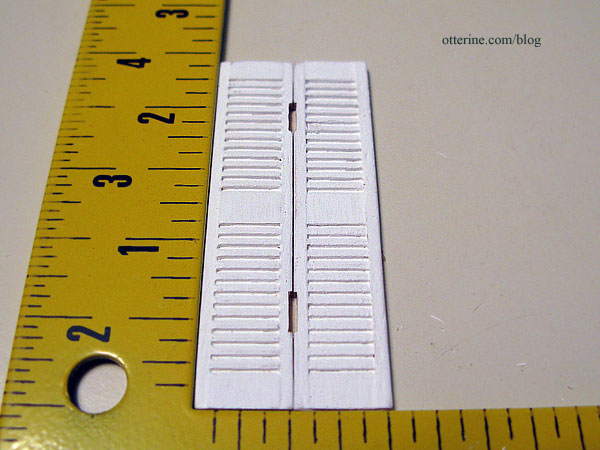
I started with half scale window shutters from Houseworks. Each one measures approximately 1/2″ x 2 1/2″. Four of them lined up side by side are just about the right fit for the standard windows of the Newport. If you wanted the look of café shutters without the work of putting the hinges on them, you could paint them, glue them together along the edges and glue them as a single piece to the window frame.
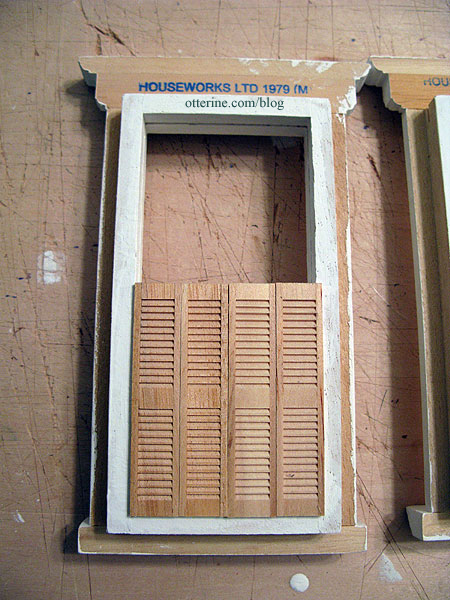
I painted the shutters white, including the plain (non-louvered) backs. Once dry, I sanded them before putting on a second coat.
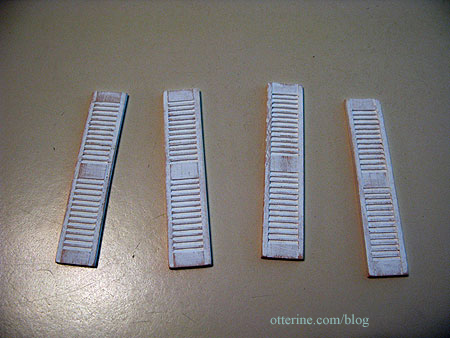
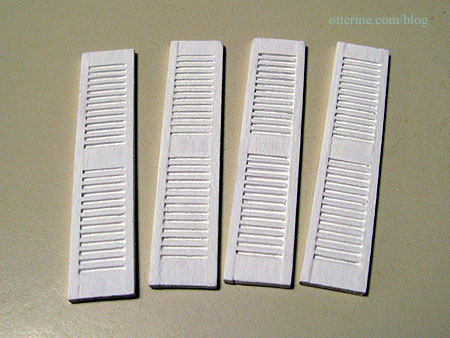
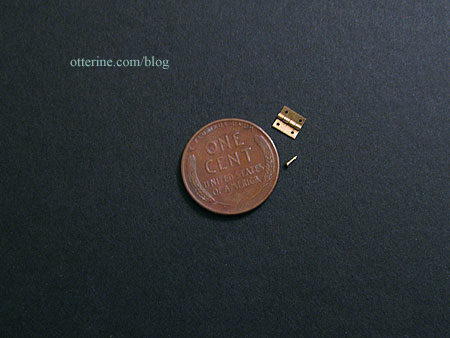
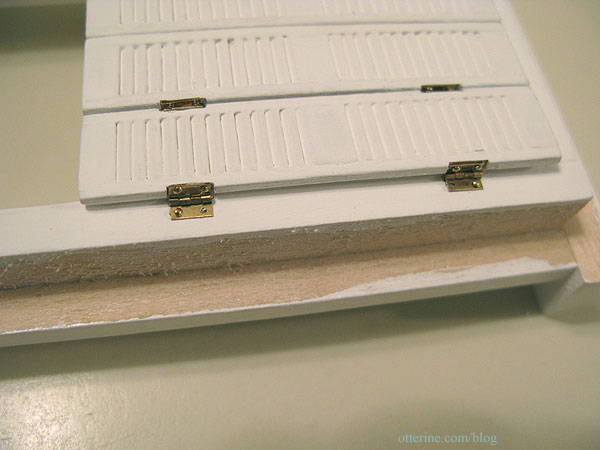
In order to make the shutters functional, I used eight very tiny hinges per window; they each measure 3/16″ square when open. They have incredibly tiny nails as well. I recommend working in an area where you won’t easily misplace them (spoken from experience). Cats get very curious about you when you are scrounging on the floor on all fours, but they are not much help. I did find the wayward nail, by the way…all four times!
Lining up two shutters with the louvers going the same direction, I marked the hinge placement 1/2″ from each end.
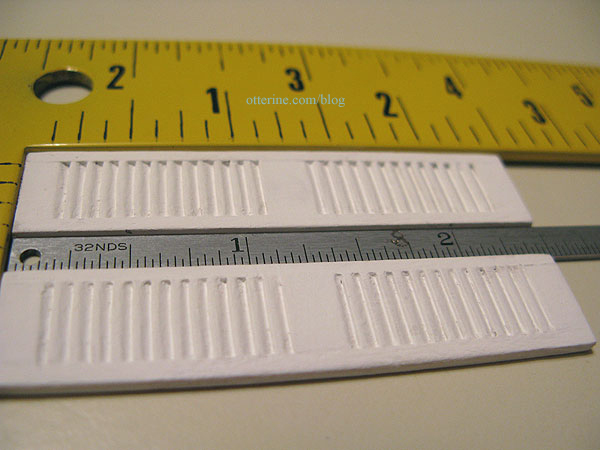
I used a tiny hand drill to make shallow pilot holes.
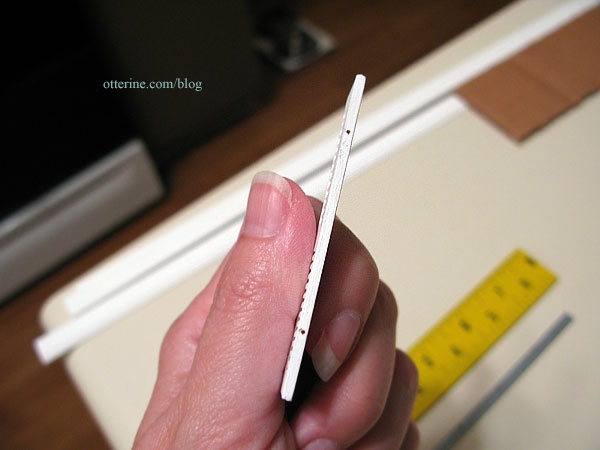
I cut out an indentation in the sides to allow for a recessed fit for each hinge, otherwise there would be gaps between the shutters and they would no longer fit the window width correctly.
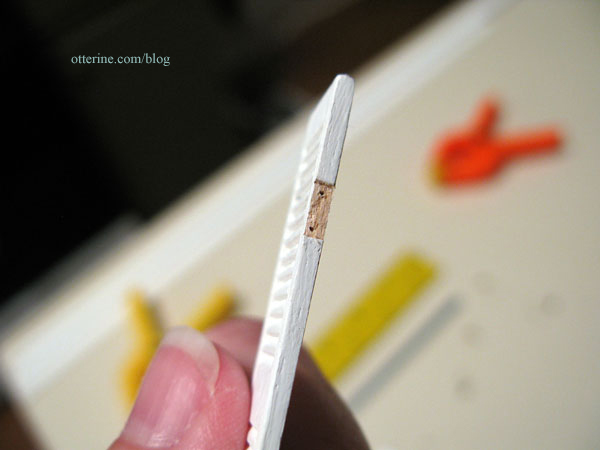
Holding the two shutters side by side and aligned top to bottom (plain backs together, with louvers on the fronts going the same direction), I copied the indentations and nail placement onto the second shutter.
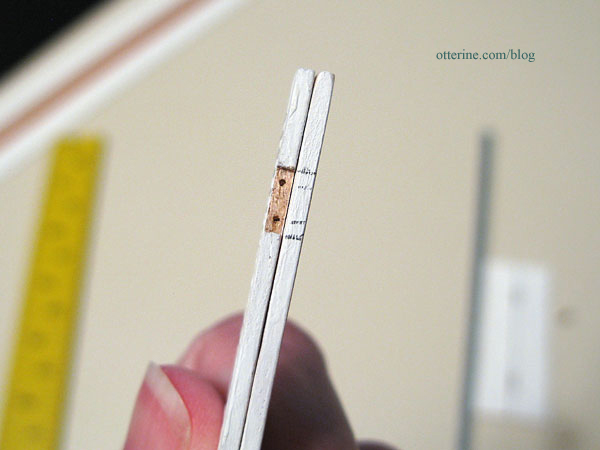
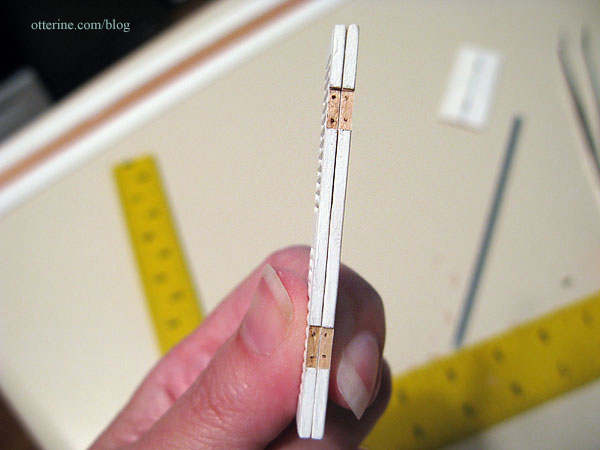
After putting a tiny dab of clear gel glue on each nail and inside the indentation, I pressed the nails into place using tweezers. Be careful not to mar the opposite side by squeezing too hard or at the wrong angle (also spoken from experience). But, that’s what spackle is for!
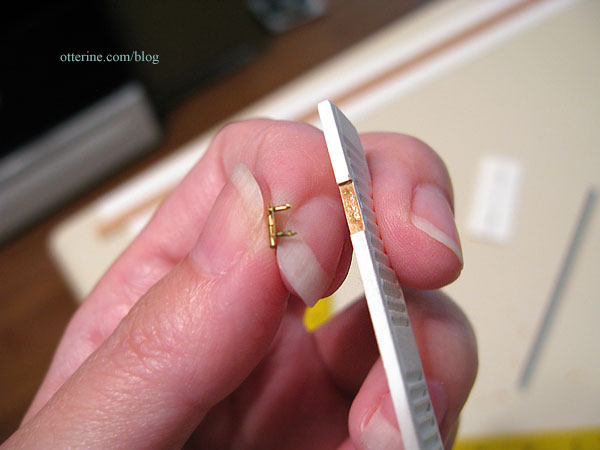
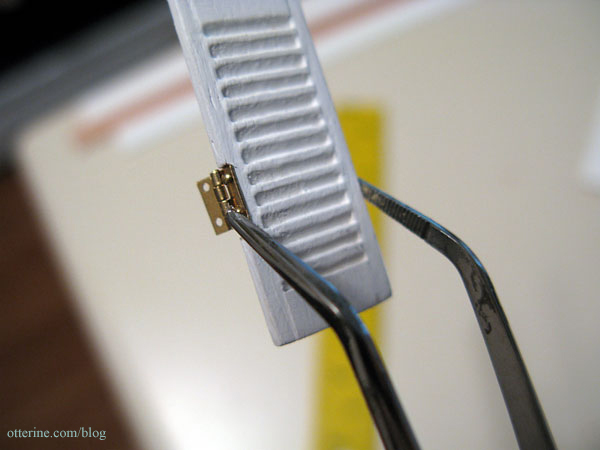
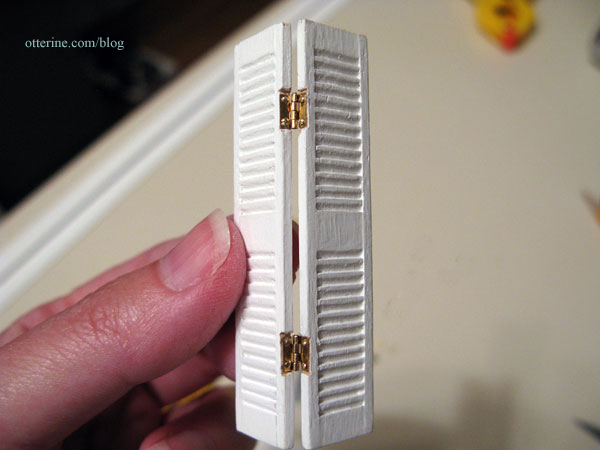
Attaching the hinges takes time and a lot of patience. I attached the first set of two shutters in one long sitting and then came back to the project the following night. Remarkably, it took considerably less time and effort for the second set. When doing the second set, make sure the louvers are going in the same direction as your first set.
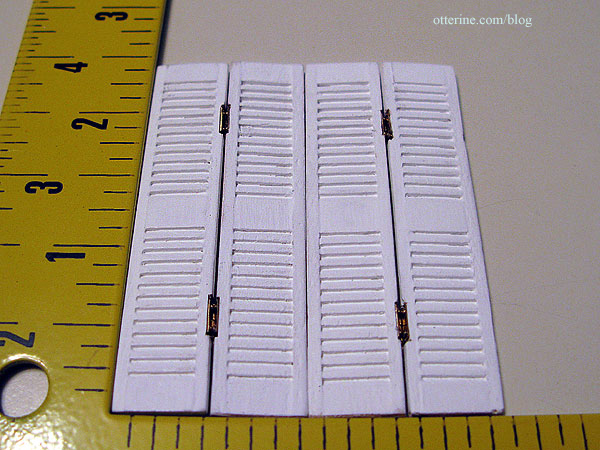
After the hinges were in place on both sets, I touched up any imperfections in the finish. I finished the bathroom window inside and out. Your window may or may not need to be installed before attaching the shutters, depending on your structure. In my case, I was able to work on the window while separate from the house.
Next, the two outer hinges were attached using the same process as the inner hinges: pilot holes were drilled, notches were cut out, small dabs of glue were put on the nails and the nails were pressed in place.
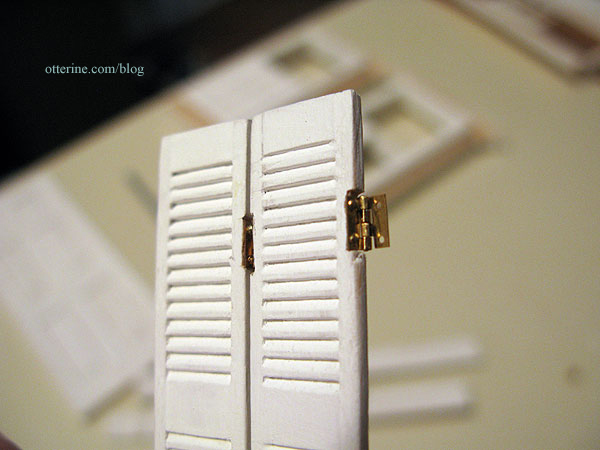
I placed the hinged shutter assembly on the window with the non-hinged side lined up with the center of the window and the top edges of the shutters flush with the board across the middle of the window. If your window doesn’t have this feature, you may need to add one for stability.
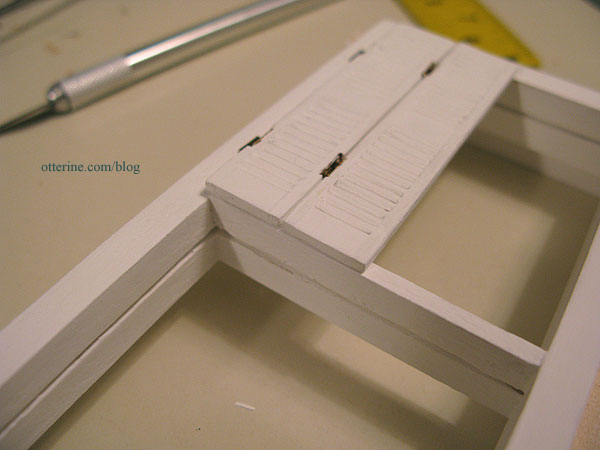
I marked the nail holes for the hinges on the side pane. I drilled pilot holes for the nails and cut out a thin indentation to allow for better movement of the hinge.
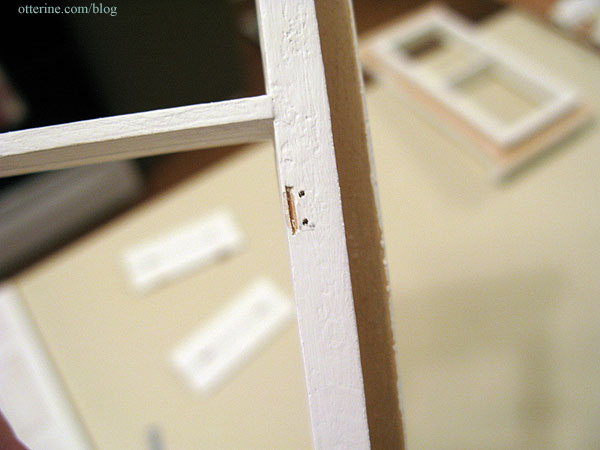
After putting a tiny dab of glue on the nail, I attached the hinges to the pane using the end of the tweezers to press the nails in.
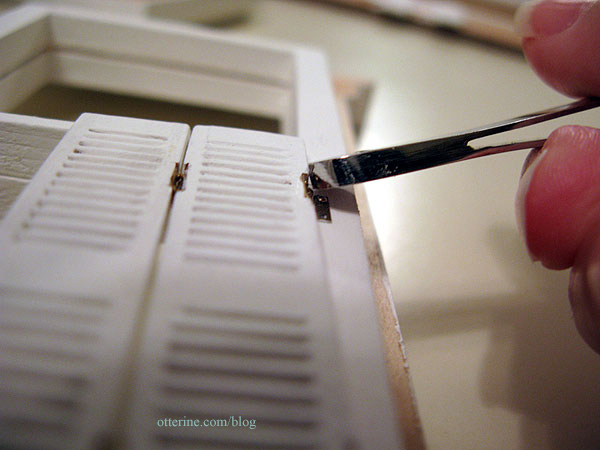
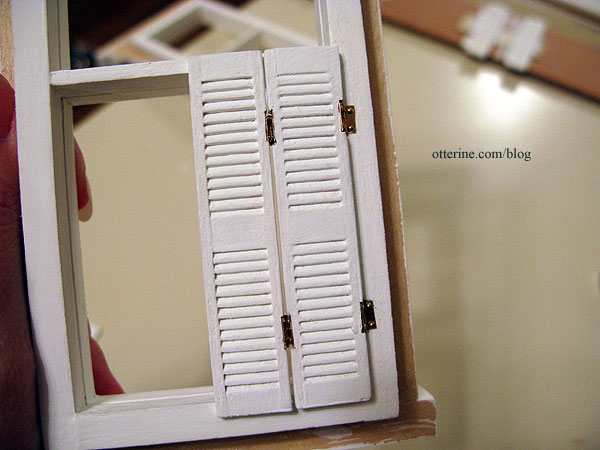
The assembly should open smoothly. These assemblies need to be treated gently – the hinges are tiny and can be easily bent.
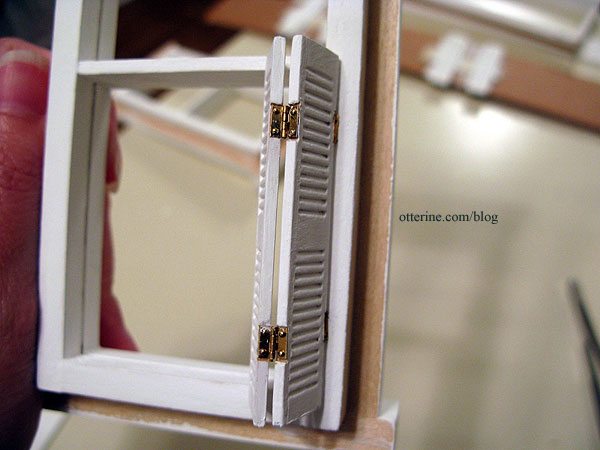
Making sure the louvers of the second set were going the same direction as the first, I attached the outer hinges on the second set. After butting the center edges together, I marked the hinge placement on the pane. To keep the whole assembly from shifting, I pressed in the top and bottom nails first.
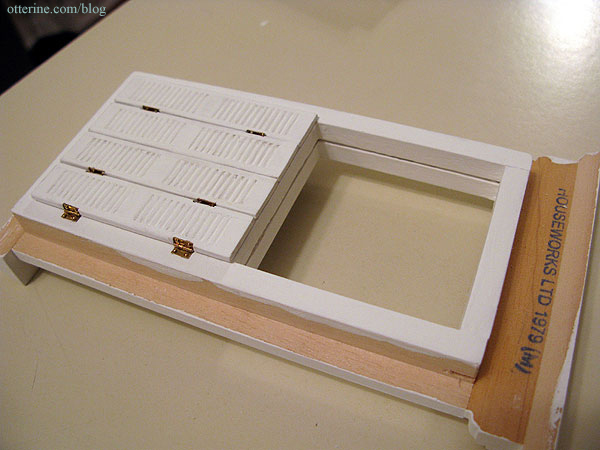
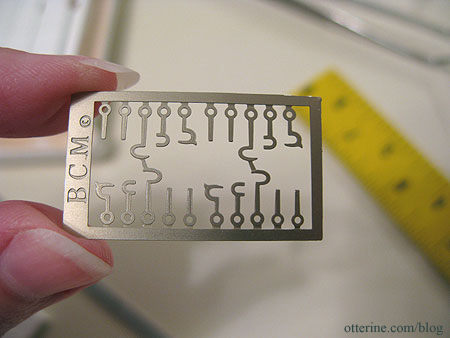
For the finishing hardware, I used laser cut brass hooks and eyes from The Ironworks (website appears to be defunct as of 2024). Closures can be fashioned from wire as well.
I bought extra hinges and one of them was bent on arrival – instant extra nails! I used one of those extra hinge nails to attach the hook, leaving a bit of slack so it would turn freely. I had to cut the eye pin short since its length was longer than my shutter thickness. I used the tip of an X-Acto blade to make an incision and then glued the eye in place.
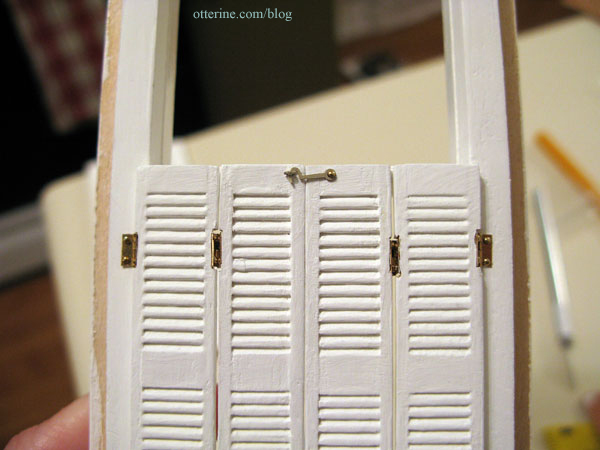
Once the window was installed, I added the interior trim while making sure there would be ample room for the shutters to open and close.
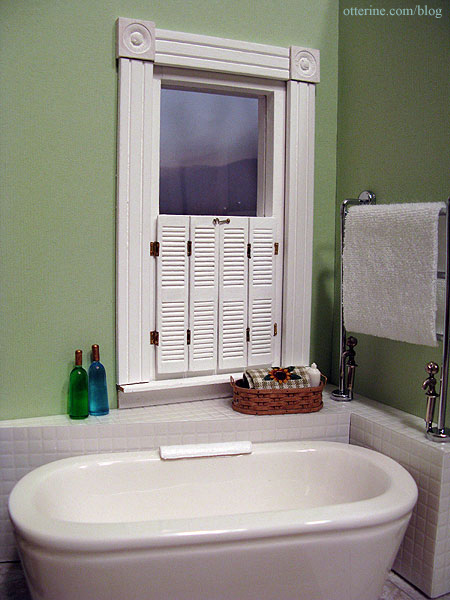
And open…
Categories: Miniatures
October 17, 2010 | 0 commentsHard wiring table lamps
For the usual light fixtures — wall lights and ceiling lights — the wires are usually easy to hide. Holes are drilled through boards and channels are made to hide the wires.

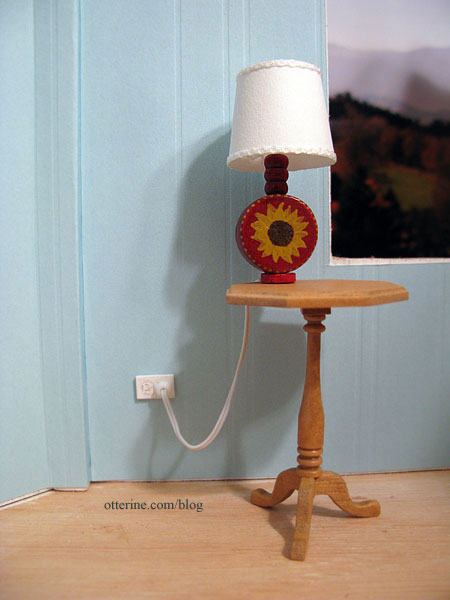
The same thing can be done with table lamps, but what about the times when there isn’t a piece of furniture to hide where the wire enters the wall? In the guest room, I had just this situation; the table next to the bed had a thin base. I could have pulled the wire behind the bed and hid it there, but where’s the fun in that? :D
So, I decided to make a mock outlet. First, I slipped a white bead onto the lamp wire; this will mimic a plug.

I cut a channel in the wall behind the table to feed the wire up the wall and through the ceiling (eventually, when the ceiling is put on).

I cut a small hole in the wallpaper where I want my outlet to be, making sure it was in line with the wire channel.

I used a small piece of bass wood painted gloss white to mimic the outlet cover. For the “open” outlet, I drew on the outline, indented it a bit with an X-Acto knife and then brushed a bit more paint over the drawing. On the other side, I made a hole to feed the lamp wire through.

I slipped the outlet onto the wire behind the bead and then fed the wire through the hole in the wallpaper.

I determined the length of cord I wanted and taped the wire into the channel in the wall.

I glued the wallpaper in place, glued the outlet in position on the wall and then moved the bead to sit flush against the outlet cover.
Categories: Miniatures, The Newport
September 11, 2010 | 0 commentsScratch built table lamps
One of the bigger challenges in decorating a dollhouse in a more contemporary style is the limited amount of contemporary lamps and other accessories on the market. There are some modern fixtures, but most are brass or old-fashioned. The table lamp selection can be pretty good, but I wanted to see if I could custom build my own lamps.
I had the bases all figured out just from looking at real life and miniature lamps. Stack beads, feed a wire through, etc. Even making shades from paper seemed simple enough, but it was attaching the shades to the bases that had me scratching my head.
Store bought mini lamps usually have a plastic disk holding the bottom of the lamp shade. I could use acrylic disks, but I would be limited by the pre-cut size of them. Then I happened upon the handmade lamps by M Carmen at Mini Shabby. She had used a jewelry finding to hold her shade in place, and it looked like a great idea! I left her a comment on her blog, and she was kind enough to send me the information on where she found them.
The site was Bindels Ornaments, and let me tell you, they have great items and ideas! They sell components and kits for lights and accessories in small scale. They even have pages showing you how they built bottles, lights, trays and candlesticks from jewelry findings. I bought both the three-prong and four-prong findings, but I found the four-prong worked best for this particular project.
I started with a wood bead base, three copper colored beads, a NovaLyte LED and some miscellaneous jewelry findings.
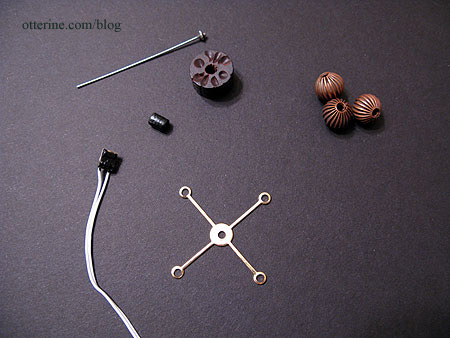
I first glued the three beads together, using a metal rod to keep them lined up as they dried. It’s not very stable, but it kept them from shifting around while working with them.
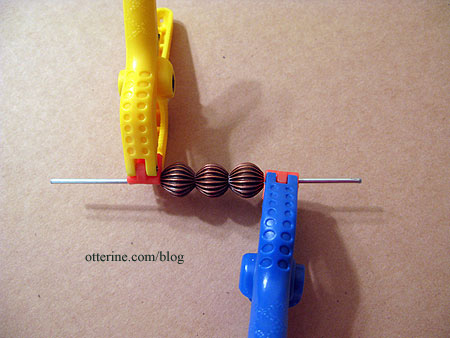
I glued the stack of three beads to the wood base. Again, the metal rod is only to keep things aligned and not glued inside the beads.
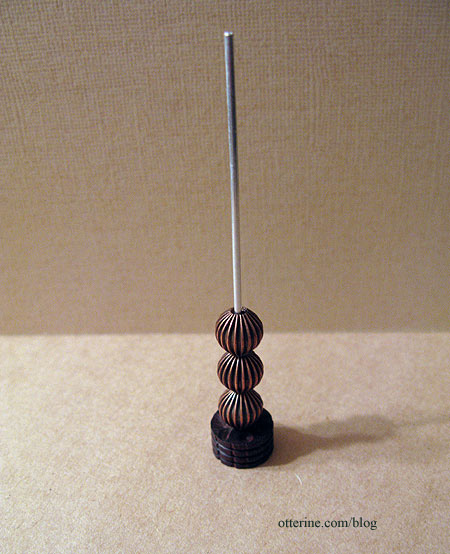
I had cut out a groove in the bottom to let the wire out the back and to keep the lamp bottom flat.
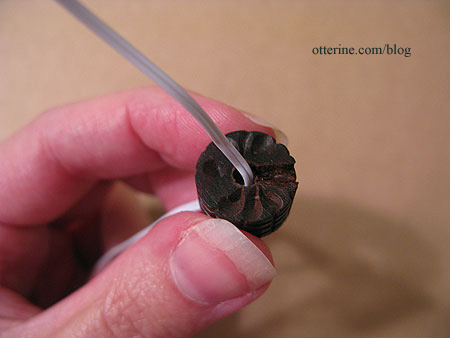
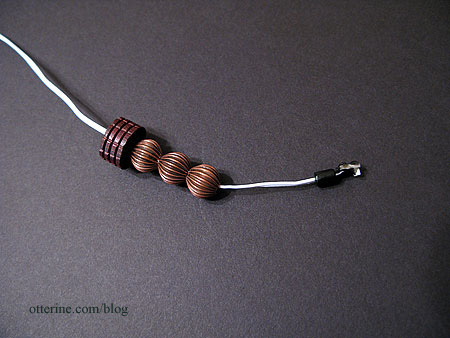
I fed a small black wood bead onto the LED wire and then fed the wire through the bead assembly.
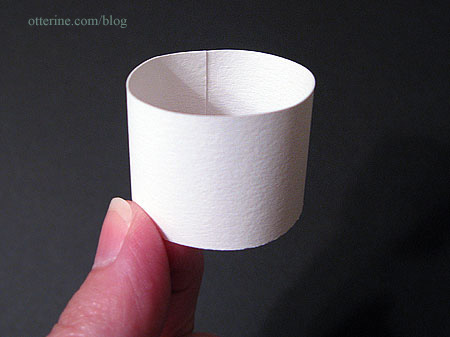
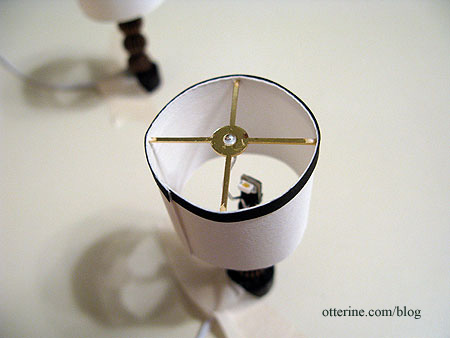
The shade is made from a strip of heavy paper 1″ wide and 4″ long, the ends lapped and glued.
I formed a holder from a fancy head pin and glued it inside the short black bead under the LED.
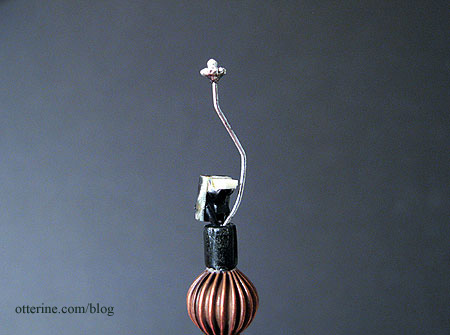
Unlike how M Carmen made her shade, though, I cut off the four circles on the jewelry finding and used it to support the top of the shade, not the middle. Since the four-prong holder showed when the light was on, I glued a strip of black quilling paper around the top edge of the paper shade.
Here are the two lamps on either side of the master bed.
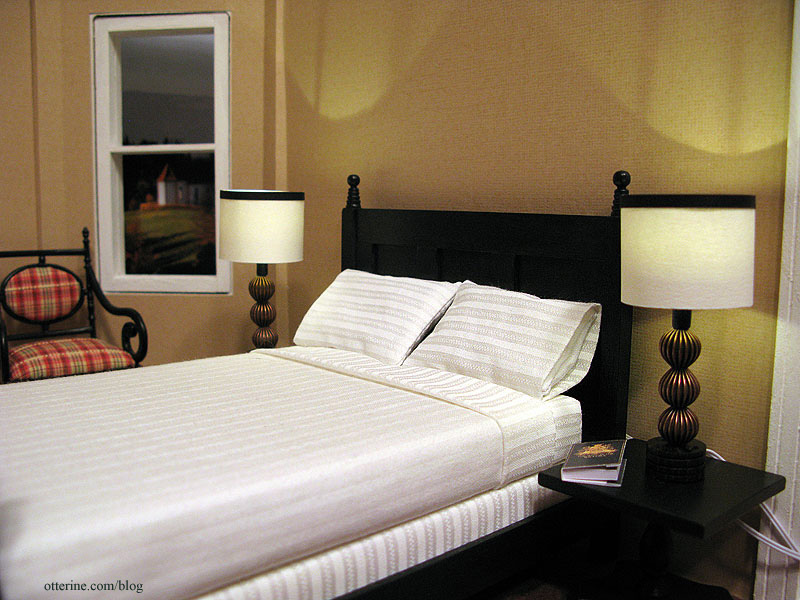
I love the way they turned out, and the LEDs provide great light not usually seen in miniature lamps.
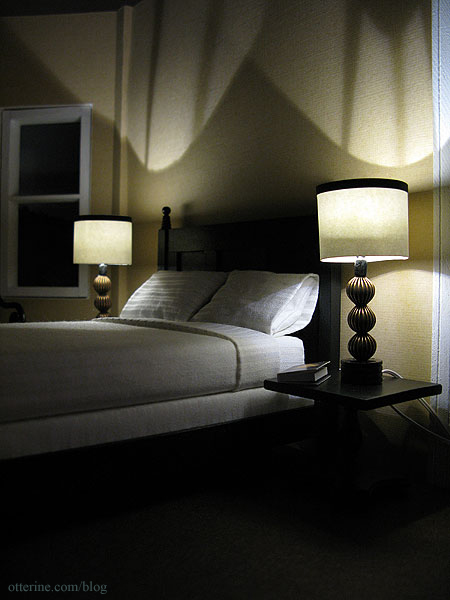
I didn’t save any money making my own lamps since I used pricier LEDs and had to buy more materials than necessary just for two lamps, but I have unique fixtures in a more contemporary style than what’s available on the market.
Categories: Miniatures, The Newport
August 10, 2010 | 0 commentsItalian shoes and matching handbag
I now own three things from Italy, though I have never been there. First is a Venetian mask I bought online about ten years ago. And, now…these beautiful shoes with a matching handbag from the wonderfully talented Patrizia Santi. :D I just love them!
I originally saw the shoes at the Bishop Show in Chicago back in April. I hesitated about buying them and lost out. The price was reasonable considering the outstanding workmanship and time involved; I just hadn’t wanted to go overboard with shopping on my first night at the show. When I went back later, however, the ones I wanted were gone.

After looking at the photo I took at the show over and over, I decided to write to the artist to find out what I had to do to get those shoes! She made a pair for me and (as a complete surprise to me) included a matching handbag. It was so thoughtful of her. I think the shoe box and shopping bag are so awesome, too. :D

I don’t typically carry handbags in real life, but I would carry this one and I would definitely wear those shoes! :D
Categories: Miniatures
May 22, 2010 | 0 commentsRya rugs and clover pitcher
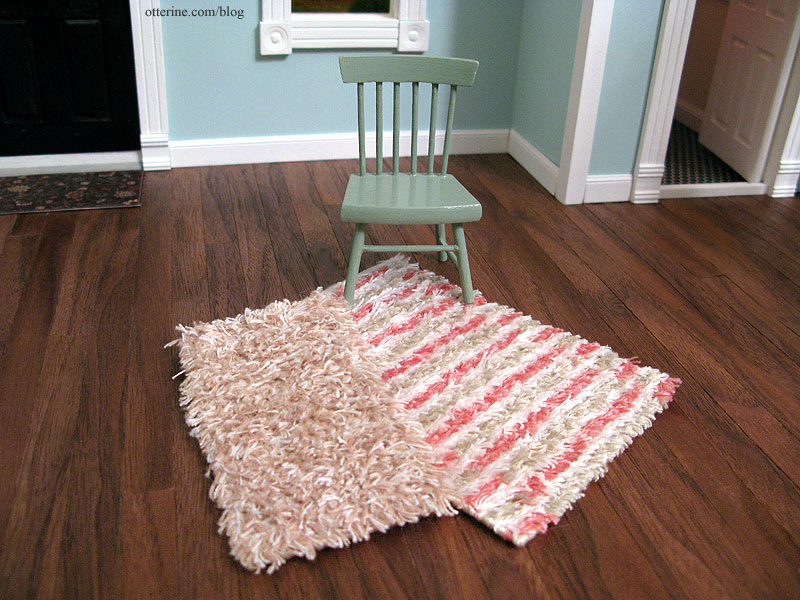
I’ve received a few minis from a two international miniaturists. First, two rya rugs made by the talented Glenda at Peppercorn Minis in New Zealand. They’re so soft and pretty I wish I were mini so I could run my toes through the pile! :D
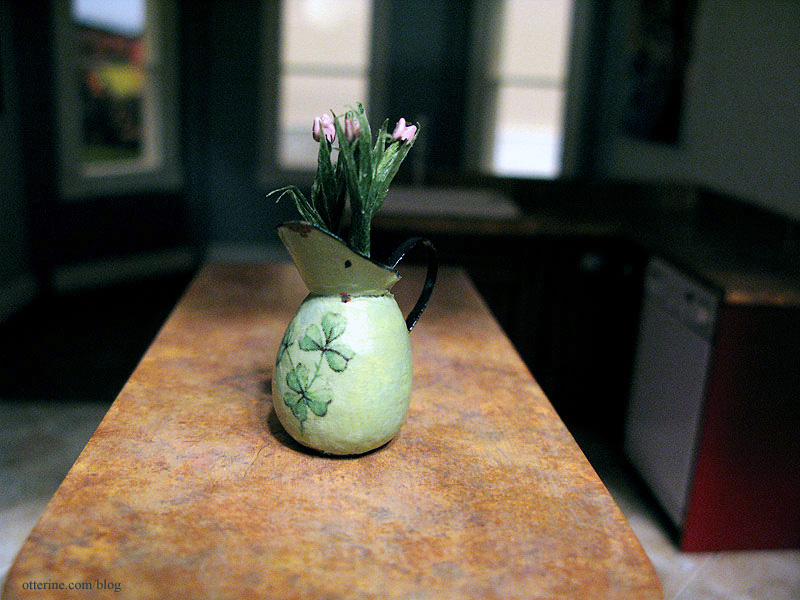
The second is a tiny pitcher with flowers from the gifted Sylvia at lotjesdollshouse in The Netherlands. I love the color and the clovers!
Categories: Miniatures
April 5, 2010 | 0 commentsFlipping the opening direction of a door
Houseworks has some of the best dollhouse components on the market, and their doors are fabulous in that they are premade and hung in frames. All you have to do is slide them into place. But, sometimes you want the door to open the other direction. As they are currently made, if the premade door is facing you, the door opens in to the right.

Here’s how I flipped one to open in to the left. First, I used masking tape to indicate the “up” direction and sides 1 and 2.

Since you are always keeping the “up” side in the right direction, this will work with other paneled doors where there is an obvious up direction. It’s less important with this type of door where the style is uniform up and down.

I removed the hinge pin on the bottom but left the pin at the top in the door.

I then measured where the original holes were and marked that same measurement on the opposite side. These need to be precise. I then used a pinvise to make the new holes. I slid my drill bit into the original hole to make sure I had the right size before drilling on the opposite side.

top of door frame 
bottom of door frame I installed the original door with side 2 facing me. The door now opens in to the left. The original holes can be filled or left in case you change your mind again.

Categories: Baslow Ranch, Miniatures
April 2, 2010 | 0 commentsPlant stand and mannequin
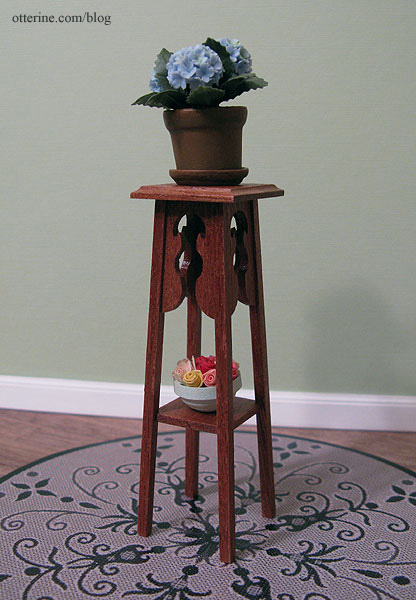
While buying supplies from a shop in the UK, I added a plant stand kit by McQueenie Miniatures to my order. It’s a beautiful kit made from mahogany that was very easy to put together. I sealed the wood with satin varnish by Delta Ceramcoat to bring out the grain of the wood.
The hydrangea plant is by Falcon Miniatures. I made the roses and bowl from quilling paper many years ago. The rug is a paper printout of the Piazza rug by Dynamic Rugs.
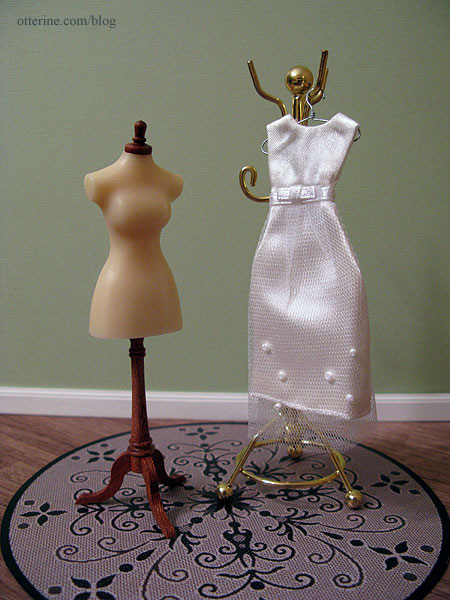
The other kit came from Hazel Dowd, a different supplier in the UK. The mannequins are sold premade as well, but I bought it unassembled at a lower cost. It was a very easy kit, again with a wood base and cap beautiful enough to varnish without modification.
The wire hanger is by Handley House and the dress is a scrapbooking item by Jolee’s by You. I plan to make some clothing myself but couldn’t pass up this beautiful dress in perfect scale. :D The brass coat rack came from a furniture lot a friend gave to me.
Categories: Furniture, Miniatures
March 13, 2010 | 0 commentsKitchen sink
The kitchen sink that came with the Euro Mini’s sink cabinet was very shallow and not exactly what I wanted.

The hole in the top of the cabinet for the sink was deep, so there was plenty of room to add a deeper sink. My attempts at making a sink out of polymer clay were lumpy and rather sad. So, I built one out of 1/8″ basswood and balsa.
I first measured and cut the vertical pieces to fit inside the opening in the cabinet. I then glued them onto a thin sheet of balsa using a jig. Before enclosing the box, I used a metal sewing eyelet to punch a hole for a drain.

Once the basic box was dry, I cut the balsa base to fit and drilled a hole in the base cabinet to match up with the drain.

Using 1/4″ half round strip wood, I built a frame for the top of the sink box.

I used a tiny bit of spackling to fill in any gaps between the frame and the box.

I watered down the paint so the finish would dry without any brush marks, sanding in between coats to remove any imperfections that would give away the fact that the sink is wood and not porcelain. Once the paint finish was dry, I added a couple of coats of gloss sealer (Delta Ceramcoat gloss varnish). To get the effect in the bottom of the sink, I let the gloss sealer pool. I also covered it after applying the gloss to keep dust from settling on the finish.

UPDATE (01-12-10)
Alas, the above sink is no more. The gloss varnish cracked and yellowed in the thicker areas when it dried. I had used it on the faux granite without a problem. Thin coats of this varnish work great.I made a second sink, and this time I used Triple Thick Brilliant Brush-On Gloss Glaze by DecoArt for the finish.

The finish turned out like porcelain again, though the glaze was definitely thick and not easy to use. You have to work fast because it dries so fast. I am pleased with the second sink but disappointed that the varnish I had used ruined the first.
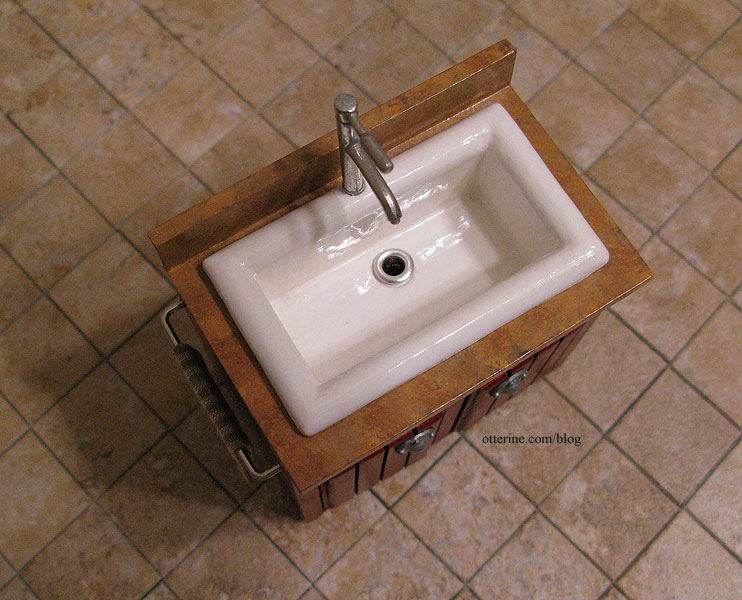
Here the sink is installed in the cabinet with the sewing eyelet drain pressed into place. Crisis averted! :D

Update 02-20-10:
Well, I spoke too soon. The second varnish (Triple Thick Brilliant Brush-On Gloss Glaze by DecoArt) turned yellow, too. There are big letters on the front of the package that read, “Non-Yellowing,” so I don’t know what happened.
I wasn’t going to give up on the second sink without trying to fix it first. I removed it from the cabinet, removed the hardware and gave it two coats of Krylon indoor/outdoor gloss white spray paint. It worked! :D
Categories: Miniatures
January 10, 2010 | 0 comments
NOTE: All content on otterine.com is copyrighted and may not be reproduced in part or in whole. It takes a lot of time and effort to write and photograph for my blog. Please ask permission before reproducing any of my content. (More on copyright)
Categories:

Crying over you
Tears of joy over tear-producing mini onions! I first saw a rope of these fabulous onions by Fatima on Janine’s blog Minworks. I was so smitten with those onions!!! When I saw they were offered by Fatima during the recent online mini show, I snapped them up!
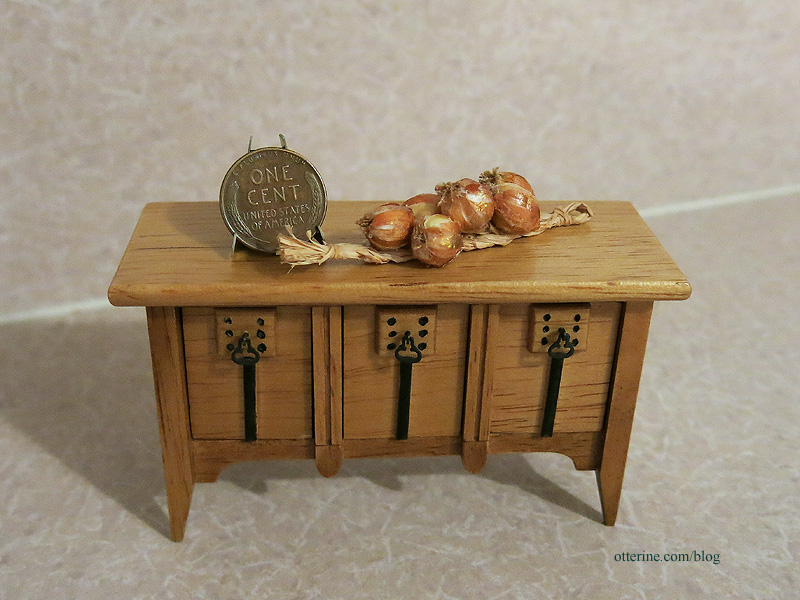
I swear these are real onions that were put through a shrink-ray. :D They are so perfectly flaky and translucent.
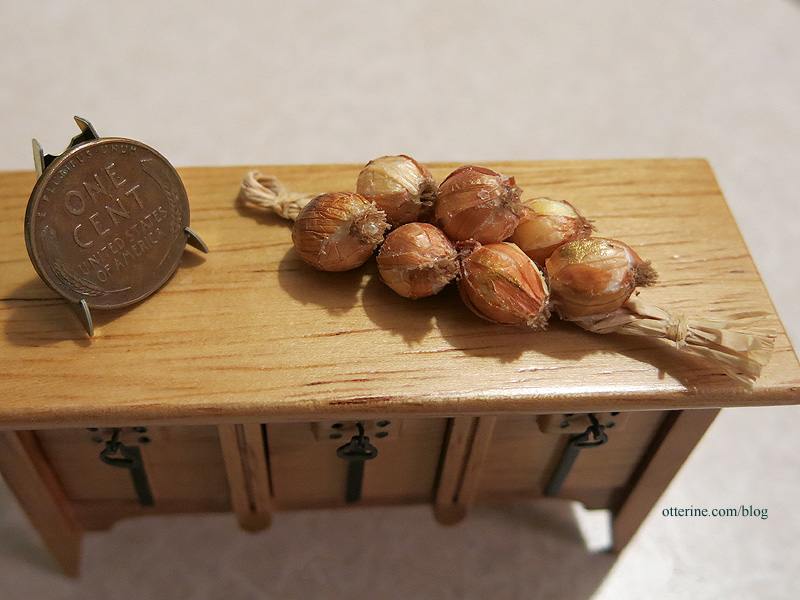
Fatima has an etsy shop Beauxminis and a website by the same name. :]
Categories: Miniatures
August 31, 2015 | 0 commentsFinding a Holy Grail miniature
I’m sure every miniaturist has a Holy Grail or two…I’d say I have roughly a dozen. These are miniatures we long for but cannot find, or perhaps afford. I searched extensively for this metal trash can, and now I have one in my collection. :D
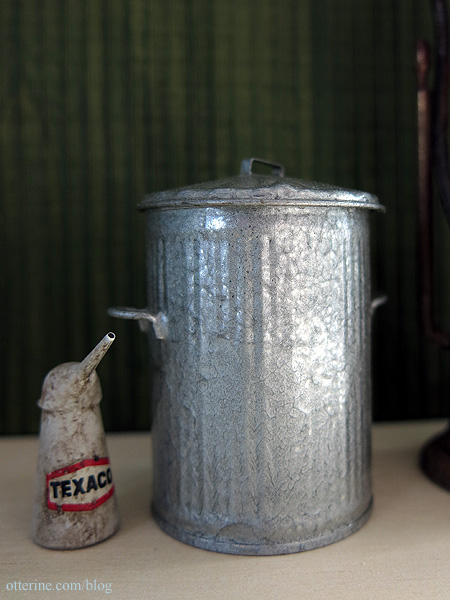
It has the perfect metallic finish and ribbed detailing. There is no maker’s mark, and it came from an estate without any additional information. (A blog reader later said this was likely made by Ken Ketteridge.)
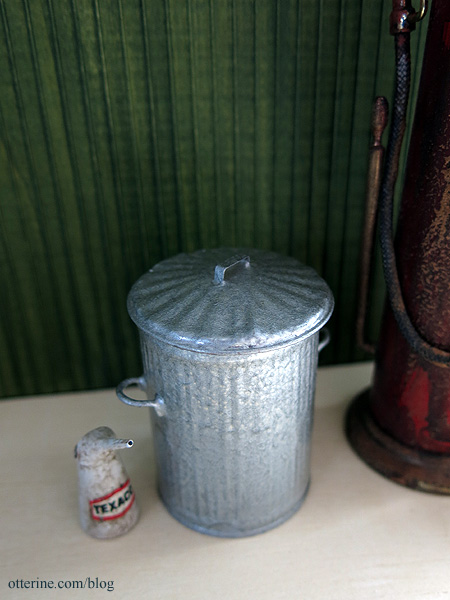
I’ve seen this item only once in the book Dolls’ House Shopkeeper by Lionel and Ann Barnard. Excellent book, by the way. So, one Holy Grail down!
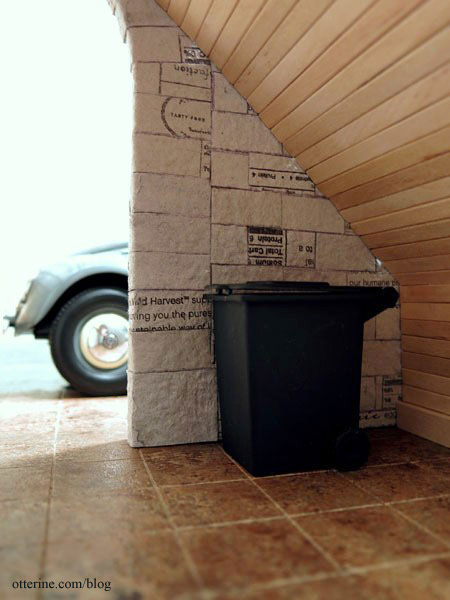
I will not be altering this item in any way, so it might be too clean for the barn. But, the Brownstone has that fancy trash nook. :]
Categories: Miniatures
August 4, 2015 | 0 commentsThe Quicker Brick
No, I will never give up on egg carton brickwork, but I tried an experiment to help a friend out with a brick floor project. We were thinking egg carton brick, but she has a Beacon Hill and three large floors to fill. Even with awesome results, cutting egg carton bricks is time consuming and daunting to say the least.
Then the other day I was down a Pinterest rabbit hole, and I ran across an old entry from Tiny Handmade. The miniaturist had made a wood tile floor from popsicle sticks. I thought, what about skinny sticks for bricks? :D

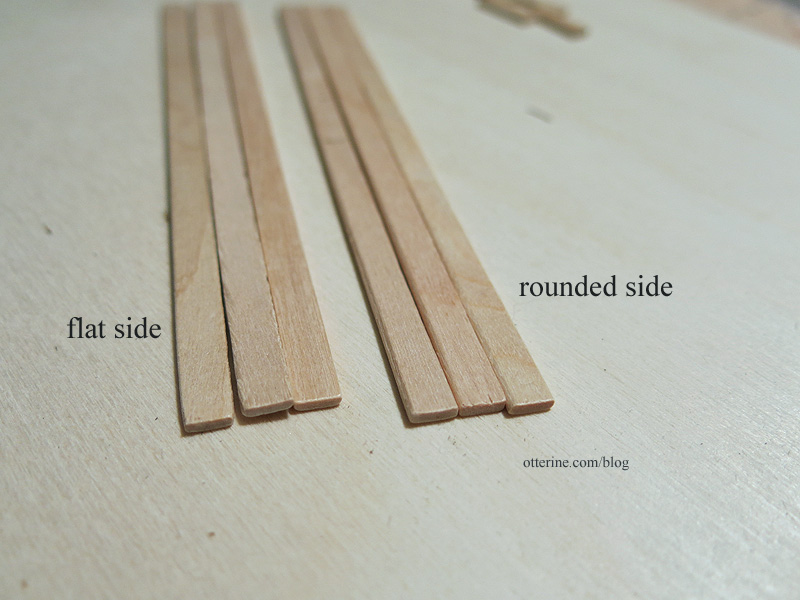
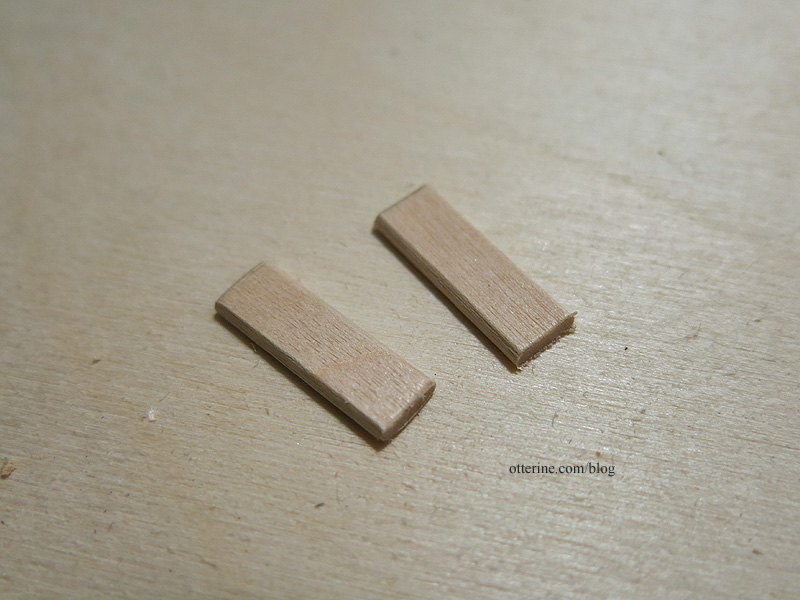
Skinny sticks are 1/4″ wide, have a flat side and rounded edges on the other side. The rounded edges will give a break between the bricks, so I made sure to use that side facing up. And, as with dating, you want to weed out the obviously warped and damaged ones.
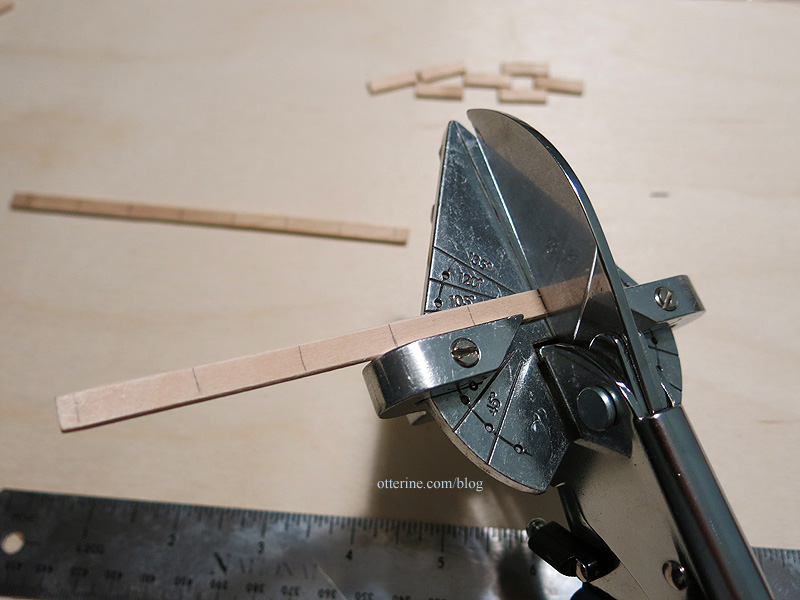
I measured 3/4″ bricks and used my Easy Cutter Ultimate to make quick work of cutting.

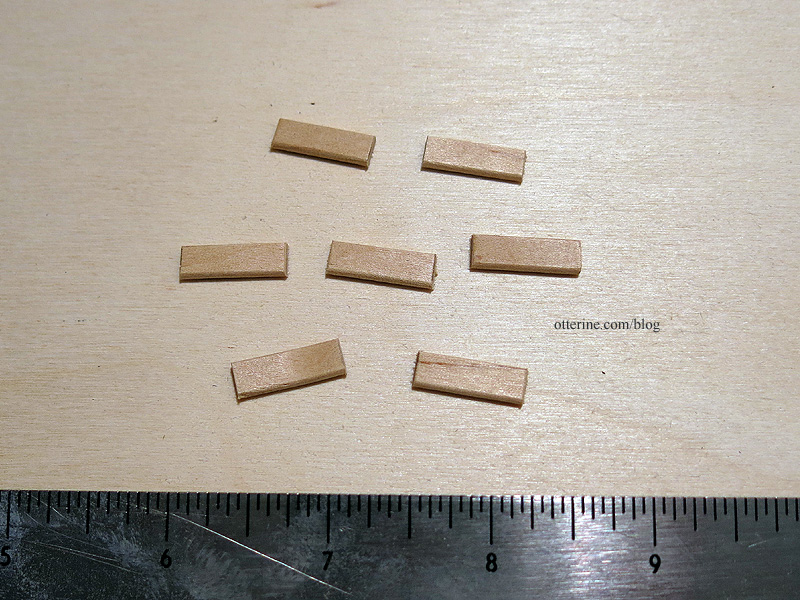
A little sanding on the edges to get rid of the excess.
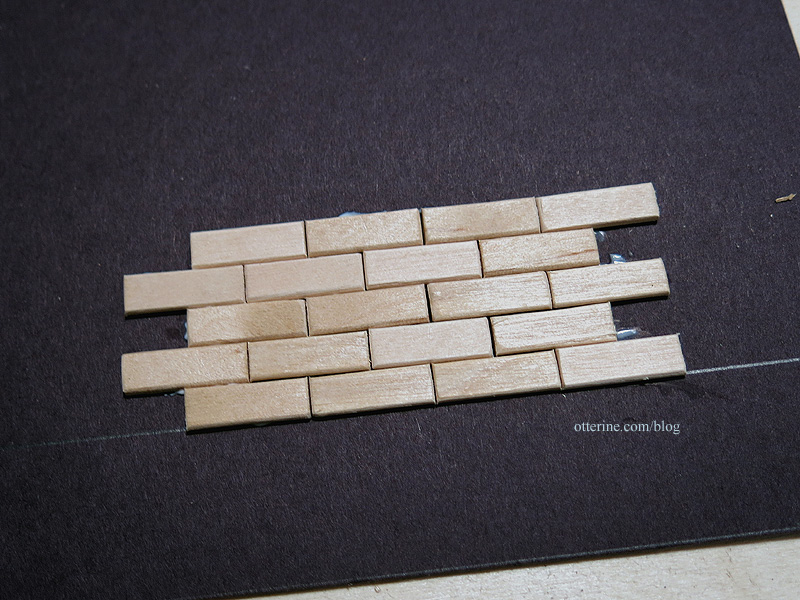
I glued them to my sample template (just a piece of black paper without lines). They have enough variance to make for more realistic looking bricks but are pretty uniform in width to make bricking easy. Strip wood would be too uniform and you’d have no gaps between the bricks unless you made the rounded edges.
I stippled on Moon Yellow by Americana using a stencil brush, which gave it a subtle texture. These are going to be relatively smooth bricks compared to the bumpy egg carton material. If you wanted more surface texture, you could use gel medium dabbed on with a sponge brush before painting. But, having them nice and smooth will make furniture placement on the surface much easier. Here the paint is still wet.
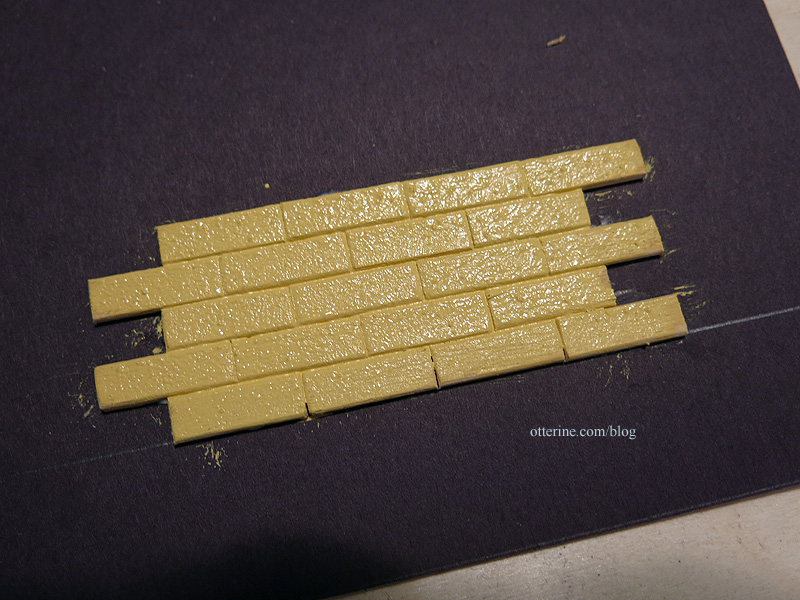
Grouting didn’t seem necessary as I just made sure there was excess paint in the grooves to cover evenly, but that would be simple enough to add with spackling, grout or other filler. These would work especially well for a painted brick wall or floor since you aren’t going to be able to bend these around a three dimensional object.
Categories: Miniatures
July 27, 2015 | 0 commentsMaking invoices
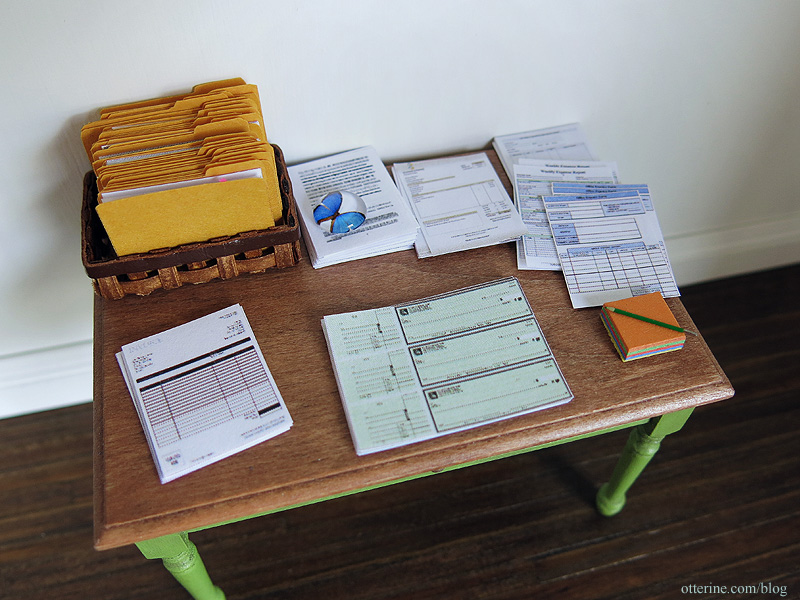
Betsy indicated wanting to know how to manipulate images to make tiny versions of real items, like the invoices I showed in my Paperwork post. Here’s a quick tutorial on invoices, but this can easily translate into any type of document you would like.
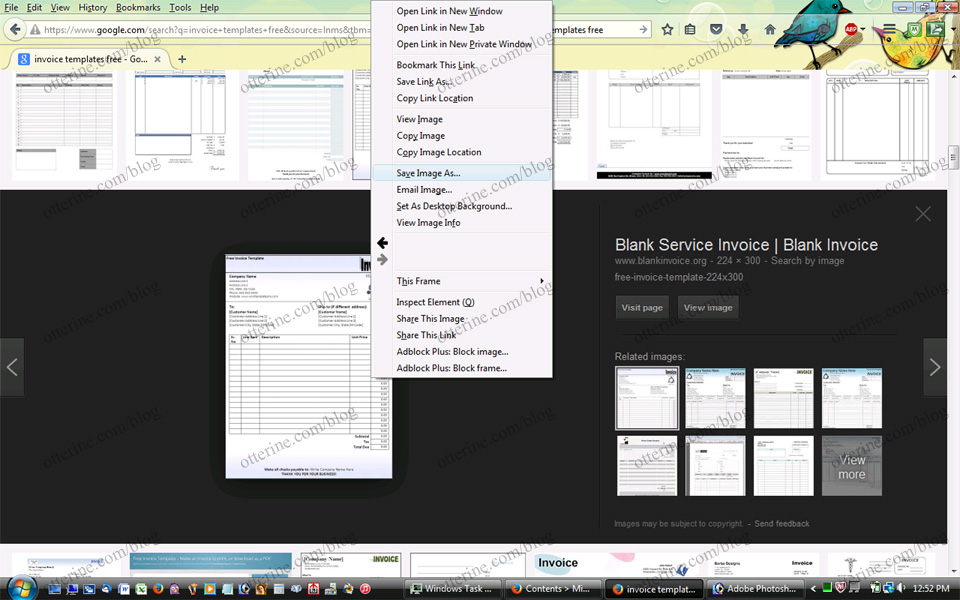
I start with an image search for “invoice templates free” (without the quotes in the search box). I usually use Google, then select images. You can see the small versions right on your screen, so you can select ones that already look legible and have good composition.

Here I’ve clicked on one I like. You lose detail when you print small, so choose one with good contrast. More often than not, you will be okay to use these images in your mini scenes that are for personal use. I would never recommend selling tiny versions of documents found online. Either way, always be sure to check the copyright info.

You can save the image to your computer in a few ways. I usually just right click on the image in the preview as above and save to my computer.
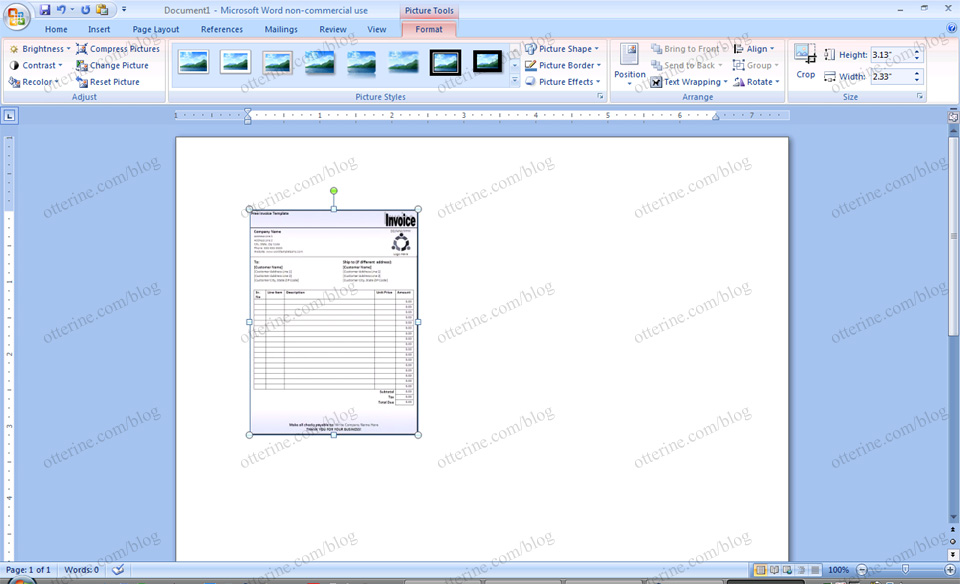
In Word, I insert the photo into a new document (Insert, Picture, select your image). Depending on the size of your image, it may appear as large or small.
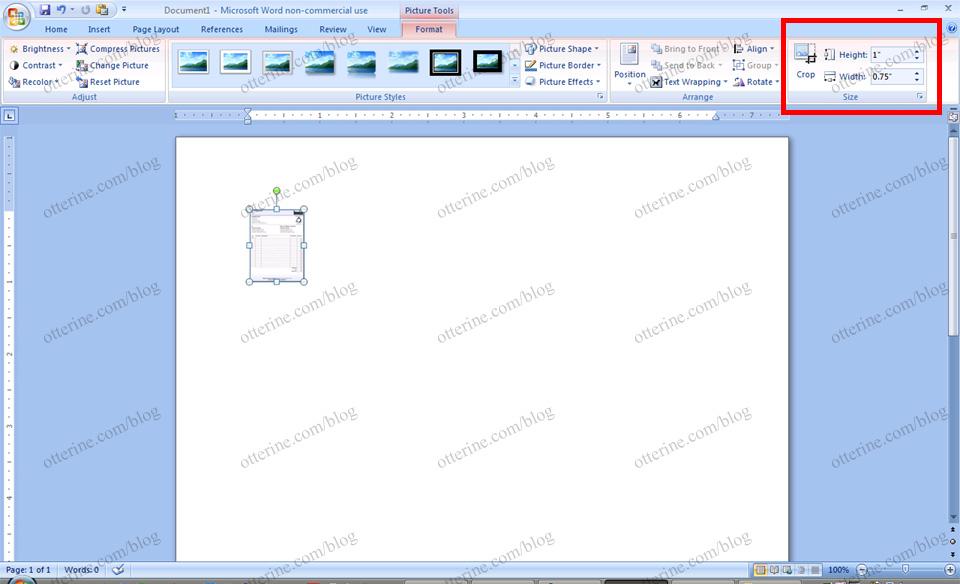
Click on your image if it is not already selected. In Picture Tools, Format, there’s a box that shows the dimensions. I usually go with 1″ in height for ease of conversion. Typically, this will make your width .75″ automatically. This is slightly larger than the true scale conversion of a standard piece of 8.5″ x 11″ paper.
Now that you have your one sized invoice, click and hold the CTRL key. Drag to make a copy. You can do this several times. Add spaces between the images to make it easier to cut.
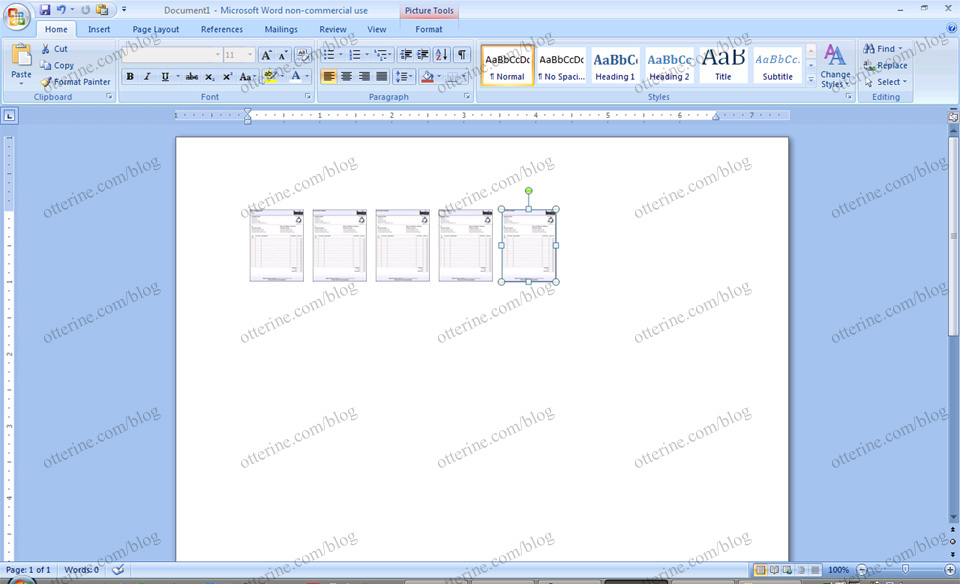
You can add other images as you like, resize them and then print. Cut and enjoy your mini invoices! :D
Categories: Miniatures
June 26, 2015 | 0 commentsTamiya tool set – part 2
Continuing work on the 1:12 scale Tamiya tool set. I’m starting with the polyethylene tank and oil jug. Here’s a reminder of what these looked like after assembly and initial sanding.


I primed them with grey spray primer and then followed that up with flat white spray paint. The grey toned down the white, which is good for a base to start aging.
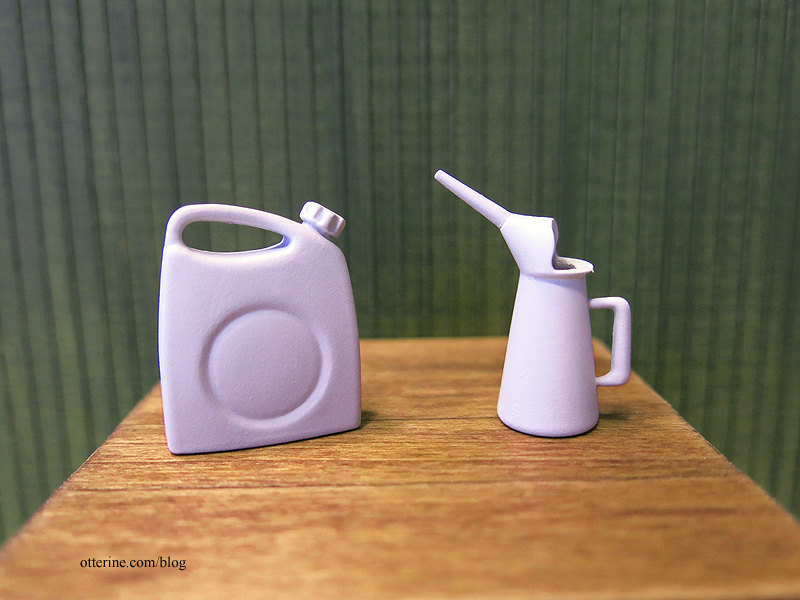
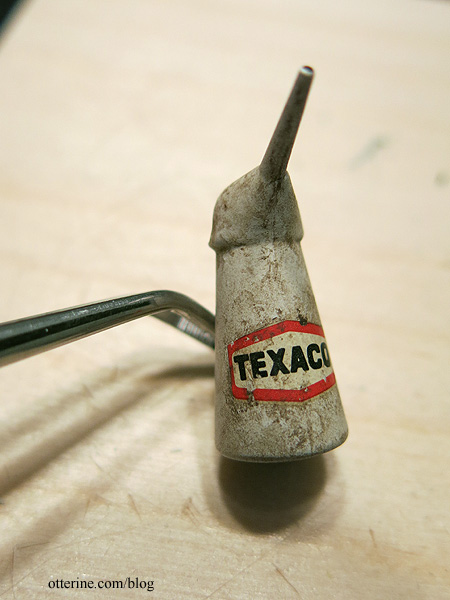
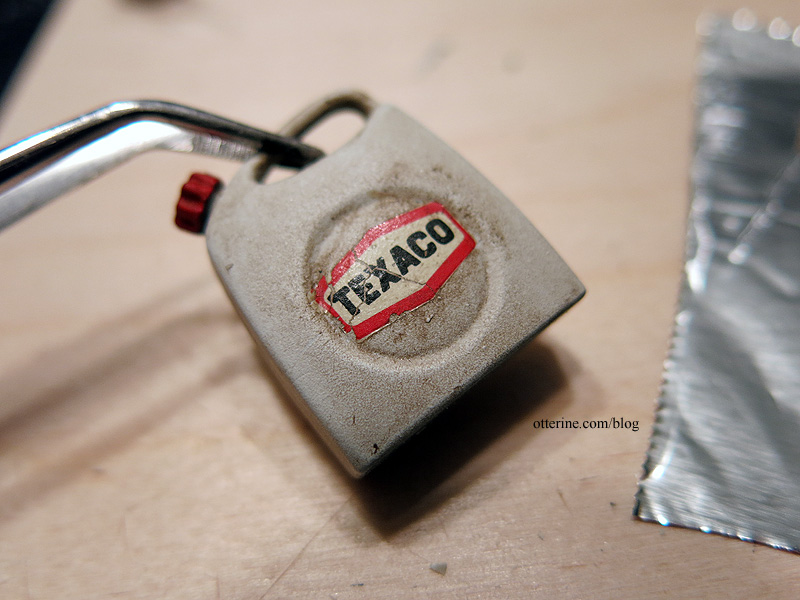
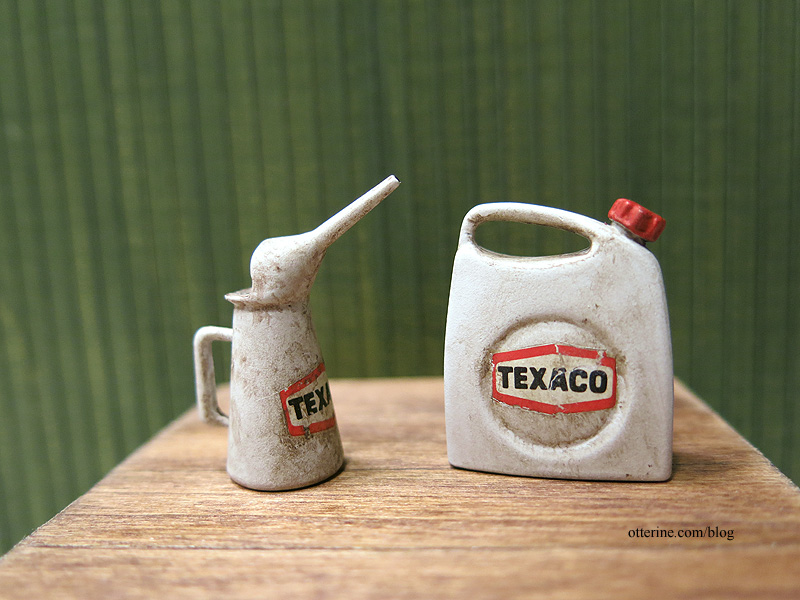
The vintage Texaco jugs I found online were all red, but I liked the white on the kit box, so I stuck with that. I painted the interior of the jug silver.

I added grime with acrylic paints thinned with Staining Medium. I left the decal whole when applying but scraped some holes from it after it dried in place. I also cut away the shiny clear portion around the outside of the decal as best I could. I put a dot of black paint at the tip of the spout to give the illusion of an opening.
For the polyethylene tank, I added the same grime and painted the cap red. I mixed some of the grime paint wash with satin varnish. Using a tiny paintbrush, I made a dribble of dried liquid down the side.
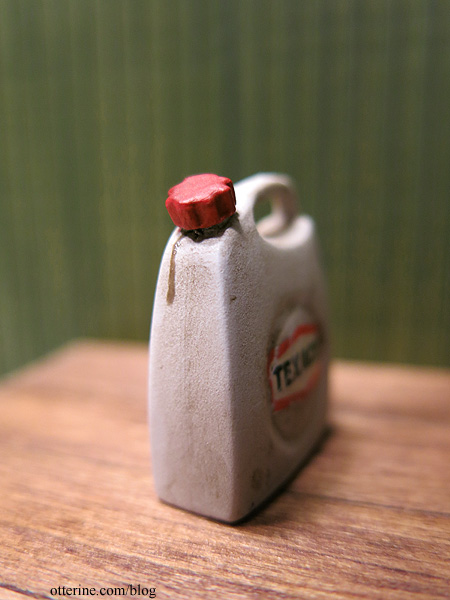
For these decals, I split them before applying so they appear broken and misshapen. I scraped holes and removed the clear halo from these as well.
I built up the cracks in the label with white paint, followed by an aging wash to tone down the brightness. Now it looks like a paper label that has loosened, cracked and moved after getting wet.

I love the way they turned out.
Categories: Miniatures, Model Cars, Vehicles
June 19, 2015 | 0 comments
NOTE: All content on otterine.com is copyrighted and may not be reproduced in part or in whole. It takes a lot of time and effort to write and photograph for my blog. Please ask permission before reproducing any of my content. (More on copyright)


