
Merry scarecrow tutorial
Who’s ready for autumn?!!!! I am eager to get back into working on the Heritage, which will be wonderful to decorate for Halloween. Below is a tutorial I wrote that was featured in the February 2012 Greenleaf Gazette.
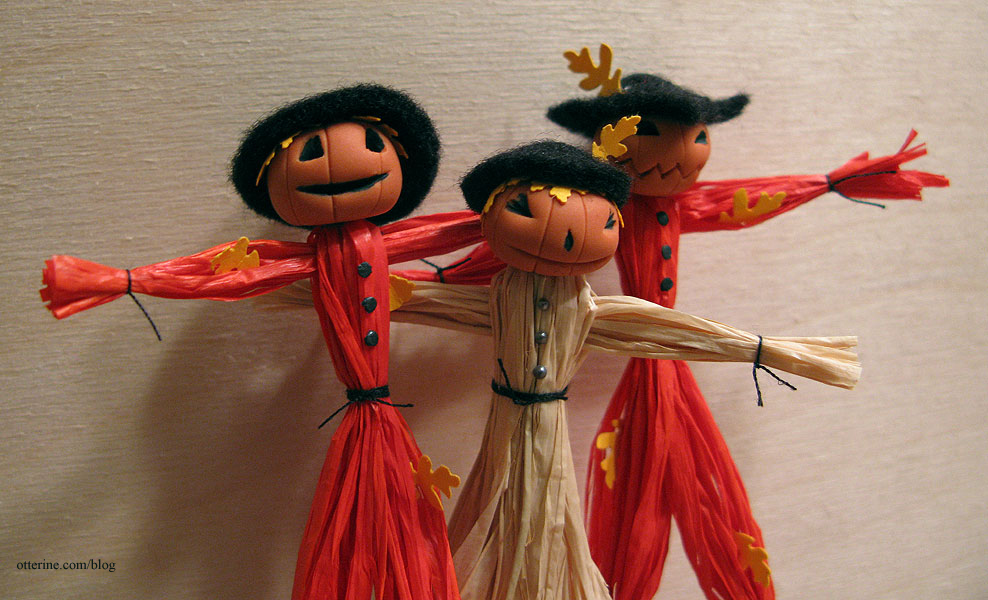
This is a fun, simple and versatile tutorial for making raffia and polymer clay scarecrows.
Along with craft glue, some small clamps, a ruler and scissors, you will need:
– Orange polymer clay
– Clay sculpting tools
– Orange or natural raffia
– Black sewing thread
– Black felt
– Yellow paper
– Leaf paper punches
– Ball stylus
– Black paper
– 1/16″ hole punch
– Black paint and small brush (optional)
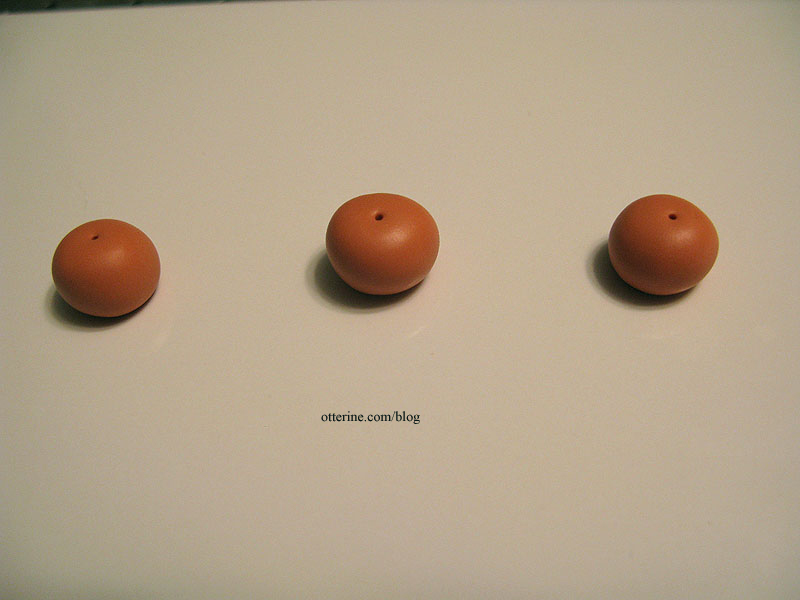
– A small bit of wire and mini drill (optional)To make a polymer clay pumpkin, roll some orange polymer clay into a ball in the size you wish for the head. I’ve used Fimo in Cognac here to form a ball approximately 3/8″ in diameter. Flatten the sphere just a bit and mark the top center with a clay sculpting tool.
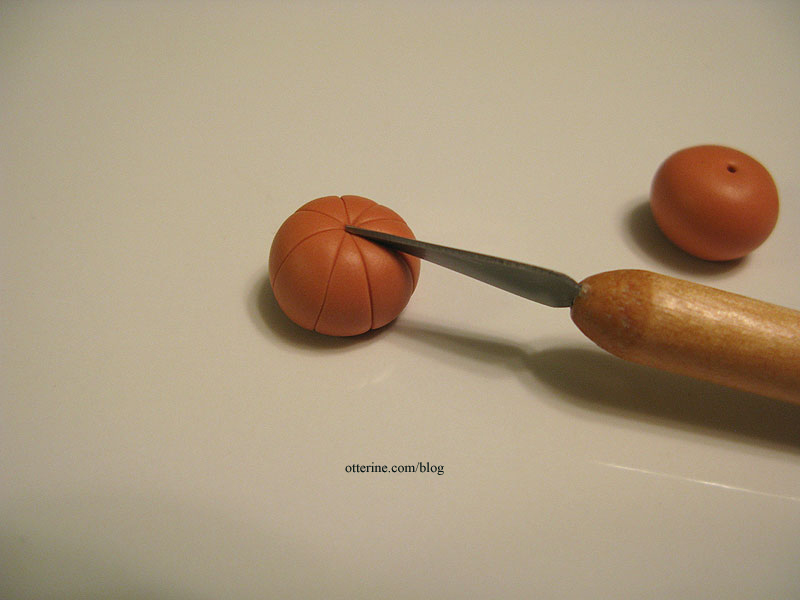
Using your sculpting tool, create indentations from the top to the bottom along the sides, evenly all the way around.
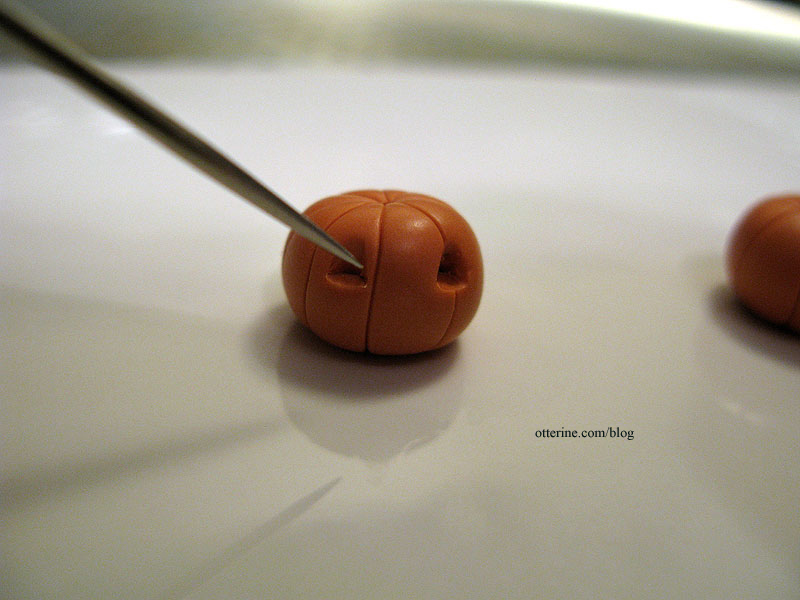
Create a face by indenting the clay. I’ve used these various tools for the faces created in my examples.
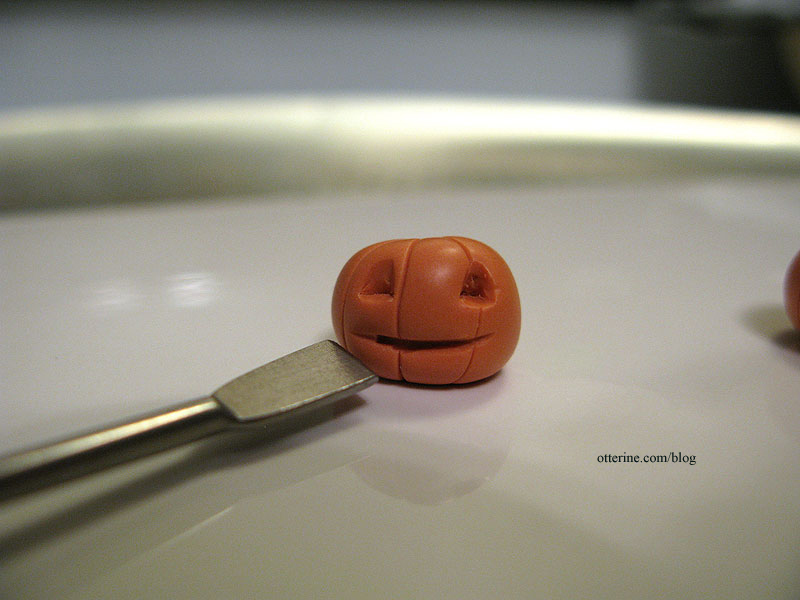
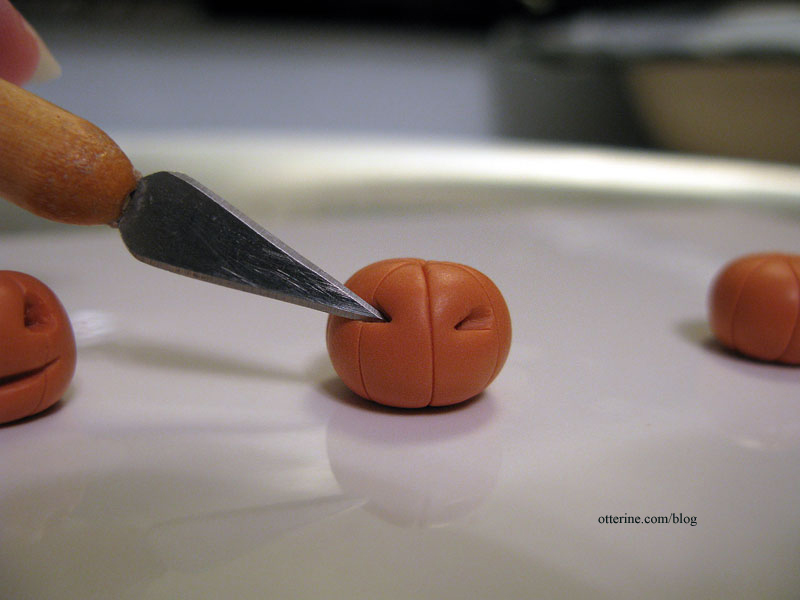
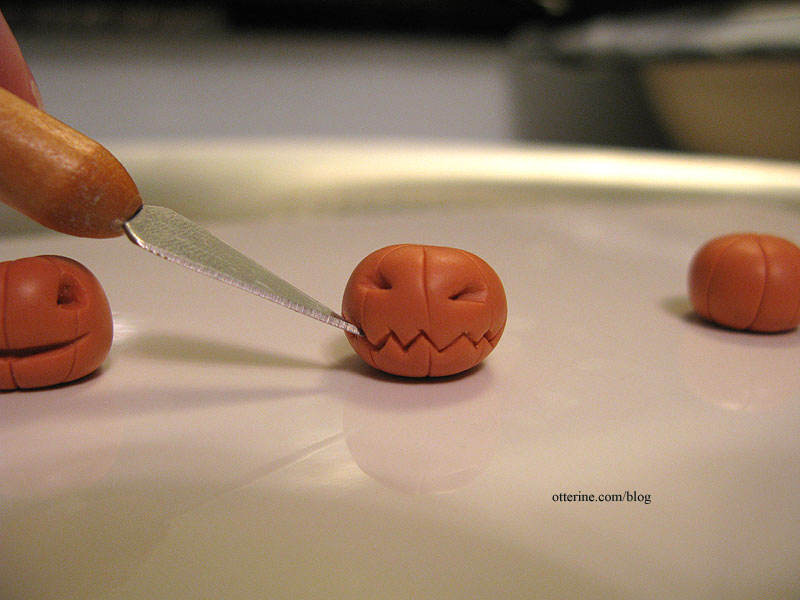
Bake according to the clay instructions and set aside to cool.
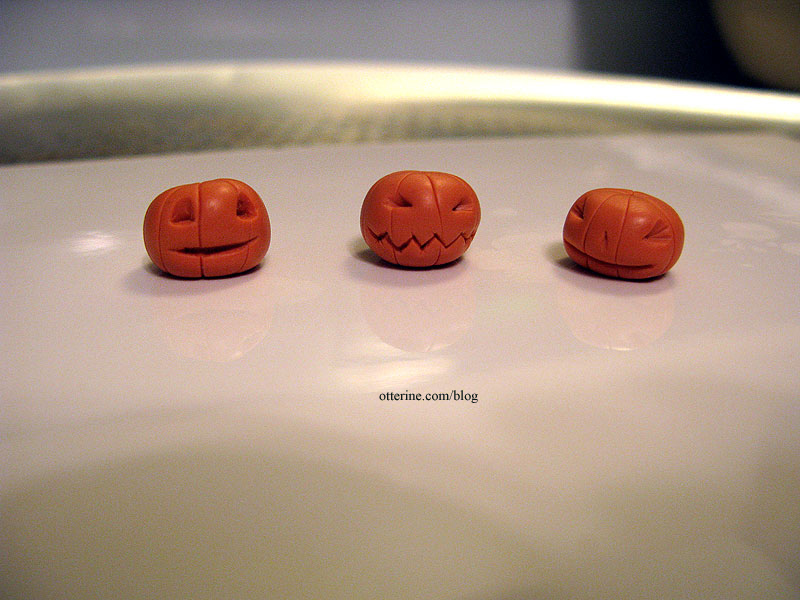
Determine the height you want your scarecrow to be from neck to feet (the polymer clay head and felt hat will add to the height, so take this into account). Take about 8-9 pieces of raffia and cut to the height measurement plus a little extra for trimming. I’ve made mine just over 3″ long. (Note: this corrects the Gazette version that stated to cut this bundle to half the height measurement.)
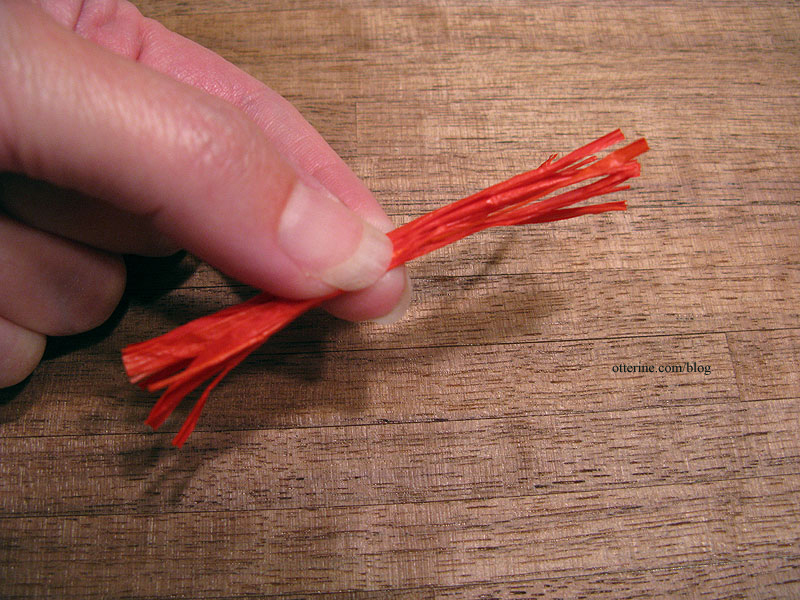
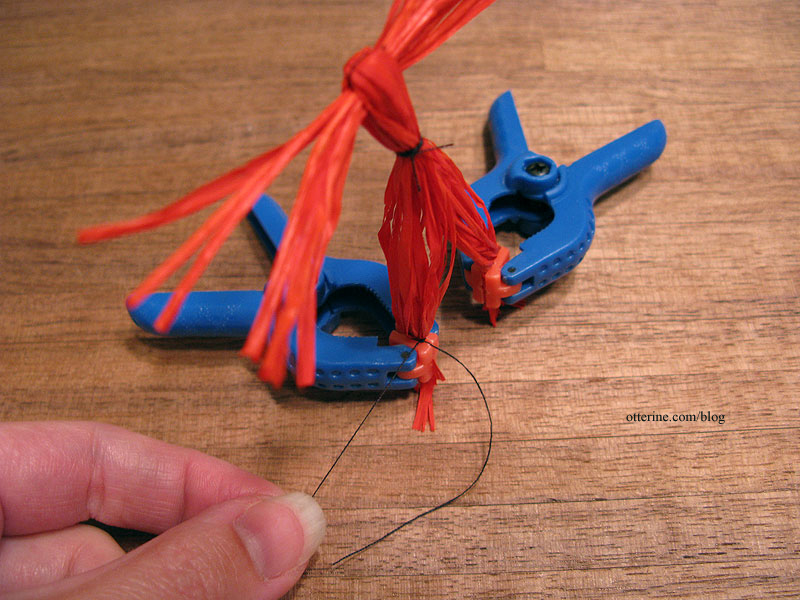
Tie the raffia bundle in the exact middle with black sewing thread, being sure to knot a few times. Cut the ends of the thread but not too close. This assembly will form the arms. Tip: use a clamp to hold the raffia while you tie the knots.
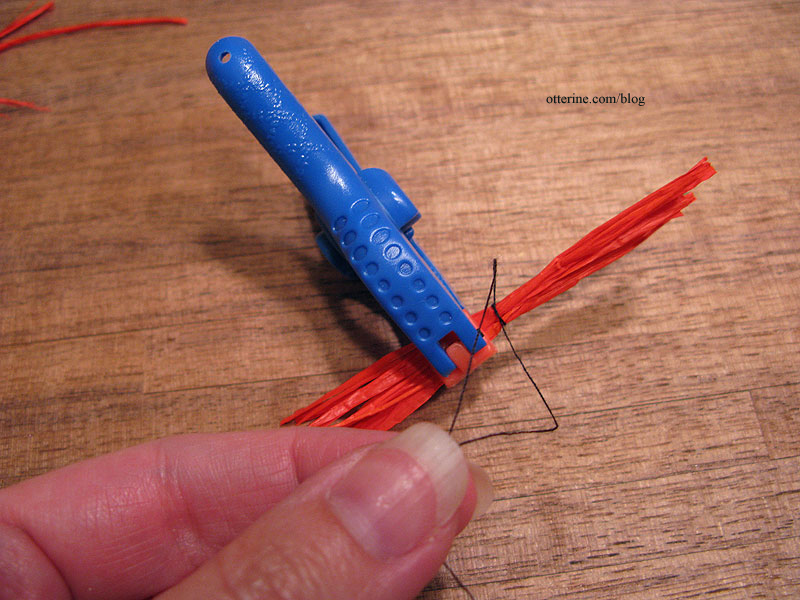
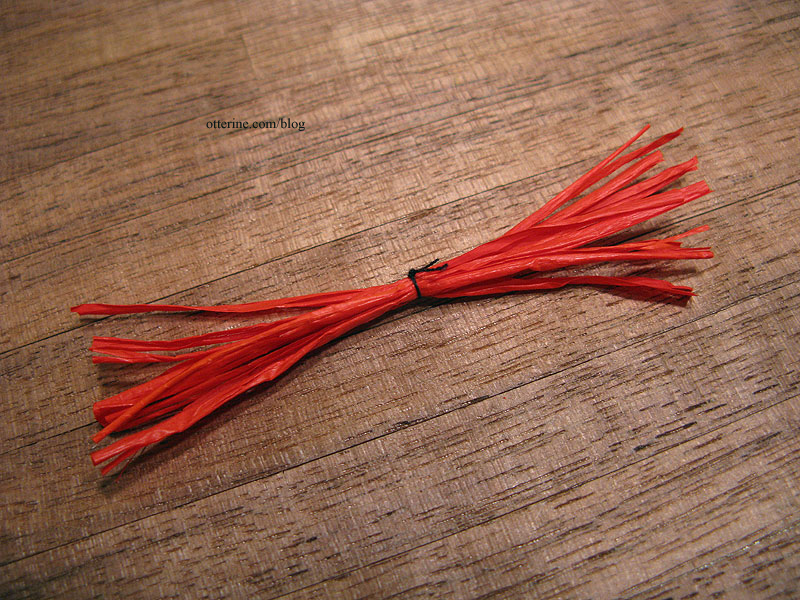
Take about 13-15 lengths of raffia and cut to twice the height measurement plus some for trimming. I’ve made mine 6.5″ long.
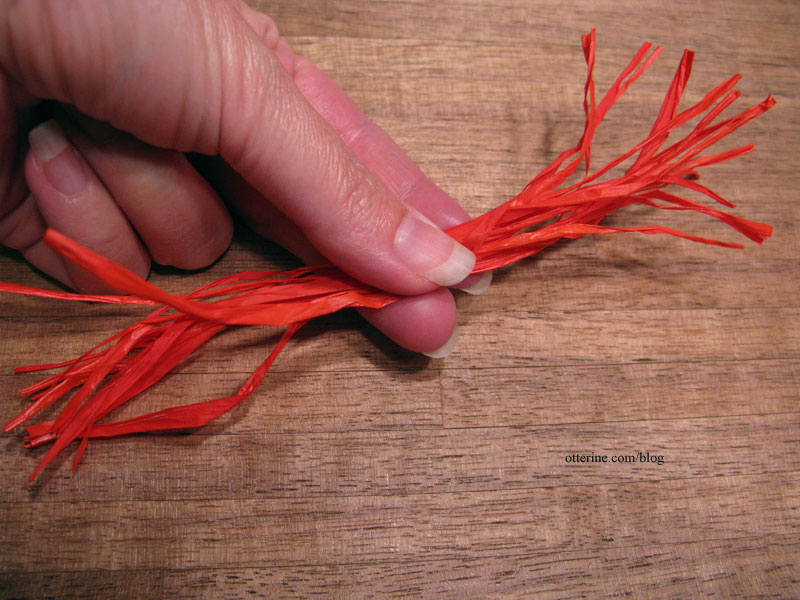
Tie the raffia bundle in the exact middle with sewing thread and cut the ends of the thread. This will form the body and legs.
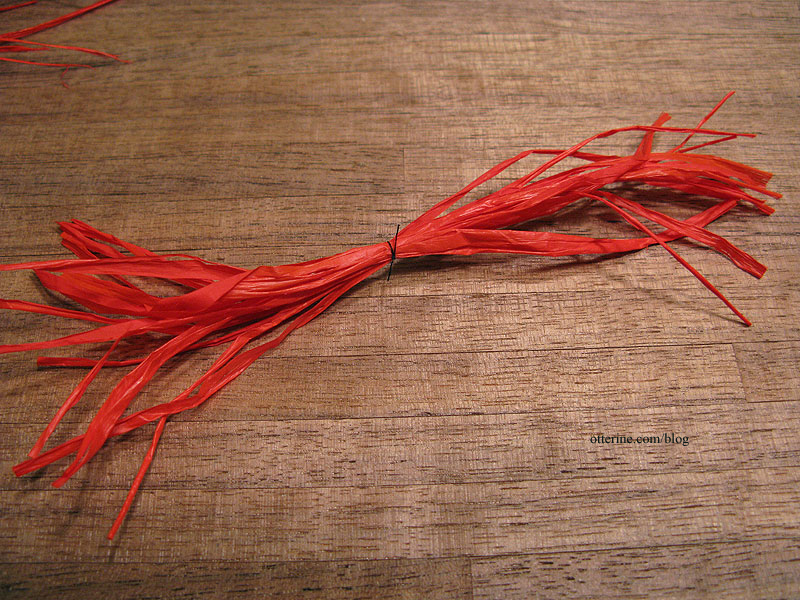
In the exact middle, glue the arm assembly at the knot and fold the body over.
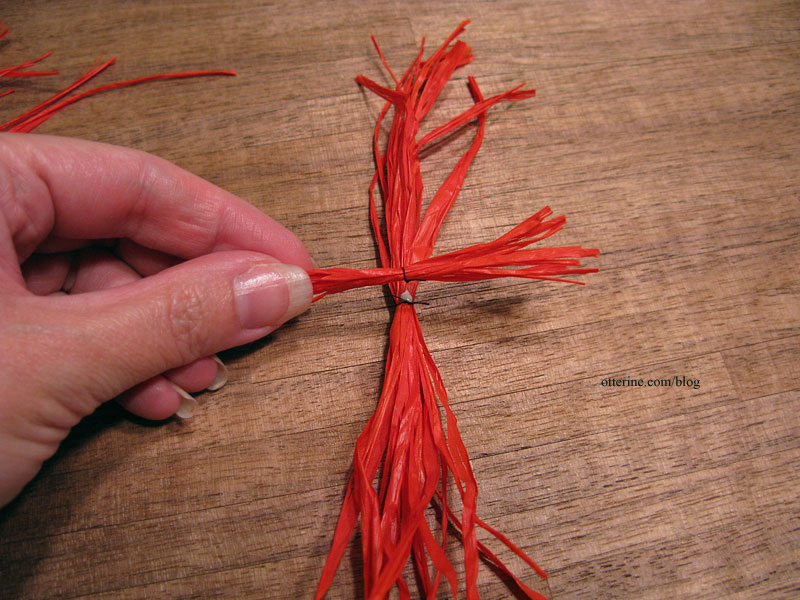
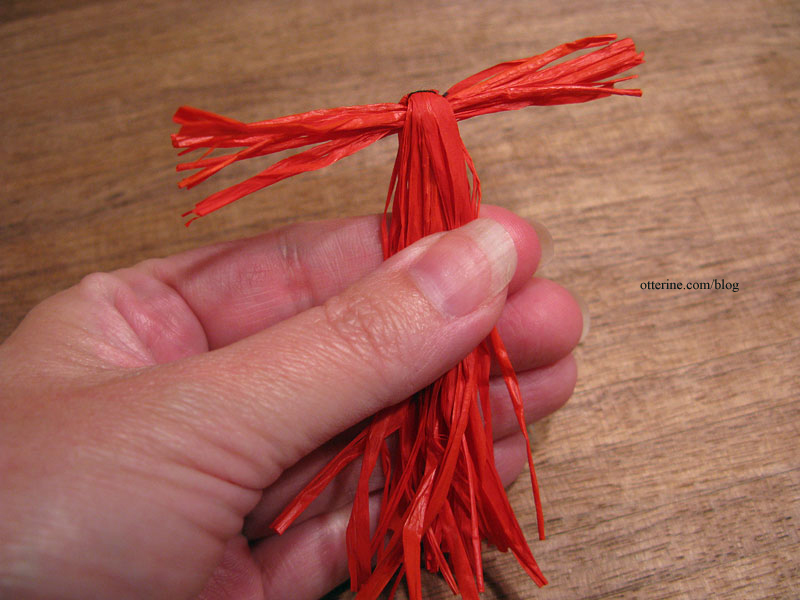
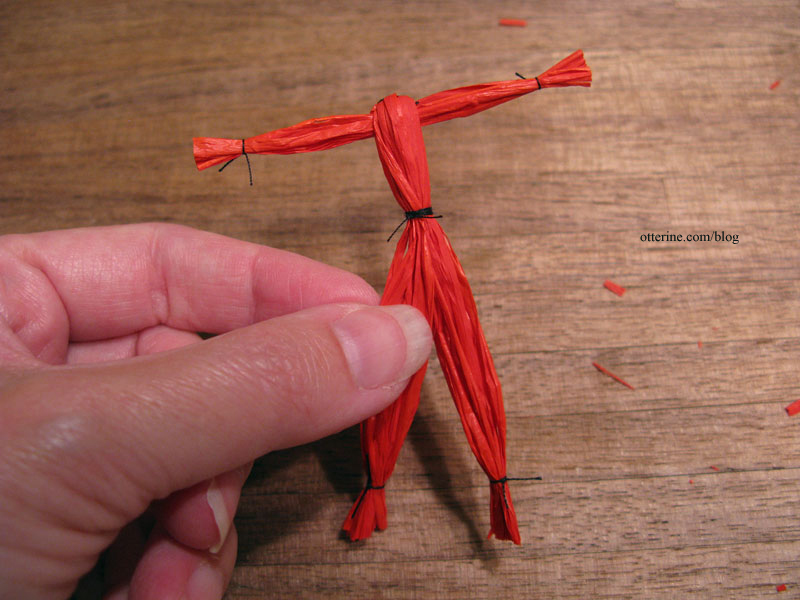
Tie the waist with black thread. Wrap the thread around a few times to form a belt (you can also add thin ribbon) and knot the thread. Cut the ends of the thread.
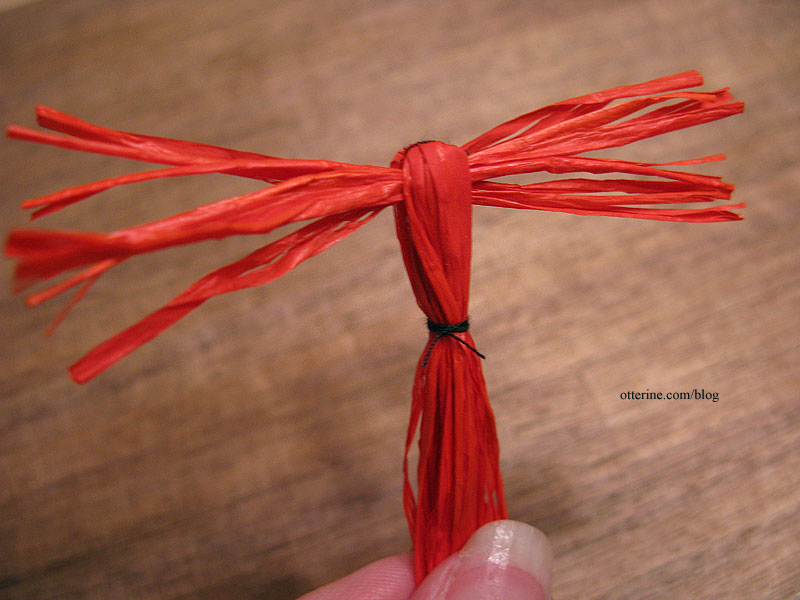
Separate the raffia below the waist into equal amounts. Tie at each ankle with black thread, leaving a bit of extra raffia to form the feet. Cut the ends of the thread. Trim the raffia ends even.
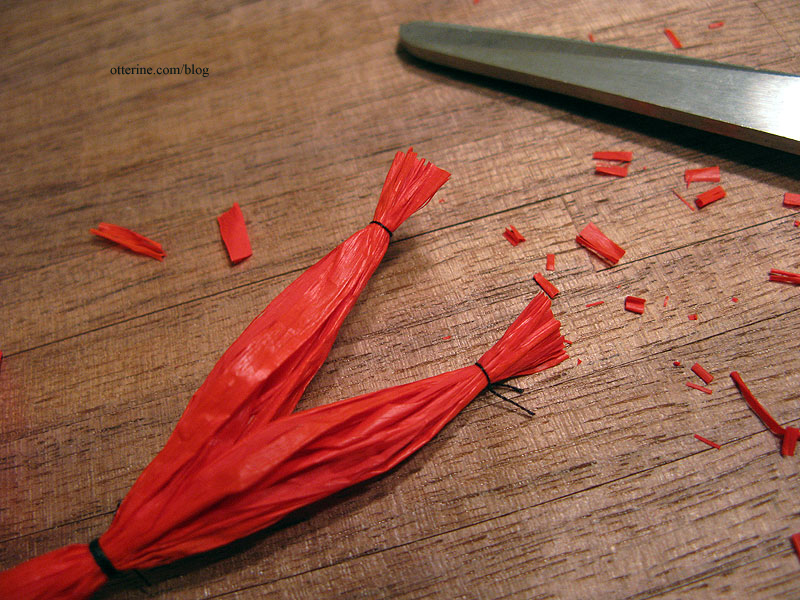
Tie at each wrist, leaving a bit of extra raffia to form the hands. Cut the ends of the thread. Trim the raffia ends even. Set body aside.
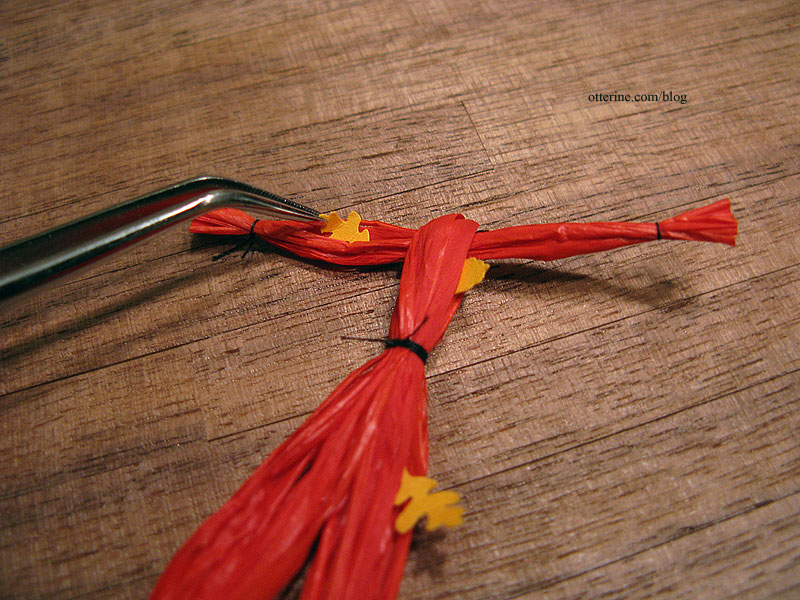
Punch out leaves from yellow paper. I use the larger leaves for the head and the smaller ones to stuff into the body.
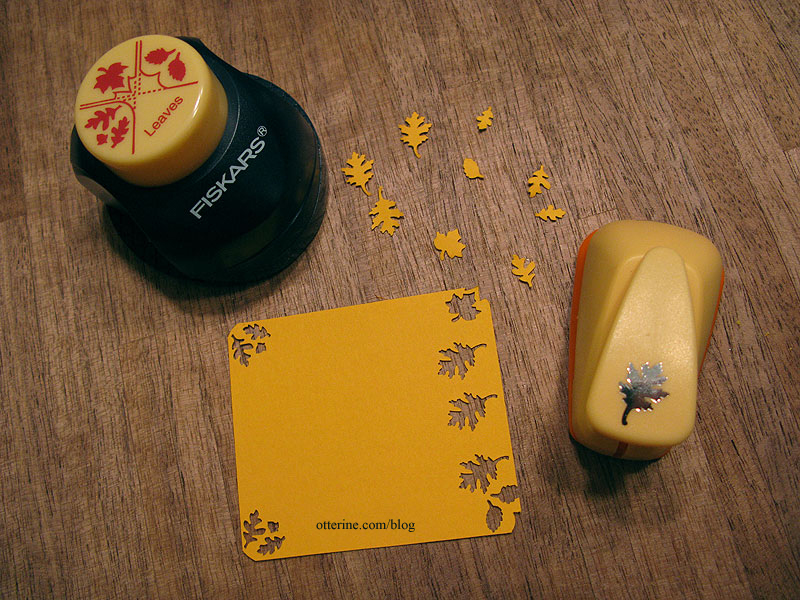
Cup the leaves with a ball stylus.
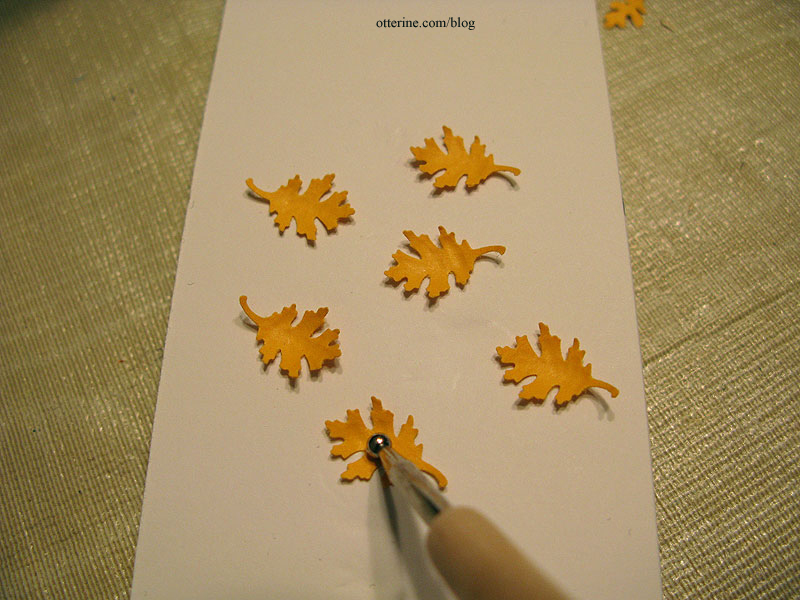
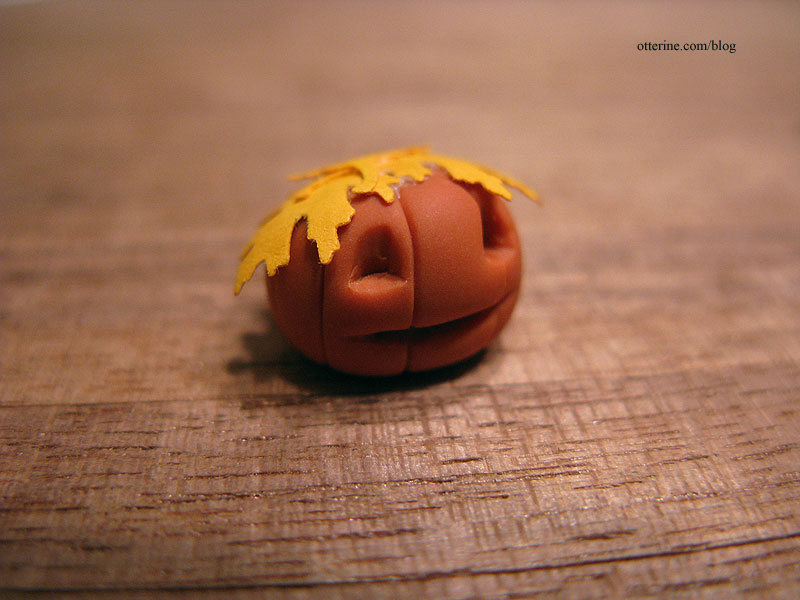
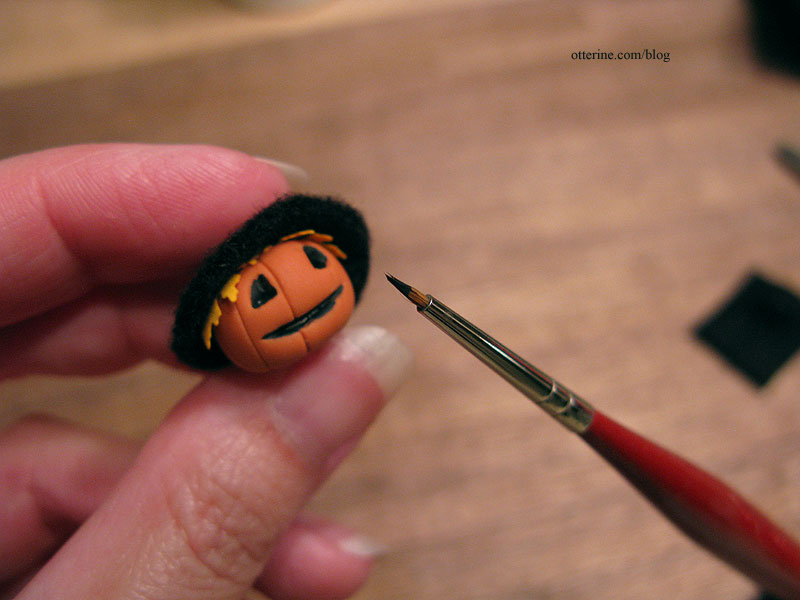
Glue three of the larger leaves on top of your pumpkin, clipping or shaping as necessary.
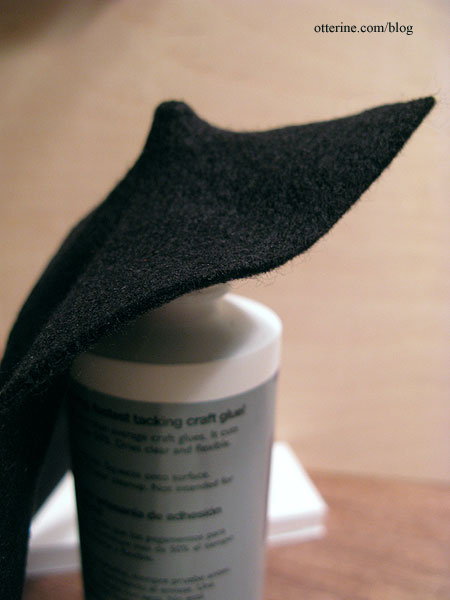
Using the tip of your glue bottle, press the felt down to form a bubble in the felt. Work gently and slowly, otherwise you’ll poke right through. I find it easier to make these bubbles on a larger piece of felt and then cut them to fit.
Using your polymer clay pumpkin as a guide, trim the black felt around the bubble to make a hat.
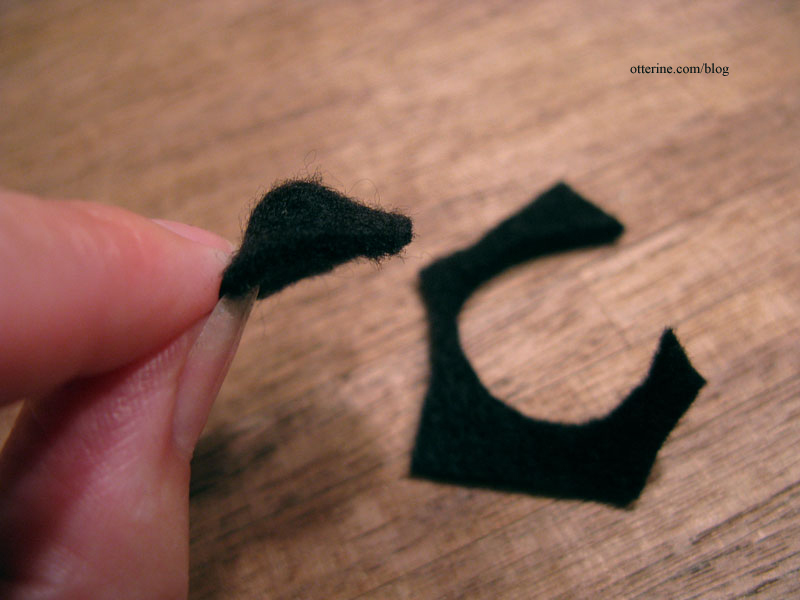
Glue the hat in place over the leaves.
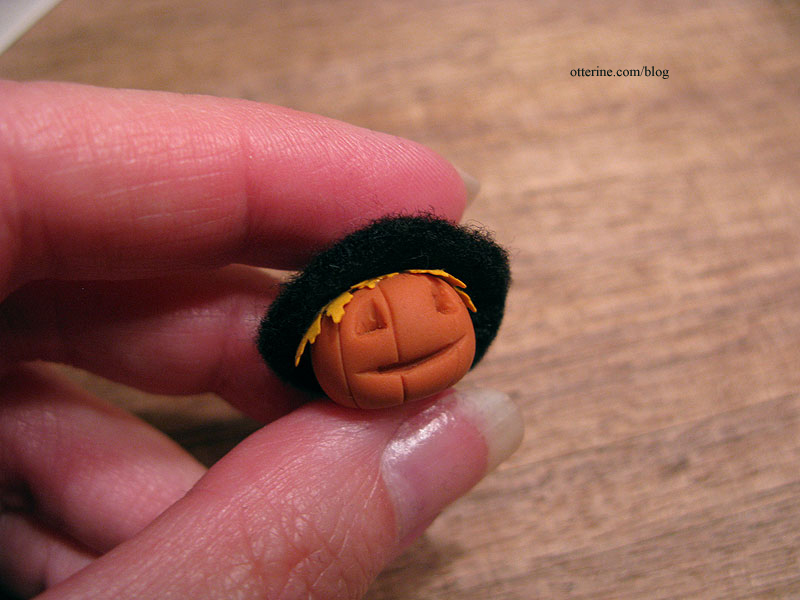
You can also skip the leaves altogether and make any crazy shaped hat you want.
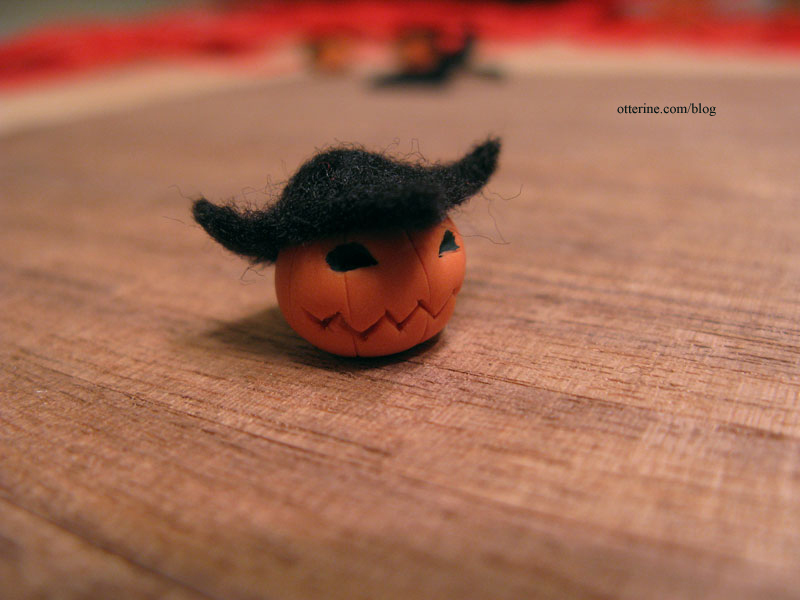
If you’d like to paint your pumpkin’s face, use a small brush to apply acrylic paint into the indentations for the eyes and mouth (and nose, if you made one). You’ll need to let the paint dry before finishing.
Shape and glue the smaller leaves into the raffia of the body.
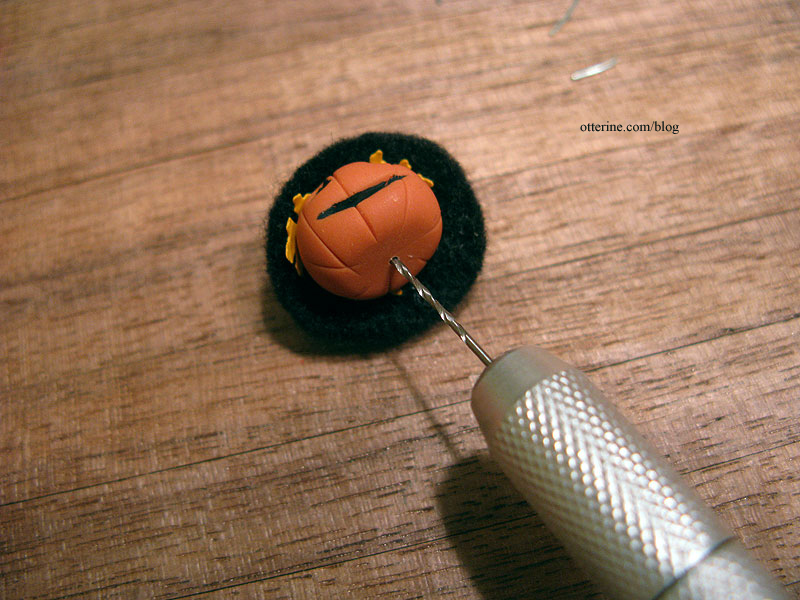
This next step is optional, but I find it adds stability. Using a small drill, make a tiny hole in the bottom of your pumpkin where you want it to attach to the neck and shoulders.
Glue a small bit of wire into the neck (I used a small length of jewelry wire I had on hand, but the wire from a twist tie would work just as well).
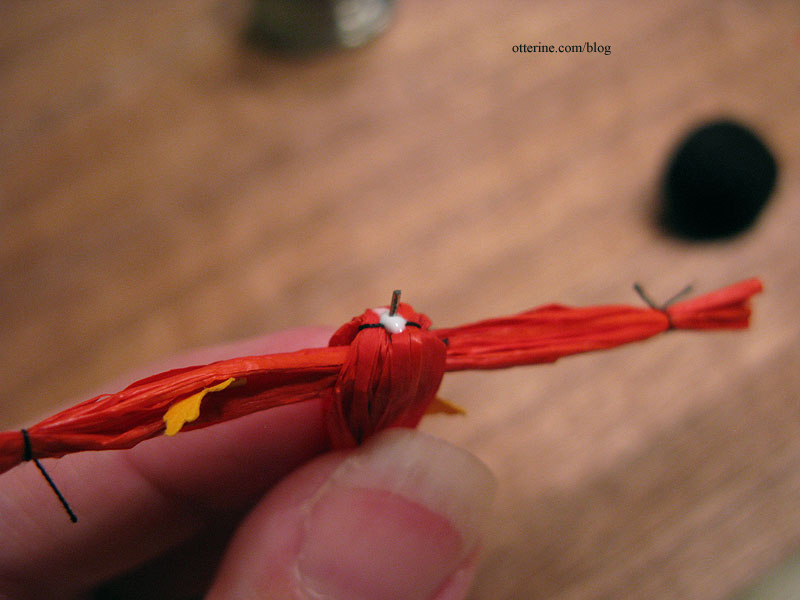
Glue the other end of the wire into the head at the neck and shoulders, adding glue between the head and the body as well. Gluing polymer clay to anything is often semi-permanent, so you may need to apply glue again in the future. Having the wire in place helps keep your scarecrow from turning into the headless horseman even if the glue comes loose. :D
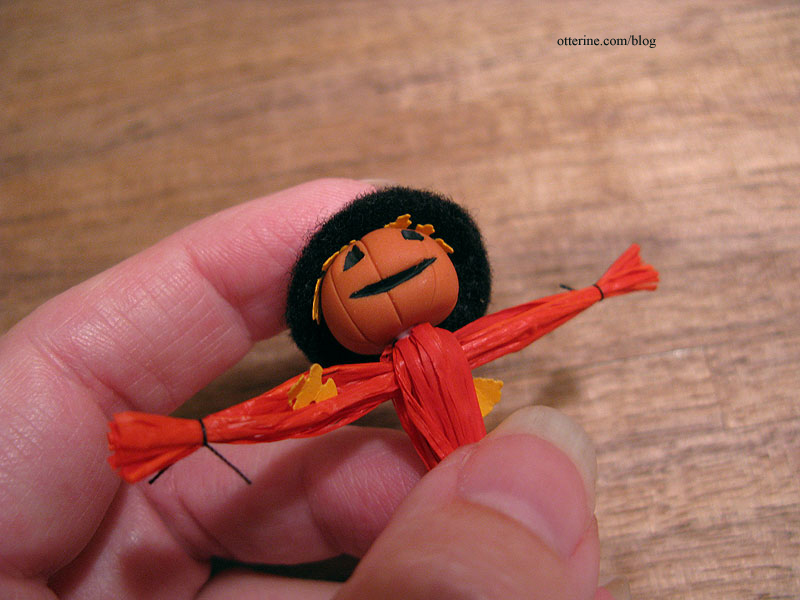
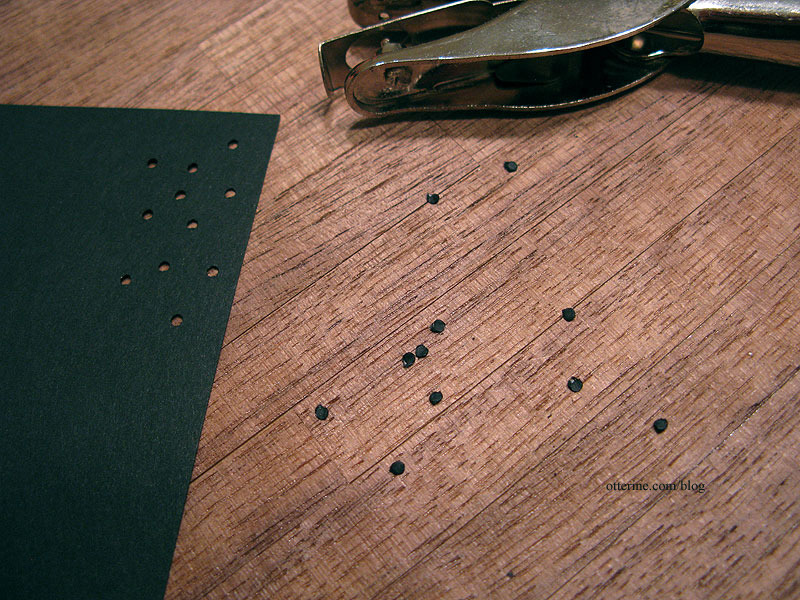
Punch out some 1/16″ circles from black paper. Glue on as buttons to the front above the waistband. You could also use paint for the buttons but be sure to set it aside and let dry completely before handling.

Here’s an example using natural raffia (I used a larger bundle for this one to have a full skirt). For the skirt, I left the raffia below the waist untied and trimmed the bottom edge for a clean look. I used small half beads for the buttons and put a leaf on her hat. Isn’t she pretty in her smart cap? :D
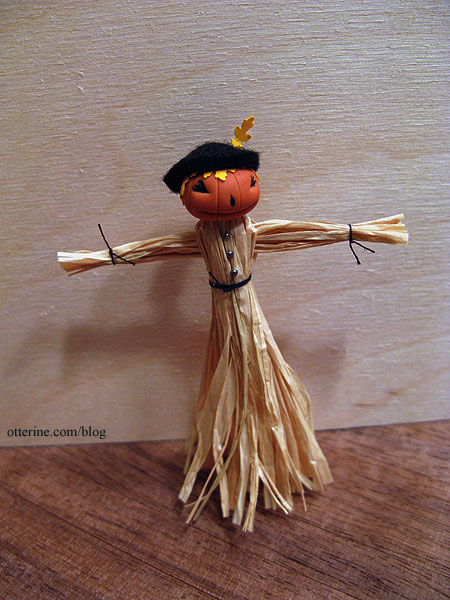
And, there you have it…a merry scarecrow (or three) for your autumn or Halloween display!
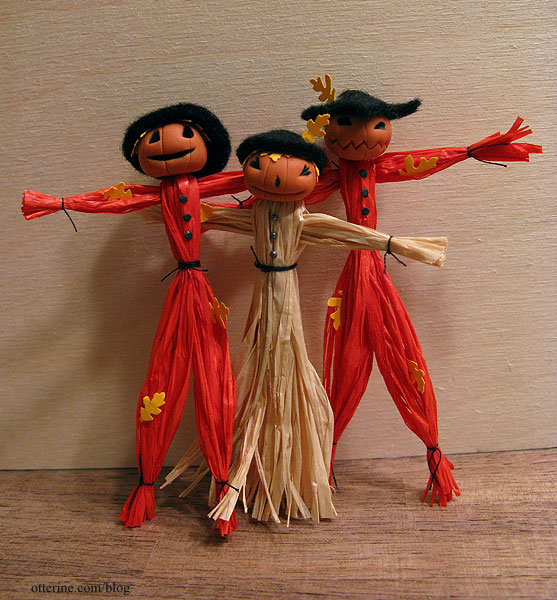
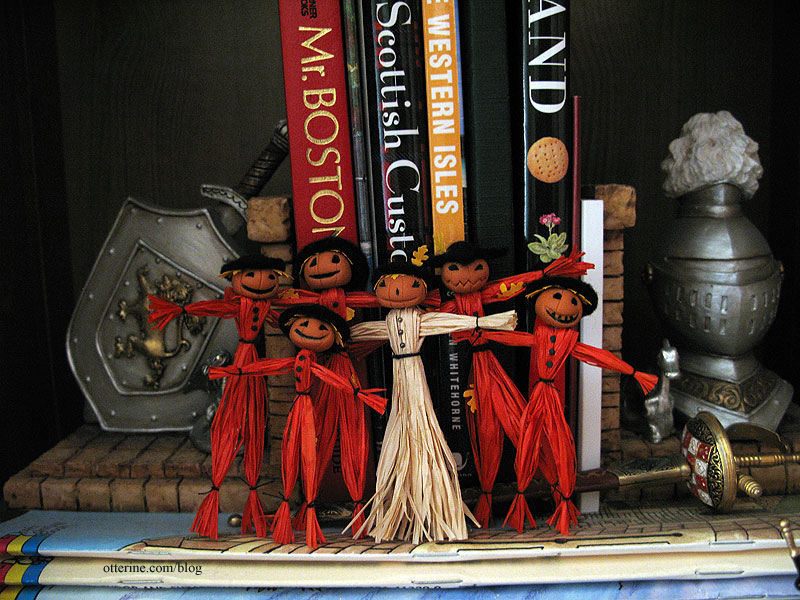
I have a few of these made for sale in my etsy shop, too.
Categories: Miniatures
August 22, 2012 | 0 commentsEggs!
Tonight, I made a basket of eggs for my hens in progress. Well, Lyssa made the baskets shown in this post, but the eggs were made from clay tonight.
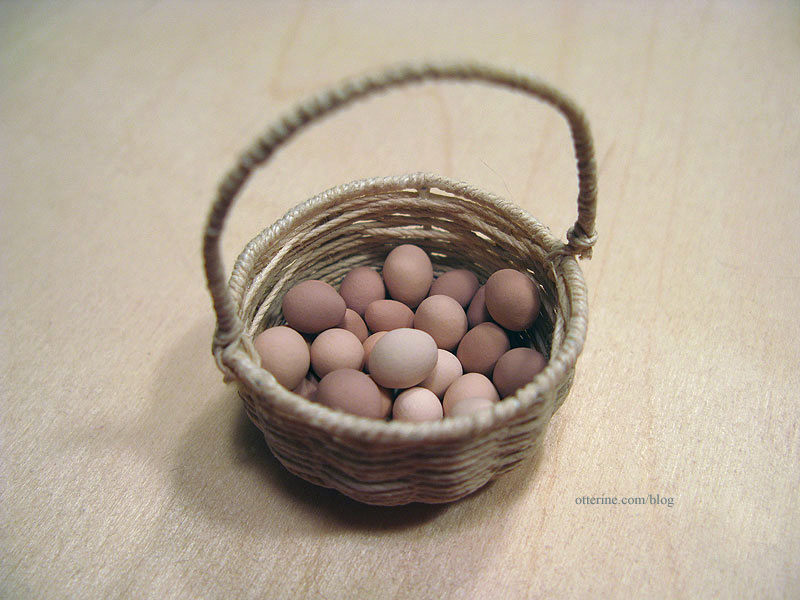
I mixed up five different colors of clay, all similar in tone, to mimic the natural variation of real life eggs. The particular breed I am emulating has lighter color eggs than the brown ones I buy at the store.
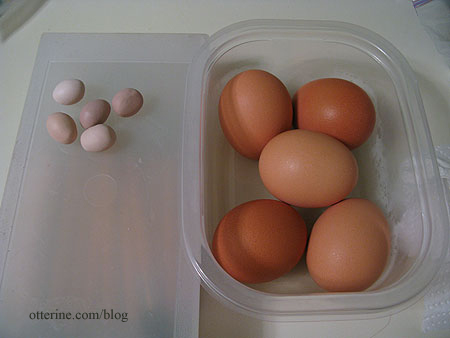
Eggs are not an easy thing to get right in clay, at least for me. The shape is somewhere between round and oval. Overall, I’m pleased with the way they turned out, and I can always pick the good ones to show on top. I made a lot more than I needed for that reason. My two hens would be exhausted laying all these eggs!
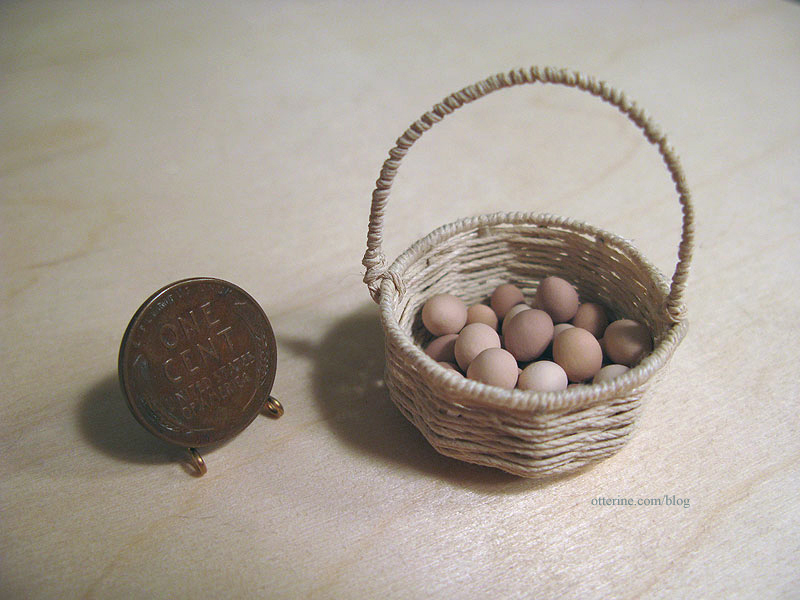
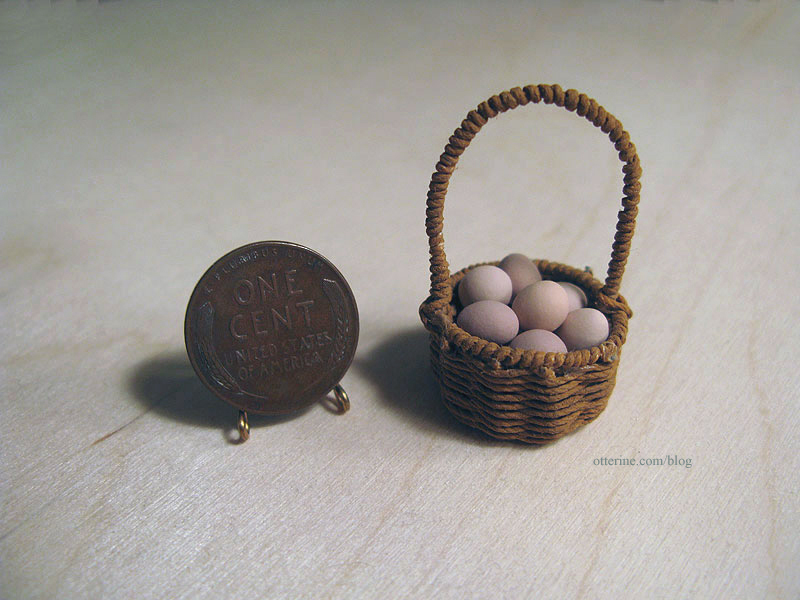
I do have a smaller basket from Lyssa, but I like the way the eggs look in the lighter color one. Perhaps it’s the number of eggs or the color of the basket I’m drawn to, I’m not sure which.
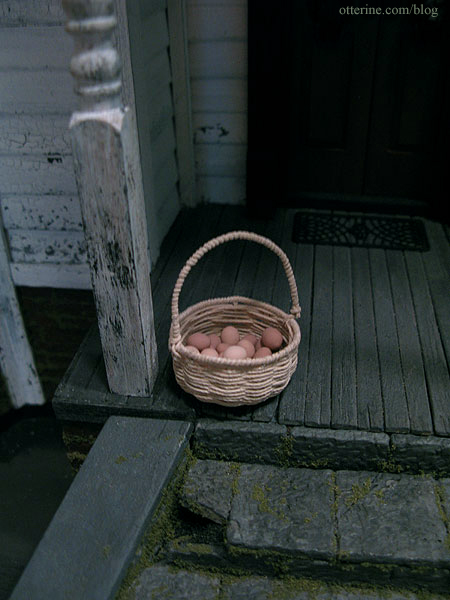
I borrowed the Heritage for a backdrop. :D
Categories: Miniatures
July 7, 2012 | 0 commentsCutting egg carton bricks plus links to finishing
Many people have asked how I get my bricks so uniform, and I can tell you they are close but not exact. The bricks I make are 1/4″ x 3/4″ for most projects. This is a little off from exact 1:12 scale, but they look spot on when finished. Whatever size you use, you do want consistency. Painting and grouting make up for any obvious flaws, and if a brick is too far off from the rest I just don’t use that one.
I first learned of egg carton brickwork from two great sites: Connie Sauve’s The China Doll and Victoria Miniland (both sites are now defunct as of 2024). I use the method from The China Doll.
I obtain egg cartons from various sources: my own household, mom and a local freecycle group I belong to. You can post want ads or reply to offers on that site, and it’s free! I use the flat surfaces of the lid and recycle the bottoms with the egg cups. You could get bricks from the cups, but to me it isn’t worth the extra time and effort. I also use the interior surface as the brick face since it has a nice bumpy texture. Words and images won’t matter after painting.
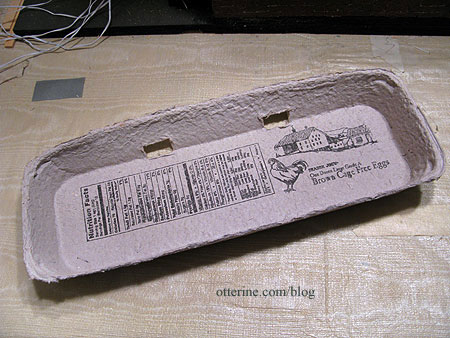
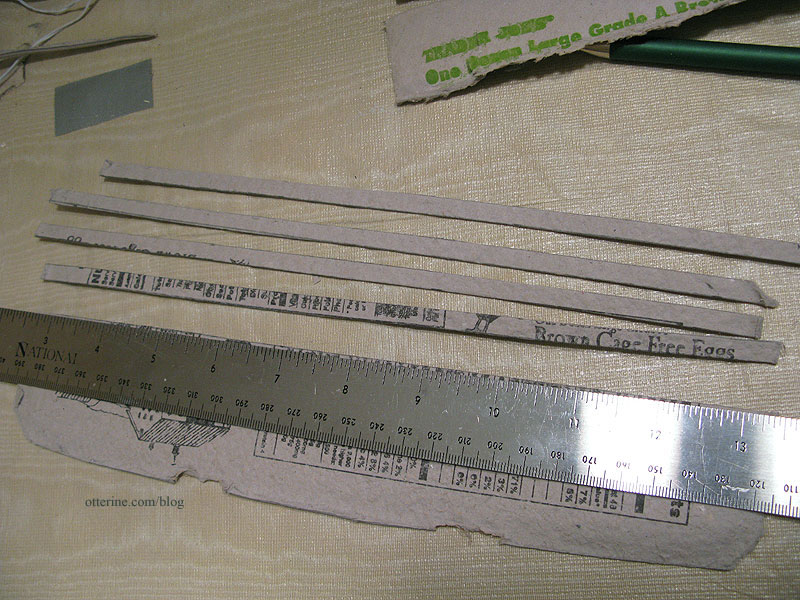
I cut the pieces into manageable flat sections. The large, flat top is obviously the best source of bricks, but the smaller pieces yield quite a few.
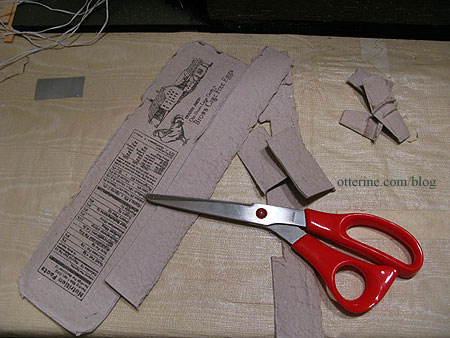
I mark one edge with a ruler and use scissors to cut along that line. If you aren’t good at keeping scissors on a straight line, you can use a sharp X-Acto knife.
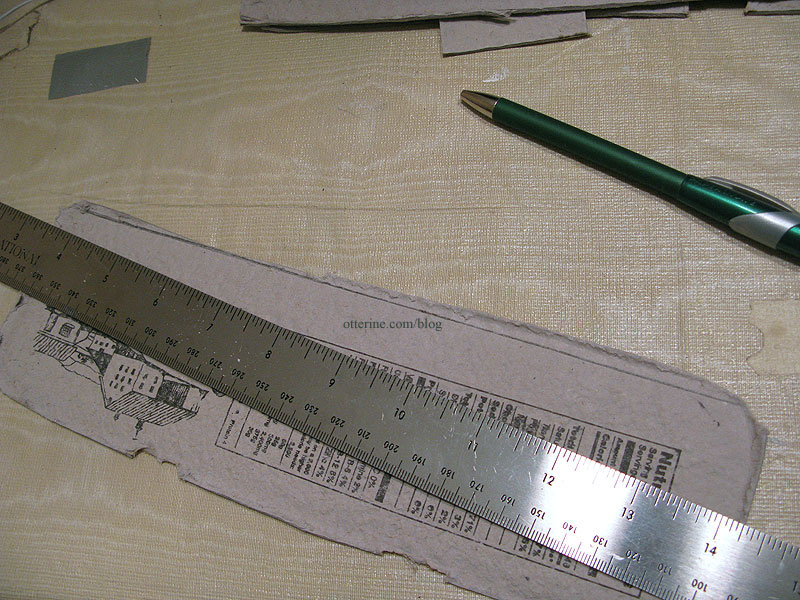
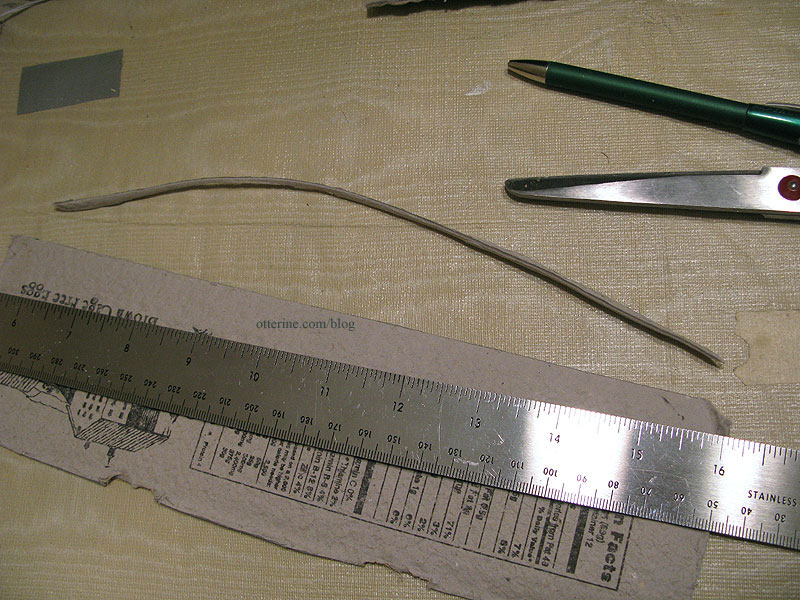
From that clean, straight edge, I mark four 1/4″ increments in several places along the edge.
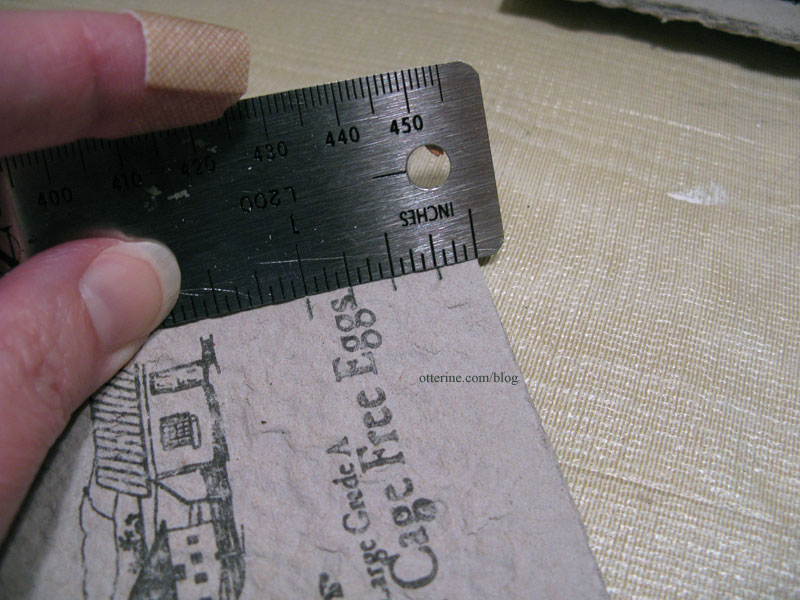
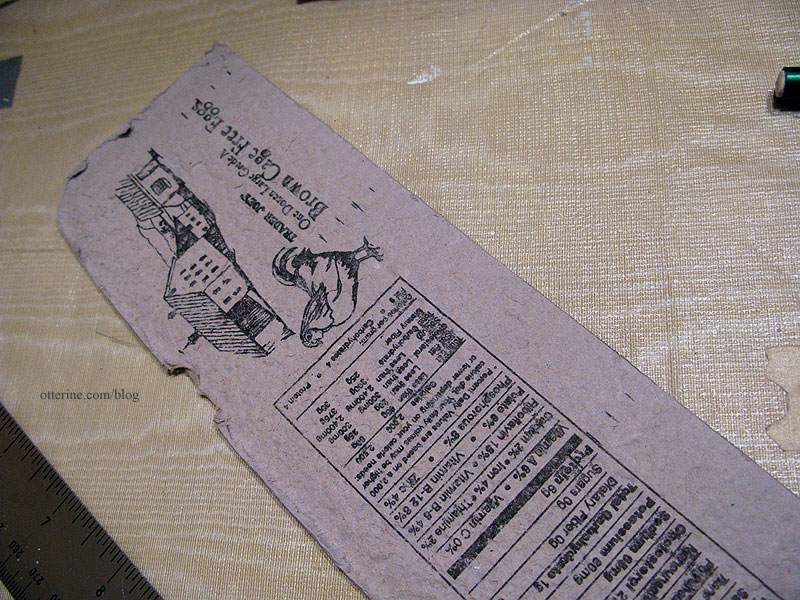
I use my ruler to join those marks and make guidelines.
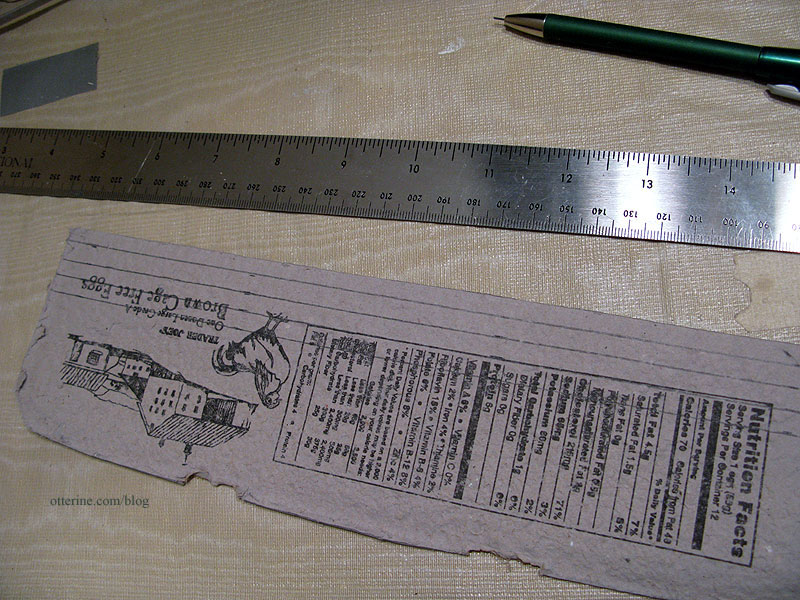
I cut along those guidelines. Again, I use scissors since my sewing experience gives me a steady hand at cutting straight lines with them. You can use an X-Acto blade, too.
After the fourth strip is cut, the edge is usually off a little. I draw a new line across and clean up the edge before repeating the 1/4″ increments until I run out of egg carton.
I square up the ends of each strip with scissors and then mark 3/4″ increments along the strip.
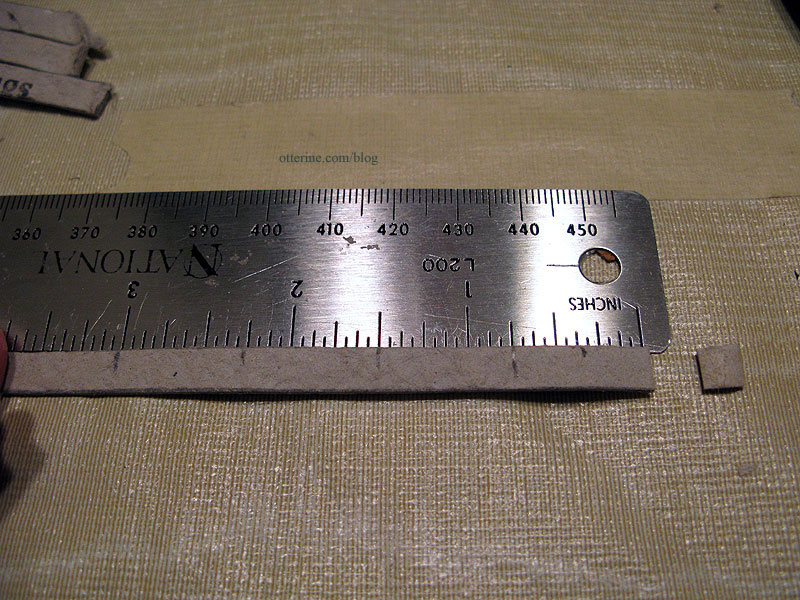
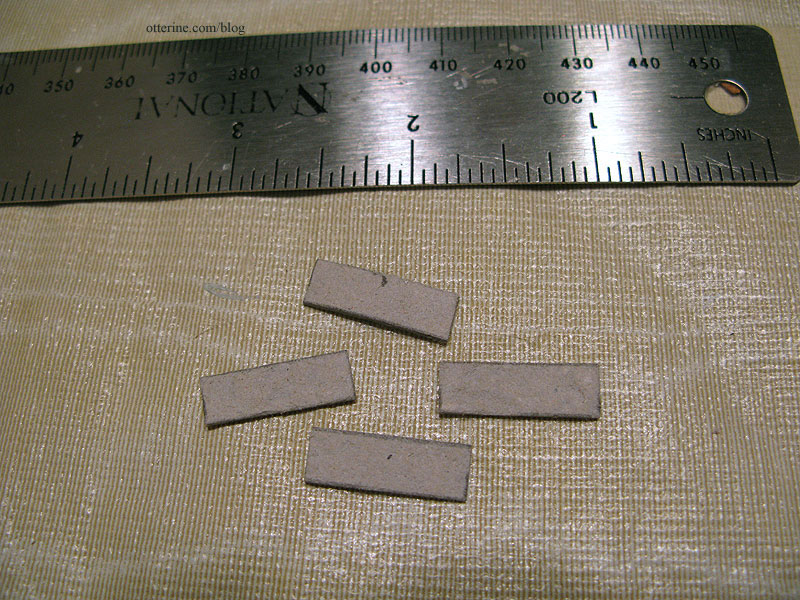
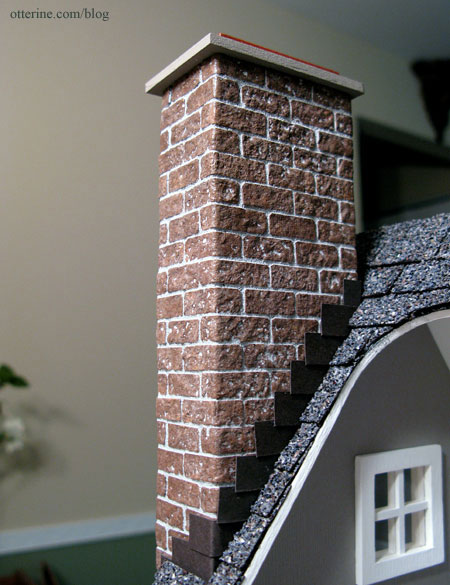
If I am bricking around any corners, I cut them to fit. These will have approximately 3/4″ showing on one side and approximately 1/4″ around the bend, but they do vary depending on how well you place the regular bricks.
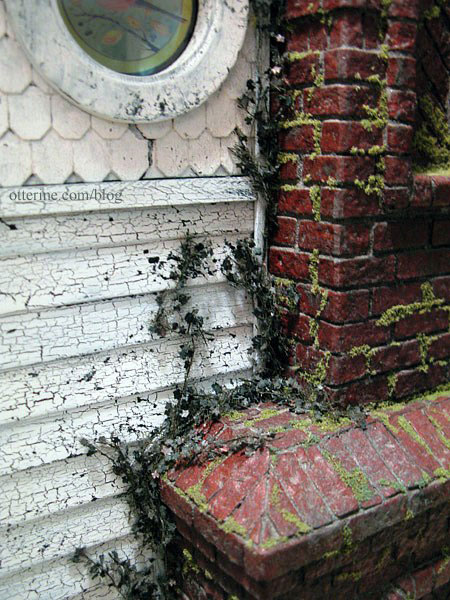
Here’s the chimney at Baxter Pointe Villa painted with layers of brown acrylics and grouted in grey. You can see the longer bricks used around the corners.
At the end of each strip, there is usually a piece that is too short. I mark that with an X and put it in a separate pile. When you do brickwork, you often need short or angled pieces. These leftovers are already the right height and can be cut to fit those smaller areas without wasting your full sized bricks.
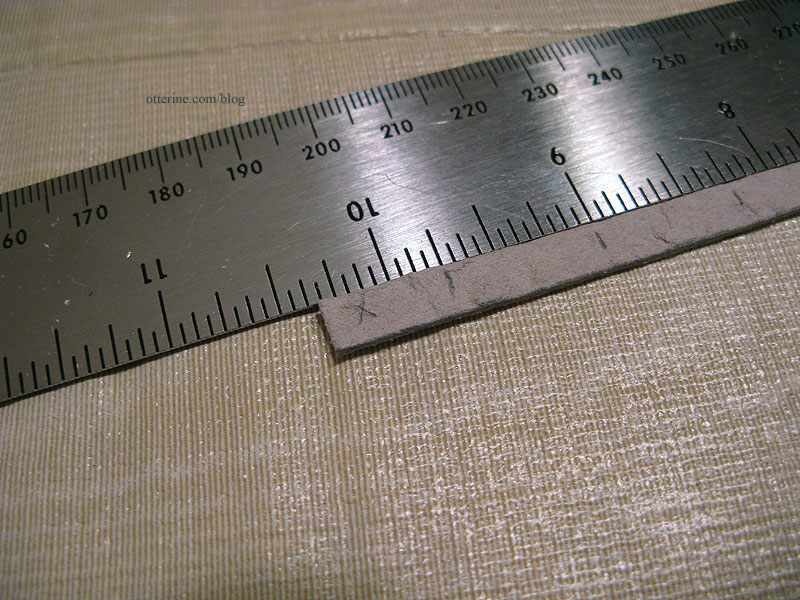
Once I have a pile of bricks, I cut the corners from each one. This gives them a more natural appearance in my opinion.
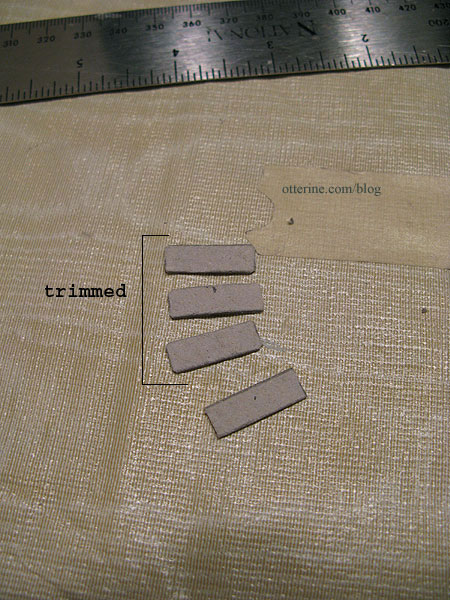
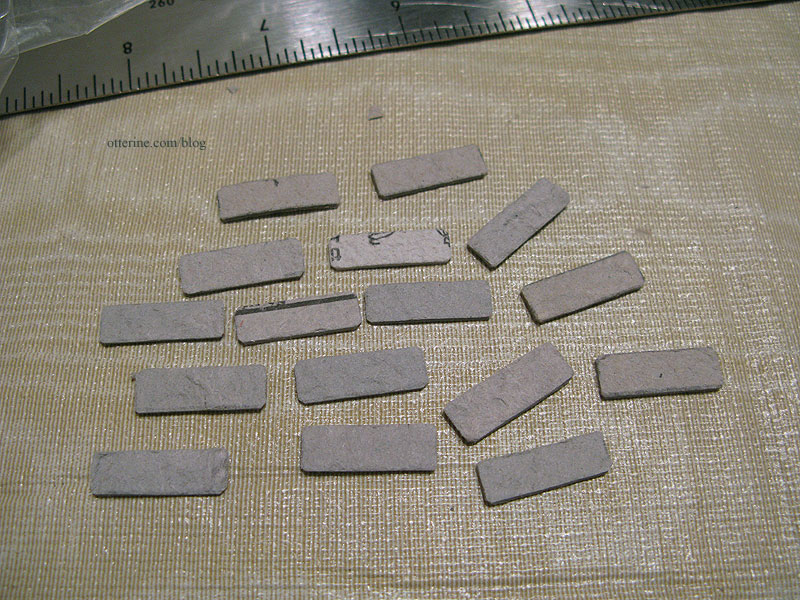
Here are my four new bricks with a bunch I’ve cut previously. They are all close in size and shape but they do vary.
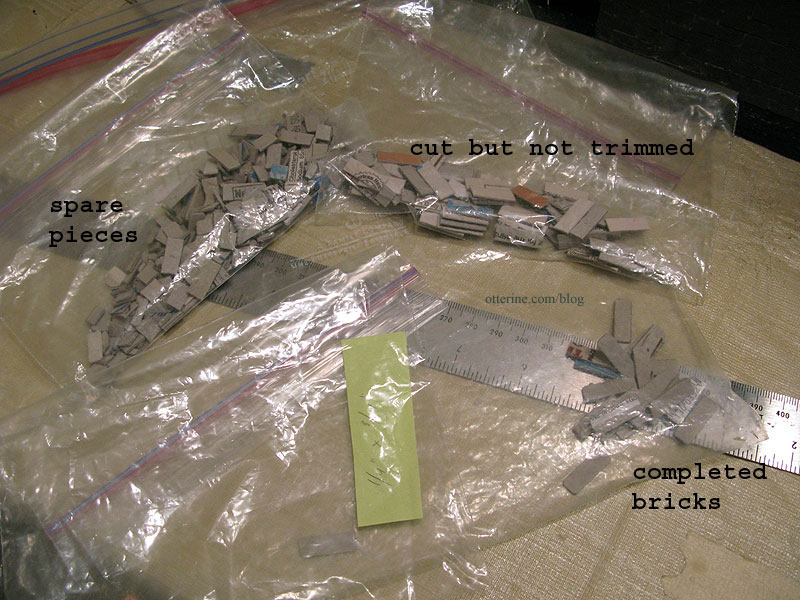
I keep a large ziploc bag for my finished bricks. I keep a smaller bag inside for bricks that have been cut to size but the corners still need to be trimmed. I also have a bag for scraps. If I’ve cut a different sized brick, I use a note inside the bag so I can tell which is which.
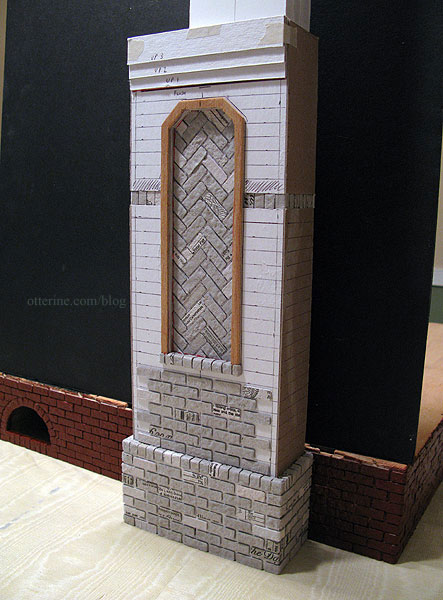
For the Heritage chimney, I used guidelines drawn on my underlying structure to plan the exact number of bricked rows I would need and to keep the structure aligned properly.
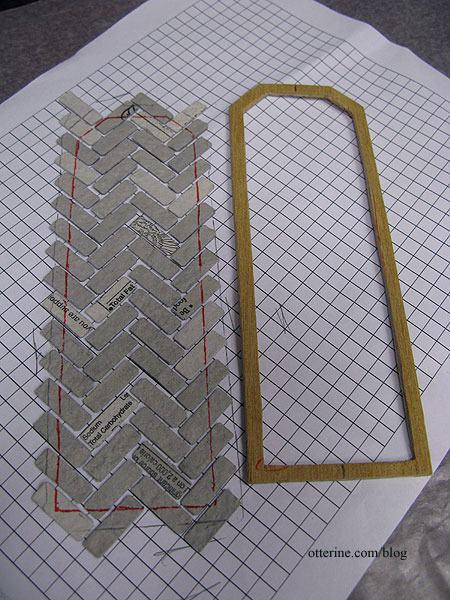
For herringbone brickwork, I use graph paper as a guide. You don’t really fill in the squares per se, but the grid helps create a more uniform pattern.
However, I usually don’t bother with guidelines for straight brickwork. I am able to eye measurements well, so I just glue the bricks with a little bit of give in between them and check with a ruler every other row to make sure I haven’t gotten too far off.
I use Aleene’s Quick Dry glue to apply the bricks. Once the bricks are in place and the glue has dried, I paint with acrylics in the color of my choice. I use a stencil brush and stipple the paint on since brushstrokes can ruin the illusion.
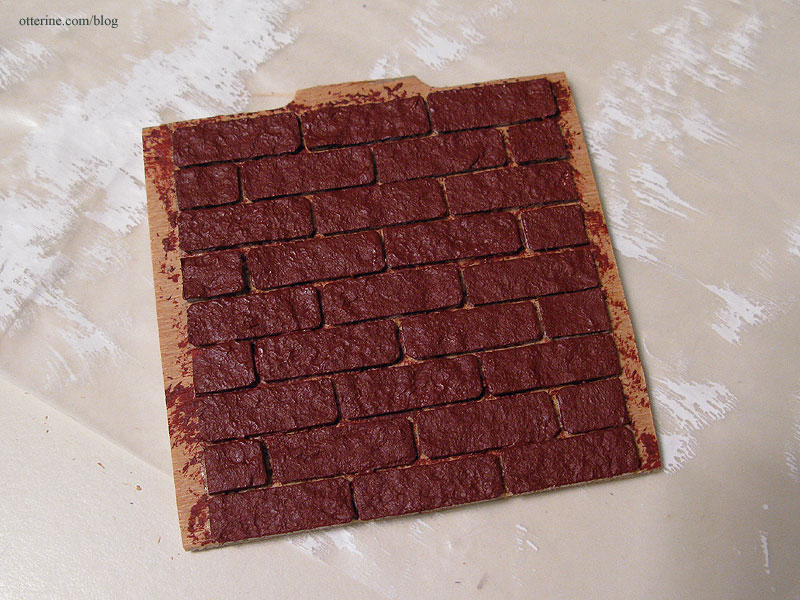
Once I have the color I want, I seal the surface for grouting. The grouting process will change the coloration, so keep that in mind when you paint. You can touch it up later. For instructions on painting, sealing and grouting, see my post on finishing the Heritage foundation. For instructions on aging the brickwork, see my post on adding grime and moss to the Heritage foundation.
Categories: Miniatures
May 17, 2012 | 0 commentsVintage table clocks
I was recently contacted by a fellow miniaturist on etsy to make a few vintage table clocks for her clock shop project. I gathered my wood bits, jewelry findings and paints to see what I could come up with for her.
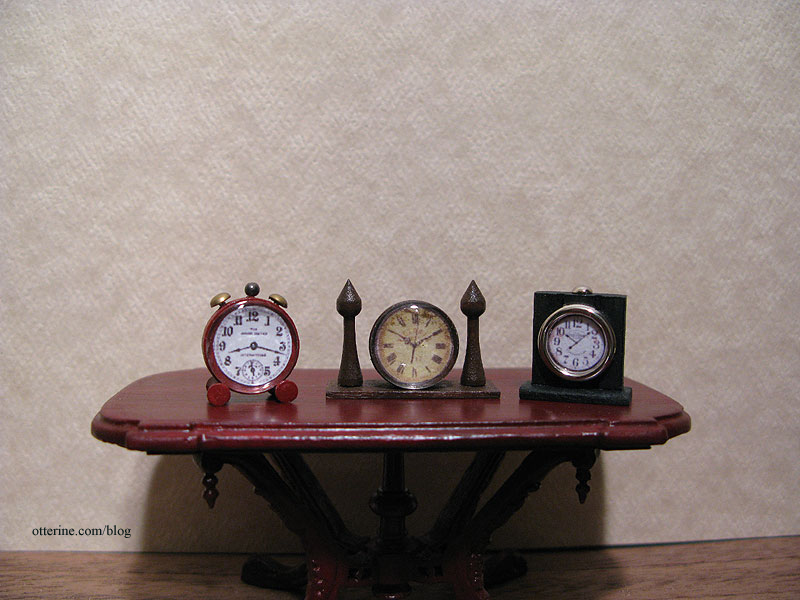
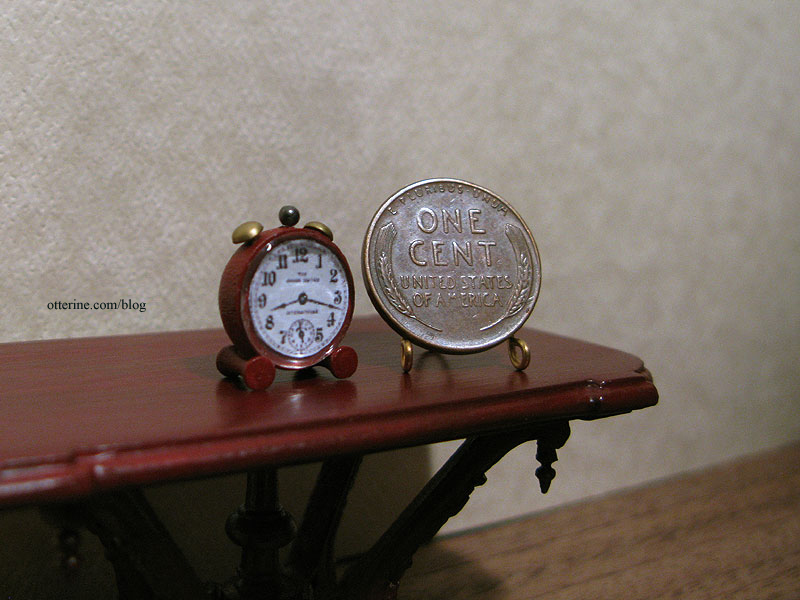
First, a tiny red alarm clock that stands just 5/8″ tall. The face is a printed image from The Graphics Fairy. I love this one especially, so I’ll probably make a one for my own project. :D
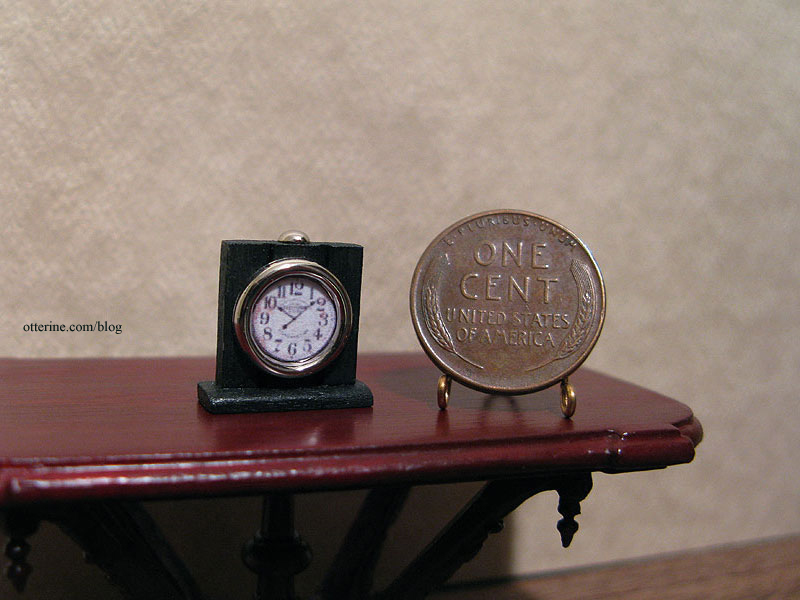
Second is a black art deco clock that stands 5/8″ tall.
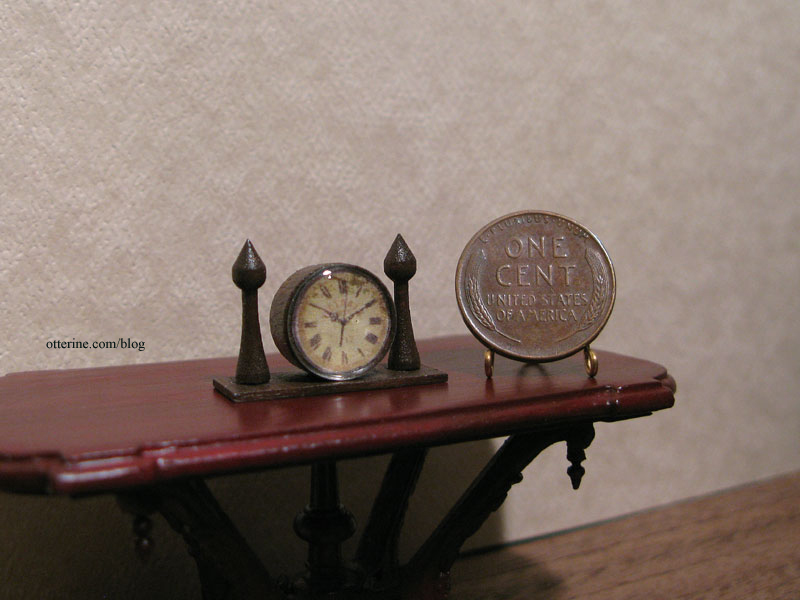
Last is a wood stained decorative clock with pillar detailing. This measures 1″ wide and just under 3/4″ tall.
Categories: Miniatures
March 11, 2012 | 0 commentsBespaq furnishings and lovely handbags
I was fortunate enough to win Audra‘s giveaway recently. As the prize, she offered a gift certificate to a miniatures shop called Happily Ever After.
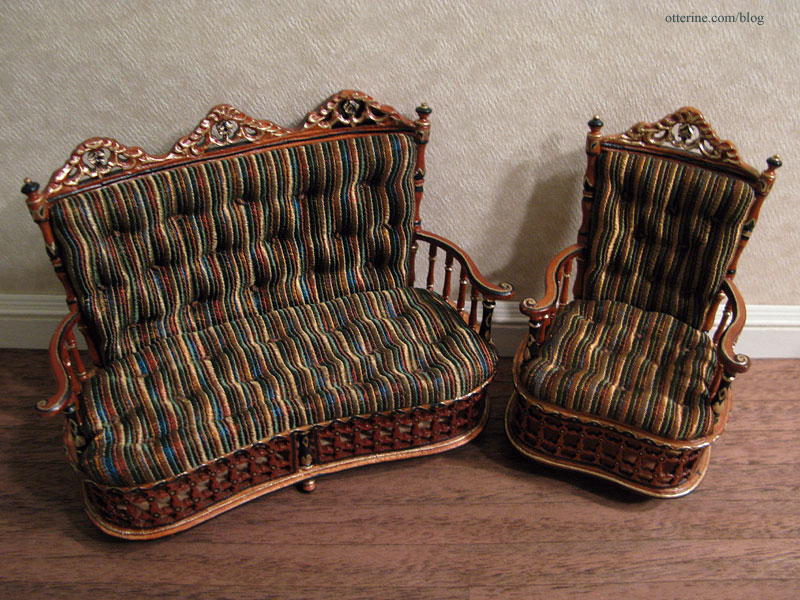
Some time ago, I bought a Bespaq Royal Marrakesh settee in walnut and have been searching for a matching chair since. I saw that Happily Ever After that a photo of the entire living room set on their site, so I wrote to Lori there to see if she had what I was looking for. She sent me a photo and a few days later, it arrived! :D
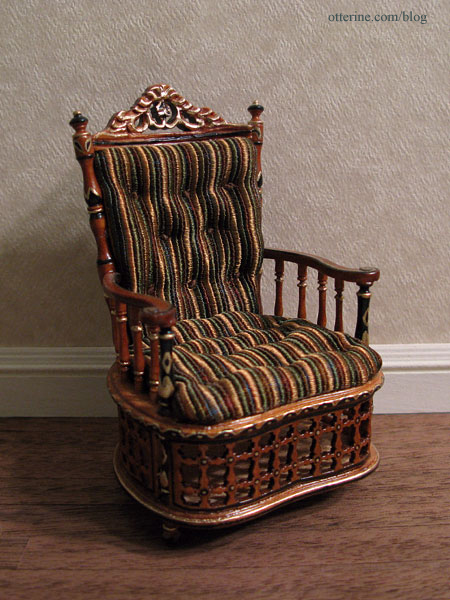
Here’s the new chair with settee I already had. This set will be for a future build.
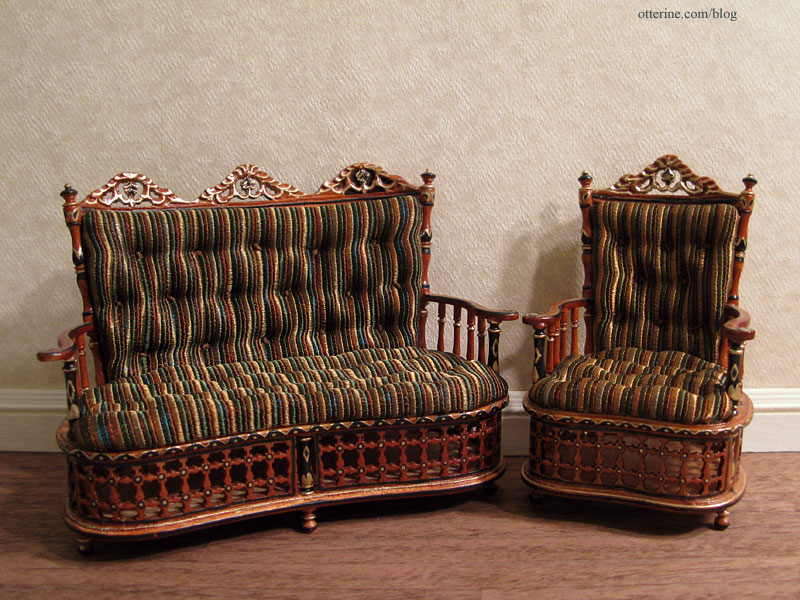
The wood and painted details match perfectly, though there is a slight difference in the fabrics. No matter to me since they are very close so dollhouse lighting and added accessories should make up that difference. Thank you Audra and Lori for a wonderful giveaway!
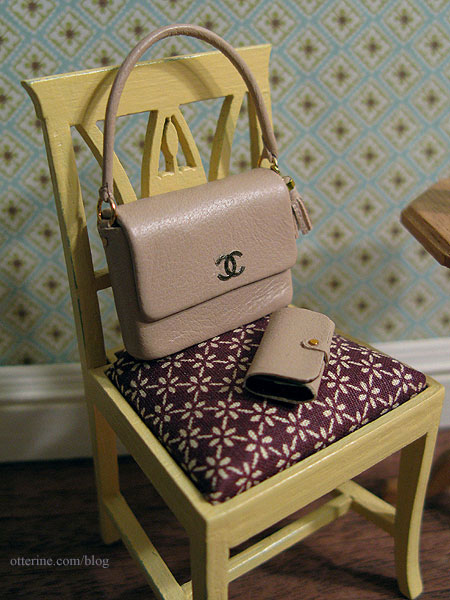
Another package arrived with the new chair today. In it were two handbag sets from Dollhouse Ara. The first is a pale pink Chanel replica handbag and wallet. They are so well made and have a nice weight to them. Included in the package was a lovely vase with dried natural flowers. Very pretty.
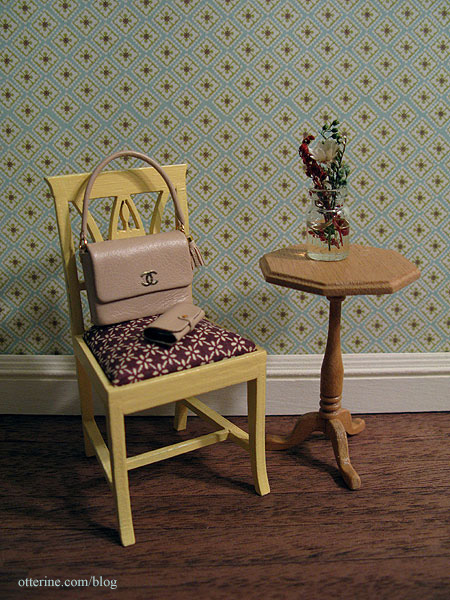
This set will go in the Heritage since they are a nice classic style that shouldn’t interfere with the era of the house. Grandma has good taste! :D
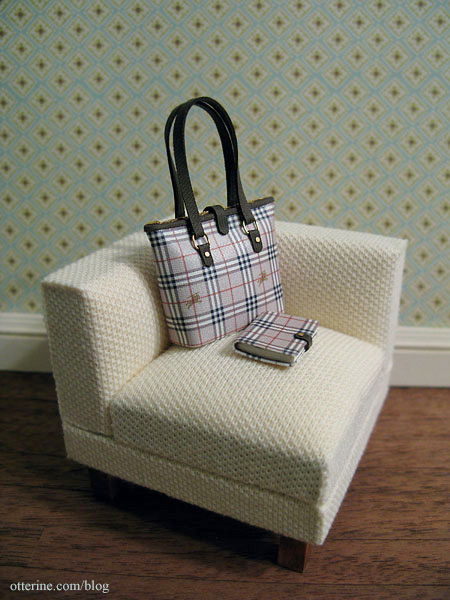
The other set is a Burberry tote bag with a covered journal. So lovely. This set will be included in a more modern build to come.
Next up, a beautiful green striped Bespaq sofa and matching chairs. Dejoux Miniatures had an awesome sale right before Christmas, and since I’ve had my eye on these for some time now, I took the plunge. I added a Bespaq coffee table to complete the set, though the color doesn’t work all that well.
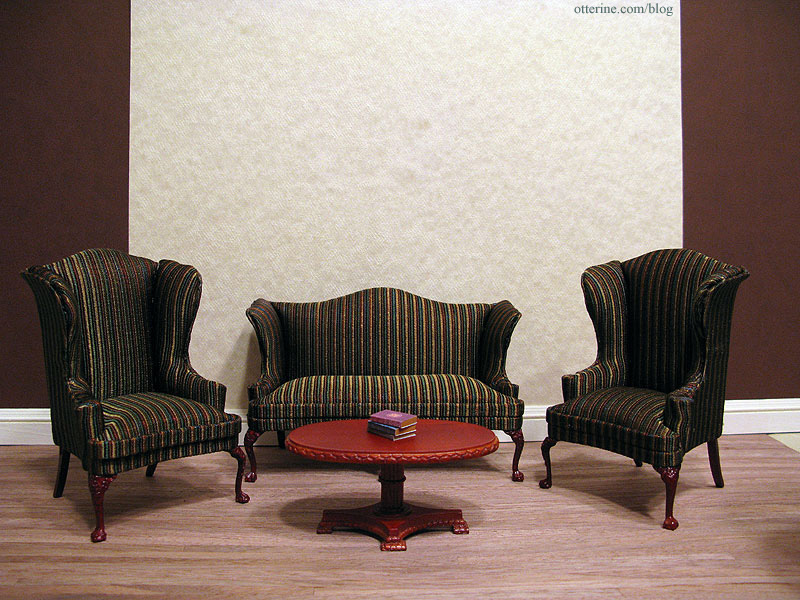
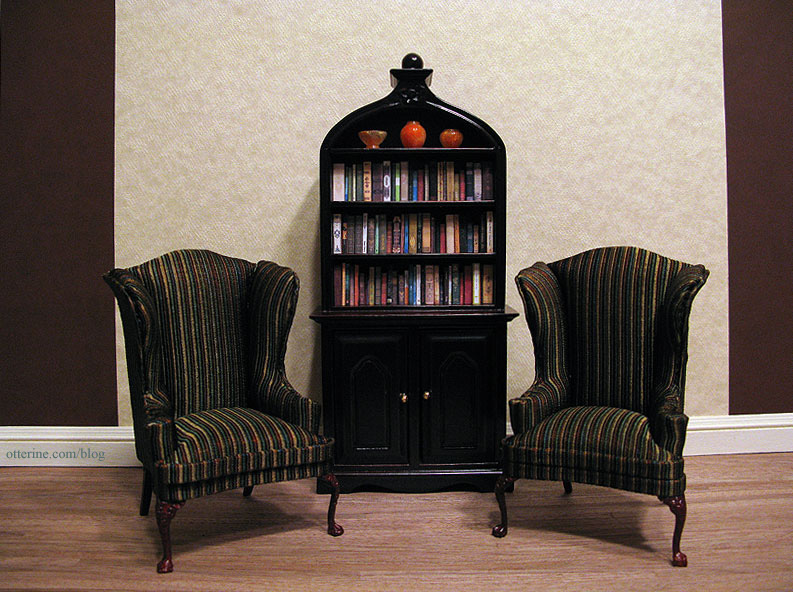
Quite honestly, I’m considering breaking up the set to use the pieces in separate projects. I could see a fine study with the two chairs. The chairs somewhat overpower the sofa when used as a whole set.
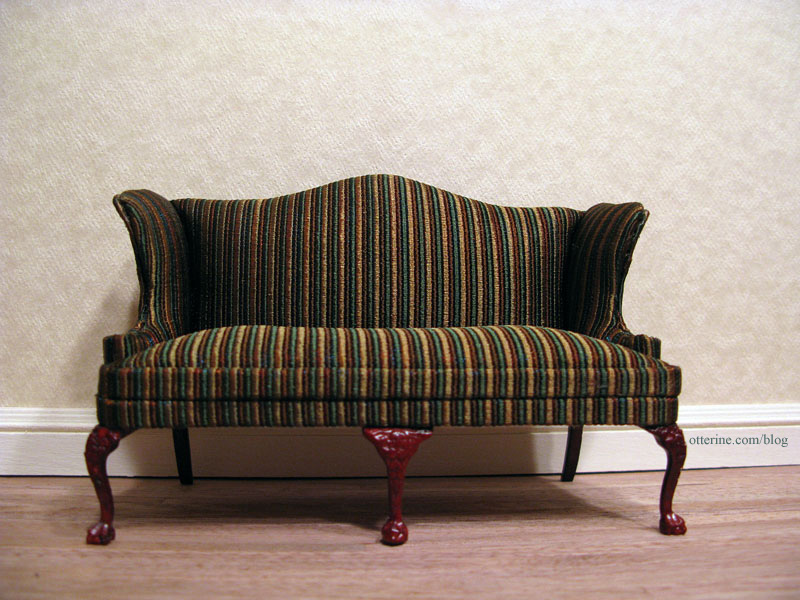
The sofa is beautiful and a perfect standalone piece. It could be easily coordinated with wood carved accent chairs.
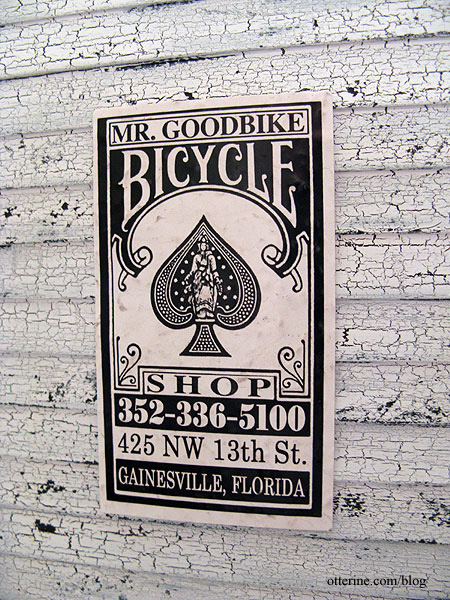
The next item is not a purchase but a lucky find…sometimes the best kind of mini. I went to visit Lyssa in Florida. When I returned to the hotel one night, this card caught my eye. It’s a business card made with vintage playing card imagery. It had been run over a bit but the gloss finish is intact.
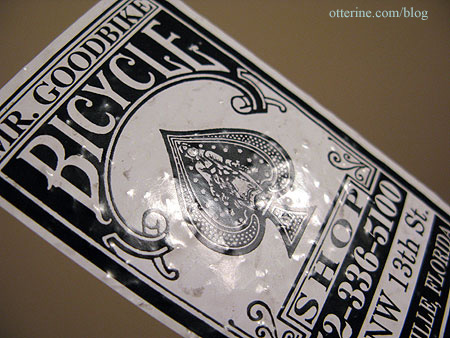
It reminds me of an old metal sign you’d see on the side of a building. :D Into the mini stash it goes!
Categories: Furniture, Miniatures
March 3, 2012 | 0 commentsFancy bookshelf
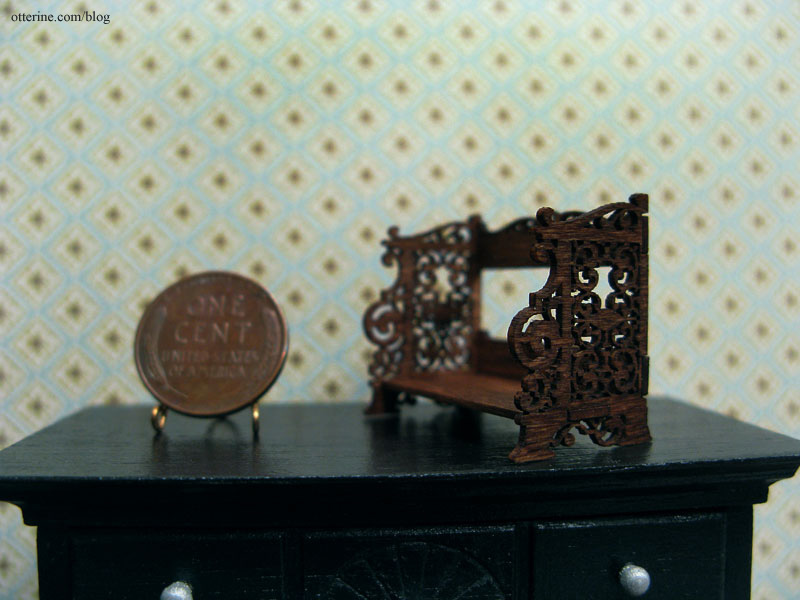
In addition to the banjo clock, I also put together the Jacobean book rest kit from Cynthia Howe Miniatures. It was so delicate that I ended up breaking a piece of the fretwork while removing the excess wood pieces. I cut the other side to mimic the design. ;D
The instructions said to put it together before staining, but I was worried about warping and I wanted to get a good glue hold, often better with bare wood.
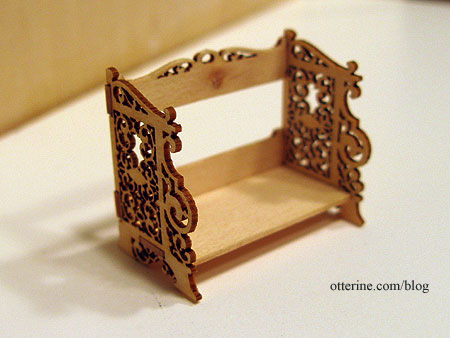
I stained the shelf with Minwax English Chestnut, leaving the color light to show off the wood grain. This is some seriously psychedelic wallpaper! :O This is Flower Frenzy by We R Memory Keepers.
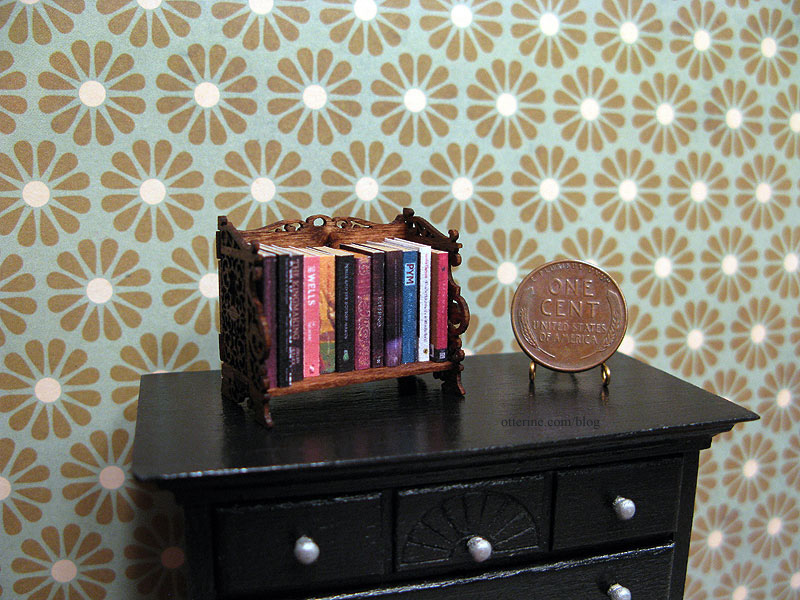
That’s better. :D I’m not sure if either of these papers will find their way into the bathroom upstairs, but I wanted to photograph them with some furniture to see what they looked like. This is Cute Little Diamonds by The Paper Studio.
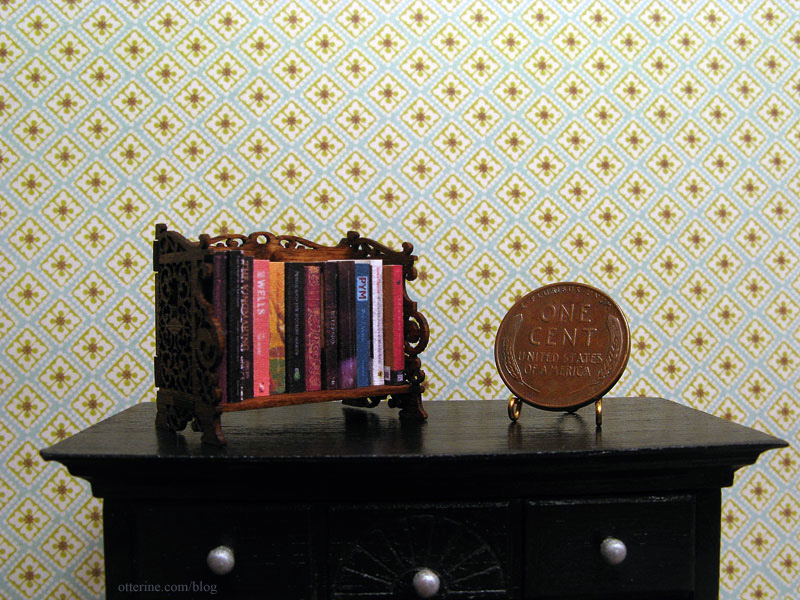
The shelf will likely end up in one of the upstairs rooms in the Heritage, probably the bathroom. The kitchen and parlor are pretty much set for furnishings. :D
Categories: Miniatures, The Haunted Heritage
February 22, 2012 | 0 commentsAutumn fruit basket, handmade rug, kitchen stool
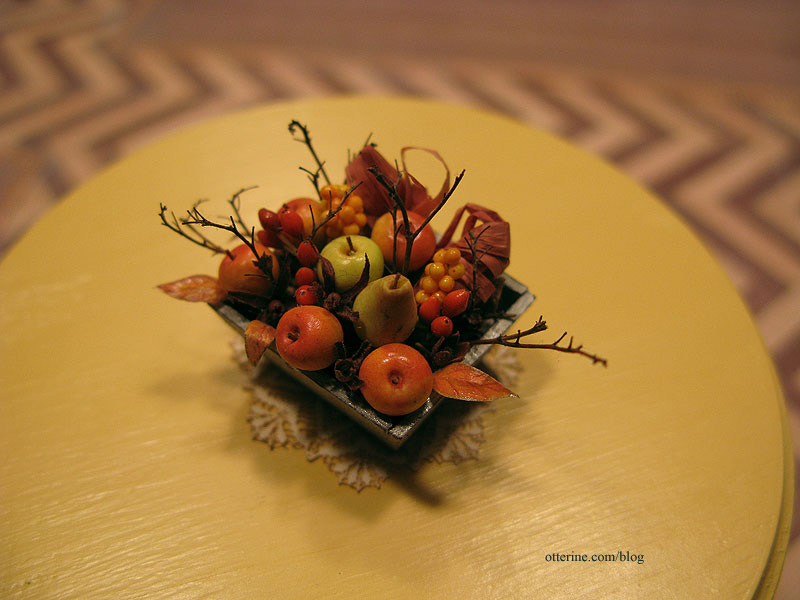
I plan to make some polymer clay food somewhere down the line, but when I saw this beautiful basket from Hungarian Miniatures on etsy I just knew it would be perfect for the Heritage.
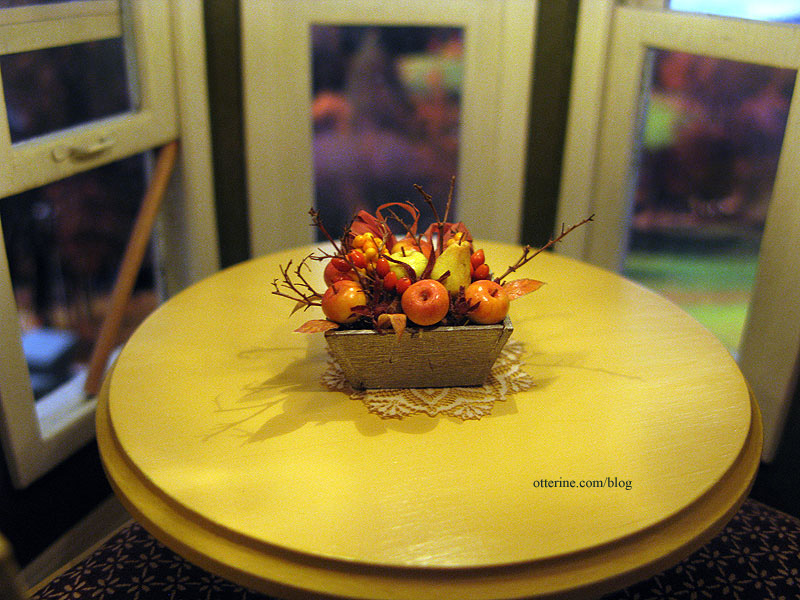
You would not believe the amount of detail! Bözse makes beautiful minis, and I am proud to display this wonderful creation in the Heritage.
I found this beautiful rug by Katie Arthur of Dollhouse Littles on etsy and loved it. The texture of it is amazingly lifelike.
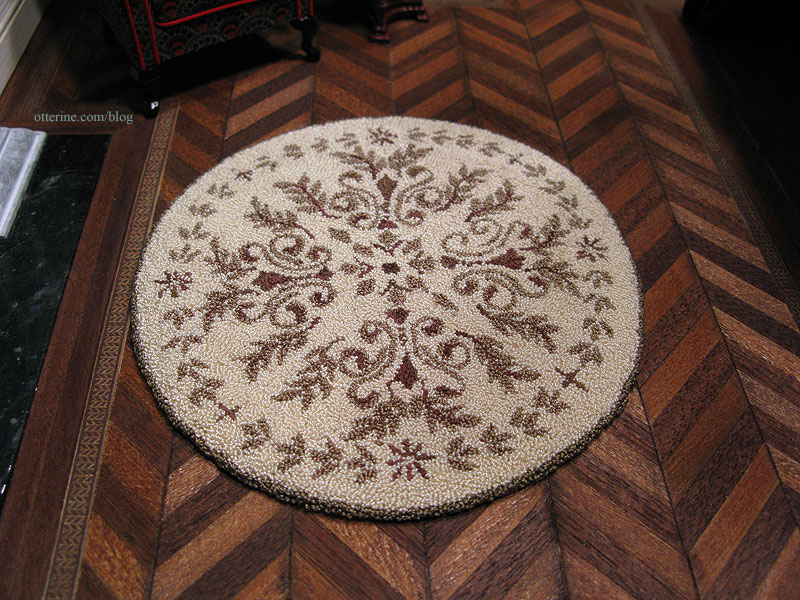
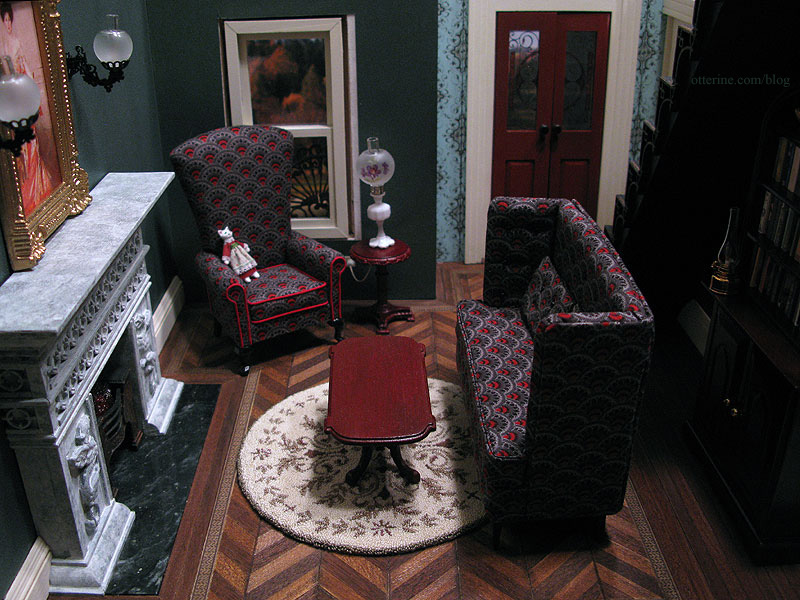
I really hadn’t intended for it to be for the Heritage, but when I put it on the wood floor to photograph it the room felt complete with it. I added the furniture and discovered that the round shape worked perfectly. It didn’t cover too much of the floor and didn’t interfere with the legs of The Sofa. The legs of the coffee table are thin enough so most of the rug shows underneath it.
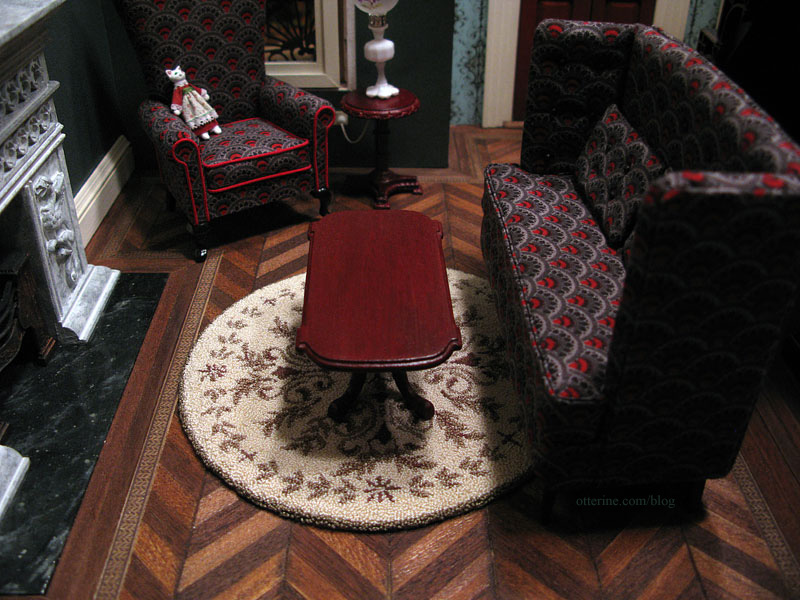
The soft colors and light tone of the rug work well to tie in the fireplace in an otherwise dark room.
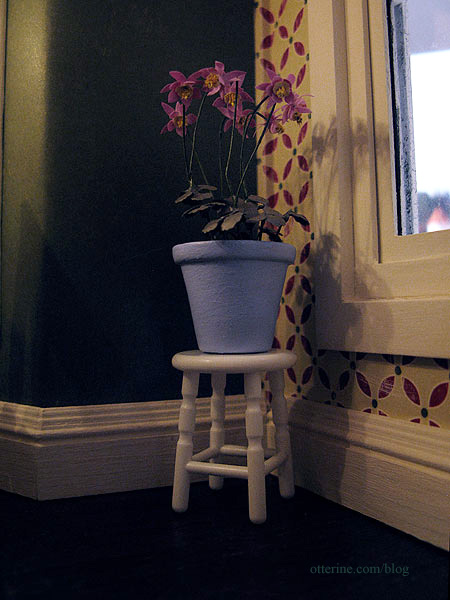
I started making a small Chrysnbon plastic stool for the kitchen. It’s from the Victorian bathroom kit and had been originally intended for Baxter Pointe Villa, but I ran out of time with that build. I needed something to keep the flower pot off the floor and in case grandma needs to reach for something up high. Right now it is just plain white plastic, but I’ll paint it to give it an old, well worn look.
Categories: Miniatures, The Haunted Heritage
February 16, 2012 | 0 commentsPerfect mitred baseboards – a tutorial
One of the best ways to achieve realism in a miniature setting is to add baseboards. But, nothing ruins that illusion more than big gaps at the joins. With a little patience, there’s a relatively quick fix to achieve perfect mitre joins, even if your cuts are off. (Note: for my tutorial on the electrical outlet, see this post.)
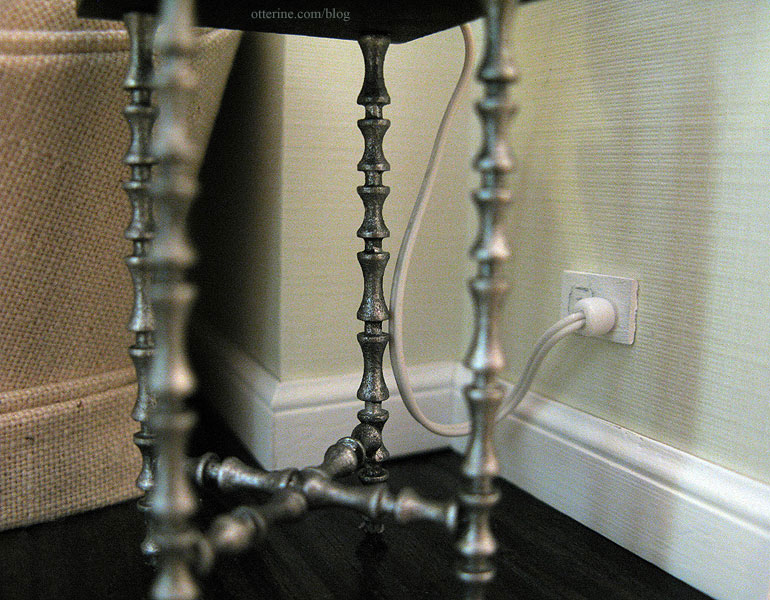
living room in Baxter Pointe Villa Here’s the process I followed in the Heritage kitchen, where the uneven angles of the bay window left rather noticeable gaps in the cut baseboard. Dollhouses are not often square, even with the best of intentions.
I use an Easy Cutter to make my mitre cuts in the first place, though this tutorial doesn’t cover that part of the process since I can’t photograph myself working on something that requires two hands! :D I’m starting at the point where you already have the best mitre cuts you could make. The baseboards need to be finished, cut and glued in place, matching the mitres as best as possible. I’ve left my baseboard relatively rough to reflect the age of the house.
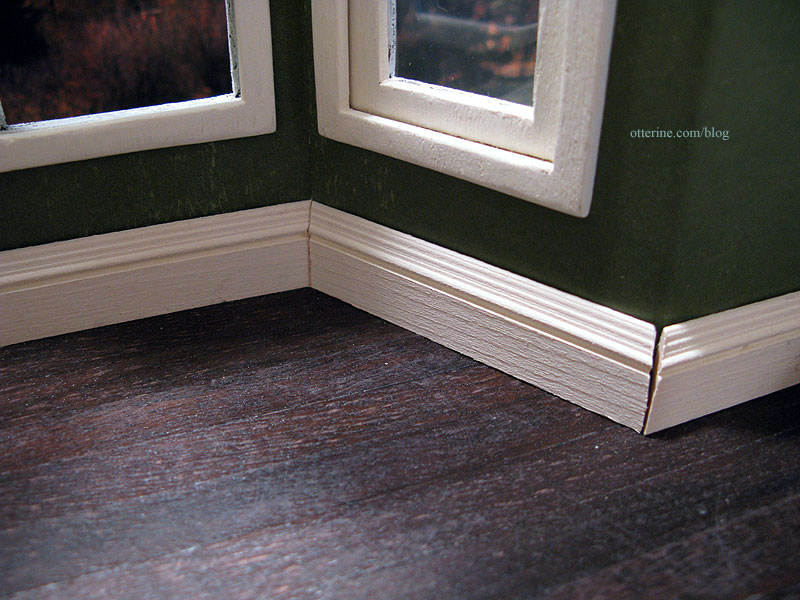
Inside corners usually have minor gaps, if any, and are the easiest to fix.
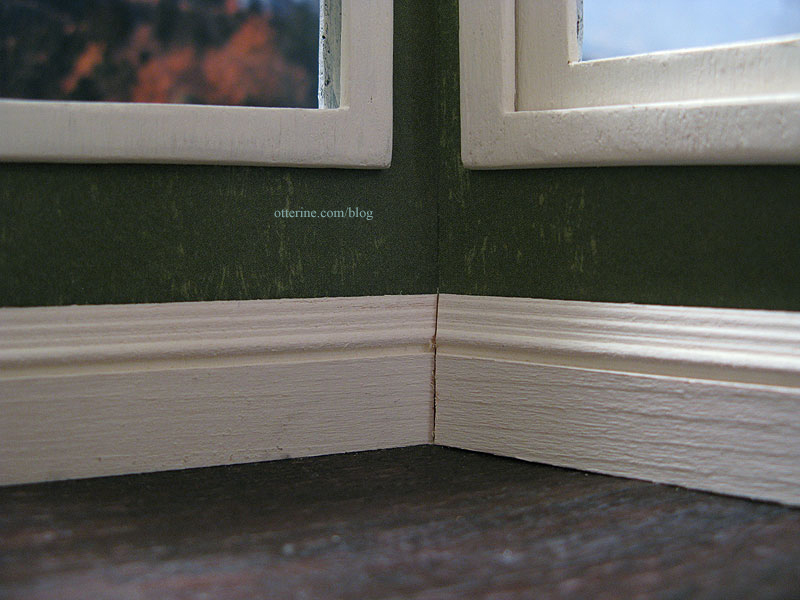
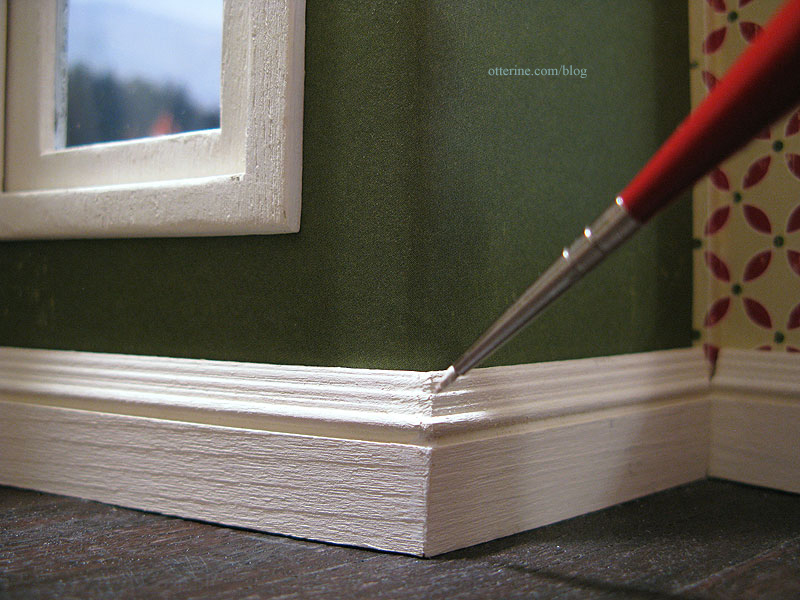
I take a tiny paint brush dipped into the same paint used on the baseboards and dab small amounts of paint into the crease.
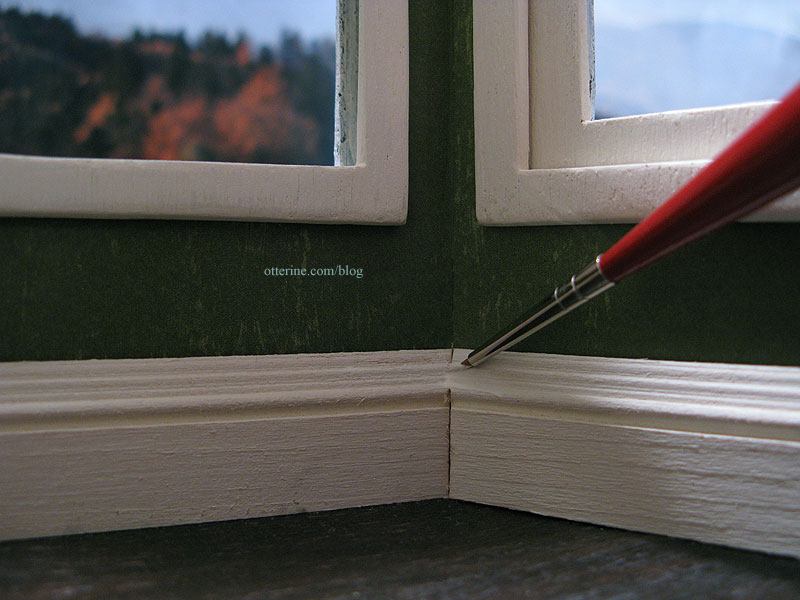
Be sure to blend the paint outward to eliminate bulk and obvious brushstrokes. In the photo, I could see I missed the very bottom – so I went back and filled that in later. :]
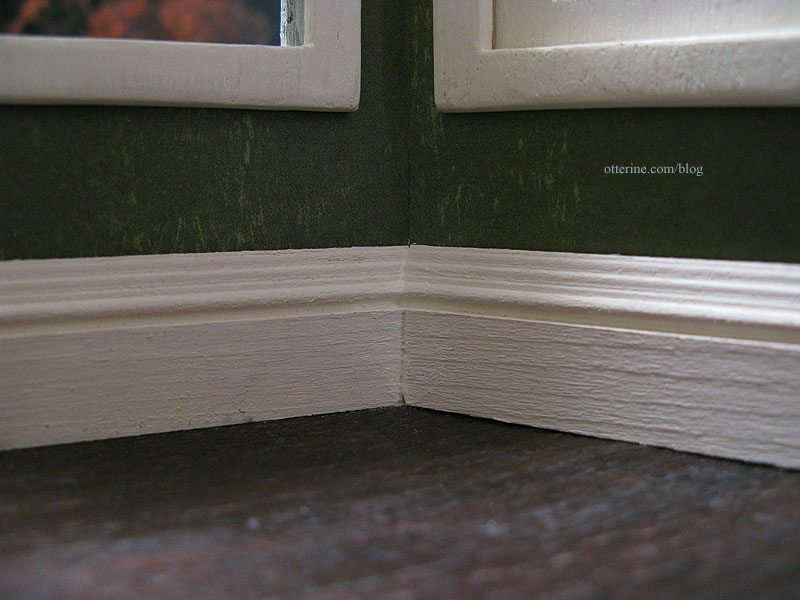
Be careful not to get any paint on the wall or the floor. If I get some stray marks, I usually wait until the paint has dried and gently chip off the paint from the wallpaper or flooring with the tip of an X-Acto blade. Wiping it while wet can often cause a bigger mess that’s harder to clean up.
For outside corners, minor gaps can be filled in the same way, with paint. For larger gaps, I apply spackling compound into the gap using a palette knife.
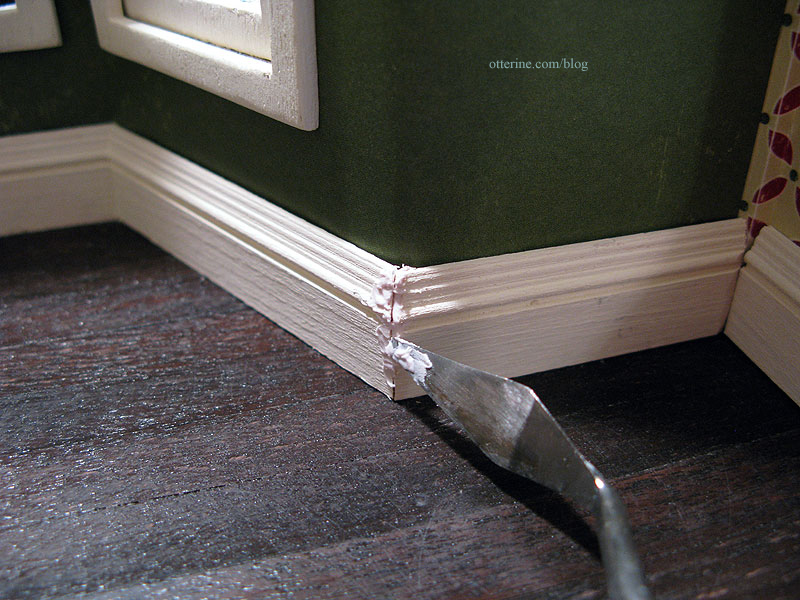
I then smooth the material with my finger and reapply as necessary. It’s better to build it up a little than to use too little.
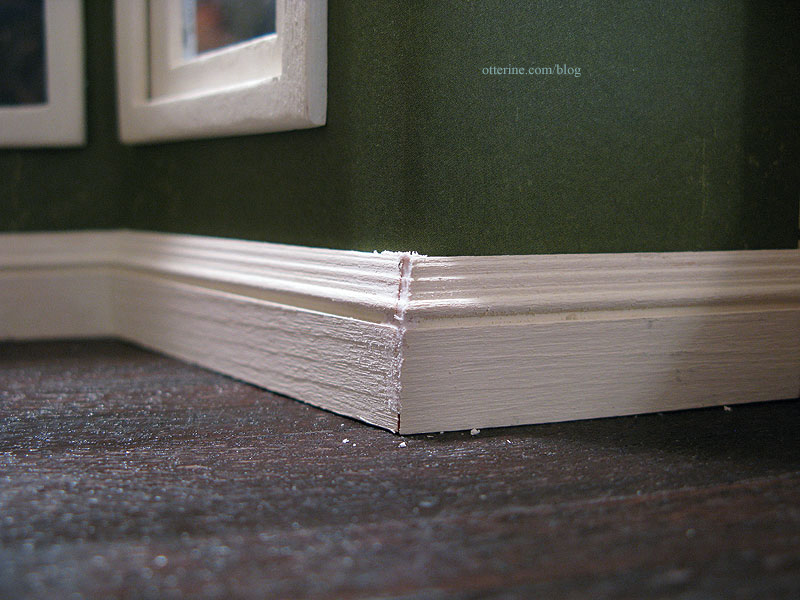
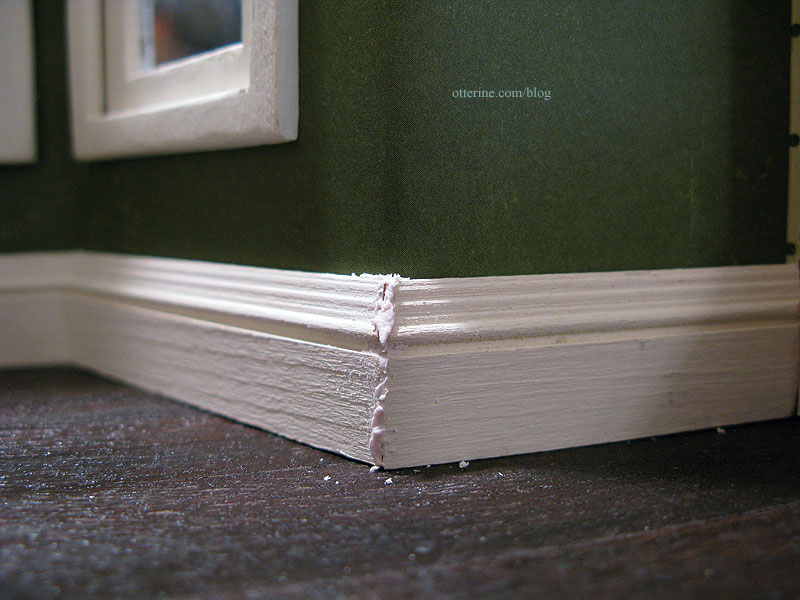
Before the compound dries, I use a toothpick to mimic the grooves of the baseboard. It doesn’t have to be perfect since sanding will take care of that.
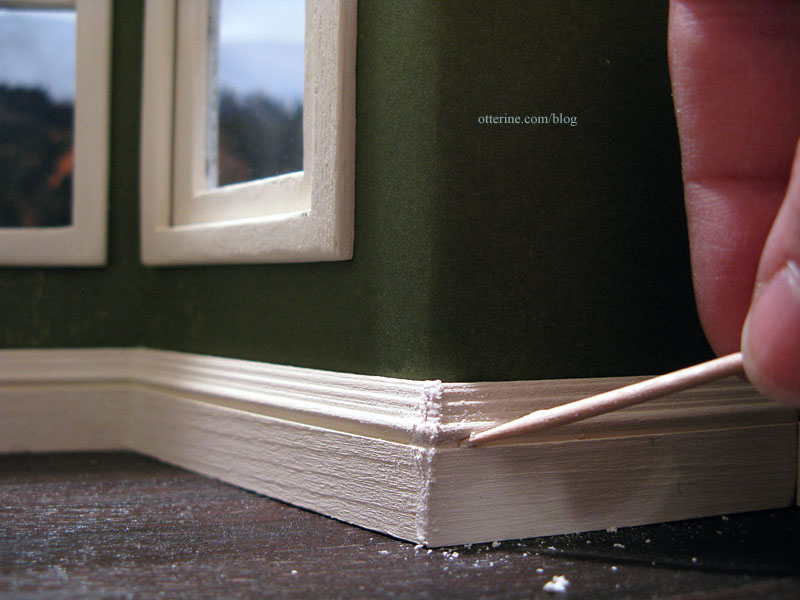
Once dry, I sand the spackling to a point at the corner. I do this by sanding the flat surface of each board toward the corner without sanding directly on the corner. I also fine tune any routed details with sandpaper in the same manner, though this time I follow around the corner.
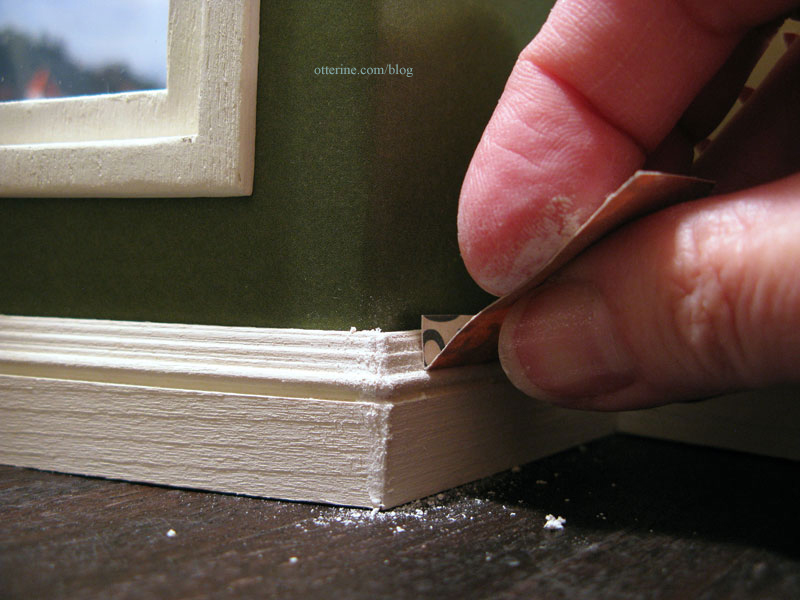
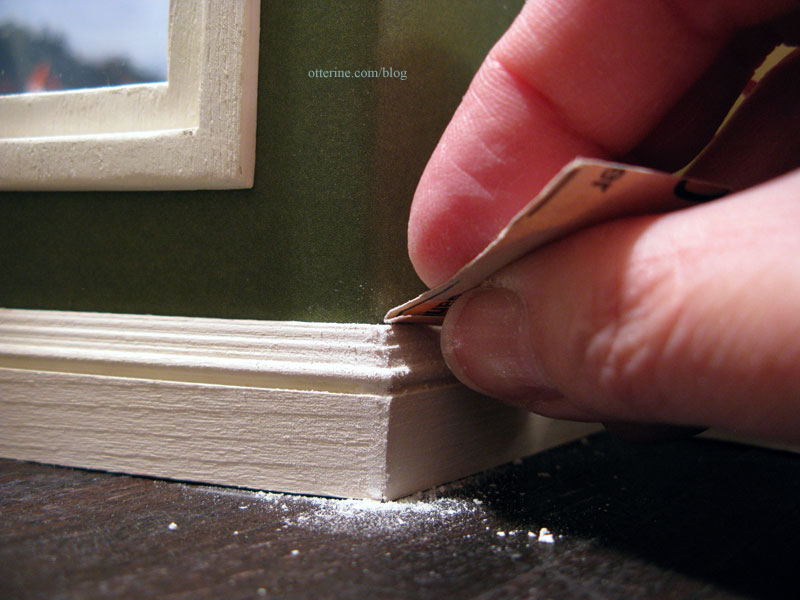
I make sure the top is level by sanding.
Using a clean, dry brush, I remove the excess dust from sanding and refine further. You can add more spackling if needed, let it dry and sand more.
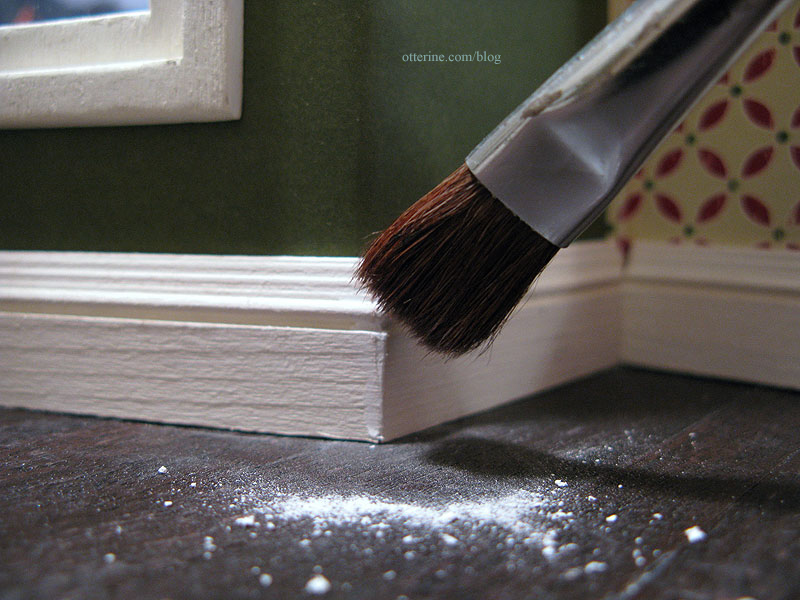
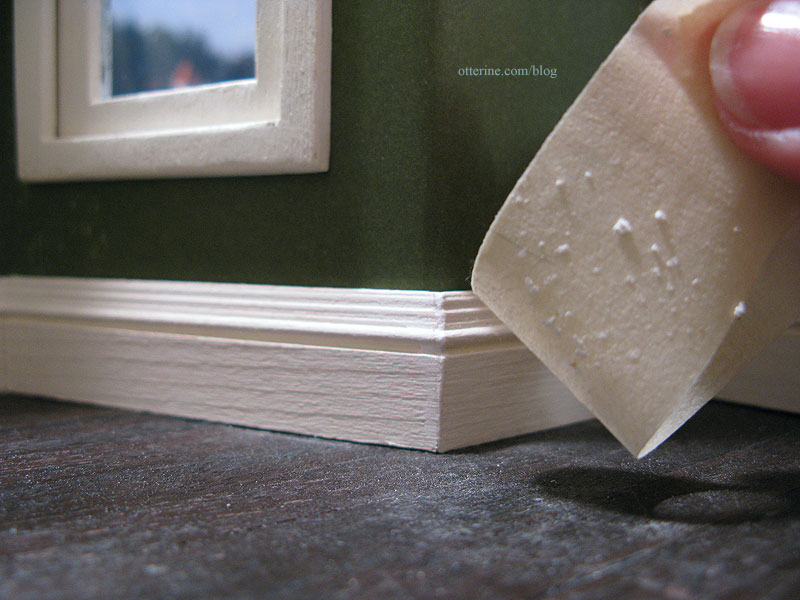
I use a piece of masking tape to pick up the dust.
Since this is an old house, I decided to leave the baseboard a little imperfect as though the corner has been knocked into repeatedly over the years. ;]
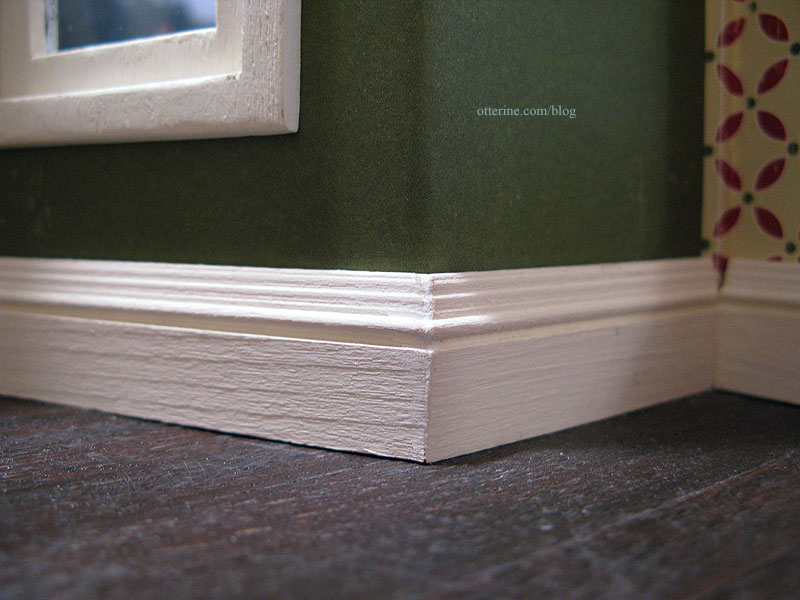
Once I have good form to the corner, I paint over the spackling compound, blending the paint along the baseboard.
Now, the gaps are nearly invisible and won’t interfere with your miniature scene.
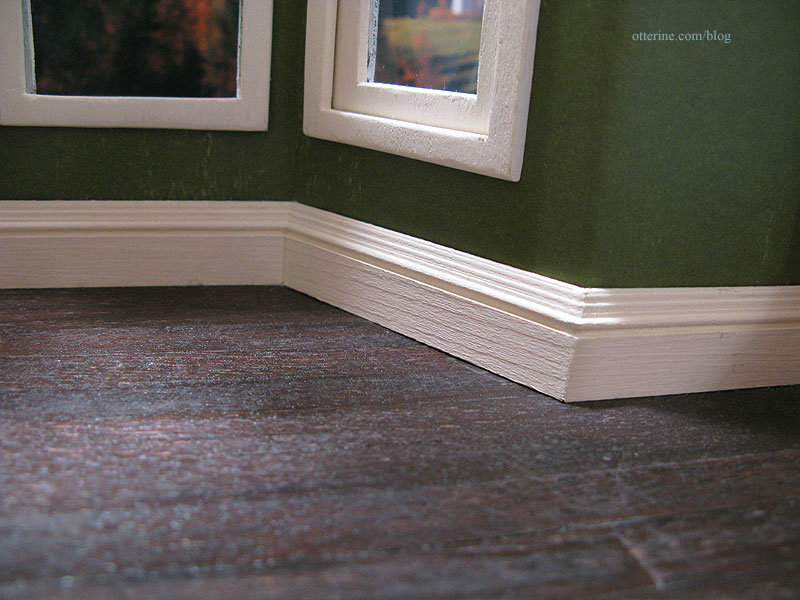
Your furniture and accessories become the focus, not bad mitre cuts! :D
This method is for painted baseboards, though it might be possible to use stainable wood filler to achieve the same results on stained wood. I’ve not tried that yet, though.
Categories: Miniatures
January 10, 2012 | 0 commentsBooks – a few of my favorite covers
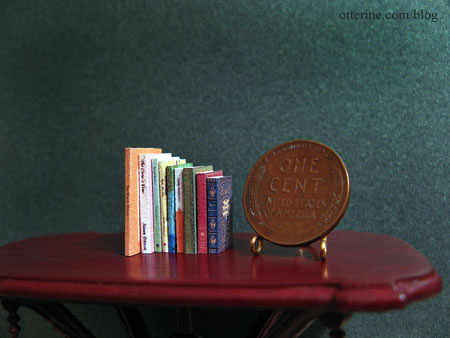
I always judge my mini books solely by the covers, though I do occasionally add books that I like for their content in real life. As I was making up books, I figured I’d share a few of my favorite covers. Some of these might be hard to see since I am photographing the minis I made. They do lose some legibility from printing so small, but I don’t want to violate any copyright laws by posting book covers that might not be in the public domain. You can always search for the titles online if you’d like a better look.
The House Mouse, by Dorothy Joan Harris and Illustrated by Barbara Cooney. This has a super cute dollhouse with a mouse occupant! I’d like to make the cover illustration as a wall hanging mini house.
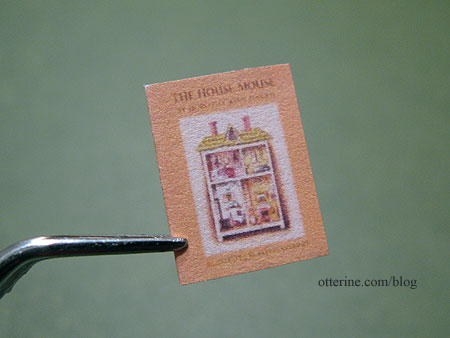
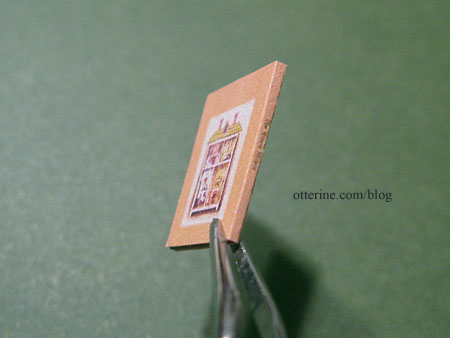
I was able to find only the cover, so I made the spine and back in Photoshop. For the back, I used the image again and eliminated the text.
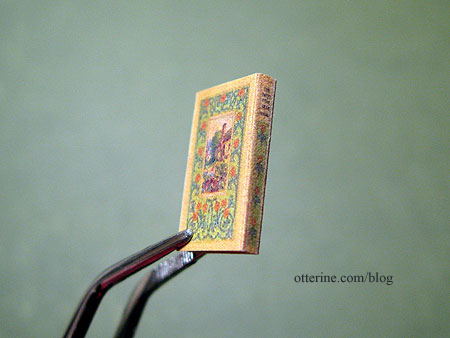
Sweet of the Year by Emily Ridgway. This came from abebooks.com, an excellent source of book covers and sometimes spines. I love the villa in the garden illustration.
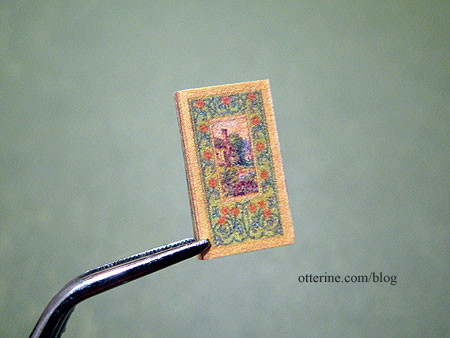
This one had the spine in the image, so I duplicated the front image for the back cover, flipping it in the opposite direction.
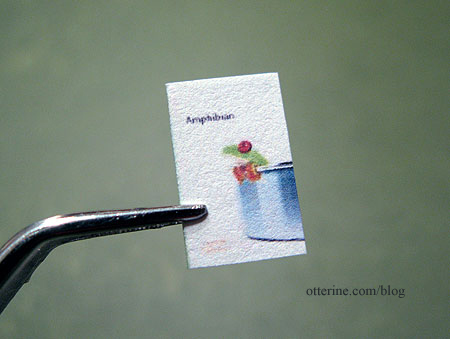
Amphibian by Carla Gunn. Froggy. Enough said. :D
Return of the Bird Tribes by Ken Carey. Beautiful illustration.
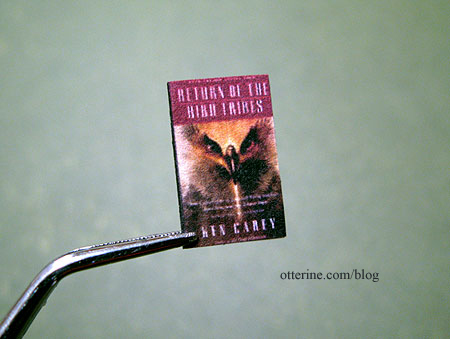
I made up the spine and back cover, this time using solid colors and dropping in a UPC box on the back cover. This is one of grandma’s many modern additions to her library. ;]
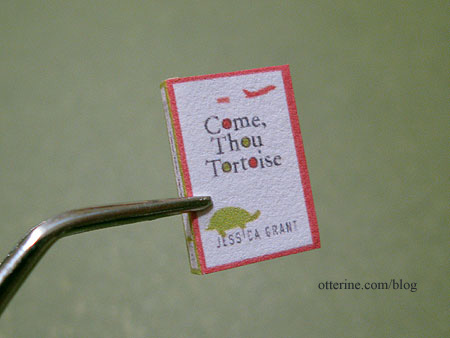
Come, Thou Tortoise by Jessica Grant. Lovely colors and graphics. This is apparently a funny book, but I’ve not read it.
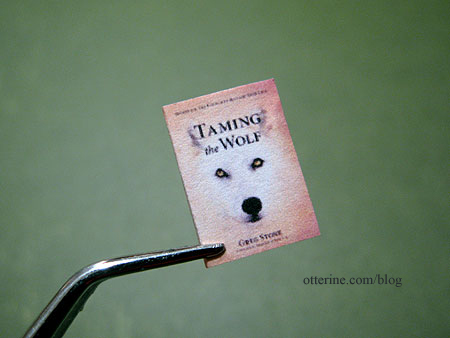
Taming the Wolf by Greg Stone. This is actually a self help book on resolving conflict, but the cover to me says adventure in the wilderness. I could see this cover being on the sequel to The Return of the Bird Tribes shown above. :D
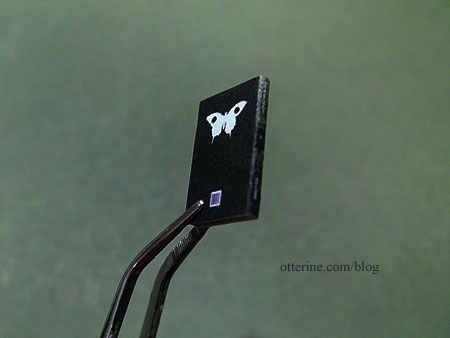
The White Mary by Kira Salak. Love this cover – the greens, the butterfly, the layout!
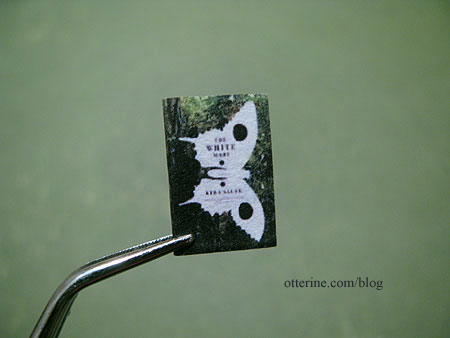
I made the back by copying the butterfly graphic, rotating it and removing the text. I made the spine by copying the green background, duplicating it in mirror image and adding text. I also added the UPC box again. I later found the actual spine and back cover, but I liked mine so well I printed it instead.
Utopia by Thomas Moore. This is a book first published in 1516, though I don’t believe this is the original cover. Ever After is one of my favorite movies for its fun take on the Cinderella story, not to mention the costumes, and this book plays a part in that movie. When I first stumbled onto the cover during my online searches, I knew I had to use it.
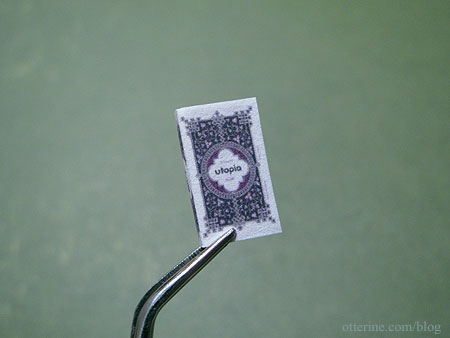
I created the back by mirroring the front, removing the text and copying some of the border design elements into the middle. The spine is a section of the front cover, with text replaced.
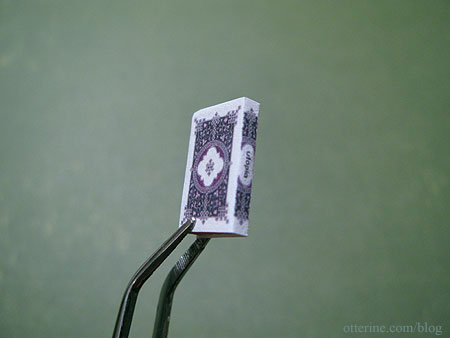
Obviously, I haven’t used any covers I don’t find appealing in one way or another, but these are some of the highlights.
Categories: Miniatures, The Haunted Heritage
December 3, 2011 | 0 commentsWood and brass train
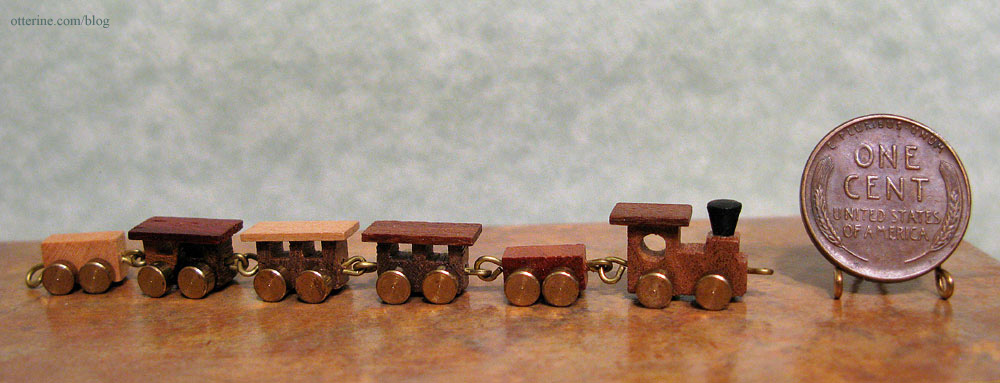
In a recent craigslist miniature lot purchase, there was a beautiful wood and brass toy train. The wheels spin and the cars are attached to one another with hooks. Isn’t it wonderful?! So tiny!
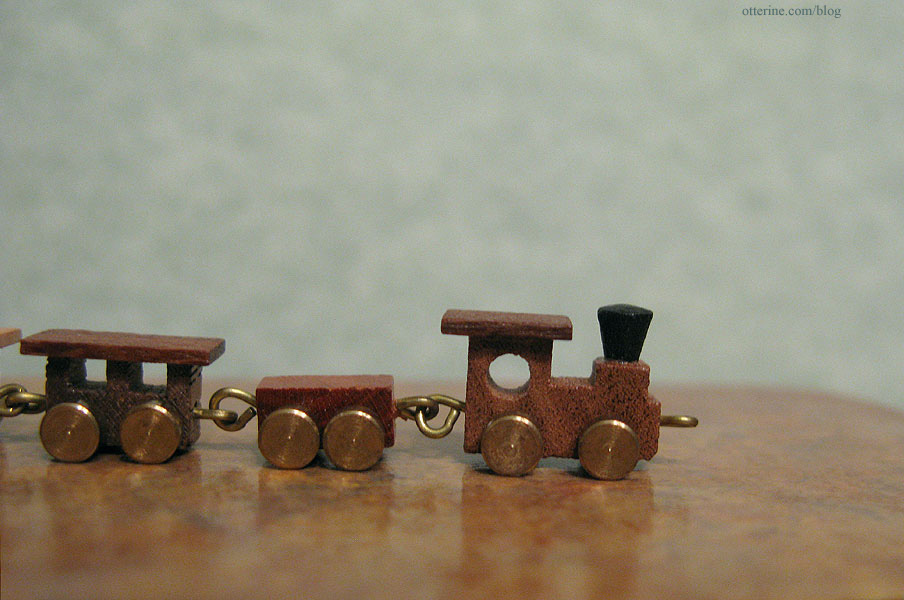
I’m not sure where I’ll display it, but I wanted to share it.
Categories: Miniatures
November 30, 2011 | 0 commentsMiniature Treasures: Catacombs Clock Case
I recently found my way to a blog on some of the most amazing miniatures I’ve ever seen. The artist uses old, sometimes ancient, pieces and creates wonderful works with such character. One of these works I instantly loved…his dark but beautiful debut miniature that he based on an old clock case and the French catacombs.
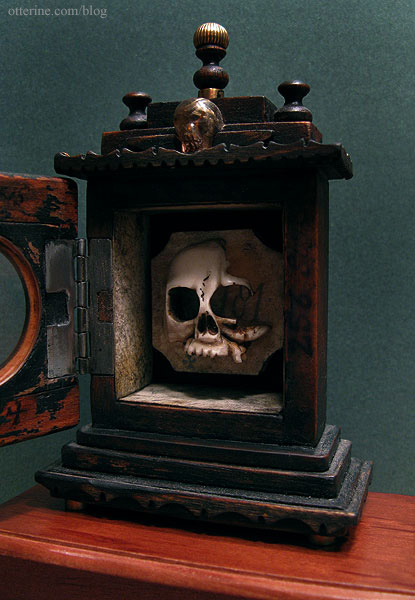
When Tony later posted on his blog that all of his works were for sale, I don’t think I could have sent that email to him any faster! :D He replied promptly, and after some email exchanges, all was set and that beautiful piece was on its way to me.
It soon arrived safe and sound. It’s just so gorgeous, so well made. I tell you – it even smells awesome!!!! :D It smells of wood and parchment and leather. The scent reminds me of ‘new car smell’ most of all.
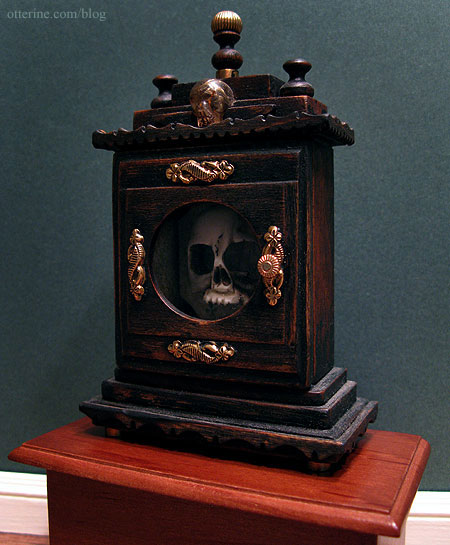
Tony used a skull carved from genuine bone, genuine 18th century vellum, optical glass from a pair of broken Victorian spectacles, a hand carved rutile quartz skull, and items from broken watches and clocks.
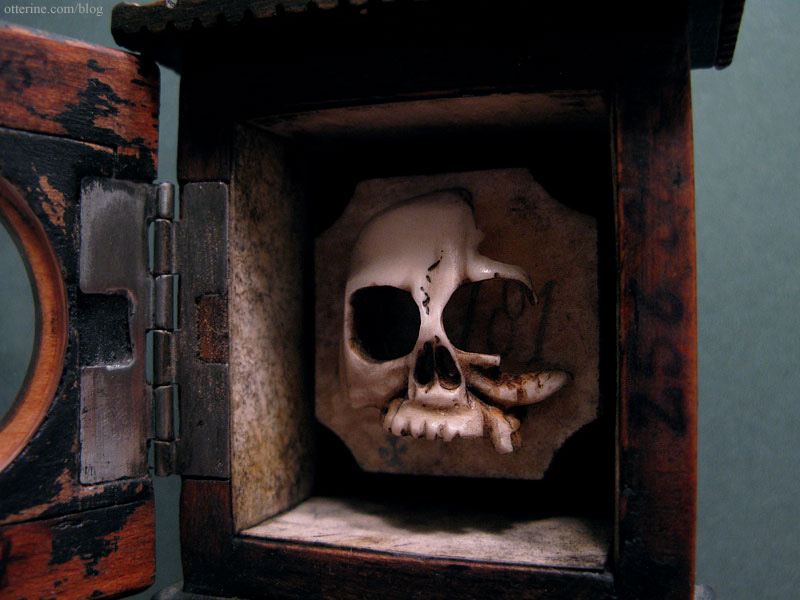
Thank you, thank you, thank you, Tony, for this beautiful work of art. I will indeed treasure it!
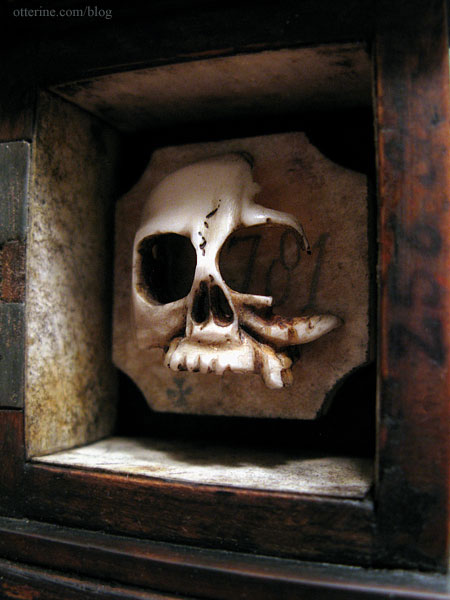
(As of 2024, his blog is no more, but you can find the artist here.)
Categories: Miniatures, The Haunted Heritage
September 6, 2011 | 0 commentsFlowers and shells
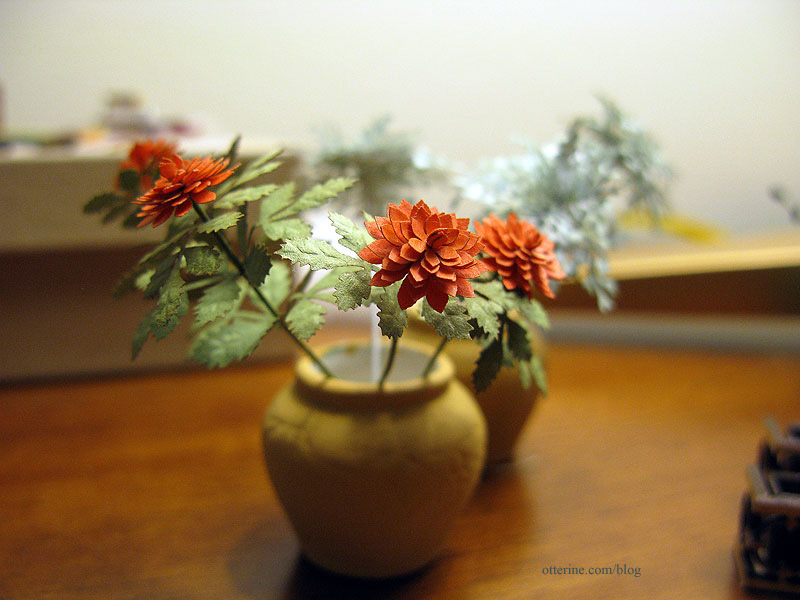
I made some Bonnie Lavish Dahlias in orange. I made red ones previously but this time used Bonnie’s veiner for a much more realistic leaf texture. The vases are from Manor House Minis and were originally pale green.
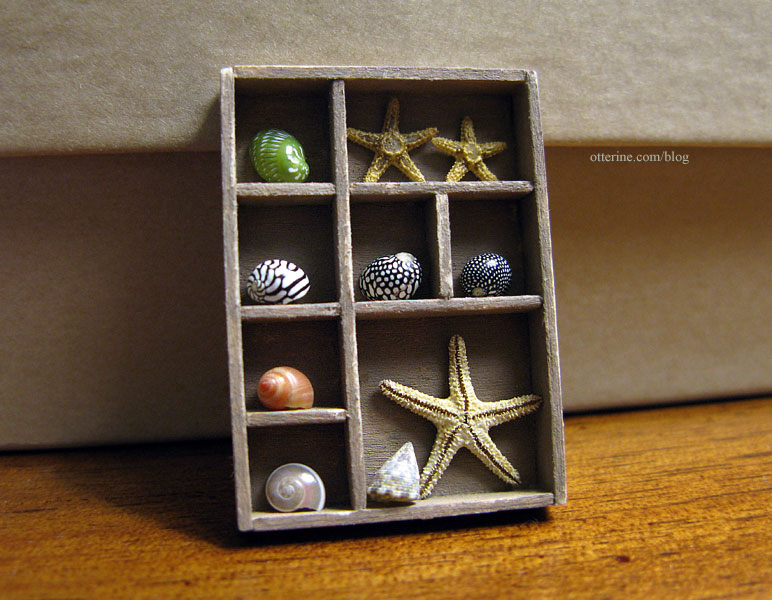
The second is a shadow box made from strip wood and painted Mushroom by Folk Art. I sanded the edges to make it more rustic. The shells are approximately 1/4″ and the largest starfish is about 1/2″ in size. :] All came from Marco Island Shells.
Categories: Flowers, plants, and trees, Miniatures
June 28, 2011 | 0 comments
NOTE: All content on otterine.com is copyrighted and may not be reproduced in part or in whole. It takes a lot of time and effort to write and photograph for my blog. Please ask permission before reproducing any of my content. (More on copyright)
Categories:

Quilling
I recently inherited a large tub of quilling supplies that included tools, paper packs and kits. The art of paper quilling is a beautiful decorative art that can cross over into the miniature realm. My grandma Grace taught me this art when I was young.
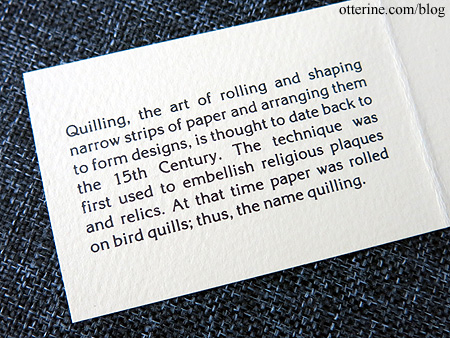
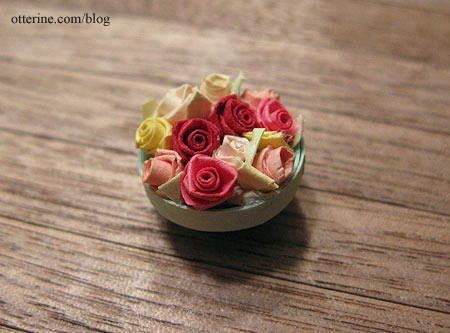
I always liked the miniature flowers the best, especially paper roses. Here’s a bowl of roses I made with grandma.
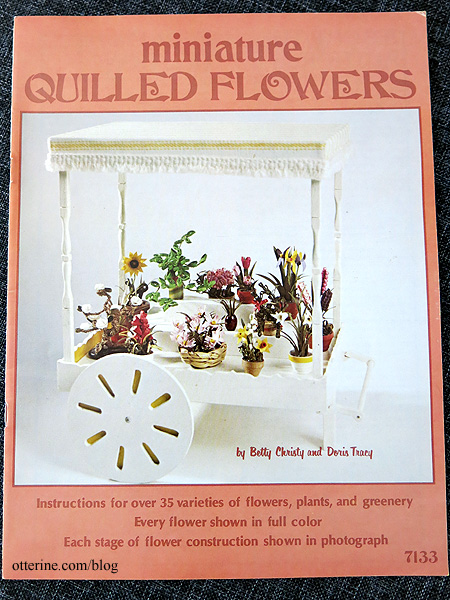
I remember this book from my art sessions with her. :]
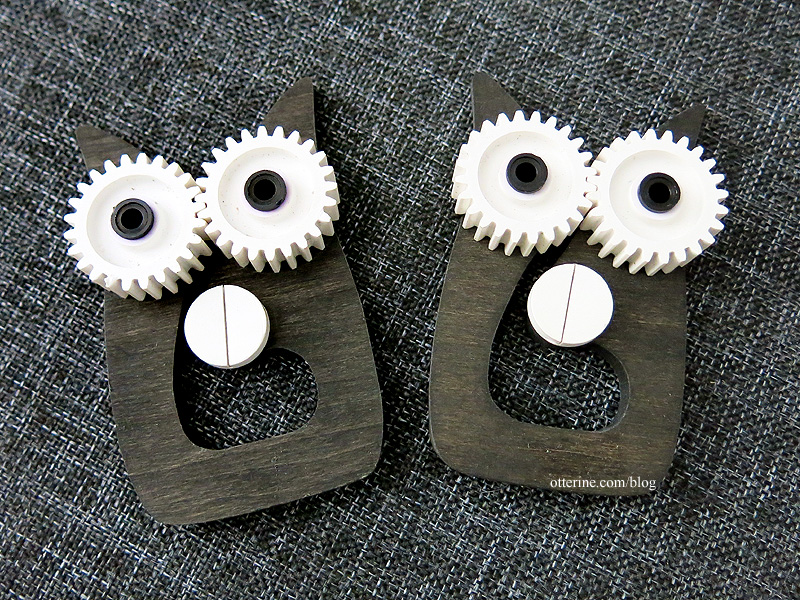
I always loved the crimper tool since it looks like an owl. :D
I will be listing some of the decorative art kits on eBay, but these are the ones I am keeping for future projects.
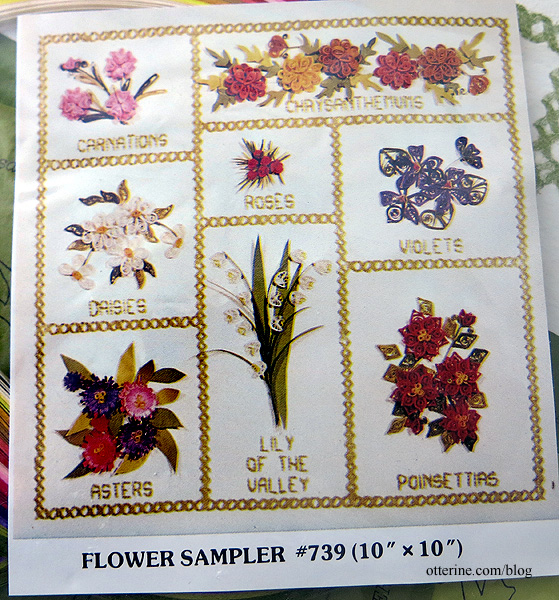
Some plants are more realistic than others, but I even like the appeal of the more artful ones.
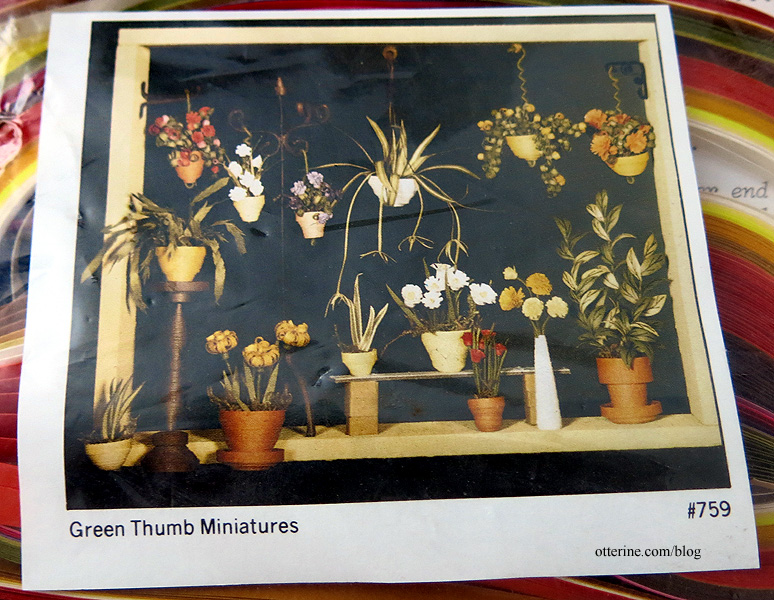
I haven’t opened them, but I think some of the kits have the materials to make the wall boxes, too.
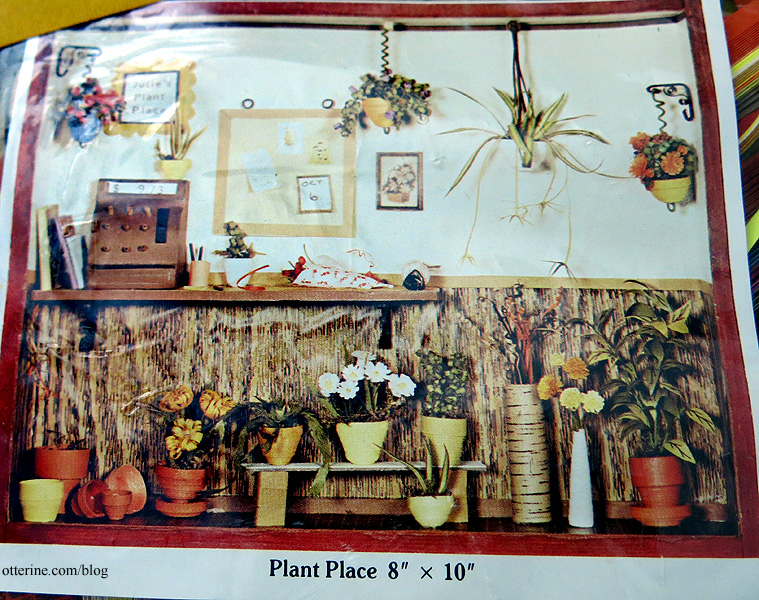
Even if I don’t make quilled paper bowls, the plants themselves will work well in miniature scenes.
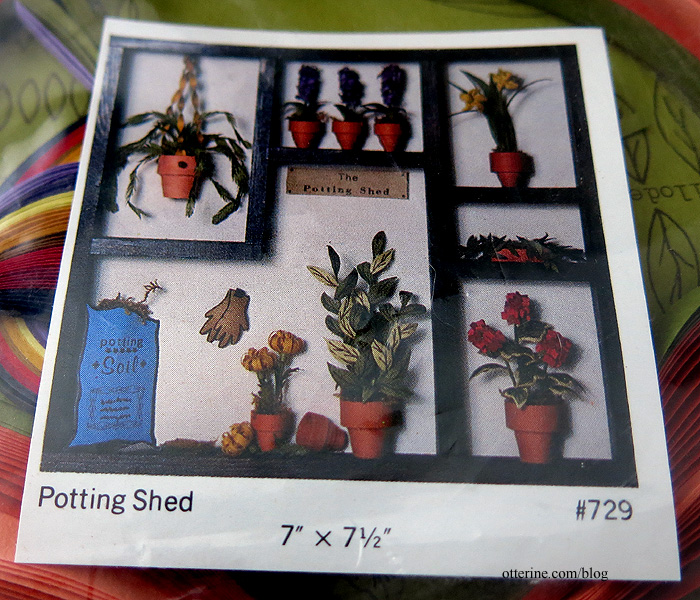
With my true miniature flower kit experience, I am sure these can be made into some great plants.
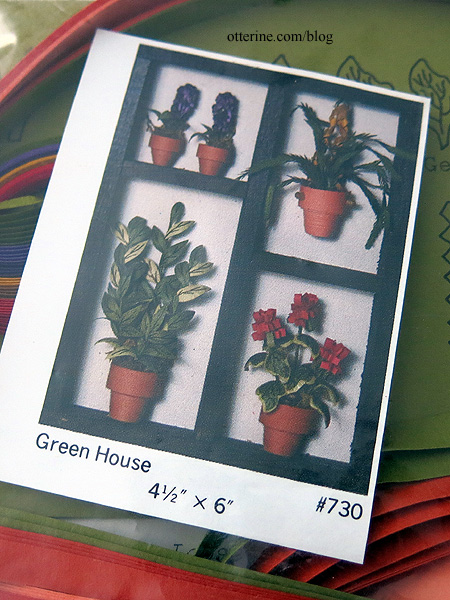
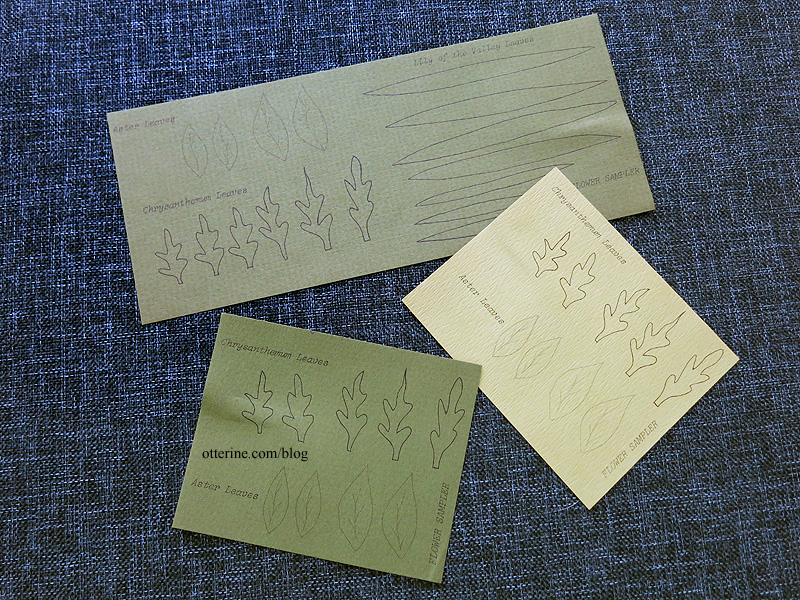
In addition to the kits, there were several sample packs of pre-drawn leaves. These will come in handy for miniature plants.
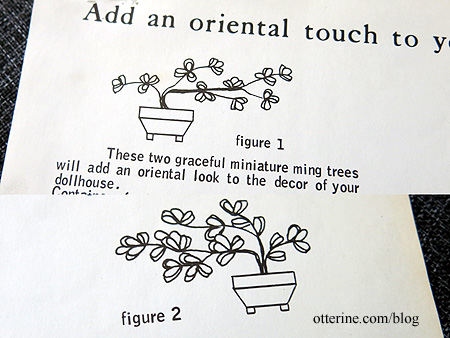
There were also loose instruction sheets for plants. I have plenty of color paper packs to make these in any combo I like.
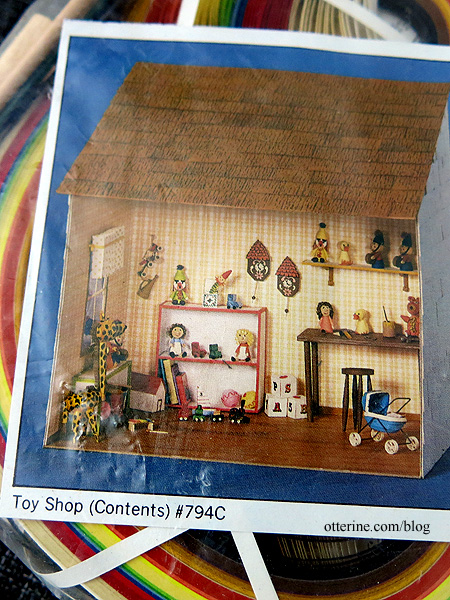
There were also two kits with miniature accessories.
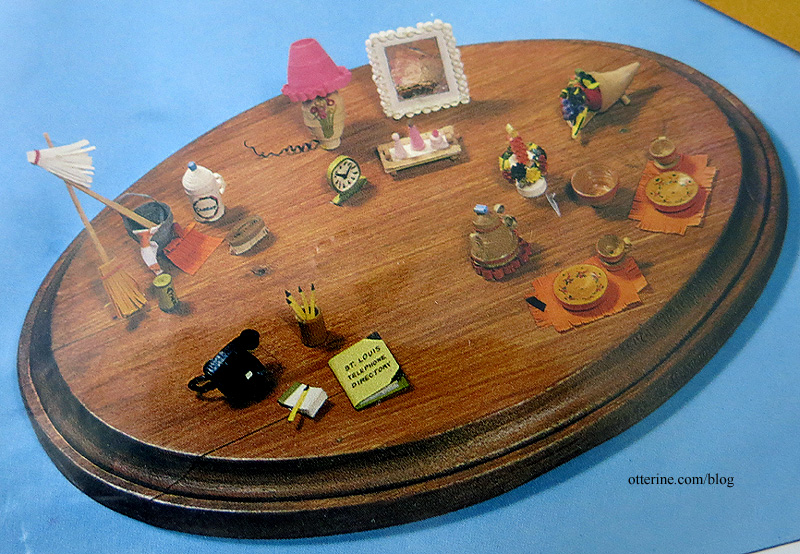
I think these are just paper kits without the minis included.
Categories: Flowers, plants, and trees, Miniatures
January 23, 2016 | 0 commentsConstruction zone all set for the New Year
Behold one of my holiday presents to myself. Mini Materials had a special on their website for the holidays, so I picked up a Jersey barrier.
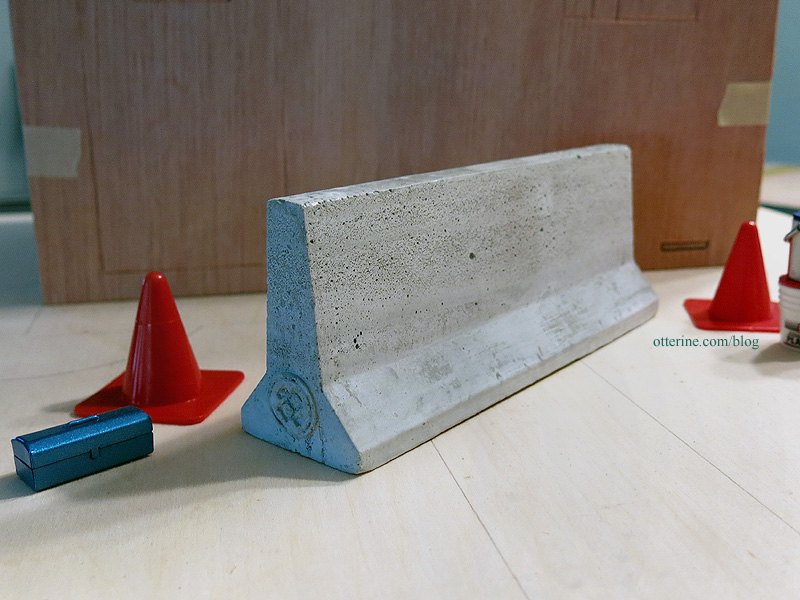
This is the same maker that sent me a sample of their cinder blocks and pallet awhile back. The barrier is made from concrete and weighs a good deal. It could be an interesting paperweight when not in use on mini construction sites. I love the texture.
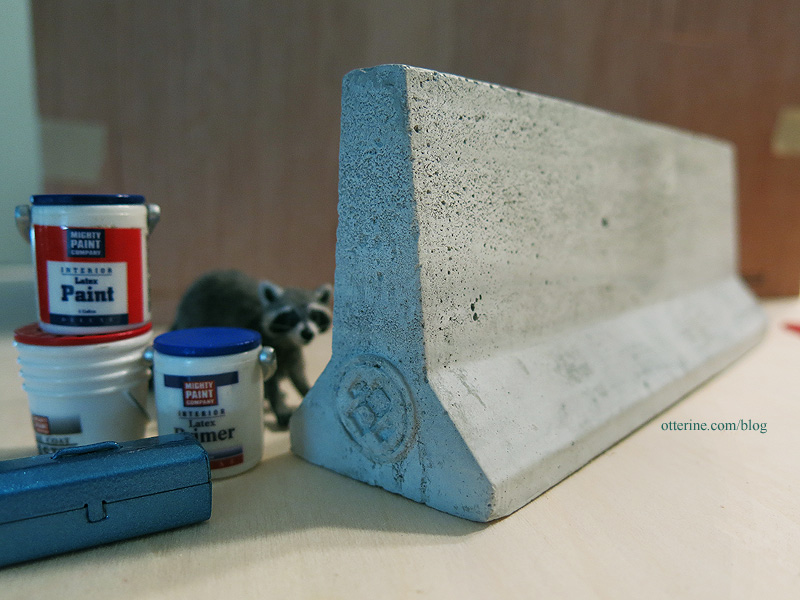
Roland is intrigued. The marvelous little toolbox is from miniatures.com, and the buckets of construction materials were purchased on eBay sometime ago. The cones are from a Dollar Tree toy set.
Wishing you all a Happy New Year!!! I know I am looking forward more mini projects in 2016! :D
Categories: Miniatures
December 31, 2015 | 0 commentsTrying out fabrics in miniature scenes
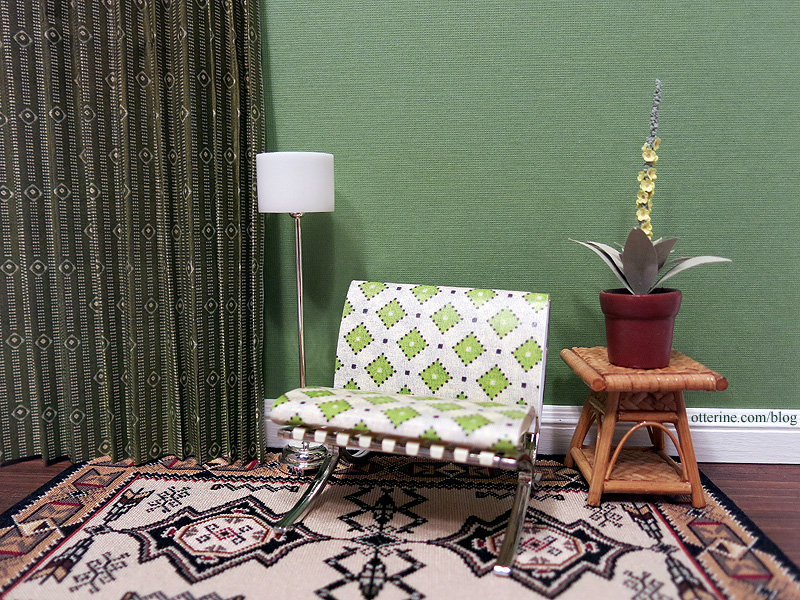
Sometimes you have only a small amount of fabric to use or you are unsure if the fabric will work with the décor you want. In order to save time and materials, I make color copies of the fabric to test out in scenes before I cut the real deal.
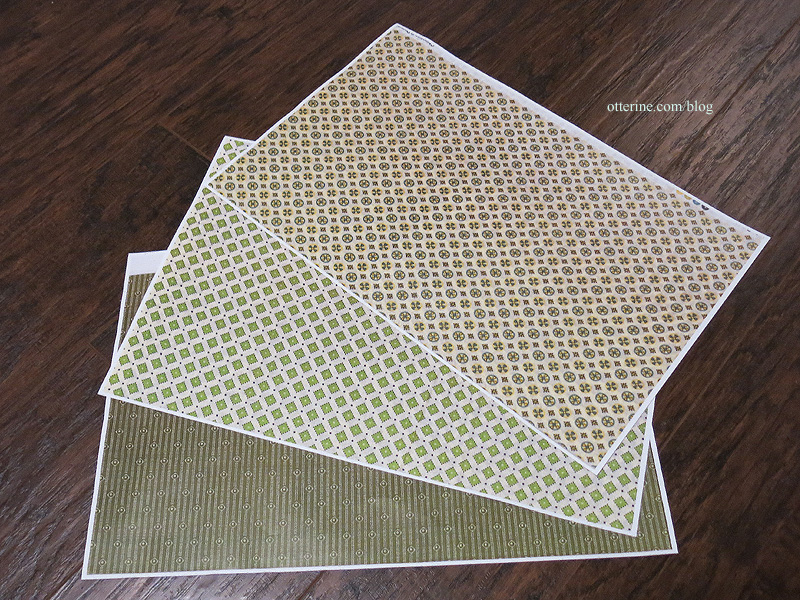
Paper is excellent for curtain tests. You can quickly try out different fabrics to pick the right one for the space. Or, if you have a fabric that would never hold its shape or is too thick for miniature draperies, you could use the paper copy itself instead of fabric. You would just need to have more care when curling and pleating the paper into shape.
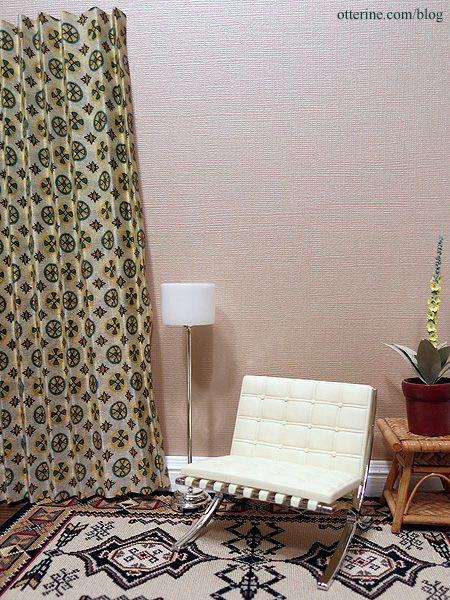
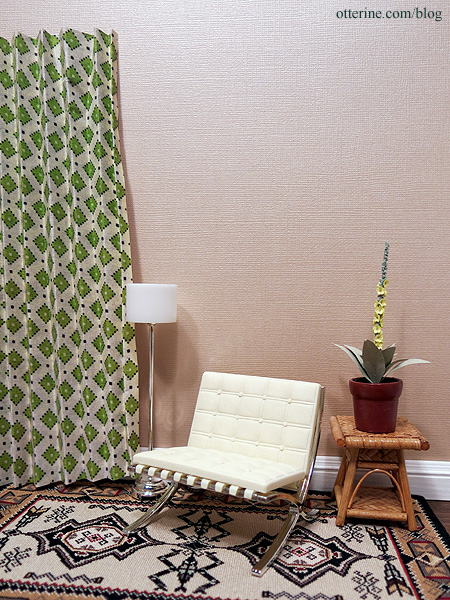
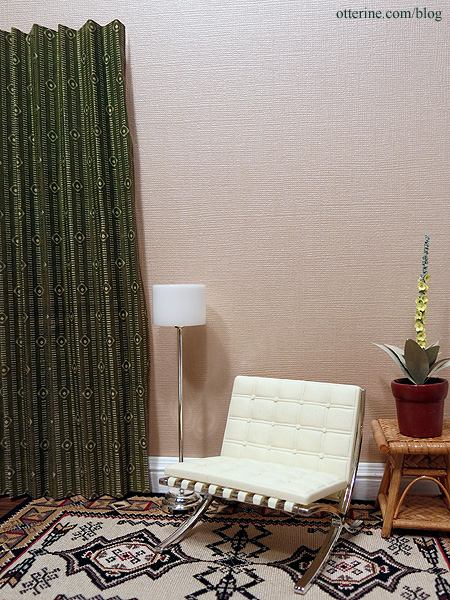
You can test pillows for scale and color.
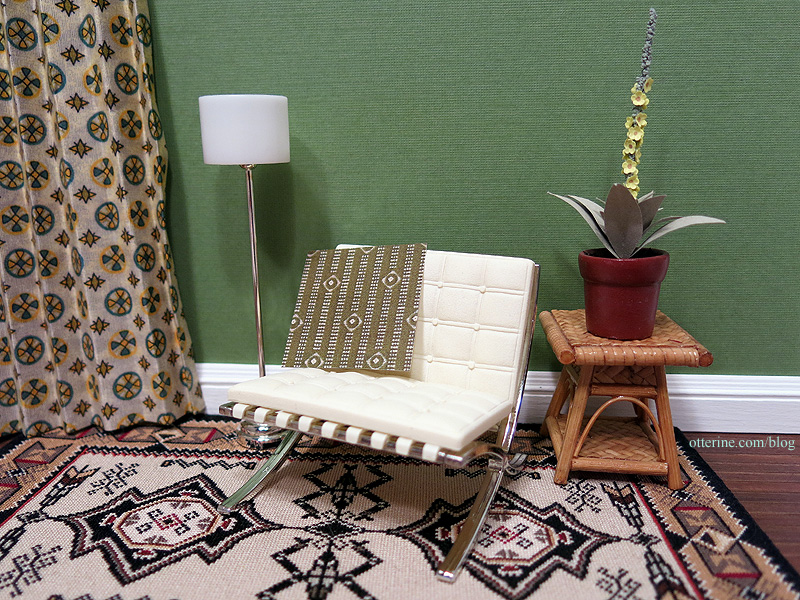
Upholstery is trickier, but you can get a rough idea here as well. :]
Categories: Miniatures
October 29, 2015 | 0 commentsIt’s hot, it’s cold
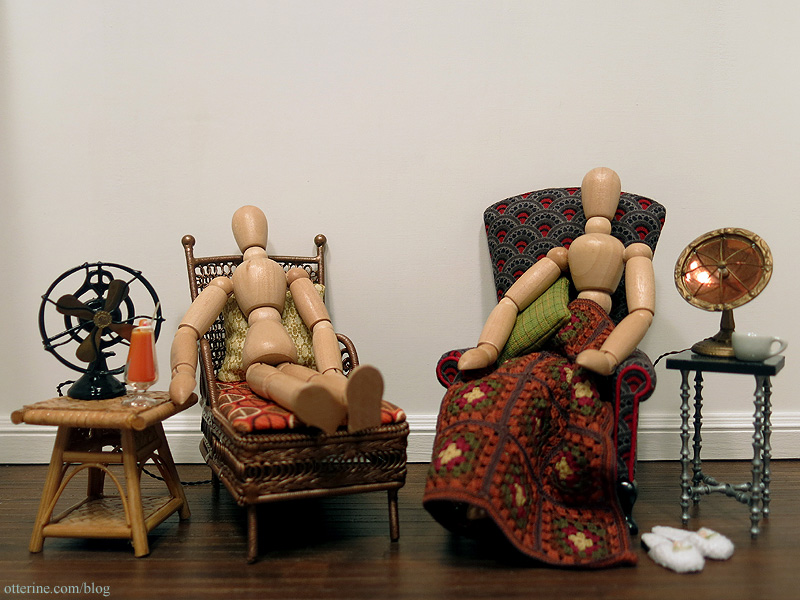
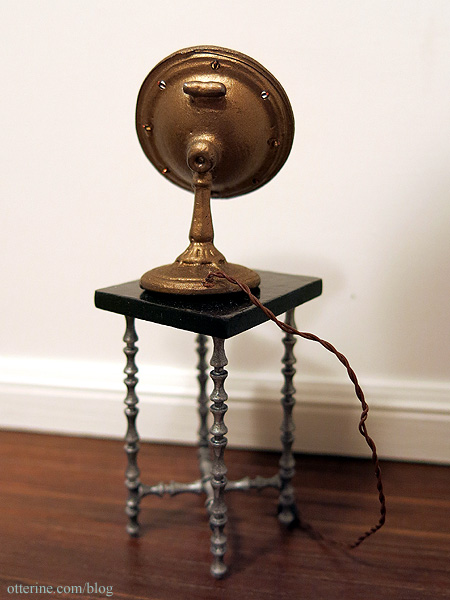
In the ping-pong weather of autumn, I now have my choice of vintage fan or parabolic heater. :D
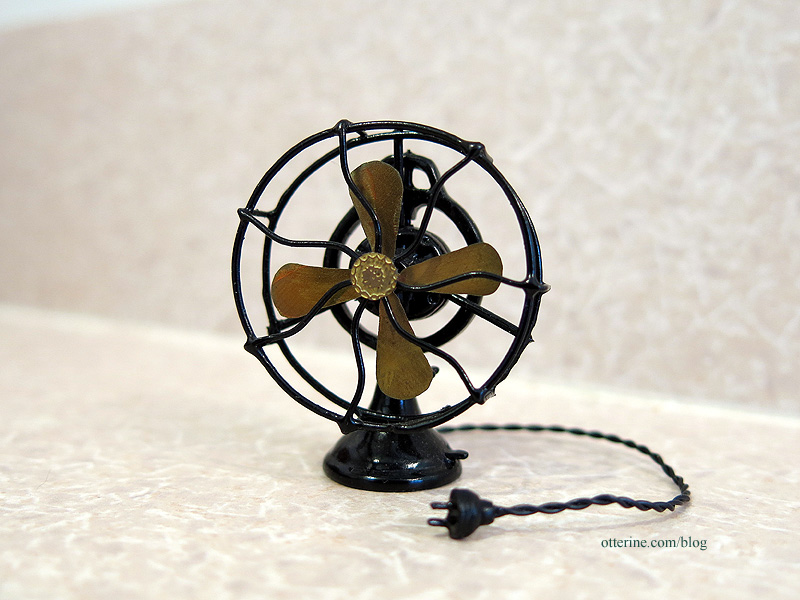
I’ve shown you the vintage fan before. I thought it was by The Kummerows, and Barbara Kummerow said she did think it was their work. :]
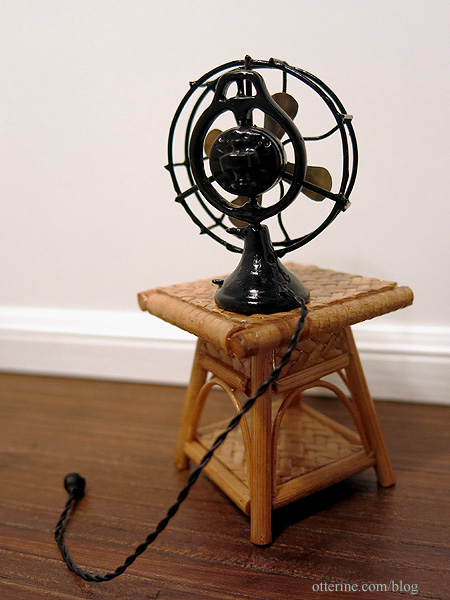
I didn’t show you the back, however. The rattan side table was purchased on a business trip to Vancouver from Ross’ Miniatures.
I’m not sure who made the parabolic heater, but it’s so well done.
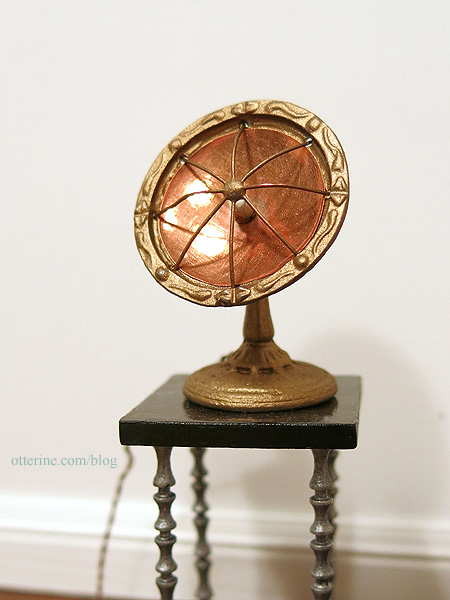
It, too, has a false cord just like the fan. The table is my recreation of the Oly Studio Ichibad Side Table in miniature.
Categories: Miniatures
October 26, 2015 | 0 commentsAnother grail find – vintage table fan
A long time ago, I saw this lovely image at Hither, Thither and Yon. I fell in love with the vintage table fan by The Kummerows. I did a quick search back then and found nothing, so into the inspiration file it went. Fast forward to now, and I believe I’ve found one of these originals on eBay. I’ve asked the original fan artisan if this is their work and am waiting to find out. It’s so much like the inspiration photo that it just has to be. :D

This is one of those great pieces that will likely make the rounds in many houses and scenes. :D
———-
Update: The artist confirmed it is their work.
Categories: Miniatures
September 21, 2015 | 0 comments
NOTE: All content on otterine.com is copyrighted and may not be reproduced in part or in whole. It takes a lot of time and effort to write and photograph for my blog. Please ask permission before reproducing any of my content. (More on copyright)


