
Finding a Holy Grail miniature
I’m sure every miniaturist has a Holy Grail or two…I’d say I have roughly a dozen. These are miniatures we long for but cannot find, or perhaps afford. I searched extensively for this metal trash can, and now I have one in my collection. :D
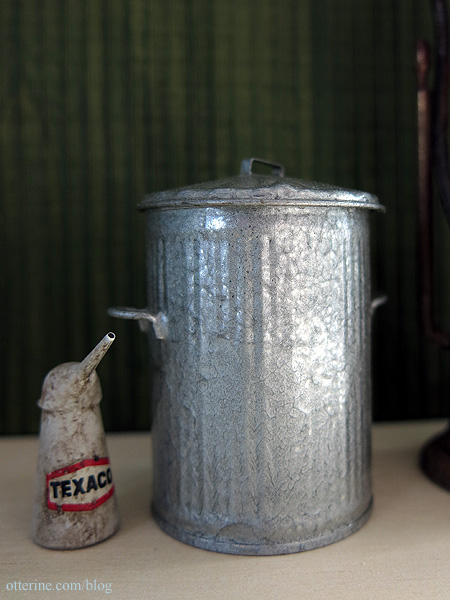
It has the perfect metallic finish and ribbed detailing. There is no maker’s mark, and it came from an estate without any additional information. (A blog reader later said this was likely made by Ken Ketteridge.)
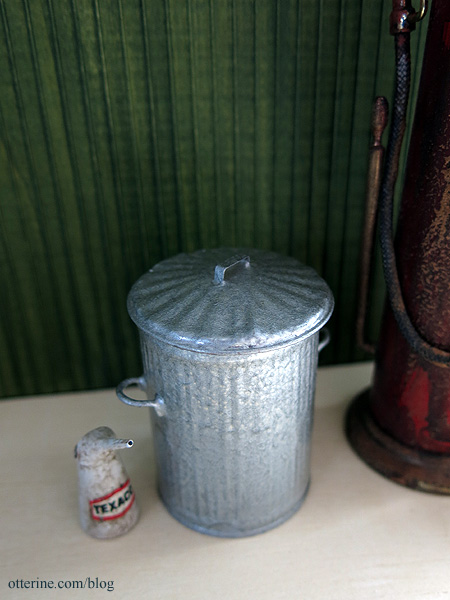
I’ve seen this item only once in the book Dolls’ House Shopkeeper by Lionel and Ann Barnard. Excellent book, by the way. So, one Holy Grail down!
I will not be altering this item in any way, so it might be too clean for the barn. But, the Brownstone has that fancy trash nook. :]
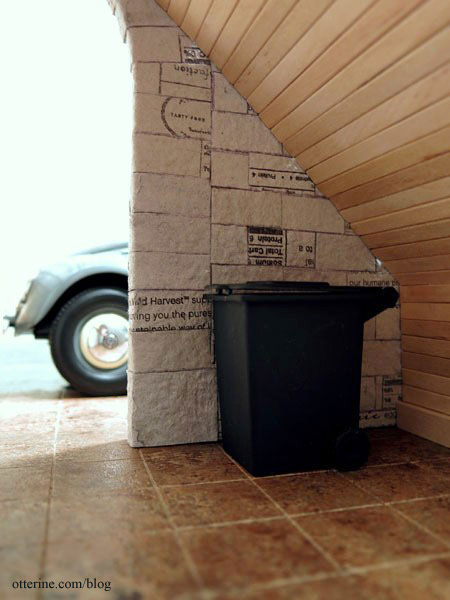
Categories: Miniatures
August 4, 2015 | 0 commentsThe Quicker Brick
No, I will never give up on egg carton brickwork, but I tried an experiment to help a friend out with a brick floor project. We were thinking egg carton brick, but she has a Beacon Hill and three large floors to fill. Even with awesome results, cutting egg carton bricks is time consuming and daunting to say the least.
Then the other day I was down a Pinterest rabbit hole, and I ran across an old entry from Tiny Handmade. The miniaturist had made a wood tile floor from popsicle sticks. I thought, what about skinny sticks for bricks? :D

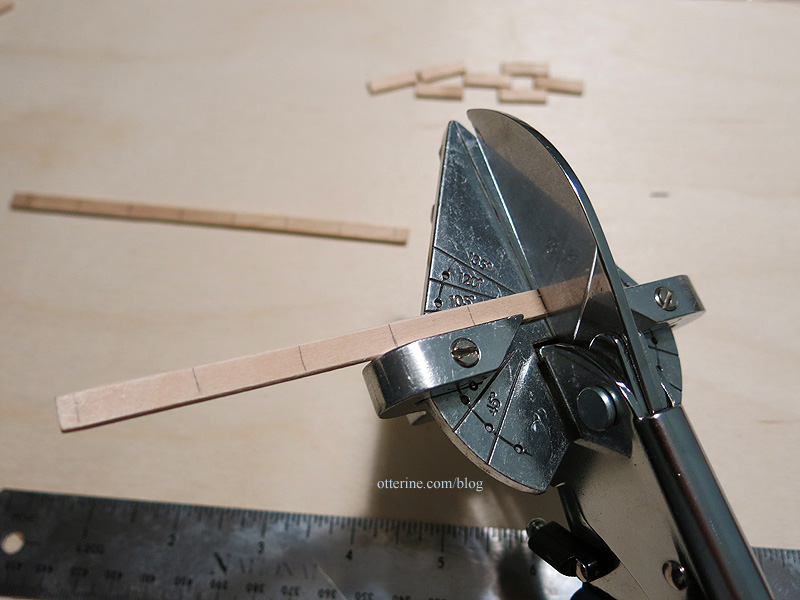
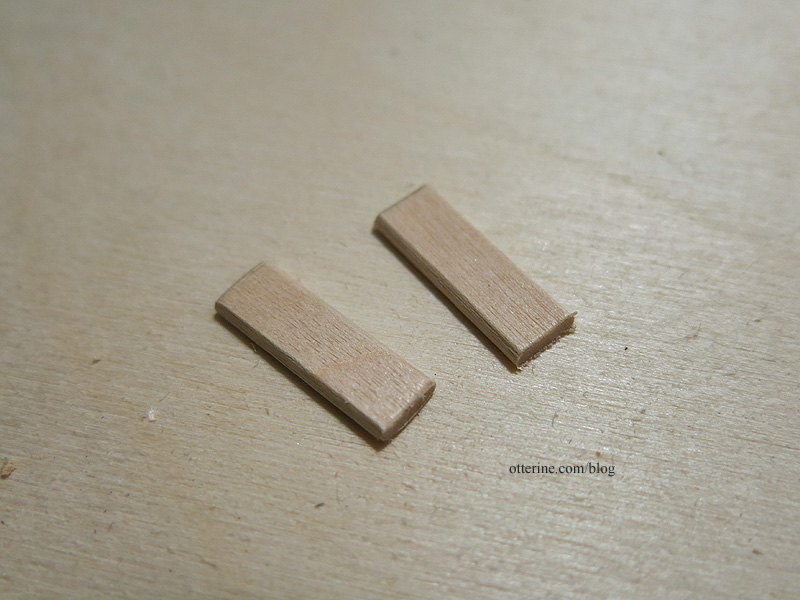
Skinny sticks are 1/4″ wide, have a flat side and rounded edges on the other side. The rounded edges will give a break between the bricks, so I made sure to use that side facing up. And, as with dating, you want to weed out the obviously warped and damaged ones.
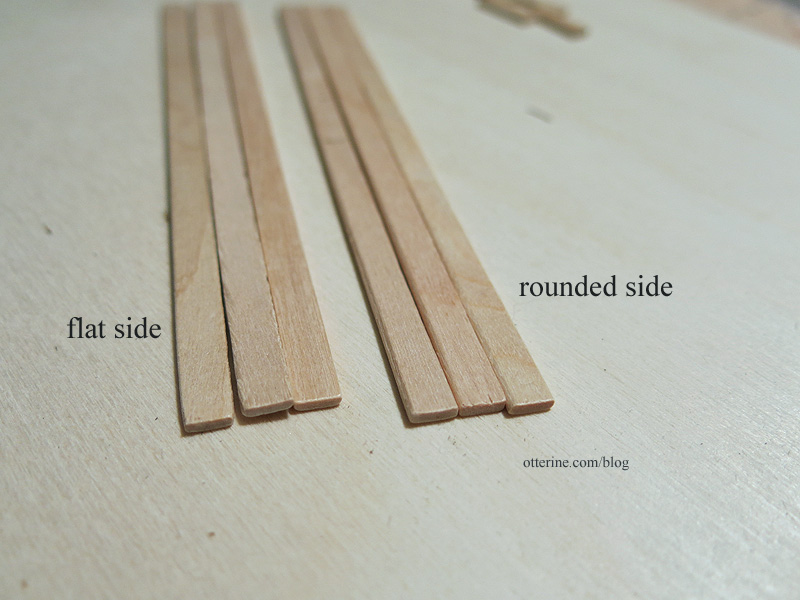
I measured 3/4″ bricks and used my Easy Cutter Ultimate to make quick work of cutting.

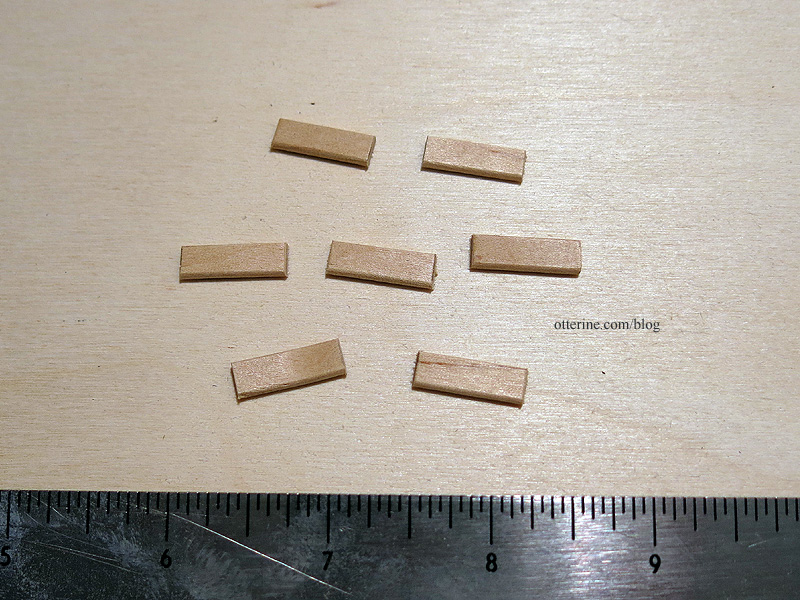
A little sanding on the edges to get rid of the excess.
I glued them to my sample template (just a piece of black paper without lines). They have enough variance to make for more realistic looking bricks but are pretty uniform in width to make bricking easy. Strip wood would be too uniform and you’d have no gaps between the bricks unless you made the rounded edges.
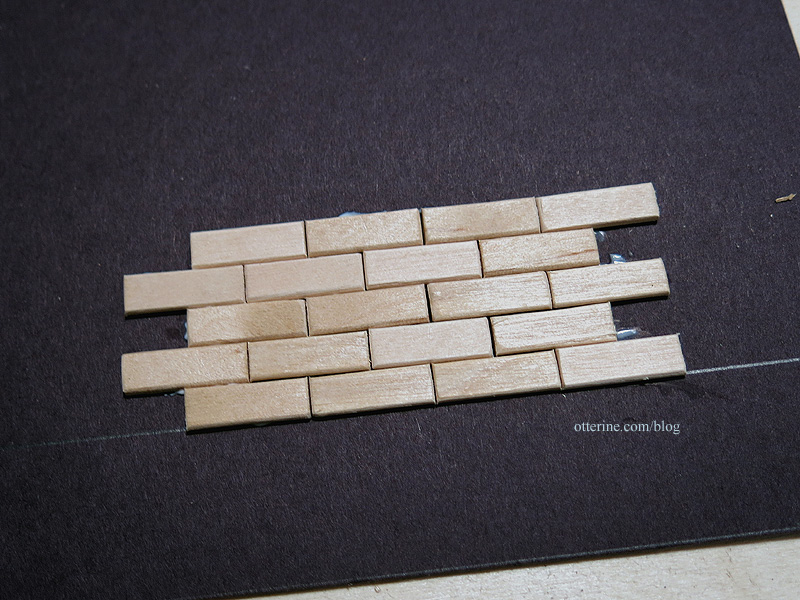
I stippled on Moon Yellow by Americana using a stencil brush, which gave it a subtle texture. These are going to be relatively smooth bricks compared to the bumpy egg carton material. If you wanted more surface texture, you could use gel medium dabbed on with a sponge brush before painting. But, having them nice and smooth will make furniture placement on the surface much easier. Here the paint is still wet.
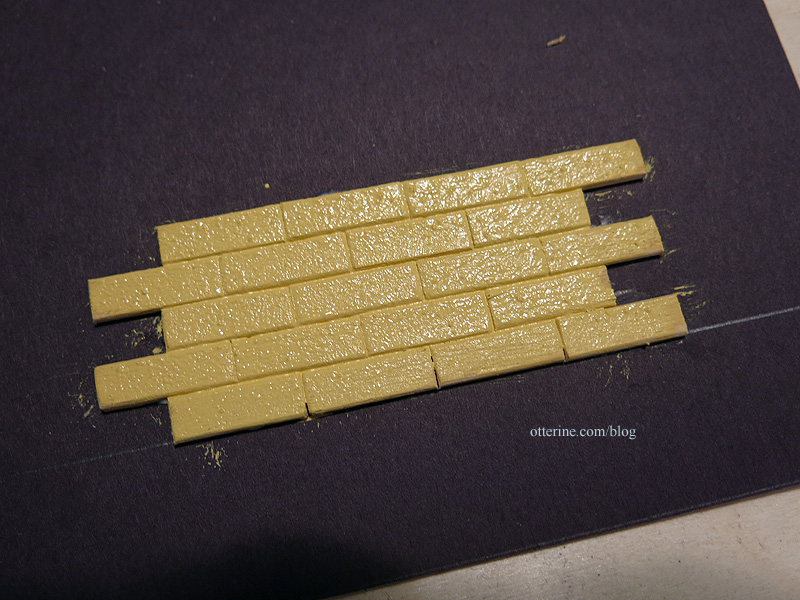
Grouting didn’t seem necessary as I just made sure there was excess paint in the grooves to cover evenly, but that would be simple enough to add with spackling, grout or other filler. These would work especially well for a painted brick wall or floor since you aren’t going to be able to bend these around a three dimensional object.
Categories: Miniatures
July 27, 2015 | 0 commentsMaking invoices
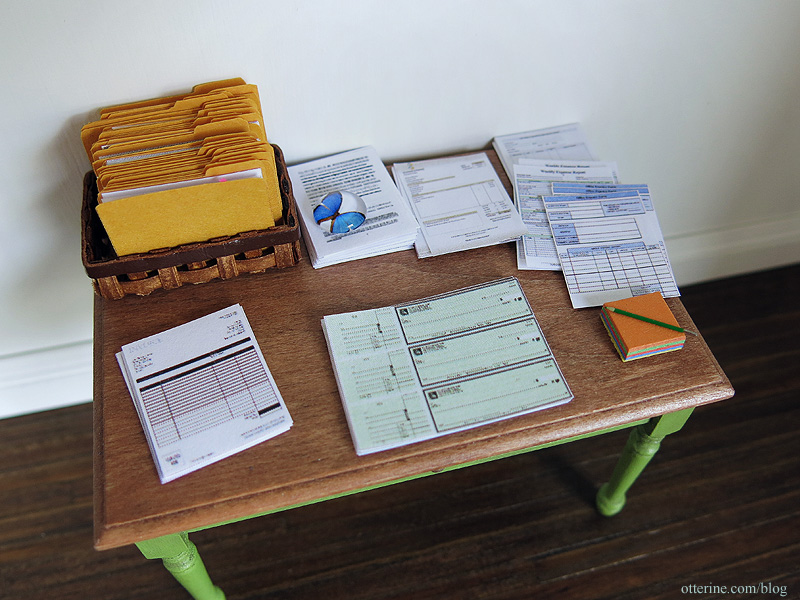
Betsy indicated wanting to know how to manipulate images to make tiny versions of real items, like the invoices I showed in my Paperwork post. Here’s a quick tutorial on invoices, but this can easily translate into any type of document you would like.
I start with an image search for “invoice templates free” (without the quotes in the search box). I usually use Google, then select images. You can see the small versions right on your screen, so you can select ones that already look legible and have good composition.
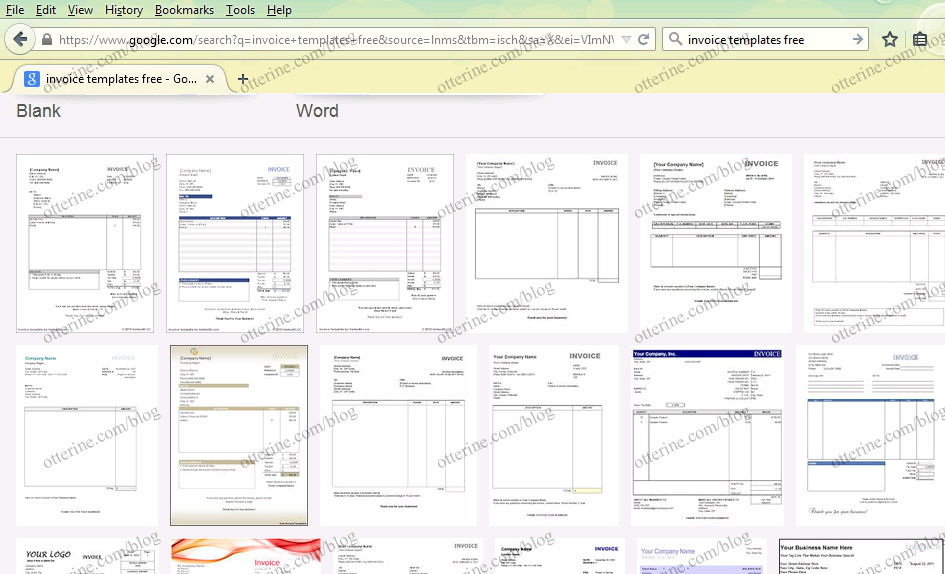
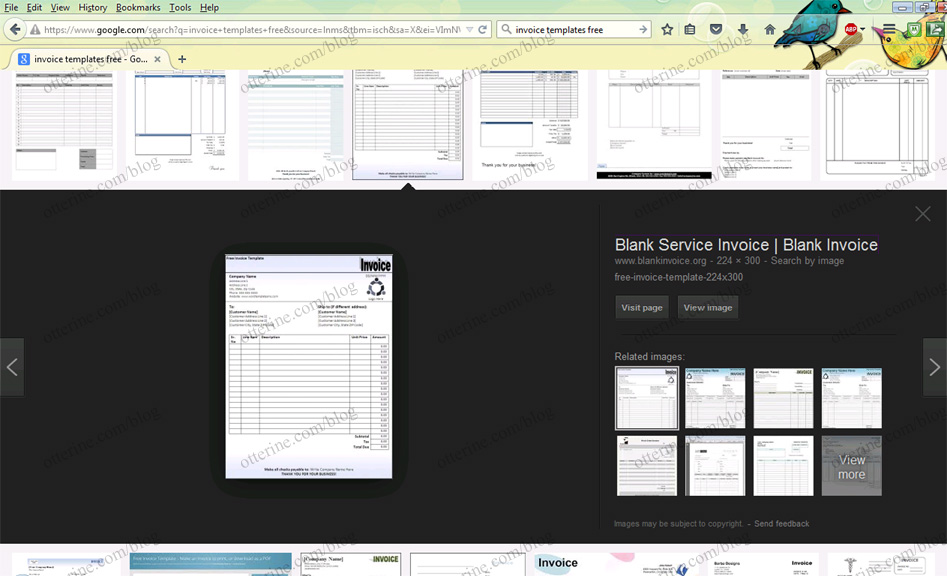
Here I’ve clicked on one I like. You lose detail when you print small, so choose one with good contrast. More often than not, you will be okay to use these images in your mini scenes that are for personal use. I would never recommend selling tiny versions of documents found online. Either way, always be sure to check the copyright info.
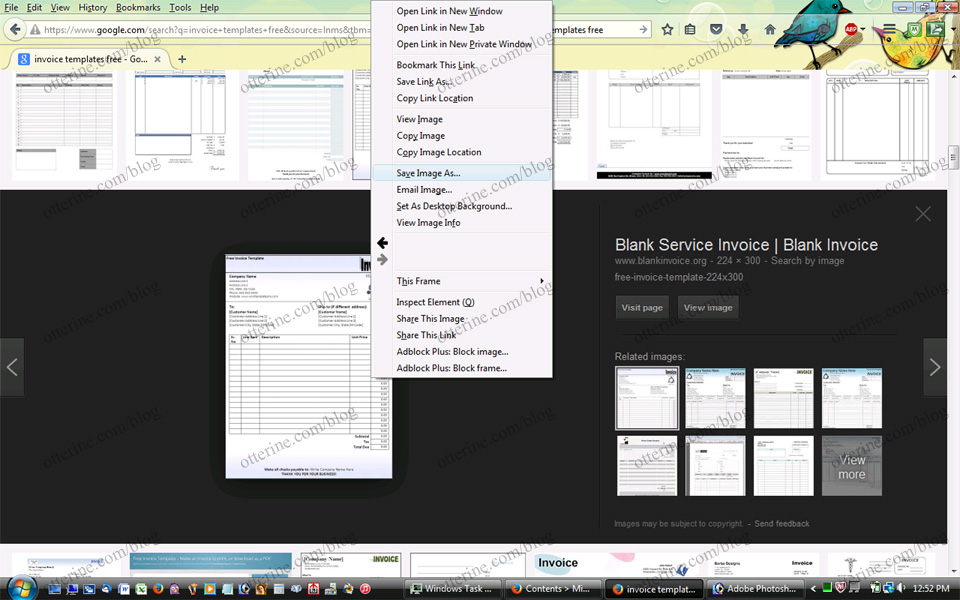
You can save the image to your computer in a few ways. I usually just right click on the image in the preview as above and save to my computer.
In Word, I insert the photo into a new document (Insert, Picture, select your image). Depending on the size of your image, it may appear as large or small.
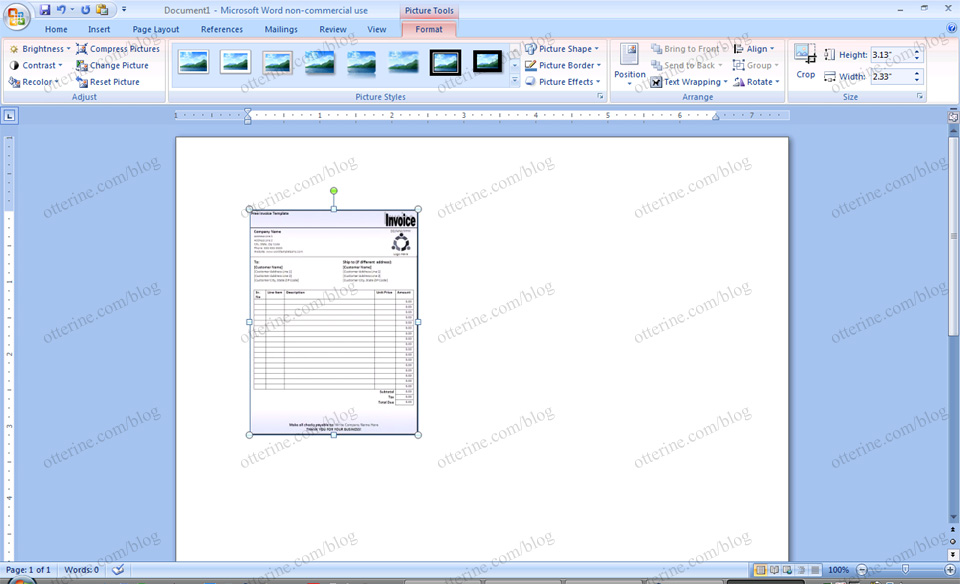
Click on your image if it is not already selected. In Picture Tools, Format, there’s a box that shows the dimensions. I usually go with 1″ in height for ease of conversion. Typically, this will make your width .75″ automatically. This is slightly larger than the true scale conversion of a standard piece of 8.5″ x 11″ paper.
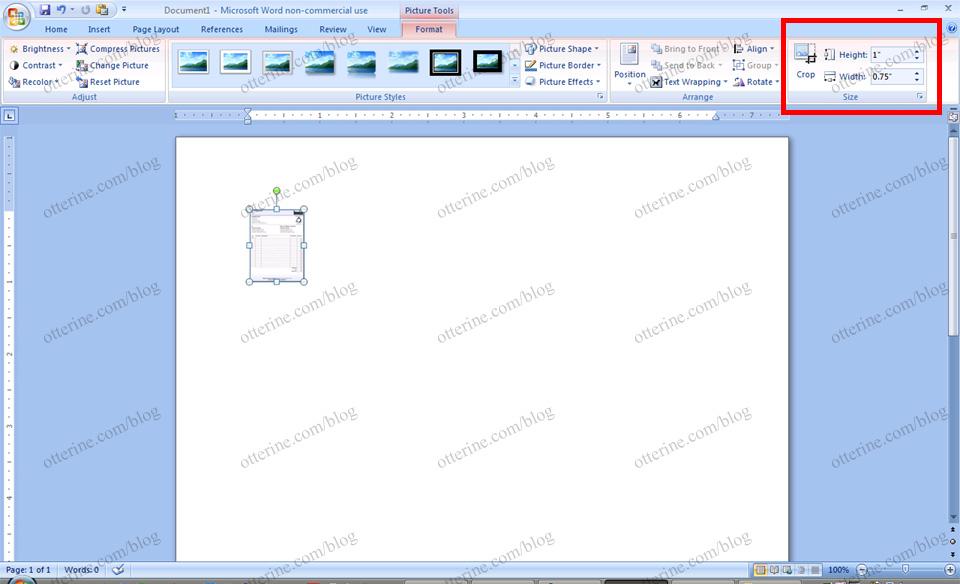
Now that you have your one sized invoice, click and hold the CTRL key. Drag to make a copy. You can do this several times. Add spaces between the images to make it easier to cut.
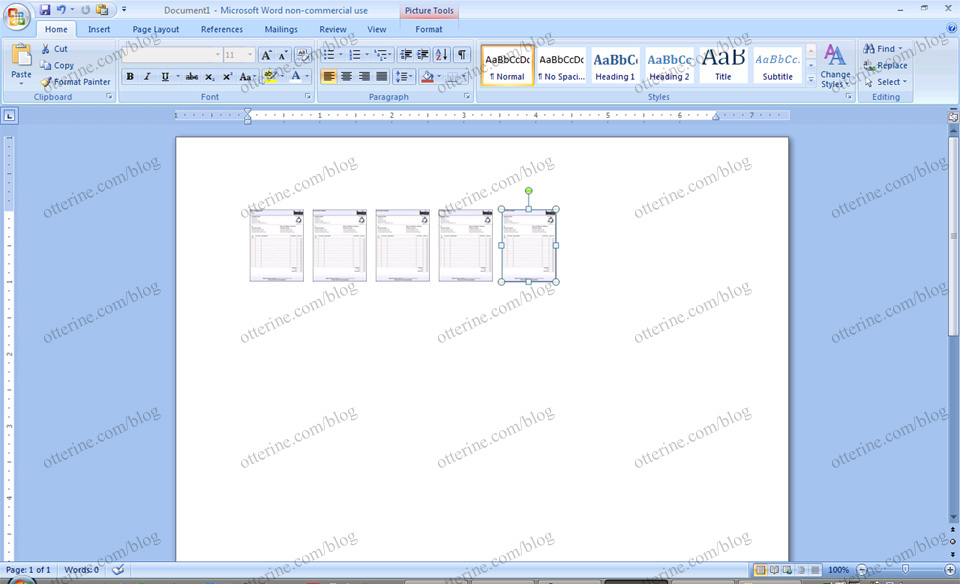
You can add other images as you like, resize them and then print. Cut and enjoy your mini invoices! :D
Categories: Miniatures
June 26, 2015 | 0 commentsTamiya tool set – part 2
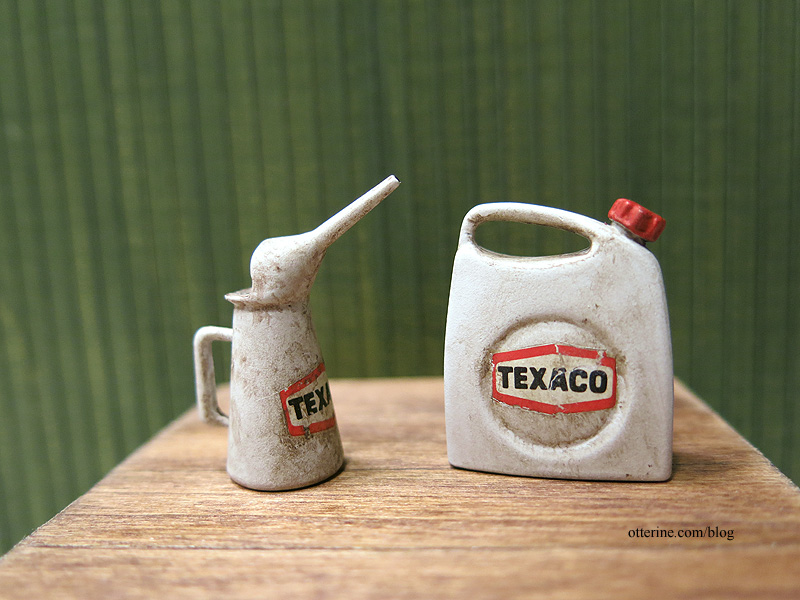
Continuing work on the 1:12 scale Tamiya tool set. I’m starting with the polyethylene tank and oil jug. Here’s a reminder of what these looked like after assembly and initial sanding.


I primed them with grey spray primer and then followed that up with flat white spray paint. The grey toned down the white, which is good for a base to start aging.
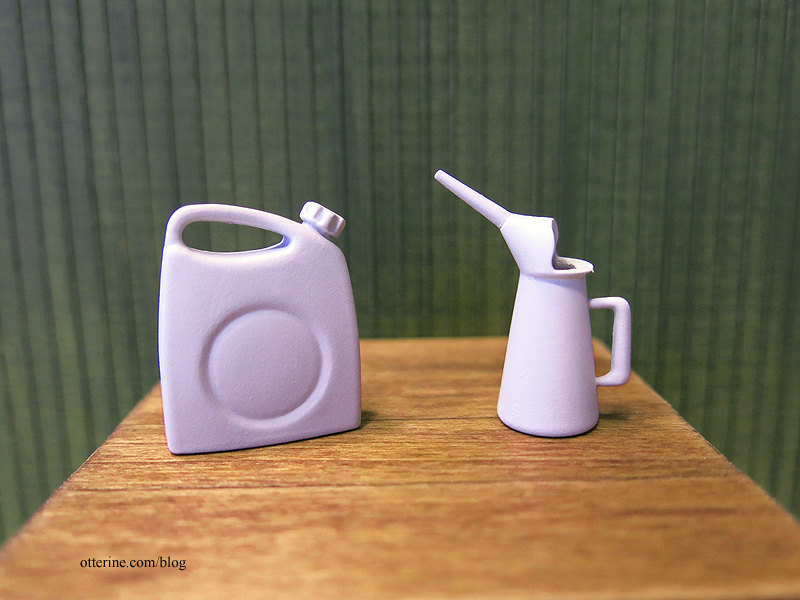
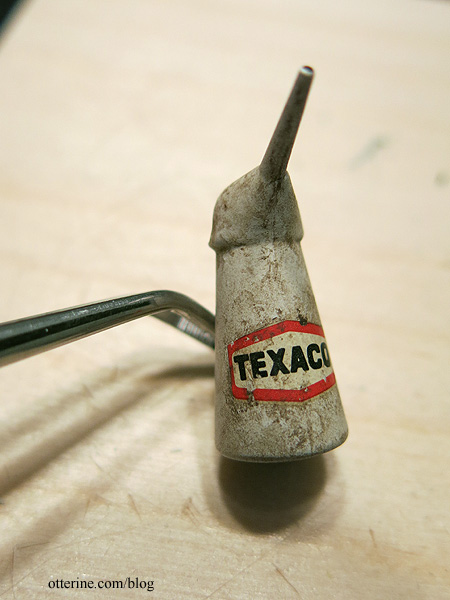
The vintage Texaco jugs I found online were all red, but I liked the white on the kit box, so I stuck with that. I painted the interior of the jug silver.

I added grime with acrylic paints thinned with Staining Medium. I left the decal whole when applying but scraped some holes from it after it dried in place. I also cut away the shiny clear portion around the outside of the decal as best I could. I put a dot of black paint at the tip of the spout to give the illusion of an opening.
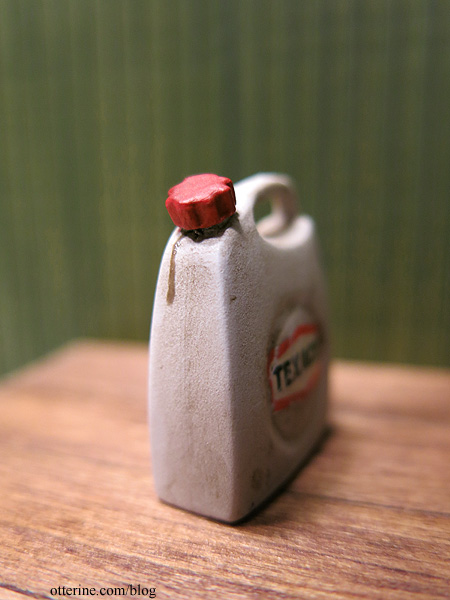
For the polyethylene tank, I added the same grime and painted the cap red. I mixed some of the grime paint wash with satin varnish. Using a tiny paintbrush, I made a dribble of dried liquid down the side.
For these decals, I split them before applying so they appear broken and misshapen. I scraped holes and removed the clear halo from these as well.
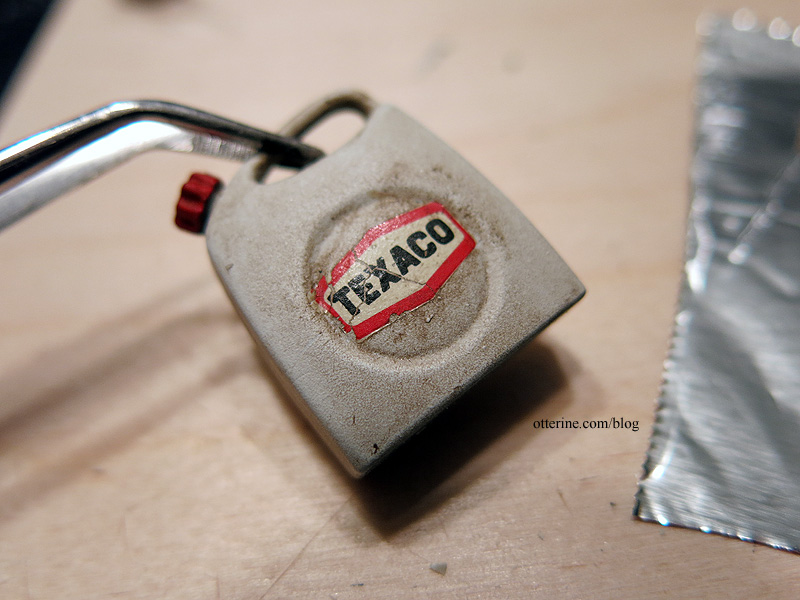
I built up the cracks in the label with white paint, followed by an aging wash to tone down the brightness. Now it looks like a paper label that has loosened, cracked and moved after getting wet.

I love the way they turned out.
Categories: Miniatures, Model Cars, Vehicles
June 19, 2015 | 0 commentsTurn, turn, turn
In addition to the lovely tools Bill sent, he’s been trying his hand at turnings as well (with much success if you ask me). The woods he used are so interesting. :D
California Lilac, green

California Lilac, aged

Timber bamboo – I zoomed in on these to show the leopard like patterns.

Bamboo garden stake

Wild rose trunk – I love the range of patterns

He sent me some test shots of the bowl and scoop, and I used some polenta to mimic those. :]

Arbutus burl

I think they are all wonderful, but this is my favorite. :D

Thank you, Bill! These are all so lovely. :D Spoiled rotten, I tell you…spoiled rotten!
Categories: Miniatures
June 11, 2015 | 0 commentsCopyright and Pinterest use
This is not an all inclusive list, but here are some basic guidelines about copyright and internet etiquette. All content on otterine.com is copyrighted and may not be reproduced in part or in whole. It takes a lot of time and effort to write and photograph for my blog. Please ask permission before reproducing any of my content.
Copyright exists as soon as you create something, though there is of course an added legal process to further that notion. It should be understood that one can’t copy posts from one place and post them on one’s own blog or website without permission. Just because my work is on the internet does not mean it is in the public domain or meant to be reproduced freely. You do not have to make money using someone else’s work to violate copyright. Even if you are using the work for personal use only, if you reproduce it in print on the web or otherwise, it can be a violation of copyright. Please visit Copyright.gov for complete information.
Please do not republish my blog posts, images, and/or tutorials on other websites or blogs, including Pinterest, without permission.
Pinterest users: Please pin only one photo from a blog post — do not post multiple photos or entire tutorials on Pinterest.
If you’ve had a Pinterest pin or other image removed at my request, it is typically due to that image being hot-linked on multiple other websites and the only way to resolve the issue is to remove the source image from Pinterest. I will also have Pinterest remove multiple pins from the same post as well as any pins where the link directs to a location other than my blog or website related to me.
I do understand that Pinterest is a means for people to both save links to tutorials and to discover artists’ work in the first place. However, please understand that when large sections of my work and tutorials are pinned, it essentially equates to my work being reproduced in its entirety on another website. In fact, each pin creates a new but exact duplicate of a copyrighted work using Pinterest’s numbering/naming system. From there, the images can be republished onto other websites without links back to the original source, which is harder to track. If my work is published in its entirety elsewhere, then people have no reason to visit my blog.
Pinterest also puts the responsibility solely on the user as to whether they have the right to use the images they choose to pin. A copyright holder can ask Pinterest to levy “strikes” against a user for violating copyright. I don’t know the full policy for Pinterest, but I do know Facebook will block repeat offenders. Just because Pinterest exists doesn’t mean users are exempt from copyright law or in any way protected by Pinterest if they get into legal trouble.
I don’t mind a photo or two pinned, but this large scale copying has often gotten out of hand. I understand that many people who pin responsibly might be caught in these sweeps to remove images. It’s not a commentary on those users, and I’m sorry if it causes confusion, offense or hurt feelings. That is not my intention. As they say, it takes one bad apple to spoil the bunch.
There is no easy answer, so I try to strike a balance between being flattered at one or two images pinned and fighting copyright infringement where entire sections are posted to Pinterest, Facebook, VK.com, YouTube, or other websites.
As for images posted on other websites, if I can find a way to contact the website owner or blog writer, I try to do so. In cases of foreign language sites and sites without any obvious contact information, my only recourse is to go to the source website or hosting company.
When I contact people about removing my copyrighted works, I address it professionally and in a friendly manner. Sometimes, with the use of Google translate, it doesn’t always come across well. There are also certain legal statements that often need to be included in DMCA reports, and that legal language can seem harsh and unforgiving. I understand that some people don’t understand copyright, so I give the benefit of the doubt as much as possible.
It should go without saying that no one should put their logo on any work that is not their own, but many have done so and not just on any one particular website. I’ve read praises for my work and the work of others, but all of the photos have the writer’s logo or name superimposed on the work. Please do not put your logo or name on my work.
I offer my guidance and ideas free of charge, but my work should also be respected. I always give credit to others when I use their ideas or share their work. I love to create and share ideas on my blog, but I do think the rights of artists should be protected and respected. It bothers me when I find my friends’ works unattributed or copied in whole as well. It’s a fine balance between publicity and infringement. I am doing the best I can.
There is a contact form at the top of the page so you can send me a private message at any time.
Categories: Miniatures
June 11, 2015 | 0 commentsTamiya tool set – part 1
I’ve started working on the 1:12 scale Tamiya tool set.
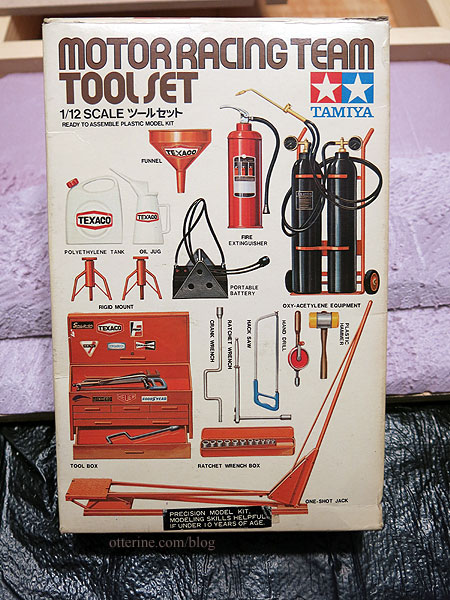
I might not make everything in the box, mainly because I already have better examples of these tools in metal and wood. The first bit of business is to remove the pieces from the sprue then sand or fill the imperfections.

Many of the pieces are assembled with glue, so I’ve done my best to fill in the joins. I won’t know how successful I’ve been until after I spray on the primer. :] They are obviously visible, but they feel smooth and might disappear under the primer.

I’ll likely age these pieces, so that will give me some flexibility.

Depending on how the cart for the oxy-acetylene torch turns out, I might remake it in metal for better realism and weight. I plan to paint the wheels separately, so they are not attached to the cart yet.

While I was at it, I’ve included the barrels from Bill. I’ve filled in a couple of holes in the red barrel with contour putty, which I will sand down once dry. I also removed the molded lines and injection marks. These have great detailing, so I hope the painting works out well.

Categories: Miniatures, Model Cars, Vehicles
June 9, 2015 | 0 commentsPresto!
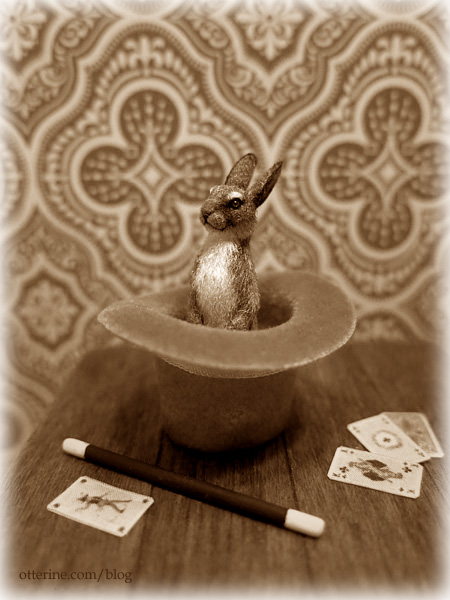
I’m channeling my inner Bullwinkle and working some mini magic!
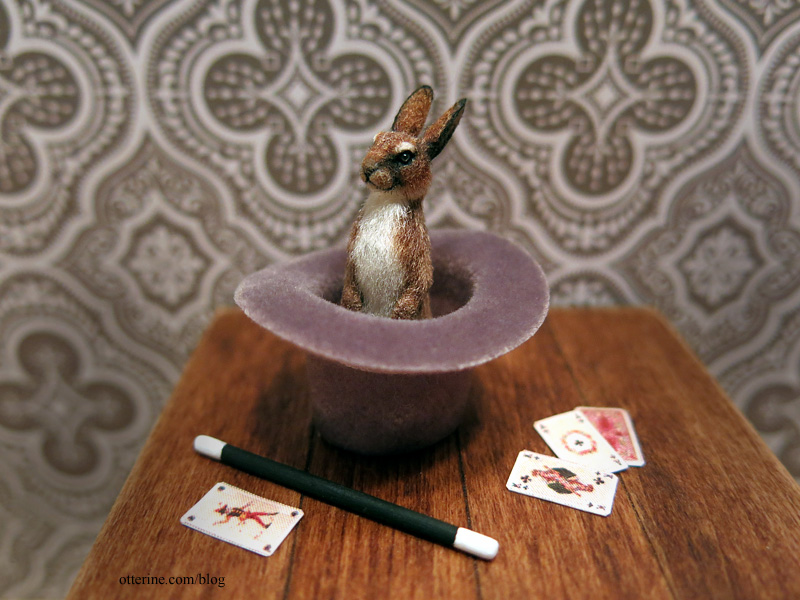
I made a few playing cards from this free printable on Wings of Whimsy. I sanded down a thin wooden dowel and painted it to look like an old fashioned magic wand. The top hat is by Heidi Ott. I chose a grey hat since it’s easier to keep the dust away in photos. Friedrich is ready to amaze you.
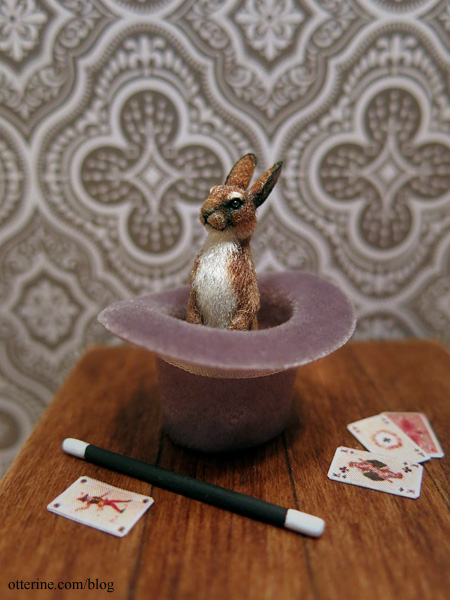
Presto! :O Whoa…we’ve gone back in time. :]
Categories: Animals and birds, Miniatures
June 4, 2015 | 0 commentsMini seed packets — shake, shake, shake
I bought a package of pre-printed seed packets by Farrow Industries at one of the local shows.
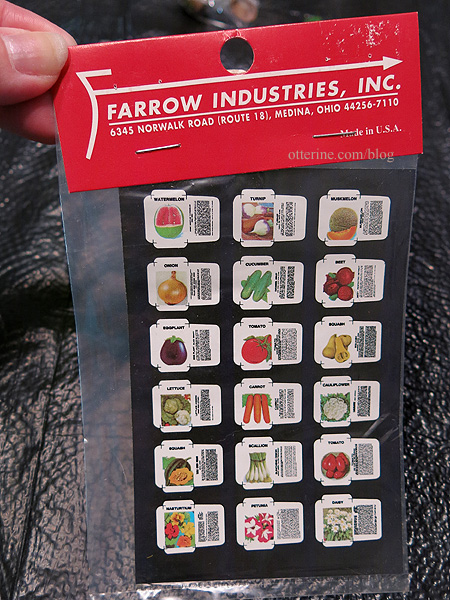
These were made before laser cutters became all the rage, so you have to cut them out individually. I used scissors to do this part.
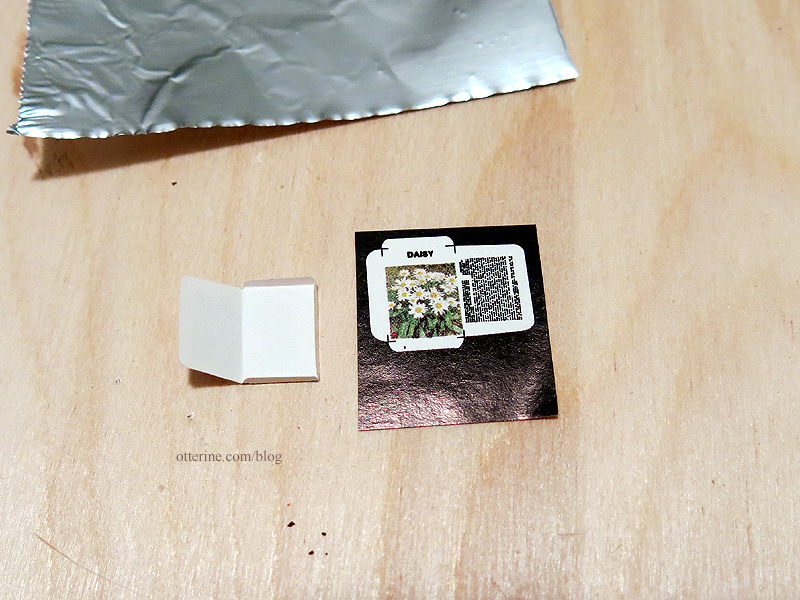
I scored lines with an X-Acto blade, using the small guidelines printed in the design.
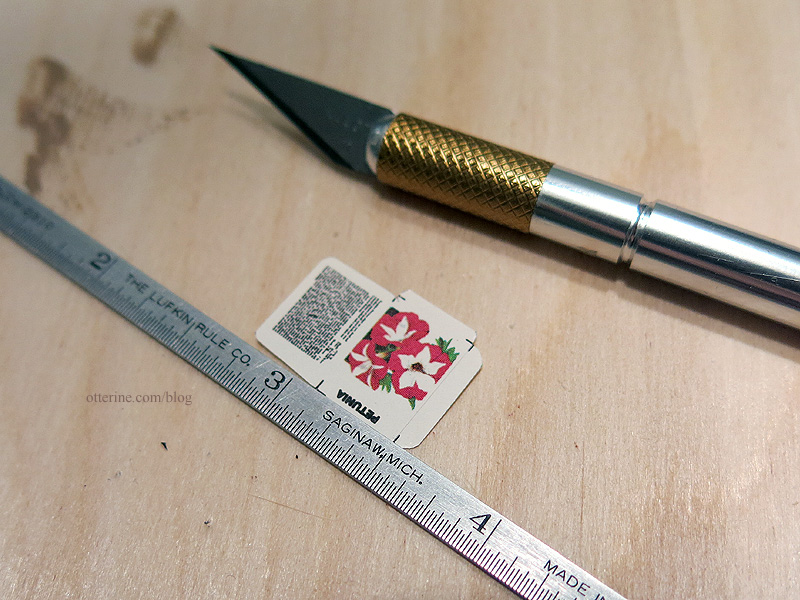
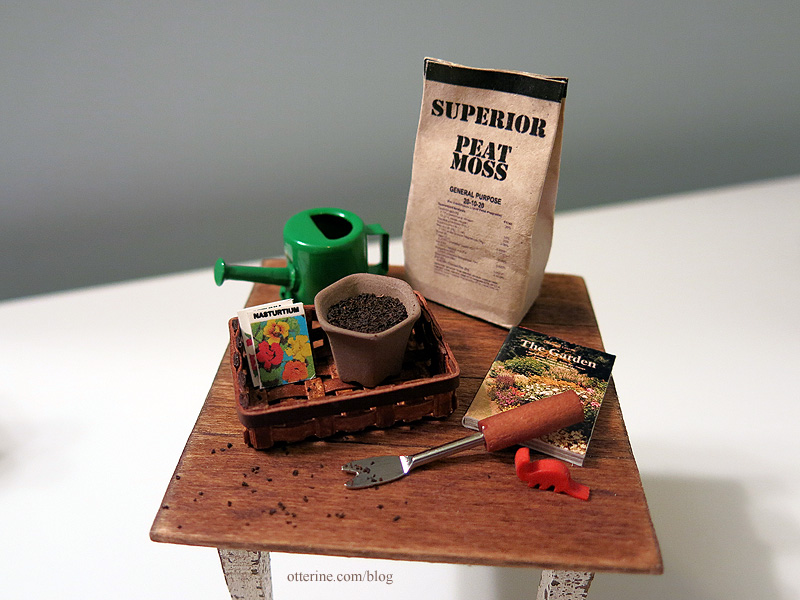
I added a little something before gluing them closed. When you shake, shake, shake the package, it sounds like the real deal! Little “seeds” rattle inside the package.
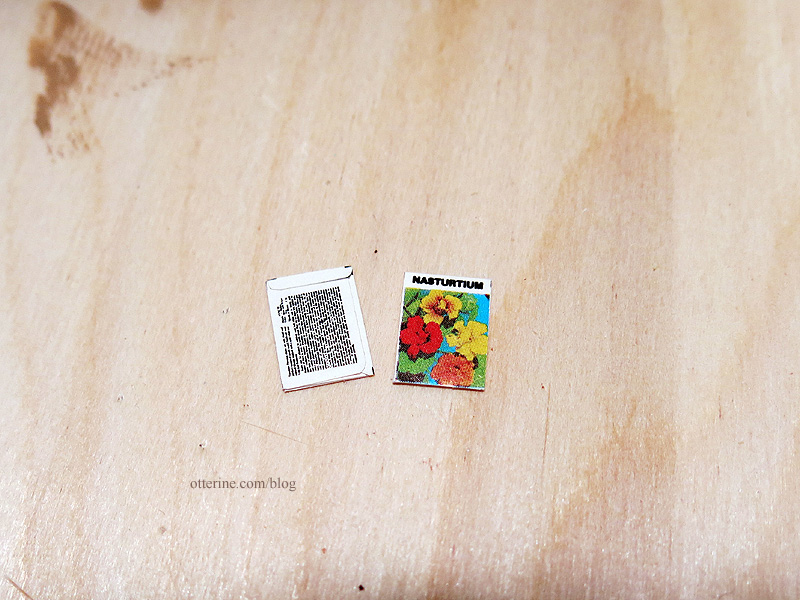
These are wonderfully detailed. The sheen of the paper is very much like real life seed packet material, not too glossy.
Categories: Flowers, plants, and trees, Miniatures
May 19, 2015 | 0 commentsDesigner Emulation Kit 2, part 1
I think the main reason miniaturists have hoards of projects for rainy days isn’t due to a lack of self control but more for the simple understanding that you had better grab something you like when you see it because it will likely vanish from the marketplace right around the time you want it for a project. :D
Such is the case with Designer Emulation Kits. These are little circuit board mini kits you build. They end up as modern mini light fixtures. These were designed by Mark McKenna, but the website is now defunct and you can find these babies only on the secondary market.
The one I liked best is DEK2, based on the classic Arco lamp by Achille Castiglioni. I was able to find a new kit on eBay.
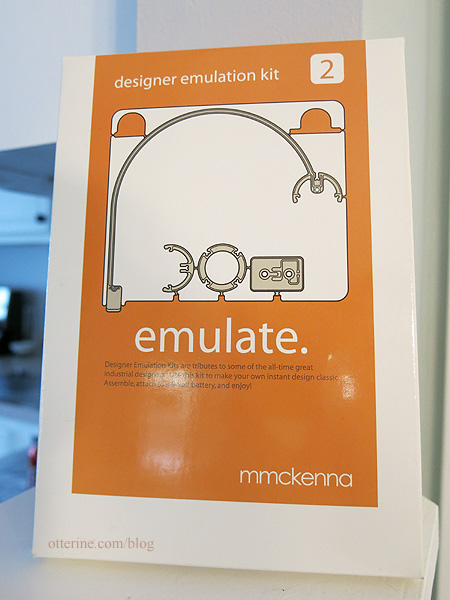
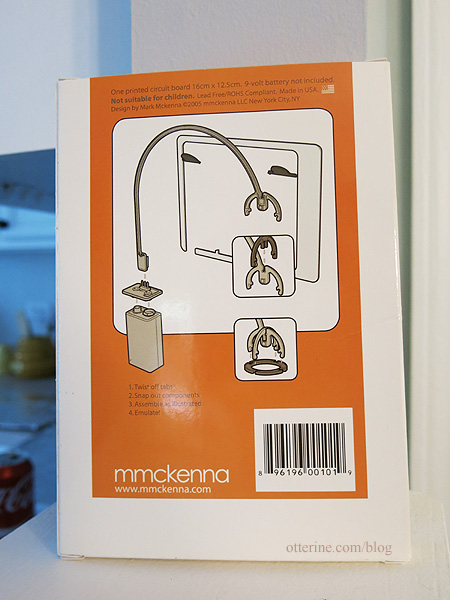
The simple instructions are on the back of the box.
Inside, there’s a clamshell plate that holds the circuit board and the toolkit emulator. Yep, that’s a standard emery board. :D You add the 9V battery.
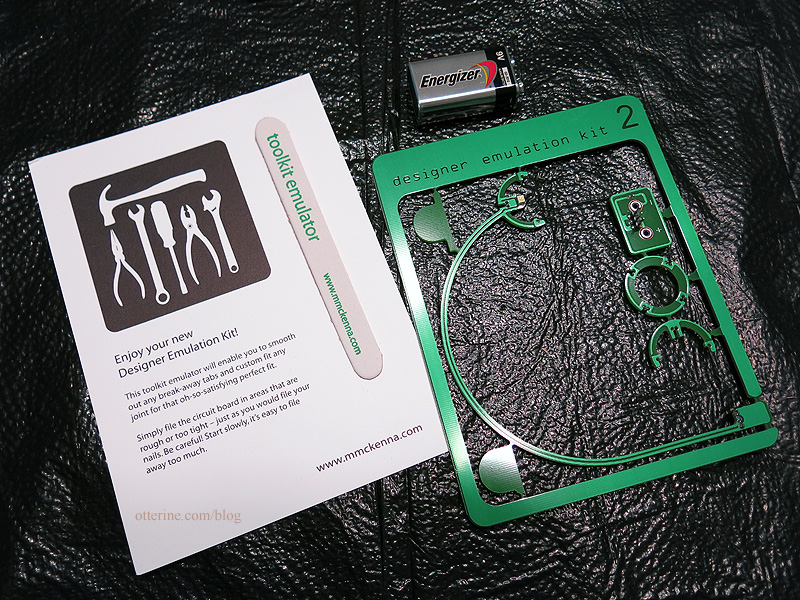
I used some heavy scissors to clip out the parts and sanded the nubs with the included sanding board. It was easy peasy.
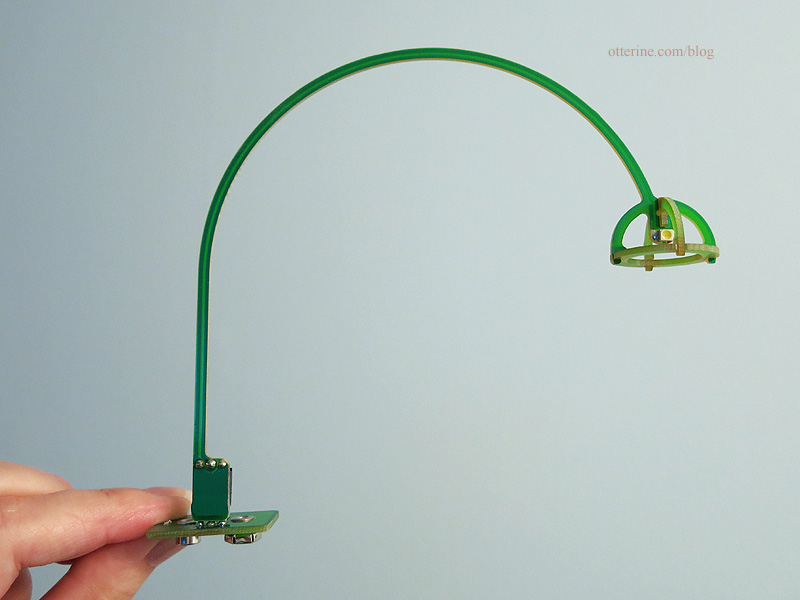
The material is not delicate, which is good for popping it on and off the 9V battery base. As a bonus, it’s wonderful in 1:12 scale. It is a little bright, but some glass paint should help tone it down.
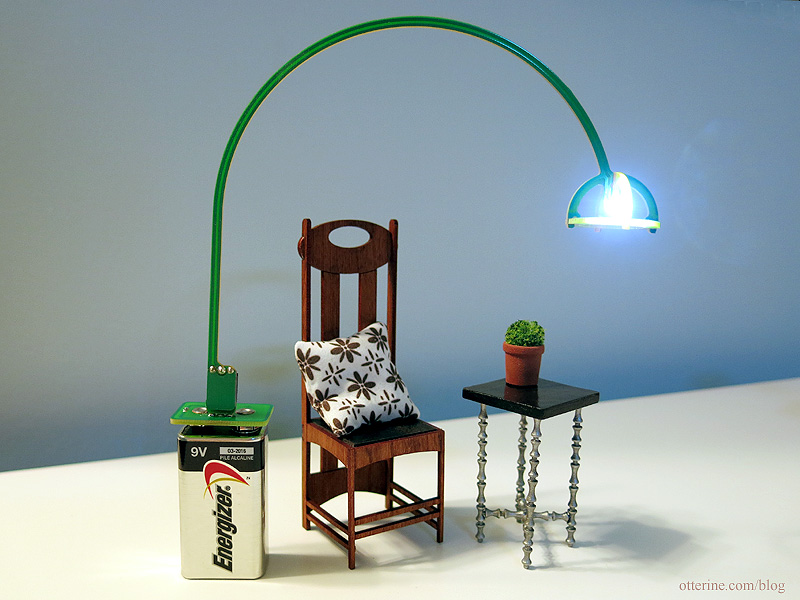
Now, I just need to build a modern end table to hide that battery. :D
Categories: Miniatures
May 17, 2015 | 0 commentsFire Hydrant
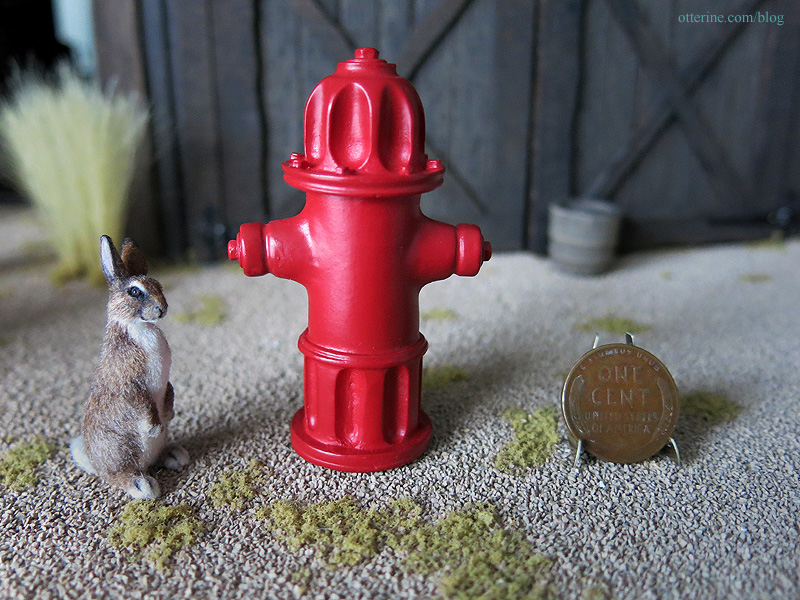
One of the items on my mini wish list has been found! It’s the discontinued fire hydrant by Dee’s Delights. It’s so red!!! :D
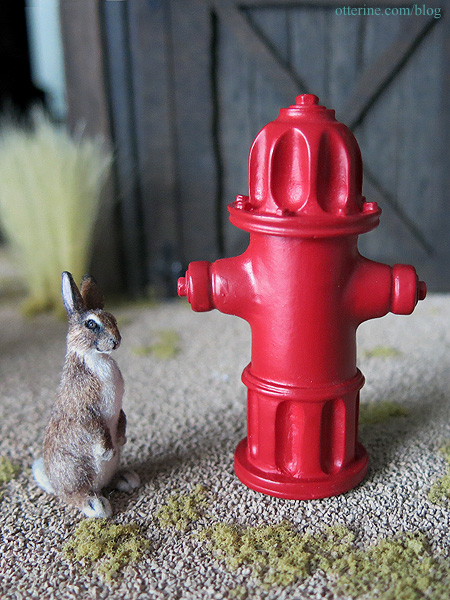
It’s a remarkably detailed and realistic piece, and it’s a shame these are no longer made. Luckily, Mary’s Miniatures had two of them for me — one for The Brownstone and one for my stash in case an idea strikes. :D
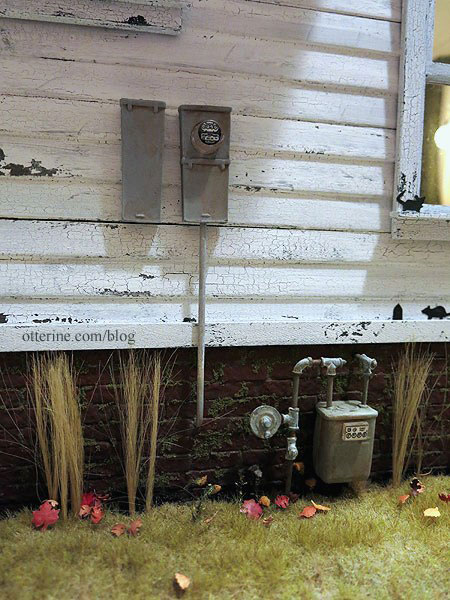
I’ve used the gas and electric meters from the same line for the Haunted Heritage, and those are still available on the mini market.
Ah, it really is the little things. :]
Categories: Miniatures
May 4, 2015 | 0 commentsLa Vache Qui Rit
That is one of my favorite things to say in my very rusty French — laughing cow. And, it’s the name of a wonderful cheese! :D
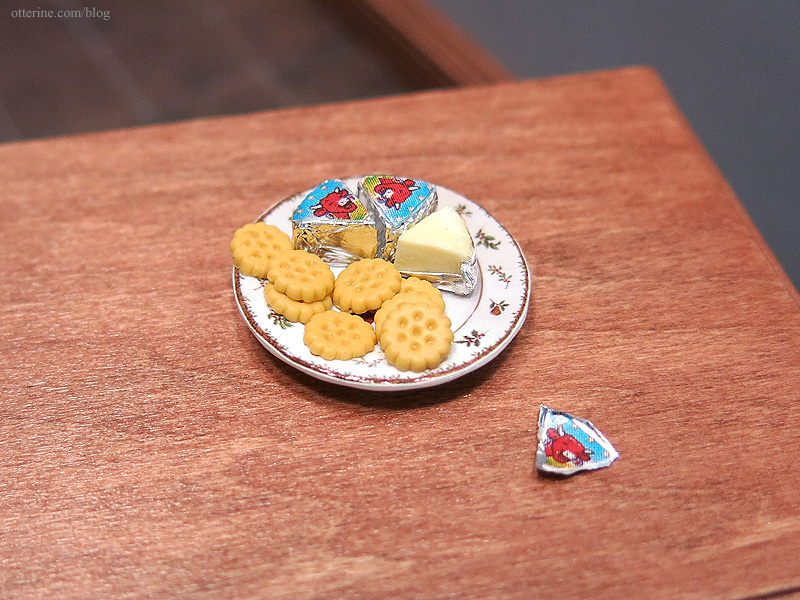
This mini cracker and Laughing Cow cheese set comes from I Love Mini Things. Here I’ve placed the cheese on a plate by A Lavender Dilly. The tray and pitcher are gifts from Barbara, and the canning jars are from Keli.
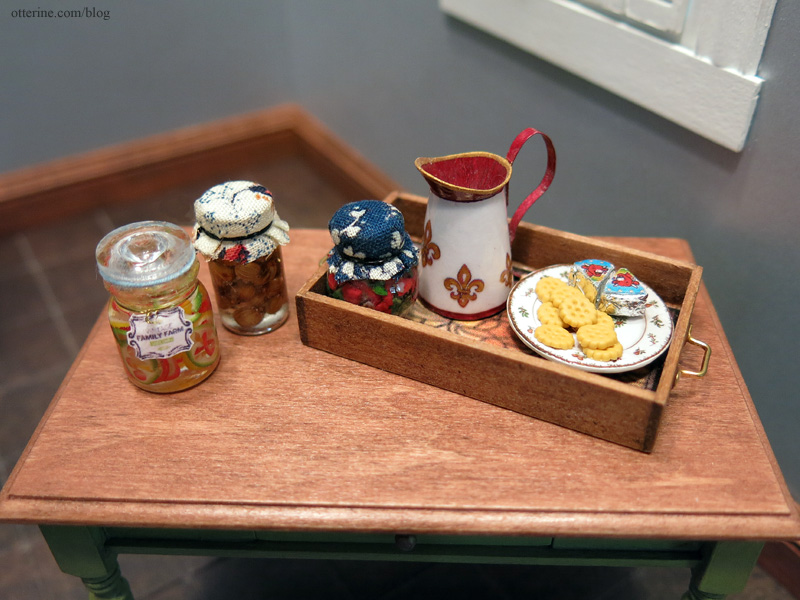
Thank you, Keli and Barbara! :D
Categories: Miniatures
May 1, 2015 | 0 comments
NOTE: All content on otterine.com is copyrighted and may not be reproduced in part or in whole. It takes a lot of time and effort to write and photograph for my blog. Please ask permission before reproducing any of my content. (More on copyright)

Autumn Scarecrows
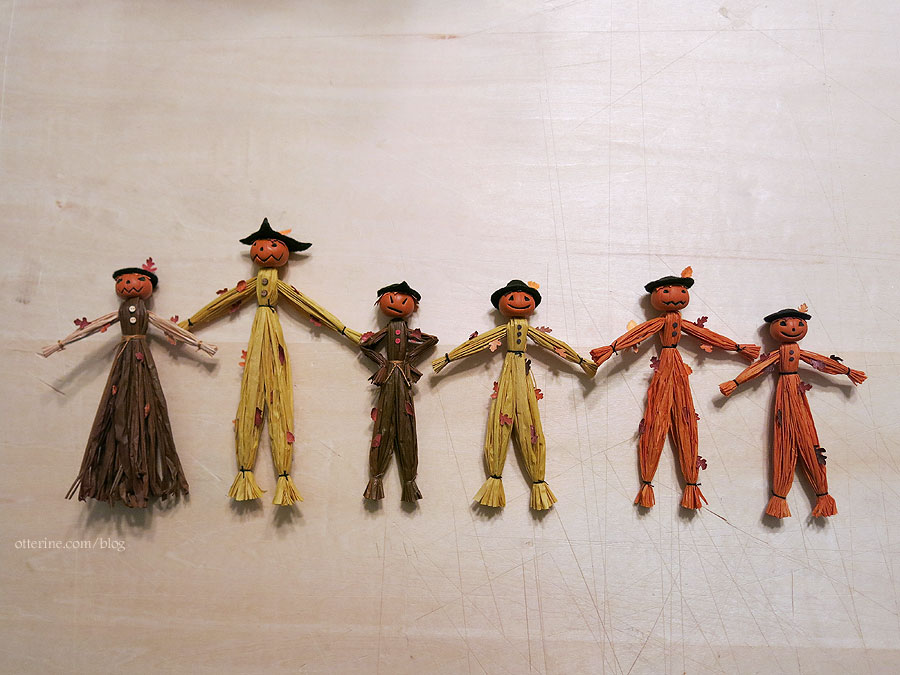
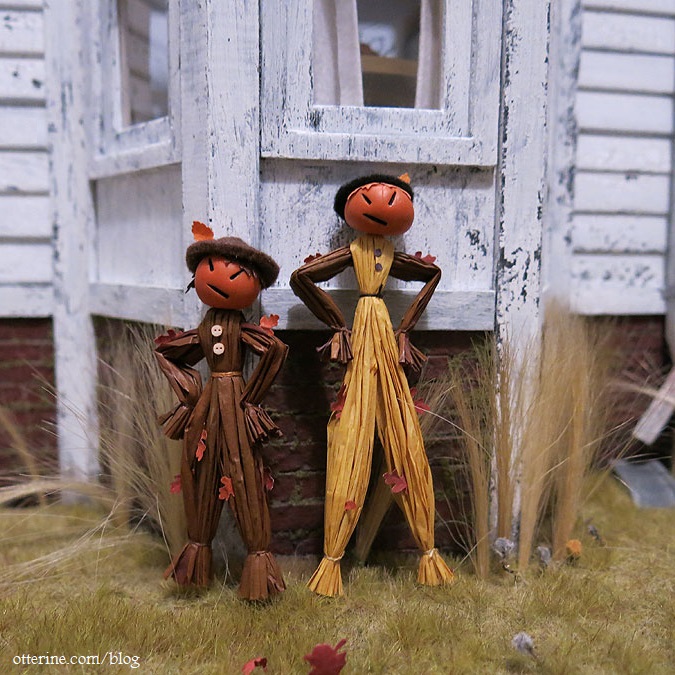
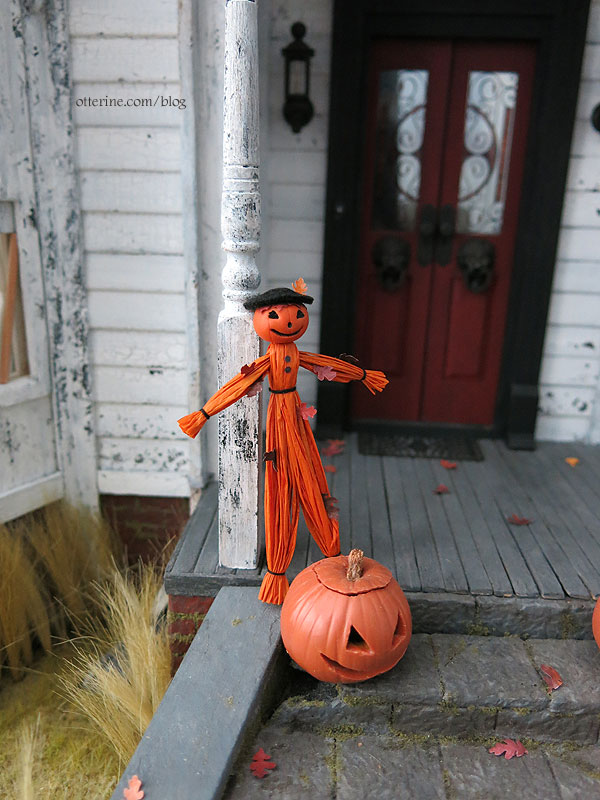
I made a fresh batch of scarecrows for the autumn season. Who’s looking forward to Halloween?! (meeee!)
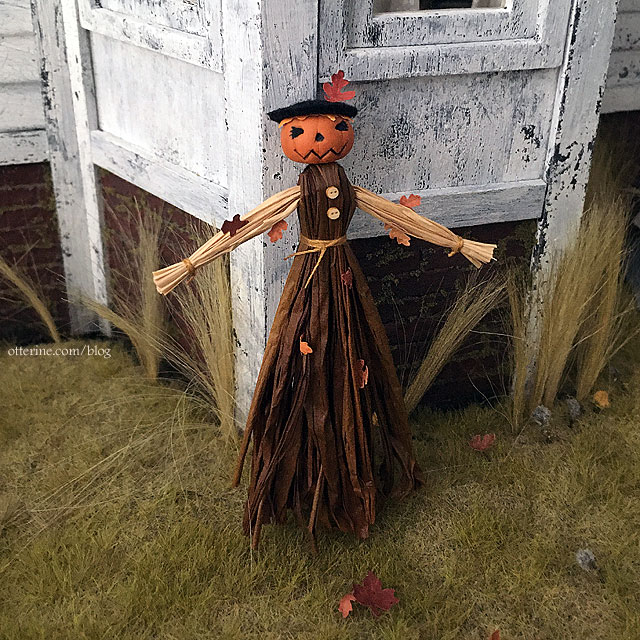
A few of these will be in my etsy shop when it reopens. I also have a few more in the works.
Categories: Miniatures
September 2, 2021 | 0 commentsBread dough bowls
This past month, I made up some rising bread dough bowls using polymer clay. Today, I spent time making the kitchen towels used to cover them. In reality, the towel would cover them completely, but in mini, I let some of the dough peek out. Perhaps the baker is checking for readiness. One is for me, but the others will be in my etsy shop.
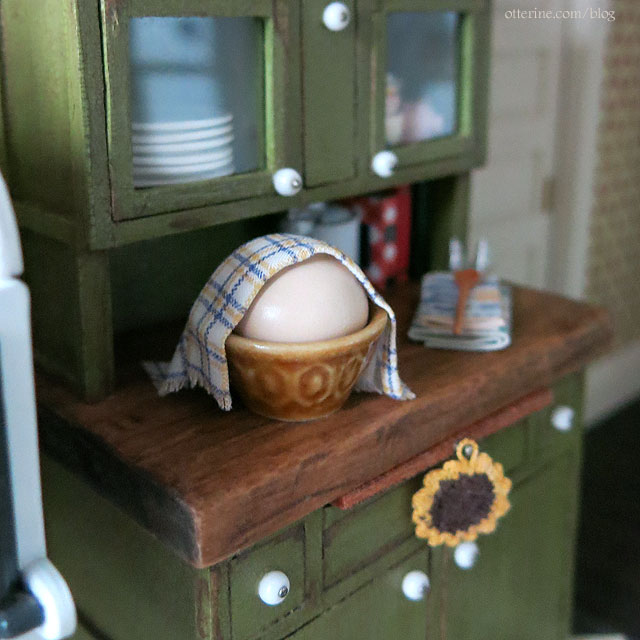
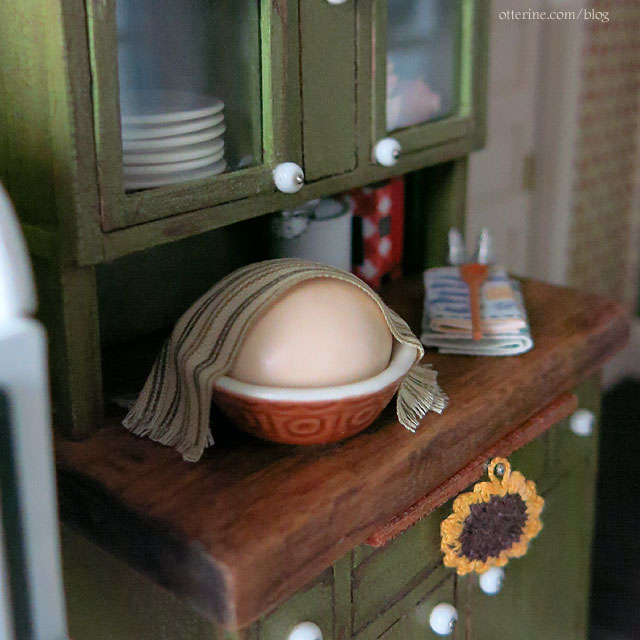
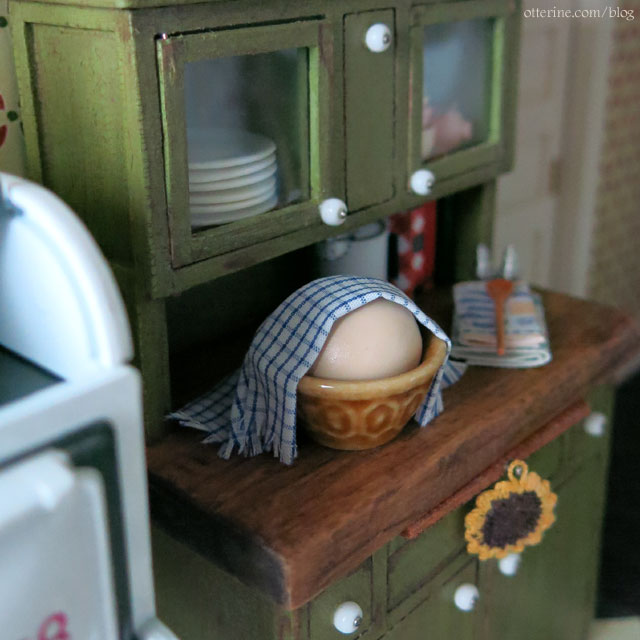
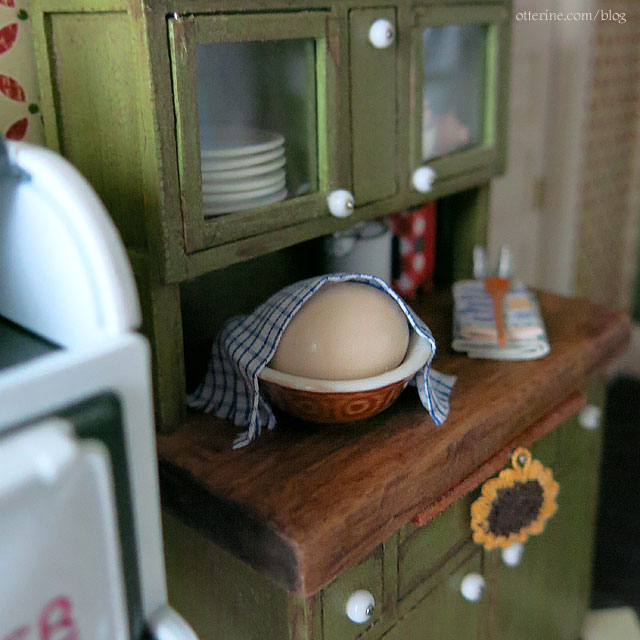
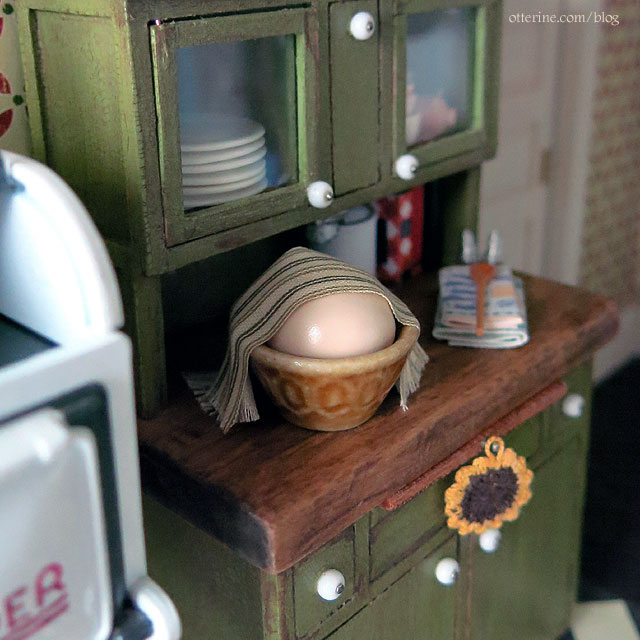
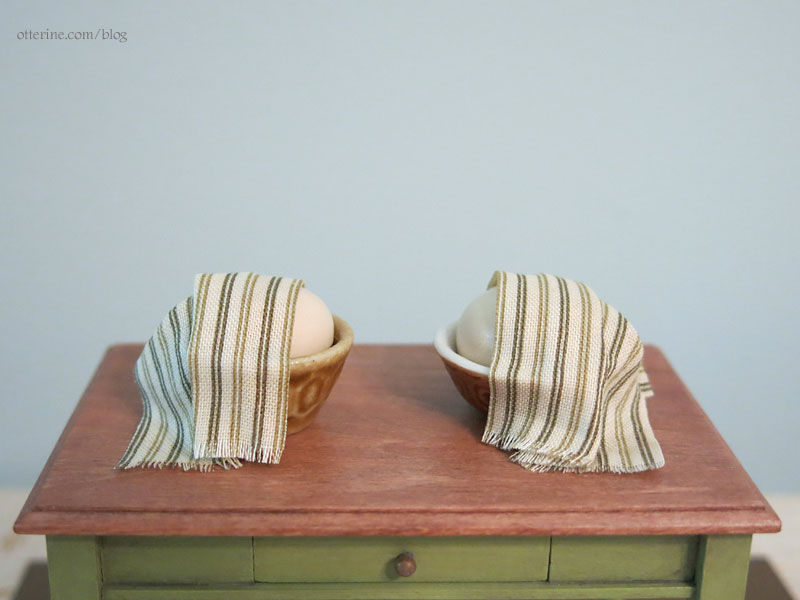
Categories: Miniatures, Polymer clay
August 28, 2021 | 0 commentsMemories and gifts
The miniature community lost a talented miniaturist and lovely lady, Elly in Amsterdam. I knew her through a petitpoint group and never met her in person, but she was one of the sweetest ladies and super fun. She’s definitely missed. One of her close friends is also a talented miniaturist and is looking after Elly’s estate. Josje has a blog of Elly’s miniatures for sale, and I bought two items to have something from Elly. :]
These cat matryoshkas are beautifully painted and actually function.

Too stinkin’ cute!

The coal scuttle is something I don’t have a plan for, but it is so well made it could be just an antique used for décor in a more modern setting. :]

One little coal was included.

Mom gave me two needlework books for Christmas that I’m sure Elly would have loved. The first is Embroidered Cats by Hiroko Kubota.

While it’s not an instruction book and not for beginners, the book illustrates the process of turning a photo into an embroidered likeness. I might need to see about making a needlework Jasper. With a little planning, it could probably be done in miniature to make a wall hanging.

The other book is Cluny Tapestry Rabbit, a counted cross-stitch pattern by Scarlet Quince. Elly made a similar one in miniature for a fire screen. This is a larger pattern, but with a high count fabric, it might be a good wall tapestry in miniature.

Categories: Books and media, Miniatures, Needlework - French knot rugs
January 24, 2019 | 0 commentsHappy New Year 2018!
I have a new toy! Mr. Meeseeks is from the Rick and Morty show. It’s a funny albeit crass show that isn’t for everyone, but I love it! Mr. Meeseeks is my favorite character so far. He comes with a gun and a golf club (makes sense if you’ve seen the show), but here he is about to enjoy some wine after completing his work. :D
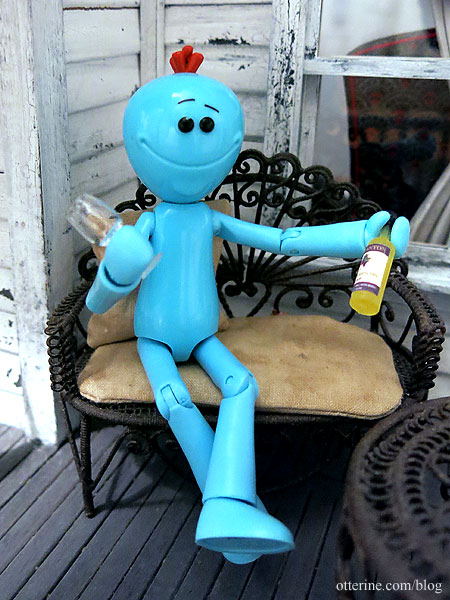
Categories: Miniatures
January 8, 2018 | 0 commentsKitty tray
I treated myself to a splurge item just because. NAME Miniatures has a great collection of estate pieces, and I could not get this kitty out of my head. It’s a beautifully painted tray with a stand on the back that is held on with wax, so the tray could be displayed flat as well. But, who would cover that face?!! :] The work is signed HS 02. If anyone has information on the artist, I would love to know.
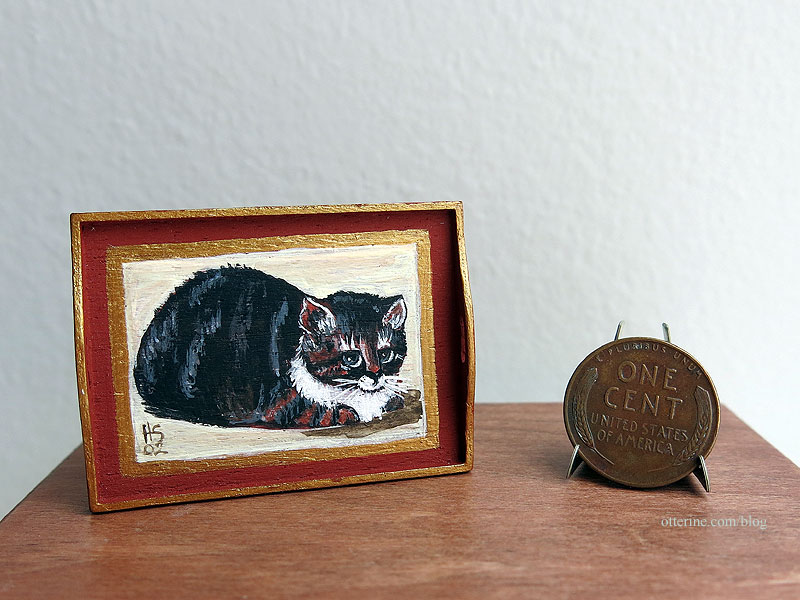
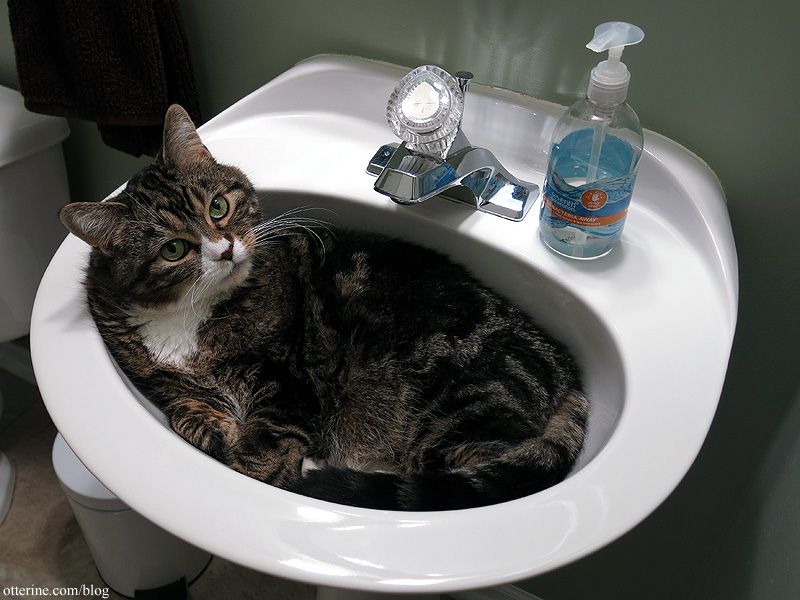
Now, if I could only figure out why that kitty seemed so appealing and familiar. Hmm…don’t tell me. It’ll come.
Categories: Miniatures
June 13, 2017 | 0 comments
NOTE: All content on otterine.com is copyrighted and may not be reproduced in part or in whole. It takes a lot of time and effort to write and photograph for my blog. Please ask permission before reproducing any of my content. (More on copyright)


