


NOTE: All content on otterine.com is copyrighted and may not be reproduced in part or in whole. It takes a lot of time and effort to write and photograph for my blog. Please ask permission before reproducing any of my content. (More on copyright)

Categories:
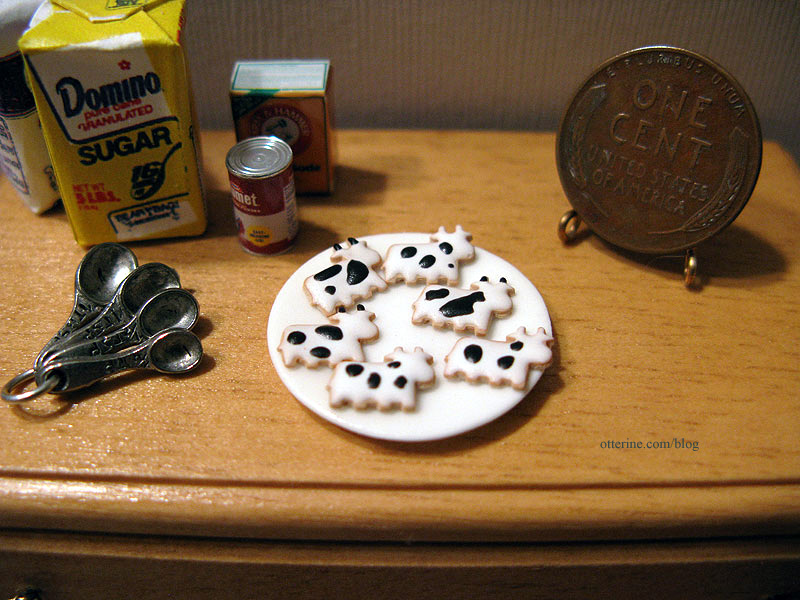
Moo Cow Cookies!
I tried another cookie design…tiny moo cows! :D They are iced in black and white, each one a unique freehand creation.
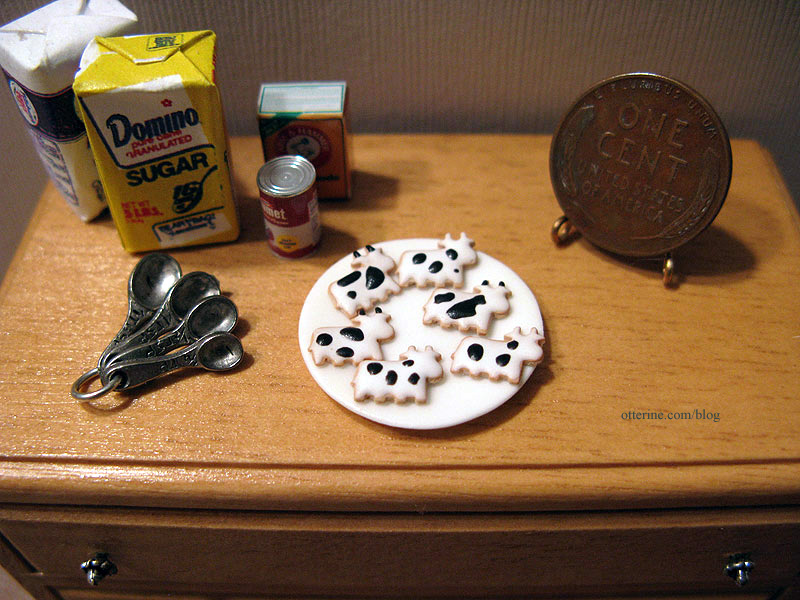
I posted this set in my etsy shop.
Categories: Miniatures
November 26, 2012 | 0 commentsCora, the Bengal kitty, and other fine minis
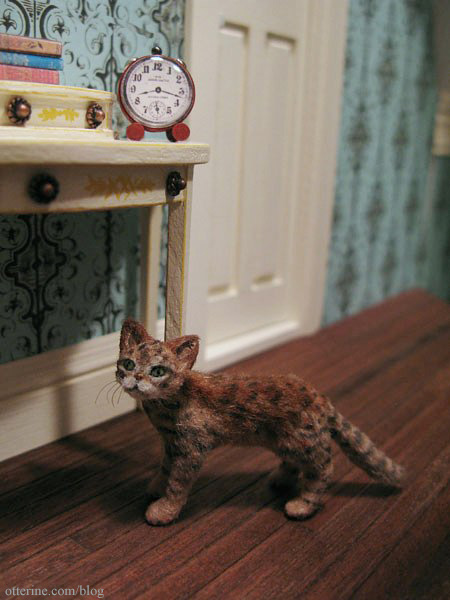
This is Cora, a beautiful Bengal *Reve*. She will live at the next build, with Woodrow as her outdoor friend.
I have a few other miniature acquisitions to share besides Cora. First, a lovely peony in a pitcher and a fabulously detailed china plate, both from Peiwen of Oiseau deNim.

This windmill plate is also from Peiwen. I just love the detailing.

Next is an adorable stuffed bunny from Sisters Dreams. He is so well made and so cute! :D

I had my eye on this cross-stitch runner for some time, and it was still at The Dollhouse Needle when I went back for it. I borrowed a pumpkin from the Heritage.

This lovely wall hanging is also from Mary Lynne at The Dollhouse Needle, though I bought quite awhile ago. She makes wonderful things! The flowers were borrowed from The Aero Squadron Lounge.

Categories: Animals and birds, Miniatures
November 12, 2012 | 0 commentsBaking in mini – my maiden voyage
I used to make clay foods when I was young for my childhood dollhouse, but that was limited to mostly hamburgers. :D Since rediscovering minis as an adult, I’ve seen so many talented food artisans online and at the mini shows.
I recently bought some suitable colors of clay and started experimenting.
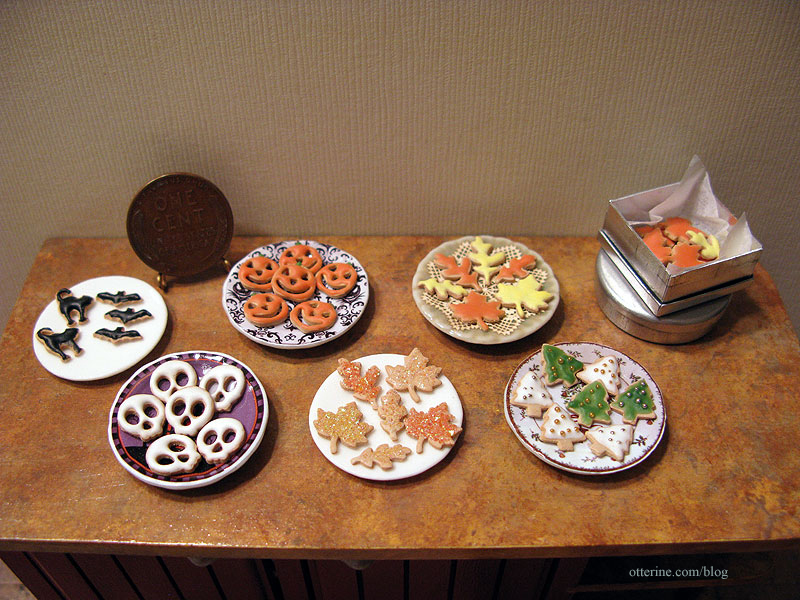
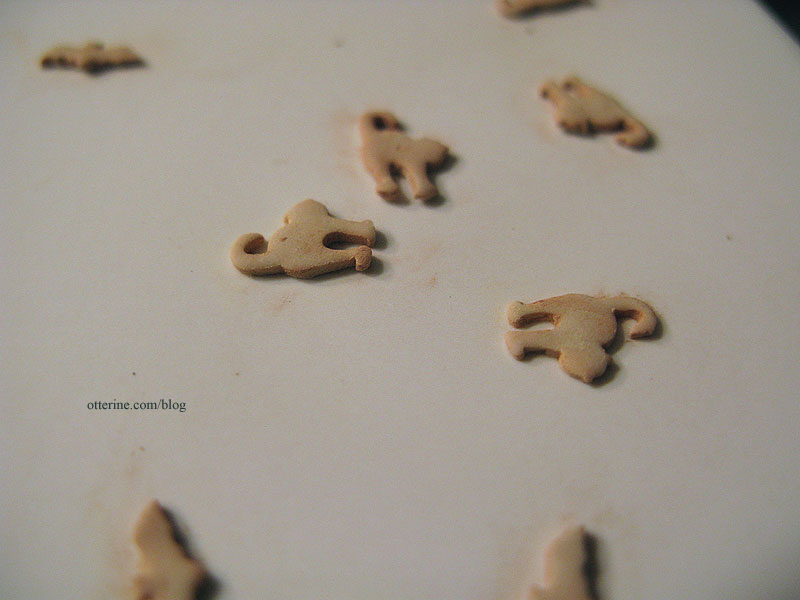
Here is the first batch of cookies using Fimo clay in the color sahara. I started with bats and cats since making festive cookies was part of the to-do list for my Halloween display that I didn’t have time to finish before the holiday.

I used chalk pastels to give them some golden color. After baking, they really do look like plump, warm-from-the-oven cookies! :D
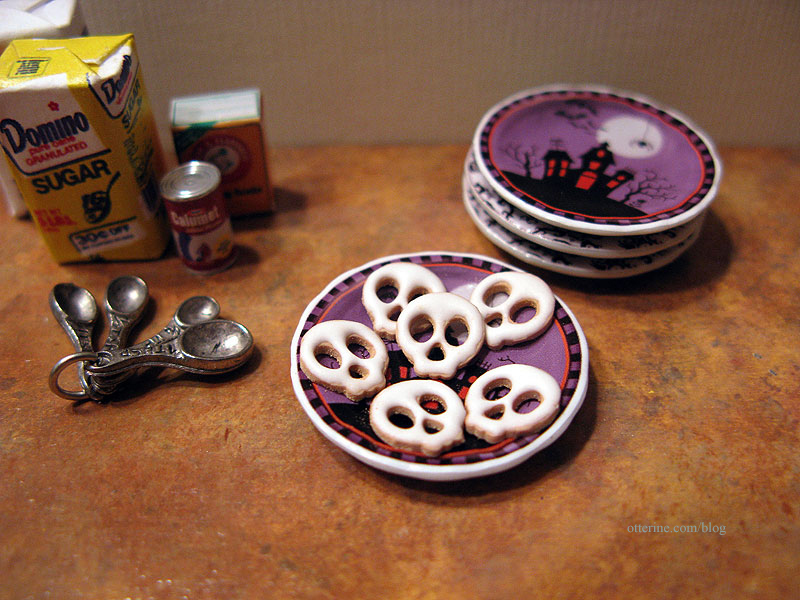
I used clay mixed with the Translucent Liquid Sculpey as well as oil paint mixed with the Translucent Liquid Sculpey to make icing for the cookies. The oil paint was certainly easier to mix and work with, so I will pick up a starter set of colors next time I head to the store.

Here’s a plate of skulls with white frosting. I don’t know why, but these are my favorite. :D
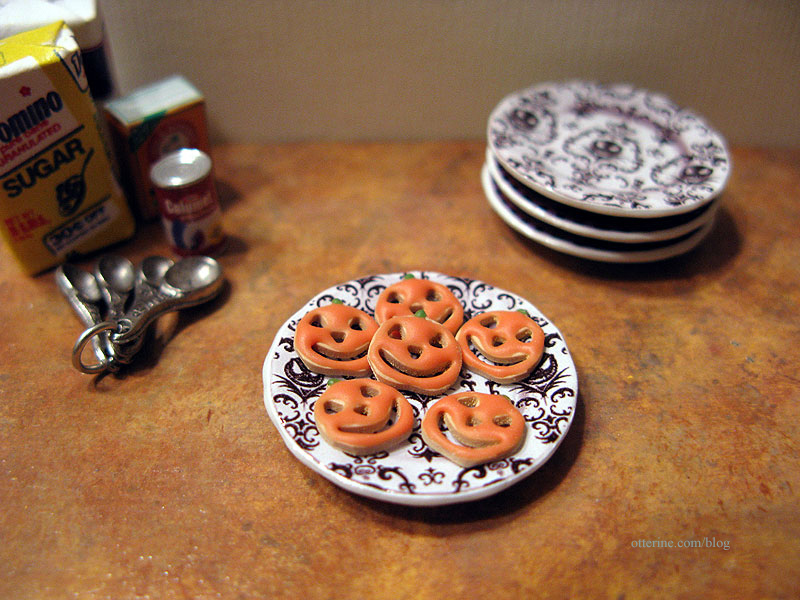
The pumpkin cookies are rather fun, too.
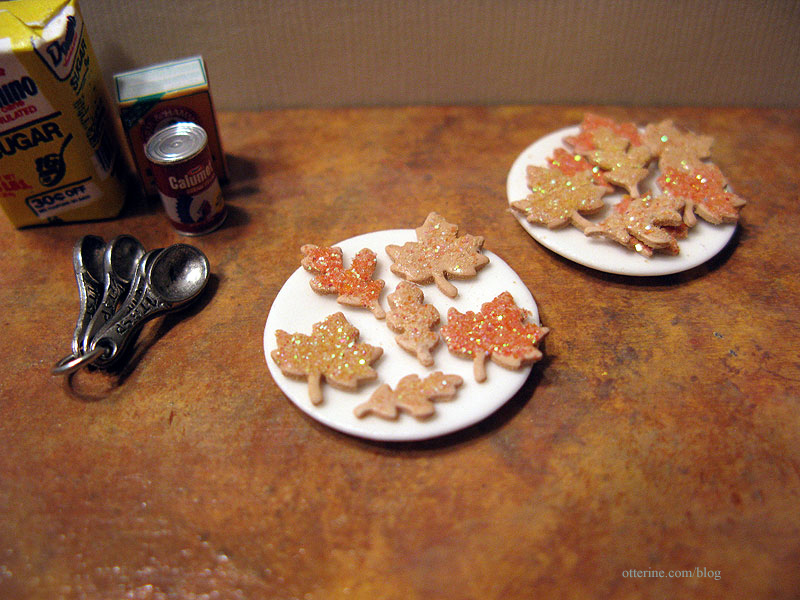
The leaf cookies could be used for the general autumn season or for a Thanksgiving setting.
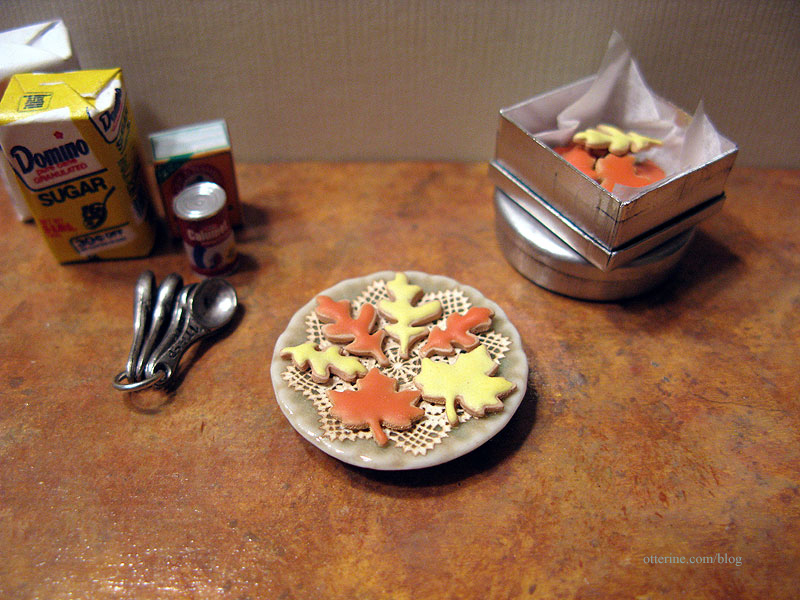
I left some of the leaves bare and decided to try a different method, coating them in three shades of glitter to mimic sugar cookies.
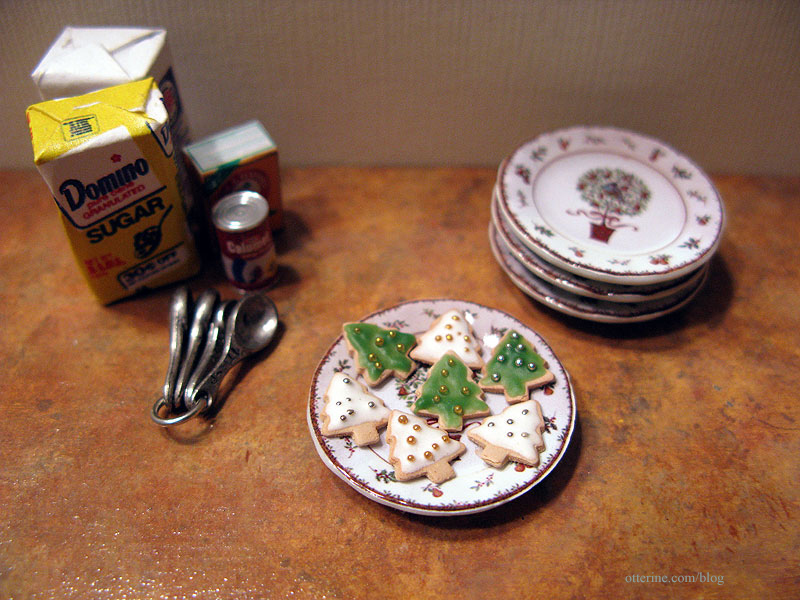
The frosted Christmas trees have added micro beads in gold and silver.
I spent all day on these lovelies and certainly had fun, but after all that work…there aren’t any cookies I can actually eat!!!! :O
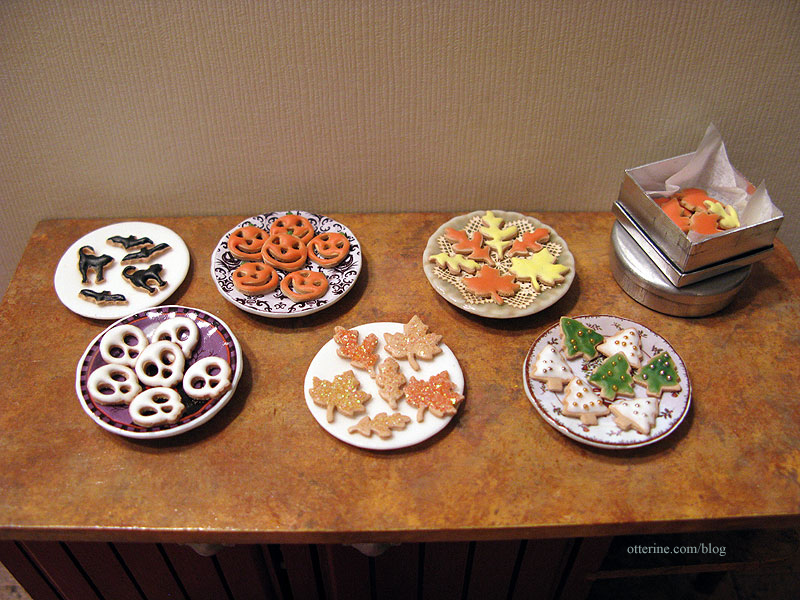
Two designs of Halloween plates and Christmas plates from A Lavender Dilly. Plate with doily from Stewart Dollhouse Creations.
Categories: Miniatures, Polymer clay
November 3, 2012 | 0 commentsMerry scarecrow tutorial
Who’s ready for autumn?!!!! I am eager to get back into working on the Heritage, which will be wonderful to decorate for Halloween. Below is a tutorial I wrote that was featured in the February 2012 Greenleaf Gazette.

This is a fun, simple and versatile tutorial for making raffia and polymer clay scarecrows.
Along with craft glue, some small clamps, a ruler and scissors, you will need:
– Orange polymer clay
– Clay sculpting tools
– Orange or natural raffia
– Black sewing thread
– Black felt
– Yellow paper
– Leaf paper punches
– Ball stylus
– Black paper
– 1/16″ hole punch
– Black paint and small brush (optional)
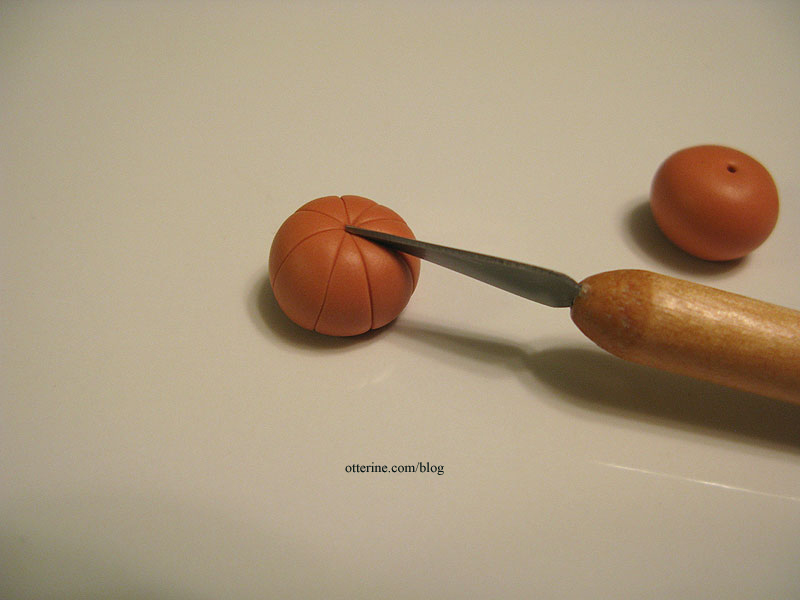
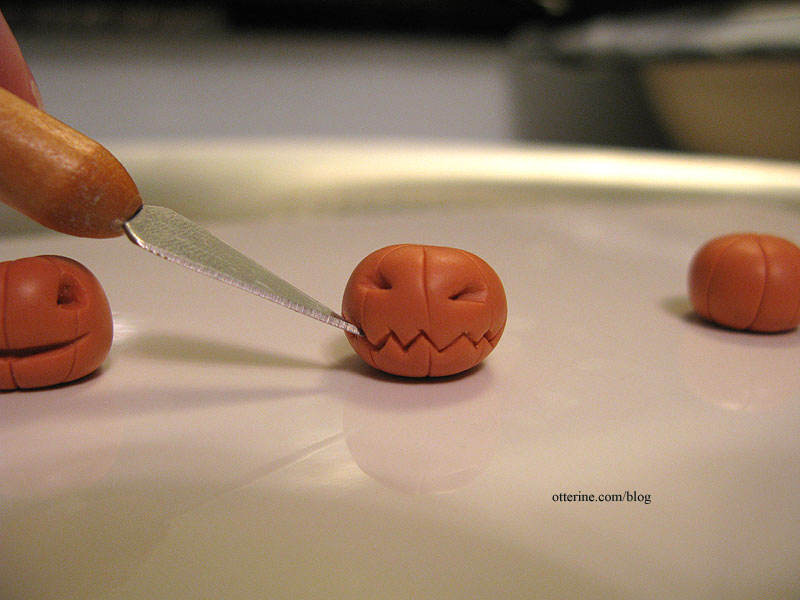
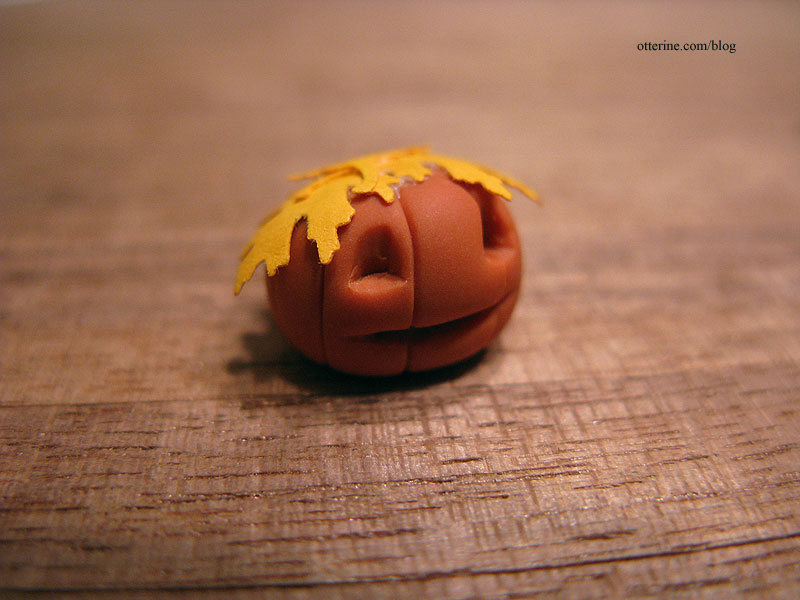
– A small bit of wire and mini drill (optional)To make a polymer clay pumpkin, roll some orange polymer clay into a ball in the size you wish for the head. I’ve used Fimo in Cognac here to form a ball approximately 3/8″ in diameter. Flatten the sphere just a bit and mark the top center with a clay sculpting tool.
Using your sculpting tool, create indentations from the top to the bottom along the sides, evenly all the way around.
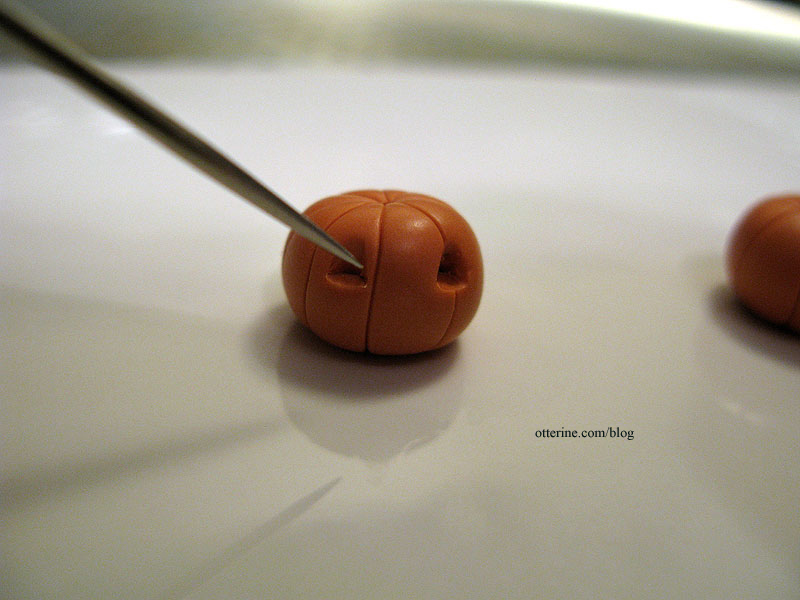
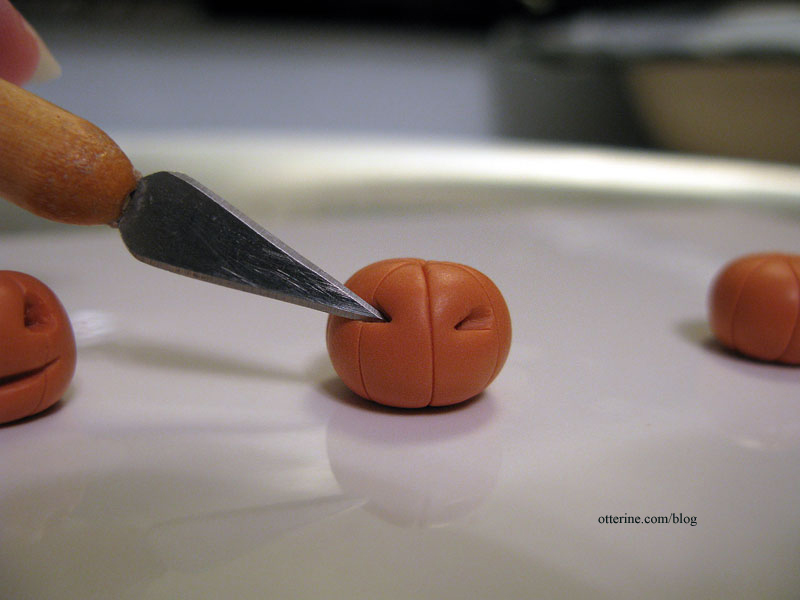
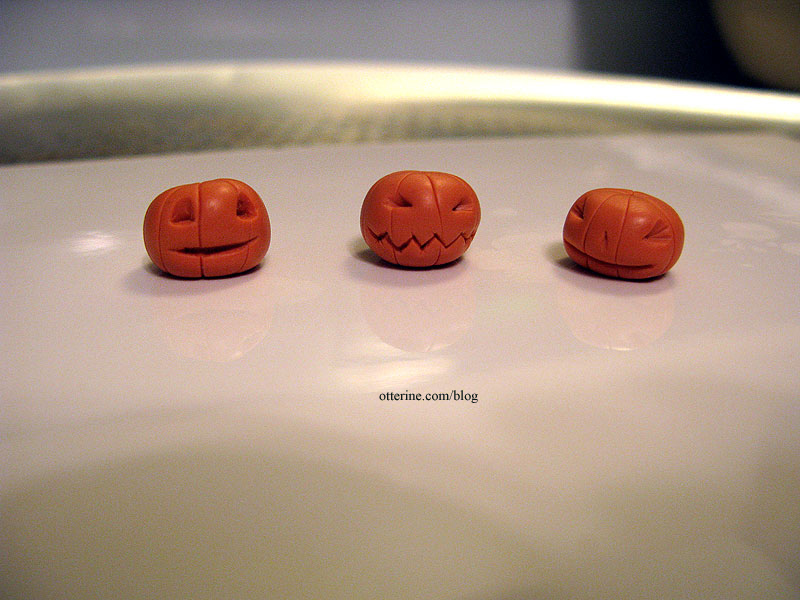
Create a face by indenting the clay. I’ve used these various tools for the faces created in my examples.
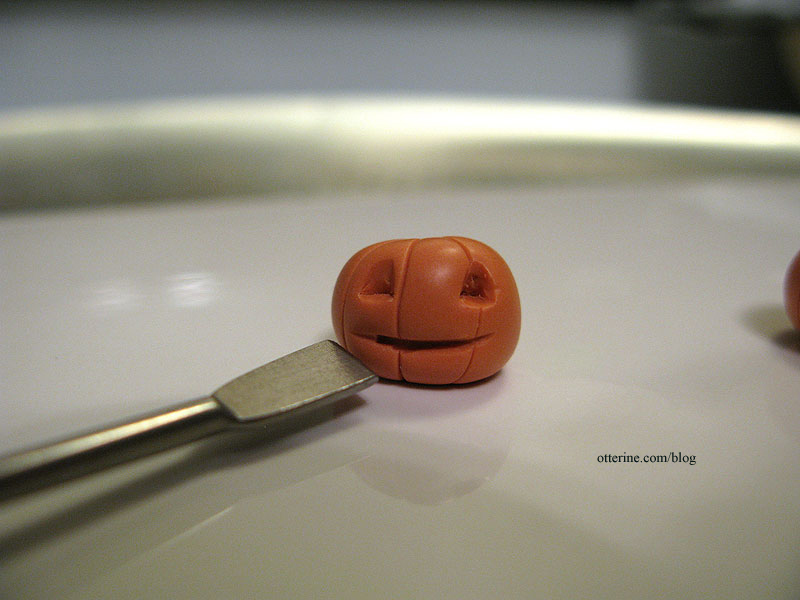
Bake according to the clay instructions and set aside to cool.
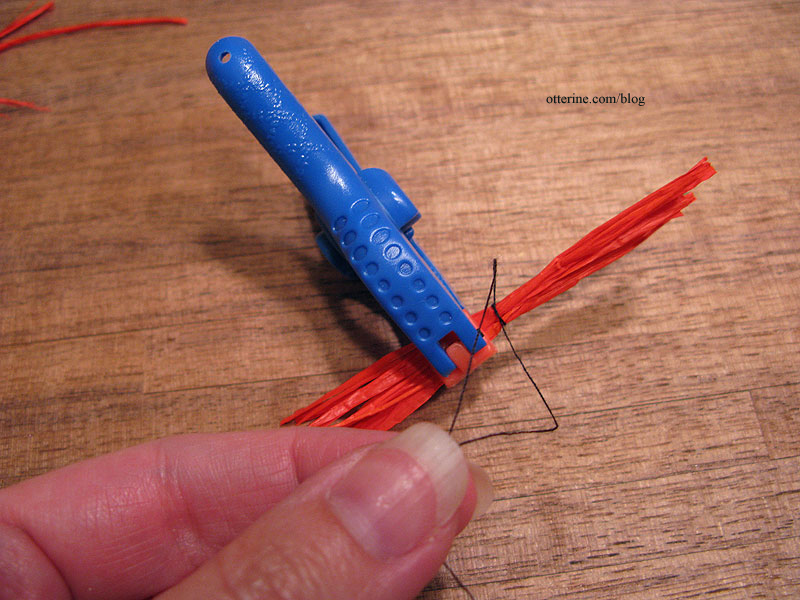
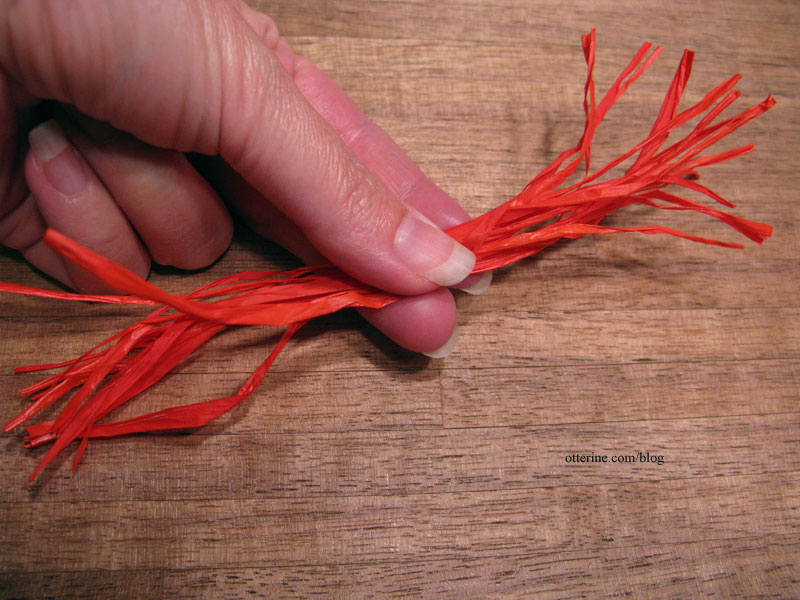
Determine the height you want your scarecrow to be from neck to feet (the polymer clay head and felt hat will add to the height, so take this into account). Take about 8-9 pieces of raffia and cut to the height measurement plus a little extra for trimming. I’ve made mine just over 3″ long. (Note: this corrects the Gazette version that stated to cut this bundle to half the height measurement.)

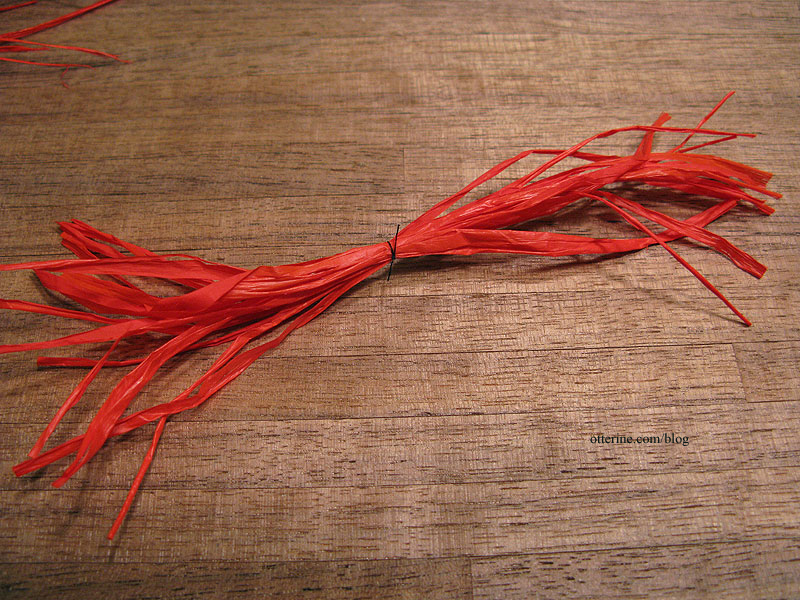
Tie the raffia bundle in the exact middle with black sewing thread, being sure to knot a few times. Cut the ends of the thread but not too close. This assembly will form the arms. Tip: use a clamp to hold the raffia while you tie the knots.
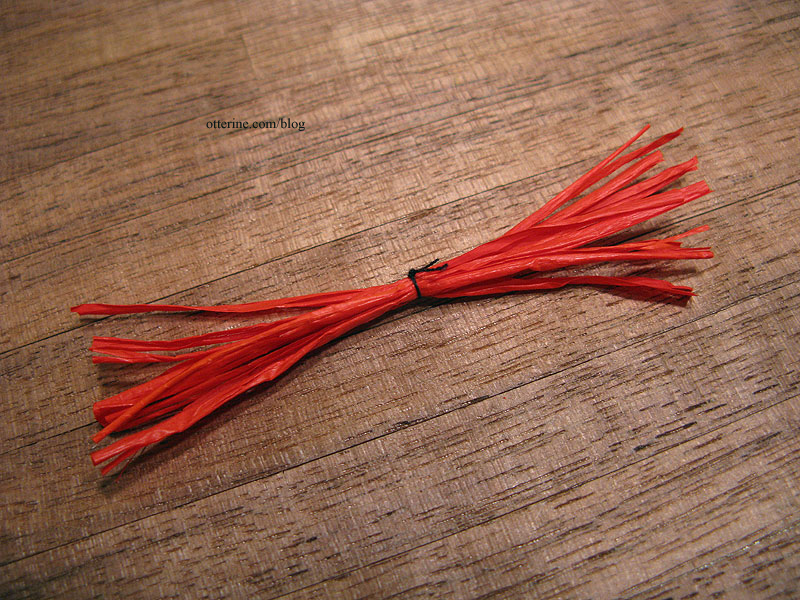
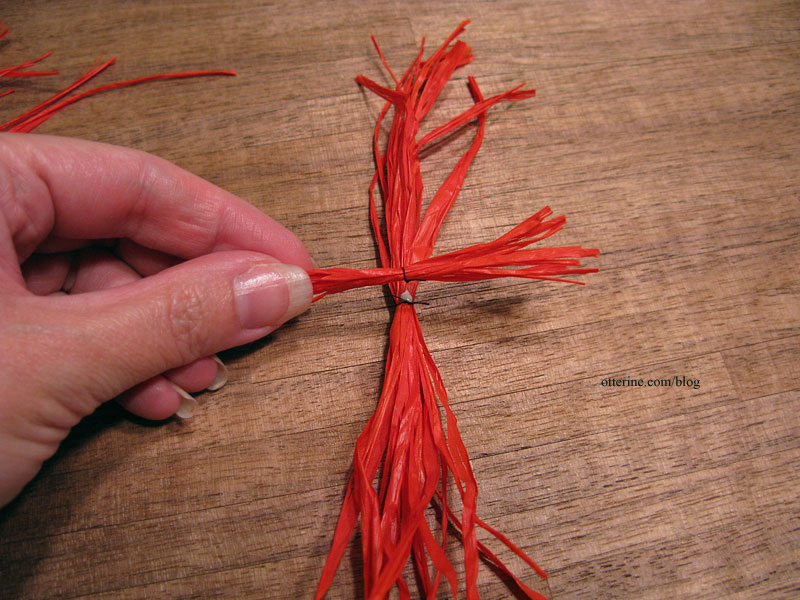
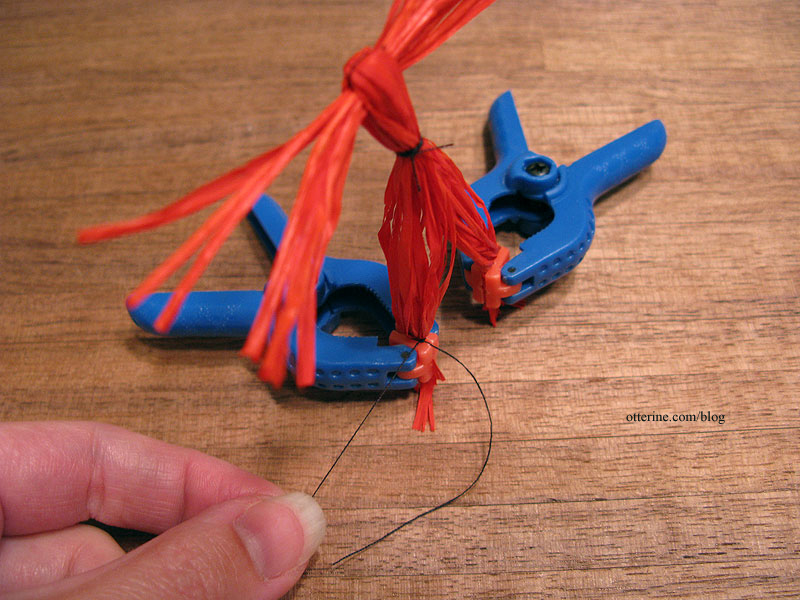
Take about 13-15 lengths of raffia and cut to twice the height measurement plus some for trimming. I’ve made mine 6.5″ long.
Tie the raffia bundle in the exact middle with sewing thread and cut the ends of the thread. This will form the body and legs.
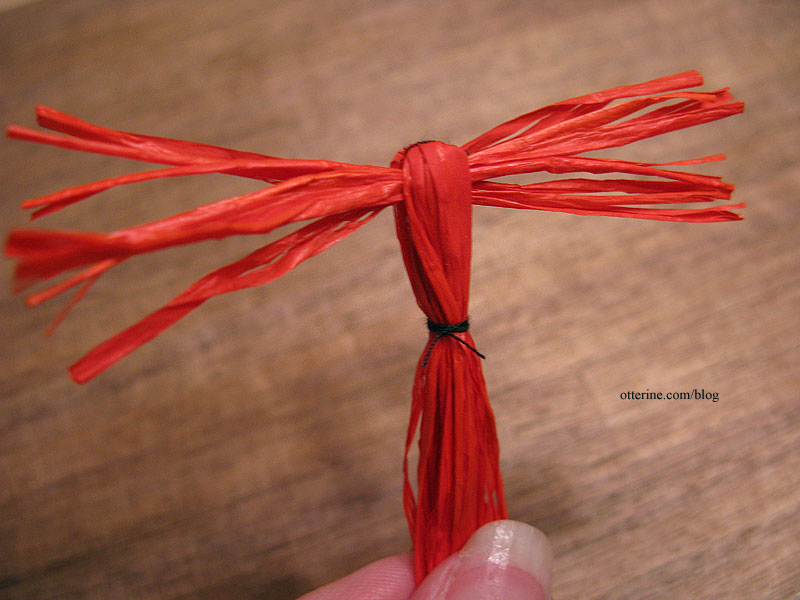
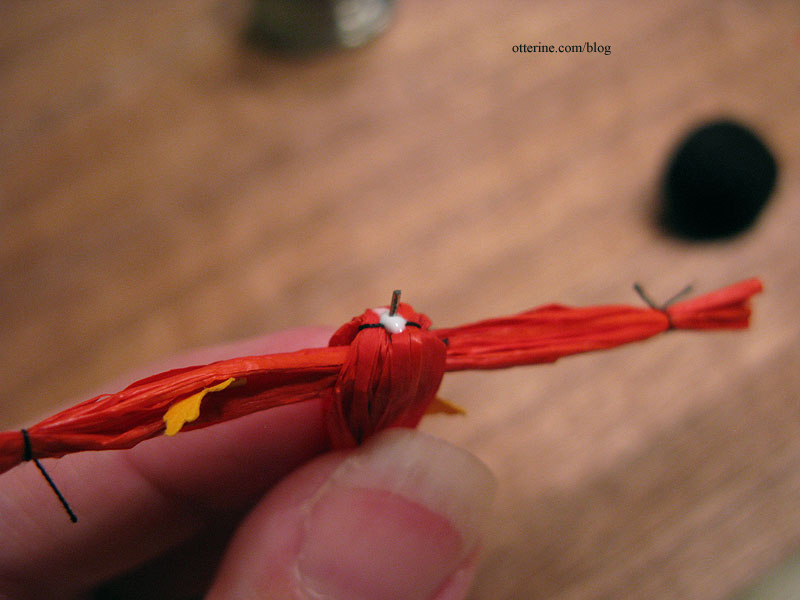
In the exact middle, glue the arm assembly at the knot and fold the body over.

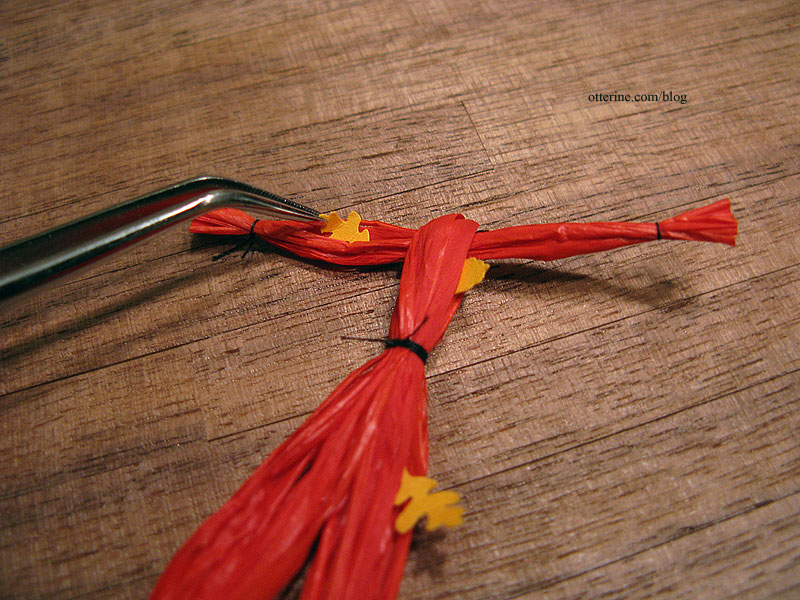
Tie the waist with black thread. Wrap the thread around a few times to form a belt (you can also add thin ribbon) and knot the thread. Cut the ends of the thread.
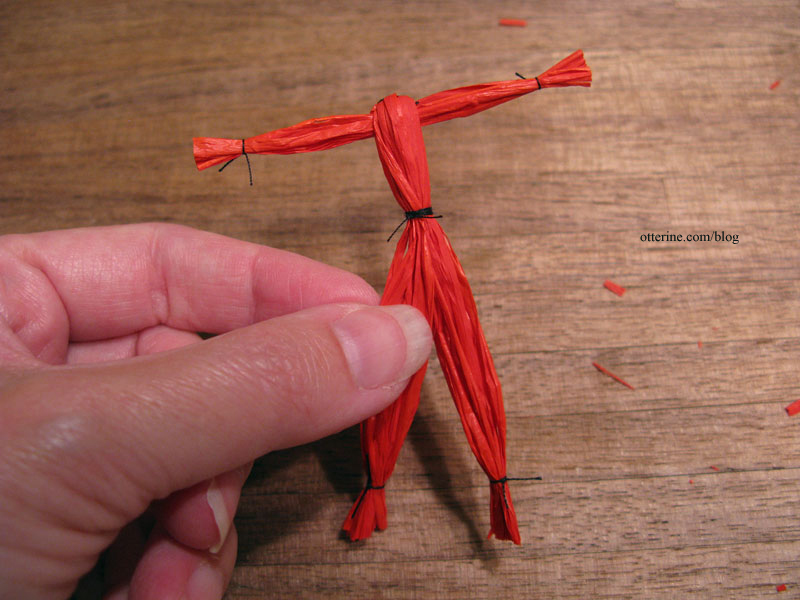
Separate the raffia below the waist into equal amounts. Tie at each ankle with black thread, leaving a bit of extra raffia to form the feet. Cut the ends of the thread. Trim the raffia ends even.

Tie at each wrist, leaving a bit of extra raffia to form the hands. Cut the ends of the thread. Trim the raffia ends even. Set body aside.
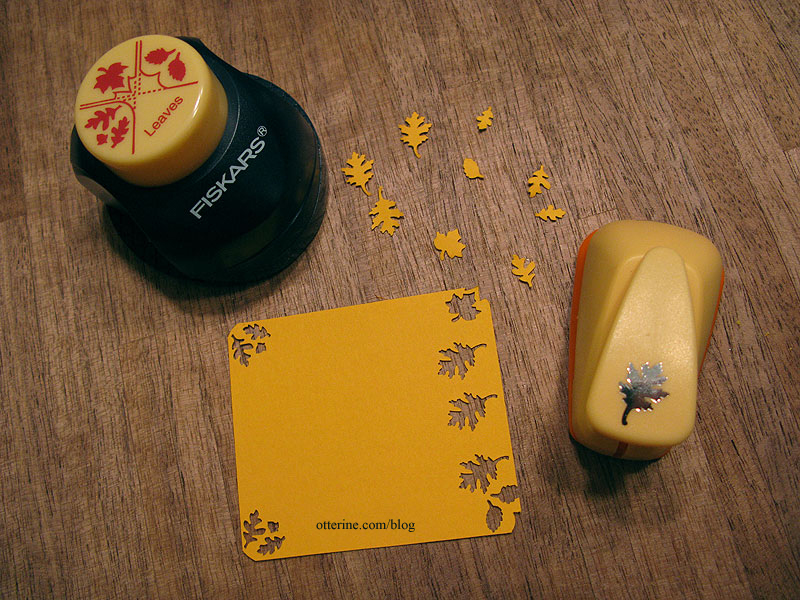
Punch out leaves from yellow paper. I use the larger leaves for the head and the smaller ones to stuff into the body.
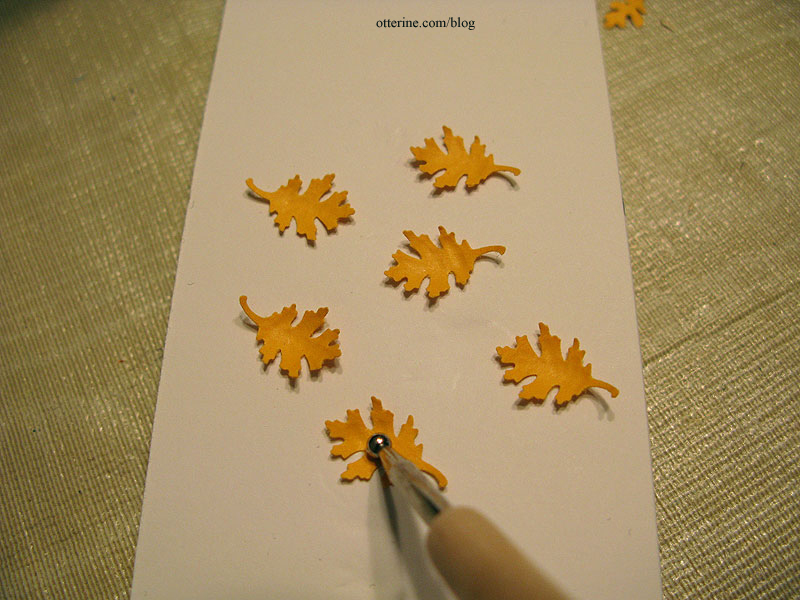
Cup the leaves with a ball stylus.
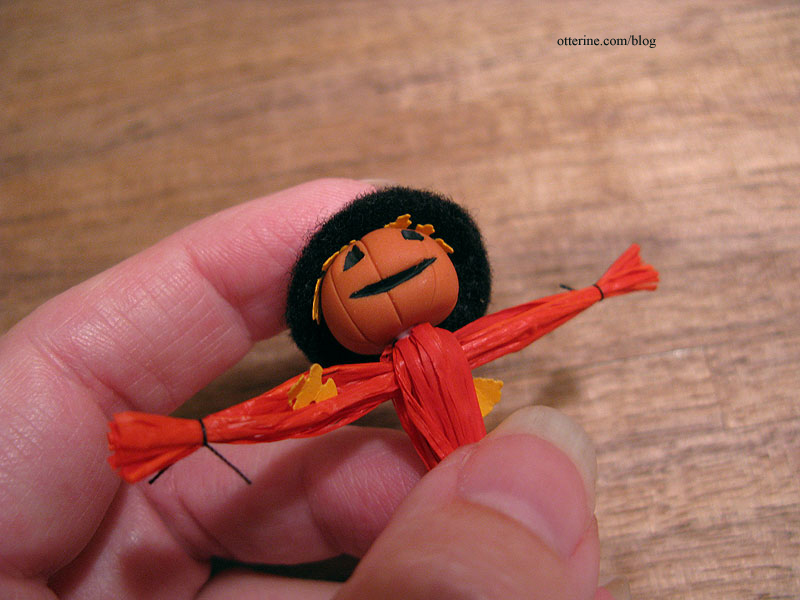
Glue three of the larger leaves on top of your pumpkin, clipping or shaping as necessary.
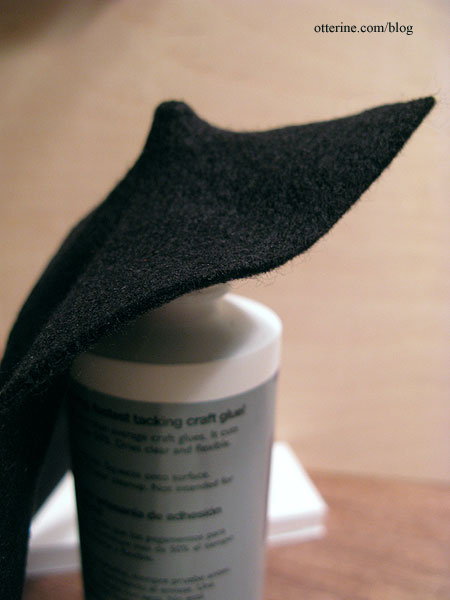
Using the tip of your glue bottle, press the felt down to form a bubble in the felt. Work gently and slowly, otherwise you’ll poke right through. I find it easier to make these bubbles on a larger piece of felt and then cut them to fit.
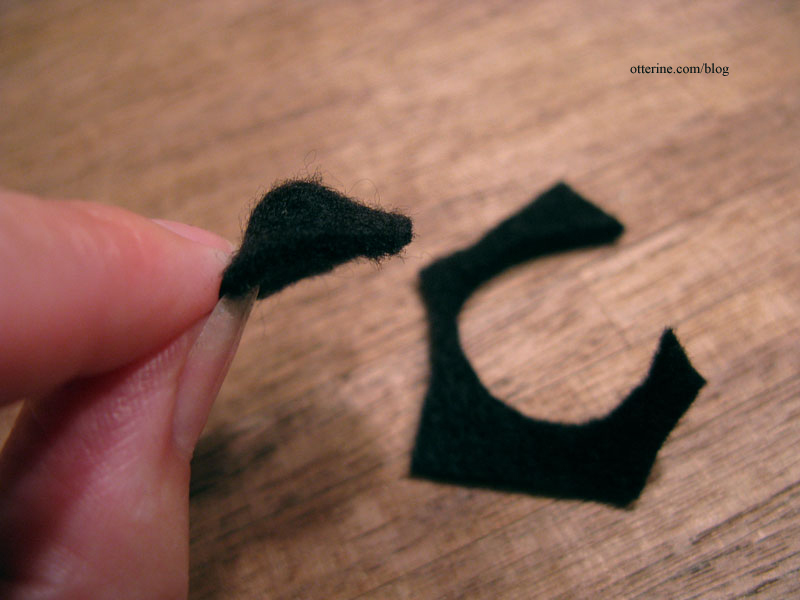
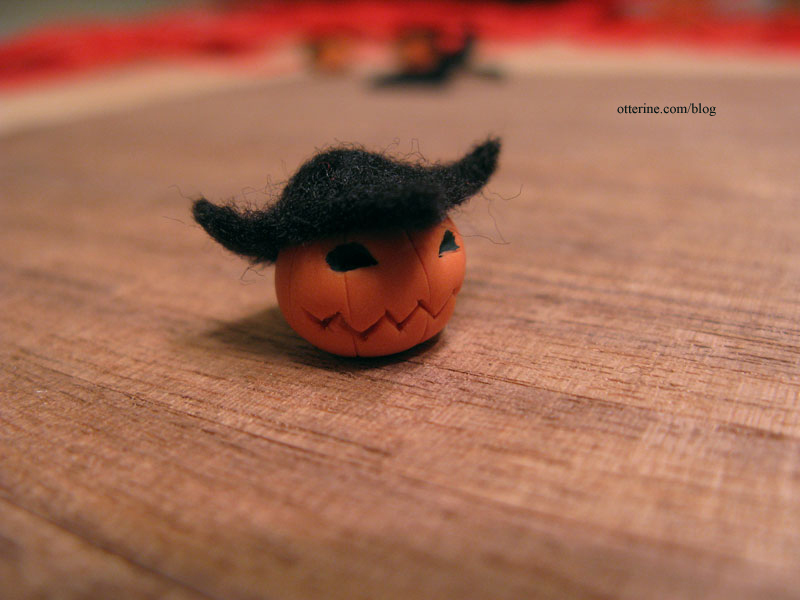
Using your polymer clay pumpkin as a guide, trim the black felt around the bubble to make a hat.
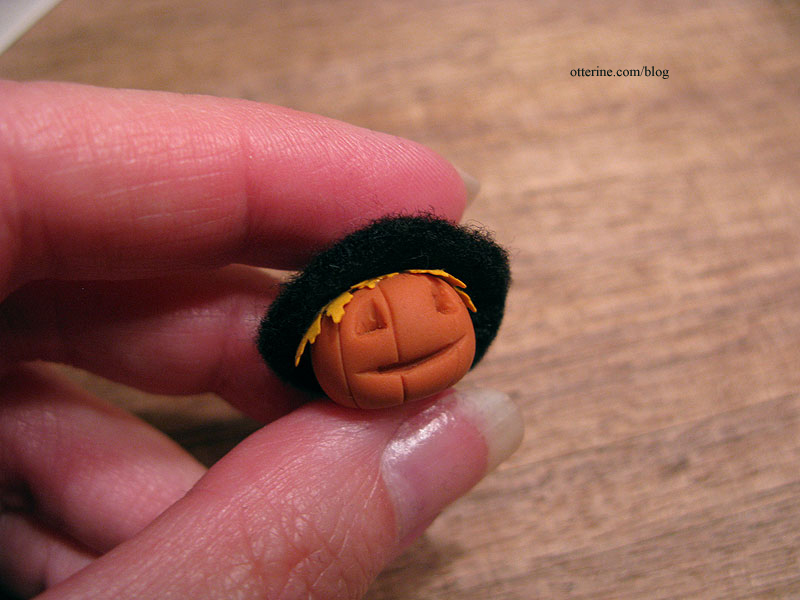
Glue the hat in place over the leaves.
You can also skip the leaves altogether and make any crazy shaped hat you want.
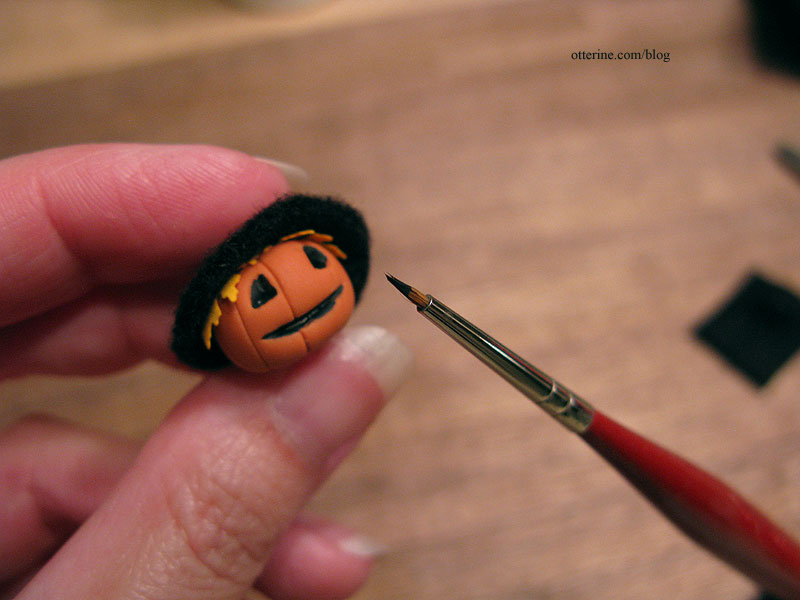
If you’d like to paint your pumpkin’s face, use a small brush to apply acrylic paint into the indentations for the eyes and mouth (and nose, if you made one). You’ll need to let the paint dry before finishing.
Shape and glue the smaller leaves into the raffia of the body.
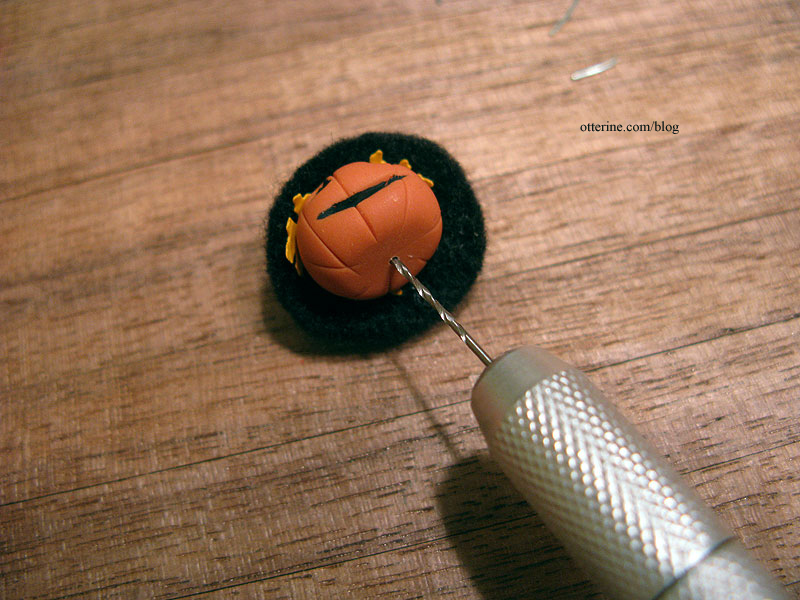
This next step is optional, but I find it adds stability. Using a small drill, make a tiny hole in the bottom of your pumpkin where you want it to attach to the neck and shoulders.
Glue a small bit of wire into the neck (I used a small length of jewelry wire I had on hand, but the wire from a twist tie would work just as well).
Glue the other end of the wire into the head at the neck and shoulders, adding glue between the head and the body as well. Gluing polymer clay to anything is often semi-permanent, so you may need to apply glue again in the future. Having the wire in place helps keep your scarecrow from turning into the headless horseman even if the glue comes loose. :D
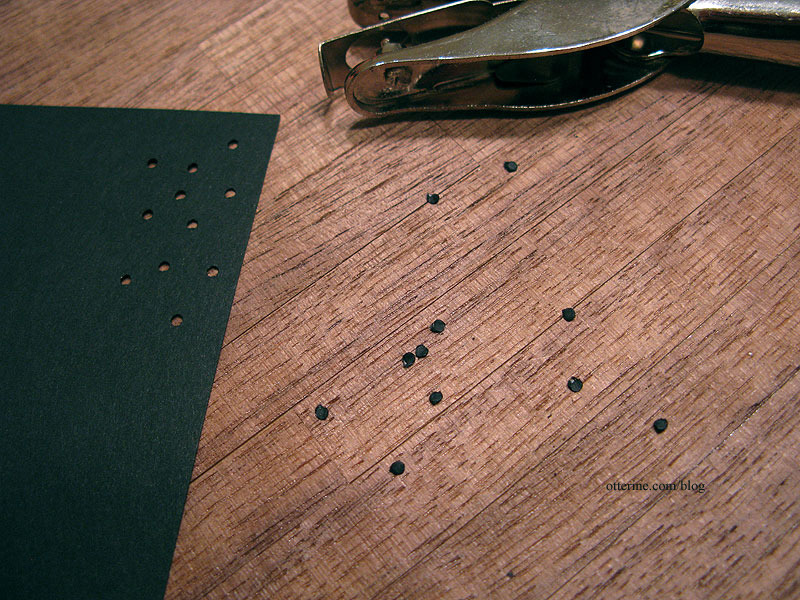
Punch out some 1/16″ circles from black paper. Glue on as buttons to the front above the waistband. You could also use paint for the buttons but be sure to set it aside and let dry completely before handling.
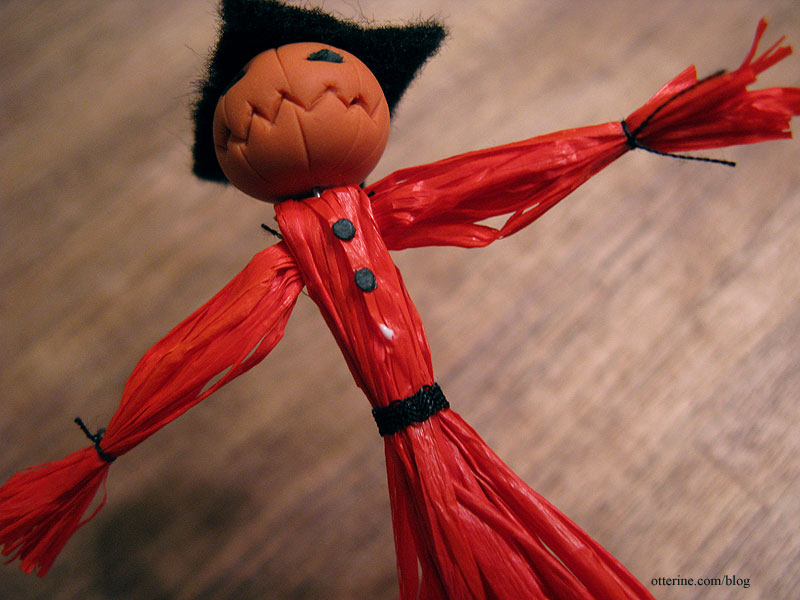
Here’s an example using natural raffia (I used a larger bundle for this one to have a full skirt). For the skirt, I left the raffia below the waist untied and trimmed the bottom edge for a clean look. I used small half beads for the buttons and put a leaf on her hat. Isn’t she pretty in her smart cap? :D
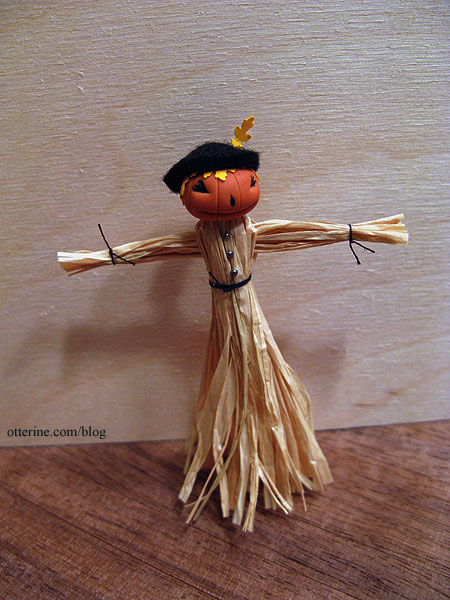
And, there you have it…a merry scarecrow (or three) for your autumn or Halloween display!
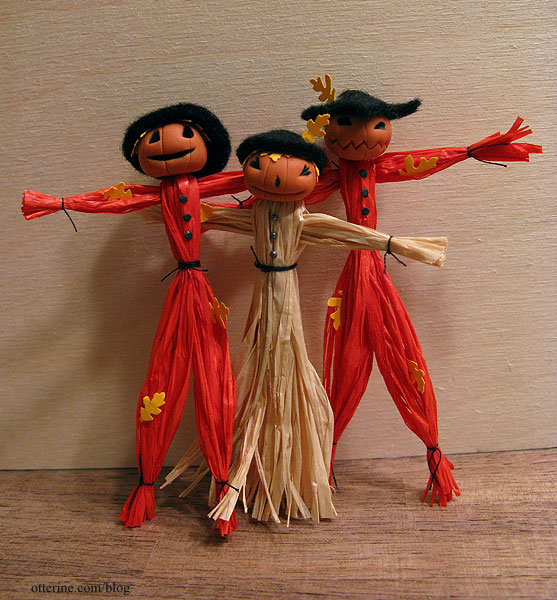
I have a few of these made for sale in my etsy shop, too.
Categories: Miniatures
August 22, 2012 | 0 commentsEggs!
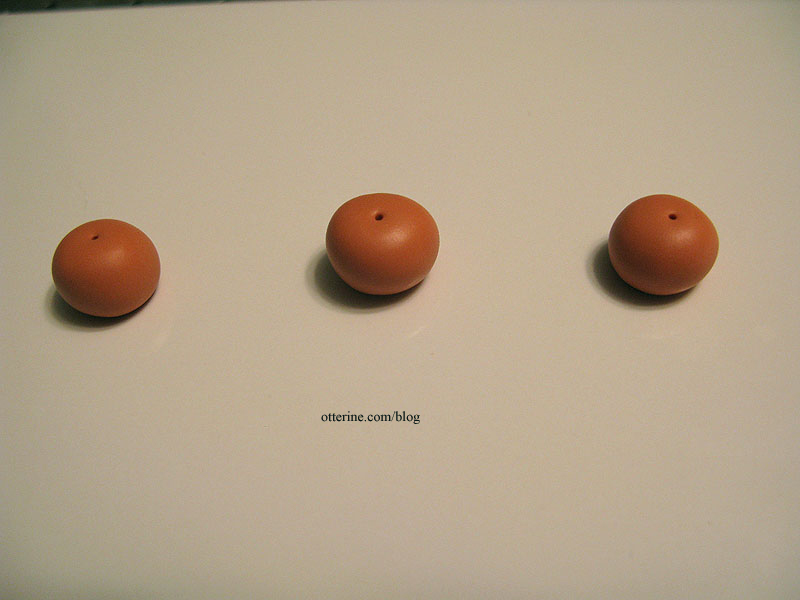
Tonight, I made a basket of eggs for my hens in progress. Well, Lyssa made the baskets shown in this post, but the eggs were made from clay tonight.
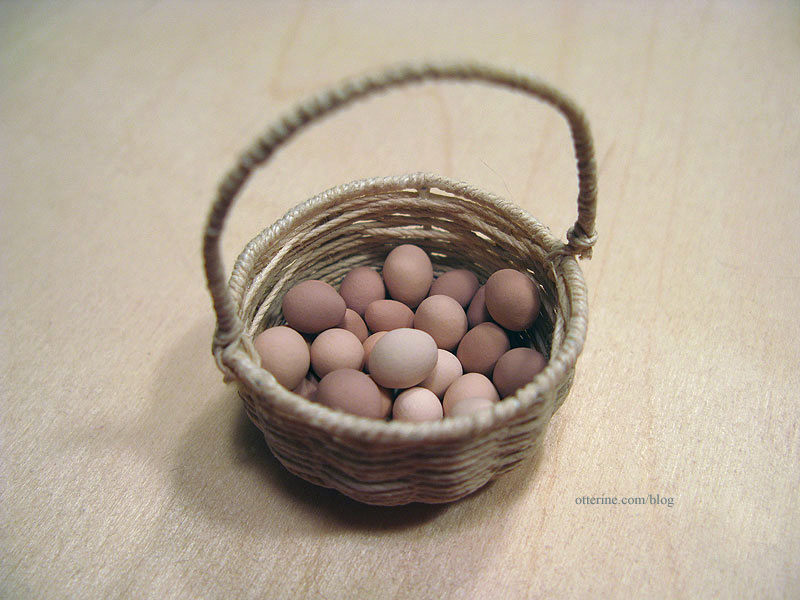
I mixed up five different colors of clay, all similar in tone, to mimic the natural variation of real life eggs. The particular breed I am emulating has lighter color eggs than the brown ones I buy at the store.
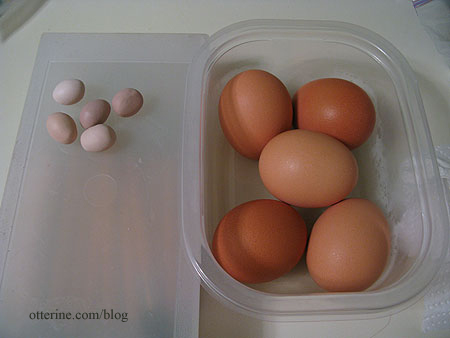
Eggs are not an easy thing to get right in clay, at least for me. The shape is somewhere between round and oval. Overall, I’m pleased with the way they turned out, and I can always pick the good ones to show on top. I made a lot more than I needed for that reason. My two hens would be exhausted laying all these eggs!
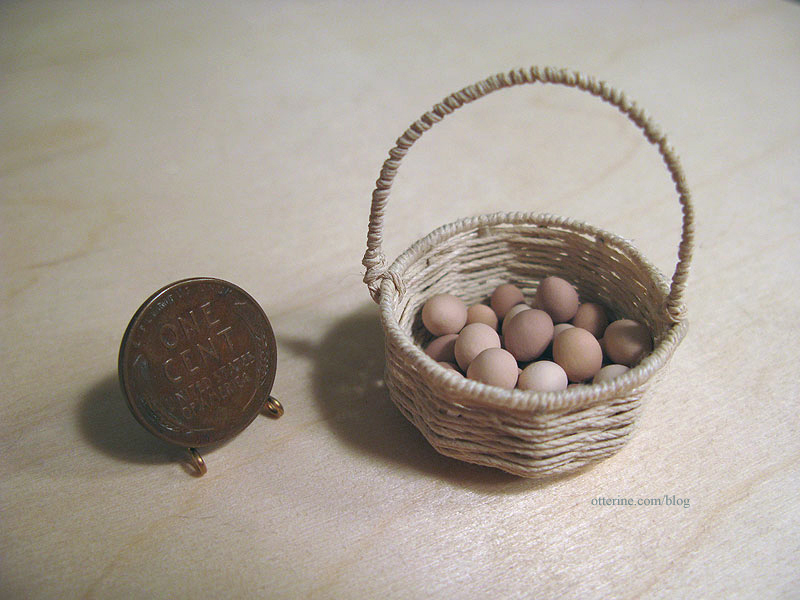
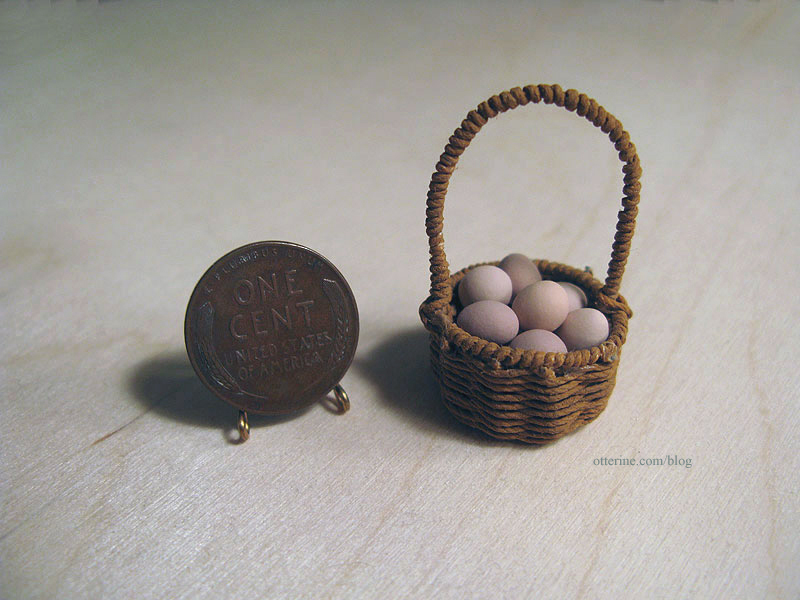
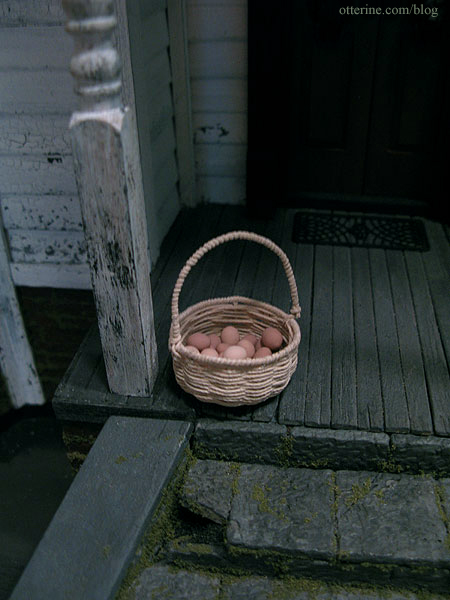
I do have a smaller basket from Lyssa, but I like the way the eggs look in the lighter color one. Perhaps it’s the number of eggs or the color of the basket I’m drawn to, I’m not sure which.
I borrowed the Heritage for a backdrop. :D
Categories: Miniatures
July 7, 2012 | 0 comments
NOTE: All content on otterine.com is copyrighted and may not be reproduced in part or in whole. It takes a lot of time and effort to write and photograph for my blog. Please ask permission before reproducing any of my content. (More on copyright)