
Half Clocked – ceiling beams
Since I had cut a new gable from thinner wood, I had to pad the exterior portion where the gable shelf was located to keep the gable shelf properly aligned with the front of the roof. But, since I am including the dovecote, I cut the front hook off the ceiling beam.
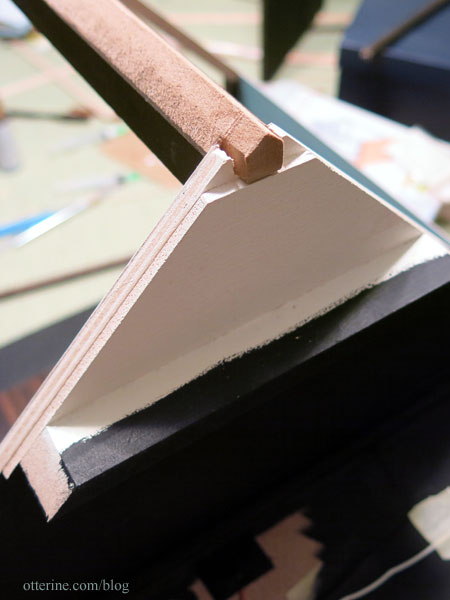
Since I had taken off some depth from the building, I needed to also cut down the length of the center beam. The back wall will abut the structure, so I cut the hook off this end as well. I originally cut new support beams from 3/8″ strip wood, but I didn’t like it in the end. So, I modified the kit support instead. There’s some space between the end of the beam’s notch and outer edge of the support beam. I’ll explain that later. You can also see the shim I needed to raise the center beam to sit flush with the glued roof panels.
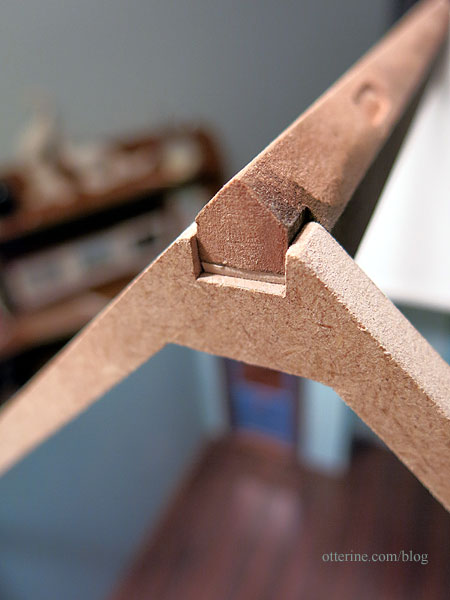
I painted the beam and support Bittersweet Chocolate by Americana to coordinate the stained back beams and other trims. It’s not a perfect match but it blends well enough.
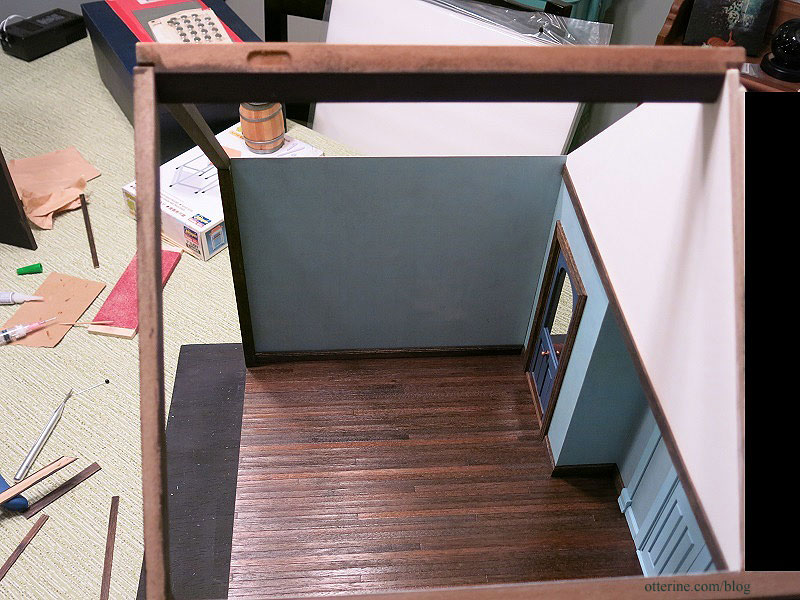
Before I could glue it all in place, I wanted to mark and cut the gable and side trims. I won’t install these until the roof is glued on to make sure there’s a good fit, but it was easier to measure while things were still in dry fit. I glued the main roof on next, then attached my ceiling wires to the lead wires already in place from previous work. I painted these black afterward.
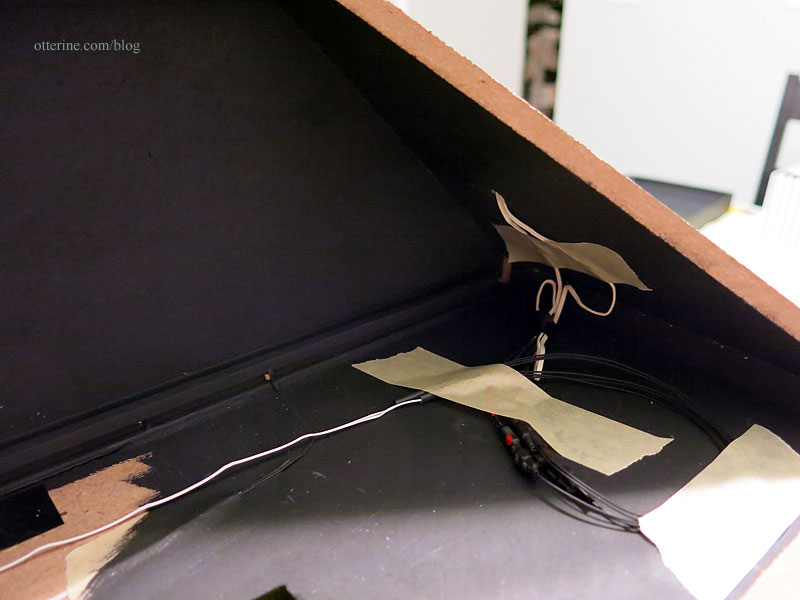
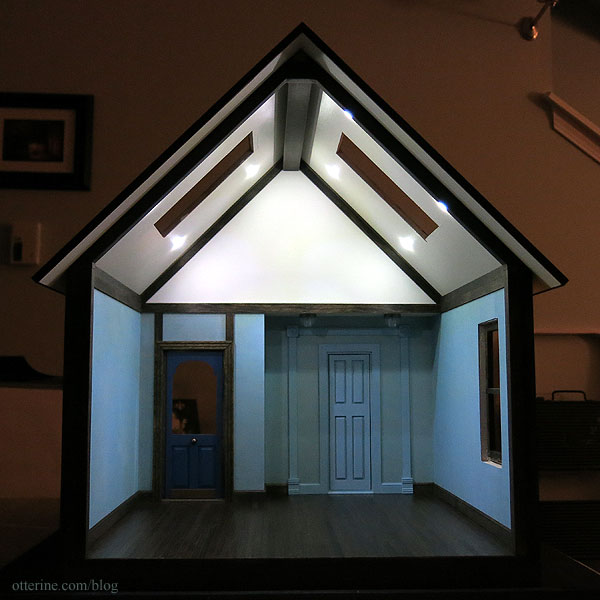
With the roof firmly in place, I finished up the interior trims. All that is left is the side window, but I want to save that until later once the messier parts of the landscaping are done.
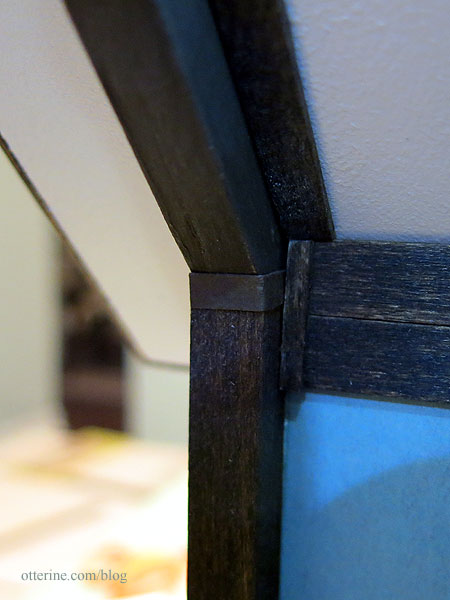
Since the joins for the back beams were a little off, I made brackets from paper.
Categories: Half Clocked
November 15, 2018 | 0 commentsHalf Clocked – insert wall, part 3
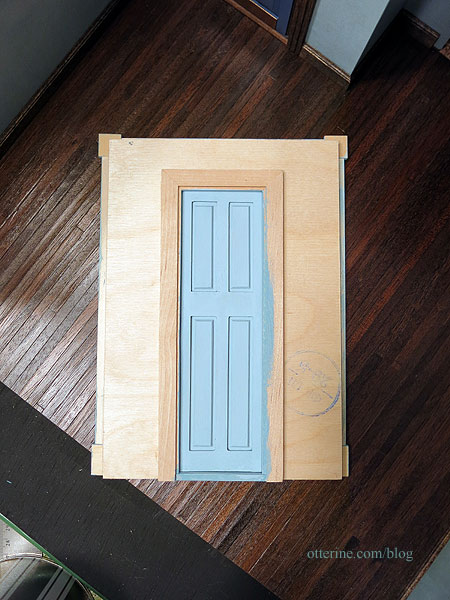
Continuing work on the insert wall. I am using scrapbook paper Happenstance – Fluke by The Paper Loft. It is flat paper, but it has a printed design that looks like old fresco. You might recognize it from the first floor of Watson Mill. Since I will have to trim around the removable wall insert and didn’t want a highly contrasting border, I bought Ceramcoat Waterfall to paint the door and trims. It should complement well without fading into the background or being overpowering. I haven’t cut the trims yet.
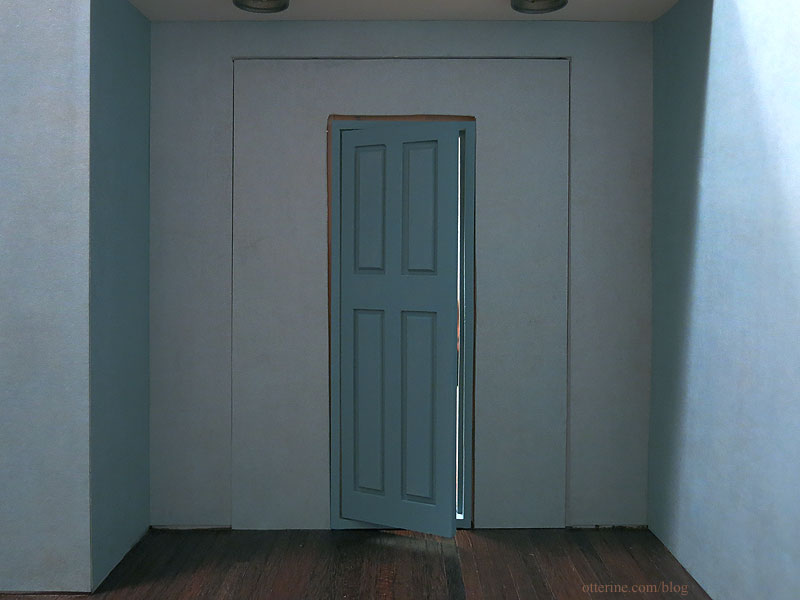
For the enclosed gable, I’ve opted for plain drawing paper. It’s not pure white, so it works well for the space without being too much of a contrast. Since I plan to have a warm white vaulted ceiling, I didn’t think a big blue triangle would look right.
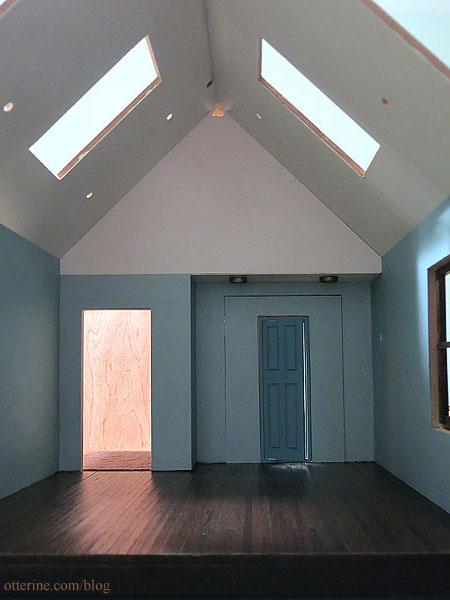
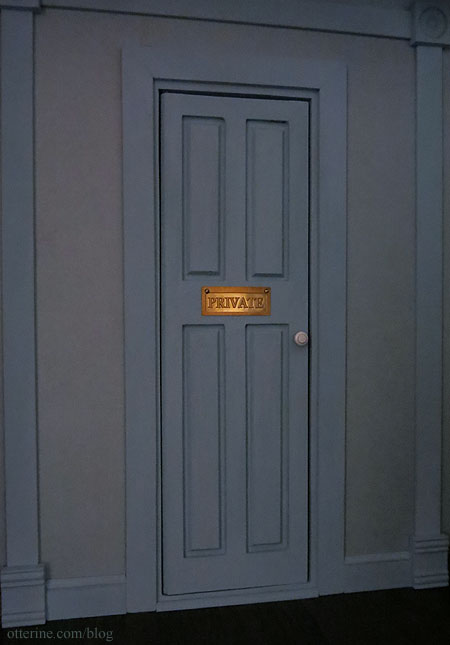
After mulling it over, I decided the Ceramcoat Waterfall paint was nice, but it was darker than I wanted once in place. I was trying to make the door blend more with the wall as if to say, nothing to see here. I mixed the Ceramcoat Waterfall with Ceramcoat Blissful Blue to get a lighter color. I painted over the base coat of Ceramcoat Waterfall, and the result was much closer to my original idea. For the trims, I started with a base coat of plain Ceramcoat Waterfall since I needed it all to match the door.
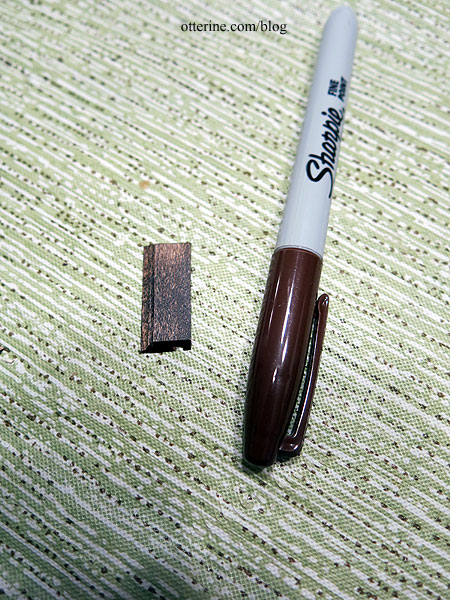
The baseboards around the room are Minwax Jacobean, so to disguise the mitres I used a dark brown Sharpie on the cut edges before gluing the boards in place.
I thought it might end up looking weird to have dark baseboards on the removable wall. Typically, when you’re painting a door the same color as the walls, the trims are also the same color. I didn’t want blue trims throughout, so I mixed the styles. Somehow, it works and looks relatively seamless.
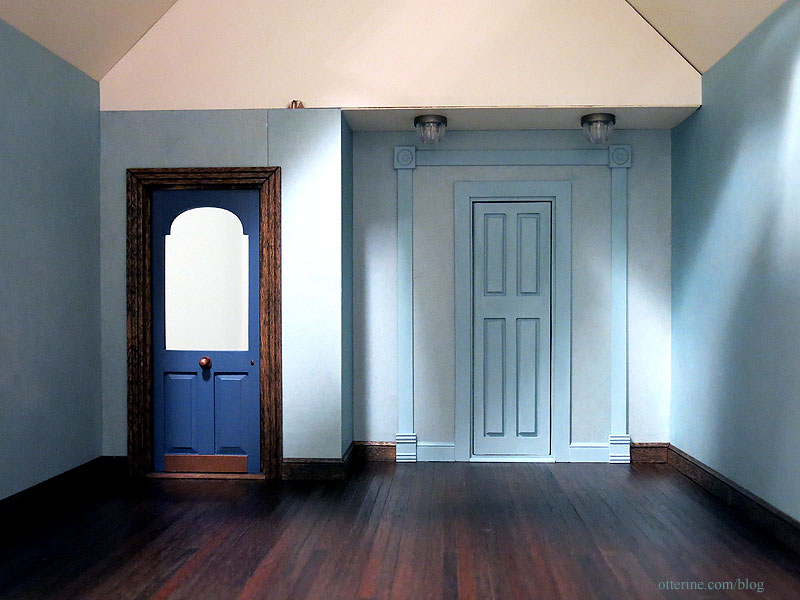
It will also fade more into the background once furnishings and the dark gable trims are added. It might not be the cleanest solution, but I just didn’t want dark trim to interfere with the line of sight when the structure is filled and I needed that large of an opening.
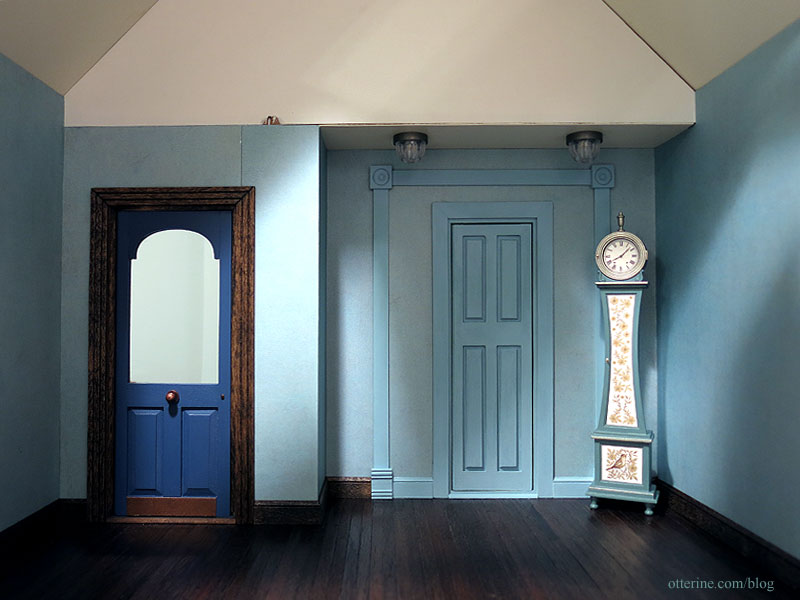
The wall is a tight fit, which is just fine. This won’t need to be removed often.
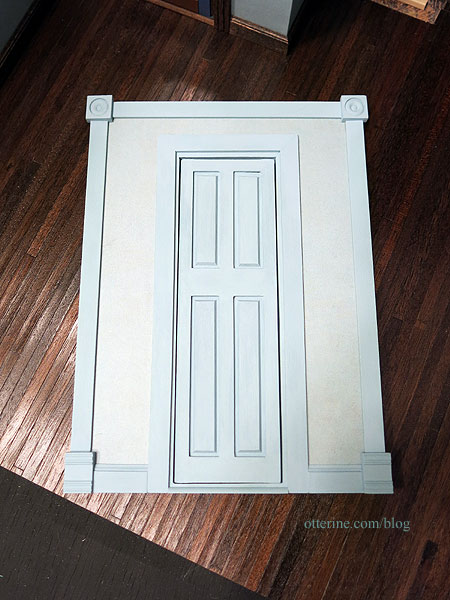
And, the back….
I added a brass plaque and white doorknob for final finishing.
Categories: Half Clocked
November 13, 2018 | 0 commentsHalf Clocked – roof, part 1
Thanks to Sheila, we know what bargeboards are. So, today, I am working on the fascia and bargeboards. I stained lengths of 1/16″ x 1/4″ basswood to attach to the exposed edges of the roof. I used Minwax Jacobean. On top of that, for the gables, I’m adding Paulina trim from Heritage Laser Works. These are only 1/32″ thick and very delicate, so I had to come up with a way to stain them without breaking them.

I used a piece of foam core board and drenched the trim with stain using a brush.

I then turned it over to drench the other side.

Gently picking up the trim, I wiped the excess from the board.

I placed paper towels on the board long enough to cover the length of trim.

I pressed the trim in the paper towel a couple of times until very little stain lifted from the wood.


I installed the basswood trims first.

Then came the fancy trims. I always keep scraps of any fancy trims I use in my projects, and it worked well for tiny finials for the apices. These are parts from laser cut railings from Laser Tech that I used for Walnut Bay Light.

I’ll have to finish this up once the remaining smaller roof pieces are attached.
Categories: Half Clocked
November 5, 2018 | 0 commentsHalf Clocked – recessed lighting
There isn’t a lot of space for lighting now that I’ve cut down the structure, so I’m opting for recessed ceiling lights alone for the interior. I’ve put NovaLyte can lights in past houses, but they require a 3/8″ thick board to sit flush. In this instance, I will fake it with LEDs from Evan Designs and nylon washers.
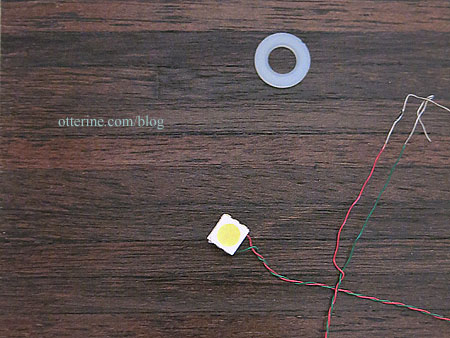
I am planning eight for the ceiling. It might seem like a lot, but the vaulted ceiling is high above the living space and I want to be sure there is plenty of light. If they are too overwhelming once in place, there are methods for addressing the color and brightness. I will run these wires along the roof to the enclosed gable and down through the small front room to the landscaping board. They won’t be easily replaceable, so let’s hope they last a long time. Hence, the reason to use long-lasting LEDs.
I will add two new old stock ceiling light kits by Illinois Hobbycraft to the front alcove as well. As you can see, I had some flooring issues. I’m finishing a patch for the flooring separately.

The only other light I have in mind right now is the front porch light, which will be a coach lamp.

I had a long weekend taking some vacation days, so I got some extra work done. With the structure out of dry fit, I could start tackling the roof. First up was making templates of all the roof pieces onto drawing paper. This will make for easier shingling later.

I then made my wiring channels for the recessed ceiling lights using a Dremel Trio. After, I taped the two roof boards while flat, added glue and then folded the boards. I used my carpenter’s square and a triangle to hold the boards in position while the glue dried. I left the tape in place on the exterior for stability and will remove it once I’ve installed the board onto the structure. The two smaller roof boards are still in dry fit.

I installed the LEDs in the ceiling on the roof side.

I taped over the channels on the outside to protect the wires and to keep them in place.

On the inside, I added nylon washers to serve as the recessed light rings.


I previously marked where the walls would need to connect, then painted the interior and eaves White Birch by Americana, using the same stucco stippling effect from the outside. I had a little trouble covering the joins where I filled in the one board, but it’s not very noticeable. The eaves should be a nice contrast with the dark chocolate trims.

I painted the front gable portion black. You can also see the wiring for the ceiling lights curled and clamped for later work.

I have some of the wires that will extend to the power strip in place. These have been bundled under the structure for later use when I attach the building to the landscaping board.

I’ve painted the exterior of the roof black to move on to the next steps.

Categories: Half Clocked
November 4, 2018 | 0 commentsHalf Clocked – starting the dovecote
There’s a lovely space in the Three Gables House that is perfect for a built-in dovecote (just ask Sheila). I did some scouting around online, and found a great site for inspiration and instruction. I started by measuring the entire space available. The popholes need to be scaled from 4″ by 6″ (approximately 21/64″ x 1/2″ in 1:12 scale) and roughly 1/2″ apart (in scale). This gives me room for nine birds. I drew this template in Word.

Originally, I was going to cut a triangle and then cut the popholes, but I wasn’t getting good results. So, I re-engineered my approach. I cut 24/32″ wide strips of 3/32″ thick basswood and cut them to fit. I used strips of 1/16″ thick basswood to make each floor’s landing platforms. It also works well as a design element separating the levels. This might seem like a bit of over-engineering, but it just seemed the best way to get cleaner cuts without pulling my hair out.

I marked then cut one pophole with my Proxxon scroll saw. I used that pophole as a template for the rest.

I didn’t get as good a result as I wanted. The holes varied too much for my liking. Yes, I know…time for a laser cutter. I edited an arch in Illustrator, imported it into Cricut Design Space and then used my Cricut to cut out cardstock trim for the popholes.

Now the holes are more uniform, and fancy to boot! :D

I marked the landing platform locations onto the floor boards and then cut those. I could have left the floors intact all the way across, but I wanted some pizzazz. :D

Time for construction. You can see I sanded the platform corners into curves.

I added vertical insert boards to make the interior compartments, but mainly for stability.

The upper compartment has small braces for the front wall.

I used spackling to even out any gaps.

I had to trim and slide the middle section over to line up the sections properly, but the final trims on the outer edges will disguise these issues.

Categories: Half Clocked
November 1, 2018 | 0 commentsHalf Clocked – insert wall, part 2
Here is how the insert wall looked when I left it last. I’m planning to modify the trim one more time, which I’ll get to later….

With the side and porch walls glued in place, I could continue on the insert wall. First, I traced the outer portion onto drawing paper to have a good wallpaper template.

No dollhouse is square no matter how hard you try (regular houses aren’t either, for that matter) and my hand cut wall is not precise by any means. To that end, the outer portion of the insert wall is snug in one place and loose in another. It’s also not tall enough on one side, but that’s the beauty of wallpaper covering! To make gluing the outer portion more stable, I added strip wood guides on the side that will not be seen.

The planned trim around the inner portion will keep it from falling into the open space in front, but I still added some wood stops for good measure.

I primed both parts and tested the fit with the door, which will serve as the handle to remove the inner portion. So far, so good. :]

A major/minor setback: I didn’t leave myself enough room behind the removable wall. :\ So, I chiseled out the wall frame. Yeah, it’s as scary as it sounds.

I didn’t have the wallpaper glued in, which was why I opted for demolition. The other solution would have been to make the front wall removable, which I thought was much harder to do with the brick bottom and planned landscaping. It came out relatively easily without damage. I had to cut away the flooring as well…also scary.

I put the wall back in and stabilized it. I didn’t bother removing the first stabilizing columns; I just glued in additional ones.

Like it never happened. Whew. The lesson here is don’t panic! Go ahead and swear, but don’t panic. :D

The insert fits a little tighter than it did before, but I’ll take it. Just need to shave a bit off the top. :]
Categories: Half Clocked
October 3, 2018 | 0 commentsHalf Clocked – timber walls
With the brickwork mostly done, it was time to finish the upper portions of the exterior walls. I have yet to tackle the hinged back wall other than to cut a new board, but that should likely be added at the end for the best fit. Since I’ve been taking the building in and out of dry fit, I had many errant pencil marks for trim placement. To make my final markings, I used colored lead for my mechanical pencil so I could differentiate the final lines from the previous mess. (As an Amazon Associate, I earn from qualifying purchases.)


I used yellow frog tape for the lower edge since I thought it would be easier on the brickwork. Masking tape might lift the finish on the brick, but there was no reason not to use it around the remaining areas. I wasn’t worried about crisp paint lines, but I did want some bare mdf for better trim adhesion later.

No process pics, but the stucco is a relatively easy though fickle finish. I spread spackling over the two walls where I filled in openings; the other two I left plain. After it dried, I sanded the areas smooth. The walls didn’t have to be completely flat. I just needed to mask the window outlines so their halos wouldn’t be seen later. Next up was a coat of Americana White Birch. This is a satin paint, so it has a lovely sheen once dry. I tapped the paint on with the flat side of a foam brush to achieve a light stucco finish. Once dry, I touched up any areas that needed it and removed the tape.

While working on the stucco, I stained the trim pieces Minwax Jacobean. I love this rich, dark chocolate brown. I’m usually a white trim gal. It was then time to get out of dry fit!!! Always a momentous occasion with all the worry that I’ve not done something I should have while the walls were flat. Of course, I’ve left the new front wall unattached since I do need to work on that one flat.

After gluing the main trims in place came the task of measuring and cutting the upright timbers. I had a pattern in mind, but I wanted to see the uprights alone before making any final decisions. I evenly spaced the boards on the short side, opting for narrow spaces.

On the long side, I trimmed above the window for uniformity but followed a similar look as the short side for the rest of the wall.

I will try out a few patterns to see if I want anything beyond this, though I already love the look and will most likely leave it as is.

I left the porch simple so it doesn’t get lost and will be easier to decorate. The door frame has been stained to match the trims, but I am still deciding on a door color. I painted the porch ceiling stucco white so it would brighten the space.

Categories: Half Clocked
September 17, 2018 | 0 commentsHalf Clocked – casting call
I need a rabbit for Half Clocked. I have this lovely wood rabbit I bought back in 2012 from artbase, but I don’t want to alter the original for my purpose.

Using EasyMold Silicone Putty, I made a mold of the rabbit and let it be for a long time while working on other aspects of the build (as an Amazon Associate, I earn from qualifying purchases).

I’m using Alumilite Amazing Casting Resin, my first time using an opaque resin (as an Amazon Associate, I earn from qualifying purchases). I followed the directions exactly, though I did mix too much for the pour. I wasn’t sure how to gauge the amount needed. Watching it cure was fun. :D

The result? It turned out well considering my original mold was not that great. You often can’t tell you have a bad mold until you cast something in it. But, the resin is sandable, and I did not want to start over. This cast would work well for my purpose since it looked more hand carved than the original. Here’s one of the flaws from the mold before I sanded it smooth.

The instructions recommended painting right away, but the acrylic brown I used did not want to stick. I washed the paint off and then used a spray primer. The paint adhered to the primer without issue. Pretty great for a maiden voyage, and it works well for my purposes. :]
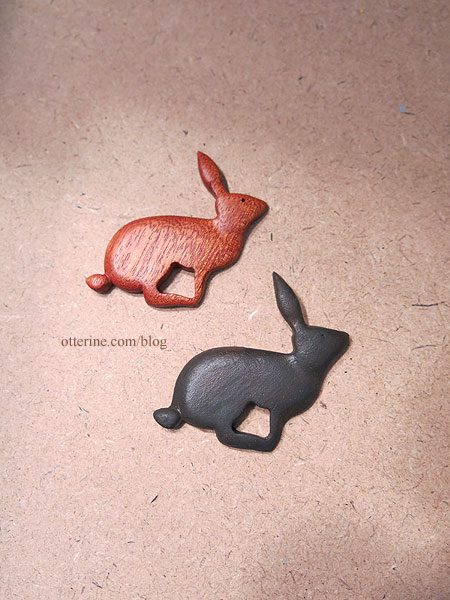
Hmm…I kinda want a chocolate bunny now. haaaaaaaaaa
Categories: Half Clocked
September 16, 2018 | 0 commentsHalf Clocked – herringbone brick porch
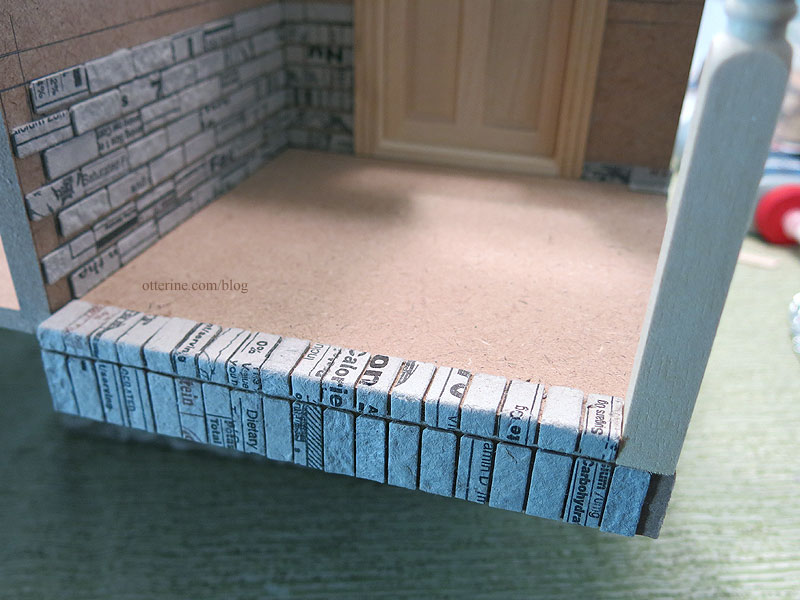
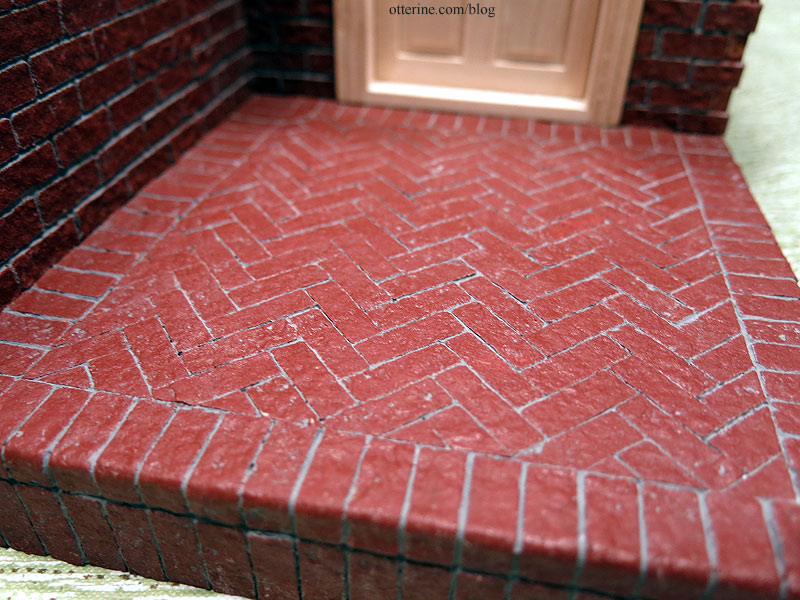
I’m going with a brick base again, so I was back to the egg carton brickwork. For the porch landing, I wanted a straight brick border with a herringbone center. I started with the front step, using vertical bricks on the riser. I couldn’t find a true example of this in real life from a quick image search, but it doesn’t look terribly out of place. I just didn’t want to carry the horizontal rows from the front and side walls around the porch step. I’m replacing the porch post with a Houseworks turned post, so I had to fill in the space a little with strip wood.
For the herringbone center, I printed 1/4″ square graph paper. The bricks don’t align to the grid perfectly as you glue them in place, but it is the best tool for keeping things relatively on track from row to row. I spaced these very close since this is a walkway and I wanted to minimize the grout. A welcome mat and plant pots are great for masking any inconsistencies.
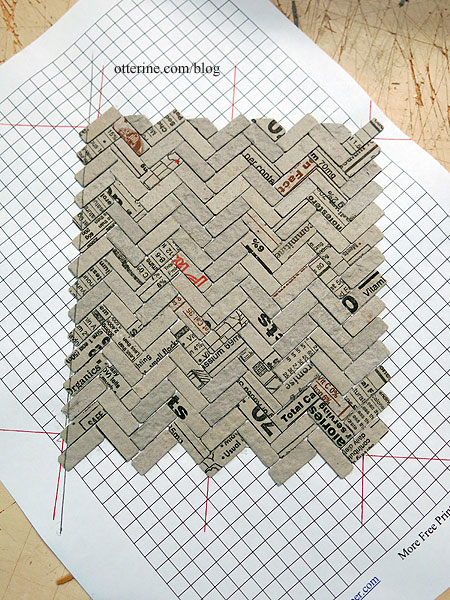
Once I had the herringbone pattern glued to the paper, I cut a template to determine the best layout.
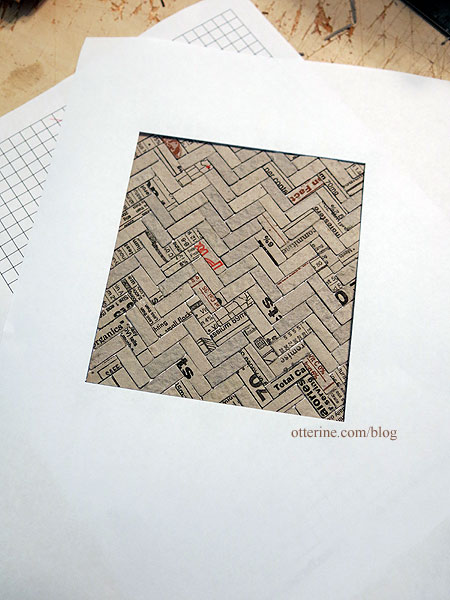
I marked the border, cut the herringbone section and glued the paper to the porch. Then I could finish the straight border. I also planned to have a brick walkway later in the landscaping phase.
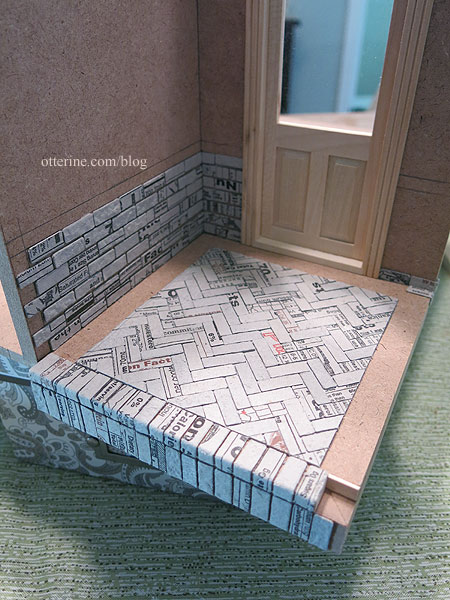
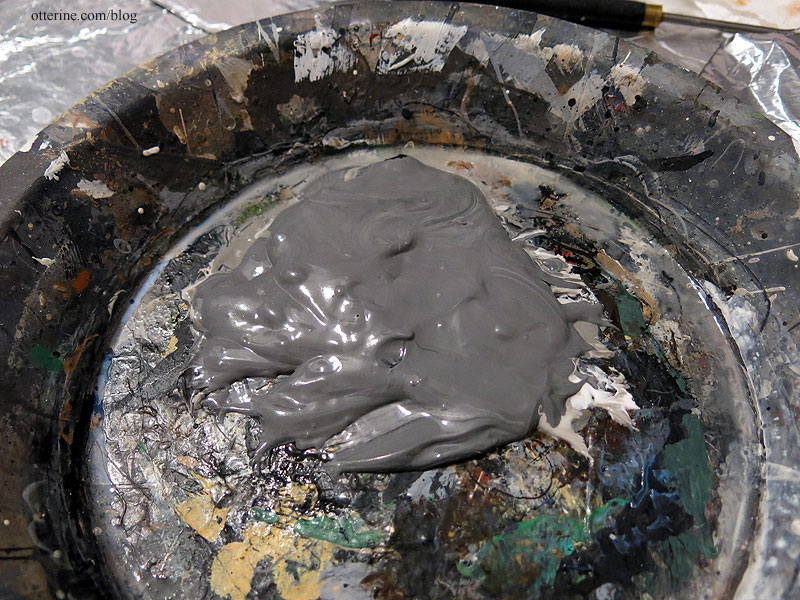
For the grout, I mixed spackling, neutral grey paint, black paint and Aleene’s Quick Dry glue. I added the glue just in case the paint made the spackling too thin to stay put.
The grey looks great with the Liquitex Burnt Sienna painted brick, but I will still add some subtle aging washes later.
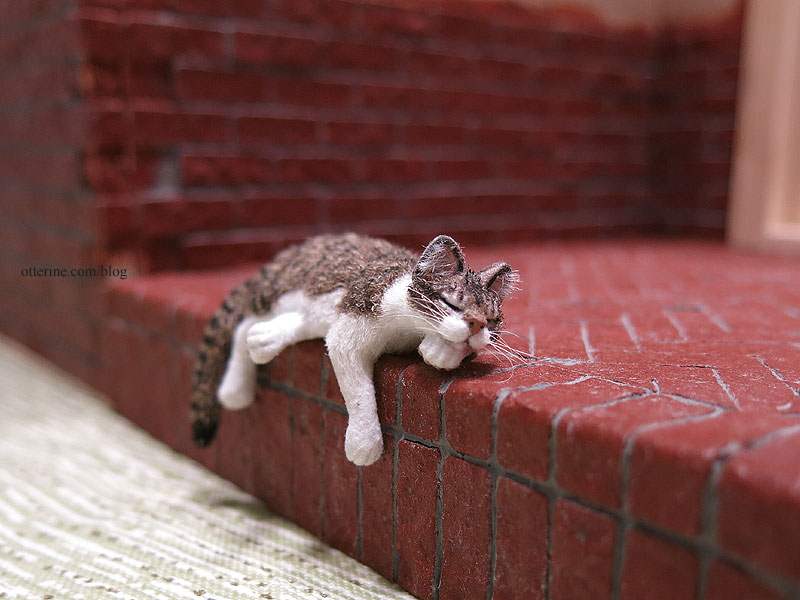
Finn is back to napping. :D
Categories: Half Clocked
August 22, 2018 | 0 commentsHalf Clocked – back wall and insert wall
Since I want to glue the roof in place and have the back open, I needed to figure out how to hinge a wall. Nothing is glued in place just yet so I can engineer on the fly. I have cut 3/8″ square basswood support beams for the back sides and new beams for the ceiling. I’ll likely be cutting the back wall as one piece, so the beams will give it something to abut when closed.

I’m also making a small room up front under the gable. I cut a 1/4″ thick plywood board to fit the space and then planned my trims and door. I’m using a Classics narrow door since other interior doors looked too big proportionally.

A blog reader asked about how I cut the skylight holes, so here is a link to an old post I did on making cuts without power tools. I still use this method a lot, and it works really well on mdf especially. Here are the cuts in process.

However, now I often finish the cut with my scroll saw to get a cleaner final cut. The scroll saw can and does wander, but these holes are fully enclosed by the door or window they house, so it’s not a huge deal.

On the other hand, if you use a component that is smaller than the existing hole, you need to fill it. I typically use strip wood.

Since I want the door to open into the main room, I needed to pad the edges of the door casing (here’s an old post on that technique). I didn’t need it to be neat since this side of the door won’t be seen. I’ll make any minor adjustments once I’m ready to install the insert wall.

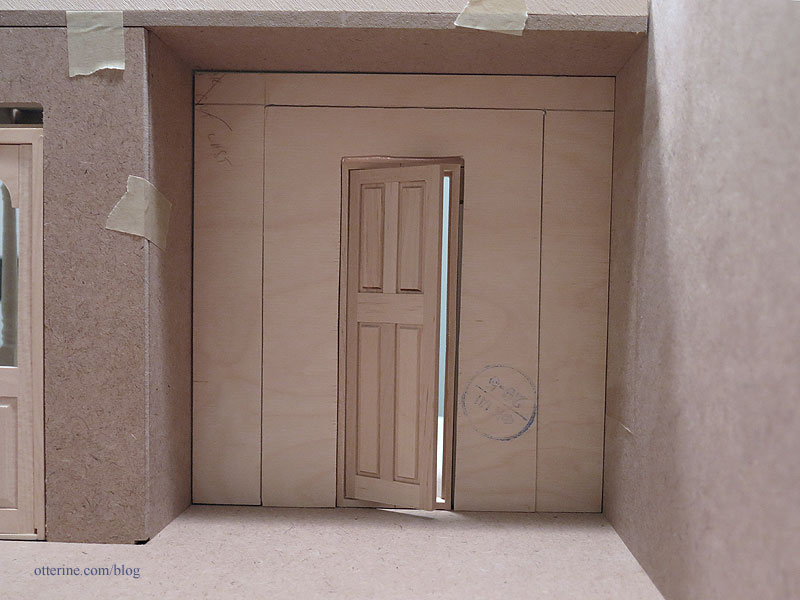
I want to be able to access the front room more than the narrow door will allow, so I will be making the insert wall removable. This is a bit of hassle since I don’t want the board to have gaps all around it nor do I want to continually risk scuffing the floor and ceiling moving it around. So, I will cut the wall into two pieces – one will be a permanent part of the structure and one will be fully removable with the door acting as the handle. This will make a lot more sense once I get the trims cut and in place, but here is the plan in dry fit. The outer side panels and upper panel will be permanent, but the door and its two adjacent panels will be one removable unit.

I mulled over this design a few days, and changed it slightly for the final. After measuring multiple times to make sure I had a suitable plan for the removable wall, I marked and cut my insert board using my scroll saw. Again, I tried to get the cuts as straight as possible, but the trims will disguise any imperfections.

The trims will be cut after I have installed the frame portion and the wallpaper (on order), but this is now the plan. It seems a better balance than the initial plan.

It will be a larger opening in the end (sorry for the poor quality on this pic, but the camera kept focusing through the opening).

Should work well. :D
Categories: Half Clocked
August 5, 2018 | 0 commentsHalf Clocked – kits in progress
I’ve been working on some stash kits to fill the HC build. I have a birdhouse from Art of Mini.

And, two new old stock kits – Shenandoah Designs tiered server and House of Miniatures trestle table.

Sanding them took the most time, but I have them built and ready for finishing.

I hate assembling any three-legged stand, but they look so nice I just swear through the process to get it done. I inevitably get glue all over, so I almost always end up painting these types of bases.

I’m not sure of colors yet, though I do really like the aged military green shown on the birdhouse kit cover. I might end up going with that for this piece.

The trestle stand was a pretty clean assembly glue-wise, so I might use some stainable wood filler for the few gaps and end up staining this piece.

Categories: Furniture, Half Clocked
June 10, 2018 | 0 comments
NOTE: All content on otterine.com is copyrighted and may not be reproduced in part or in whole. It takes a lot of time and effort to write and photograph for my blog. Please ask permission before reproducing any of my content. (More on copyright)

Half Clocked – fireplace insert
Since my fireplace is only for show, I made a flat brick insert from egg carton bricks instead of a firebox.

I glued the bricks to a paper grid and then cut the insert to fit.

Before installing, I painted the bricks Neutral Grey and then used spackling for the grout. I didn’t want any color to clash with the fire screen, which is black and gold, and the grey brings out the marble detailing.

I used a piece of thin cardstock to attach the brick insert to the fireplace.

I think this will be lovely with the baseboards and fire screen installed. I’m not sure I need a hearth since there will be no logs or even candles. More on that to come.

The fireplace was part of a miniatures lot I bought online. I have two that are very similar, and one is for the Brownstone. They are heavy, well made and have crisp detailing. The material appears to be some sort of translucent resin. There are no markings or manufacturer details. The seller indicated that she purchased them in 1996 at The Dolls House Toys Ltd., Covent Garden, London.
Categories: Half Clocked
December 2, 2018 | 0 commentsHalf Clocked – furnishings and such
Here is where we left off with the kits.

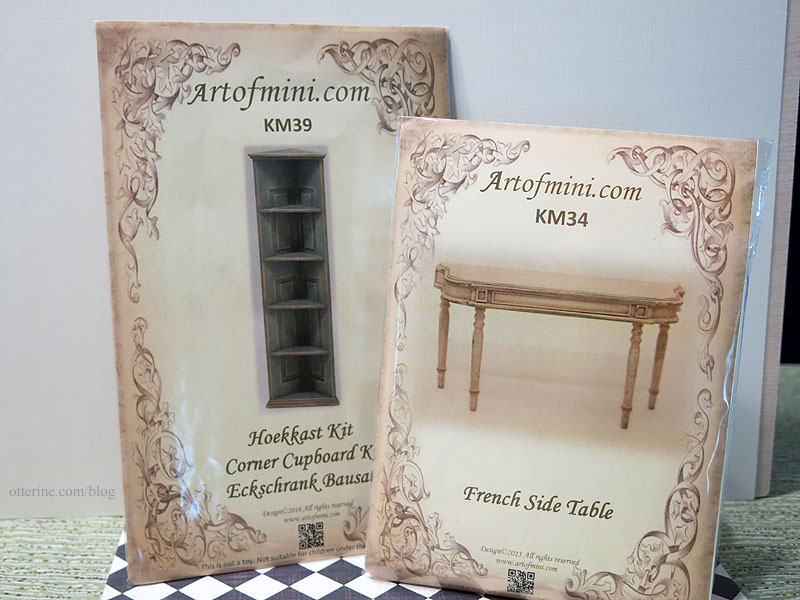
I also started a French side table kit by Art of Mini (shown on the right below; the corner cupboard is for Watson Mill).
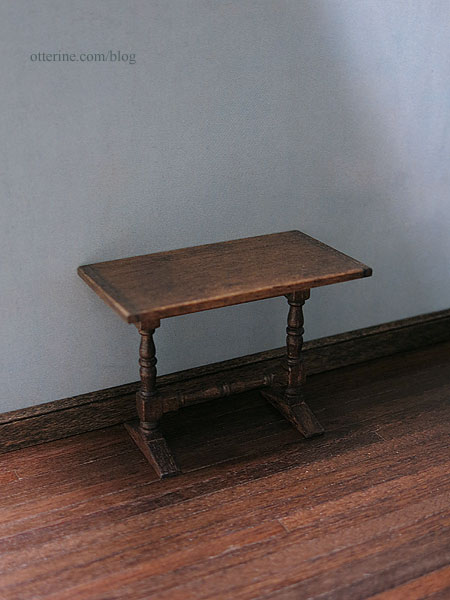
For the trestle table, I opted for a stained finish. After filling in any minor gaps with wood putty, I stained the piece Minwax Dark Walnut. I touched up any glue/putty areas with brown paint and then added a coat of Delta Ceramcoat Satin Varnish.
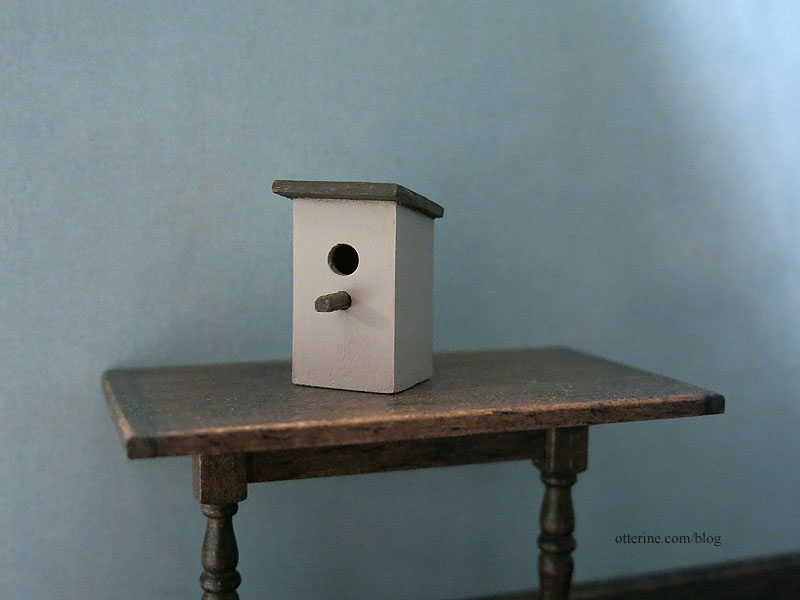
I painted the birdhouse green, but then I thought, “Why is just about every birdhouse I make green? I’m sure birds like other colors.” So, I painted over that with Battleship and painted the roof Bittersweet Chocolate, both by Americana. Now it’s a house suited for the unassuming bird who doesn’t like to draw attention. :D
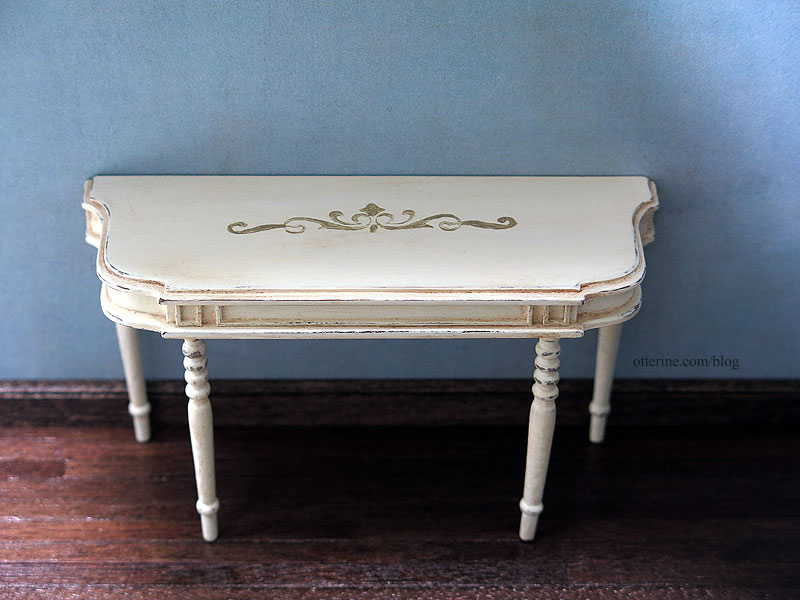
For the French side table, I started with a coat of Bittersweet Chocolate by Americana. I want this to be an old table, perhaps once stained and lovely then re-purposed with a coat of paint (or three).

The Folk Art Vintage White paint I had was very thick for being rather old, so I added some water. With the dark undercoat, it took several layers to even out. That added to the refinished look unexpectedly, so a nice happy accident. I rubbed the paint with a piece of brown paper bag to remove the high spots. Then I used a light grit sanding stick to bring out some of the dark details from underneath.
I added metallic detailing with Taupe by Folk Art. I used a rubber stamp and the same paint on the top (technique detailed here). I rubbed the piece again with a piece of brown paper bag until I had a nice sheen.


The legs warped a little, but that adds to the antique feeling…at least that’s what I tell myself. :D
The tiered server started with a coat of Basil Green by Folk Art. I had to paint this since I always get glue everywhere when putting together any three-legged stand. I used one of the small rubber stamps with the same paint as the French side table to add some detailing.

This piece was also prone to warping, but I like the way it turned out. :]
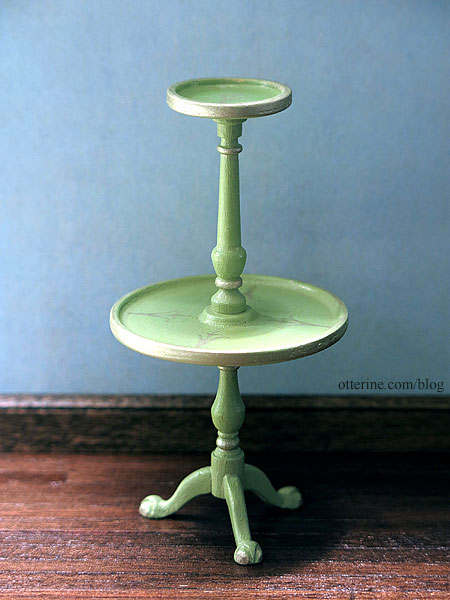
I have a few more furnishings in mind, so more on that to come….

Categories: Furniture, Half Clocked
November 28, 2018 | 0 commentsHalf Clocked – landscaping
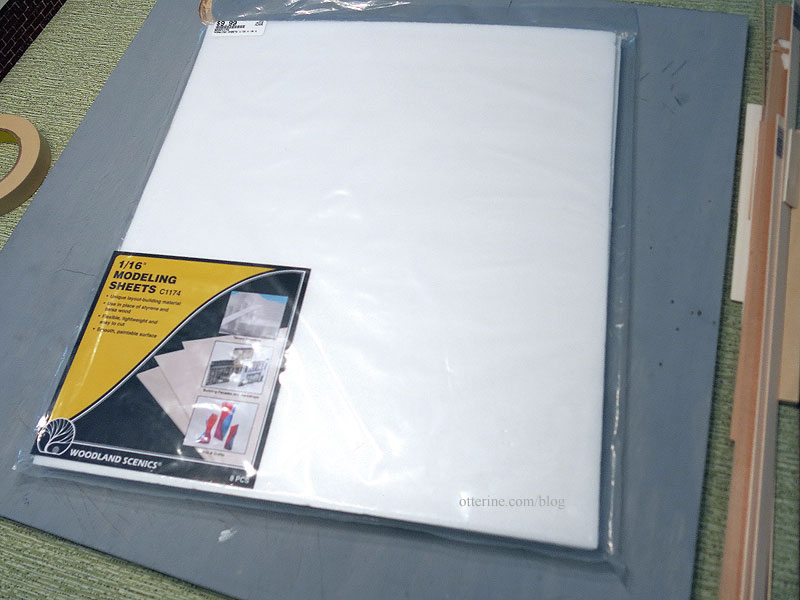
The landscaping board is finished on the edges with iron-on veneer edging. I then glued layers of white 1/16″ foam sheets by Woodland Scenics using Weldbond glue. I went with thin foam so I could keep the land relatively flat on the baseboard while still allowing for natural unevenness.
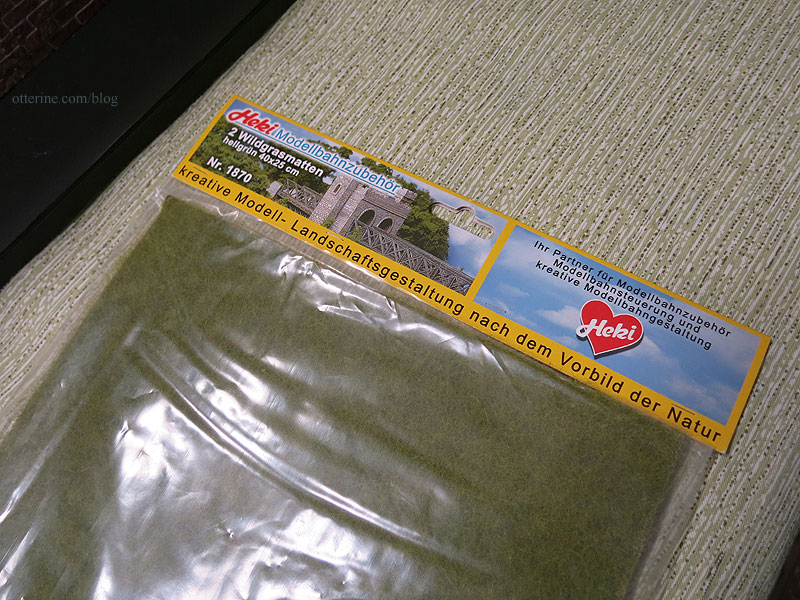
For the grass, I’m using Heki Summer Meadow Field Grass. It has a paper backing that isn’t the easiest to seam, but I do like the color, variation and texture. I also had it in my stash already, so that saved on costs.
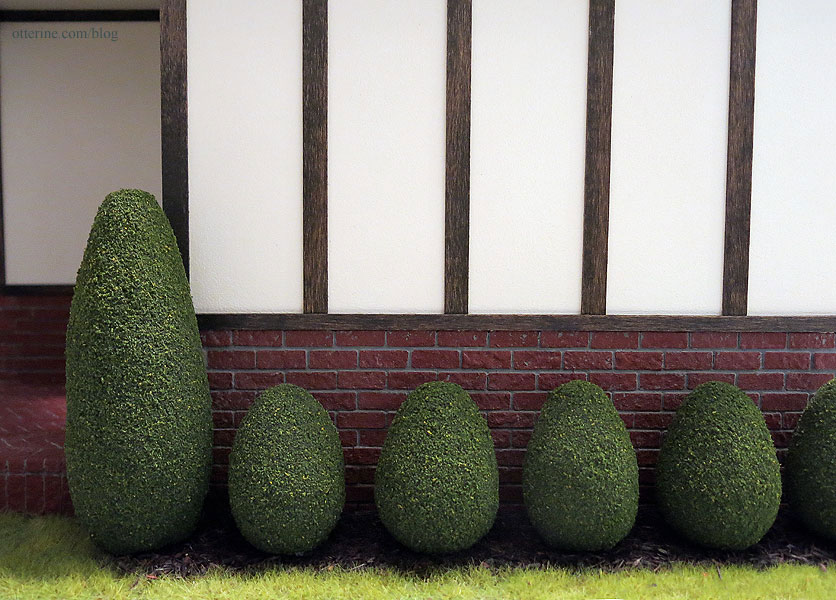
Since I’ll be planting the 20 shrubs I made around the structure, I opted for mulched areas (shrubbery tutorial available in my etsy shop). This cut down on the grass quite a bit. I started in the back on one side and cut a strip of grass with an uneven edge for a more natural look.
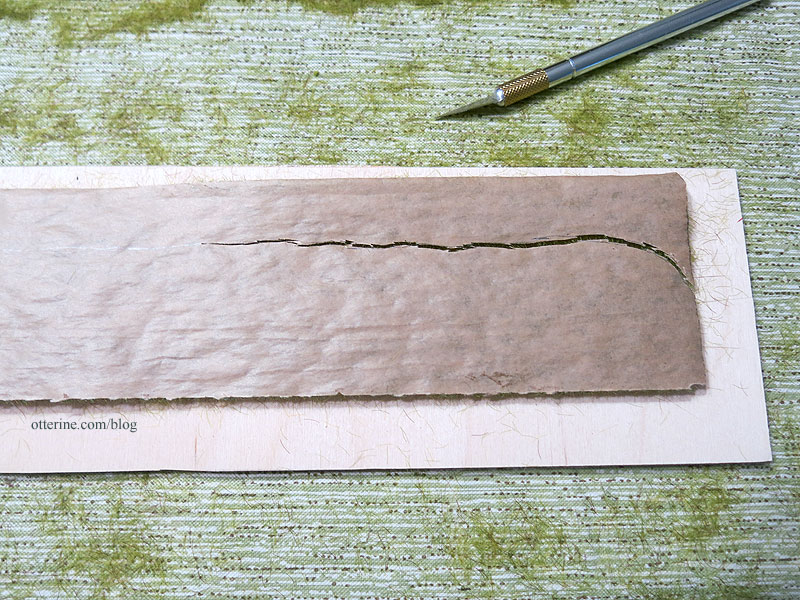
I glued this with Weldbond glue spread with a brush.
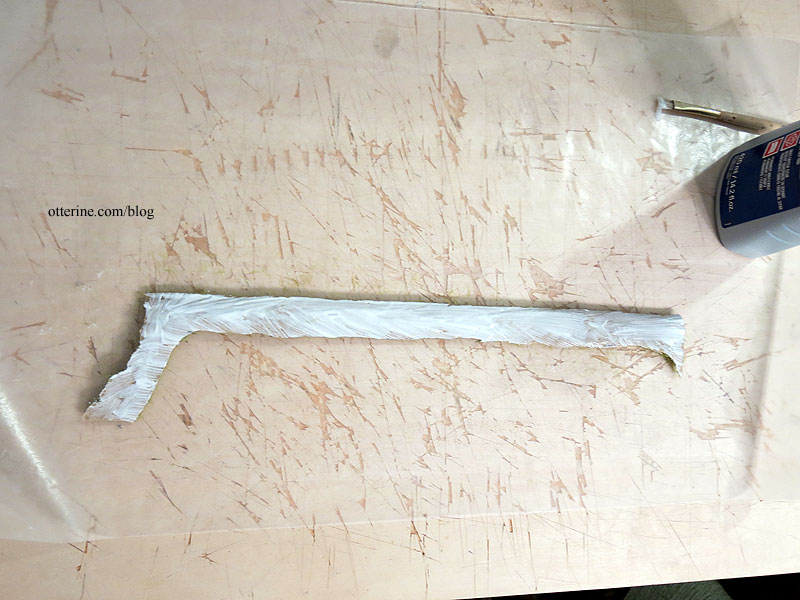
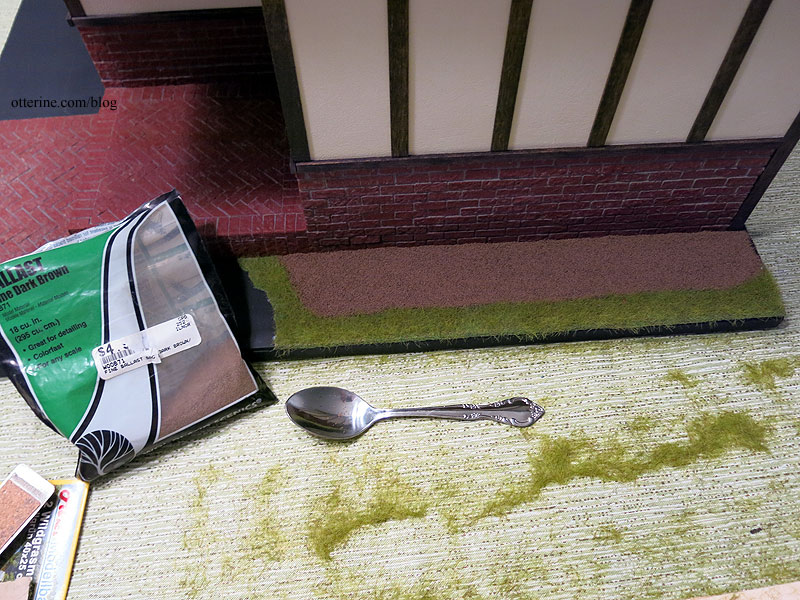
I added Woodland Scenics Fine Dark Brown Ballast as the mulch base, to serve as dirt. If there are any bare spots in the mulch, this will blend well.
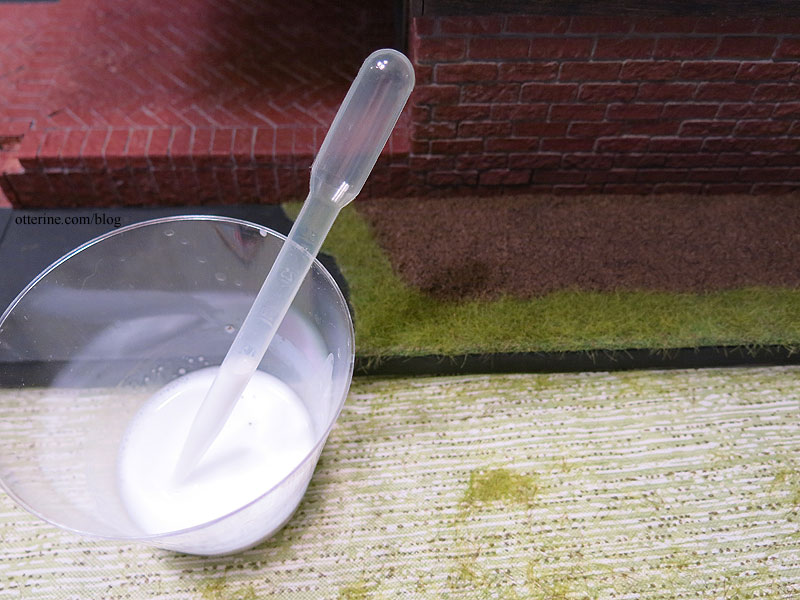
I held it in place with Woodland Scenics Scenic Cement applied with a pipette.
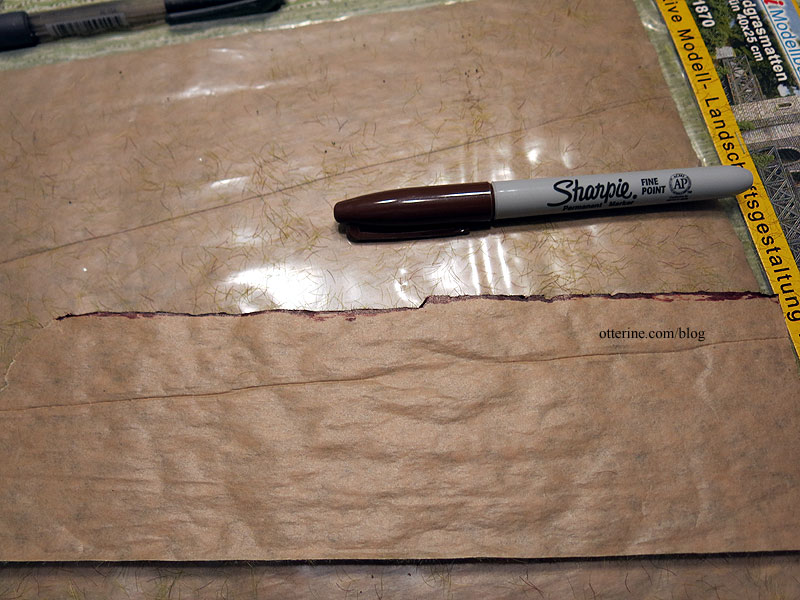
I colored the edge closest to the brick with a brown Sharpie to allow for better blending. The edge of the grass would be a light green otherwise and somewhat out of place.
I let the ballast dry overnight, then added the mulch. Again, I used Woodland Scenics Scenic Cement applied with a pipette.
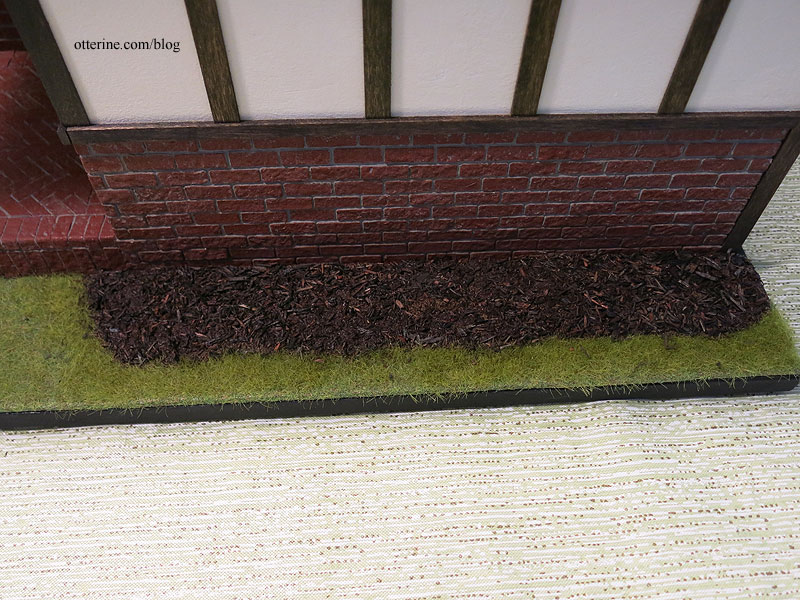
I let the mulch dry overnight and vacuumed the lawn to get rid of any excess. The shrubs are glued right on top of the mulch with Weldbond and a dab of super glue gel to hold them steady while the white glue dried. I foresee at least one of these popping off in the future, but at least they are easily repaired or replaced.
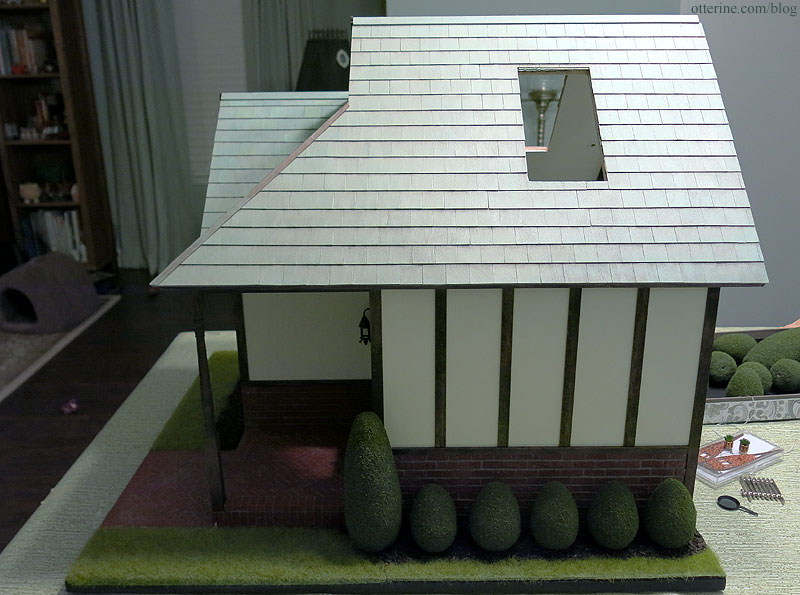
With the landscaping in place, it finally looks like a solid structure. :]
Categories: Half Clocked
November 27, 2018 | 0 commentsHalf Clocked – brick walkway
I am getting close to gluing the structure to the landscaping base, so I can start to work on the brick walkway. Here’s the porch already done.

I started by marking a printed grid to match where the porch meets the walkway.

I wanted more herringbone, so I started with a 4.5″ by 5″ section.

Once that was done, I cut a template for the shape I wanted.

I glued that section to the base board.

I then individually cut the straight brick border.

Then paint….

Then grout was applied before the house was attached to the base. Easier to work with that way.

Categories: Half Clocked
November 25, 2018 | 0 commentsHalf Clocked – roof, part 3
Continuing work on the roof. I used 3/8″ corner molding to finish off the ridges.

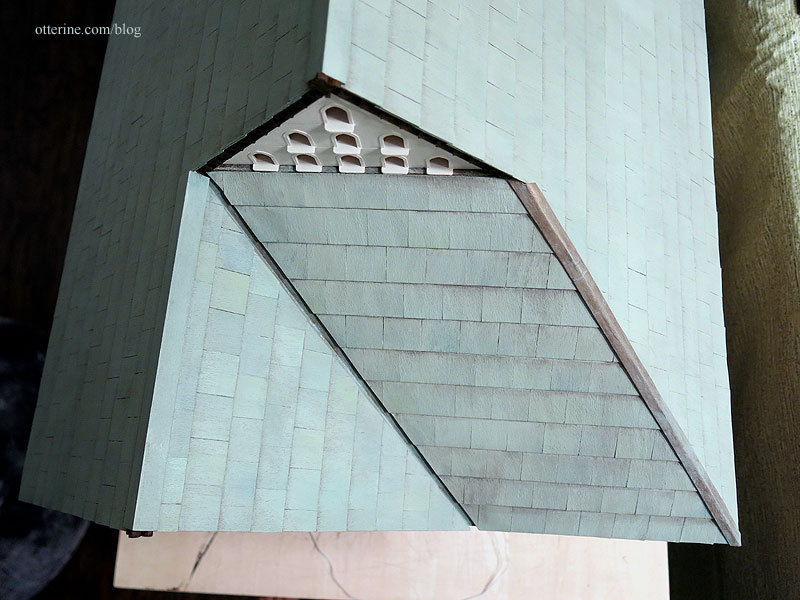
Time for paint! I masked the roof trims and mixed a large tub of paint from the below grouping. There’s a Tudor house near my office with a green grey roof that I just adore, hence the color selection.
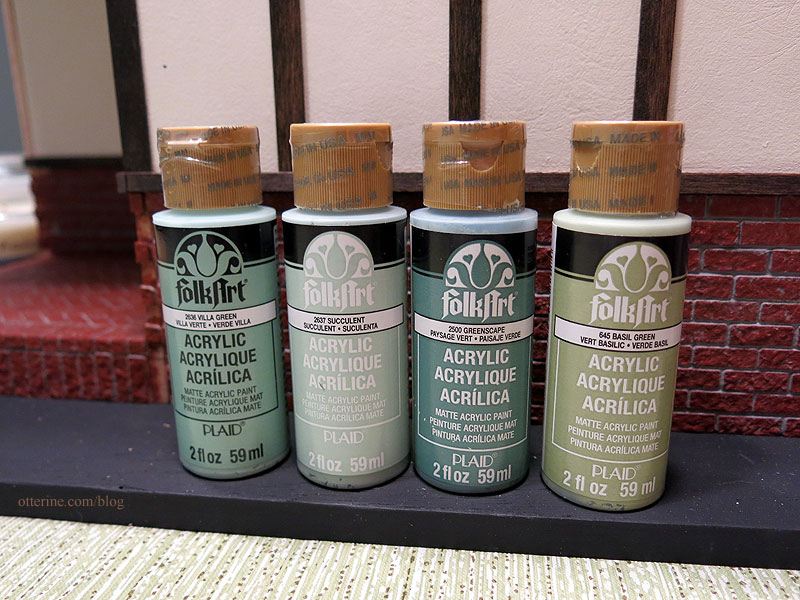
Once I had the roof painted with a thin base layer of the mixed paint, I used the unmixed and undiluted colors to paint individual shingles at random.


I took some of the mixed paint and added Staining Medium by Americana. I brushed this over the roof to blend the individual shingles. Light coats mean you can stop when you get the right shading. However, it just ended up way too bright blue in real life, though it looks fine in the photos.

I spread Slate Green by Americana over the entire surface. It toned down the color and unfortunately negated the need to have individually painted shingles. :\ Then it was too bright, so I used Neutral Grey by Folk Art mixed with Staining Medium to add some light aging and depth. Better. :D

Since the wood was too thick for the one roof hip, I cut a piece of cardboard to cover the join. I painted this Liquitex Antique Bronze and gave it a light patina.
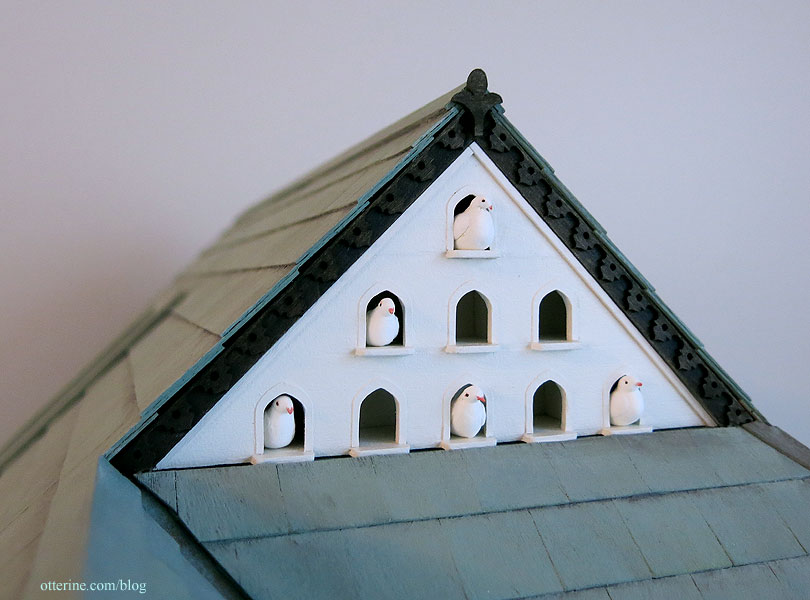
With the painting complete, I could also add the remaining fancy gable trims, glue in the dovecote and add the final trims.

The doves were made with Hearty Super Lightweight air dry clay and a little paint. :] The clay was easy to work with and set up overnight. It’s still pliable enough to squeeze the fat little birds into the popholes. :D
Categories: Half Clocked
November 24, 2018 | 0 comments
NOTE: All content on otterine.com is copyrighted and may not be reproduced in part or in whole. It takes a lot of time and effort to write and photograph for my blog. Please ask permission before reproducing any of my content. (More on copyright)


