
Robomeows!
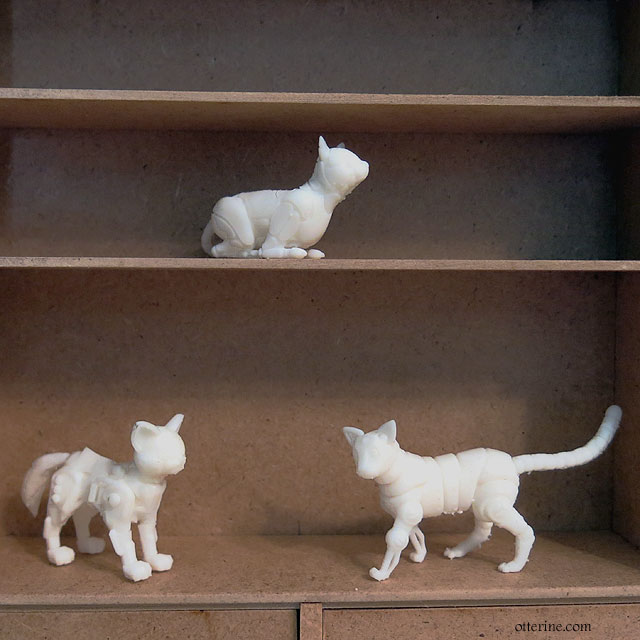
Debora and her husband printed some robot cats I found online. They are perfect for Bert’s place. Links to the artists are: Kit-E on top shelf, Robotic Cat on lower shelf left, and Mechanimals-Cat on lower shelf right.
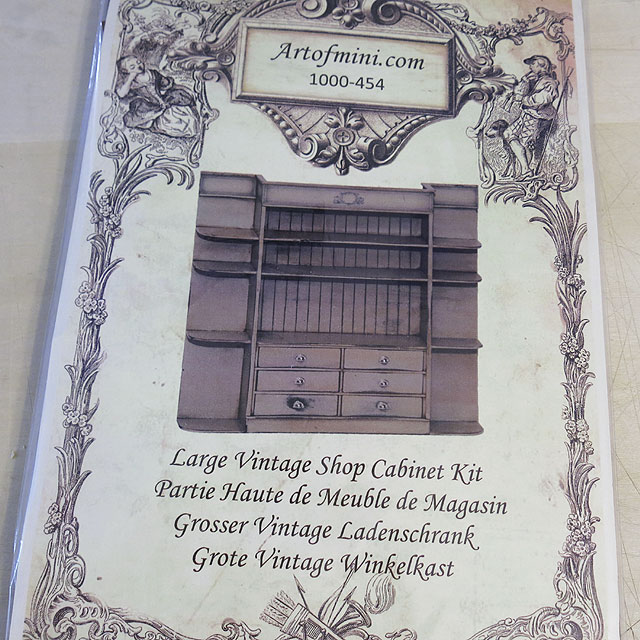
The cabinet kit is from Art of Mini, purchased at the Bishop Show last month.
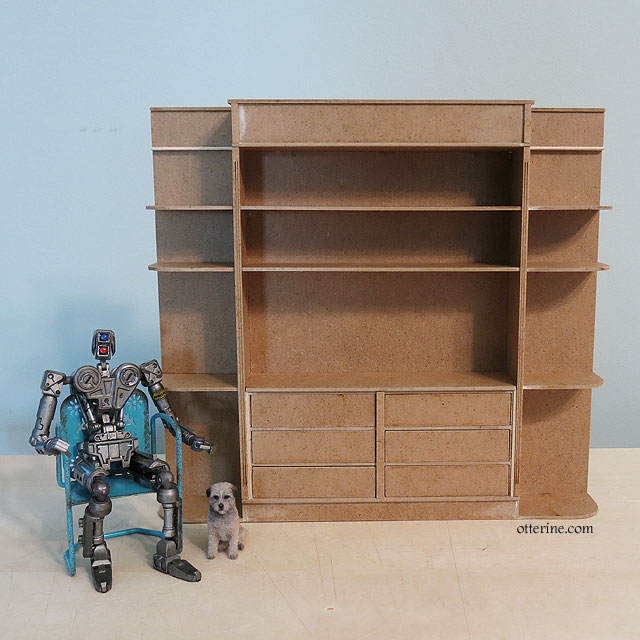
I made a few changes but built it mostly to spec.
Categories: Bert's Depot, Droids and Robots
May 26, 2023 | 2 commentsCinder block trial
Back in 2020, when I first started working on this idea, I wanted an old cinder block finish inside and out. Now, using true mini cinder blocks would be extremely expensive and make for a heavy build. Egg carton brick is one of my favorite finishes, but I didn’t like the look of egg carton cinder block after I started. So, I’m trying something different this time: sandpaper over cardboard.
To make things easier, I’ve purchased a roll of 180 grit sandpaper already cut to 1 inch wide (as an Amazon Associate, I earn from qualifying purchases). Since it is a thinner material than I want, I also bought a roll of upholstery cardboard tack strip that is 1/2 inch wide.
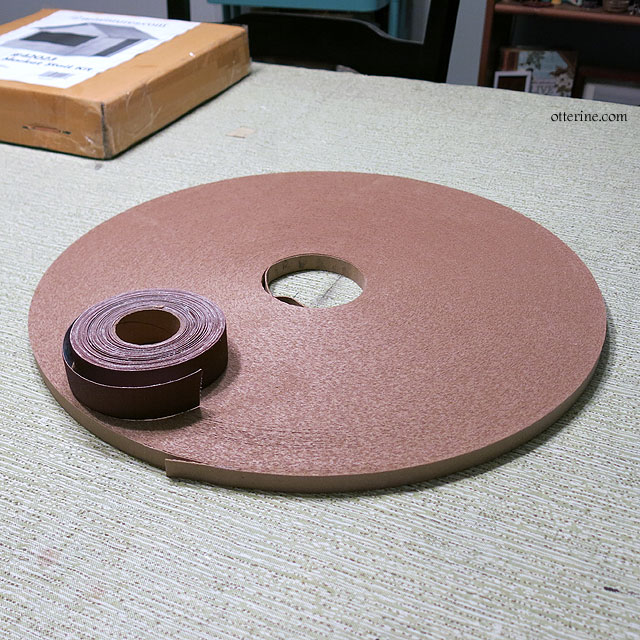
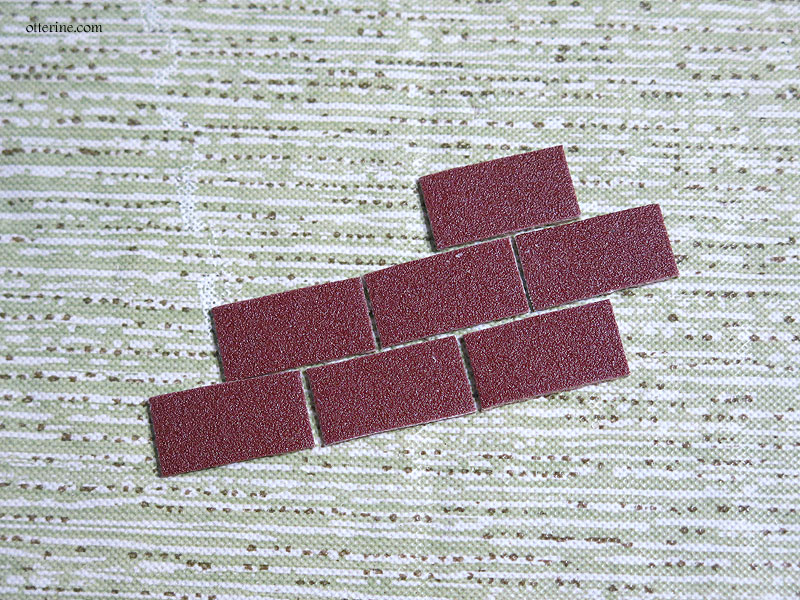
Since the sandpaper is the length I want and the tack strip is the width I want, making the individual blocks should be pretty straightforward. I glued the tack strip to the back of the sandpaper, then snipped with scissors. Rinse, repeat. A whole lot of repeat….
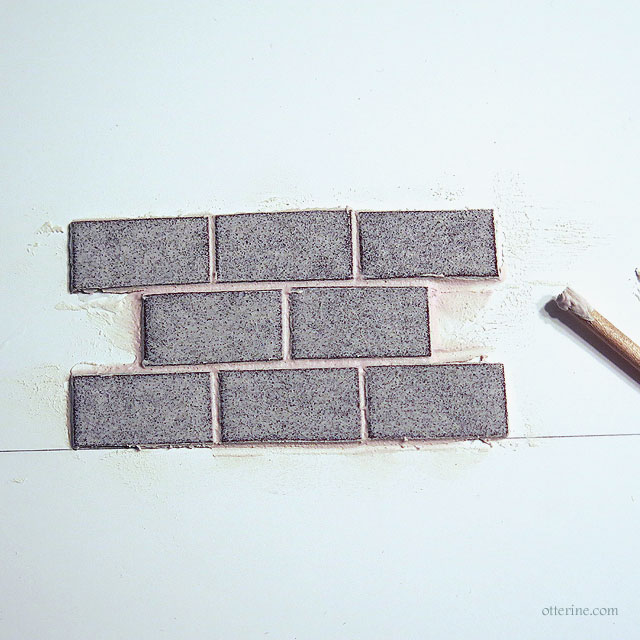
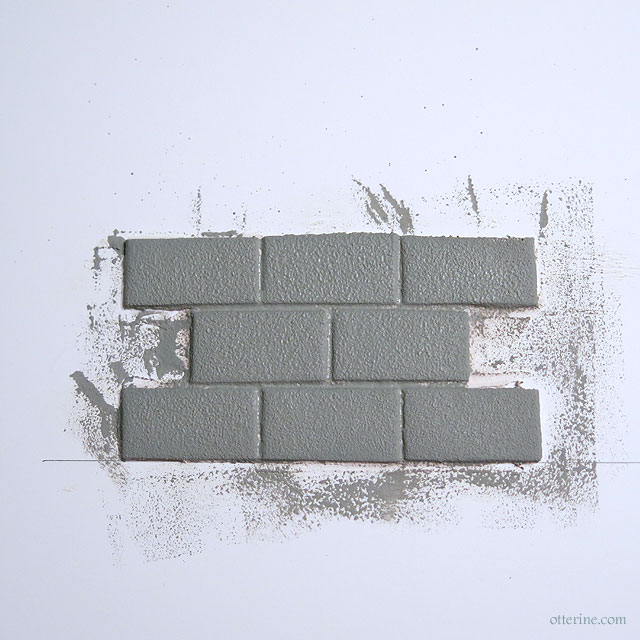
I have a vision of where I want to end up, now it’s just a matter of trying out some techniques to get there. Making up a sample board seems to be a good place to start. I added a layer of spackling over the blocks, dragging a dowel between the blocks to mimic mortar, then painted grey.
I think I finally have it.
Categories: Bert's Depot
February 11, 2023 | 0 commentsRatty side door – tetanus shot suggested
In following with the aging of the garage door, I wanted a metal side door that would show its age, perhaps a few dents. The easiest material to use would be plastic. I cut two rectangles of 0.04″ styrene sheet. Using a lighter, I heated up random sections and pressed in with a butter knife to create dents and an awl to create dings.
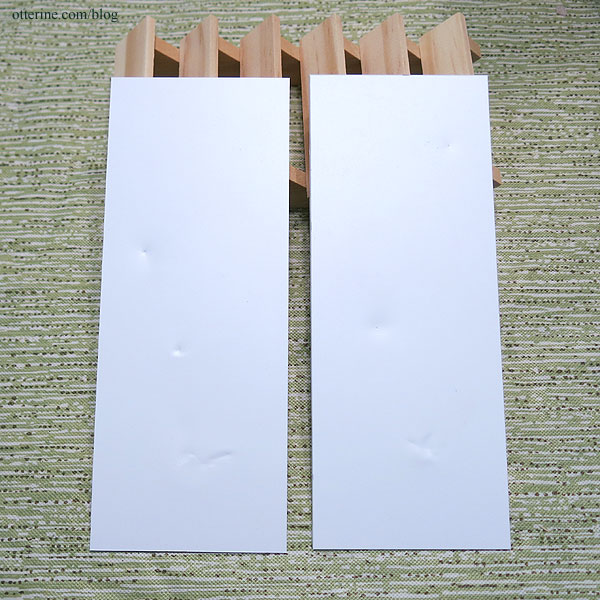
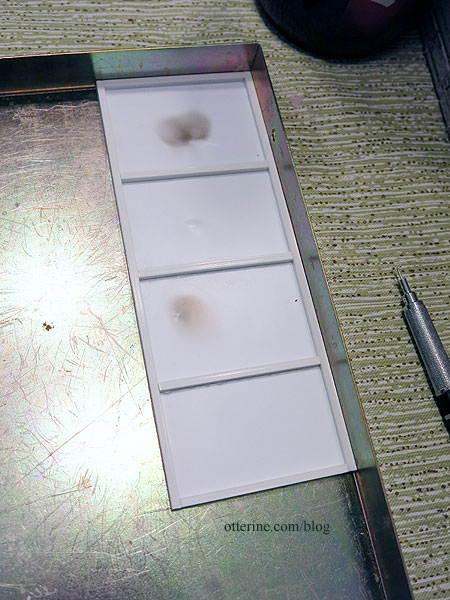
I used 3mm styrene to make an internal structure between the two rectangles to make a hollow door. You can see the scorch marks on the back side from the lighter.
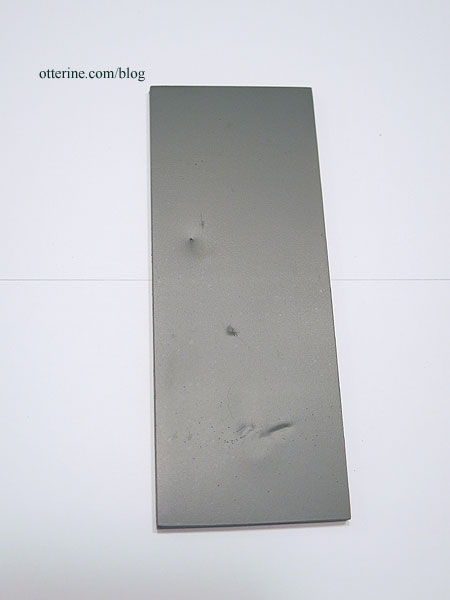
I started with grey primer to grab the plastic. I’m showing the exterior only until the end since it was the same process on both sides.
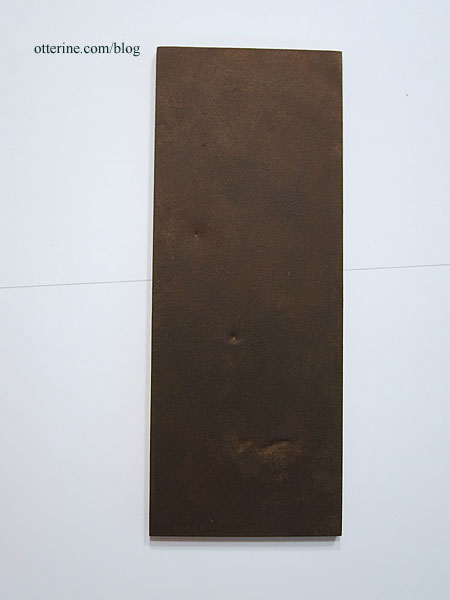
I then painted both sides with acrylic paints to create corrosion.
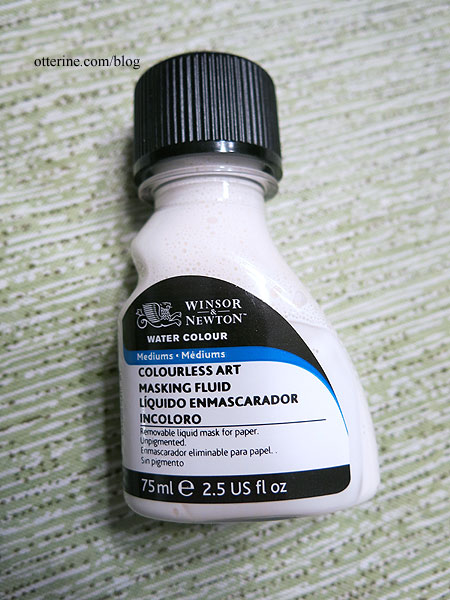
I masked random areas with Winsor & Newton Masking Fluid. This is a pricey fluid used for watercolor painting; it covers any space you want to remain white on a painting.
It dries clear, and you paint over it.
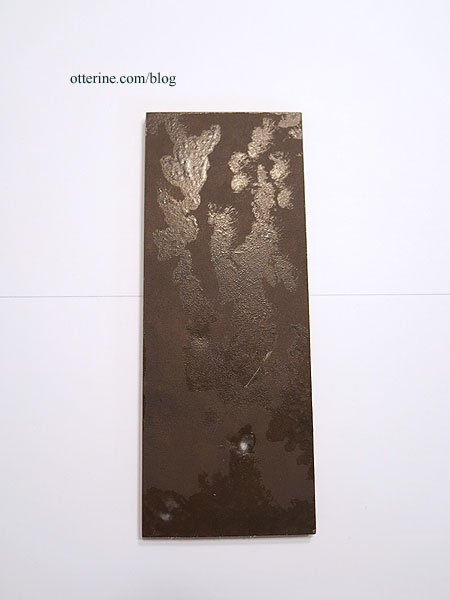
I started with gloss Cherry Red by Krylon. I used an eraser to lift the rubbery masking after the paint dried.
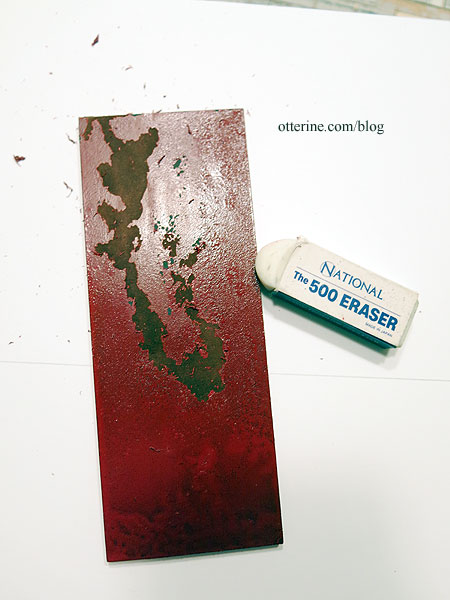
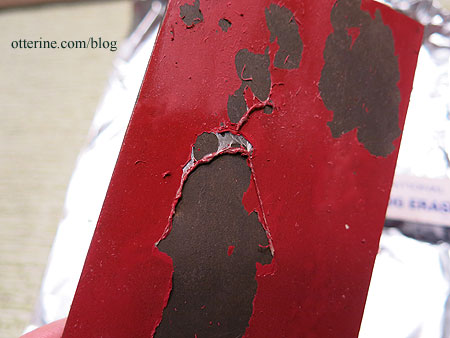
Since the paint was dry to the touch but not yet cured, it also marred the gloss finish — an added bonus. No new paint on this old door.
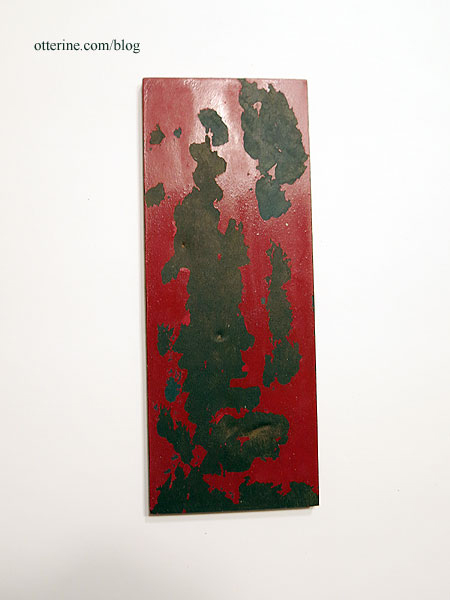
I applied masking fluid again, following the initial patterns loosely.
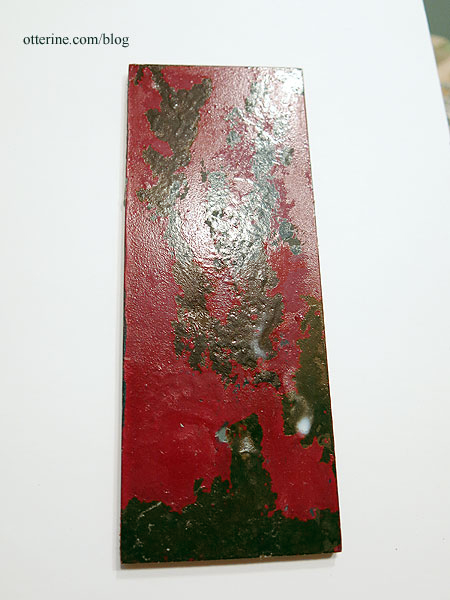
The next color was Rust-Oleum Deep Forest in satin finish, which has a lot of blue tones to it.
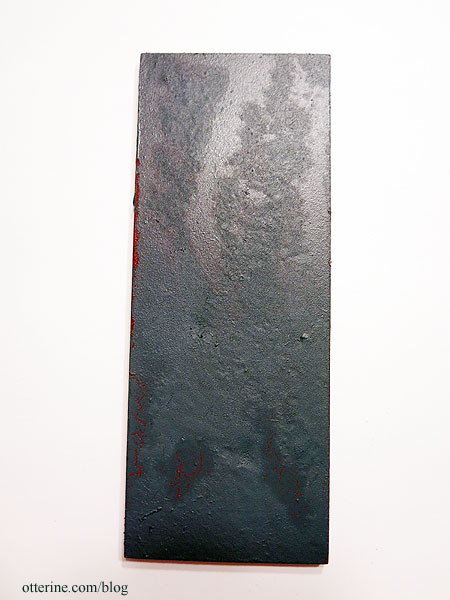
Removing masking…and you can see the red and corrosion underneath.
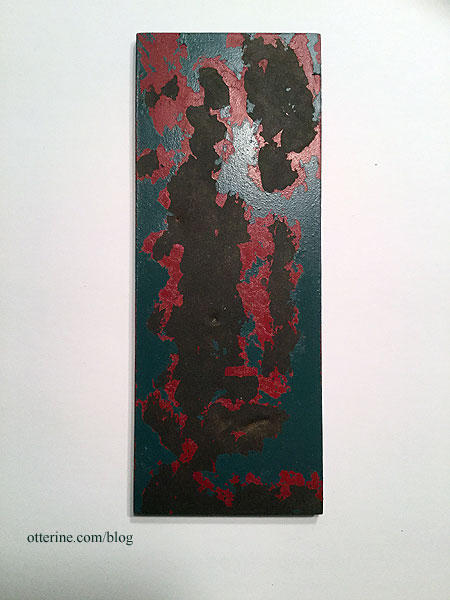
Racing Green by Tamiya was the next color, then final masking. The white portions are where the masking fluid is still drying.
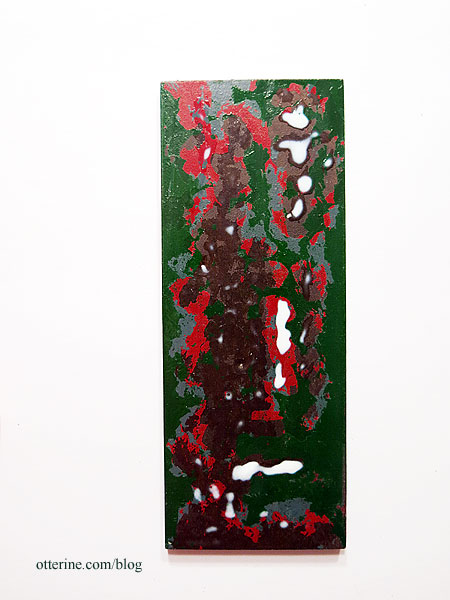
This last time, some of the paint lifted to the grey primer. I used acrylic paints to reapply the corrosion layer over the grey primer areas and to dirty the bottom and lead edge where hands would be constantly touching the door.
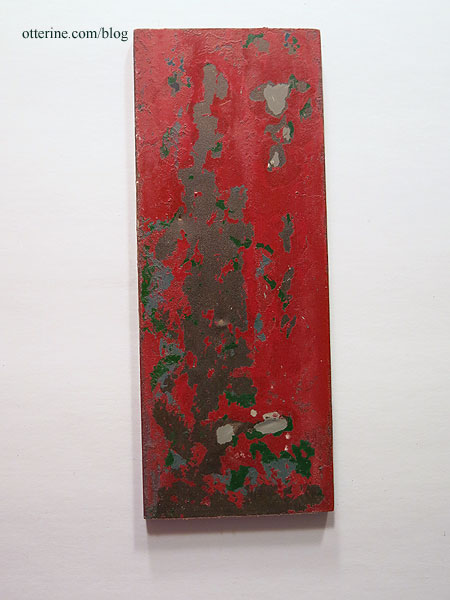
I was originally going to go with a grey door, but how boring. haaaaaa! The exterior was finished with gloss Cherry Red by Krylon since I liked how it “aged” the first time around. I barely waited for the paint to dry this time before attacking the finish and removing the masking. I wanted a truly battered door. :D
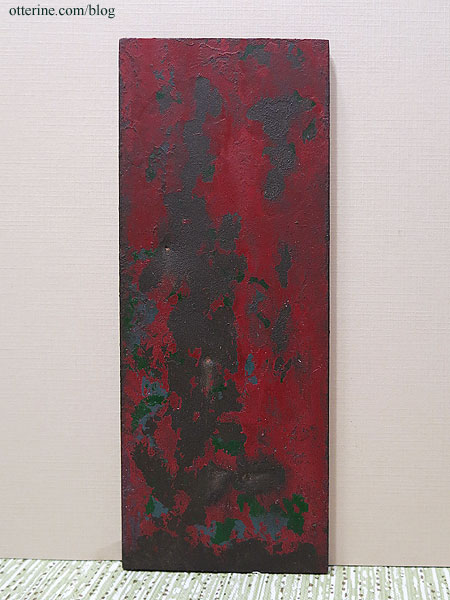
I love the way the dents and dings turned out.
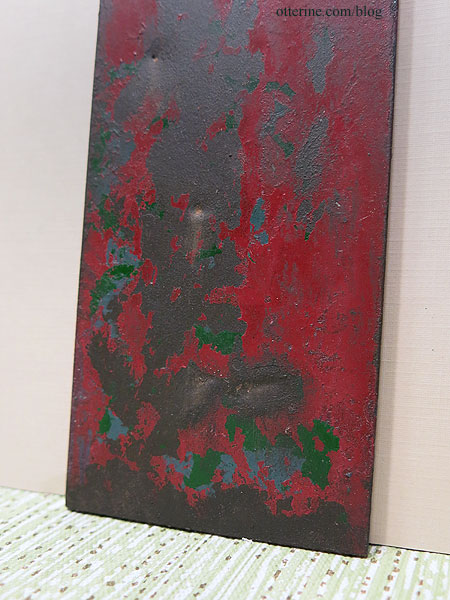
I went with Rust-Oleum Deep Forest for the interior. I masked very little on the interior after the third paint coat since it would have been more protected from the elements but still subject to wear and tear.
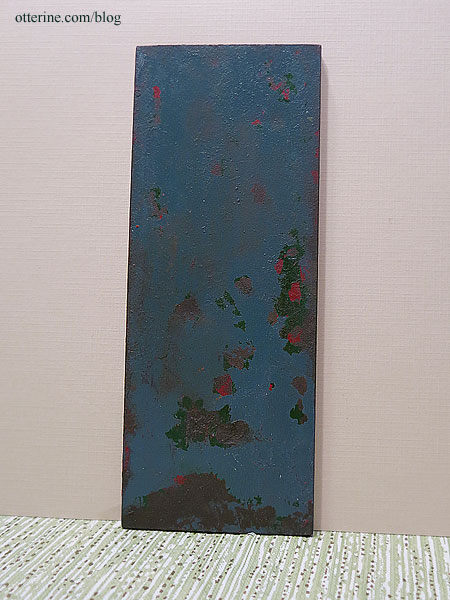
The bottom gets the most abuse from perhaps being kicked closed or ramming into things inadvertently left in its path over the years.
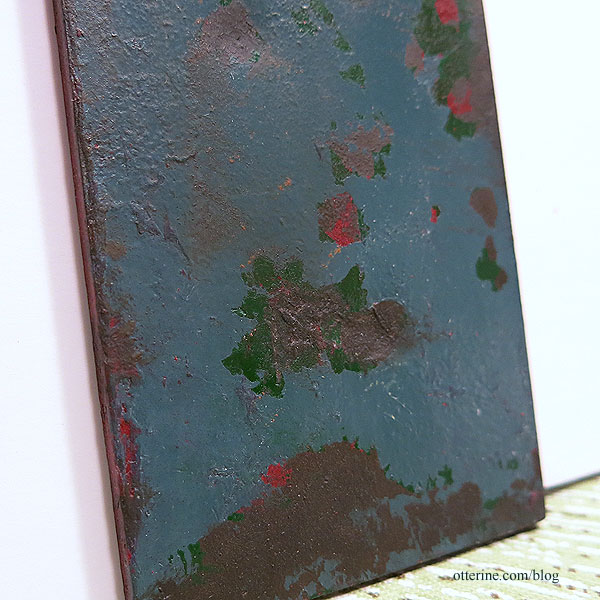
Spray paints have recommendations such as applying second coats within 2 hours or waiting for 48 hours to prevent crazing (wrinkling). Since I was within that “don’t spray” time, I achieved some crazing. Often when I try to get crazing, I can’t, and when I want a pristine finish, I get crazing. At least it worked as intended this time.
Now to build a frame….
Categories: Bert's Depot
August 16, 2020 | 0 commentsBullet holes in miniature
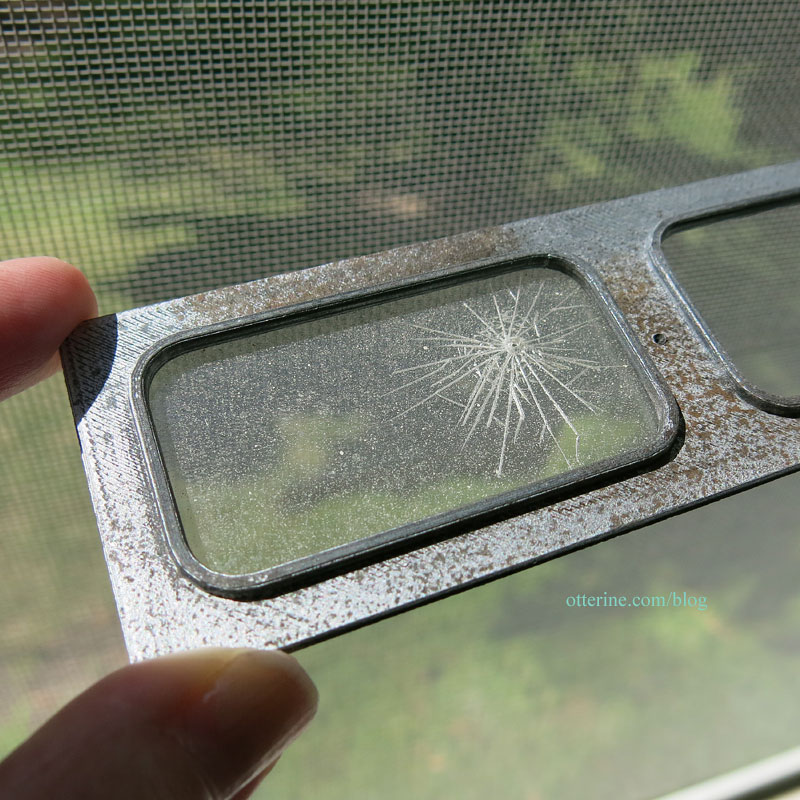
I thought an old garage door could use a busted window pane, so I drew a bullet hole freehand with an X-Acto blade.
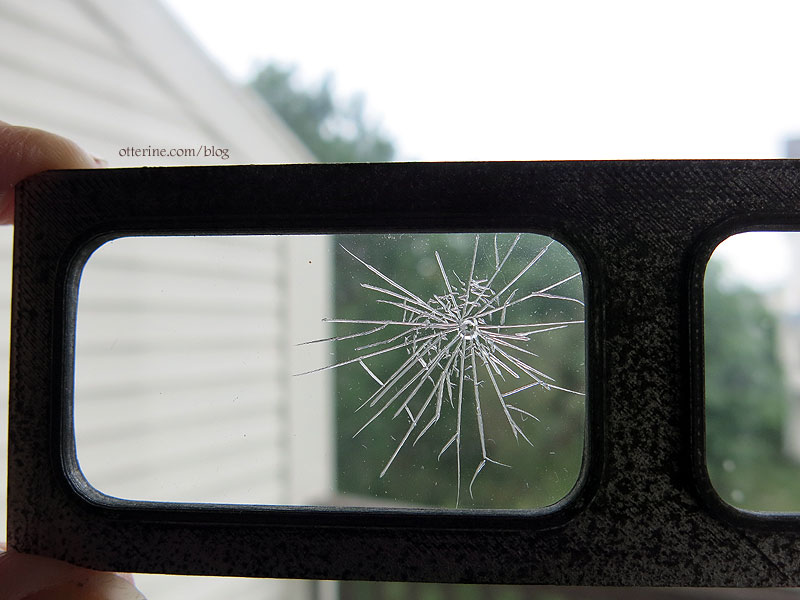
I was rather pleased with how it turned out.
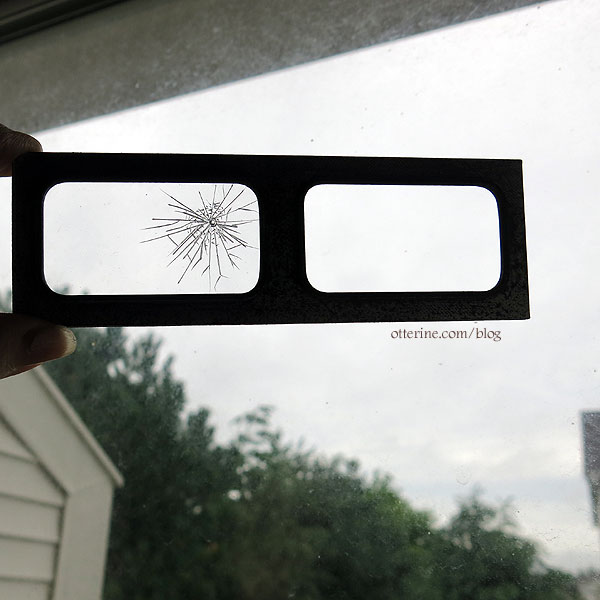
Just one hole in the window and one on the center of the panel. I didn’t want the garage to have been used as target practice. :D
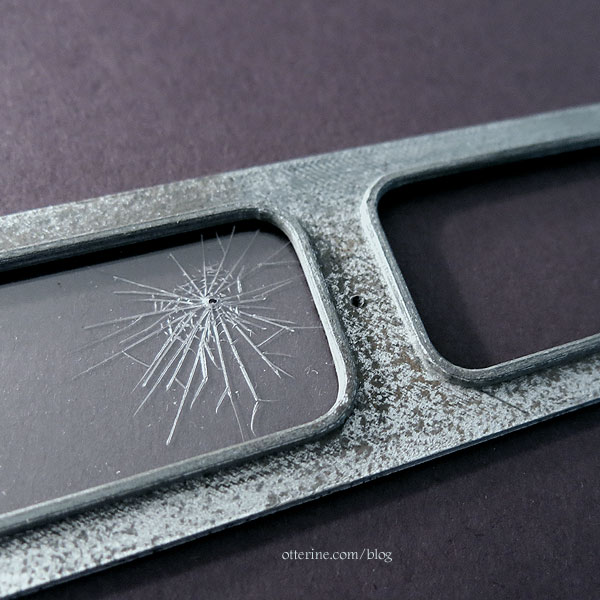
Before installing the pane, I did some aging with spray painting, barely catching them with over spray to simulate dirt.
Categories: Bert's Depot
August 8, 2020 | 0 commentsRobox – dyeing trials
I bought the white Robox with the intent of altering the color to be more mechanical. The green (military) was darker than I wanted.
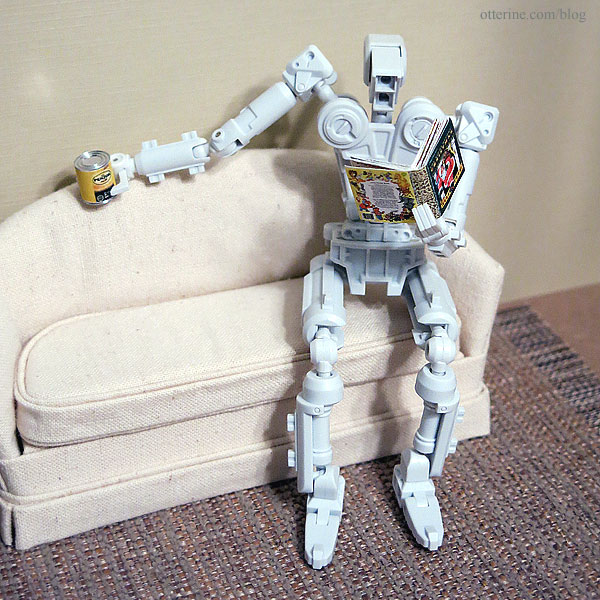
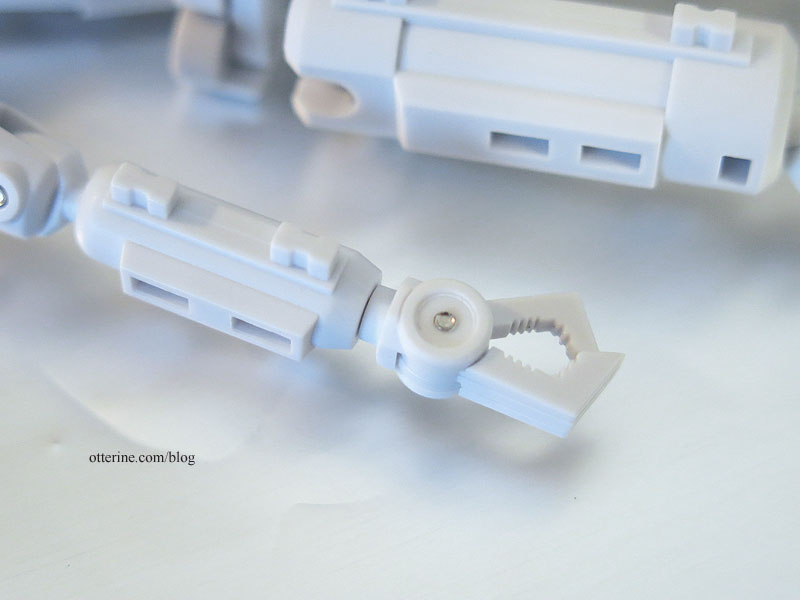
Painting is an option, but the figure can’t be taken apart other than removing at the shoulder, elbow, hip and knee ball joints. The head and ankles also separate but are smaller joints. The remaining connections have pins. That would make painting difficult and possibly disastrous, so I researched the possibility of using dye. It would still settle into joins, but it might be easier to control than paint.
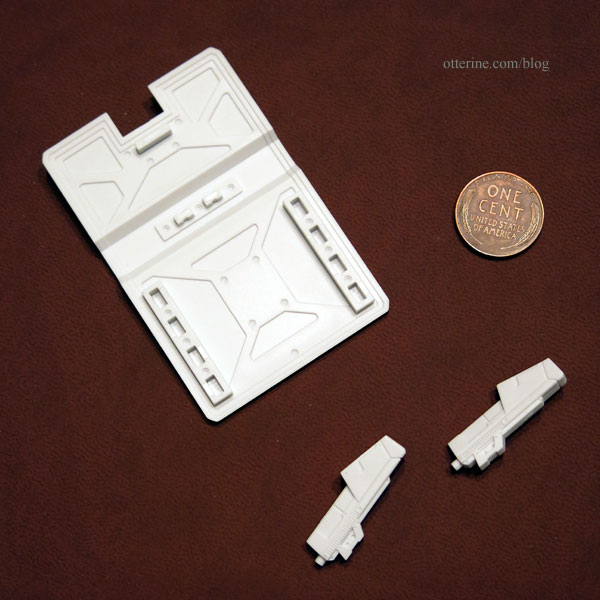
I had two weapons and the shield to use for testing dye.
I bought a saucepan, tongs and aluminum trays for craft use only. I also had latex gloves and a clock with a second hand for tracking time. (Note: There are a number of product links in this post to the various dyes I tried. As an Amazon Associate, I earn from qualifying purchases from those links.)
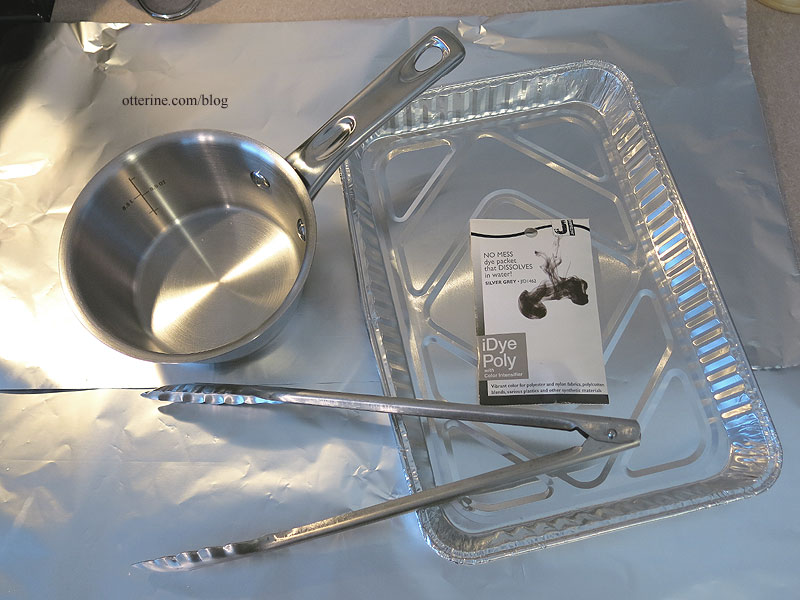
The first attempt was with iDye Poly in silver grey. You are to use the whole packet which dissolves in water, but that is also meant for a large amount of fabric. I didn’t use the intensifier since I was looking for a lighter color change.
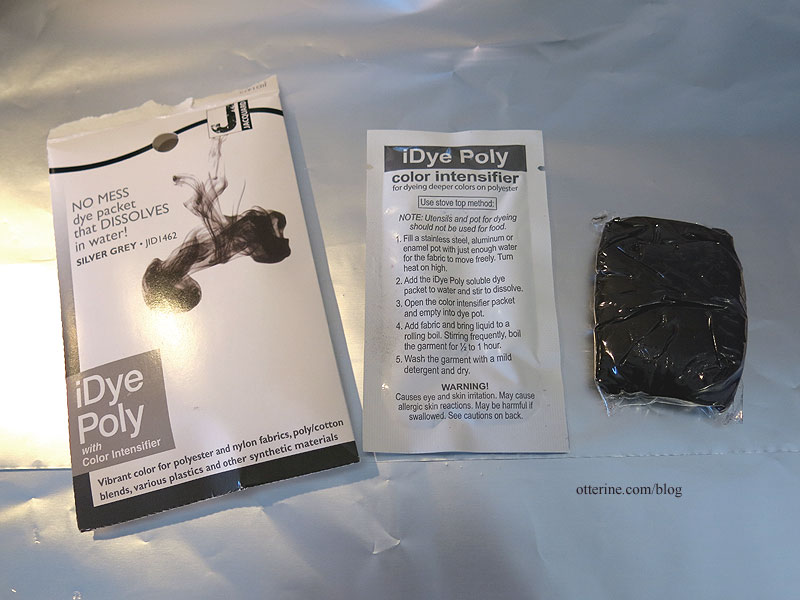
I decided to cut the packet open in a sandwich bag to use less. I started with a plastic teaspoon measure of the dye in a half quart of water.

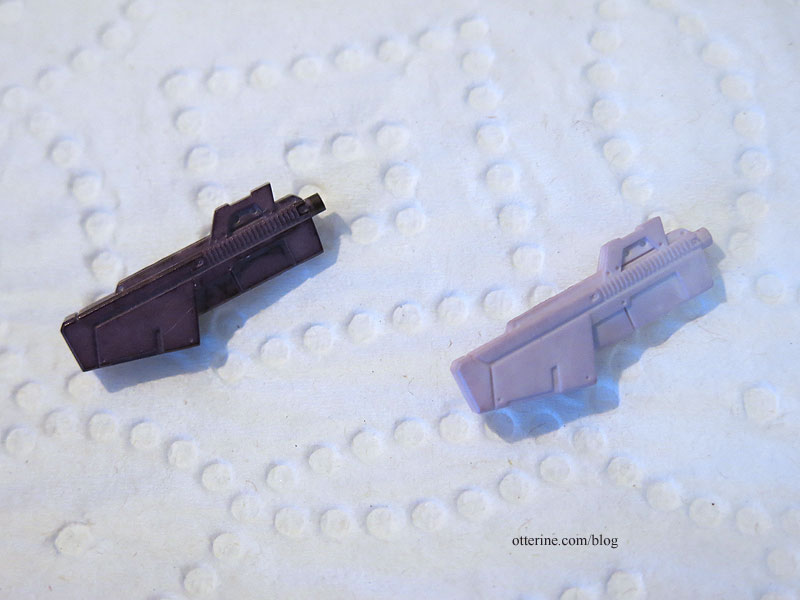
After one minute in the boiling dye water, the color came out a dark violet purple. Not exactly what I was going for. I dumped that water completely and then used half the amount of dye in a half quart of fresh water. As expected, this made the plastic lavender. There was just more red in the mix than I wanted. What I did like was the subtle variation in coverage, which gave the items more depth and character.
I cut the shield into pieces for the remaining trials. Since I had three additional colors, I decided to try all of them to make the final choice. First, one teaspoon of iDye Poly in gunmetal in a half quart of water. This was just another shade of purple.
Second, two teaspoons of RIT Dye More in Frost Grey in a half quart of water, which I did for short duration and longer duration for two good results of grey. Third, one teaspoon of RIT Dye More in Graphite in a half quart of water, which was again purple and dark. I opted for RIT Frost Grey in the medium tone.

I pulled the figure apart at the major ball joints.

I had to do three batches since the water would boil off as I went: arms, legs, then torso/head as one unit. My end result was a 95% success. In an unexpected but promising turn, the joints turned darker and that would save me time trying to detail those. One calf and one forearm turned a slightly different shade of grey with more brown in it; the calf is the most obvious. The functionality was impacted slightly in that the ball joints are very tight now (I suspect the heat impacted the two types of plastic differently), except the head rolls about. :D I added some mini hold wax to the head joint and fixed that issue. I will add some lubricant to the other joints.

I will add further details and aging, but I am pleased with the results so far. I can work on the mismatched coloration, or perhaps he’s had an overhaul or two with not-quite-right replacement parts. :D
Categories: Bert's Depot, Droids and Robots
March 9, 2020 | 0 commentsRobox
While I was researching droid builds for inspiration, I ran across an action figure from 2018 called Robox. This is made by 1000toys and comes in white (pale grey) and black (military). I don’t think they are still manufactured, so I had to scout around until I found one on eBay.
Starts out as a box.
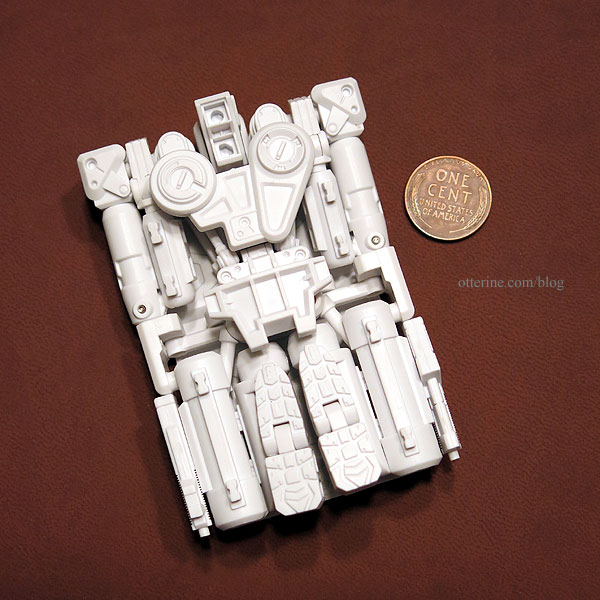
The back shield is removed first.
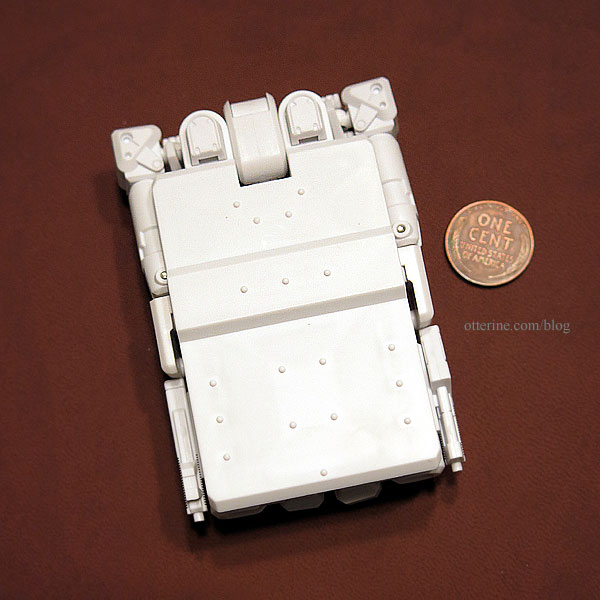
There are two weapons included but you wouldn’t know they were missing if left off.

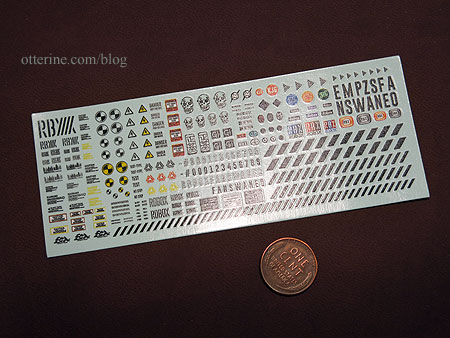
It also comes with decals.
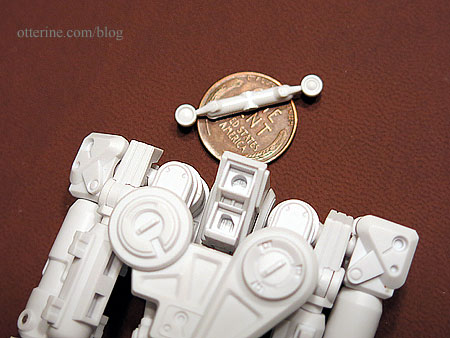
The eye pieces were not yet installed in the one I found, which is good since I’d like to do some customizing.
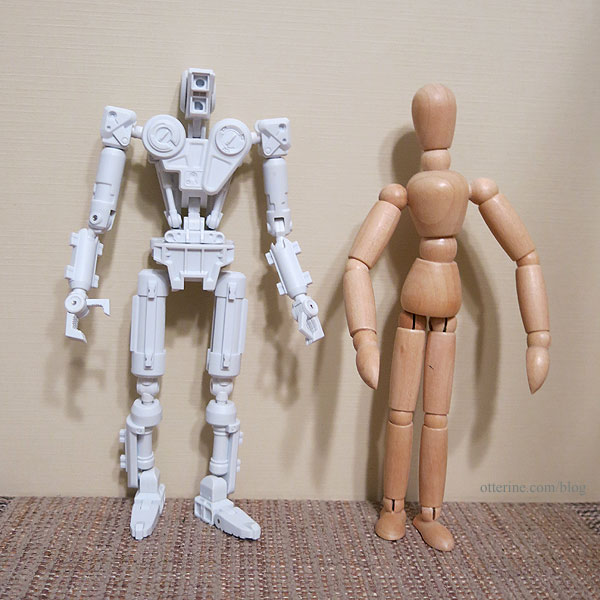
After unfolding, a fine robot appears! Here he is with the 5 3/4″ tall wood model. Robox (yet to be named) is much more flexible than the wood models.
He likes books.

And, now he’s going to help me make a martini! Olives, beware! :D
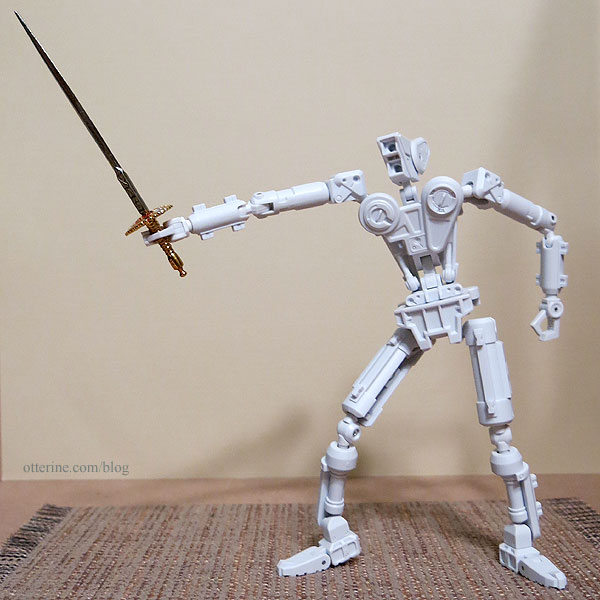
I think he’s a keeper. haaaaaaaa
Categories: Bert's Depot, Droids and Robots
February 25, 2020 | 0 comments
NOTE: All content on otterine.com is copyrighted and may not be reproduced in part or in whole. It takes a lot of time and effort to write and photograph for my blog. Please ask permission before reproducing any of my content. (More on copyright)

Robomeows!
Debora and her husband printed some robot cats I found online. They are perfect for Bert’s place. Links to the artists are: Kit-E on top shelf, Robotic Cat on lower shelf left, and Mechanimals-Cat on lower shelf right.

The cabinet kit is from Art of Mini, purchased at the Bishop Show last month.

I made a few changes but built it mostly to spec.

Categories: Bert's Depot, Droids and Robots
May 26, 2023 | 2 commentsCinder block trial
Back in 2020, when I first started working on this idea, I wanted an old cinder block finish inside and out. Now, using true mini cinder blocks would be extremely expensive and make for a heavy build. Egg carton brick is one of my favorite finishes, but I didn’t like the look of egg carton cinder block after I started. So, I’m trying something different this time: sandpaper over cardboard.
To make things easier, I’ve purchased a roll of 180 grit sandpaper already cut to 1 inch wide (as an Amazon Associate, I earn from qualifying purchases). Since it is a thinner material than I want, I also bought a roll of upholstery cardboard tack strip that is 1/2 inch wide.

Since the sandpaper is the length I want and the tack strip is the width I want, making the individual blocks should be pretty straightforward. I glued the tack strip to the back of the sandpaper, then snipped with scissors. Rinse, repeat. A whole lot of repeat….

I have a vision of where I want to end up, now it’s just a matter of trying out some techniques to get there. Making up a sample board seems to be a good place to start. I added a layer of spackling over the blocks, dragging a dowel between the blocks to mimic mortar, then painted grey.

I think I finally have it.

Categories: Bert's Depot
February 11, 2023 | 0 commentsRatty side door – tetanus shot suggested
In following with the aging of the garage door, I wanted a metal side door that would show its age, perhaps a few dents. The easiest material to use would be plastic. I cut two rectangles of 0.04″ styrene sheet. Using a lighter, I heated up random sections and pressed in with a butter knife to create dents and an awl to create dings.

I used 3mm styrene to make an internal structure between the two rectangles to make a hollow door. You can see the scorch marks on the back side from the lighter.

I started with grey primer to grab the plastic. I’m showing the exterior only until the end since it was the same process on both sides.

I then painted both sides with acrylic paints to create corrosion.

I masked random areas with Winsor & Newton Masking Fluid. This is a pricey fluid used for watercolor painting; it covers any space you want to remain white on a painting.

It dries clear, and you paint over it.

I started with gloss Cherry Red by Krylon. I used an eraser to lift the rubbery masking after the paint dried.


Since the paint was dry to the touch but not yet cured, it also marred the gloss finish — an added bonus. No new paint on this old door.

I applied masking fluid again, following the initial patterns loosely.

The next color was Rust-Oleum Deep Forest in satin finish, which has a lot of blue tones to it.

Removing masking…and you can see the red and corrosion underneath.

Racing Green by Tamiya was the next color, then final masking. The white portions are where the masking fluid is still drying.

This last time, some of the paint lifted to the grey primer. I used acrylic paints to reapply the corrosion layer over the grey primer areas and to dirty the bottom and lead edge where hands would be constantly touching the door.

I was originally going to go with a grey door, but how boring. haaaaaa! The exterior was finished with gloss Cherry Red by Krylon since I liked how it “aged” the first time around. I barely waited for the paint to dry this time before attacking the finish and removing the masking. I wanted a truly battered door. :D

I love the way the dents and dings turned out.

I went with Rust-Oleum Deep Forest for the interior. I masked very little on the interior after the third paint coat since it would have been more protected from the elements but still subject to wear and tear.

The bottom gets the most abuse from perhaps being kicked closed or ramming into things inadvertently left in its path over the years.

Spray paints have recommendations such as applying second coats within 2 hours or waiting for 48 hours to prevent crazing (wrinkling). Since I was within that “don’t spray” time, I achieved some crazing. Often when I try to get crazing, I can’t, and when I want a pristine finish, I get crazing. At least it worked as intended this time.
Now to build a frame….
Categories: Bert's Depot
August 16, 2020 | 0 commentsBullet holes in miniature
I thought an old garage door could use a busted window pane, so I drew a bullet hole freehand with an X-Acto blade.

I was rather pleased with how it turned out.

Just one hole in the window and one on the center of the panel. I didn’t want the garage to have been used as target practice. :D

Before installing the pane, I did some aging with spray painting, barely catching them with over spray to simulate dirt.

Categories: Bert's Depot
August 8, 2020 | 0 commentsRobox – dyeing trials
I bought the white Robox with the intent of altering the color to be more mechanical. The green (military) was darker than I wanted.

Painting is an option, but the figure can’t be taken apart other than removing at the shoulder, elbow, hip and knee ball joints. The head and ankles also separate but are smaller joints. The remaining connections have pins. That would make painting difficult and possibly disastrous, so I researched the possibility of using dye. It would still settle into joins, but it might be easier to control than paint.

I had two weapons and the shield to use for testing dye.

I bought a saucepan, tongs and aluminum trays for craft use only. I also had latex gloves and a clock with a second hand for tracking time. (Note: There are a number of product links in this post to the various dyes I tried. As an Amazon Associate, I earn from qualifying purchases from those links.)

The first attempt was with iDye Poly in silver grey. You are to use the whole packet which dissolves in water, but that is also meant for a large amount of fabric. I didn’t use the intensifier since I was looking for a lighter color change.

I decided to cut the packet open in a sandwich bag to use less. I started with a plastic teaspoon measure of the dye in a half quart of water.

After one minute in the boiling dye water, the color came out a dark violet purple. Not exactly what I was going for. I dumped that water completely and then used half the amount of dye in a half quart of fresh water. As expected, this made the plastic lavender. There was just more red in the mix than I wanted. What I did like was the subtle variation in coverage, which gave the items more depth and character.

I cut the shield into pieces for the remaining trials. Since I had three additional colors, I decided to try all of them to make the final choice. First, one teaspoon of iDye Poly in gunmetal in a half quart of water. This was just another shade of purple.
Second, two teaspoons of RIT Dye More in Frost Grey in a half quart of water, which I did for short duration and longer duration for two good results of grey. Third, one teaspoon of RIT Dye More in Graphite in a half quart of water, which was again purple and dark. I opted for RIT Frost Grey in the medium tone.

I pulled the figure apart at the major ball joints.

I had to do three batches since the water would boil off as I went: arms, legs, then torso/head as one unit. My end result was a 95% success. In an unexpected but promising turn, the joints turned darker and that would save me time trying to detail those. One calf and one forearm turned a slightly different shade of grey with more brown in it; the calf is the most obvious. The functionality was impacted slightly in that the ball joints are very tight now (I suspect the heat impacted the two types of plastic differently), except the head rolls about. :D I added some mini hold wax to the head joint and fixed that issue. I will add some lubricant to the other joints.

I will add further details and aging, but I am pleased with the results so far. I can work on the mismatched coloration, or perhaps he’s had an overhaul or two with not-quite-right replacement parts. :D
Categories: Bert's Depot, Droids and Robots
March 9, 2020 | 0 comments
NOTE: All content on otterine.com is copyrighted and may not be reproduced in part or in whole. It takes a lot of time and effort to write and photograph for my blog. Please ask permission before reproducing any of my content. (More on copyright)


