It might seem strange to start the landscaping with the mill in dry fit, but this will help me visualize how the mill will look in the end. I want a relatively steep landscape for the mill, considering the base board is 20″ square. I used layers of 1/2″ thick builders foam. I used a freshly cut whole piece for the bottom layer, but the other layers were made from scraps to use up the scraps. I used Weldbond glue to attach the layers and then pressed it flat with magazines overnight.
I’m 95% sure I want to do a wood shake exterior on the mill. I made a support system from 1″ plywood strips, adding a couple spare pieces of mdf that will help hold it in place when I glue it later on.

I cut pieces for the increase in slope to the door and added a rounded step at the top. Some of this might change in the end, but it helps to have it roughed in for now.

These pieces will stay loose until later on so I can further shape them for the final landscaping.
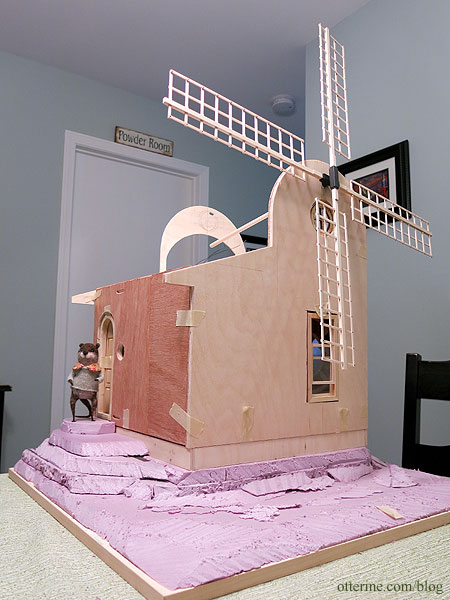
In the front, I want a bit of relatively flat land for some fun features to be revealed later. I think this is a good start, very tall and stately. :D

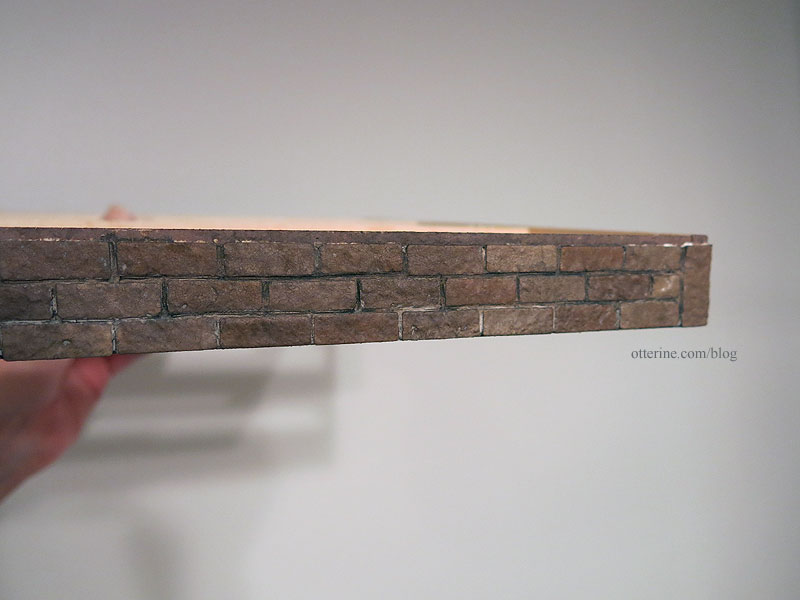
I had egg carton bricks on hand, so I didn’t bother to reinvent the wheel. Most of the time, I will measure my board and determine how many bricks across I need and adjust the measurements accordingly. It’s a small foundation, so I didn’t think it would matter much once landscaping is in. Since my bricks didn’t end well at the corners, I opted for corner stones cut to fit.

I chose brown based bricks instead of my usual brick red. :]

I started with an even brown base.

I then stippled on the other colors to create variations before sealing with Delta Ceramcoat Matte Varnish (which always dries shiny with how it is applied).

After it dried, I grouted with spackling.

I added a couple of dark brown and black washes to tone down the grout, then finished off with a spray of Testors Frosted Glass to dull the finish. There will be more aging during the landscaping process, but I love how it looks so far. You can still see the subtle color differences.