Time to cut the window, door and ceiling openings. I started with the simplest of the openings — straight cuts. I centered the lower front window under the windshaft and positioned it relative to the circle library for balance. I cut the opening with the Dremel Multi-Max using a 3″ wood/drywall blade. I like that it’s a straight blade so the cuts are relatively straight, but you have to watch you aren’t cutting at an angle. The vibration is heavy, though, so it can be hard to hold a long time as it makes your hands numb.
I cut holes in the ceiling board for the dumbwaiter and ladder with the Dremel Multi-Max. These edges will be lined with wood trim during finishing.
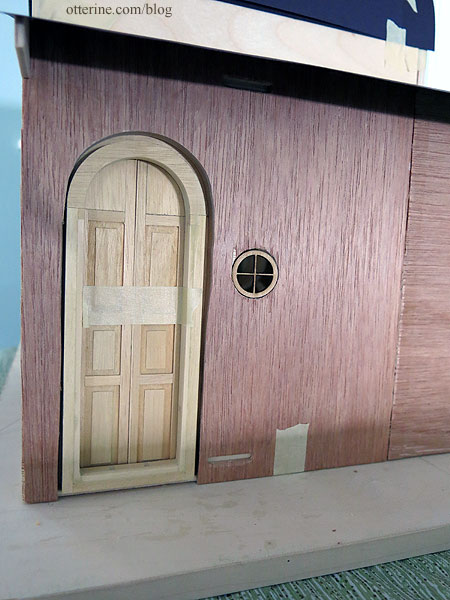
I positioned the arched door far to the back to leave as much space forward as possible while still having some room toward the back. I cut the straight sides with the Dremel Multi-Max and then cut the arch with the scroll saw. I made it larger than necessary to have some room to move it slightly. I also decided to put a tiny round window next to the door so Gustav can see who’s-a-knockin’ at the door. :D This the 1 1/8″ Simplicity Window from Heritage Laser Works.
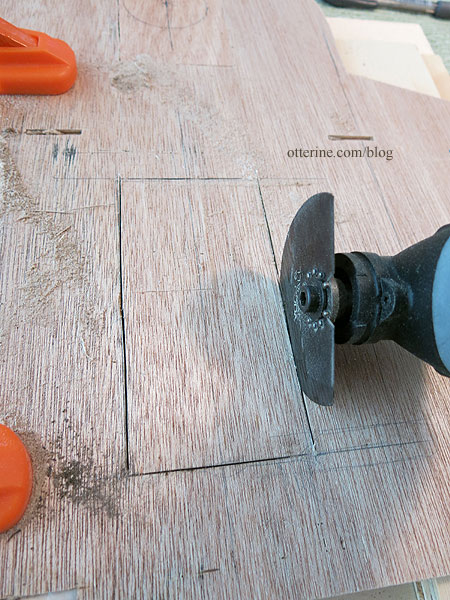
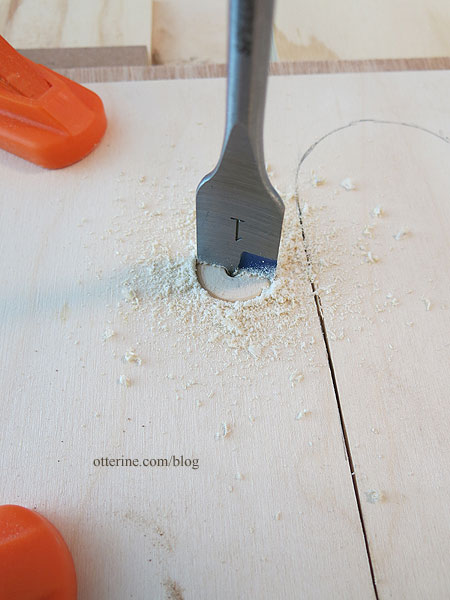
For this hole, I used a 1″ spade bit.
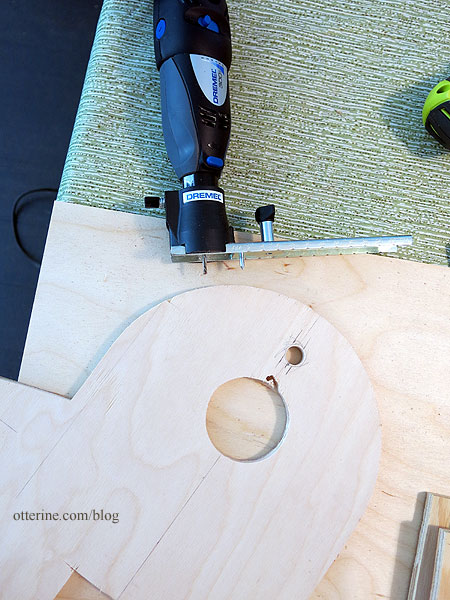
I’ve cut circular openings with the standard Dremel before, so that’s what I’ve used for the bedroom window, which is a 2 1/4″ Simplicity Window from Heritage Laser Works.
In my class with Tom Walden, I learned to make multiple passes with the Dremel to get a clean cut. That was my issue the first time I tried cutting circles; I tried cutting too much thickness at once. My issue this time was not checking the knob holding the pivot point in place after the first cut. The vibration loosened it, so it was cutting a larger circle than I wanted. I didn’t notice this until it was full on traveling outside the circle.
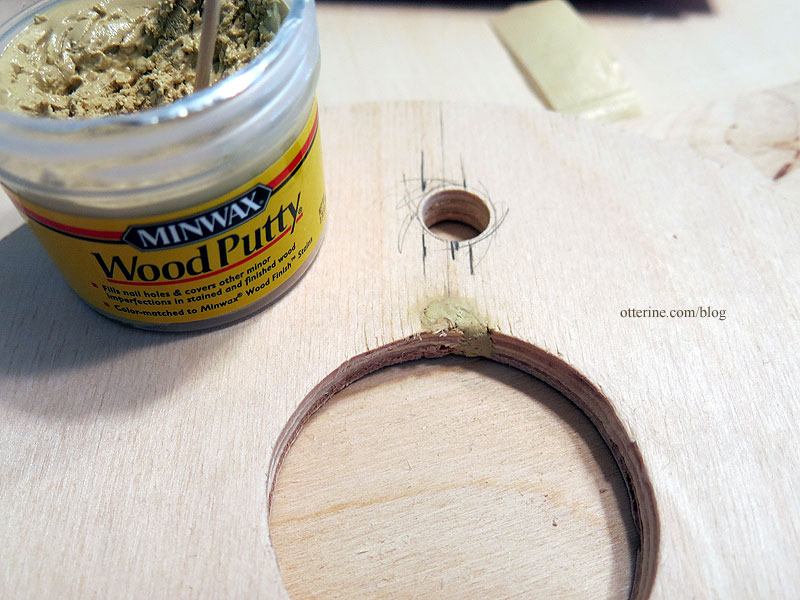
This is a fairly simple fix, though, so I just shrugged. I still swore, mind you. :D I filled the wayward hole with wood putty. I’ll wrap some cardboard circles to fill in some of the diameter of the hole. It will all be covered by interior and exterior finishes in the end.
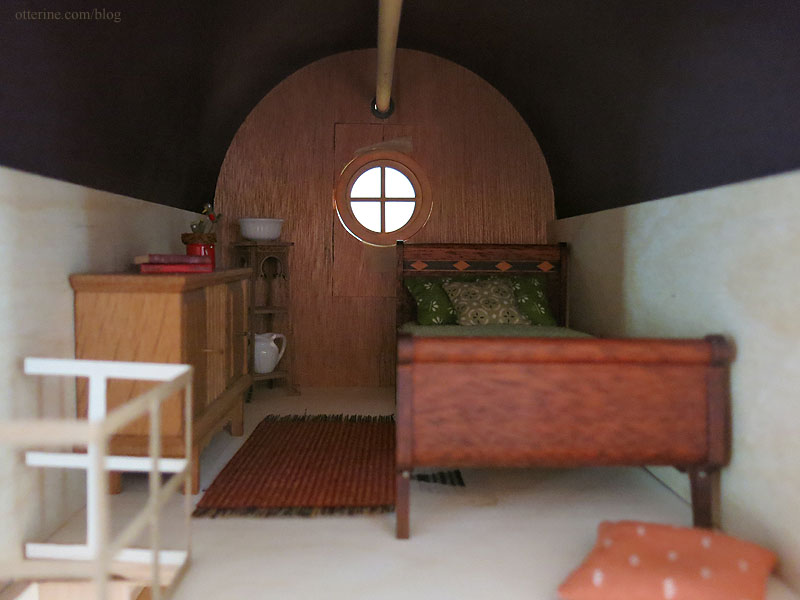
There will be interior lighting, but I wanted to see how these openings effect the natural flow of light inside the mill. Back into dry fit. While another front window would be lovely, it would cut down on wall space, which is at a premium as is. I’m planning some shelves above the trolley, which may be replaced since it is a rather wide piece for the space.
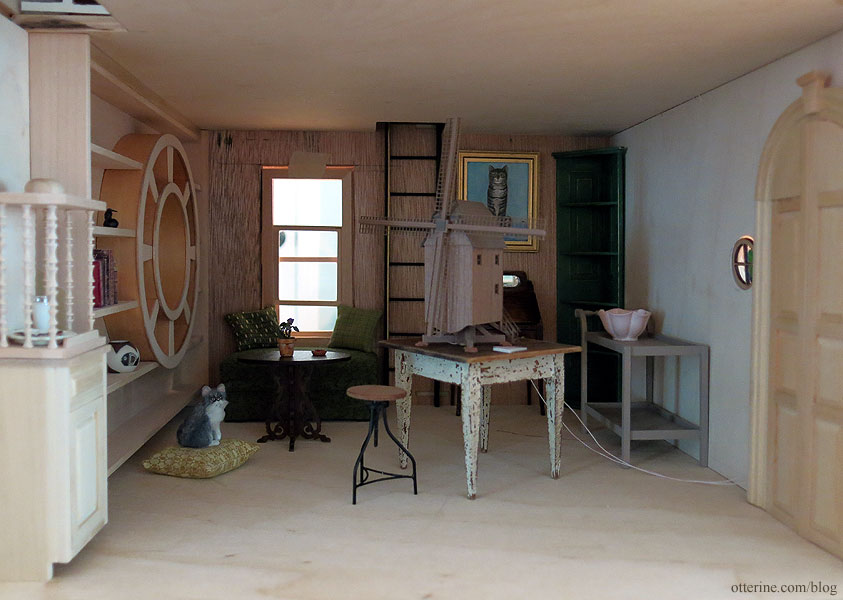
Since the white paper I was using for the roof allowed light in, I tested the dry fit with black paper this time around. The bedroom is dark, but I think it’s cozy. With some added lamps, I think it will be just fine. Plus, the ceiling won’t be black in the end. I’ll skip adding any side windows here, therefore preserving wall space for decorating.