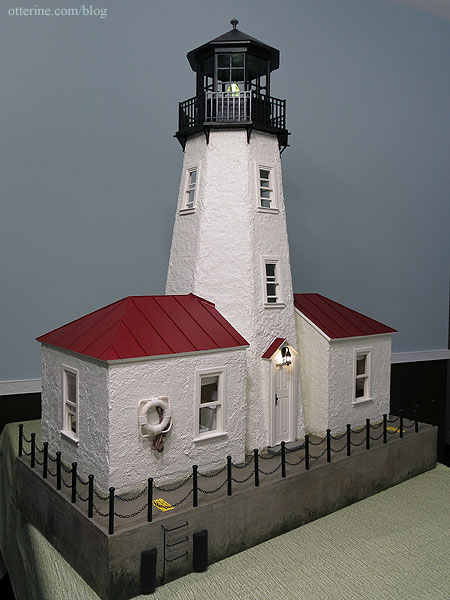
Walnut Bay Light was built in 1888 and serves as an automated aid to navigation to this day. The lighthouse and attached quarters are located offshore, accessible only by boat. The residence was last occupied in 1970, after which the light was automated. The structure fell into disrepair and was scheduled for decommissioning and dismantling in 2001. It was sold to the newly formed Walnut Bay Light Foundation for $1 with the stipulation that the tower and residence be restored and maintained. It is now listed on the National Register of Historic Places.
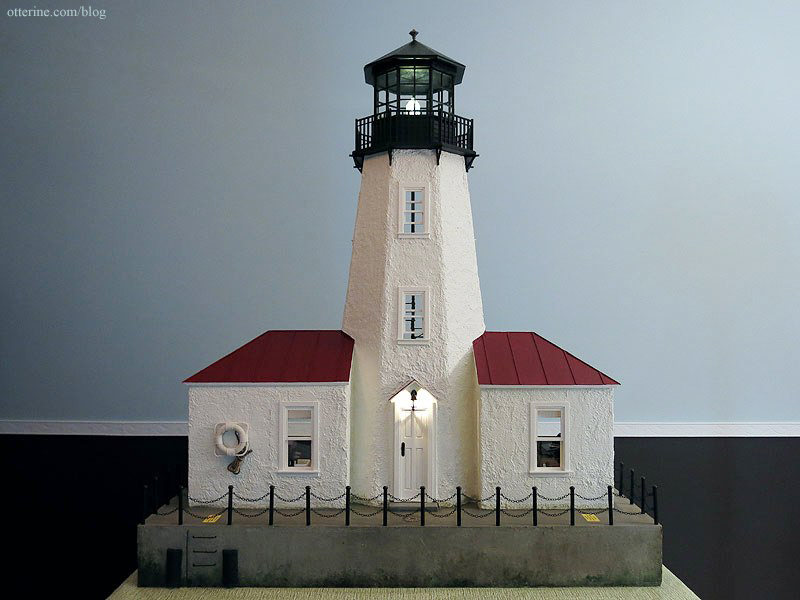
It is one of the few lighthouses offering weeklong stays, and the schedule has been full since the lighthouse opened to the public in late 2003 with a waiting list requiring reservations months in advance. While many of the original furnishings and details were lost to time or moved to other locations and museums, the Walnut Bay Light Foundation has tried to invoke the feeling of years past with its restoration while allowing for a comfortable stay. The electricity has been modernized as well as the plumbing, though it might not seem that way compared to the daily comforts you might be used to enjoying.
The boat will take you to the lighthouse on Monday and return the following Sunday to bring you back to shore. During your stay, there are lightkeeper’s duties to perform and a log book for recording your experience at the lighthouse. There are provisions in case of emergency, but you should be prepared for a self-sufficient weeklong adventure and a trip of a lifetime!
——————-
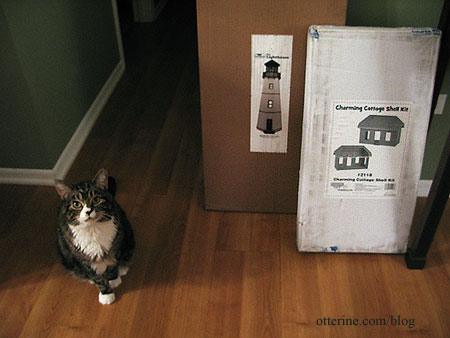
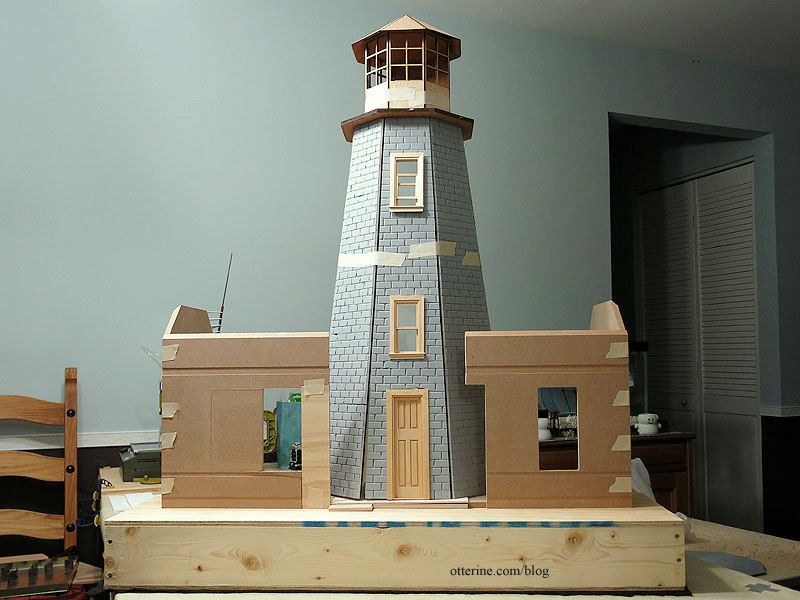
This is where Walnut Bay Light began…the Creatin’ Contest Charming Cottage and Greenleaf Lighthouse dollhouse kits (purchased during HBS‘s generous April Fools sale).
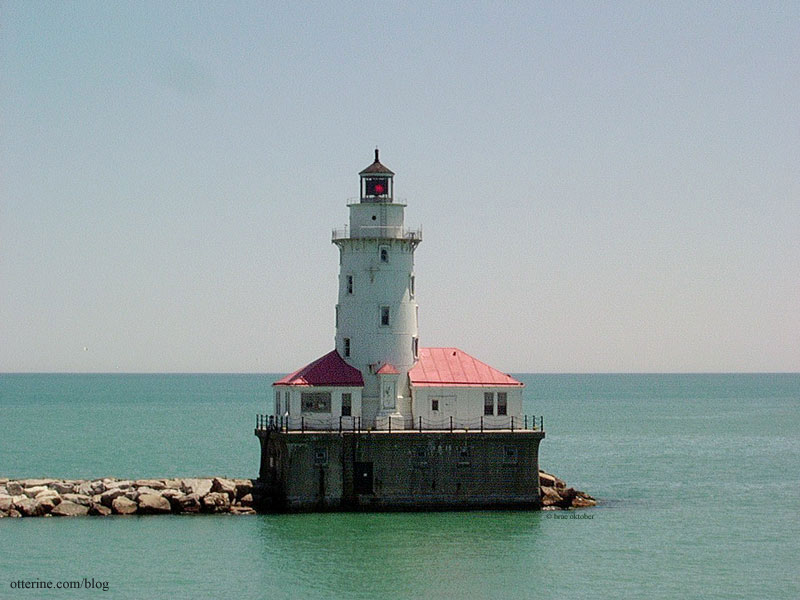
Walnut Bay Light was inspired by Chicago Harbor Light, which has a tower flanked by a lower building on either side. Originally, I thought about putting the lantern room topper on the existing cottage roof, but when I saw this photo, it was all over from there. :D
I’ve also photographed this lighthouse up close on a harbor cruise.
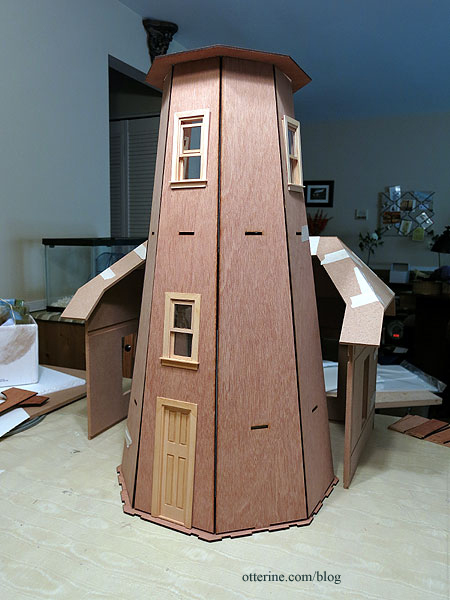
Since I planned to have a substantial base, I cut part of the first floor of the lighthouse tower down. I replaced the kit windows and door with Houseworks working attic windows and narrow door.
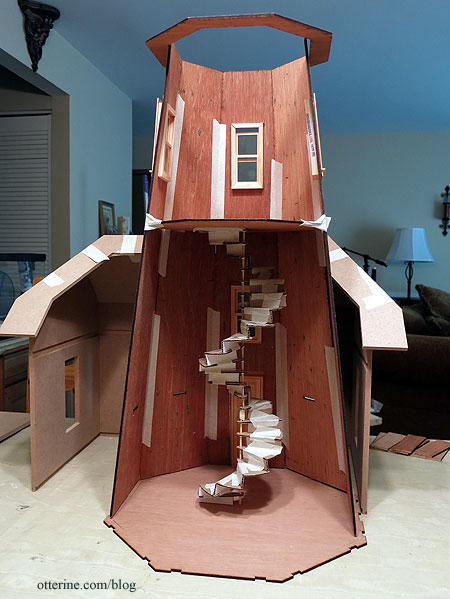
This eliminated the middle floor in the lighthouse tower, which meant I needed a breakneck staircase to access the upper floor. That’s my initial mockup of the spiral stairs in cardboard, tape and bamboo skewers. Yes, there was math involved, but it worked out really well.
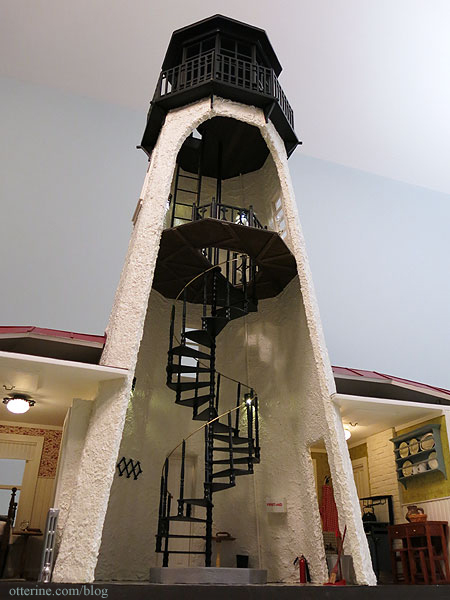
I got about this far when my condo got struck by lightning. I hadn’t worked on the kits since I had originally planned to enter the Greenleaf Spring Fling contest as well. Work ceased on both projects at this point since there wasn’t much room at the hotel where I stayed and the stress of it all zapped my creative energy.
Fast forward two months, and work was able to finally begin again. So, yes, this build was done in roughly a month and a half. :O I had a week’s vacation planned for the end of October, and I spent most of it working on Walnut Bay Light. I had applied 3/16″ thick Cellfoam 88 and carved stone in the surface since that worked so well for The Aero Squadron Lounge. I planned to stucco the entire lighthouse and keeper’s quarters, and it ended up not showing through as much as it had for the Lounge. Oh, well.
The 16.25″ tall spiral staircase is scratch built from textured and smooth plastic sheet, an orchid stake, wood beads and spindles, jewelry findings and brass wire. (Detailed post here.)
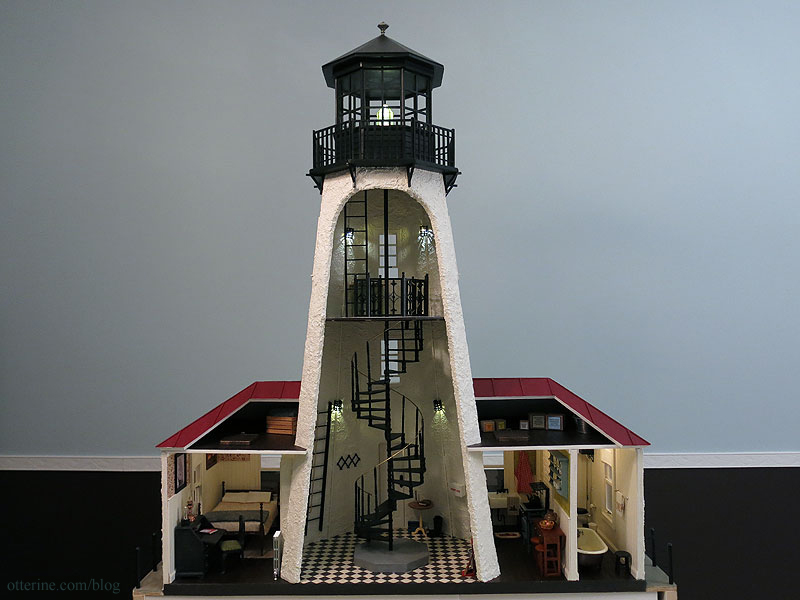
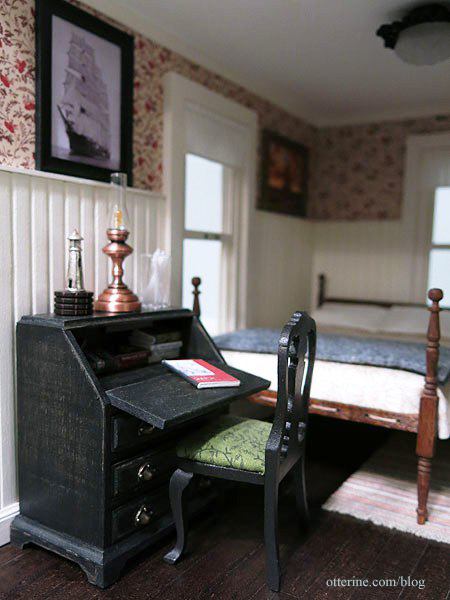
I planned the living space on either side of the tower. For the bedroom, I planned on a full bed (a twin was used in the mockup), bedside table, dresser (around the bend of the tower), desk with chair, and a potbelly stove.
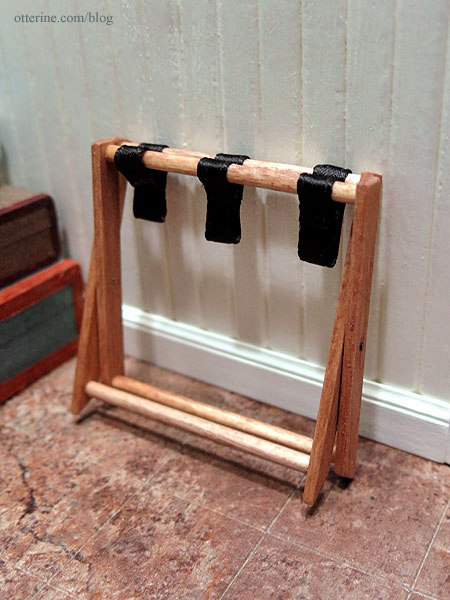
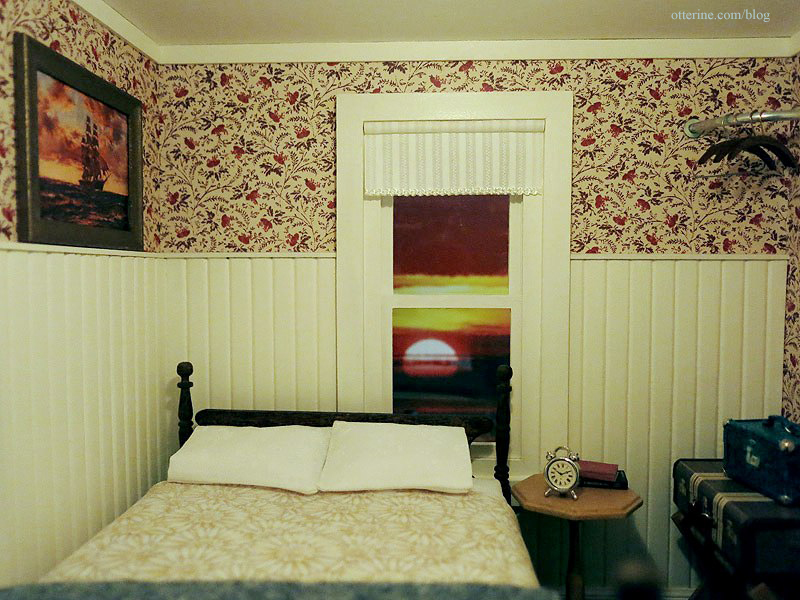
I ended up removing the dresser for a corner closet bar with hangers and a suitcase valet. Suitcases by Fran were borrowed from the Haunted Heritage attic.
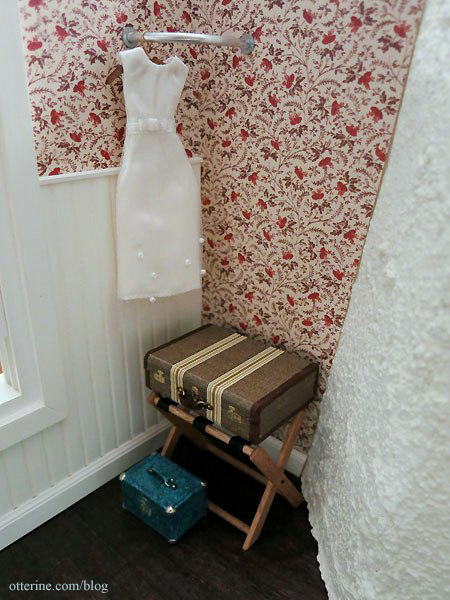
Yes, it folds for storage! :D
I ditched the potbelly stove for a Chrysnbon radiator since there was no place to put it other than to have it vent right into the tower.
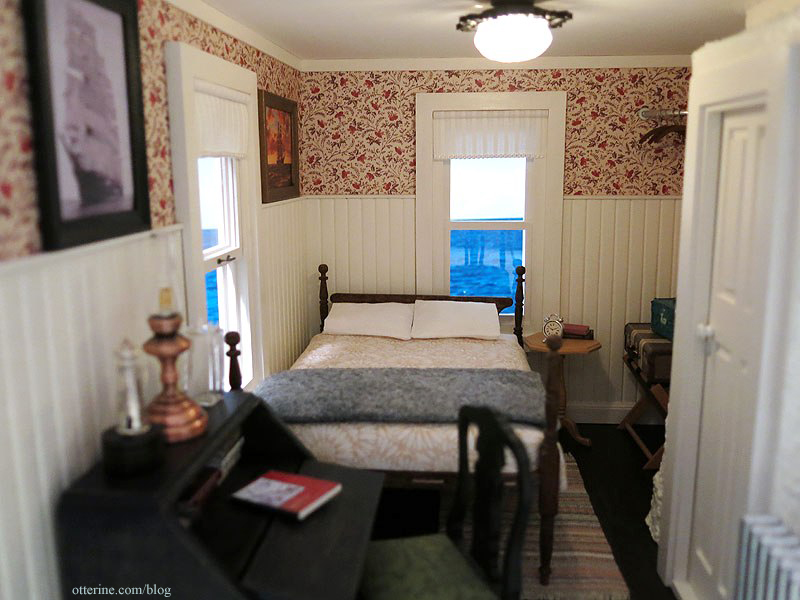
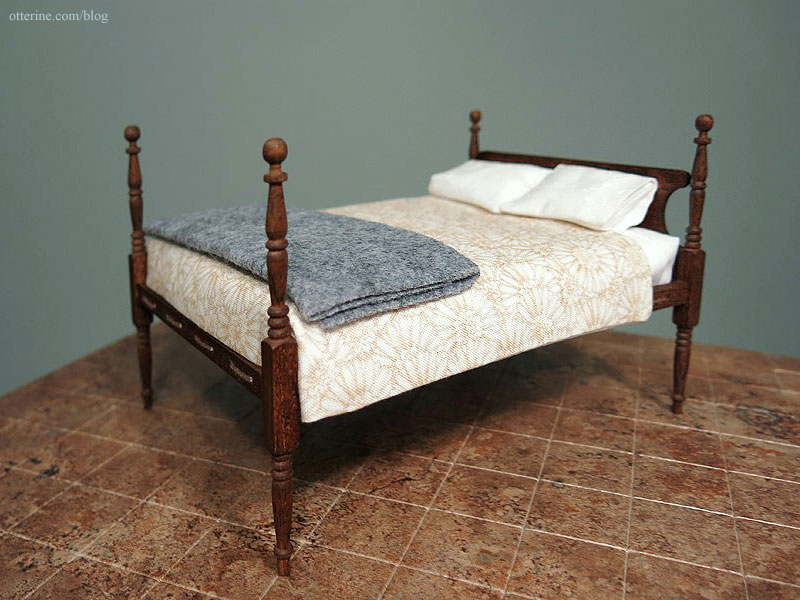
The Colonial four post double bed is a kit from HBS. I used the kit’s foam mattress, covered it with millinery batting, plain white sheets, a sunflower printed bedspread and a wool blanket made from heather grey felt.
The desk was made from a House of Miniatures kit. I think the distressed black and heavy hardware make for a perfect Captain’s desk. I have another chair in mind for this room, but I didn’t have time to finish building it. The stand-in isn’t exactly bad, so it will likely stay. :] The rug is from Manor House Minis.
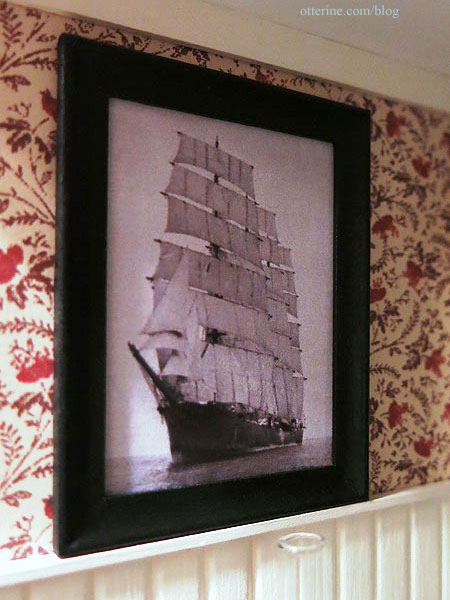
The photograph is In the lee of the port bow of the ‘Parma’ while becalmed from the National Maritime Museum.
I made the roller shades from fabric, Woodsies small dowels and thin lace trim. I love this room!
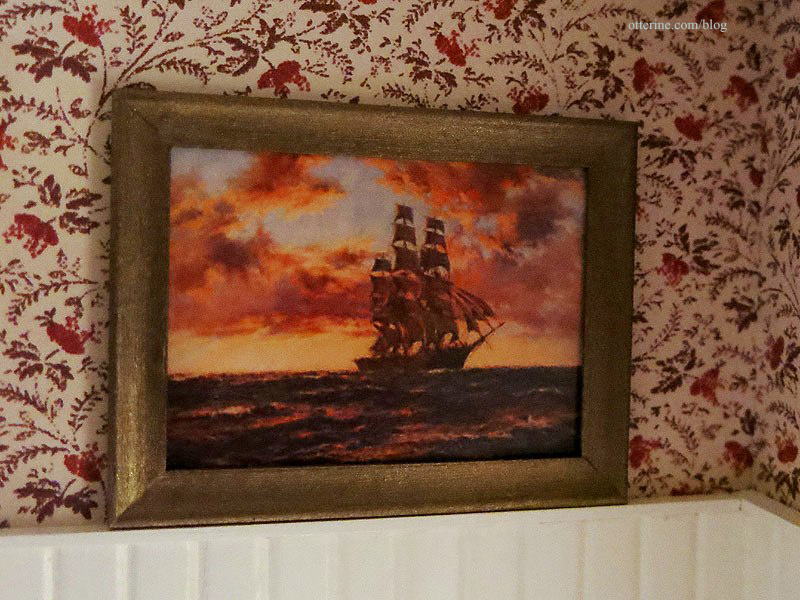
This painting is The Tall Ship ‘Clipper Kaisow’ by Montague Dawson.
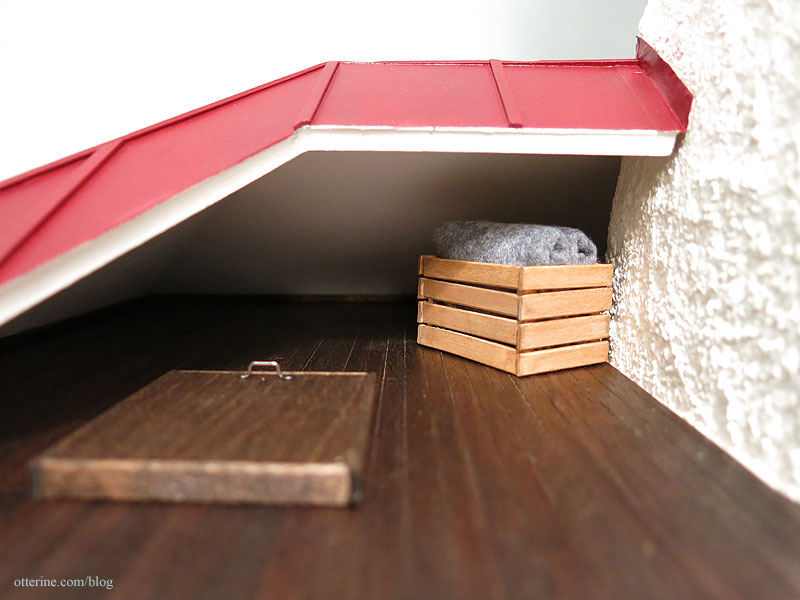
The attic above the bedroom holds two extra wool blankets in a wood box made by Lyssa. :] I didn’t add permanent light fixtures in the two attic spaces since they are so open and small.
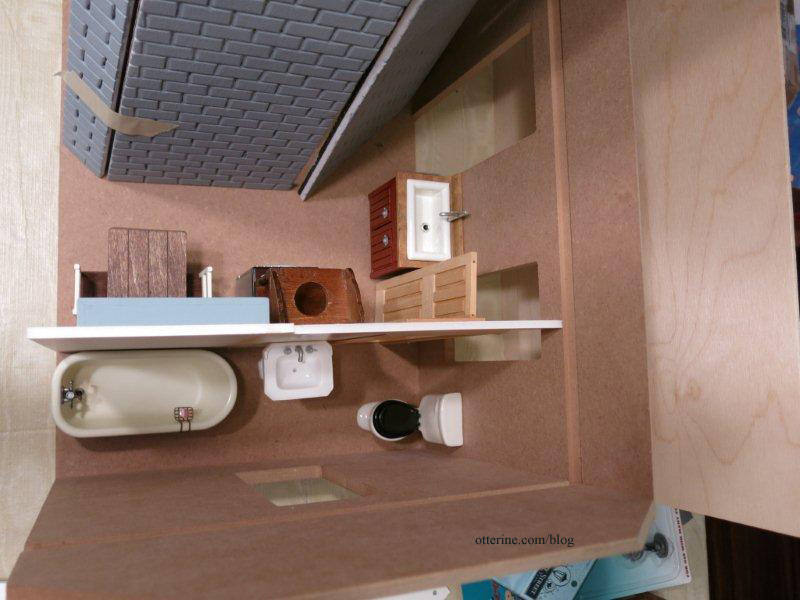
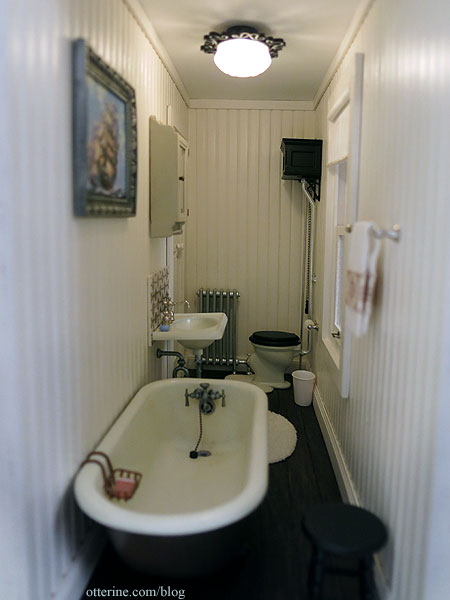
On the other side of the tower, there’s a modest kitchen and a very narrow bathroom. If you notice, I forgot the refrigerator in my mockup.
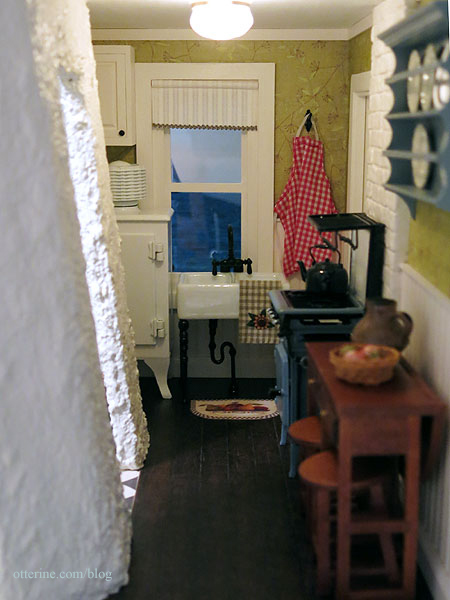
I thought about adding an old fashioned ice box but went with the monitor top fridge instead. There was just enough room for an HBS upper cabinet after moving the window opening over on this front wall. On the right, there is the Daisy House wall hutch I made and a gateleg table and stools from HBS. I had planned to paint the table and chairs but ran out of time. I had made the apron for the Heritage but didn’t have room for it.
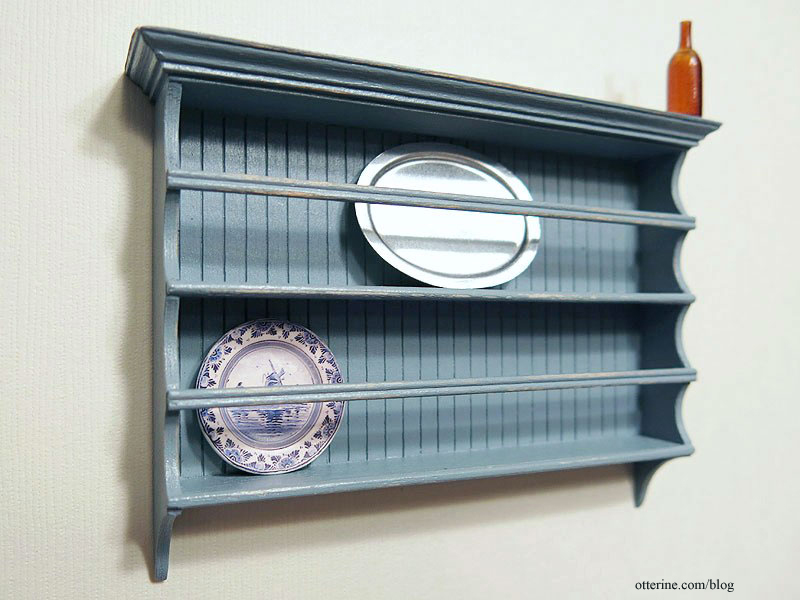
The Daisy House hutch kit was easy to assemble and has a lot of character.
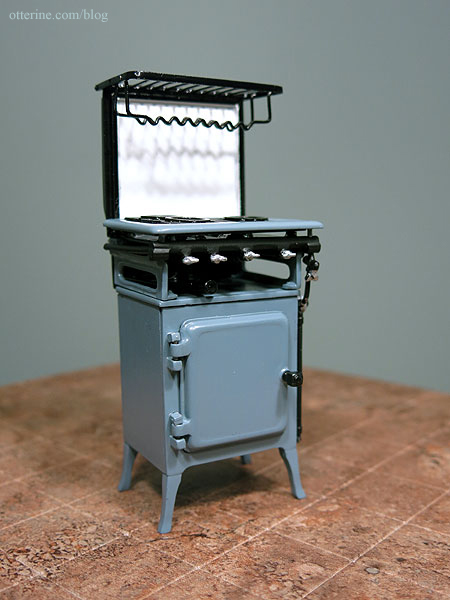
The stove is a Phoenix Models Metro Gas Cooker from New England Miniatures. I think I need some pots on pegs above it.
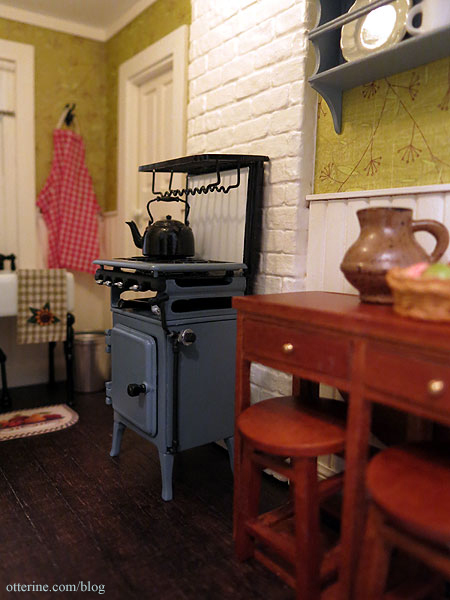
This was not an easy thing to put together, and I still need to do some altering. It’s gorgeous, though rather pricey for an unfinished piece.
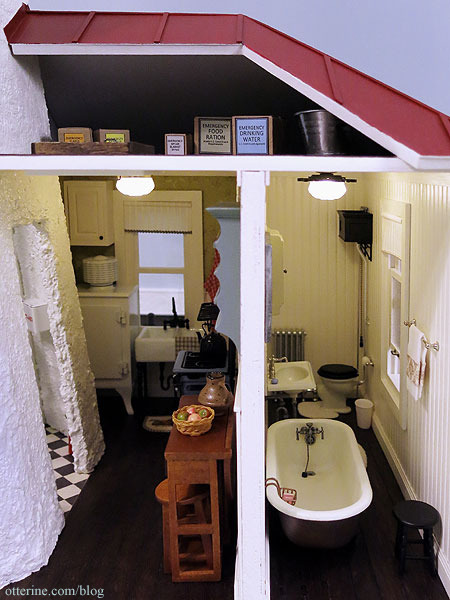
If you’ve ever stayed at an old B&B, this bathroom might actually seem spacious. I joked that this was perhaps renovated from the former dry pantry.
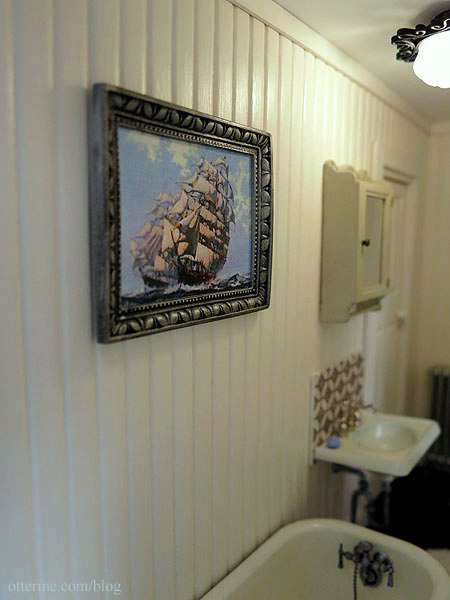
The artwork is Ariel and Taeping by Montague Dawson.
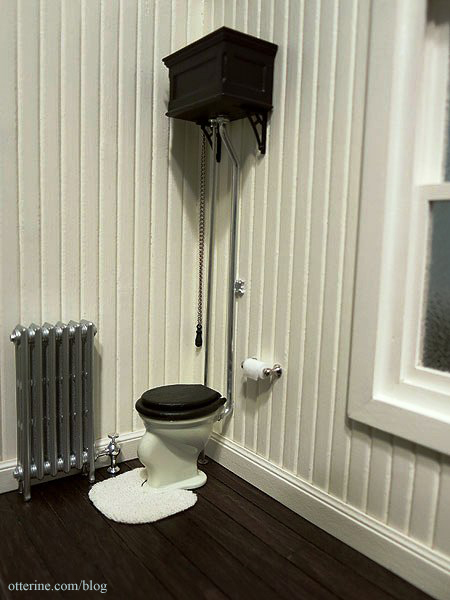
The loo had to be put in place before I could close up the room, so it and the radiator are permanent. Yes, that’s real tissue paper on the holder. :D
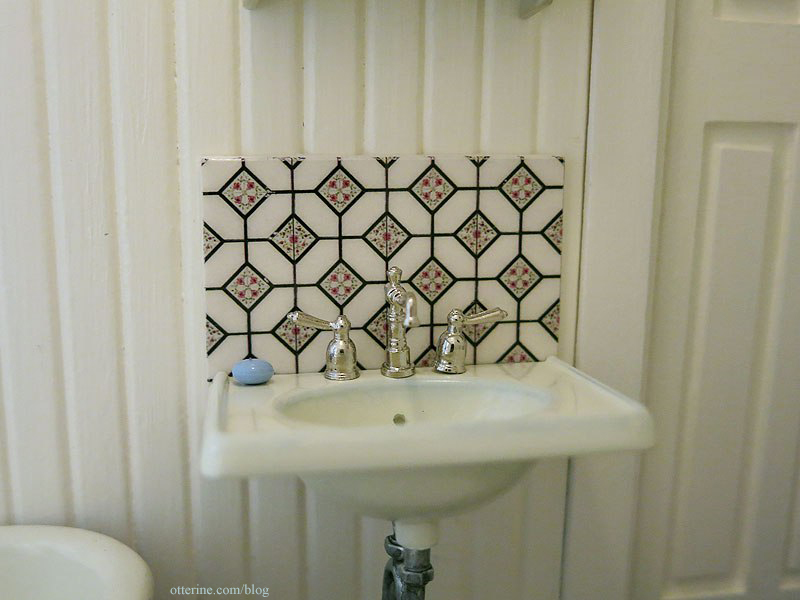
But, I borrowed the Heritage bathtub since the work in progress tub (which is nearly identical but newer looking) was not finished in time. I modified the sink to have a tile backer and used an HBS chrome faucet set. I have this very set in my real life bathroom. :] I still want to add some further detailing, so the sink is not yet glued together permanently.
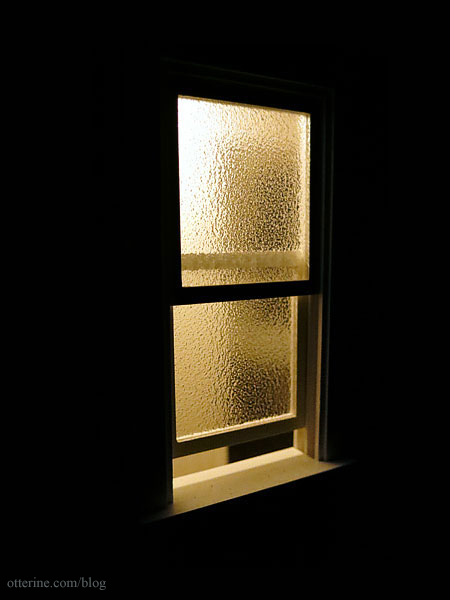
The textured glass window was made using two layers of rippled water sheet from HBS in place of the acrylic inserts included with the Houseworks working window. Just the right amount of privacy for the bathroom. We don’t need someone falling backward over the railing after getting an eyeful! :D
The attic above the kitchen and bathroom holds emergency supplies. These started out as mini cardboard boxes from HBS. I added the labels.
Once I had my room dimensions, I cleaved the cottage in half. I moved the left window toward the center and filled in the floor beneath the tower (I later removed the overhanging piece from the right front). No turning back now!
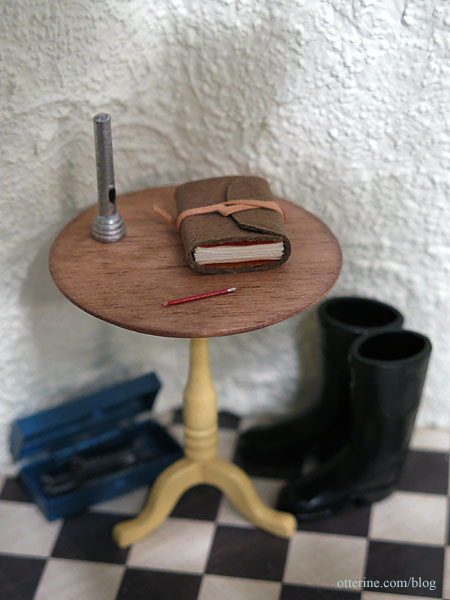
The main tower doesn’t have a lot of room for miniatures, so I tried to place a few important items. On the lower level, there is a small House of Miniatures side table with a flashlight, log book and pencil. I want to still make a radio for this part and add a few more accessories. Underneath the table is a pair of boots (Manor House) and a toolbox (HBS).
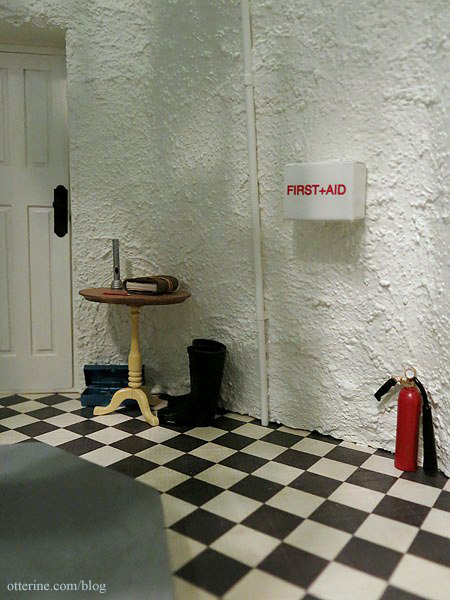
To the right are a First Aid box and a fire extinguisher.
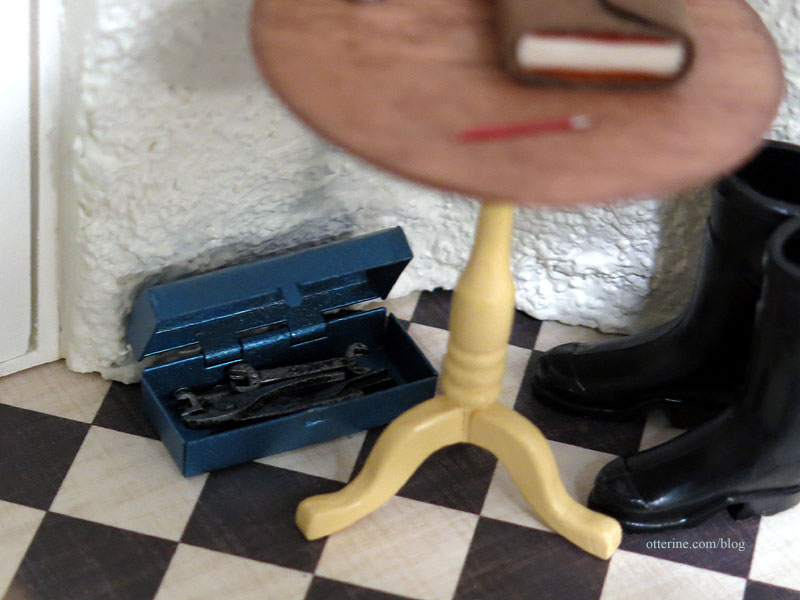
Inside the toolbox are the tools I picked up from Wright Guide Miniatures at the Bishop Show.
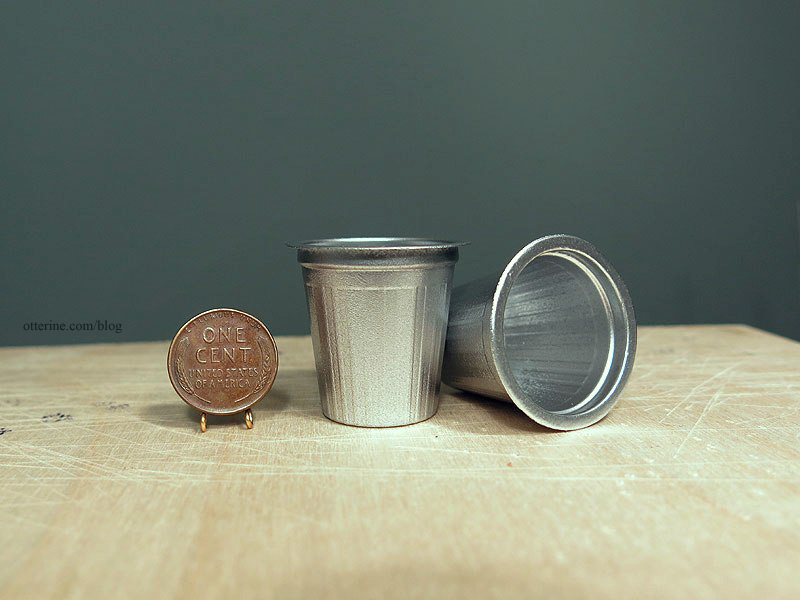
By the door to the kitchen, there’s a broom and dustpan from D’s Miniatures as well as one of my creamer trash cans. :D The other trash can is in the kitchen but hard to see in the corner.
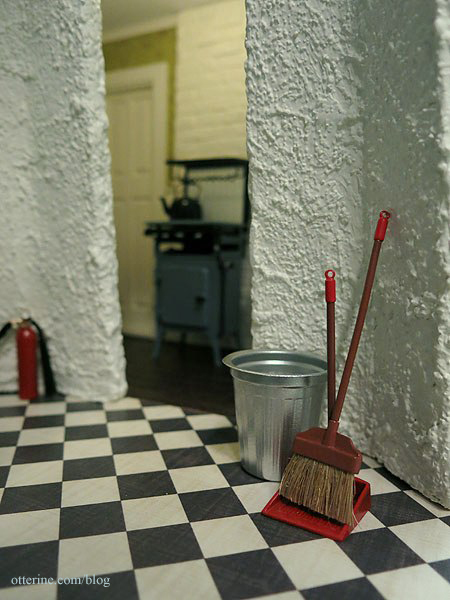
I love these! :D
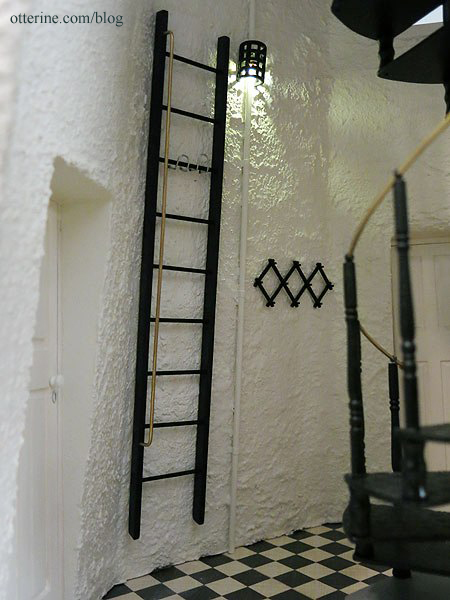
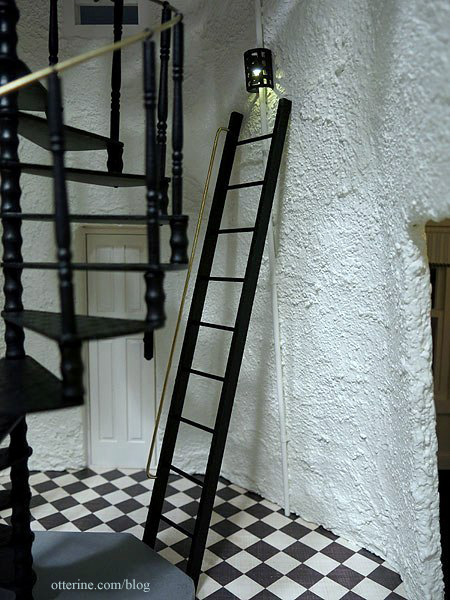
The left side has a Chrysnbon coat rack and a scratch built ladder on holders made from paper clips.
The ladder gives you access to the window above the door.
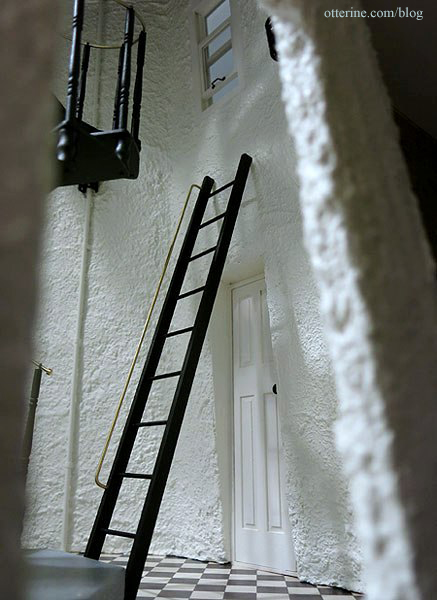
It also allows you to change the lights.
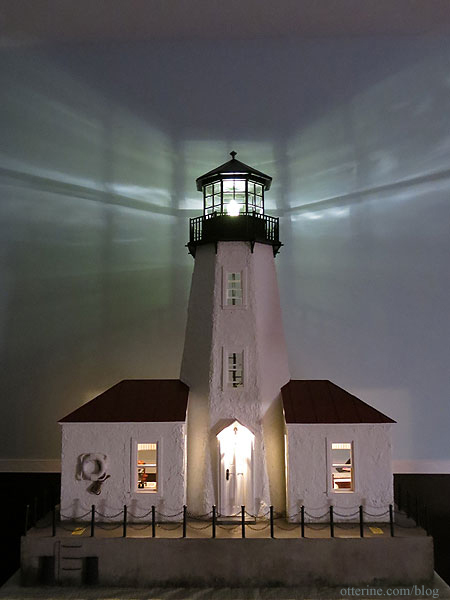
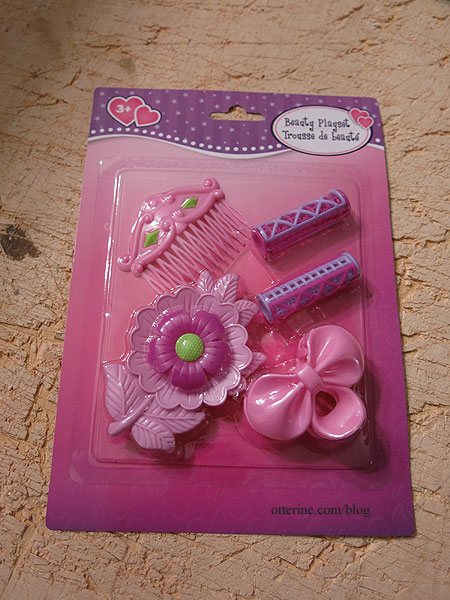
Speaking of the tower lights…those are made from doll hair rollers from Dollar Tree. :D
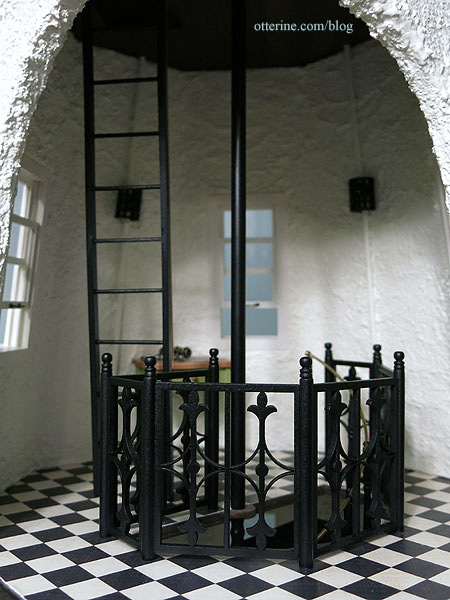
Here’s the upper floor, which is very hard to photograph. The conduits don’t actually hold the wiring in this build – strictly for show. The fancy railing is made from wood dowels, Tiny Turnings and Laser Tech railings.
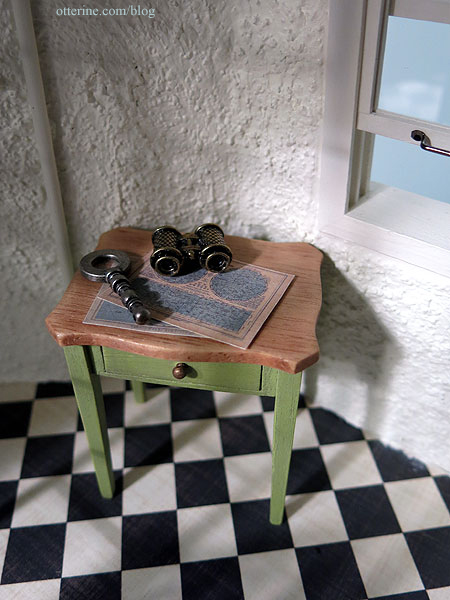
I built the Hepplewhite Serpentine Table, the star charts are from L Delaney, and the magnifying glass and binoculars are jewelry findings.
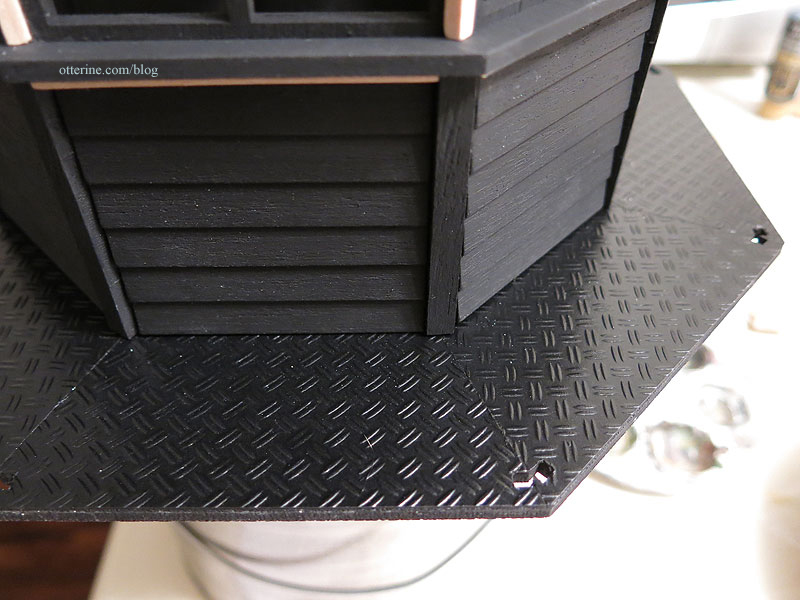
The lantern room straight out of the box was great, but I did make a number of modifications to it. Since this is a solid room (no open back) and I planned to have a lighted Fresnel lens inside, I needed the room to be removable and therefore solid. Basically, I added siding and a lot of trim to the lantern room itself. Here you can see I added double diamond plate to the exterior landing. (You can find my post of tips and tricks for the tower assembly and lantern room in this post.)
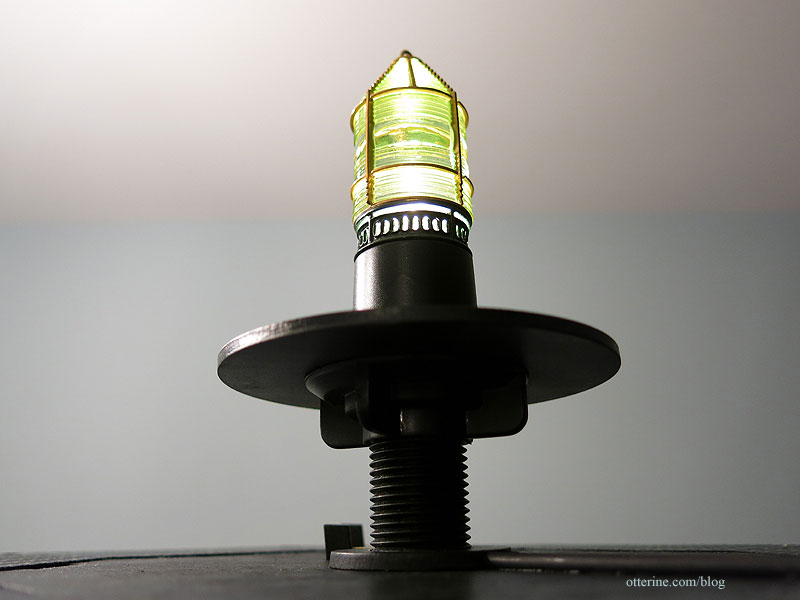
I’ve used small Fresnel lens Christmas ornament (one of a set of four) by Harbour Lights. These are a little on the small side but more workable than the larger models I have. These are no longer made but you can find them on eBay from time to time.
I built a support mechanism for the lens from a kitchen spray hose guide from Home Depot and some mdf circles from the scrapbook aisle at Michaels. You should have seen me wandering around Home Depot just looking at all the components in the plumbing and electrical aisles. I must have been asked a dozen times if I was sure I didn’t need help. I wanted something that looked mechanical and gave the illusion of having the ability to rotate.
The ornament has a solid core and no way for a lightbulb to sit inside the lens. I used the Cir-Kit lighthouse beacon, which had to be wired separately from the rest of the lights. It comes with its own control box and transformer. (You can see my full post on the Fresnel lens here.)
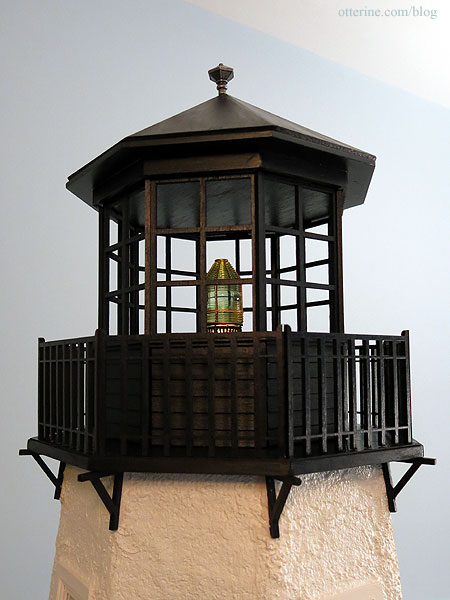
The lantern room base, outer railing and Fresnel mechanism are fixed to the tower, but the lantern room and roof lift off. I left the acetate out of the lantern room. I like being able to see the Fresnel lens without light reflecting on the window surface. The lantern roof has a small knob finial as a finishing touch. Love it!
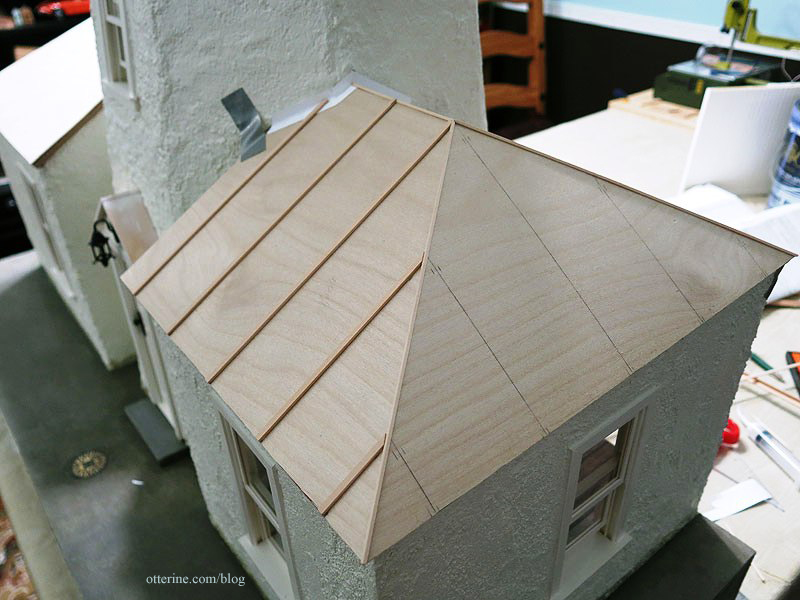
The original roof had more of a cottage style. I cut down the front and back kit pieces to fit around the lighthouse and cut new side panels from foam core board since the angle had changed and the kit pieces would no longer fit.
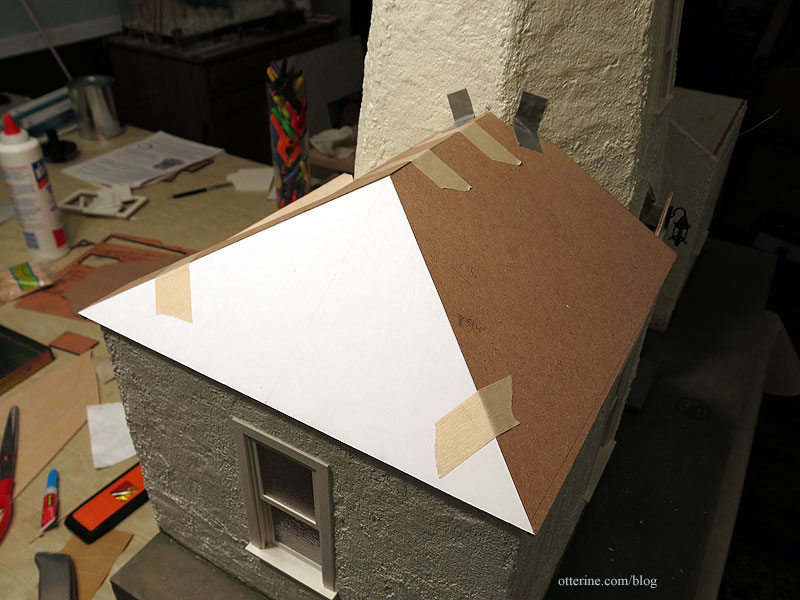
I then covered the assemblies with 1/32″ birch plywood veneer and 1/16″ x 1/8″ strips.
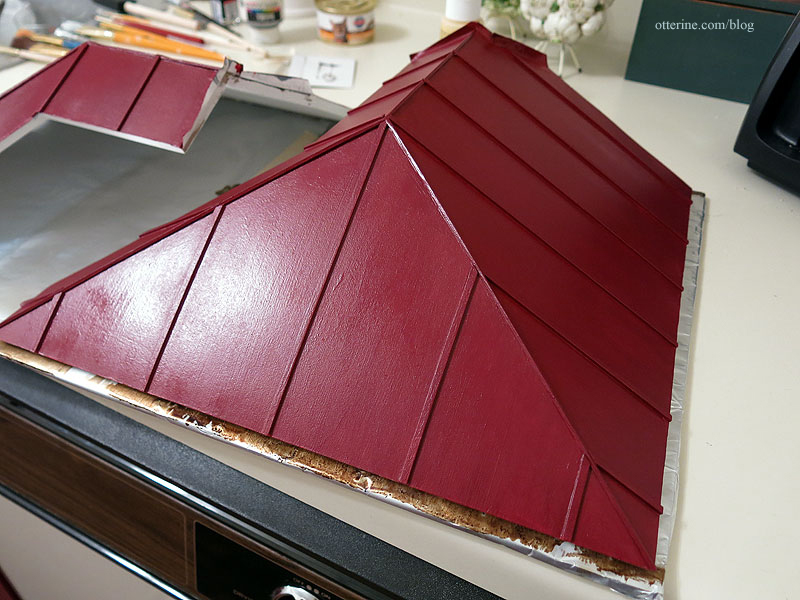
Painted Alizarin Red by Americana followed by satin varnish, the roof looks like metal. Tyvek strips serve as flashing.
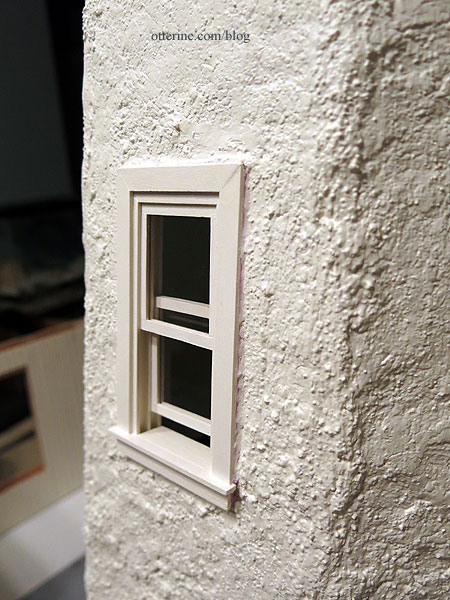
I used stucco patch from Home Depot for the exterior surface and painted it with leftover Benjamin Moore White Chocolate. It’s the color of my upper kitchen cabinets and has a wonderful semi-gloss sheen – no extra sealing required! It was nearly identical to Warm White by Americana topped with Delta Ceramcoat satin varnish, which is what I used for the trimwork throughout.
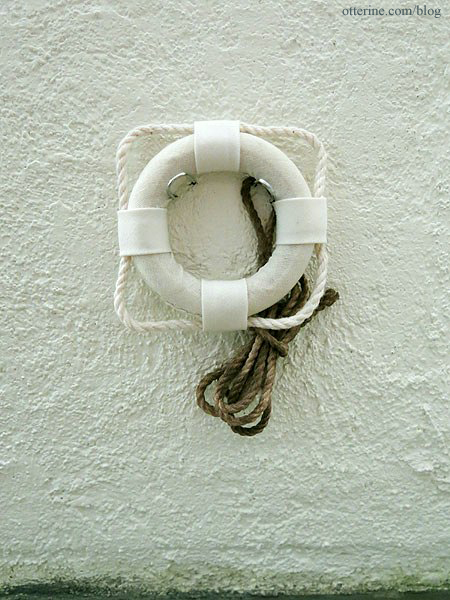
The nautical items are from Fiddly-bits Miniatures. The metal holders are the cut ends of large paperclips.
The big base started out as wood and now looks like weathered concrete with a nice coating of algae. The railing and ladder are made from brass rod painted black and brown. The boat bumpers are made from a foam hair roller. The eyelets at the top of the ladder allow the chain to be removed for access to the breakwater.
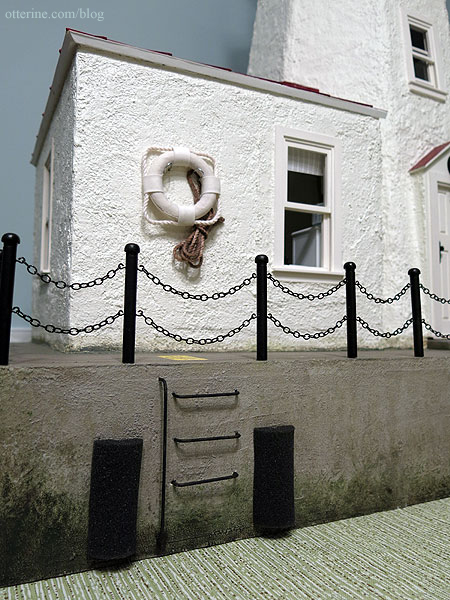
The railing is made from wood mushroom buttons and 1/4″ dowels from True Value, jewelry eyelets, Woodsies tiny dowels and chain from Michaels, and spray paint. I love my scroll saw – 26 dowels all cut to size in a matter of minutes. Drilling all the tiny holes, however, took a lot longer.
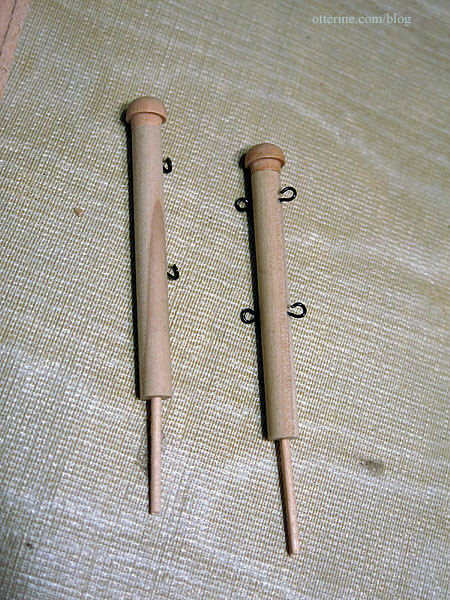
It was a lot of work but well worth the effort.
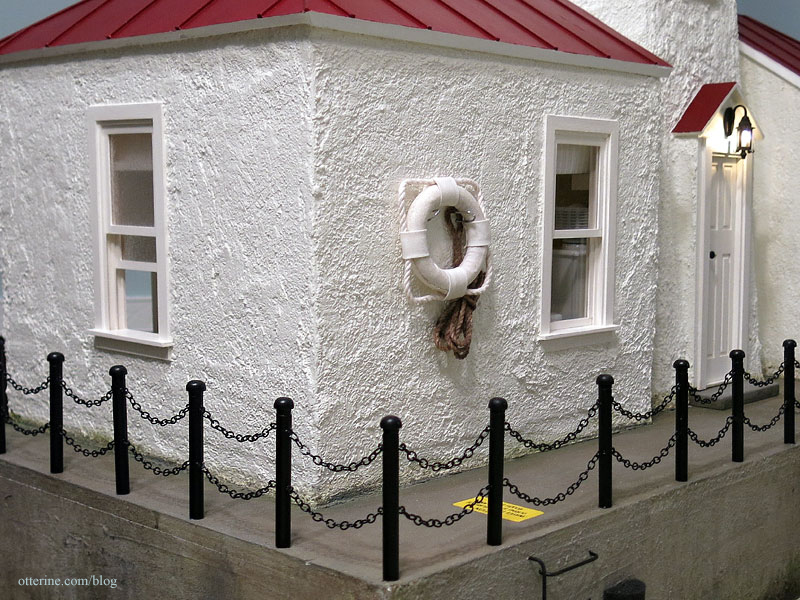
See, the bumpers work! :D
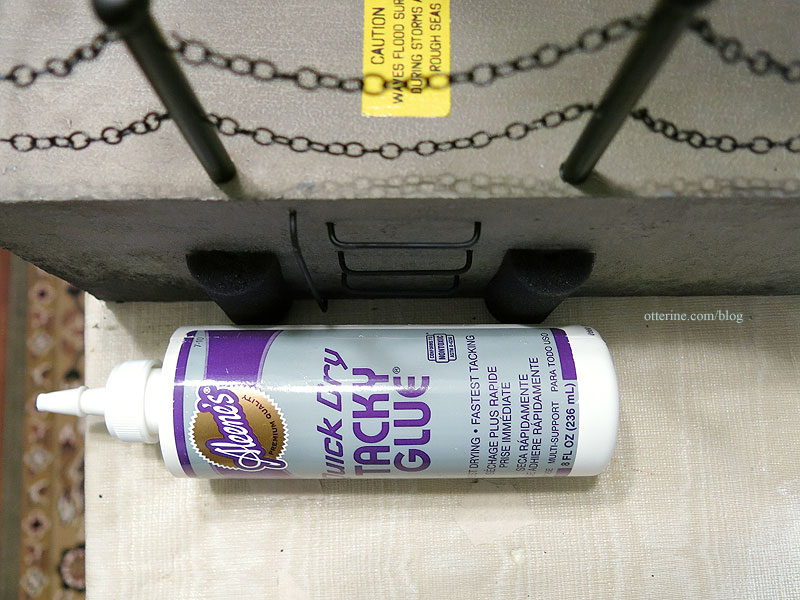
I started a Midwest dinghy model that didn’t get finished in time. Honestly, it’s been giving me fits, so I am not sure about its future. When I was first planning at the beginning of the year, I was going to make a Tall Ship with all the rigging and assorted craziness. Maybe someday….
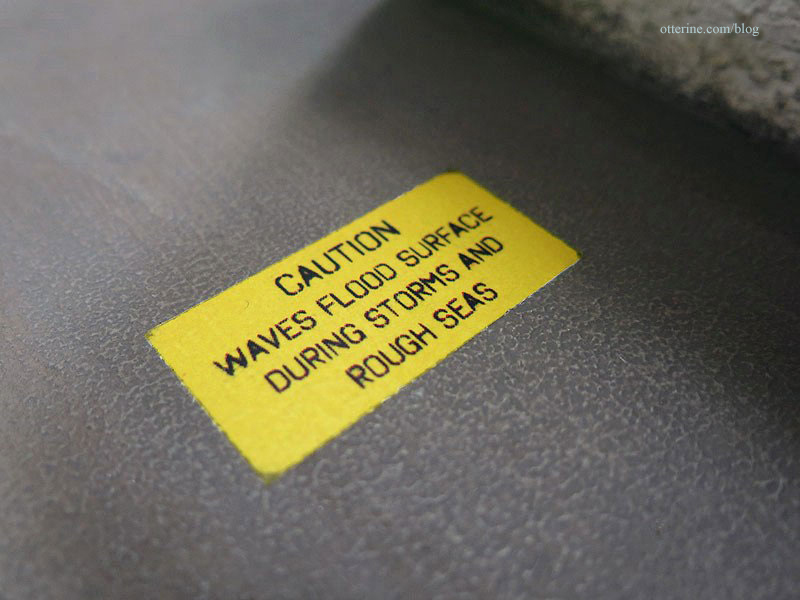
On the surface of the breakwater, there are caution signs. These were made with rub-on transfer film and a free spray paint font I found online.
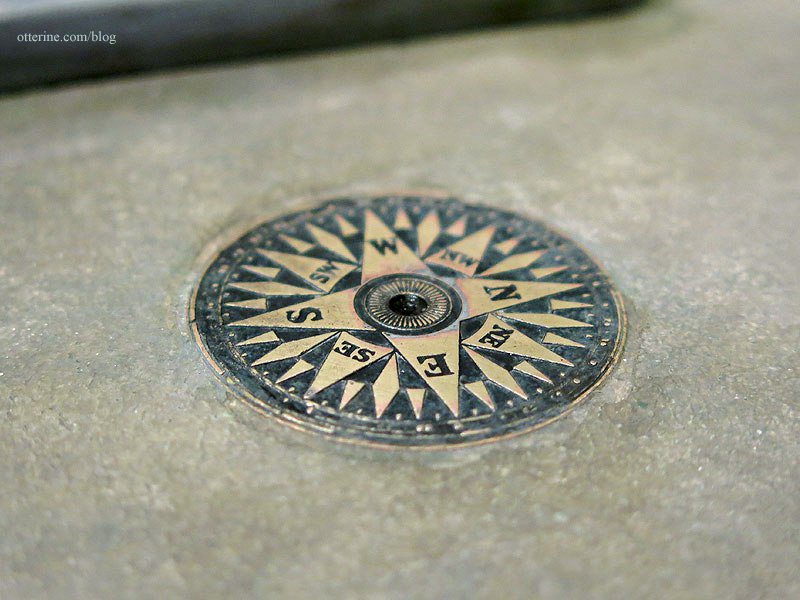
This is a Tim Holtz compass coin, found in the scrapbook section at Michaels. It is embedded in the surface of the breakwater concrete in front of the main door. This was an interesting process that I will detail separately.
I hope you’ve enjoyed visiting Walnut Bay Light as much as I have enjoyed building it. Even though the build is completely furnished at the moment, there are items I want to replace now that there is no time crunch. I’ve got a few great things on the idea list that I still want to try…hello, where’s the foghorn?
Quite awhile after the contest ended, I received some wonderful minis for Walnut Bay Light from Bill. He fashioned a new magnifying glass from a Canon camera viewfinder lens, brass tubing and a belaying pin. Fantastic! He said I needed chart dividers, too. These actually function! You open them by squeezing the rounded parts. There’s also a spyglass.
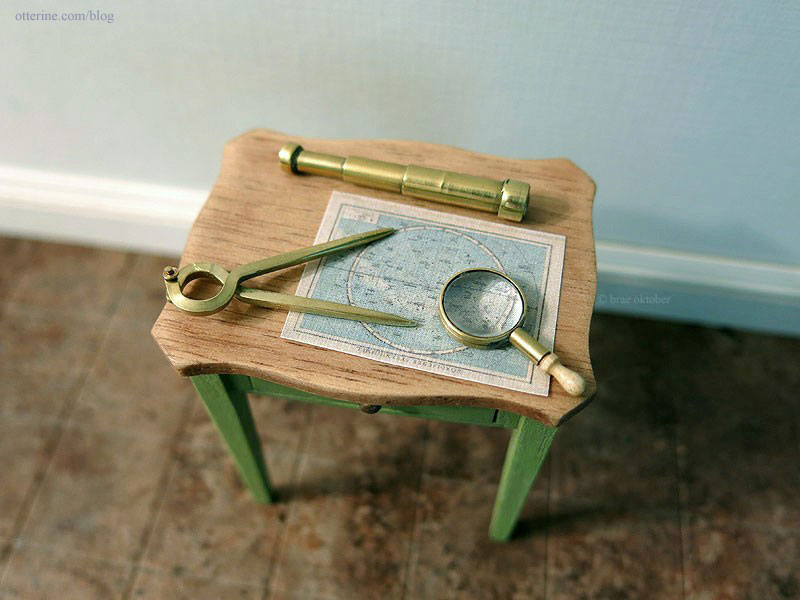
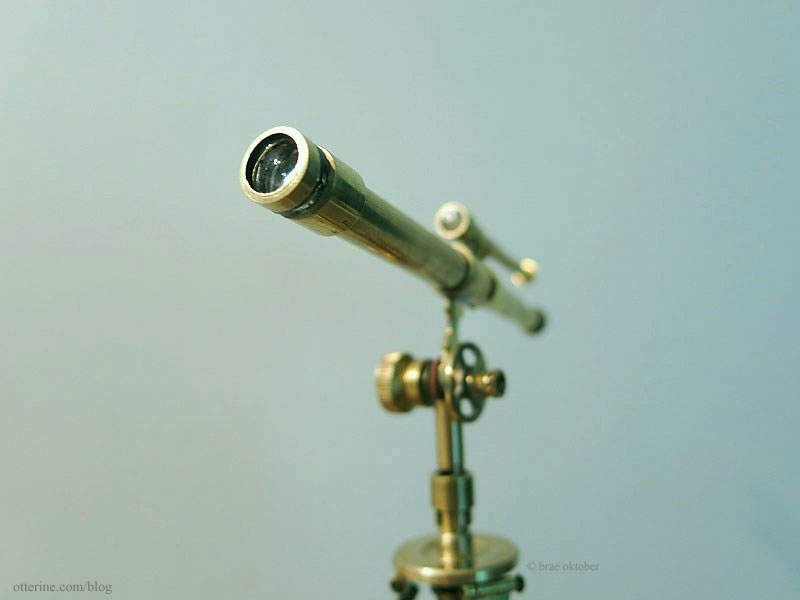
And, that led to Telescope: Otterine Model, Serial number 1, as Bill named it. I told him I never got around to making a telescope since I ran out of time.
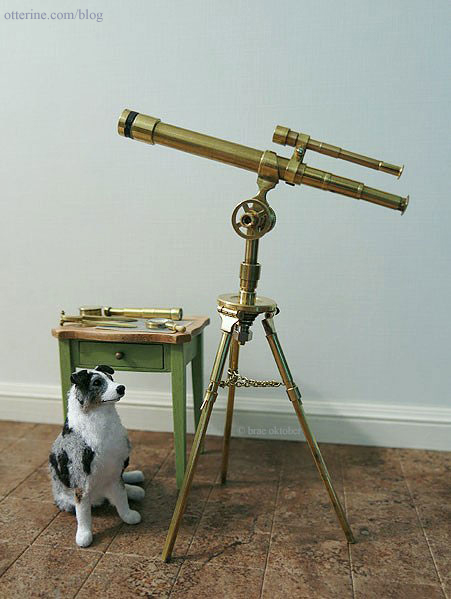
He even made the height set for me if I were to shrink to 1:12 scale.
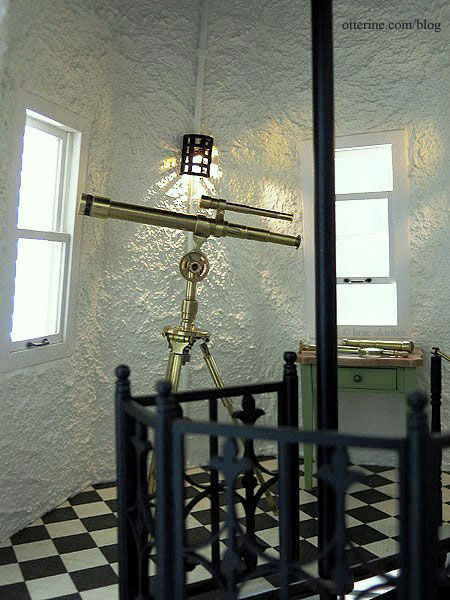
It’s a remarkable piece, and it was his first try!
————–
Contest results: Walnut Bay Light won second place in the 2013 Creatin’ Contest hosted by HBS! A huge thank you to HBS! You can see the entrants and winners here. Thank you all so much for the support, encouragement and compliments! It means the world to me. :]


