
While I did make a number of changes to the basic Greenleaf lighthouse kit, there are some things that might make it easier for someone putting one together out of the box. Or, these tips and tricks might make you think of another method to help with assembly.
Since I eliminated the bottom and middle floors, I didn’t assemble the walls according to the instructions. I also wanted to finish the upper floor tile and support underneath before installing the floor inside the tower.
My first bit of advice is to cut any new windows or doors before you assemble the structure. For the actual assembly, I used Tyvek strips. I glued strips to one edge from top to bottom and let the glue dry completely.


I then added glue to the opposite edge and glued the pieces as close together as possible. Even during the dry fit, the floor was a bear to fit, mainly because you are juggling so many pieces at once. I did have to adjust the tabs and slots slightly for the final fit, but the Tyvek strips made the tower assembly much easier.


The Tyvek strips held the edges together while still allowing for flexibility.

Before installing the upper floor, I added all my wiring channels using the Dremel Trio.

I used this same method for the lantern room roof. If I had had more time, I would have liked to make this open with rafter work. Next time…. :D

I added glue per the instructions.

After the glue was dry, I spackled the joins. I later spackled the flat surfaces to remove the wood grain so that it would look like metal once painted.

Most of the structural changes I made involved the lantern room. Since I added a Fresnel lens and lighting, I needed the lantern room to be removable since it’s a closed room with no opening in the back. To that end, I couldn’t glue the walls onto the base. I assembled the walls with the handrail in place but no glue between the walls or on the top and bottom pieces. From there, I glued the vertical trim #6 pieces at each lower join and then added cut pieces of Houseworks siding between the trim pieces.

I finished the hand rail and glued it in place. I assembled and finished the crown as well but left it detachable in case I want to add the acetate windows later on. It sits snugly over the lantern room walls and keeps the room solid. To add stability to the upper portion where the windows are, I glued pieces of 1/8″ strip wood cut to size (making sure these fit under the crown).

I added 1/16″ strip wood under the hand rail to finish the gaps between the siding and the hand rail and spackled the joins in the top crown assembly.

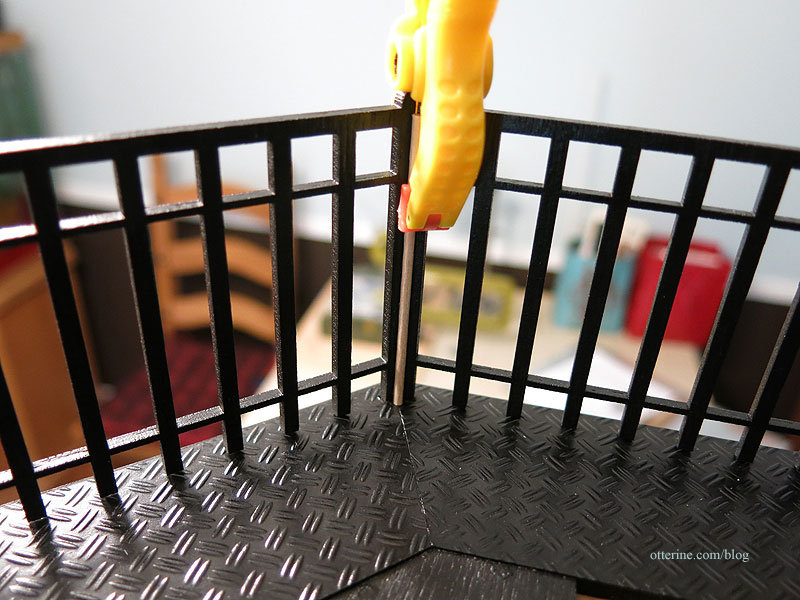
I added Plastruct 1/16″ double diamond plate plastic sheet around the exterior landing of the lantern room base, cutting it to fit around the lantern room walls.

In order to cut the holes for the railing, I used a flashlight to shine light through the plastic.


I traced the laser cut holes and cut them with an X-Acto blade.


I glued the railing in place and held the pieces together with clamps.

I reinforced the railing with small dowels since there wasn’t much surface area to glue them side to side. I painted these black and you can’t even tell there is anything there.

The lantern room and its roof lift off the base. The base and railing are attached to the tower permanently. The laser cut tabs and slots hold the lantern room in place.
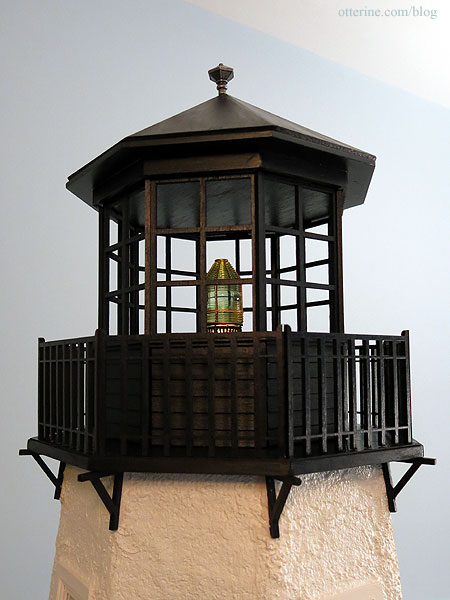
I used flat black spray paint and Minwax Satin Polycrylic spray on most of the pieces of the lantern room and hand painted only when necessary.
You can find the specifics on the Fresnel lens and its support mechanism in this post.


