
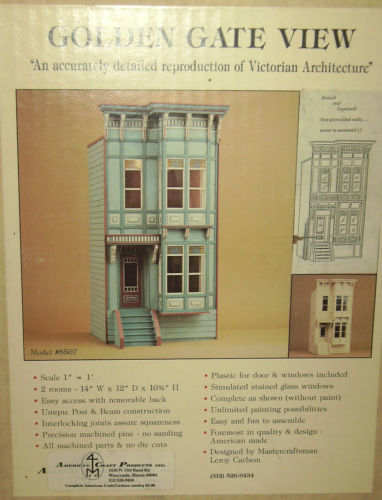
While I love the ice cream parlor colors of the kit photo, it’s not really my style. I also love Tudor design, but I’m not sure I’ll ever get around to making an authentic Tudor build. There’s a beautiful house by my office that has more modern ranch lines but it is done in Tudor finishes. With the grid and inserts of the Golden Gate View kit, I think it would lend itself well to Tudor inspiration.
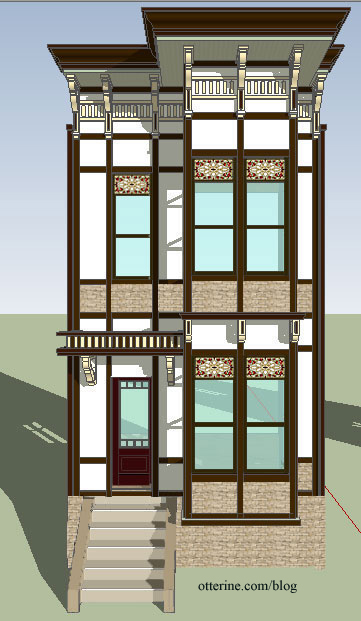
Mike was gracious to lend me his drawing so I could try out some colors. The program is Sketchup, and it is so new to me that I did part of my color mockup in Sketchup and part in PhotoShop.
After searching for stained glass windows online, I found this beautiful Meyda Tiffany Bed of Roses stained glass panel at Wayfair. I altered the image in PhotoShop with the new windows and changed the front door to dark plum. :D
The kit comes with pre-cut notched pieces to make the facade trim work. These measure 5/16″ deep x 11/32″ wide.
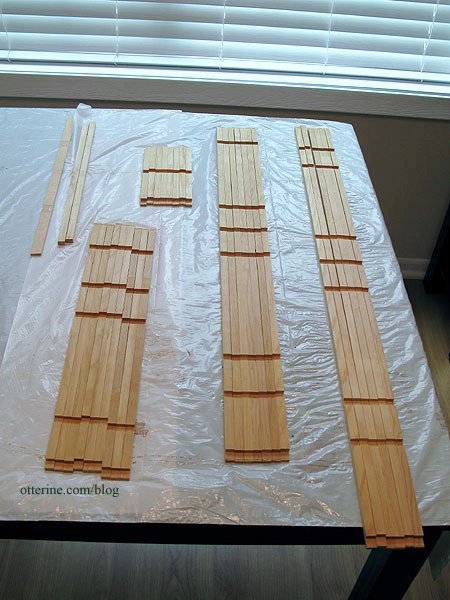
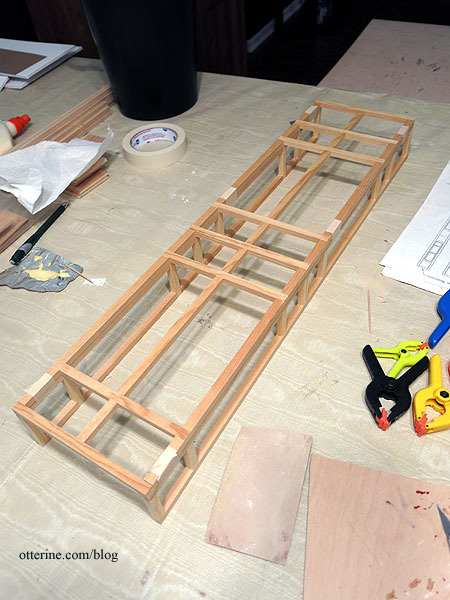
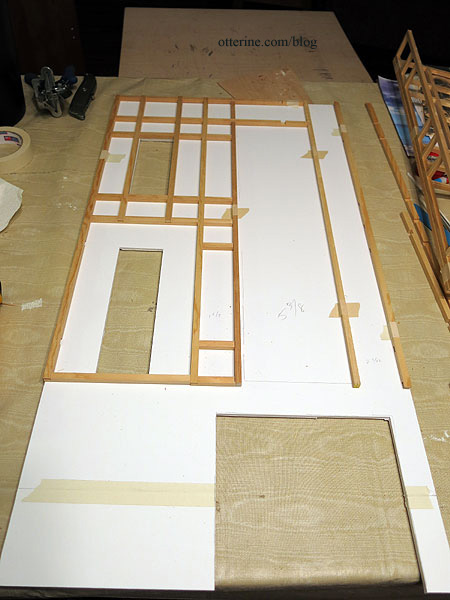
I am now making the facade wider and taller than the original kit intended, which means the kit pieces needed to be reconfigured. Since I won’t be altering the bay window portion, I assembled those walls with glue. Even though the instructions don’t indicate to do this, I used the filler pieces as spacers as I glued the grid together. Some of these filler pieces won’t be used in the end, but they helped keep the grids uniform while the glue dried. The cuts aren’t very precise, with the ends being a little long. Once the grids were glued, I trimmed and sanded the excess.
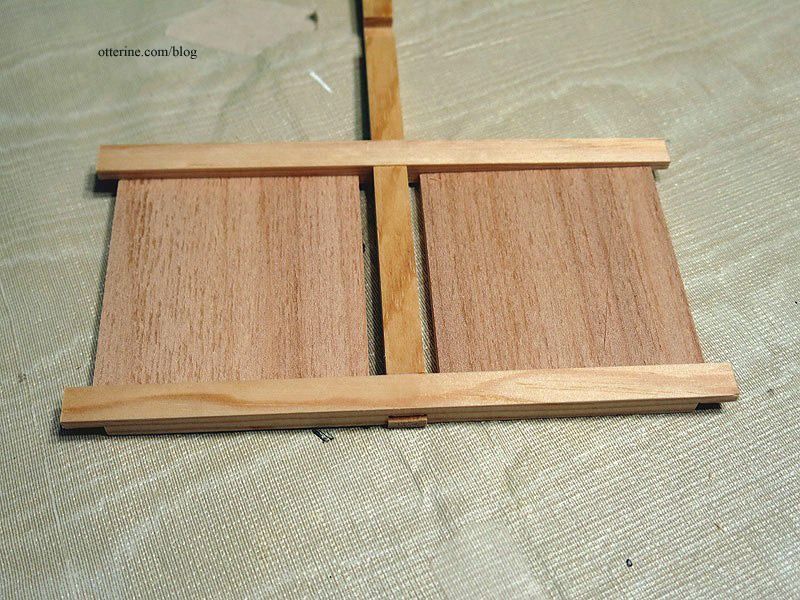
I will leave the bay window assemblies flat for now instead of glued into their final shape. Instead, I taped them together, back into dry fit.
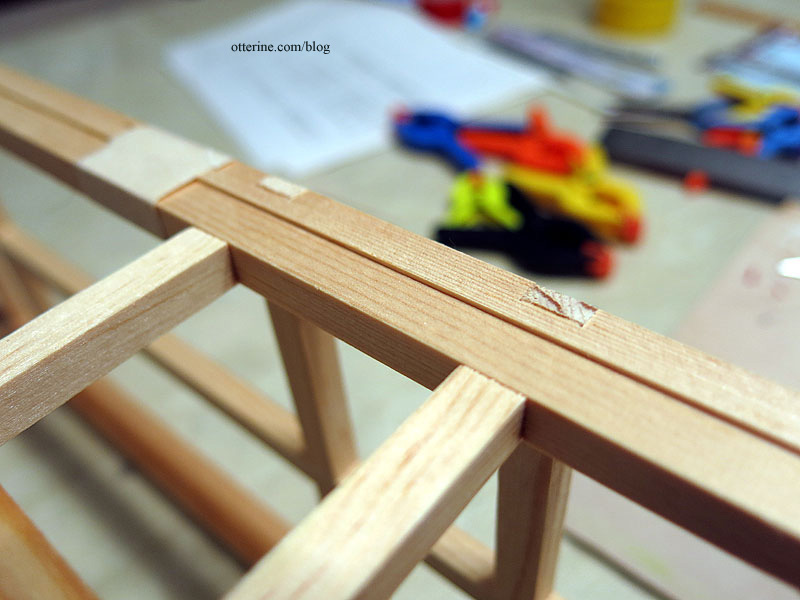
Because the grid isn’t made from square trim, the fit is off when the walls of the bay window are taped together. This will actually work in my favor since I plan to line the interior walls of the bay. You can also see the notches. There is trim to cover these later in the build, but I’ll do something different. More on that later.
Using my foam core board as a guide, I marked where the bay window would hit along the cross beams on the left side. I marked which trim pieces would be eliminated from the final layout: namely the area below the second to last cross beam. This will be all egg carton stone.
I will also eliminate the trim from the front door area, except the outline. Since I’ll be making a working door frame using the original door, the opening will need to be wider than the notched trim allows. I will fake the trim in this area with strip wood when I get to that point.
I cut away the vertical and horizontal pieces around the doorway. I also removed the portion below the bay window line.

I used some of the cut trim to make a new piece for below the doorway since the original piece had notches.
I cut the horizontal pieces up to the left side of where the bay window assembly will sit. The top two horizontal pieces remain in place uncut since that is above the upper floor ceiling line and they will be enclosed by the roof trim. The bottom one is removed since I’ll cut a floor board with the bay window extension included instead of piecing it together.
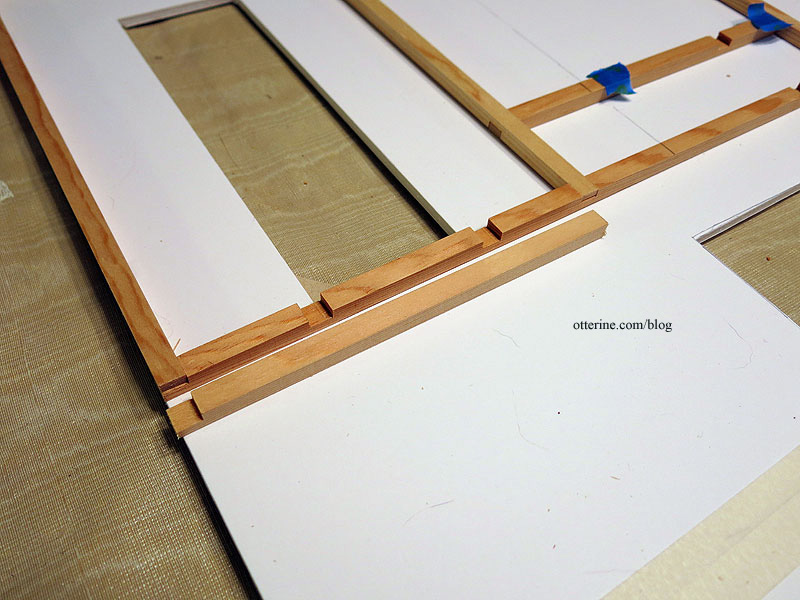
Instead of using one of the kit’s vertical pieces to sit under the left side of the bay window assembly, I cut a new piece from 5/16″ strip wood. Since there will be a wood back board, this strip doesn’t need to be notched to fit. It will be glued to the backer board and the adjacent horizontal trim ends. I used one of the original verticals for the far right timber and cut another 5/16″ timber for the right side of the bay window.
That left cutting short horizontals for the section to the right of the bay window.
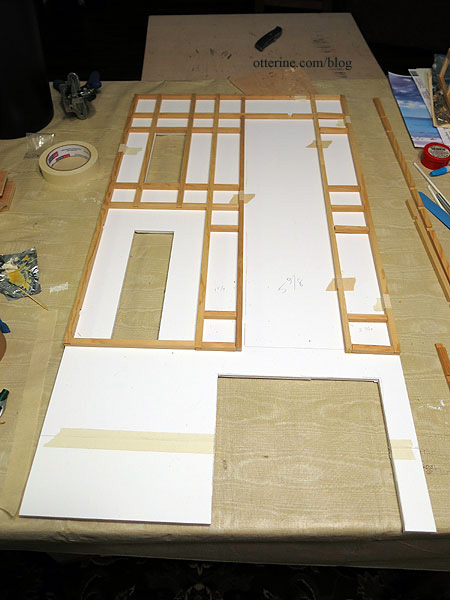
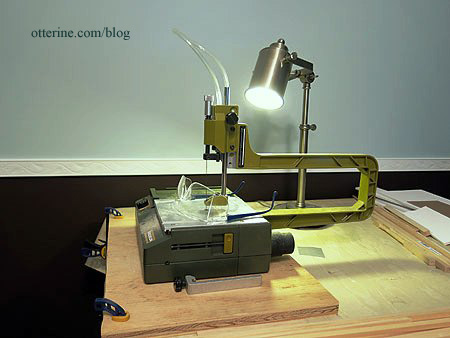
I had plenty of kit timbers to work with, and my Proxxon scroll saw made cutting a snap!
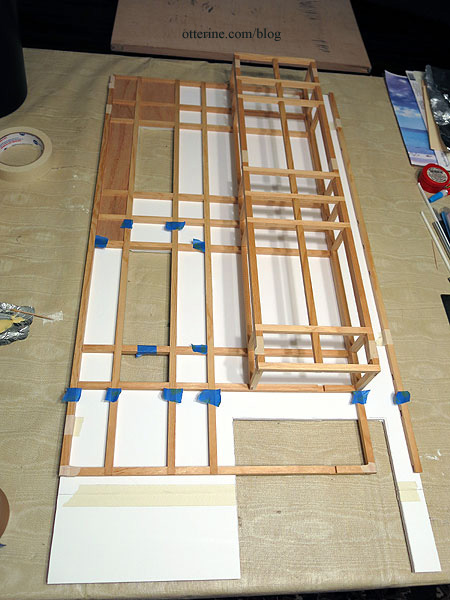
Here’s the final layout for the facade.
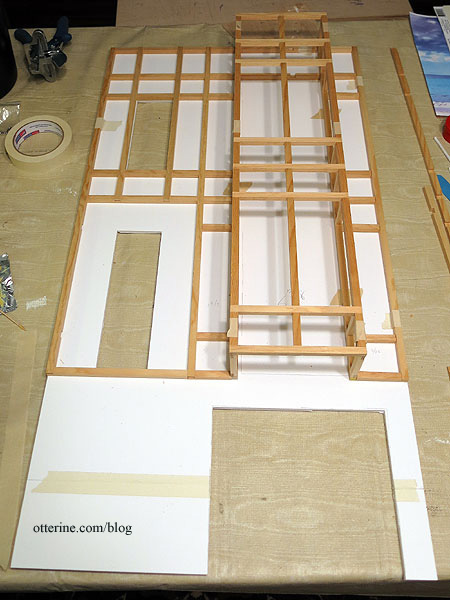
When I get to the sides of the building and the addition, I’ll have to use all 5/16″ basswood since that is what’s available in the stores. It will be close enough to the original to blend, and it will be consistent on those particular walls. I had originally thought about doing the sides in all stone, but I thought the addition should match the facade. With the front and one side done in Tudor style, I might as well carry it around to the other side, too.


