
Update on The Brownstone. I tend to keep my bashed builds in dry fit a long time, because while I can think of a lot of things that will come up along the way, there are always things I don’t think of, problems with materials or a change in direction. The facade has to be the first thing I do overall, but there are a lot of parts to it.
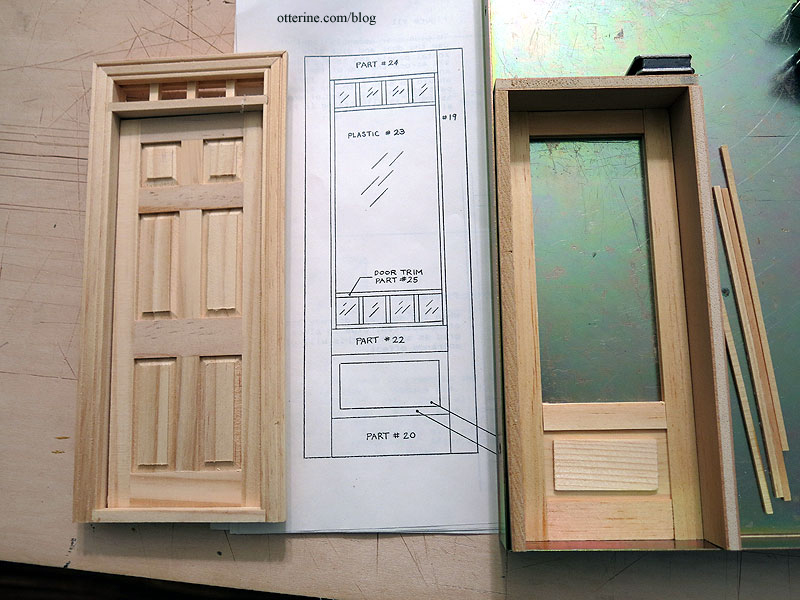
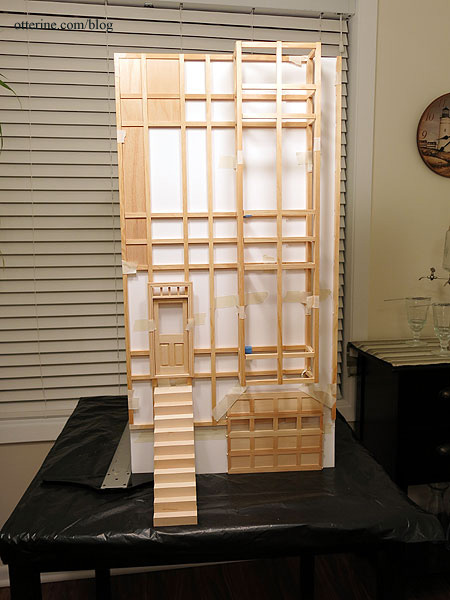
I will keep the bay windows and upper window the same as the original kit, but the front entrance needs some consideration. I’d like to keep the original kit door if possible, and it needs to be assembled from pieces. If I do keep this door, then I need to figure out a way to make it a working door, which will in turn change the way the recessed entryway is constructed. The kit instructions have you glue the door in place, but I want a functional door. So, I can’t cut my new facade backer board until I figure out the entryway in dry fit.
You can see from the drawing how this door will look with all the trim in place. The plywood surround creates the recess, but the door fills the whole interior space…there’s no frame.
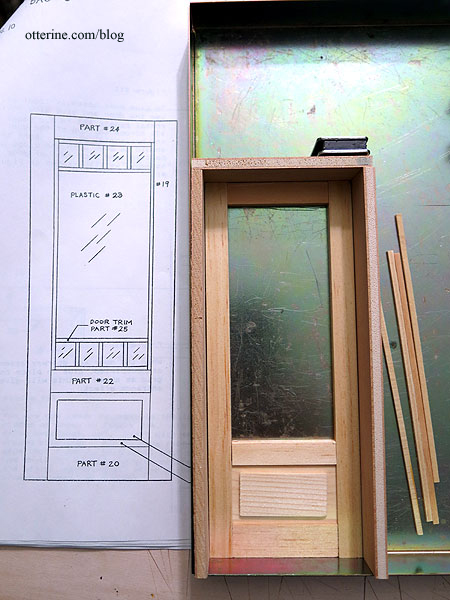
The Houseworks door I have as a backup plan is shorter and narrower than the original door, so I’m going to try to get the original to work. The original just says “row house” to me. :]
I pretty much need to address the front steps at the same time in case I want to make further changes to the entryway based on the stairs layout. With the added height to the bottom of the building to accommodate the garage door, a new front staircase needs to be constructed since the kit steps will be too short.
I bought some stair molding from Manchester Woodworks so I could cut my own steps. The original stairs are 3/4″ tall whereas the trim molding is 11/16″ tall, but it’s such a small difference that I will use the kit stairs and the trim molding stairs together to make the taller staircase.
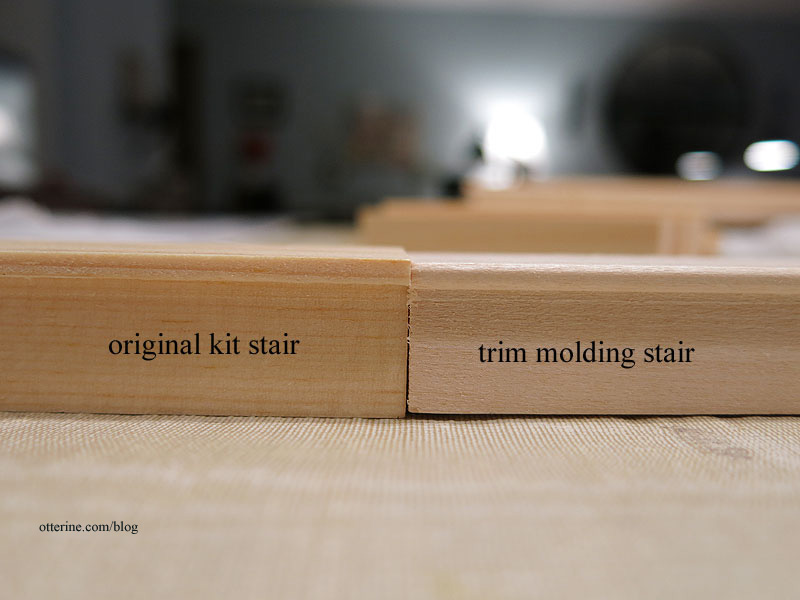
The kit stairs are 4 1/2″ wide, so I cut 8 new stairs from the molding using this measurement and glued them together as a set. I’ve left the bottom three kit steps separate for now but taped them in place to check the fit.
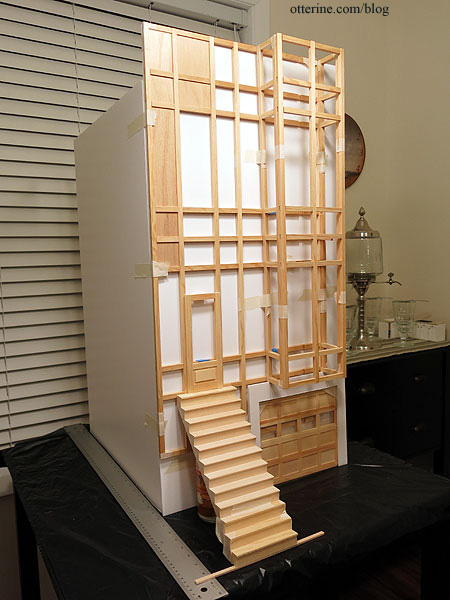
I also propped the smaller top step from the kit in place.
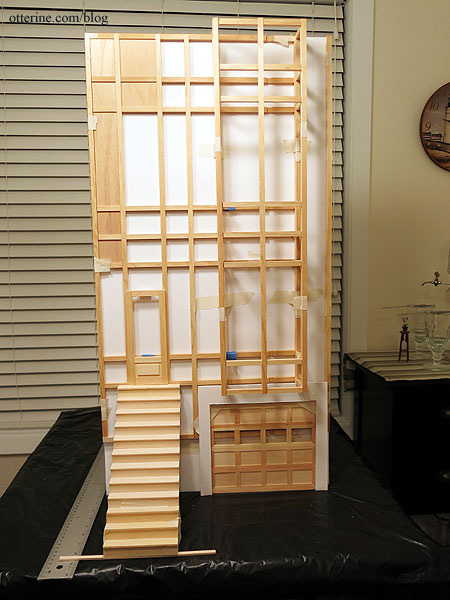
It certainly looks better than the skinny steps I used in the first mockup.
Mike on the Greenleaf forum has a wonderful drawing of the Golden Gate View that shows the construction better than the small kit box photo. One thing I don’t like is there is no front porch to speak of; the recess in the doorway is essentially the porch. Not what I want at all and not very realistic. I mean, where’s the postal carrier going to leave packages? :\
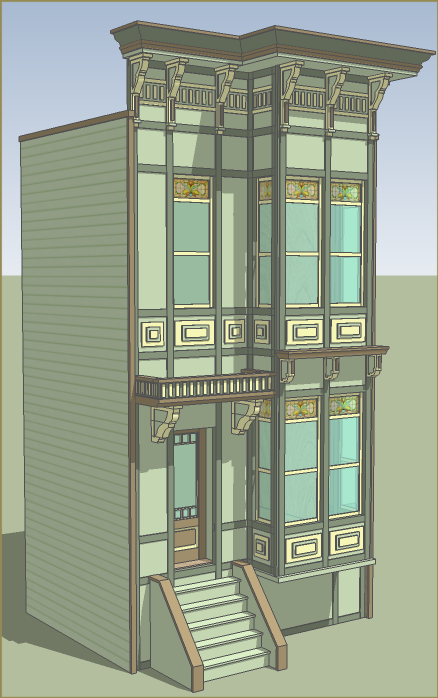
I have two choices: add a modest front porch board that will push the steps forward or I can alter the front wall to push the entrance back into the building. I really don’t want to add any more depth to the landscape board than necessary. This build will have next to no lawn, because I don’t think its necessary for the style. Leaving 1-2 inches of ease around the building should be sufficient for transport and display. If I add a porch board to the front, I just make the footprint larger.
So, that leaves pushing the entrance back into the building. I do have some room to move the interior stairs back, so I think that’s what I’ll mock up next.


