Continuing from the tower construction part 3 for The Aero Squadron Lounge.
The tower roof was my second major foray into math after the spiral stairs. I found this forum thread on conical roof framing, which had exactly the reference photo I needed to help it click for me.
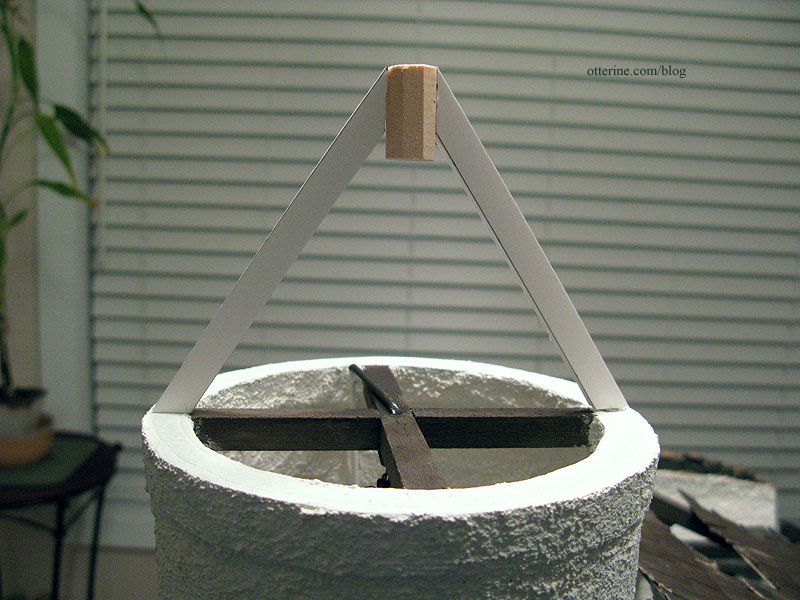
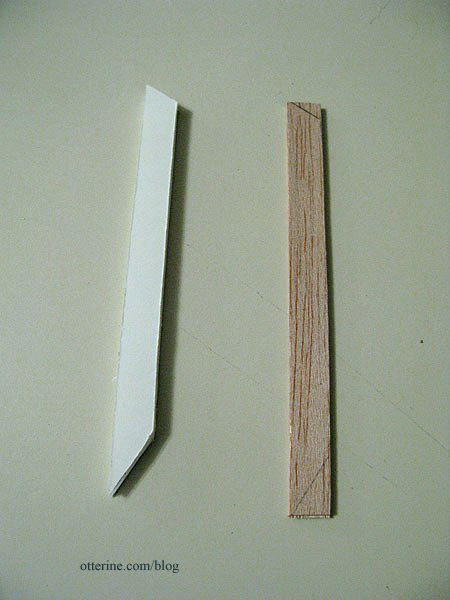
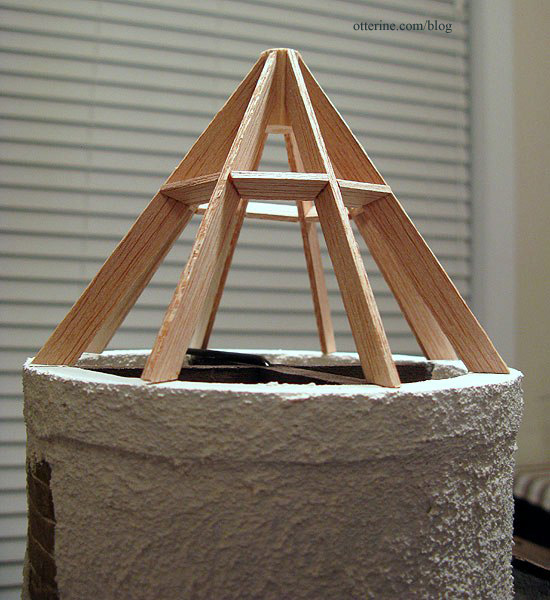
I started with a piece of octagonal trim wood from a sample pack from Manchester Woodworks. They include these packs when you order trim wood from them, and I always find uses for it. I cut two pieces of foam core board to figure out the exact length and angle for the initial support beams.
I used these as patterns to cut beams from balsa wood.
I used Aleene’s Quick Dry supplemented with super glue gel to attach the beams to the octagonal support.
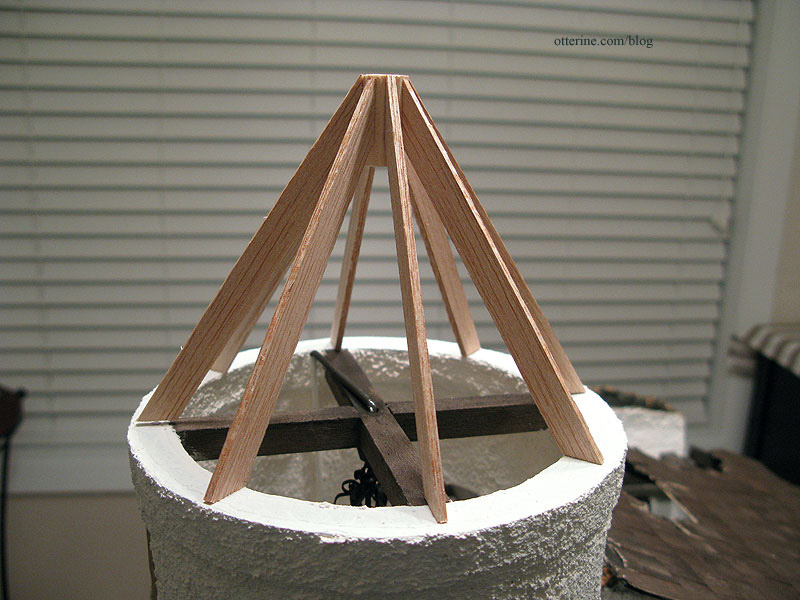
I then cut cross supports for the upper portion, again gluing in place as I went. Nothing in this support structure is completely uniform or strictly measured. I kept measuring the pieces against the top of the tower, and it ended up being somewhat organic in nature.
Next came the lower beams that ran from the center cross supports to the top of the tower.
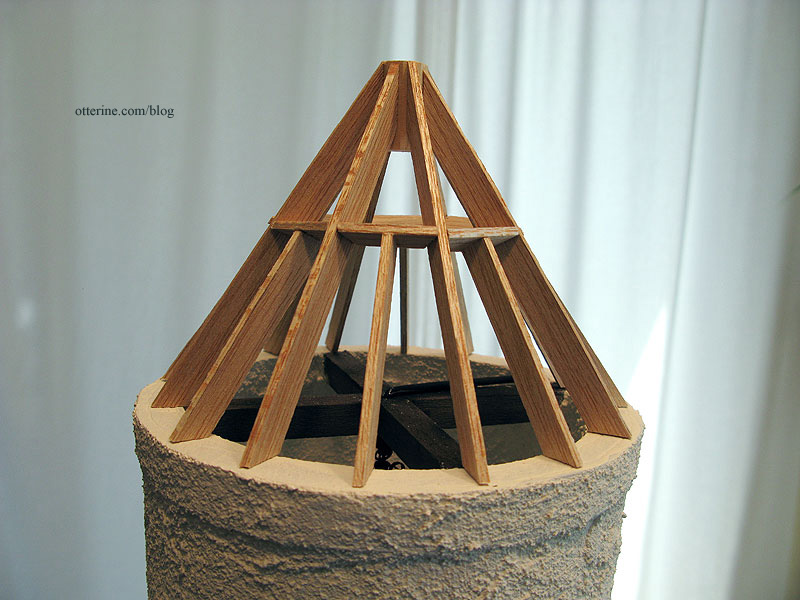
After these beams were in place, I added cross supports at the base where the roof meets the tower. These were measured individually and glued as I went along. Around this time, I discovered the best fit for the tower and drew an arrow to keep track of the direction.

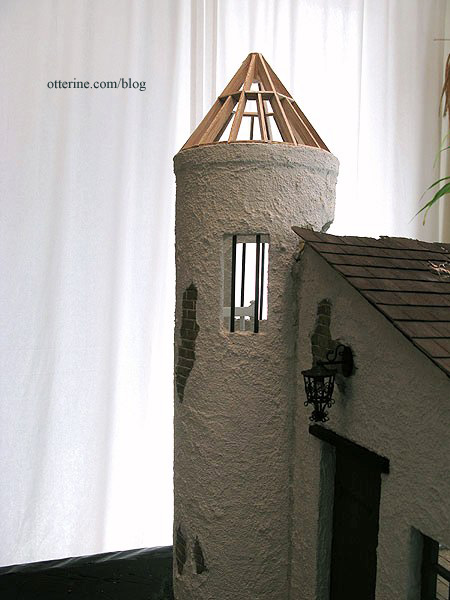
Here’s how it stood for quite some time while I procrastinated…er…thought about how to finish the structure to achieve a conical surface.
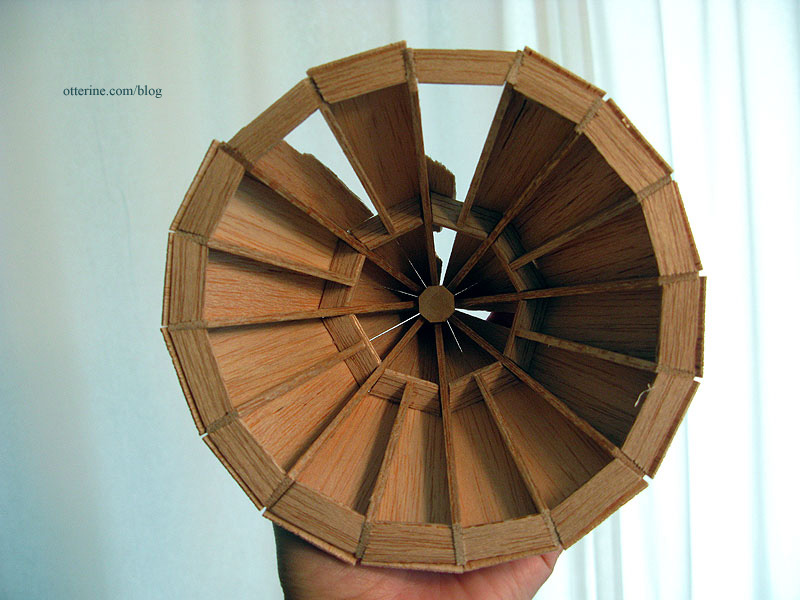
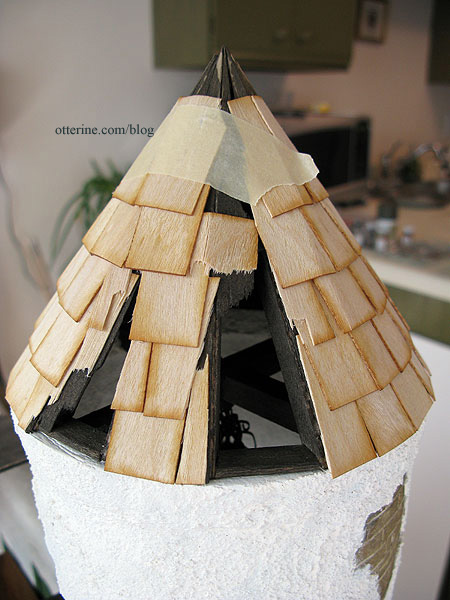
After about a month, I decided to go on a leap of faith and added thin sheets of balsa to the support structure. I used balsa because it was easy to bend as well as to break for the holes I planned to include.
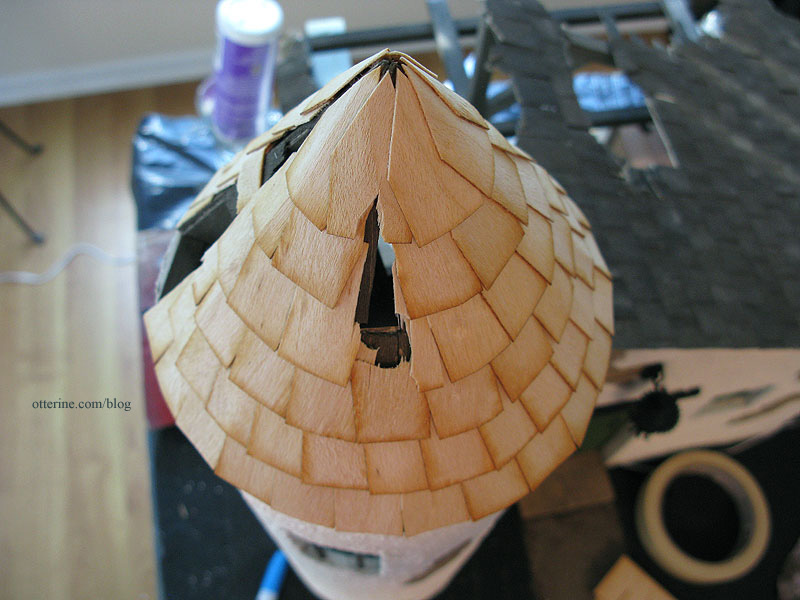
There’s one hole in the front and two larger holes in the back.
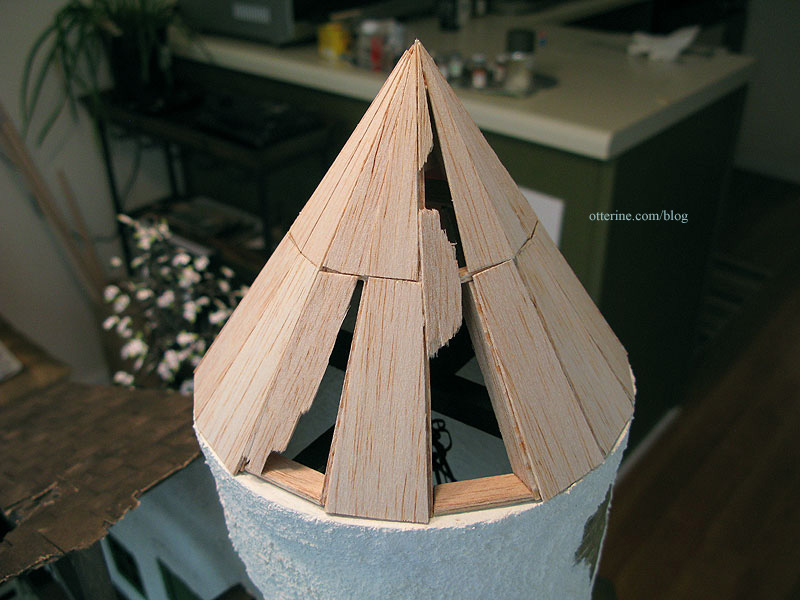
Here’s a fun view. :D As you can see, it’s not completely circular but it does follow the contour of the tower.
I gave the structure a quick wash of brown and black paint before shingling. It didn’t look any more rounded to me, but I forged ahead!
Shingling a conical roof is a test of not only patience but also the strength of super glue. :D I used the same Greenleaf speed shingles I used on the main building, but I cut and applied them one at a time before staining. I used super glue gel to supplement the Aleene’s Quick Dry glue.
The first row was relatively painless.
As you work up the tower, you have to cut and shape the shingles more. Covering the shingles below in a uniform manner also becomes more challenging. When you add holes in a roof, that challenge is amplified.
Surprisingly, though, applying the shingles to this relatively flat surface still amounted to the conical shape I had hoped to achieve.
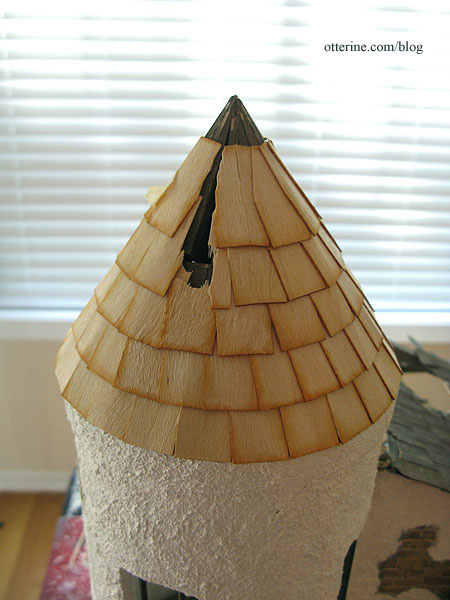
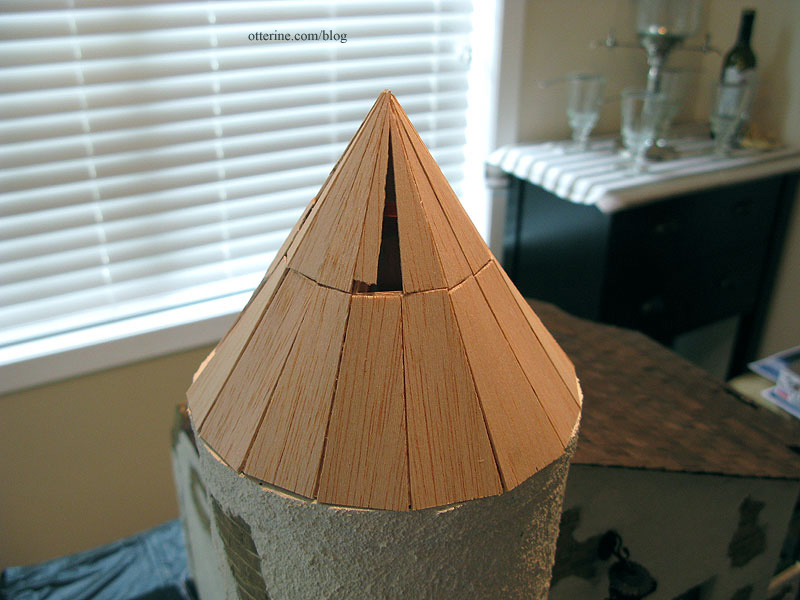
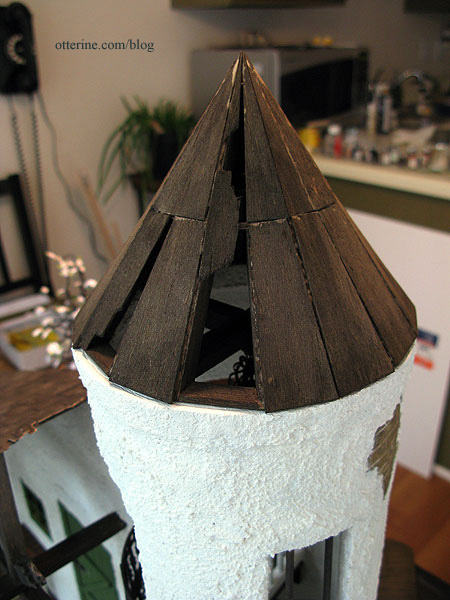
The topmost row is cut to follow the pointed tip as well as the row beneath it.
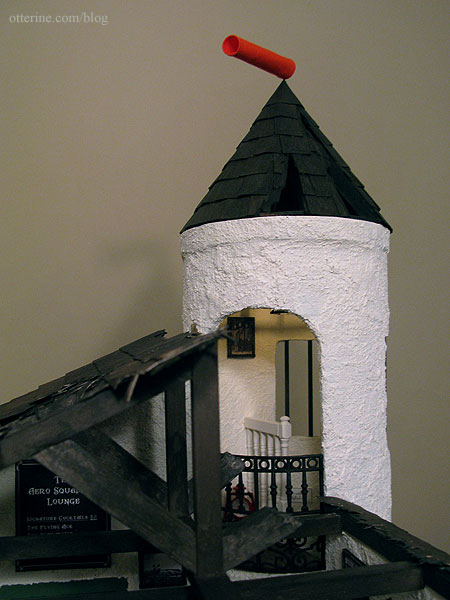
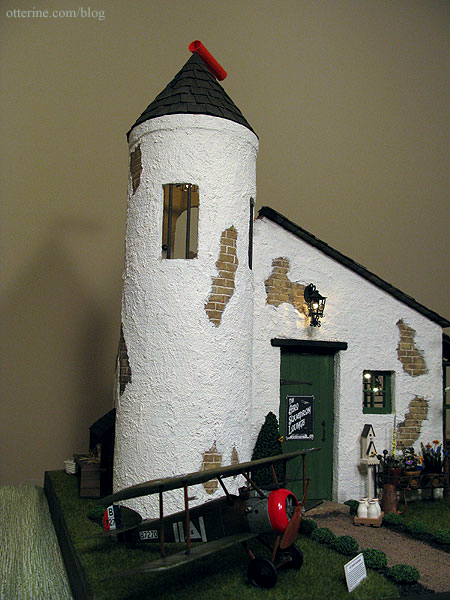
With all the layers, the roof ended up being very stable, so I’ve left it removable. I painted it with several washes of brown and black, trying to match the main roof as much as possible.
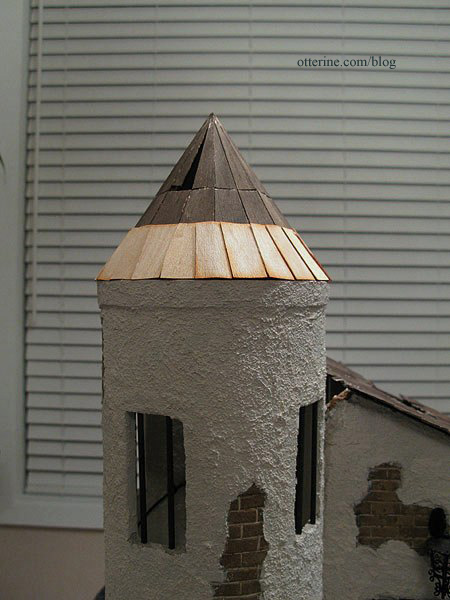
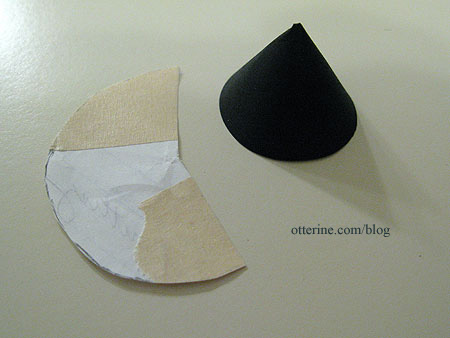
For the cone cap, I used heavy black paper cut to fit.
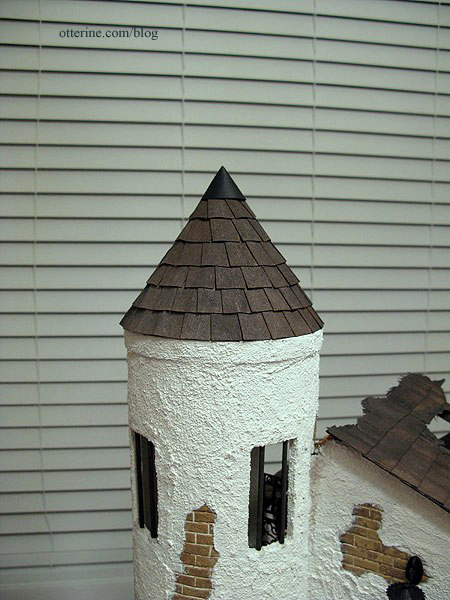
I had used a scrap of paper to make a template first. When I cut my final, I added a little flap to glue under the opposite edge.
After gluing the cone into shape, I applied spackling to disguise the seam.
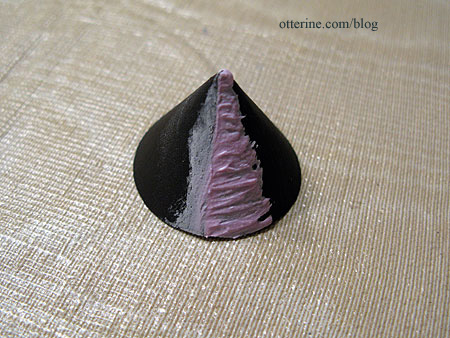
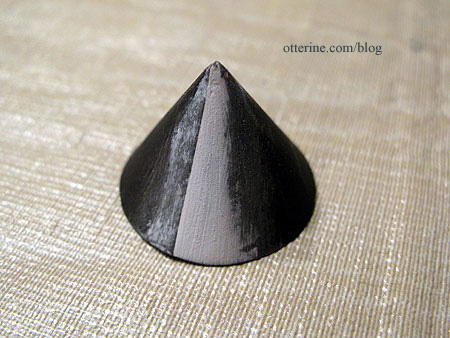
I then painted the paper brown to match the roof. The windsock is a glued tube of orange cotton held in place with a head pin. Yes, it rotates, though it pretty much always falls back into the same place.
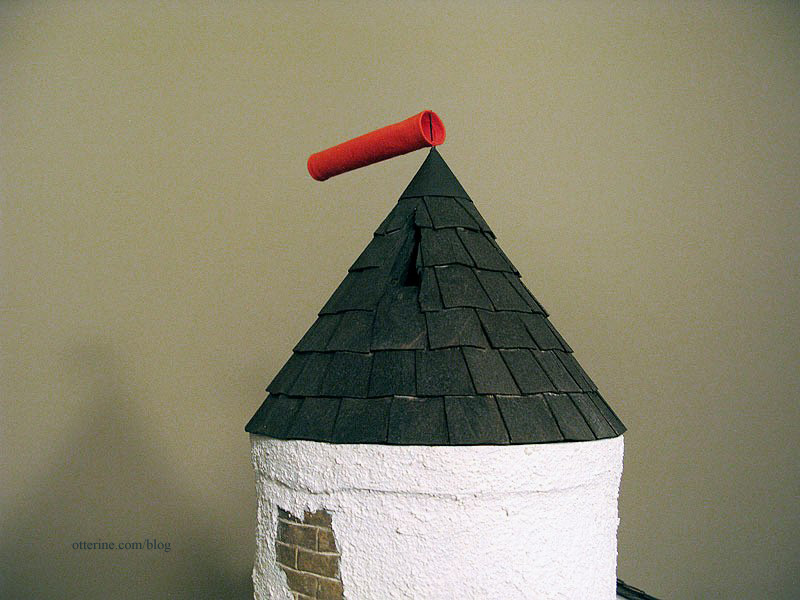
And, that’s the tower! :D
A close-up of the holes in the back.