
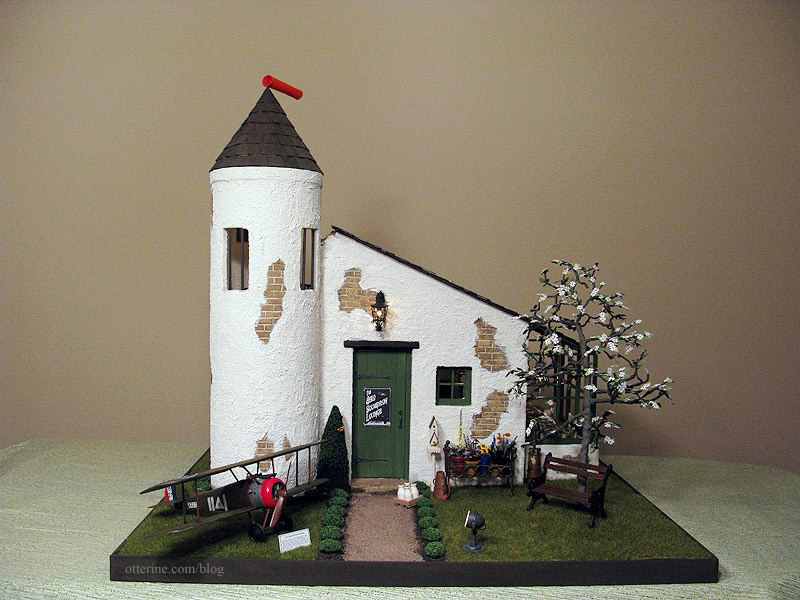
To build The Aero Squadron Lounge, I made only a few changes to the basic Greenleaf kit but they dramatically changed the look of the building.
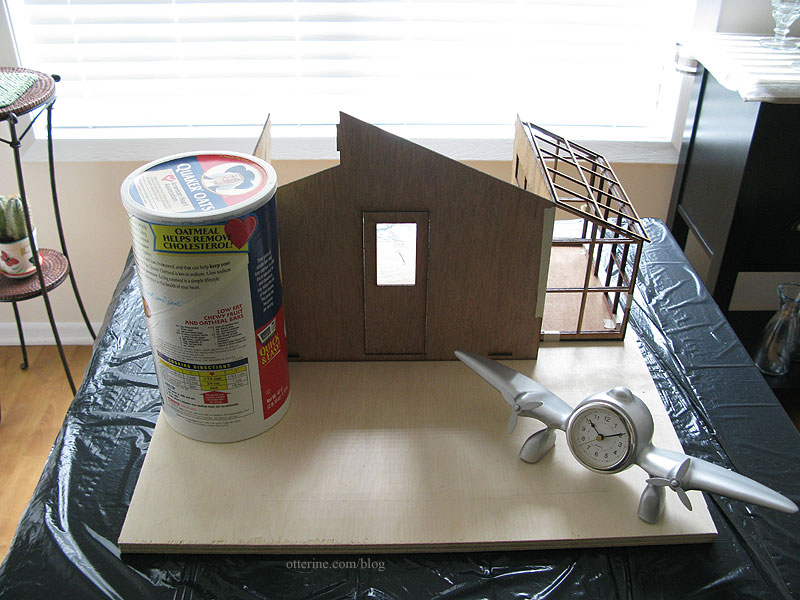
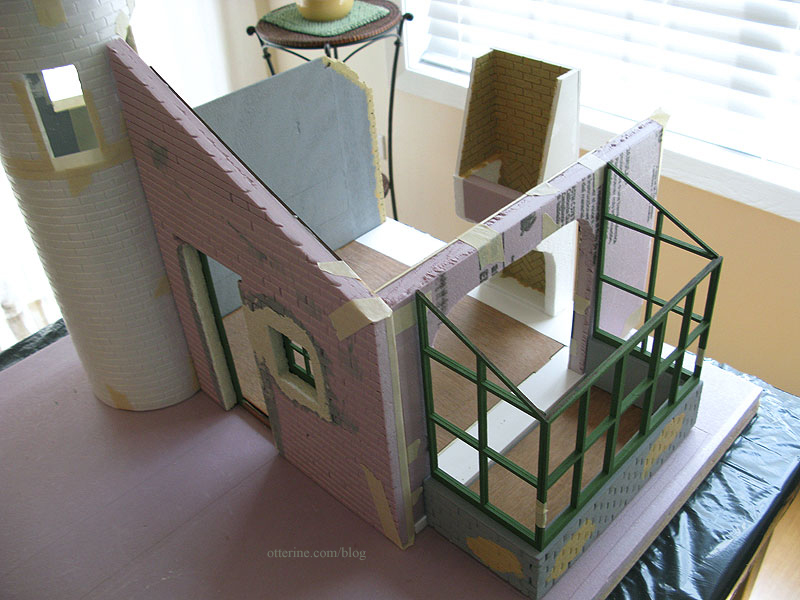
I added a tower made from a 5″ diameter mailing tube which required cutting off a portion of the front and side walls to make an opening for it. I also cut a large arch in the opposite side wall that originally had a row of windows near the top and used the scraps from these cuts to add 2″ in height to the main kit. This photo was taken before I determined I needed more floor space and before adding height to the tower.
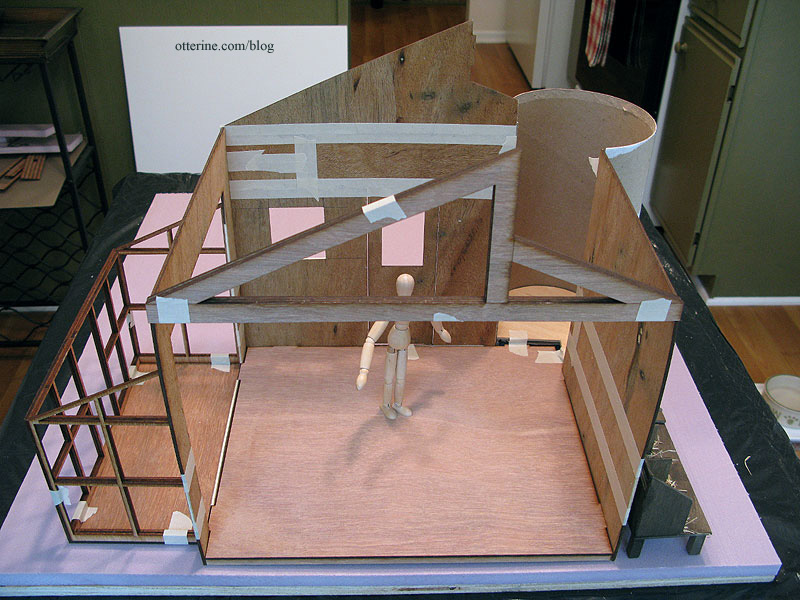
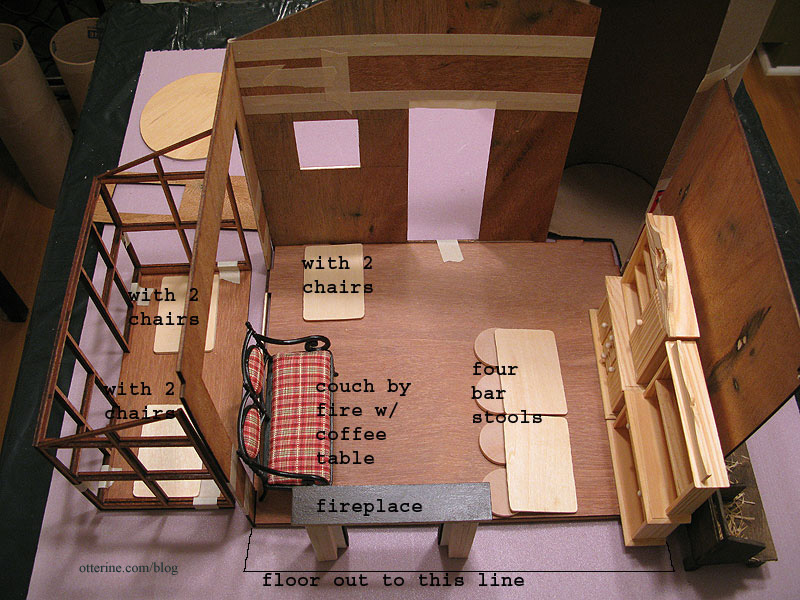
After figuring out the furniture placement, I realized the building was too small for all that I wanted to include. It’s fun looking back at the layout photos and seeing that I included everything I wanted to in the first place.
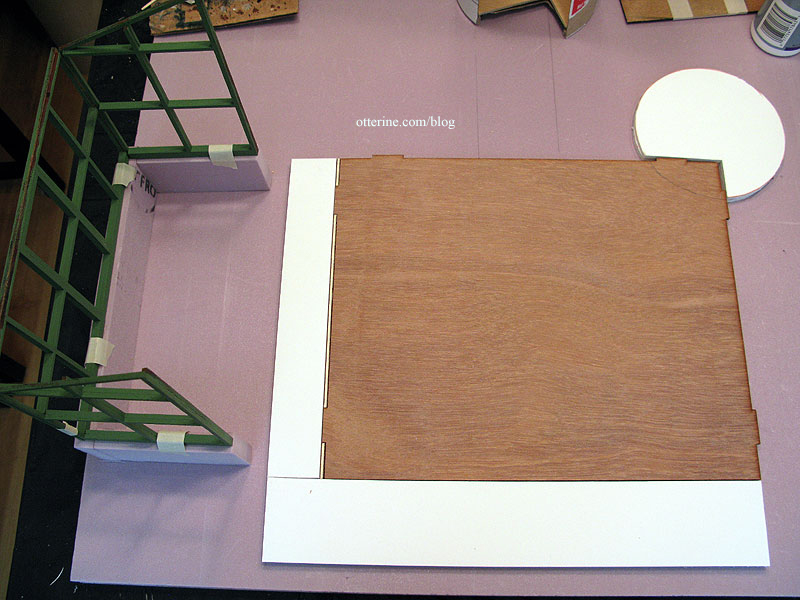
I built the floor from the base kit, adding cross support beams underneath to straighten out the warp in the floor. I didn’t get a picture of that part, unfortunately. Using a double layer of foam core board, I added 1.5″ inches to the width of the room and 2″ to the depth in the back. I also added a partial circle to serve as the tower floor.
I covered the exterior of all three walls with 1/2″ thick builders foam, taking into consideration the extra floor space. I added scrap wood to pad any excess foam showing beyond the kit walls.
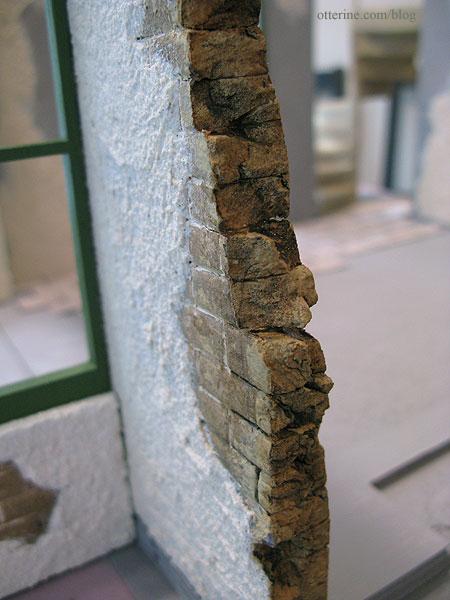
I learned the process I used to make the stone from a Scenery & Terrain Making website (as of 2024, the link is defunct). On the exterior of the building, I measured a grid of stones each measuring 5/16″ by 3/4″ on the entire surface even though I planned to add stucco to most of the build. I wanted my brickwork to be consistent. As it turned out, in some portions where the stucco is thinner, you can see the texture of stone underneath. I rather like the extra push of realism it brings.
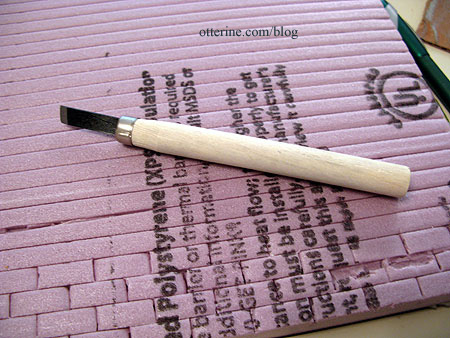
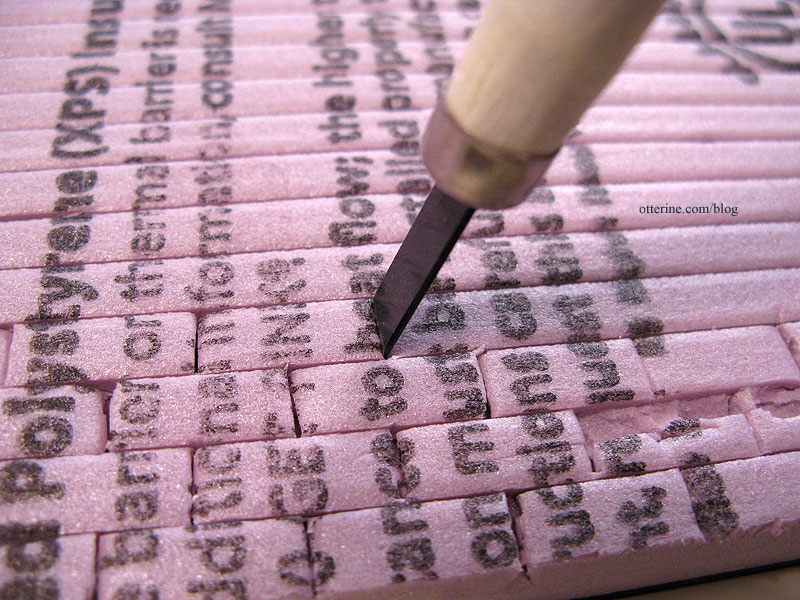
I first measured and marked lines 5/16″ apart.
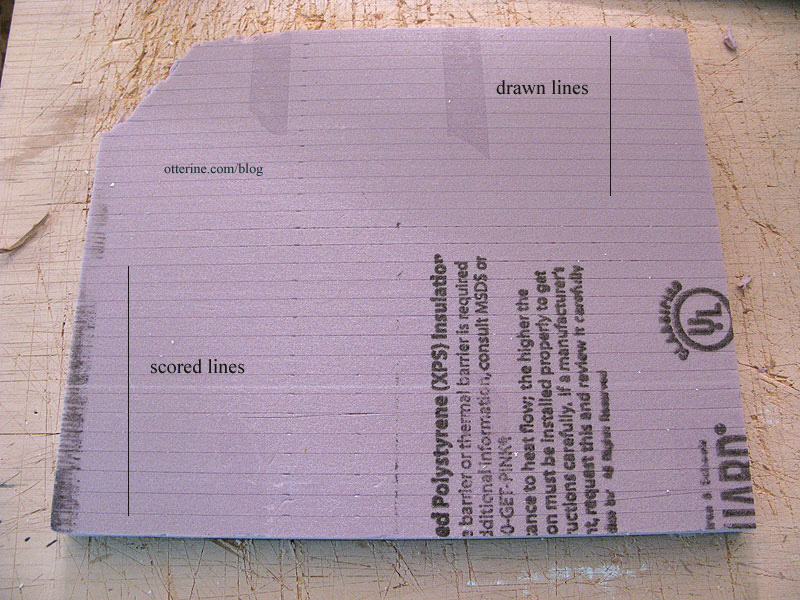
I then scored the drawn lines with a special adjustable X-Acto knife that allows you to cut into a surface at a controlled depth. You turn the knob to allow more or less of the blade to sink into the material. This kept the back of the sheet whole while allowing me to carve the stonework on the front.

Here’s a close-up of the scored lines. Every once in awhile my blade wandered. It wasn’t a problem since I planned to stucco over the stone and could easily cover mistakes. Besides, broken out stone would only add to the age of the building had I left it exposed.

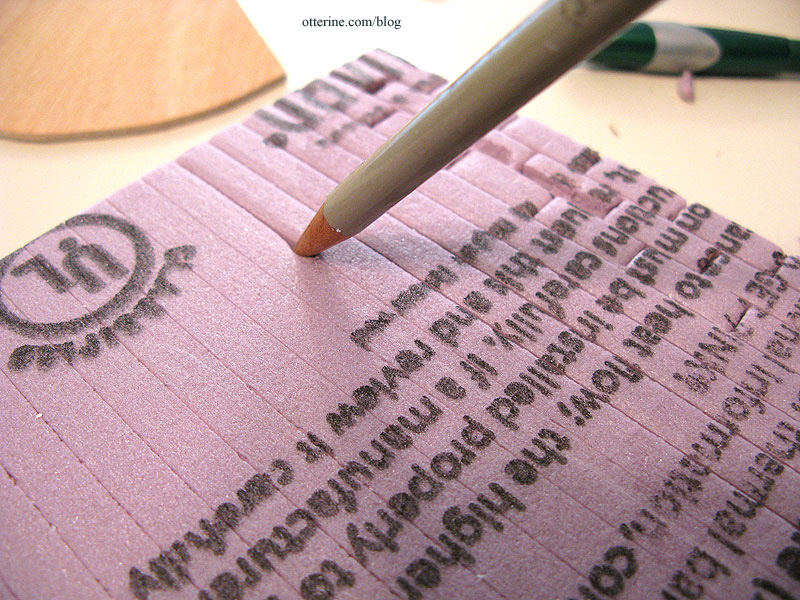
Using a dull wood pencil, I followed those cuts to make grout indentations.
The vertical grout lines were made with a cutting tool from a set bought at Michael’s to press and cut the vertical lines forming the individual stone blocks.
I just lined the blade up between the horizontal lines and pressed until it broke the front surface without cutting through the back. I used the dull wood pencil to indent these lines, too. Yes, it was a lot of work but much less work than using egg carton stone.
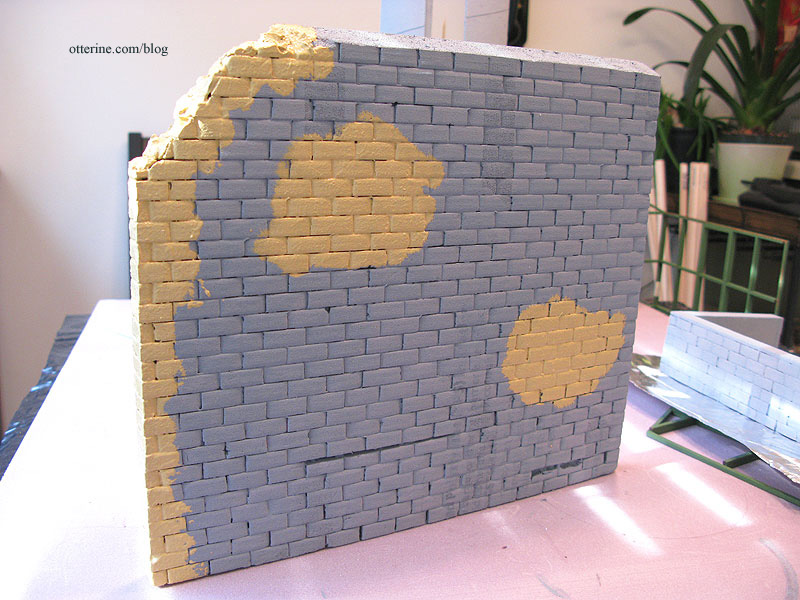
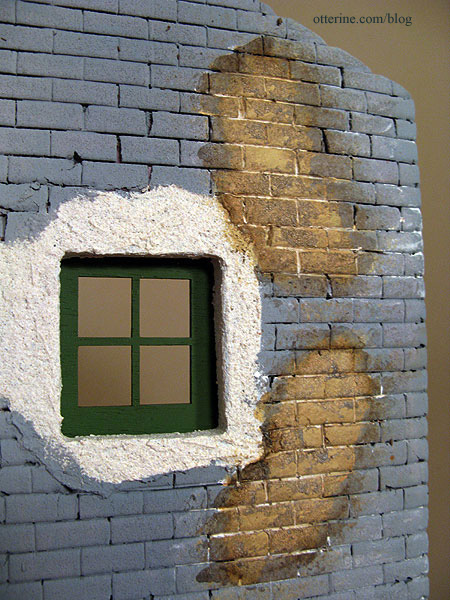
I primed all of the exposed foam with grey gesso and then painted random areas where the stone would be fully exposed using Camel by Americana as a base coat. Here is the side wall showing the back edge cut and painted. I still wasn’t decided on whether this would be an open back or a 360° build, so I prepared the wall to have an entire edge of exposed stone. I ended up doing the bombed back and the stone along the straight edge was covered with stucco in the end.
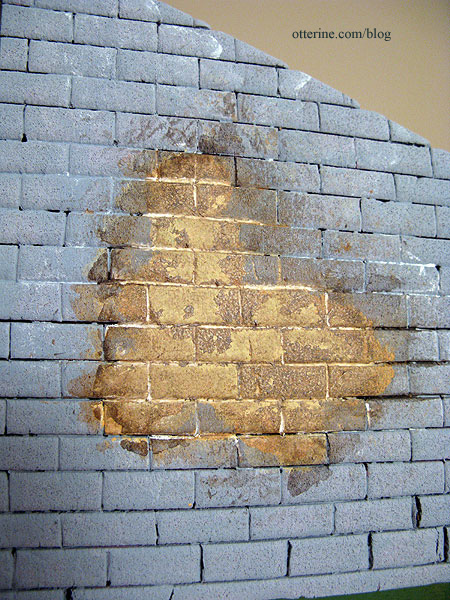
I grouted the exposed stone areas with spackling compound and then added paint washes to perfect the coloration. I also experimented with texture medium, though much of it fell away during the paint wash application. Still, it adds a little something.
For the back edge where there would be broken walls, I used flat nosed pliers to rip pieces off at random. I then continued the previously scored grout lines around the edges to make individual stones. I grouted random portions and applied the same painting technique as I had done for the exposed stone on the other walls. I couldn’t believe just how much the foam looked like real stone.
Before attaching the foam to the front wall, I added a window using leftover parts from Baxter Pointe Villa, last year’s Spring Fling entry. I hadn’t used the short front wall from that kit, and on it were two laser cut windows. I cut around the windows and used the two pieces to make one whole window in the new build.
I cut out a recess in the foam and set one of the window pieces into it. This window piece was between the outer foam and the kit wall. For the other window piece, I cut an opening in the front kit wall and glued it in place.
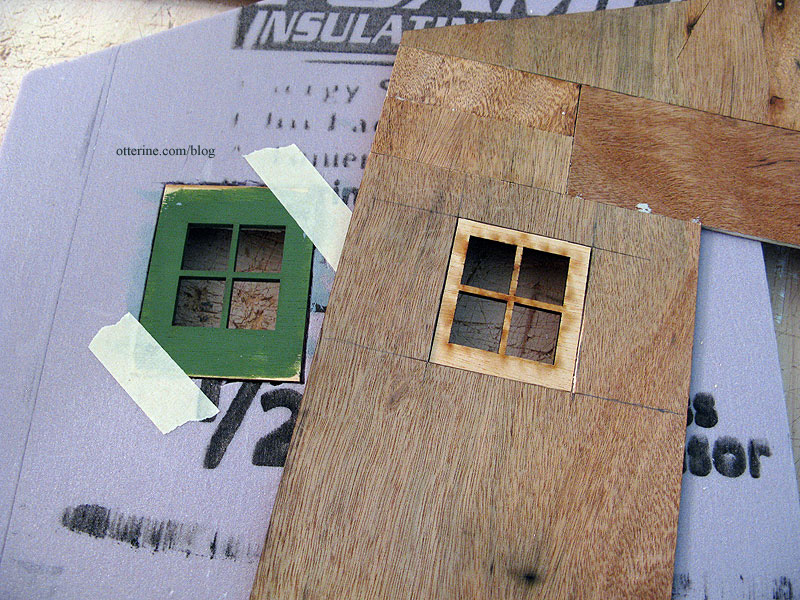
I painted both window sections Clover by Folk Art. I also applied the stucco to the foam around the window opening and painted the stucco Warm White by Americana before gluing the window in place. I didn’t think I would be able to apply the stucco or paint without getting it on the green window.
From the outside, it is a deep set window. I left the glass out of all the windows in this build, because really…what sort of weather are we trying to keep out? Have you seen the condition of the roof? ;D
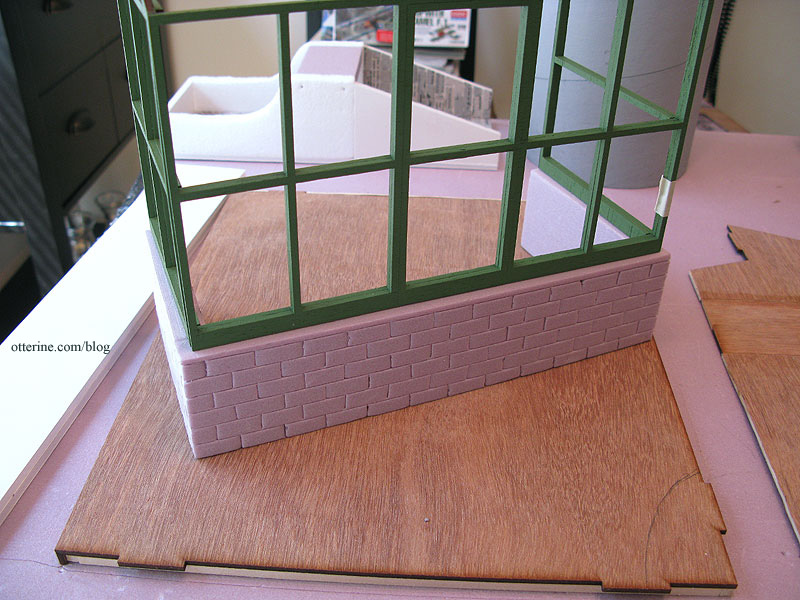
I used the greenhouse addition with the Spring Fling kit, though I’ve eliminated the working door. I added 2″ of builders foam to serve as a base for the greenhouse and built a new floor for it using a double layer of foam core board (floor not shown here). The paint is Clover by Folk Art.
I got ahead of myself and glued the pieces together before scoring the stone into the foam. It was a little more challenging to score the lines on a three-dimensional piece, but I managed.
Continued in part 2.


