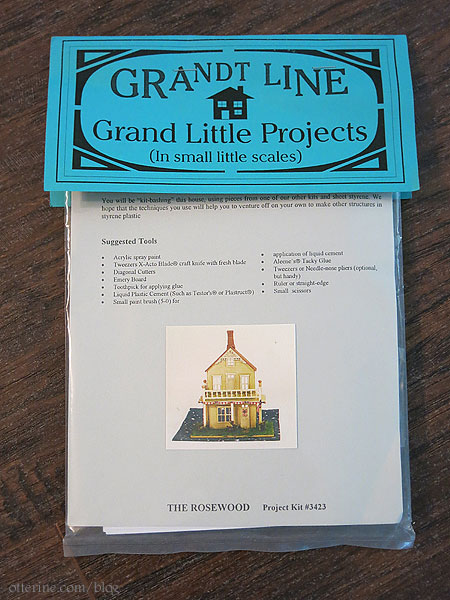
A couple of years ago, I started looking for a Grandt Line Spooky Hollow kit. While Grandt Line products are still around, these specialized kit bashing ensembles were apparently a limited run. Here is the kit photo. The project is N scale (1:160), which correlates to 1:144 scale or “dollhouse for a dollhouse” scale very well.
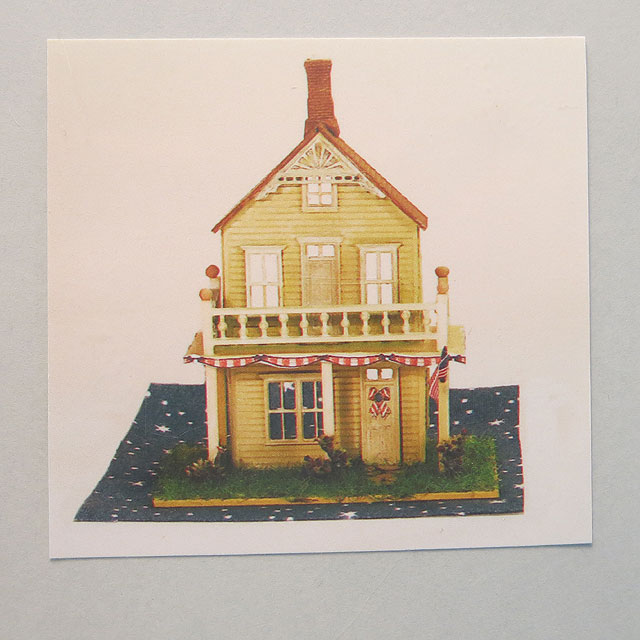
A friend made one awhile back and recognized that another kit was very similar in design. Rosewood Cottage is also one of the limited run kits, but I was able to find one at a good price.
Unfortunately, it had different parts and was made as an open back house opposed to a long side opening house.
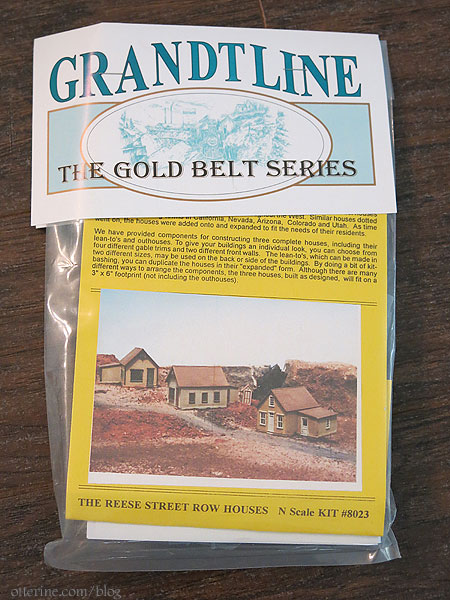
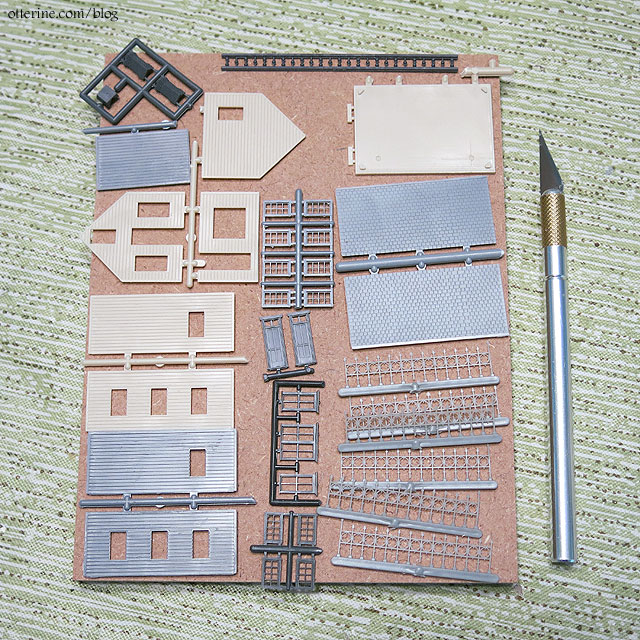
But, the instructions included a parts list that led me to find additional parts to make what I wanted. A huge thank you to San Juan Details for shipping me the Reese Street Row Houses kit so quickly.
With all the parts now in hand, I could start making my own Spooky Hollow.
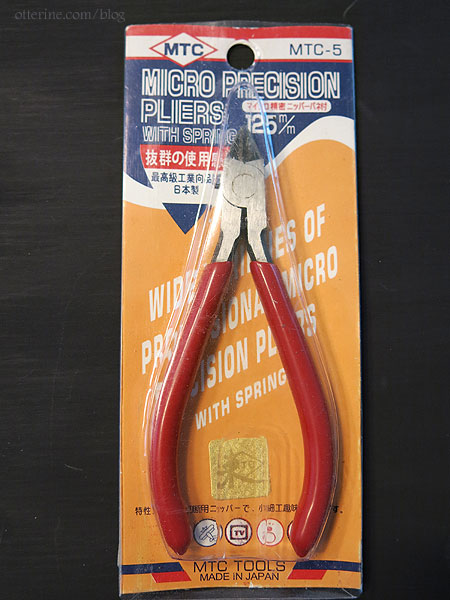
These MTC Tools Micro Precision Pliers are a lifesaver for snipping tiny and delicate parts.
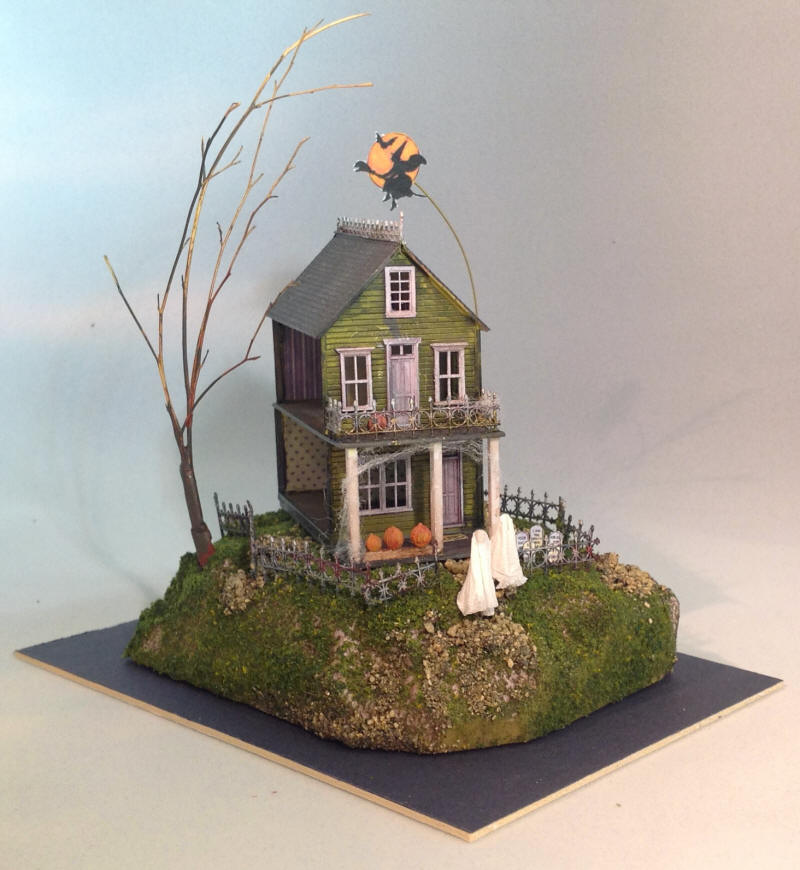
I bought the Grandt Line widow’s walk in HO scale to accent the build as well.
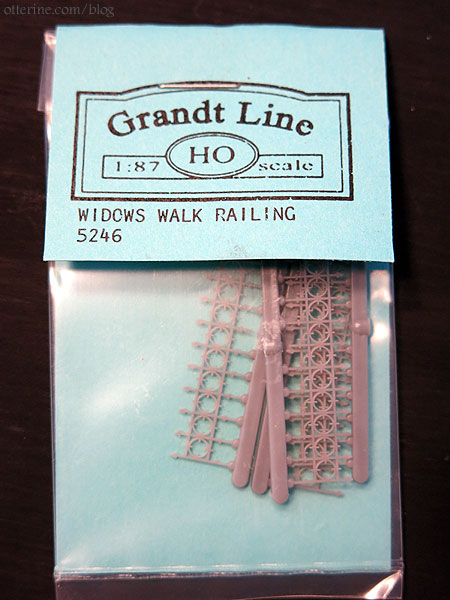
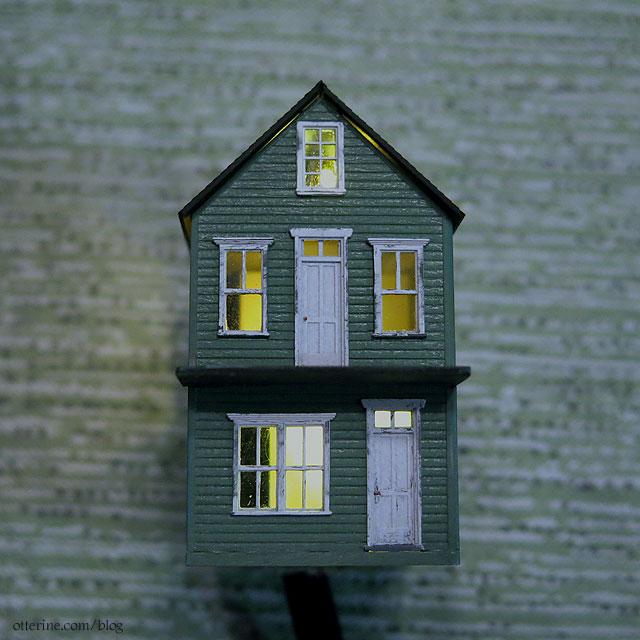
The widow’s walk on my house is just the very top of the molded part. It was a test of wills to get it to glue on straight and secure.
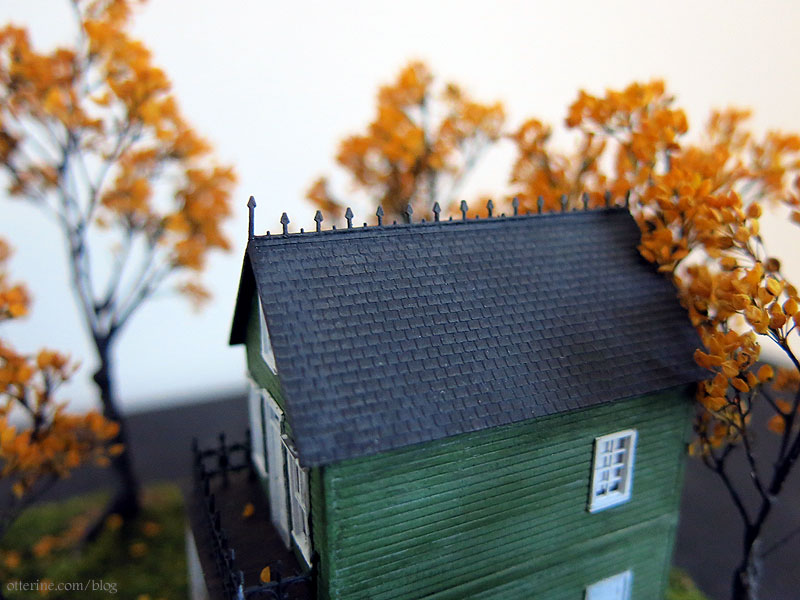
To finish the balcony and porch, I used some leftover adhesive backed micro wood from the Model T Van I built several years ago. In the end, the porch posts ended up a little wonky, but it’s an old, haunted house. I cut down more of the widow’s walk to make the balcony railing.
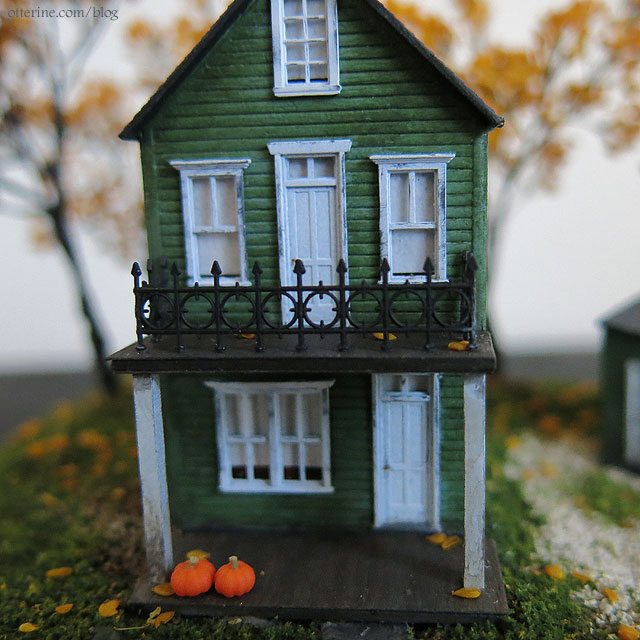
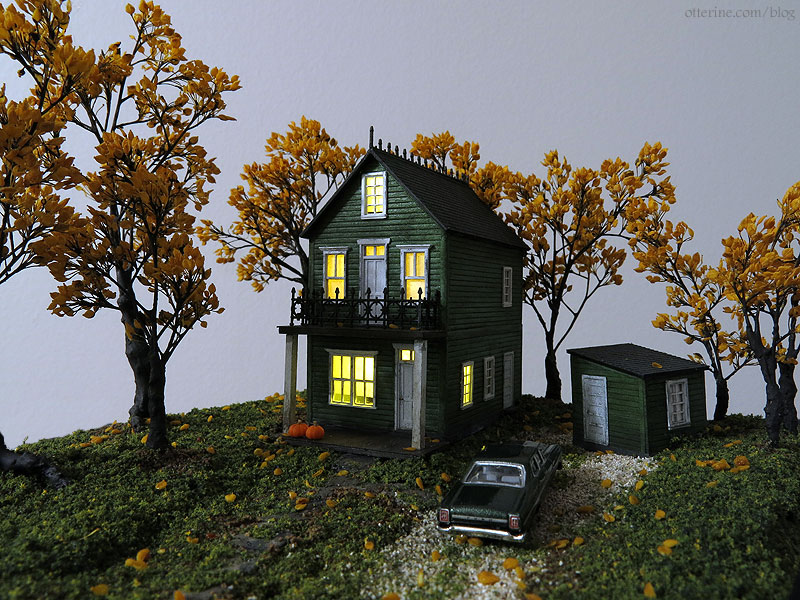
I used spray paint in moss green for the exterior, later adding some aging with acrylic paints for dimension. The windows and doors are primed in grey, then sprayed flat white.
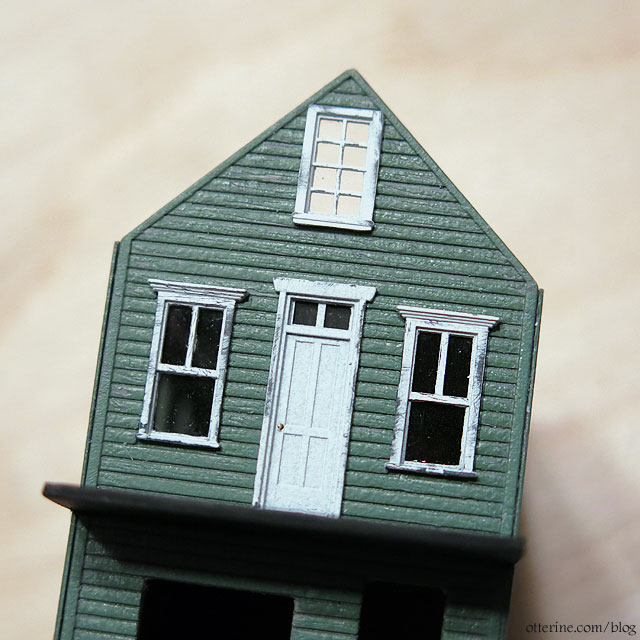
A little sanding brings forth the grey and adds a bit of age. Cutting, fitting and gluing the acetate film for the glass was an adventure. I used Testors clear parts cement, which made a bit of a mess. Good thing dirty windows are fitting for an old house.

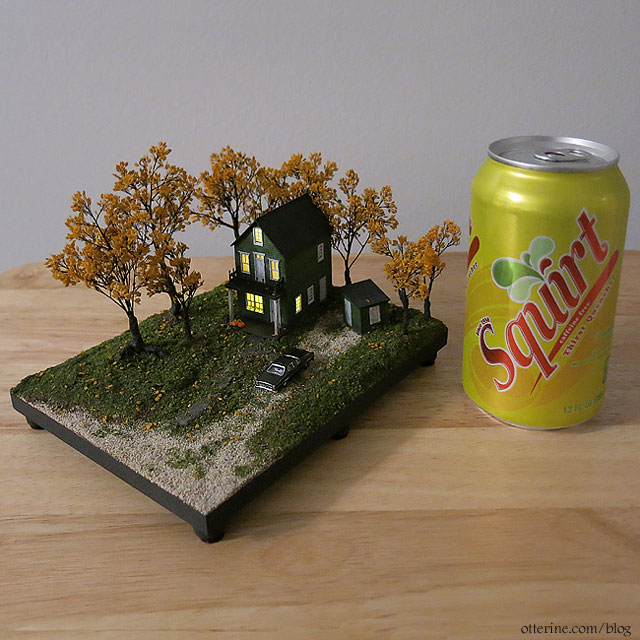
The LEDs are pico 3V in warm white from Evan Designs. I used some Gallery Glass paint to tone down the brightness, going for a warm glow on a chilly autumn evening.
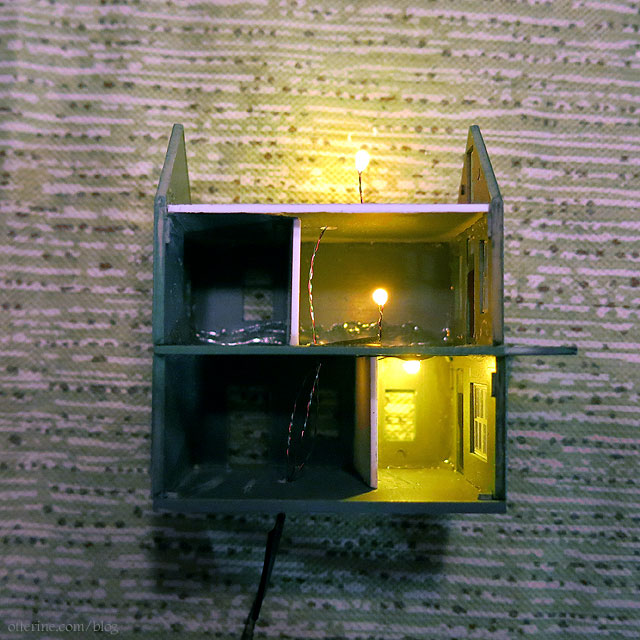
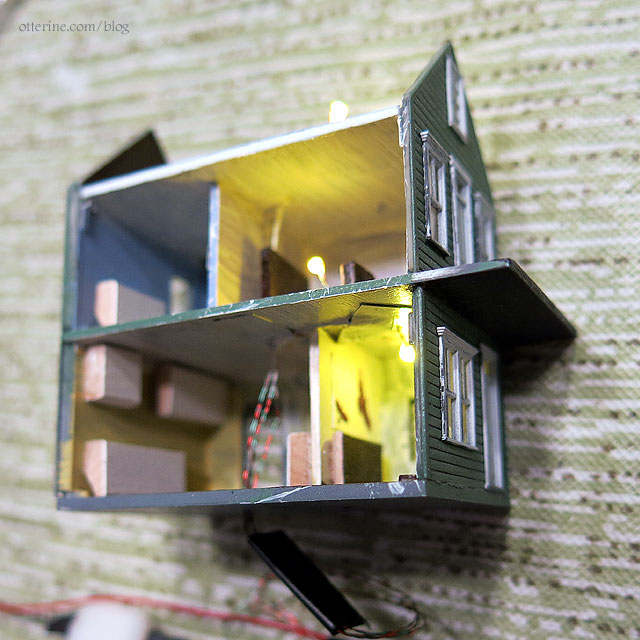
Since I would be adding LED lighting, I chose to enclose my tiny house. Once I had the lights in place and tested the look, I realized I needed to add paper shades to the windows or I would have to finish the interior. It’s rather amazing how much you can see through the tiny windows.
I painted the interior very roughly with acrylic paints and added some scraps of wood to represent furniture. The colors and shapes add dimension in reflected hues and shadows behind the thin window shades, some of which have a small gap at the bottom to allow you to almost peek inside. I even added some bird artwork on the foyer wall. You can discern it with the naked eye, but the camera doesn’t capture it well.
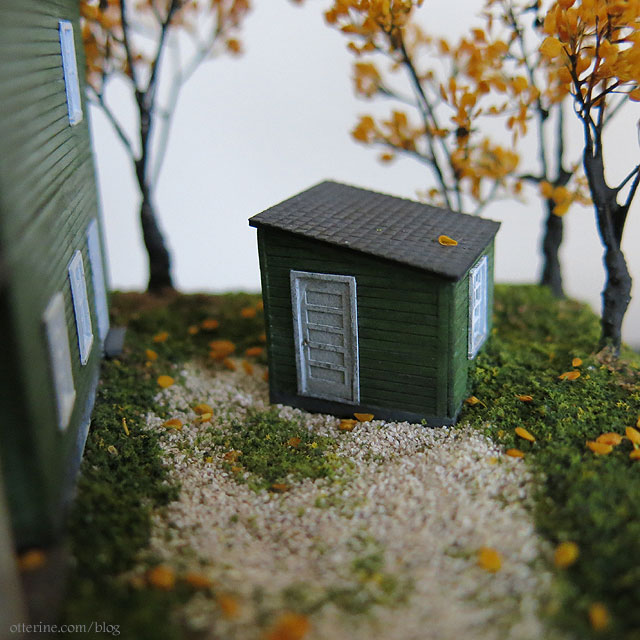
Since I had more than enough parts from the Reese Street kit, I made a matching shed.
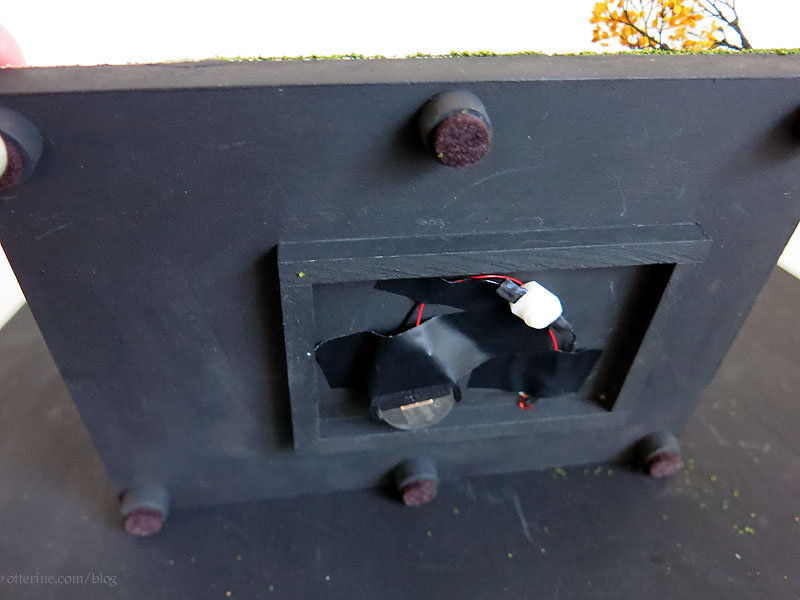
The base is a scrap of mdf with feet added so I could add a battery and switch underneath. I made a box from strip wood to disguise the battery, switch and excess wiring.
The trees are made using candytuft from Scenery Solutions. These are the same process I use for my large trees, using Durham’s Water Putty to build the trunks.

The landscaping was built up using thin sheets of styrofoam, including a stone walkway from the porch to the gravel driveway and road. Stucco patch applied unevenly over the styrofoam adds dimension to the landscape.
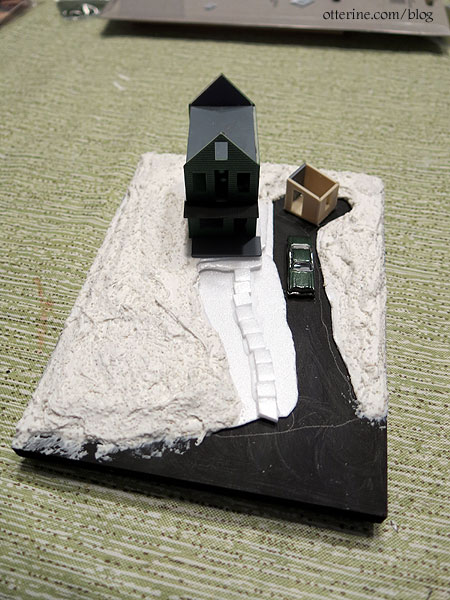
I used Woodland Scenics foliage, ballast and gravel, held in place by their Scenic Cement. I sprinkled some loose candytuft leaves on the ground as well.
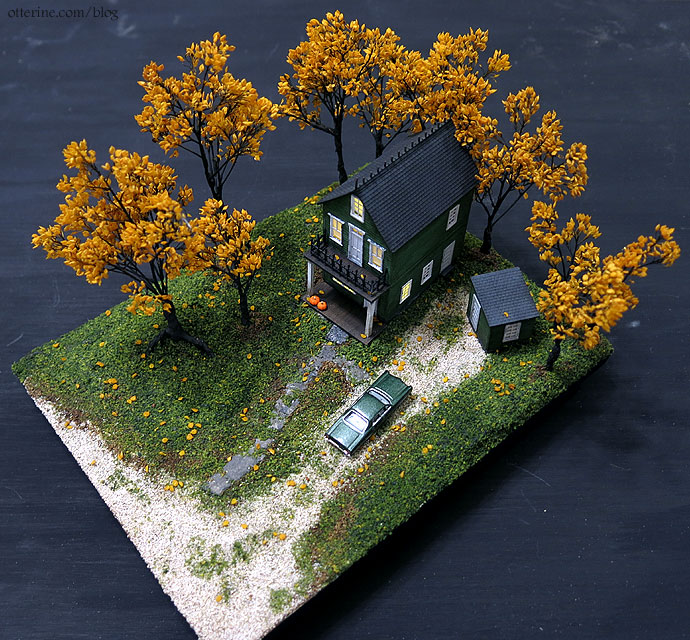
The tiny pumpkins were made by Kyle Lefort.

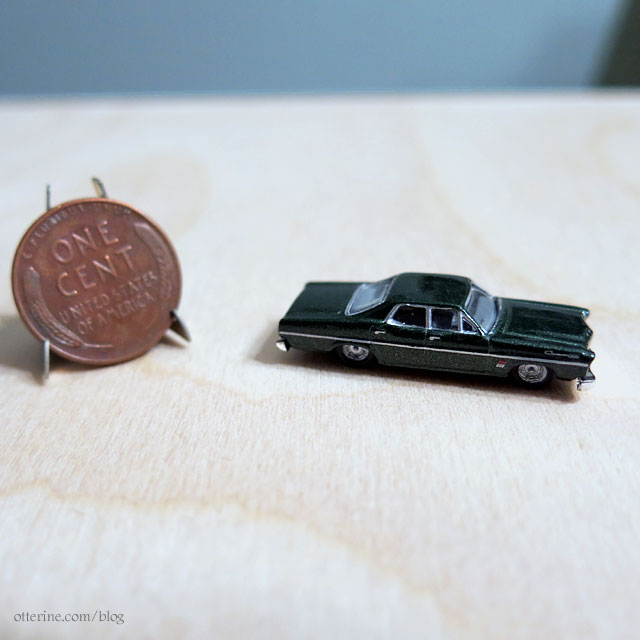
The car is a 1967 Ford Galaxie Custom 500 by Classic Metal Works. I ran across this when I was seeking small autos for the A-frame. I didn’t know then why I would need a Batmobile for the A-frame, but now I know it was meant to live at Sleepy Hollow.
And, now to put the size in perspective….
Happy Halloween, everyone! :D