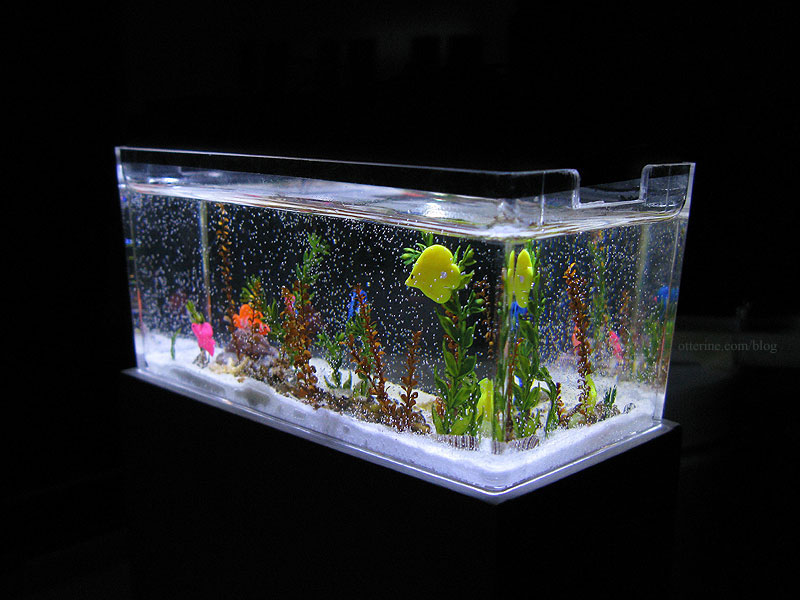
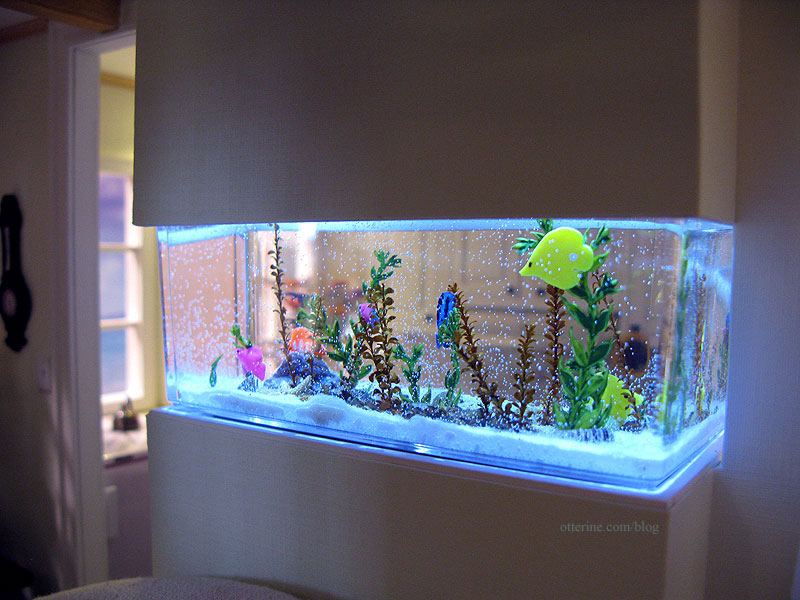
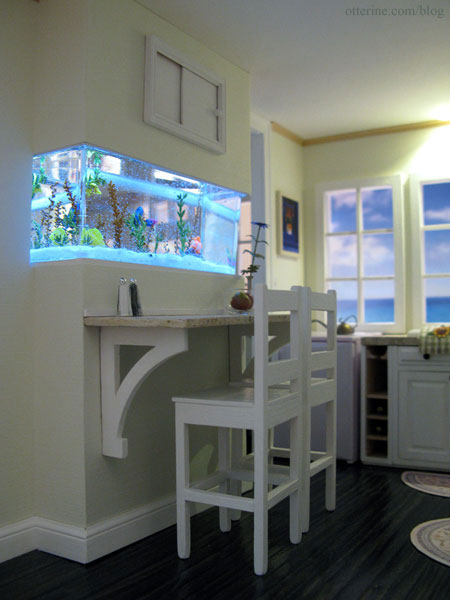
One of the main features of Baxter Pointe Villa is the saltwater aquarium room divider. This post shows the process I followed for my test tank and this final tank below.

There are several miniature aquariums on the market, some with lighting. In fact, I had one in my childhood dollhouse, though I lost track of it a long time ago. Additionally, there are miniaturists out there who have made their own fish tanks. There’s a wonderful tutorial on the Greenleaf forum for just such a tank.
I wanted to go one step further and make an elaborate saltwater tank with bright, vibrant fish and custom lighting. My inspiration for the overall size and feel of the aquarium came from various real life tanks where the aquarium is mounted in the wall and often serves as a room divider. Very posh. (For real life examples, see Fish World.)
While I did have a few smaller acrylic boxes on hand, I wanted a larger tank…something that would be better suited as a room divider than a fish tank in the corner. I found these boxes, the original purpose of which was to display diecast cars. They measure approximately 4″ L x 2″ H x 2″ D each, though the usable area is shorter since there is a noticeable lip around the top that would detract from the illusion of a real life sized aquarium. Ten dollars for five tanks gave me five attempts to get it right, though I think if it had taken me five attempts I’d have given up around three in a fit of tears and curse words.

It probably would have been better if I had a tank that were tall instead of short and more straight-sided, but I think it works well for what I intended.
Interestingly enough, the bases seem very well suited to aquarium hoods when turned upside down. Remove the knobs on top (or not), add a quick coat of paint, and you’re all set. They even have pre-drilled holes if you wanted to add lighting.

Since I had never worked with resin water before, I decided to do a test tank. I started with white sand I bought at the dollar store. I figured I would need to glue everything in place before adding the resin water, so I experimented with several different methods for gluing the sand in the tank.
I used a mixture of sand, glue and paint. For the gravel, I used gemstone beads that I smashed with a hammer into finer bits. I used the same glue/paint/sand techniques to attach the gravel to see which worked the best. Here’s the result of those multiple techniques.

I ordered some tiny, tiny, TINY shells from Ronni at Marco Island Shells, and in my package she included a bunch of slightly imperfect shells. I dipped a few in glue and pressed them into place. Actually, these aren’t the smallest she carries…she has micromini shells, too!!! :D

Look at all the intricate detail! Isn’t the natural world a remarkable thing? :]

I found some great plastic plants from A Little More in Miniatures at a local mini show. I cut them into varying lengths and used clear glue to attach them to the tank floor.


For the larger stones, fish and other live creatures, I used polymer clay. Since this was a test tank, I didn’t put a whole lot of effort into the sculpts before baking. Some were baked attached to rocks, while others were glued in place after baking. I love Sculpey Bake N Bond! Just a dab really holds so you don’t mar your creations by pressing them together.

I bought two sea urchin polymer clay molds from Tina at Beadcomber. These were cast from actual urchins and they have wonderful details.

I used the smaller one to create a flat sea creature…sort of a mix between coral and urchin. :] I dusted it with pastels before baking.

The blue fish was painted with metallic Testors paint; the rest were formed of colored clay. The rock the blue fish is on was painted with regular craft acrylic paint. As a final touch, I painted eyes on all the fish with Testors black paint using a sewing pin. The fish were all glued in place with Aleene’s clear gel glue before I added the resin.

I sealed half of the urchin creature with acrylic sealer and added a couple of non-plastic plants just to see how the resin would react with these materials.
Of course, my test tank was looking better with everything I added. Isn’t that always the case? Now, I was worried about ruining it with the resin. But, there was no turning back!

I bought Acrylic Water from Walmart since others who have made these tanks recommended it. It was also way cheaper than other casting resins on the market. It was super easy to use, but I must say finding measuring cups was not easy. Sure, I could have ordered them online, but really…a craft store that sells resin kits should have plastic measuring cups. I ended up buying a pack of 9oz. Chinet cups from Target and made my own measuring cups. :D
The test tank took 6oz. of resin mixture. I filled it to the line around the top to make it less obvious.
The directions said to mix the epoxy with the hardener and stir “until clear.” Well, it was clear but it had streak-like formations in it that I didn’t notice until after it was poured into the tank. I don’t know if that meant I didn’t stir it long enough or if that was just the nature of the resin.

During the first few minutes, some large bubbles rose to the top and popped. Using a toothpick, I dislodged a few that were stuck as well. There were some tiny bubbles left in the resin, but I liked the look of them. That sort of aeration is similar to what a real tank has.
After 48 hours, the resin had hardened and looked good for the most part.

Most of the streaks had disappeared, but there was a halo in the area where I had painted a rock with acrylic paints. Though I wasn’t sure it was a reaction with the resin, I figured it was best to eliminate those paints in the next trial just in case.

Had I intended to display the tank in a cabinet with a backdrop, the halo wouldn’t matter since I could likely disguise it…but I wanted to be able to see it from both sides and the streak ruined the illusion of real water. Still, not bad for a test tank.
For the second and final tank, I skipped the sea urchin creature and instead added two starfish, also from Ronni at Marco Island Shells.

I put in more plants as well as taller plants. I spent a bit more time sculpting the fish and added a bit more detail to them.

I also stirred the resin for close to ten minutes to make sure it was as clear as I could get it before filling it up to the side openings along the rim to take advantage of all the usable space available. I got a few more bubbles this time – probably from too much stirring, but I think it turned out fabulous!
To place it in the wall, I built a base that fits just around the tiny lip on the bottom (shown with the test tank).

I used square posts in the corners for stability.

I built the soffit in the same manner, cutting notches for the thin room divider near the ceiling and adding a brace across the inside to glue it in place. Here it is shown without the back, which was put on after installation.

I bought two cool white LEDs from Evan Designs to light the tank. To diffuse the lighting at bit, I used a recycled report cover with a lined texture to finish the inside of the topper.


And, here is the final tank set in the wall. I love it! I especially love the way the lights pick up the bubbles in the resin.

There is a door on the kitchen side of the aquarium soffit that allows access to the tank. I hardwired the lighting, so it’s meant only as a means for the residents to feed the fish! :D

Note: any resin used will likely yellow over time, so use at your own discretion. The resin for the tank made in this post is now very dark yellow.


