

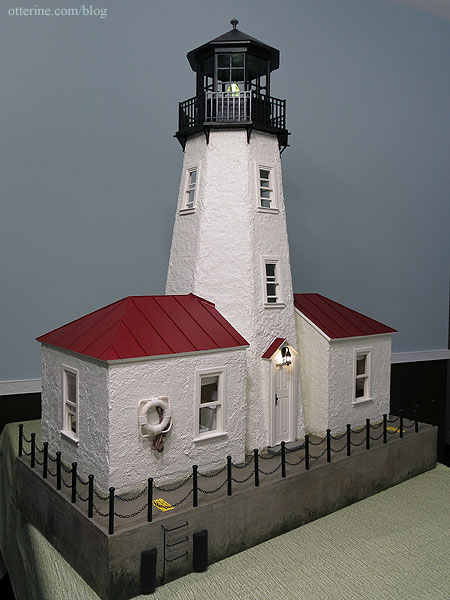
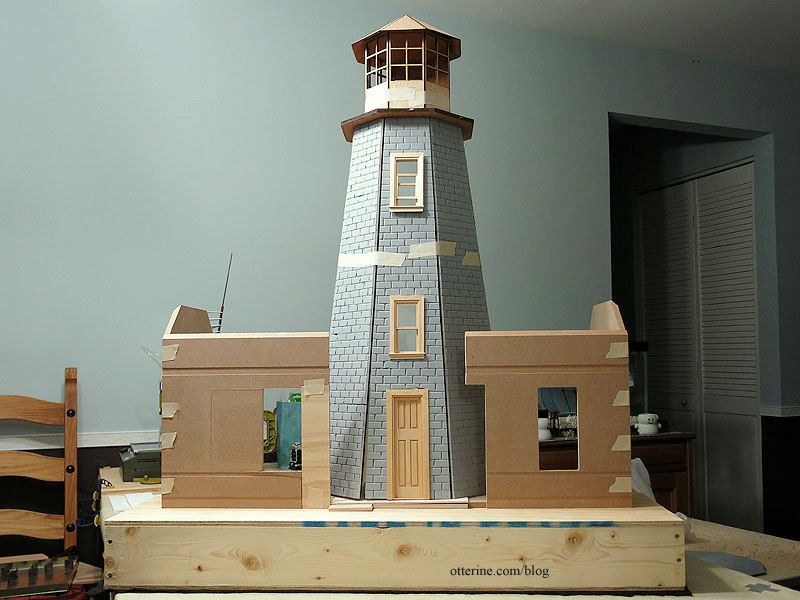
Tips and tricks for the Greenleaf Lighthouse kit
While I did make a number of changes to the basic Greenleaf lighthouse kit, there are some things that might make it easier for someone putting one together out of the box. Or, these tips and tricks might make you think of another method to help with assembly.
Since I eliminated the bottom and middle floors, I didn’t assemble the walls according to the instructions. I also wanted to finish the upper floor tile and support underneath before installing the floor inside the tower.
My first bit of advice is to cut any new windows or doors before you assemble the structure. For the actual assembly, I used Tyvek strips. I glued strips to one edge from top to bottom and let the glue dry completely.


I then added glue to the opposite edge and glued the pieces as close together as possible. Even during the dry fit, the floor was a bear to fit, mainly because you are juggling so many pieces at once. I did have to adjust the tabs and slots slightly for the final fit, but the Tyvek strips made the tower assembly much easier.


The Tyvek strips held the edges together while still allowing for flexibility.

Before installing the upper floor, I added all my wiring channels using the Dremel Trio.

I used this same method for the lantern room roof. If I had had more time, I would have liked to make this open with rafter work. Next time…. :D

I added glue per the instructions.

After the glue was dry, I spackled the joins. I later spackled the flat surfaces to remove the wood grain so that it would look like metal once painted.

Most of the structural changes I made involved the lantern room. Since I added a Fresnel lens and lighting, I needed the lantern room to be removable since it’s a closed room with no opening in the back. To that end, I couldn’t glue the walls onto the base. I assembled the walls with the handrail in place but no glue between the walls or on the top and bottom pieces. From there, I glued the vertical trim #6 pieces at each lower join and then added cut pieces of Houseworks siding between the trim pieces.

I finished the hand rail and glued it in place. I assembled and finished the crown as well but left it detachable in case I want to add the acetate windows later on. It sits snugly over the lantern room walls and keeps the room solid. To add stability to the upper portion where the windows are, I glued pieces of 1/8″ strip wood cut to size (making sure these fit under the crown).

I added 1/16″ strip wood under the hand rail to finish the gaps between the siding and the hand rail and spackled the joins in the top crown assembly.

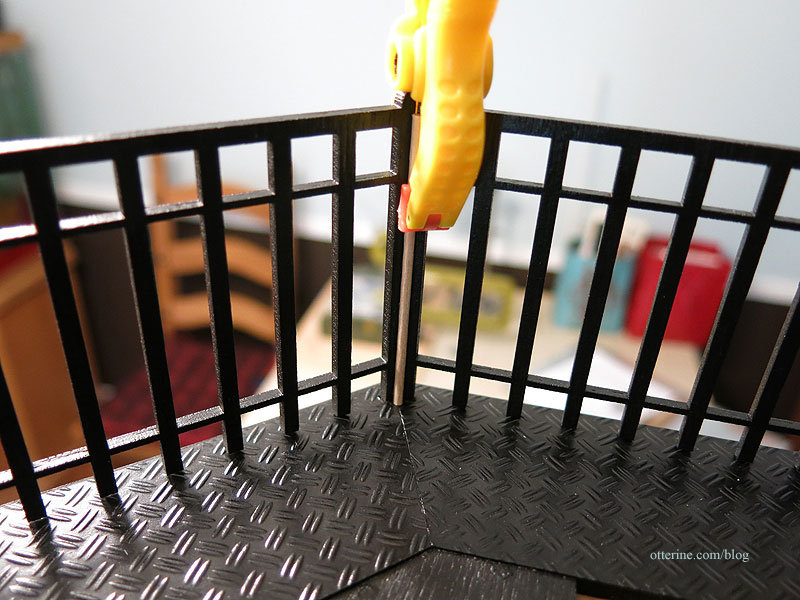
I added Plastruct 1/16″ double diamond plate plastic sheet around the exterior landing of the lantern room base, cutting it to fit around the lantern room walls.

In order to cut the holes for the railing, I used a flashlight to shine light through the plastic.


I traced the laser cut holes and cut them with an X-Acto blade.


I glued the railing in place and held the pieces together with clamps.

I reinforced the railing with small dowels since there wasn’t much surface area to glue them side to side. I painted these black and you can’t even tell there is anything there.

The lantern room and its roof lift off the base. The base and railing are attached to the tower permanently. The laser cut tabs and slots hold the lantern room in place.
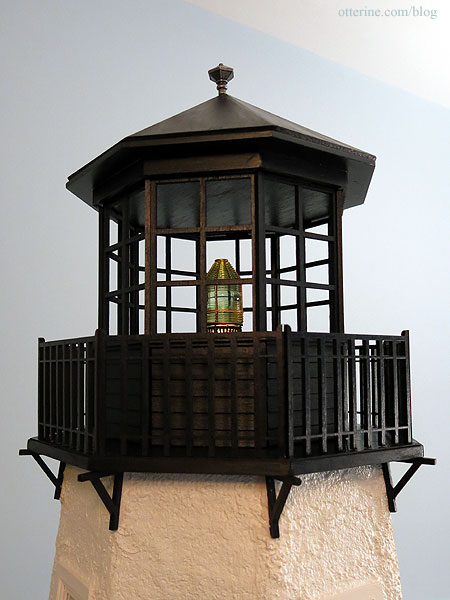
I used flat black spray paint and Minwax Satin Polycrylic spray on most of the pieces of the lantern room and hand painted only when necessary.
You can find the specifics on the Fresnel lens and its support mechanism in this post.
Categories: Walnut Bay Light
December 27, 2013 | 0 commentsSleeping mice
In addition to some other nice gifts, mom gave me a wonderful set of needle felted mice from Rustles from the Meadow. I just love Johana’s animals.
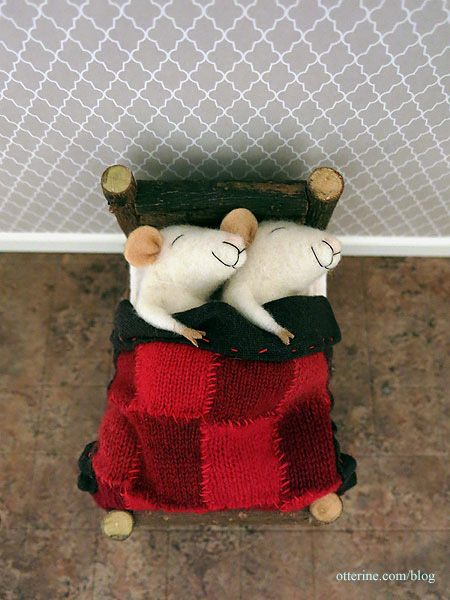
They have their own little bed to snuggle in and keep warm.
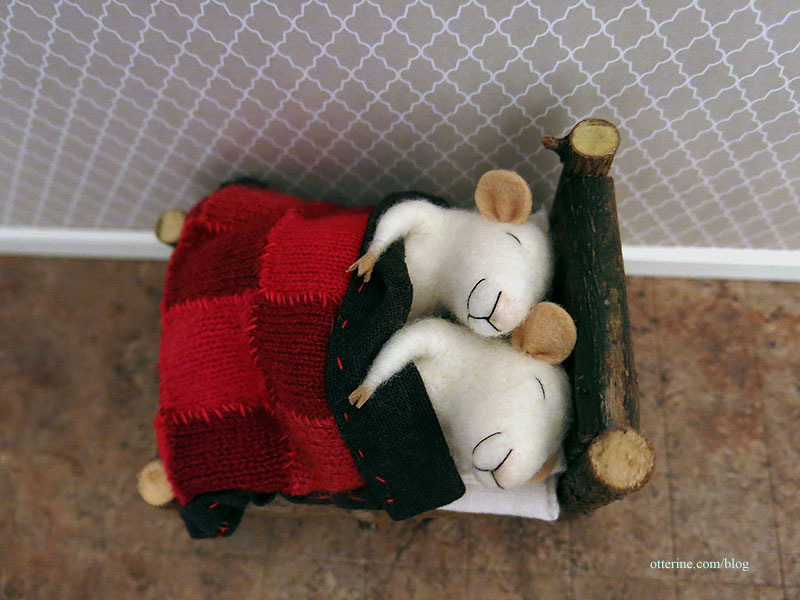
Don’t they look like they are having the best dreams?! :D

They are fully formed mice, too! You bend the tails and feet to balance them for standing alone.
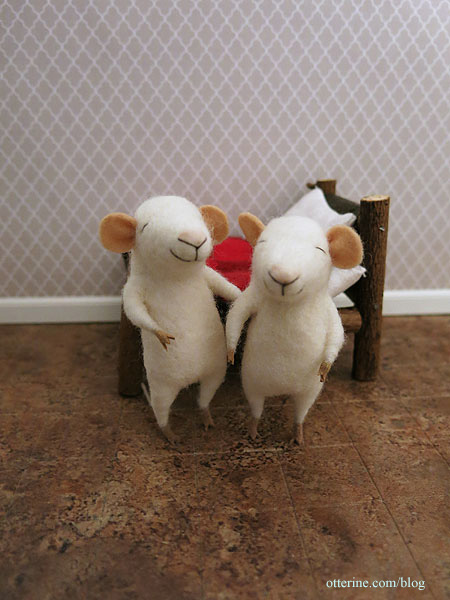
Hmm…I might have to make some robes.
Categories: Animals and birds
December 26, 2013 | 0 commentsMerry Christmas 2013
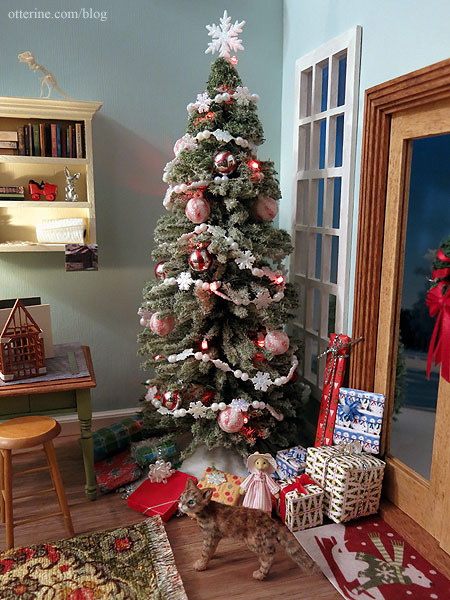
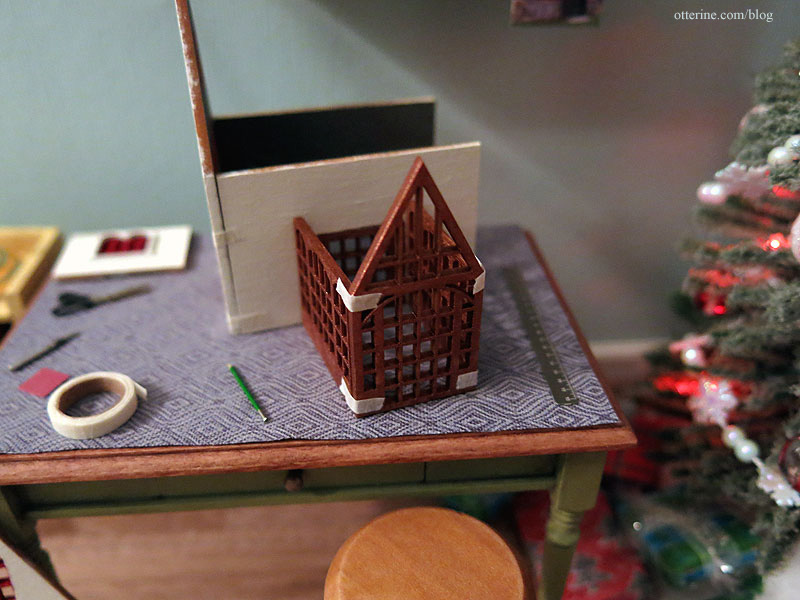
My tiny scene for Hampton House isn’t as complete as I wanted, but with the busy holiday schedule, it was the best I could do.

I started a House of Miniatures cabinet for the wall, leaving off the front doors. This still needs to be sanded and finished.
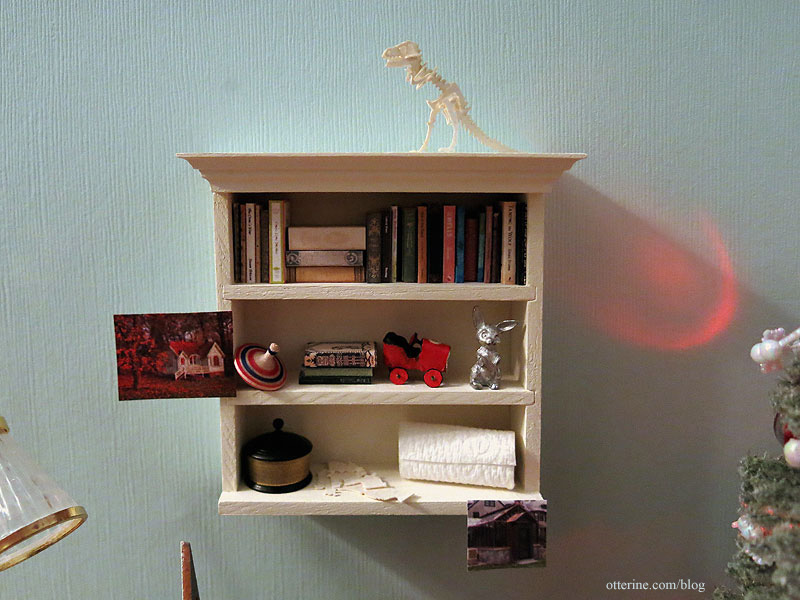
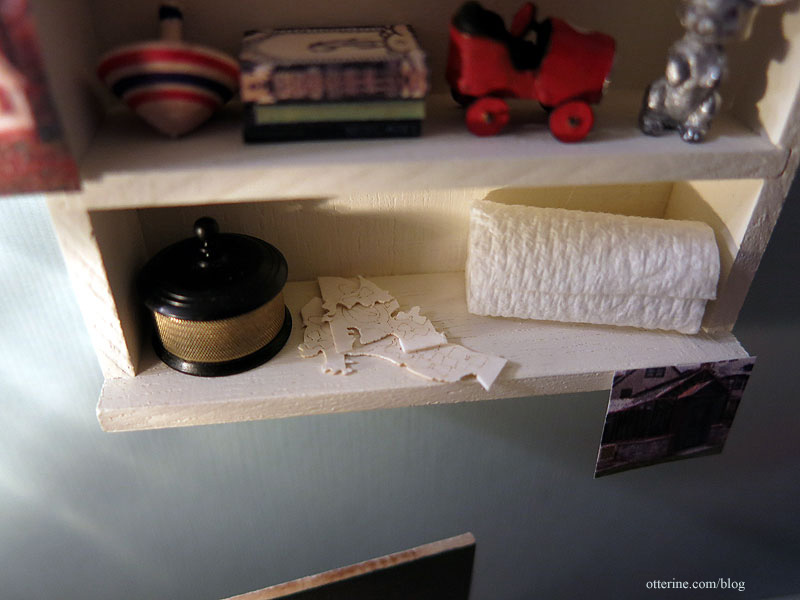
As with many of you, I often have more than one project going at a time. Hence, the partially completed Tinysaur T-Rex.

Look at those tiny pieces waiting to be cut from the frame. :D I will post about this project separately. The paper towels are from Lyssa.
Cora is running around but staying out of trouble…so far. ;]
I made a tiny roll of masking tape for the work table.
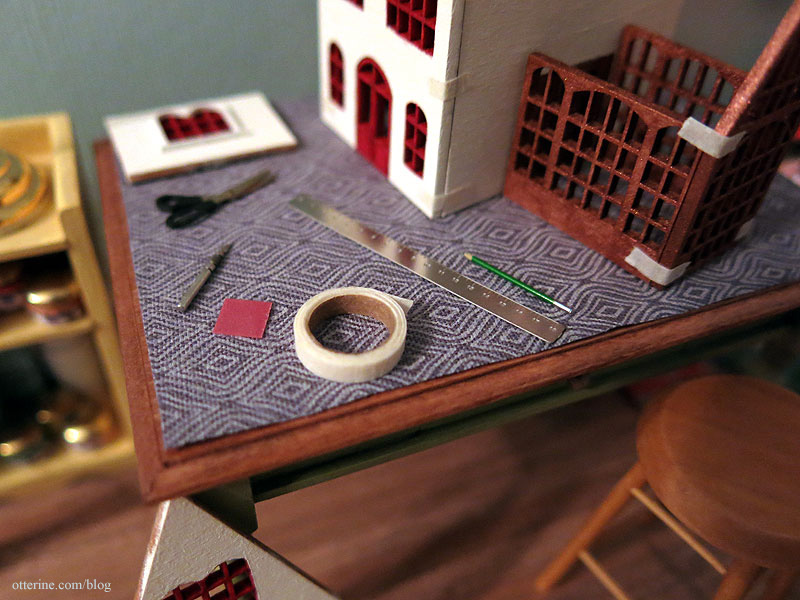
The Hampton House is in a state of dry fit to determine where the greenhouse will sit.
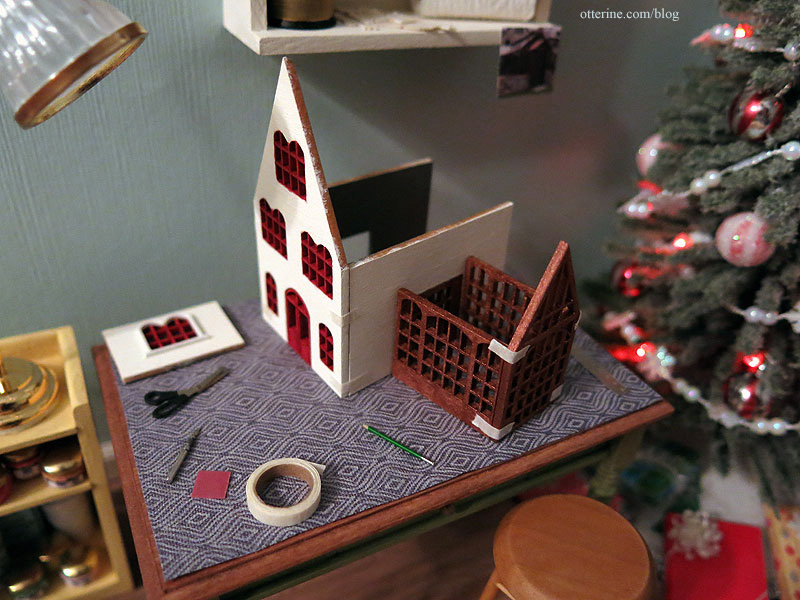
It was not easy getting the tape to stick.
Wishing you all a wonderful Christmas! :D

Categories: Micro Scale Models
December 25, 2013 | 0 commentsWalnut Bay Light – turning wood into concrete
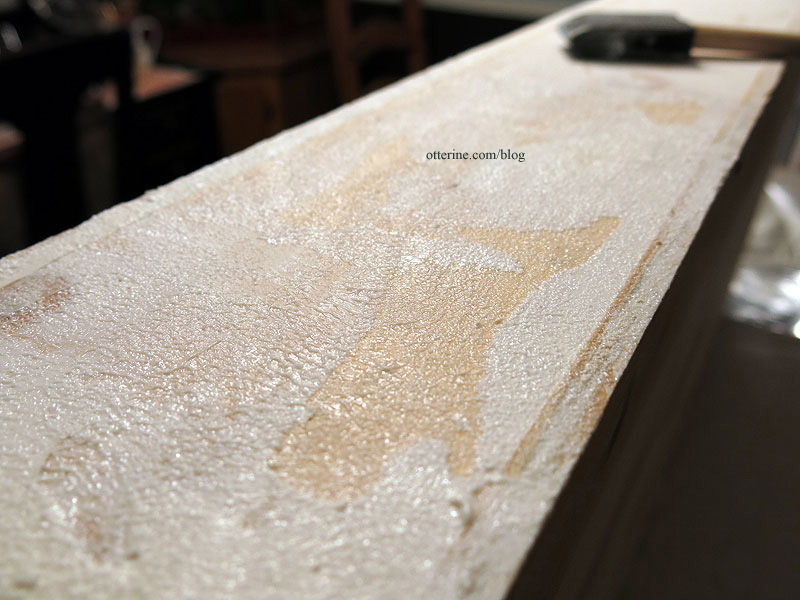
Walnut Bay Light sits on a large base that serves as the breakwater.
It started out as a large wooden box with a hollow interior for holding the wiring.
I started the conversion to concrete by spackling the rough ends of the boards and any nails. I wasn’t careful or sparing in the application since concrete in real life is not perfectly smooth. I also masked where the structure would sit to keep that surface clean.

Once that was dry, I applied matte gel medium with a sponge brush, tapping the mixture onto the surface.

I let this dry and then applied a second coat in the same manner.
I let this dry overnight and then painted with leftover Benjamin Moore Silver Fox flat paint. It was a great base color.
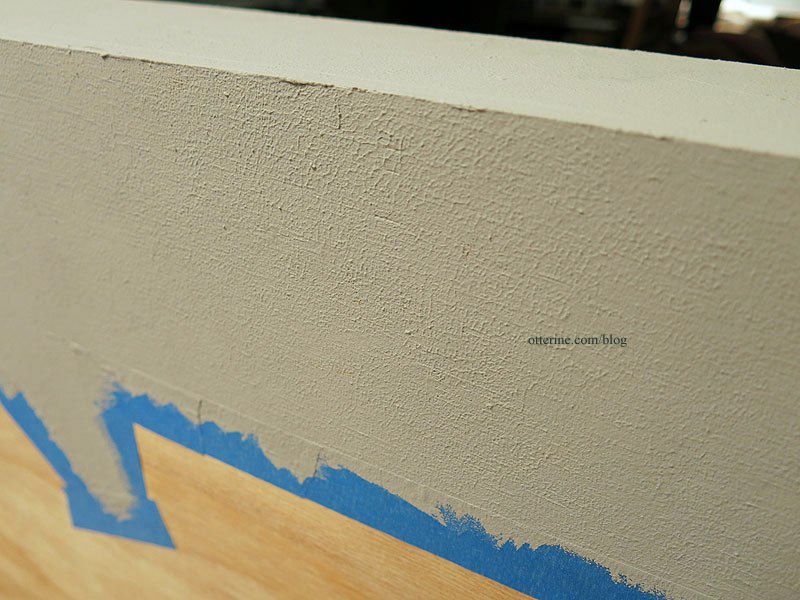
It also helped me see where there were still issues with the wood grain or spackling patches showing.

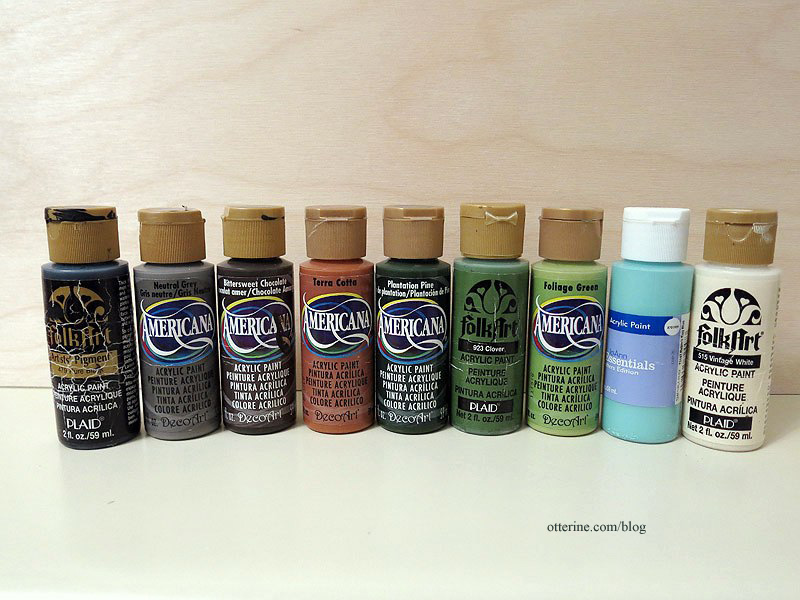
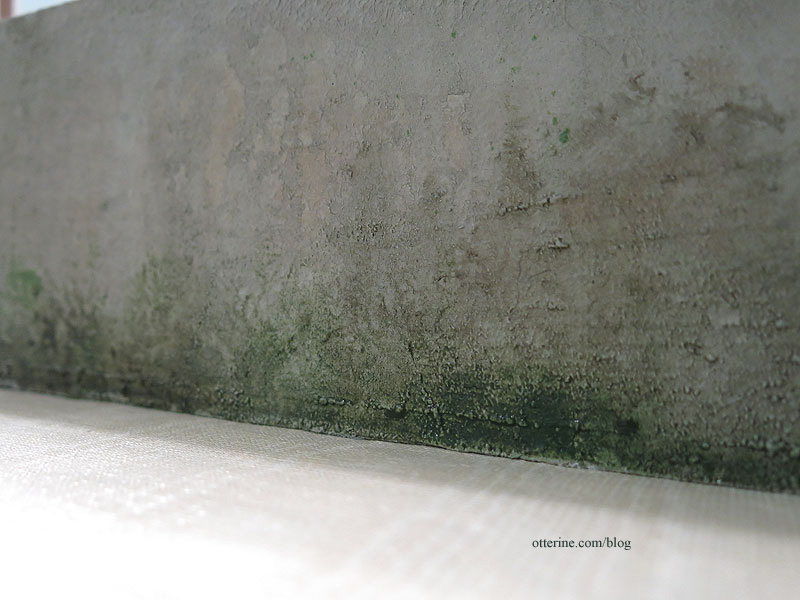
I touched up those areas with spackling and matte gel medium before painting the second coat of Silver Fox. Next came the aging washes. This was a very messy process, so I didn’t take any photos during the applications. I spread newspaper under the base to catch the excess paint and used these colors in a series of diluted washes. Folk Art: Black, Clover, and Vintage White. Americana: Neutral Grey, Bittersweet Chocolate, Terra Cotta, Plantation Pine and Foliage Green. Joann: Robin’s Egg Blue.
I brushed them on and wiped them off in random spots. Over the sides, I let the paint washes drip down the surface and sopped up the excess with paper towels around the bottom. I just kept adding until I liked the result.
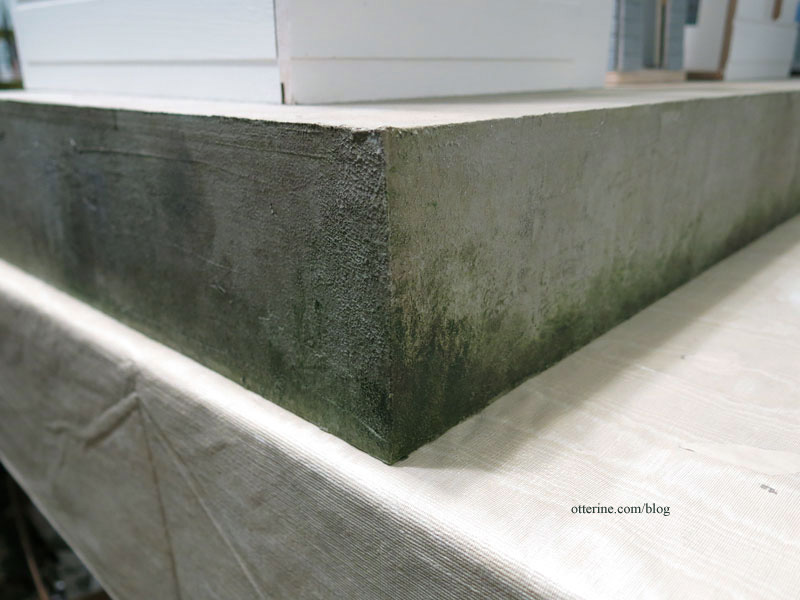
Around the bottom of the base, the paints were less diluted.
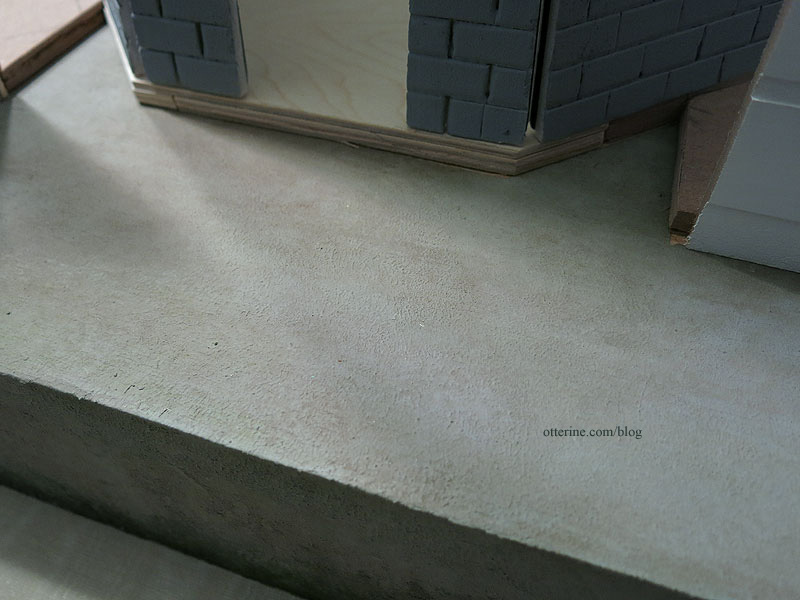
The top is more consistent in color than the sides since the surface would have been cleaned regularly. There were a few more washes added later, but they didn’t change the look much from this initial application of color.
With the addition of the ladder and boat bumpers, it really looks like a water-aged concrete structure.
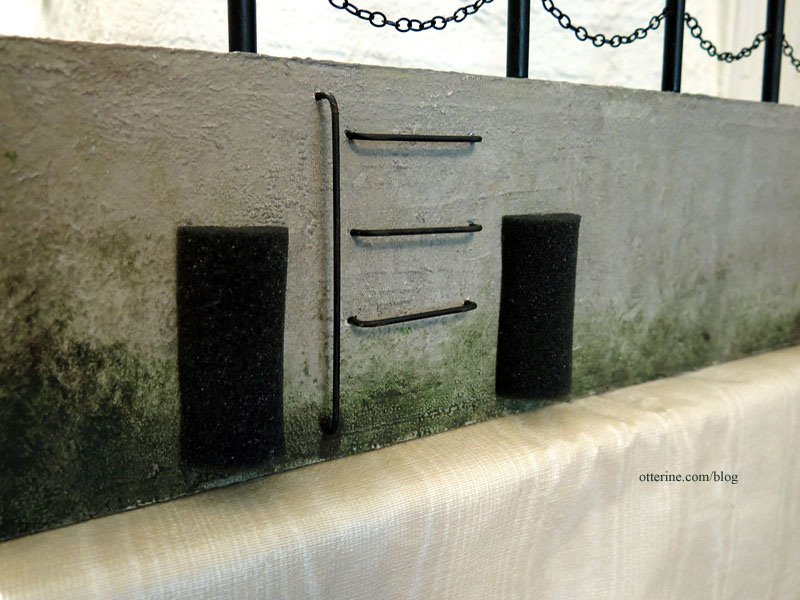
The railing and ladder are made from brass rod painted black and brown. The boat bumpers are made from a foam hair roller.
Categories: Walnut Bay Light
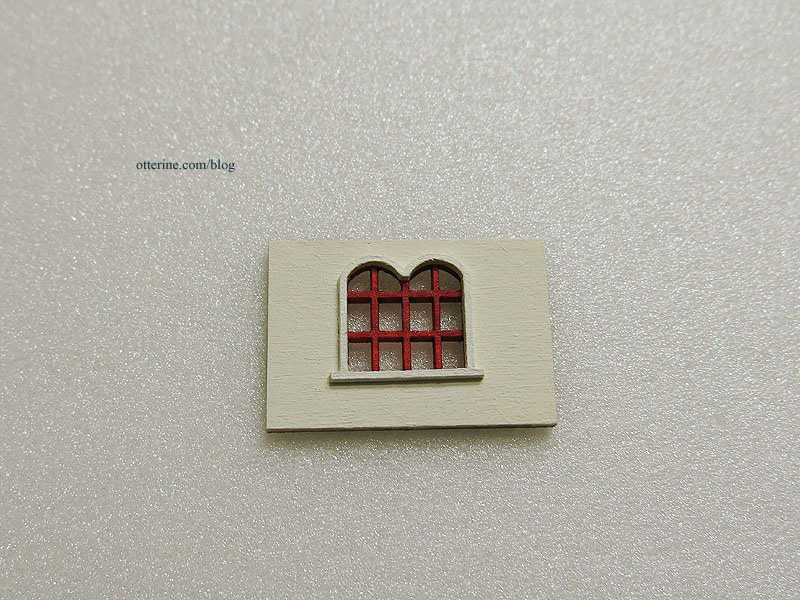
December 23, 2013 | 0 commentsHampton House – window trim
I have the main building pieces painted and ready for the window trim. I used a tiny brush to paint the trim while it was still on the frame. I tried to keep the paint only on the trim because I didn’t want to fuse the trim pieces to the frame or to each other.
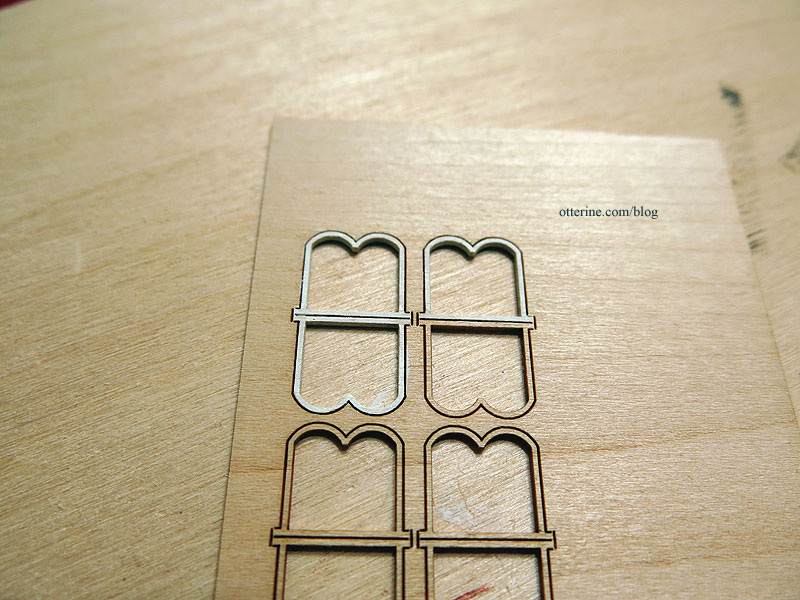
I used a brand new X-Acto blade to clip the trim pieces from the frame. Before I could glue them in place, I needed to paint the remaining edges.
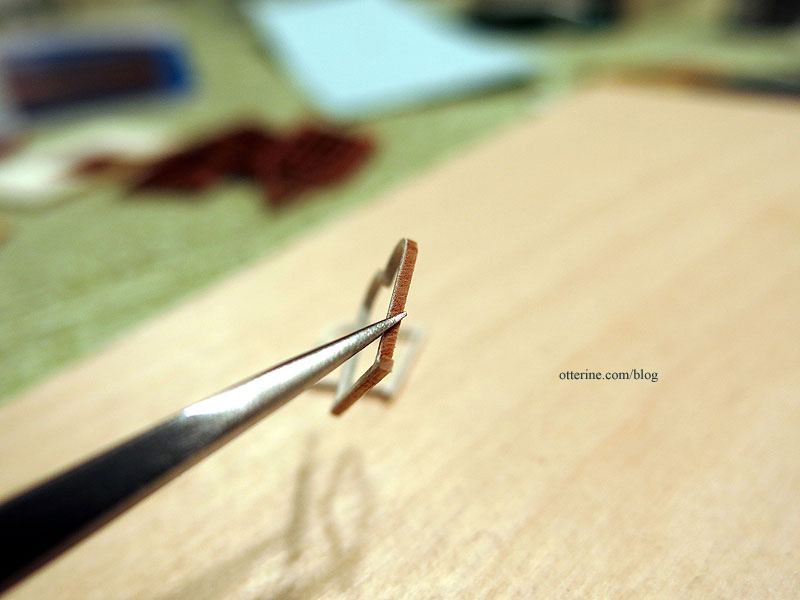
Since I was using such thin layers of paint, the paint dried quickly and I could handle the pieces right away. But, this also caused the paint to coagulate on the brush. I just kept washing the brush as I worked, and that made painting much easier.
Only the tiniest amount of glue was needed to attach the trim. I cleaned away any excess with the tip of the X-Acto blade. The windows have two coats of Warm White which make them a shade brighter than the wall color.
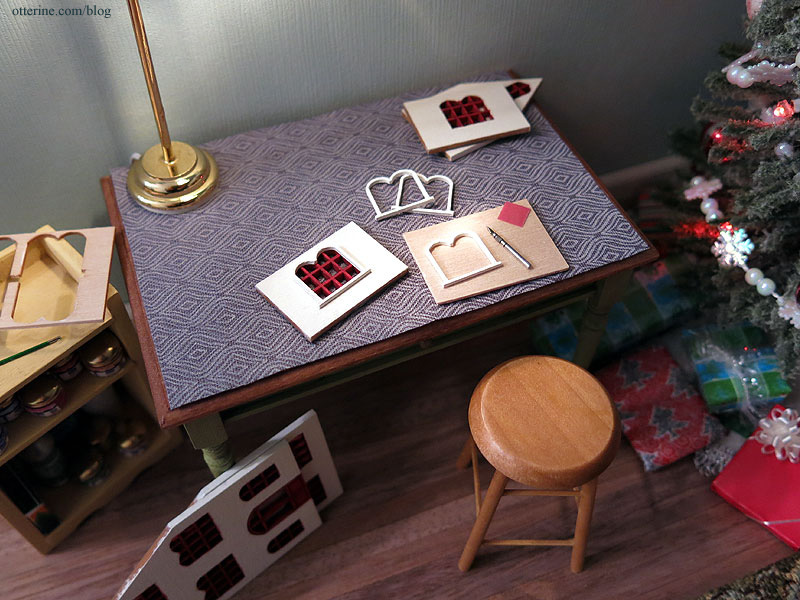
I made a quick tablecloth for the work table and cut a tiny corner of the sandpaper I’m using for the mini scene. I also added presents under the tree. :D
The marvelous mini X-Acto is from Ulus Miniaturas.
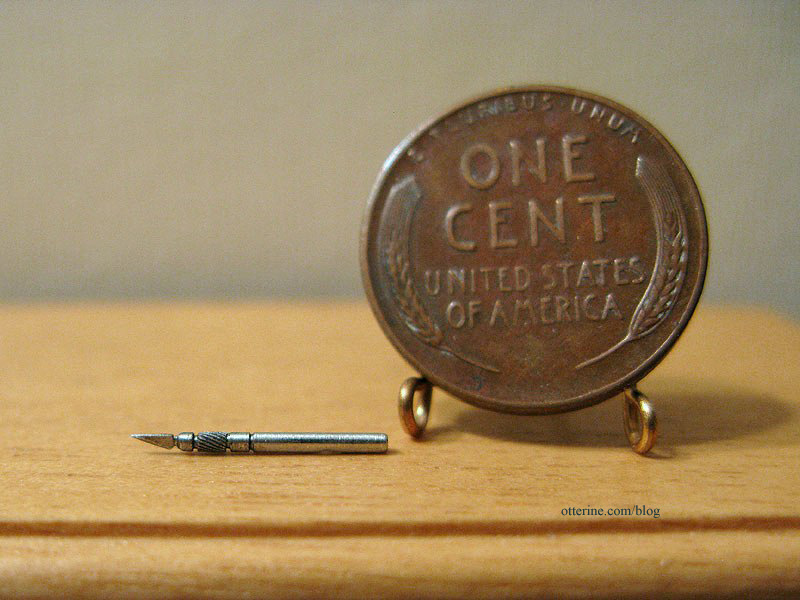
I have many more accessories I plan to add to the scene, so I will save the rest for the final Christmas post.
Categories: Micro Scale Models
December 22, 2013 | 0 comments


NOTE: All content on otterine.com is copyrighted and may not be reproduced in part or in whole. It takes a lot of time and effort to write and photograph for my blog. Please ask permission before reproducing any of my content. Please click for copyright notice and Pinterest use.


