

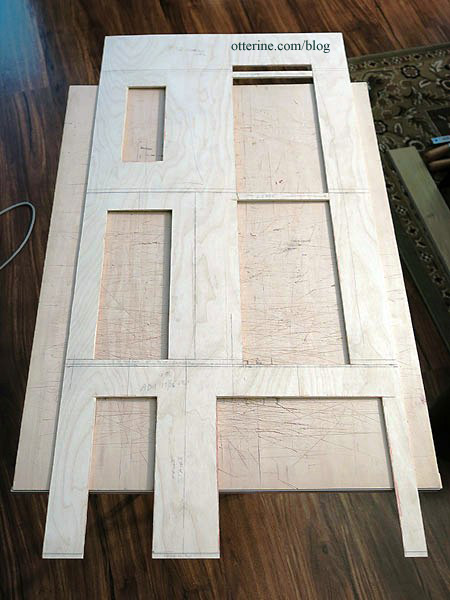
The Brownstone – openings and padding
With the new boards cut and marked, I needed to start cutting the openings for the windows and doors. I am cutting them with a utility blade. The thickest boards are 3/16″, so it is reasonably easy and quick.
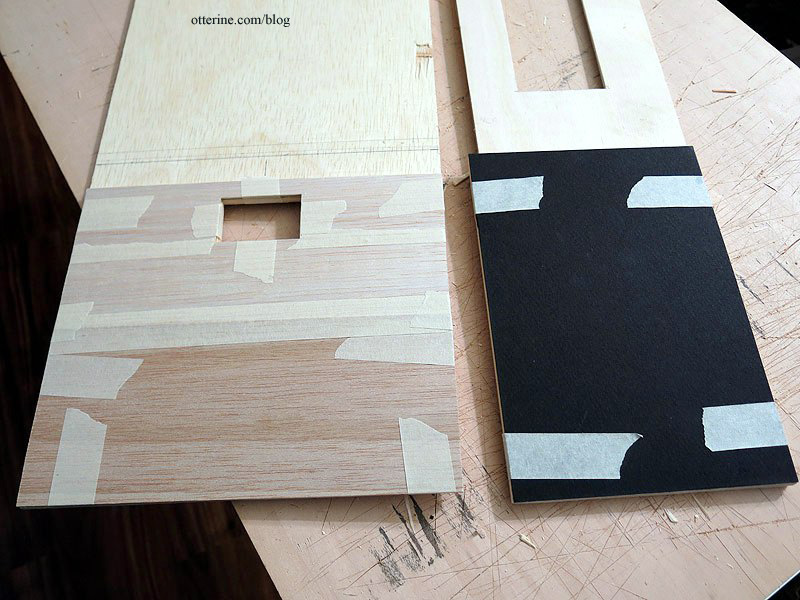
Since the timber assemblies sit on top of the structure boards, I needed to pad the lower areas that will be covered in egg carton stone. The side addition front has 5/16″ thick timbers, so I first added a 3/16″ plywood layer.
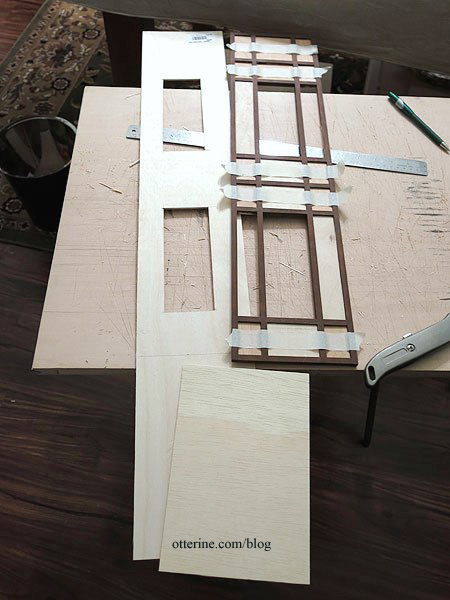
I then added a 1/16″ mat board layer. I could have used 1/4″ plywood, yes, but I was trying to use up the scraps I had on hand. The sides will have 1/8″ thick timber assemblies, so I added a layer of 3/32″ balsa — again using up the scraps I had on hand.
I have a small Timberbrook working basement window from All About Miniatures that I’ve added to the lower side wall.

Since you can’t take it apart to finish, I decided to try staining it before cutting the opening. If it turned out to be a disaster, I wouldn’t have wasted my time and energy cutting the opening for it (and then have to fill it back in). It worked well. This is Minwax Dark Walnut.
I cut the garage door and lower entry door holes in the 1/8″ thick main backer board. I cut a 3/16″ thick padding board for the lower front (not glued in place yet). This will have egg carton stone covering it.

I cut the opening for the front door and checked the fit. Hooray! :D
I cut the three openings for the bay window section and the single upper window above the door.
Categories: The Brownstone
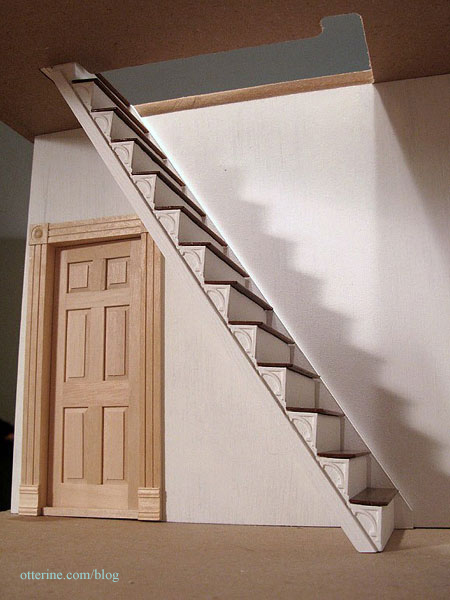
March 9, 2014 | 0 commentsThe Brownstone – main floor staircase, part 1
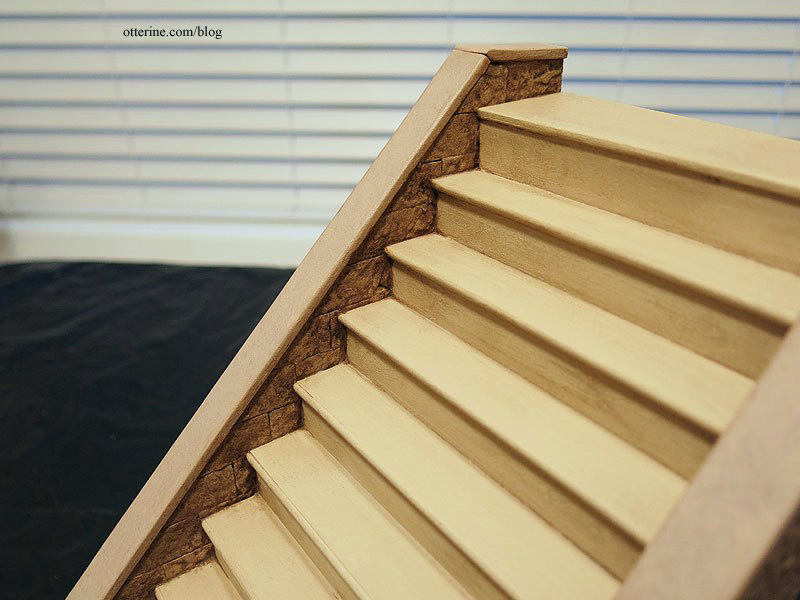
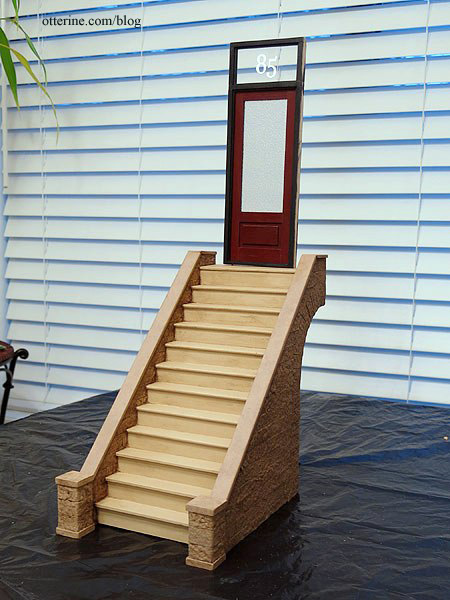
Before cutting the final holes for doorways and windows in the main floor, I worked on the staircase to make sure I didn’t need to adjust the ceiling height on the main floor. I’m making the main floor staircase from an Architect’s Choice kit purchased from All About Miniatures at the 3 Blind Mice Show.
The instructions could use a few additional drawings, but I managed to figure out what they meant. These are made for a 9 3/4″ floor to floor measurement. Since I don’t have a building to fit them into, it’s hard to visualize what that means. I think it means from the surface of the lower floor to the top surface of the upper floor. Either way, that won’t work for me since my main floor ceiling height is 10 1/2″ from the floor surface to the ceiling surface.
I have two of these kits, and the lower level will have a shorter ceiling height. So, I took an extra step from the other kit and added it to the main floor staircase. I assembled it following the kit instructions otherwise. I will still need to make adjustments once the structure is built, but my existing plans don’t need to be altered.
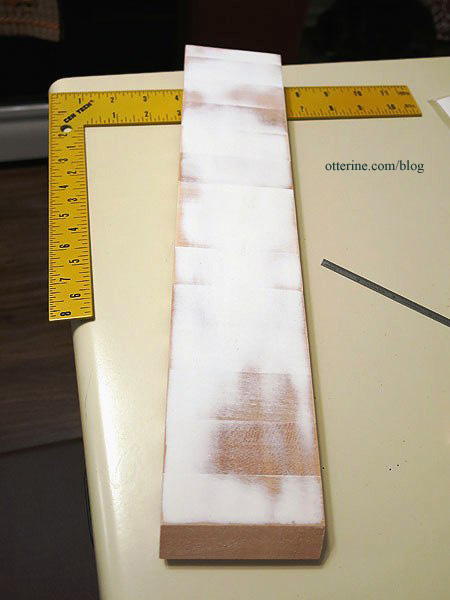
I love the look of white stairs with stained treads, so that is the look I’m going with here. I did this style in the Newport.
I spackled the back of the assembly and sanded it smooth.
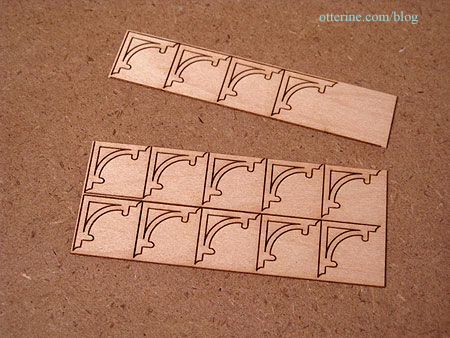
I added Laser Tech corners on 12 of the steps, just as I had done for the Newport.
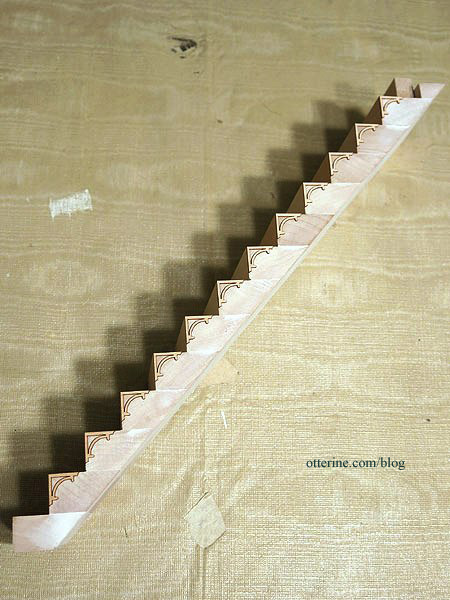
These are simple in design but add just enough interest.
I painted the assembly white. Once dry, I’ll sand it smooth and put on a final coat of paint.
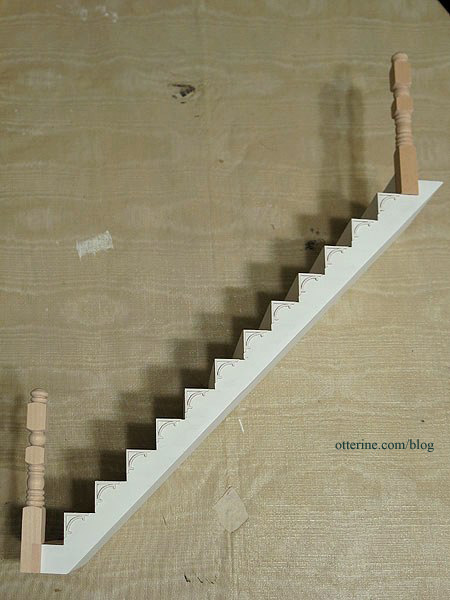
The newel posts really are spectacular in this kit. :]
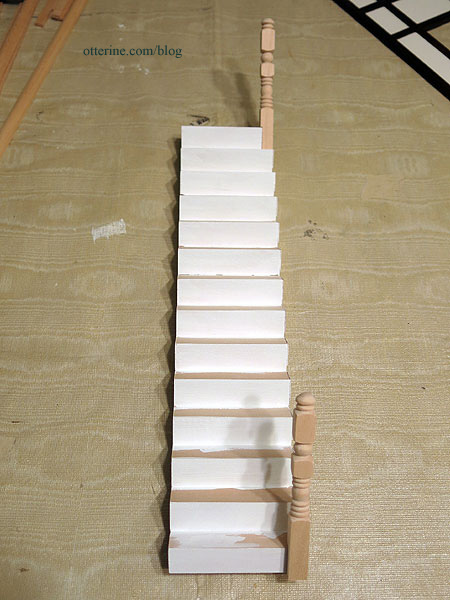
Next up, shaping the treads and staining the accent pieces.
Categories: The Brownstone
March 8, 2014 | 0 commentsThe Brownstone – trying out the final finishes
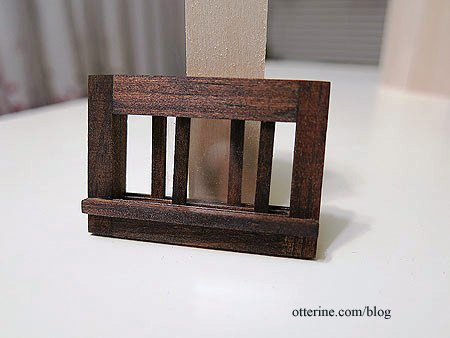
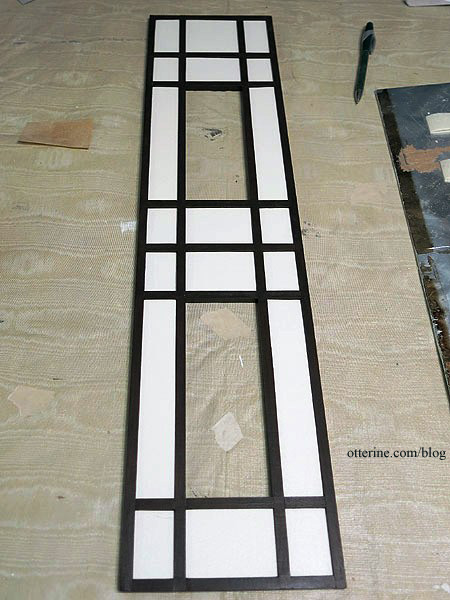
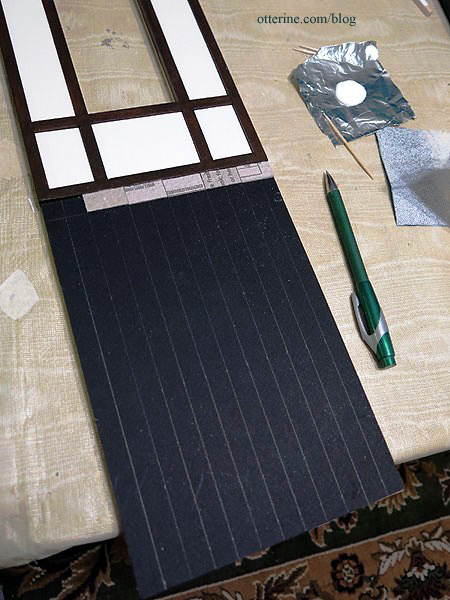
Today, I decided to proceed with the final finishes on the front wall of the side addition. I finished cutting the filler pieces and taped them to a painting board after numbering them on the back to help with reassembly.
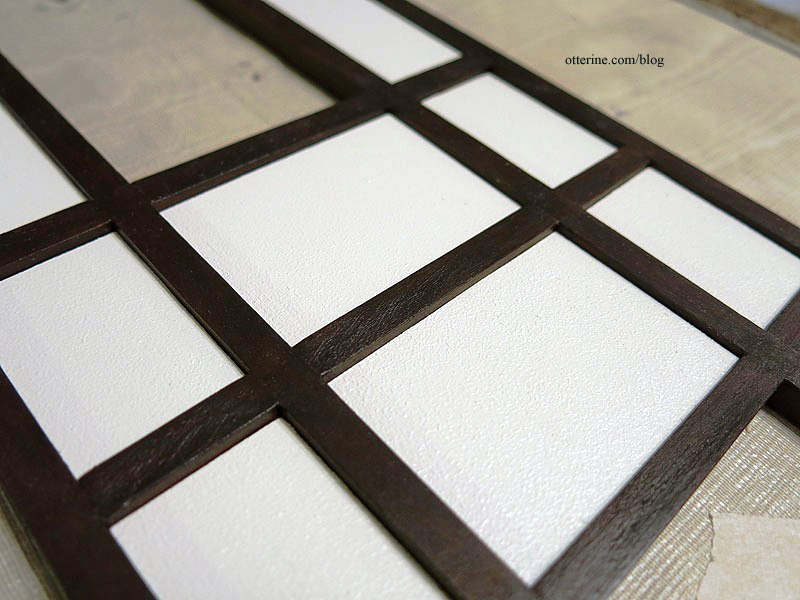
I painted the timber grid with a mix of Staining Medium and Bittersweet Chocolate by Americana. The previous base coat of Coffee Bean by Folk Art underneath created a subtle variegated color.
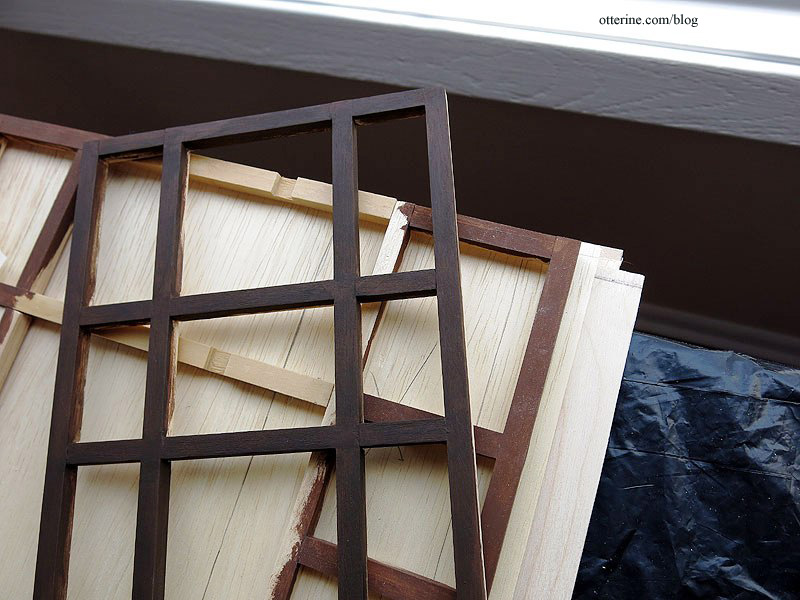
I finished the filler pieces in the same manner as the front door recess: one coat of matte gel medium and three coats of White Birch satin paint by Americana. I finished the timber grid with Delta Ceramcoat Satin Varnish. Once the pieces were dry, I pushed the filler pieces into the grid from the back. Most were so tight that no glue was needed. A few were looser.
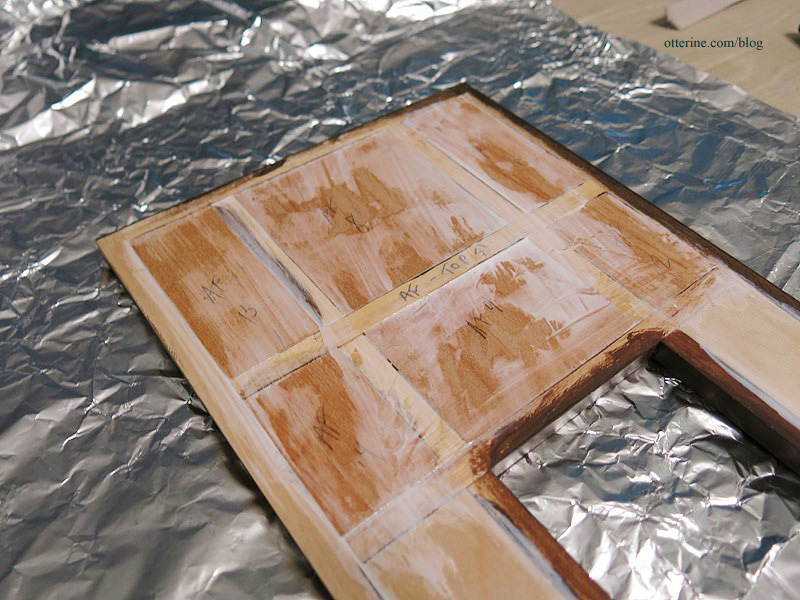
I flipped the assembly over and spread glue into the joins.
I love the colors and textures. :D
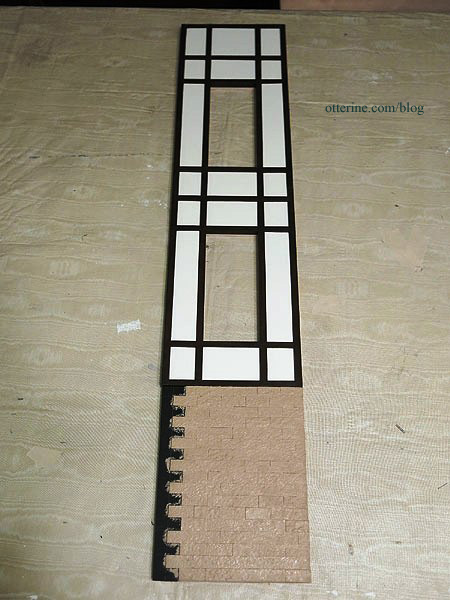
The surface assembly will stay separate until I get the windows built, but I placed it on the backer board to fit the top row of egg carton stones. The side pieces will be done later after the walls are joined, but it’s easier to do as much as possible while the boards can be placed flat on the work table.
The base coat is Fawn by Americana. The stones will be deeper in color, like the front steps, but I will do the final washes all at once so that the color is consistent around the base of the entire building. So far, it’s turning out as I had hoped.
Categories: The Brownstone
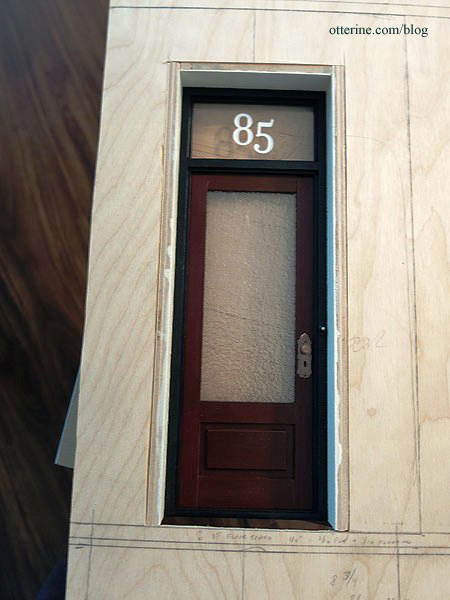
March 2, 2014 | 0 commentsThe Brownstone – front door, part 4
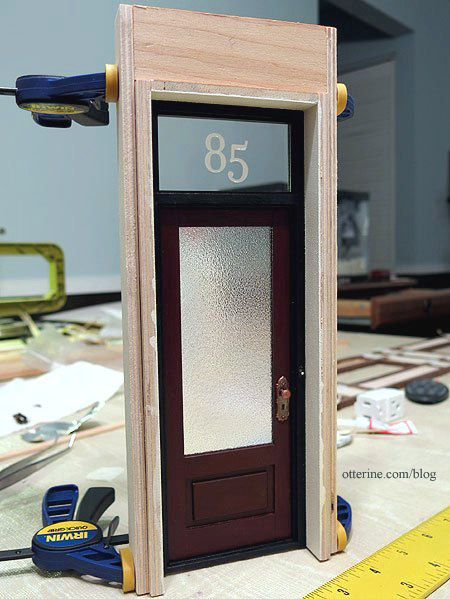
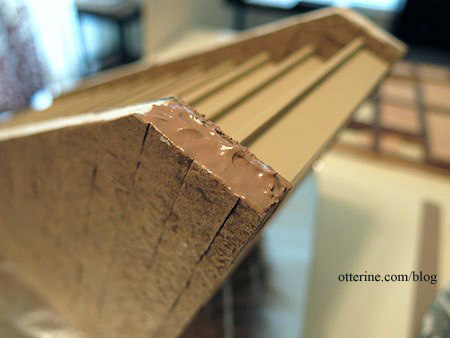
Completed work on the front door. I cut two new sides from 1/4″ plywood to fit the kit top piece to form the recess. This mimics the kit construction with taller side boards.

I dabbed on matte gel medium using a foam brush onto the exterior surfaces of the recess after masking the gluing surfaces. I set these aside to dry.

Next up was addressing the interior trim. I used door and window casing that coordinates with the 5-panel doors I will use throughout. The trim will surround both the door and the transom window. I held it in place with mini hold wax for measuring purposes.

With the previously textured pieces now dry, I added three coats of White Birch satin paint by Americana. This will be one of the main exterior house colors. I again dabbed the paint on with a foam brush. This texture has the appearance of fine plaster without the added weight, thickness or mess of stucco.

The doorknobs are bronze, which I think works rather well with the color scheme. I painted a metal doorbell from my stash for the door frame.

I like to go that extra mile and drill holes for the lock mechanism. Just some dabs of black and bronze paint, and it gives the illusion of a lock plate at first glance.

With the paint dry on the recess pieces, I glued them to the door frame.

I used the new boards to mark the cut opening on the front backer board.

The height of my first floor ceiling will be 10 1/2″ so I cut another two side boards from 1/4″ plywood measuring 10 1/2″ long and glued them to the door frame. I also cut two boards to fill in the dead space above the front door recess.

Looks like a fine recessed door to me. :D
Categories: The Brownstone
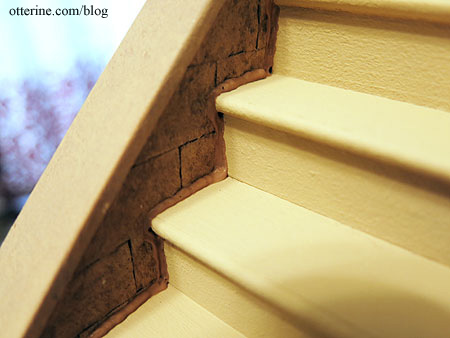
February 25, 2014 | 0 commentsThe Brownstone – entrance and front steps, part 9
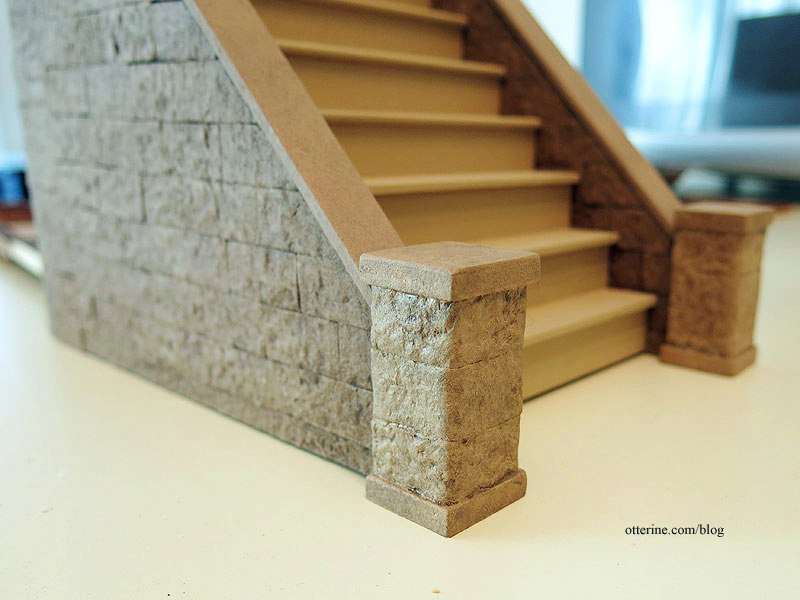
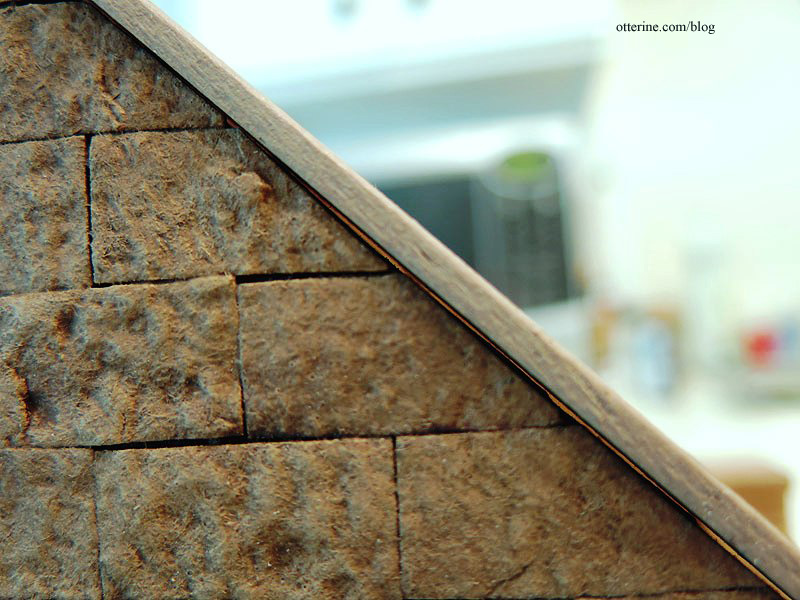
Continuing work on the entrance and front steps. With the gate built and set aside for spray-painting weather, I was able to glue the side walls to the stairs. I used Weldbond and super glue gel, then a large clamp and some masking tape to hold the piece together while the glue dried. The minor gaps will be addressed later.
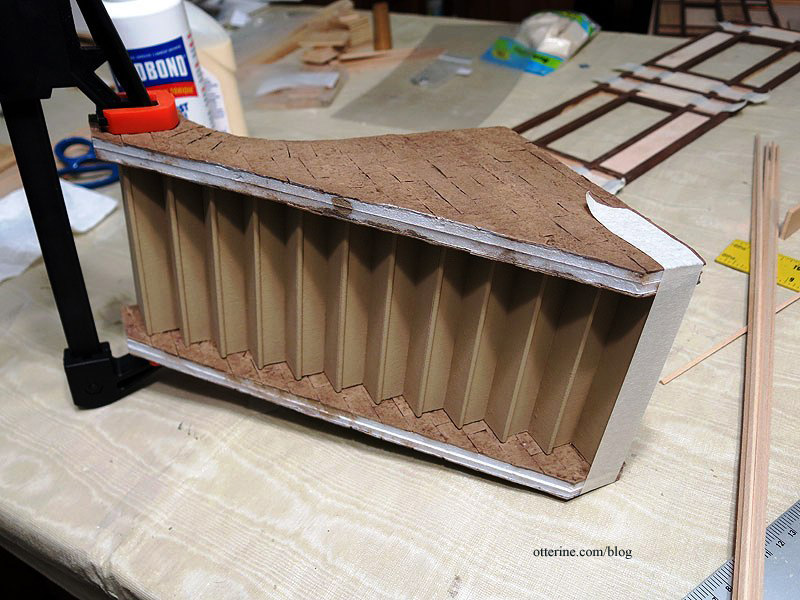
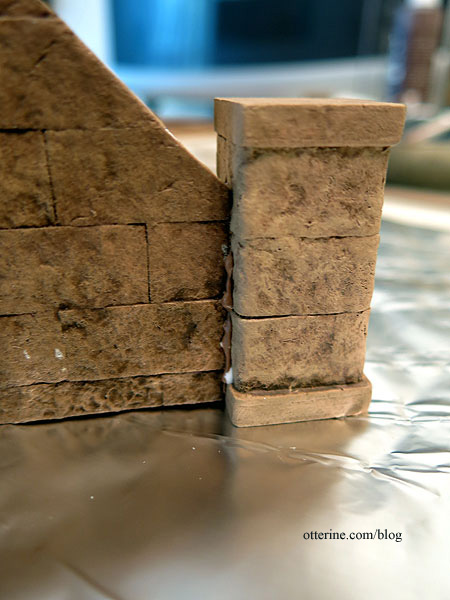
I glued two 3/4″ wood blocks together to make each pedestal to finish the front edges of the stone walls, adding long strips of 1/2″ wide egg carton material around them.
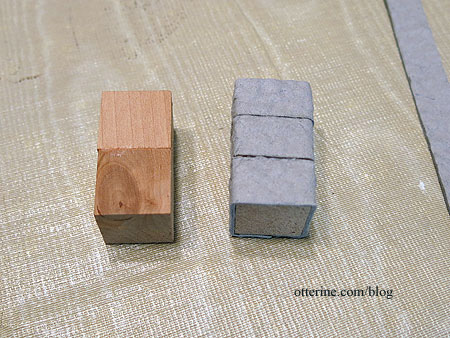
I cut plywood bases and toppers.
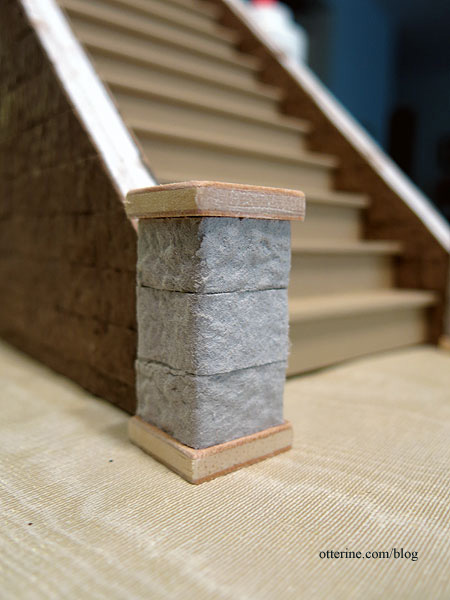
I painted the new pieces to match the previous finishes.
Since the top surfaces of the side walls aren’t perfectly uniform, there would be gaps if I glued the toppers on as is.
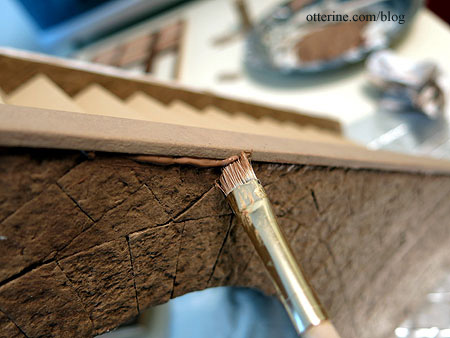
I made a mixture of spackling, Weldbond glue and brown paint. Yum, pudding! :D
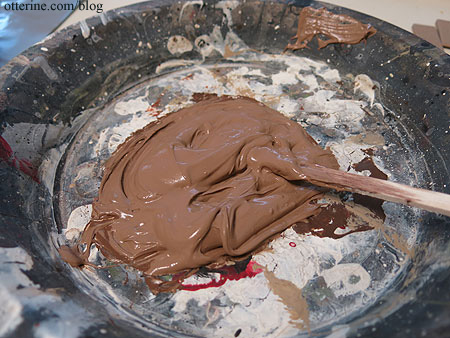
I slathered this onto the side walls and then pressed the pedestals in place.
I did the same for the toppers and wiped away any excess with a brush followed by a damp cloth.
I put some of the mixture into my glue syringe.
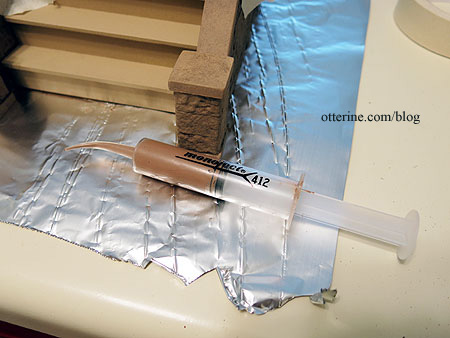
There were gaps along the sides of the steps, so I squeezed the mixture into the gaps.
I then smoothed the material and added final paint washes to finish the steps.
I’m still thinking about the railing, so I’ll leave this as is for now.
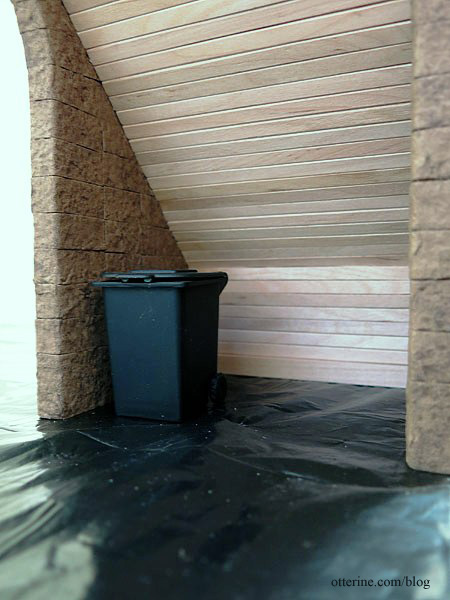
I like the way the plain sealed wood looks on the back, so it will stay as is.
Categories: The Brownstone
February 22, 2014 | 0 comments


NOTE: All content on otterine.com is copyrighted and may not be reproduced in part or in whole. It takes a lot of time and effort to write and photograph for my blog. Please ask permission before reproducing any of my content. Please click for copyright notice and Pinterest use.


