

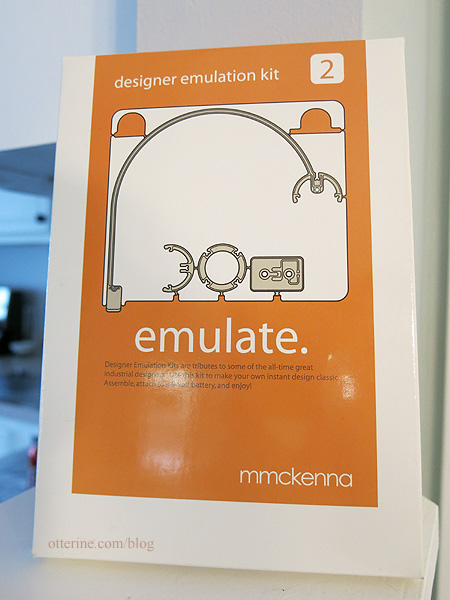
Designer Emulation Kit 2, part 1
I think the main reason miniaturists have hoards of projects for rainy days isn’t due to a lack of self control but more for the simple understanding that you had better grab something you like when you see it because it will likely vanish from the marketplace right around the time you want it for a project. :D
Such is the case with Designer Emulation Kits. These are little circuit board mini kits you build. They end up as modern mini light fixtures. These were designed by Mark McKenna, but the website is now defunct and you can find these babies only on the secondary market.
The one I liked best is DEK2, based on the classic Arco lamp by Achille Castiglioni. I was able to find a new kit on eBay.
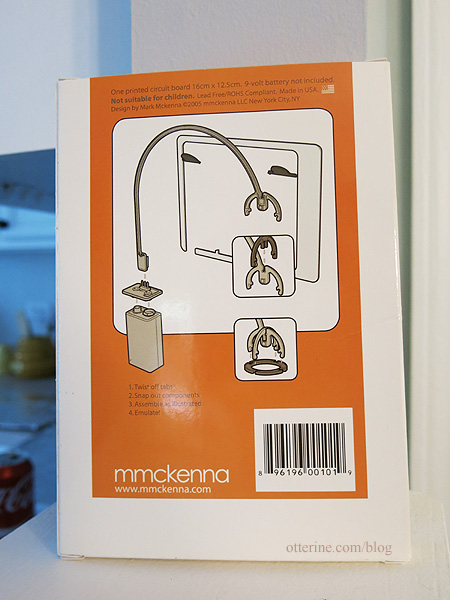
The simple instructions are on the back of the box.
Inside, there’s a clamshell plate that holds the circuit board and the toolkit emulator. Yep, that’s a standard emery board. :D You add the 9V battery.
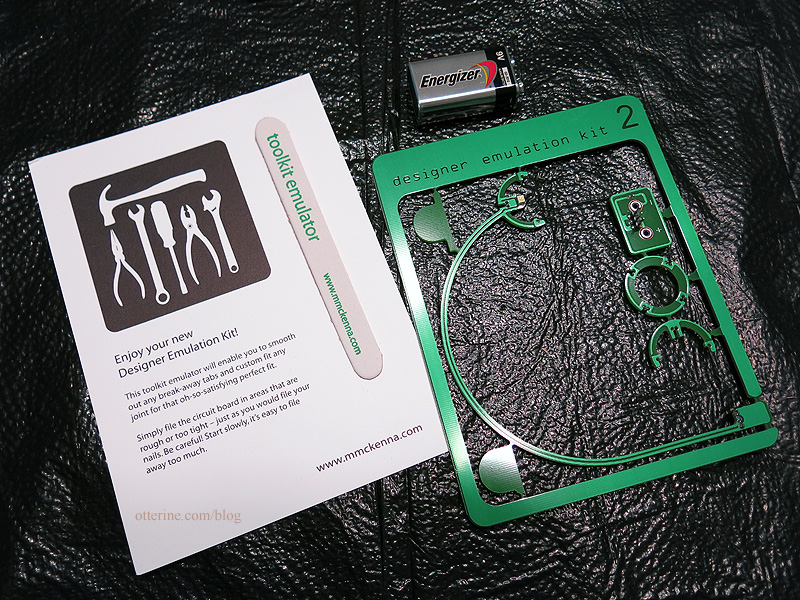
I used some heavy scissors to clip out the parts and sanded the nubs with the included sanding board. It was easy peasy.
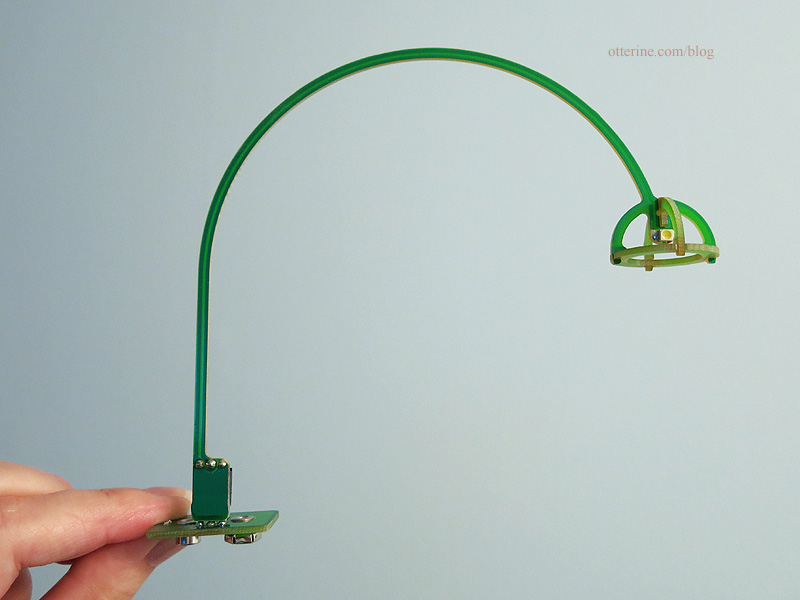
The material is not delicate, which is good for popping it on and off the 9V battery base. As a bonus, it’s wonderful in 1:12 scale. It is a little bright, but some glass paint should help tone it down.
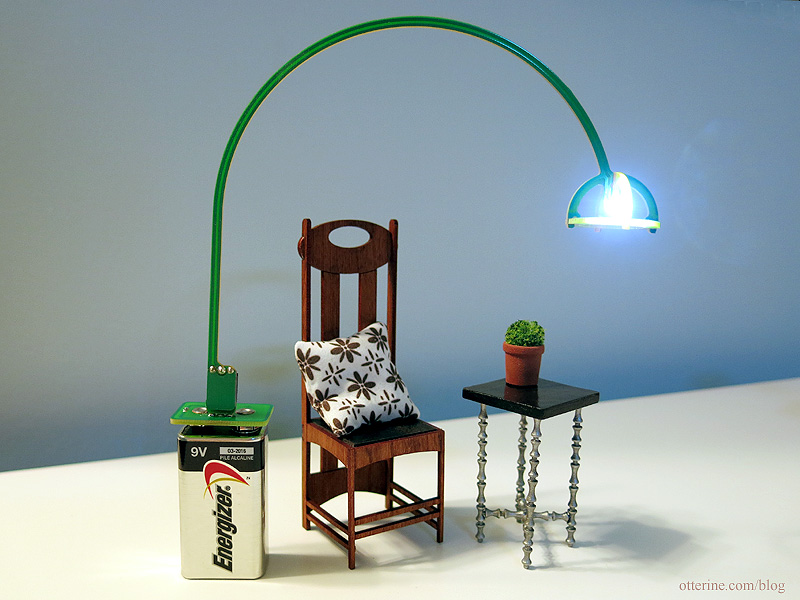
Now, I just need to build a modern end table to hide that battery. :D
Categories: Miniatures
May 17, 2015 | 0 commentsFire Hydrant
One of the items on my mini wish list has been found! It’s the discontinued fire hydrant by Dee’s Delights. It’s so red!!! :D
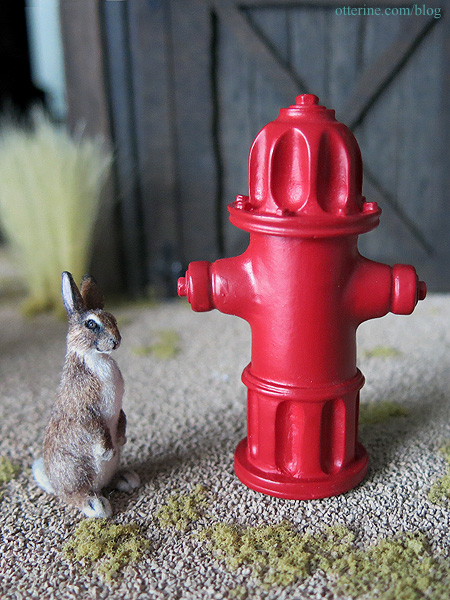
It’s a remarkably detailed and realistic piece, and it’s a shame these are no longer made. Luckily, Mary’s Miniatures had two of them for me — one for The Brownstone and one for my stash in case an idea strikes. :D
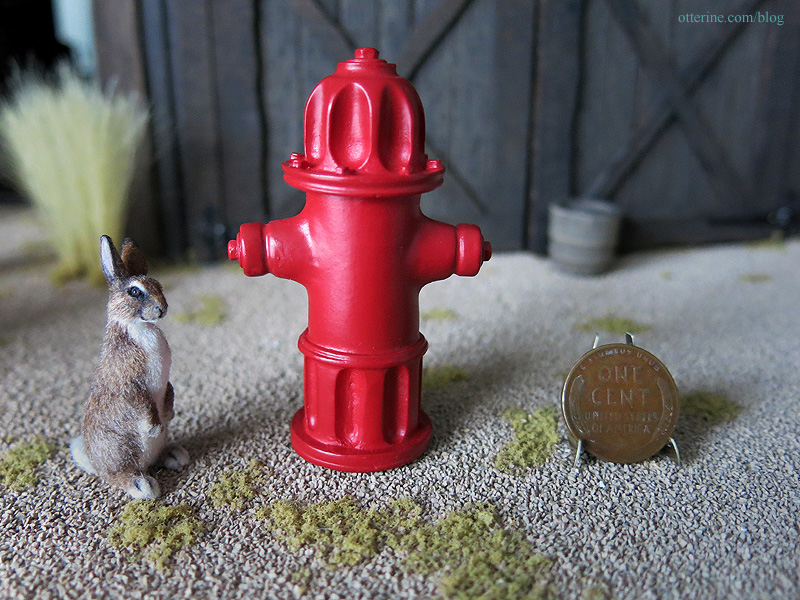
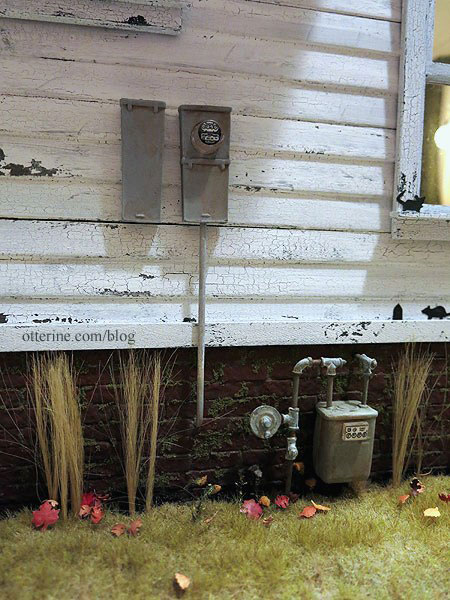
I’ve used the gas and electric meters from the same line for the Haunted Heritage, and those are still available on the mini market.
Ah, it really is the little things. :]
Categories: Miniatures
May 4, 2015 | 0 commentsLa Vache Qui Rit
That is one of my favorite things to say in my very rusty French — laughing cow. And, it’s the name of a wonderful cheese! :D
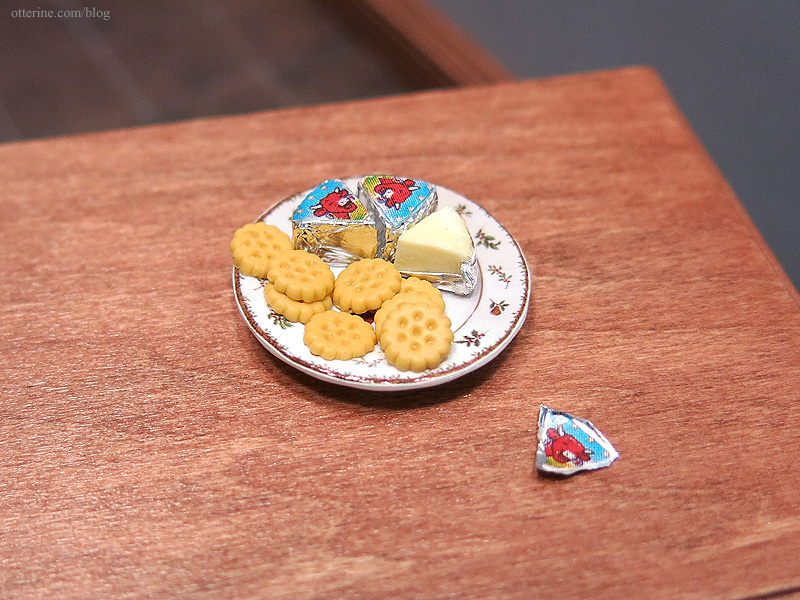
This mini cracker and Laughing Cow cheese set comes from I Love Mini Things. Here I’ve placed the cheese on a plate by A Lavender Dilly. The tray and pitcher are gifts from Barbara, and the canning jars are from Keli.
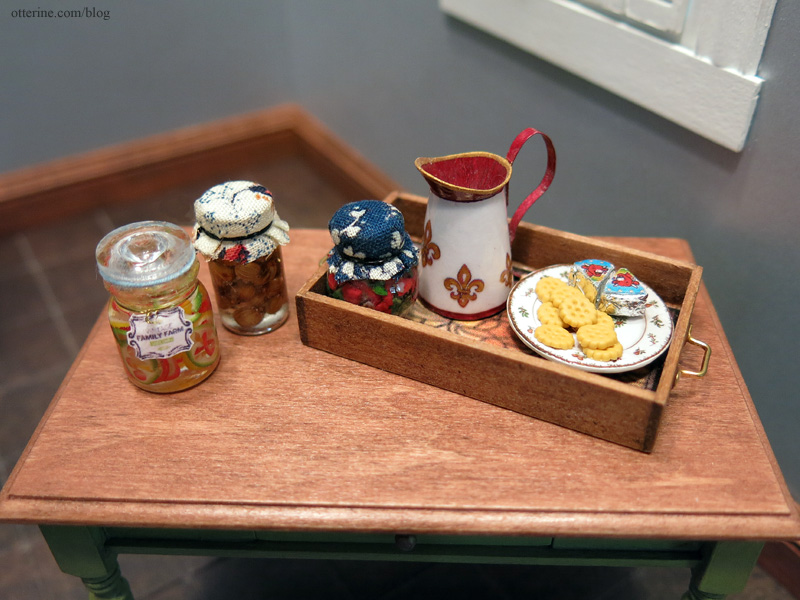
Thank you, Keli and Barbara! :D
Categories: Miniatures
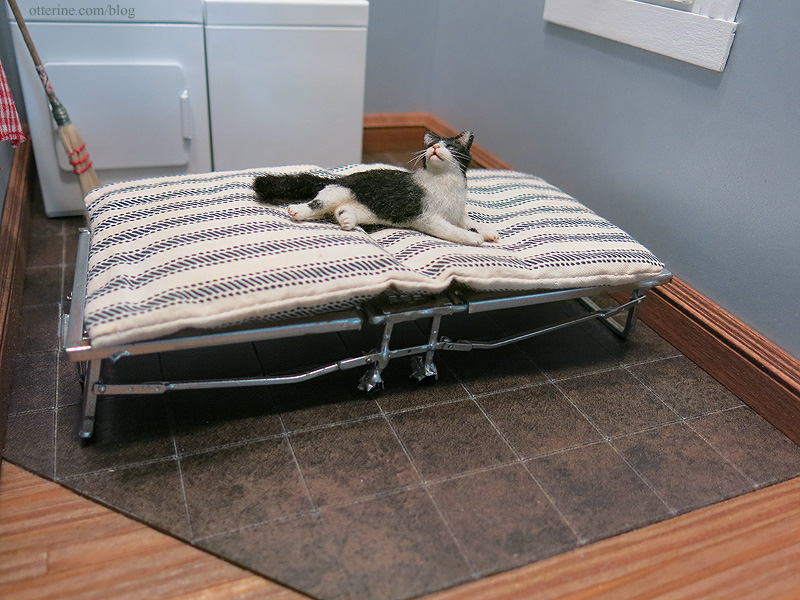
May 1, 2015 | 0 commentsVintage roll-away bed
I picked up an interesting lot on eBay and included was a roll-away bed. We had one of these when I was young (might still be in my parents’ garage for all I know). It was a weird grey green, but it was just like this.
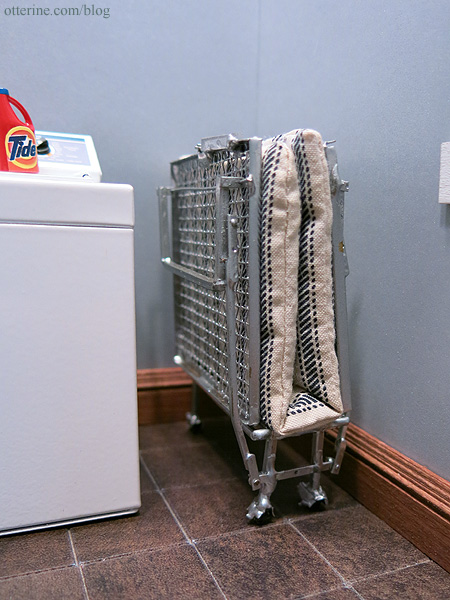
It’s a super cute item…one of those random bits from the past. I know they still sell these, but they just scream vintage to me.
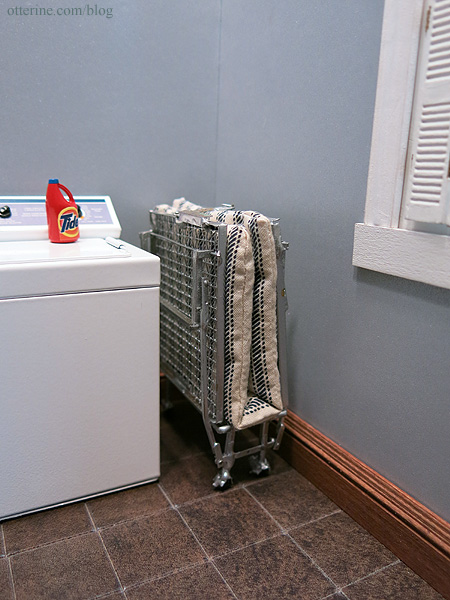
To me, it looks best closed up. When open, it loses some of its realism mainly because the mattress isn’t really working for me. Endora seems to think it’s just peachy as is. :D Crazy cats.
Don’t gasp, but when I first saw it online I thought I’d like to paint it. Now, I do like it in the silver, to a point. I would have to be careful since there are so many working parts. It might be best to use a product that will simply darken of the metal. There are some sharp parts that will need to be sanded so I don’t cut myself even if I don’t change the color.
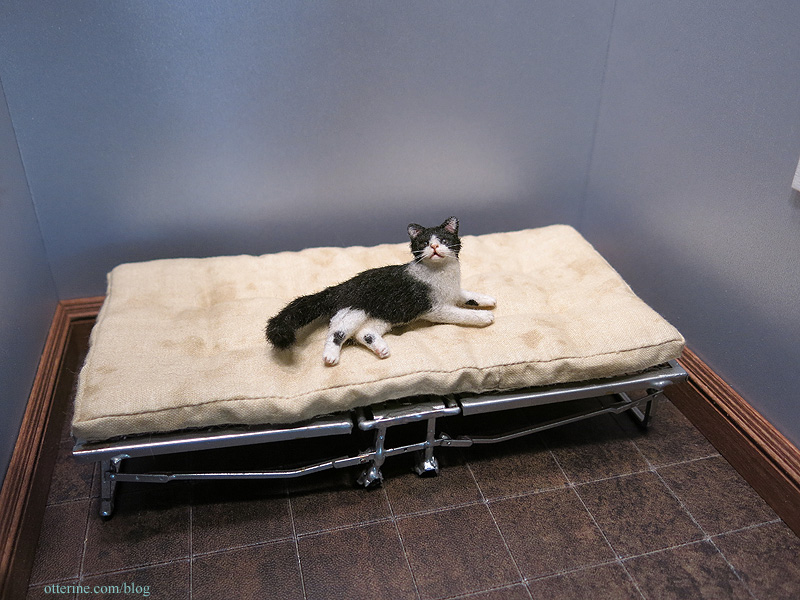
I will make a new mattress for it with fabric in better scale. It would be nice to display new and old, so I will make one of each type of mattress. Here is the ratty Baslow Ranch mattress just to try. Better, though I want one in ticking stripe. :D
These always make me think of an asylum, too. Maybe I’ll need to make a creepy room box someday.
Update: see the new ticking stripe mattress here.
Categories: Furniture
April 29, 2015 | 0 commentsMilo Valley Farm – abandoned bathtub, part 3
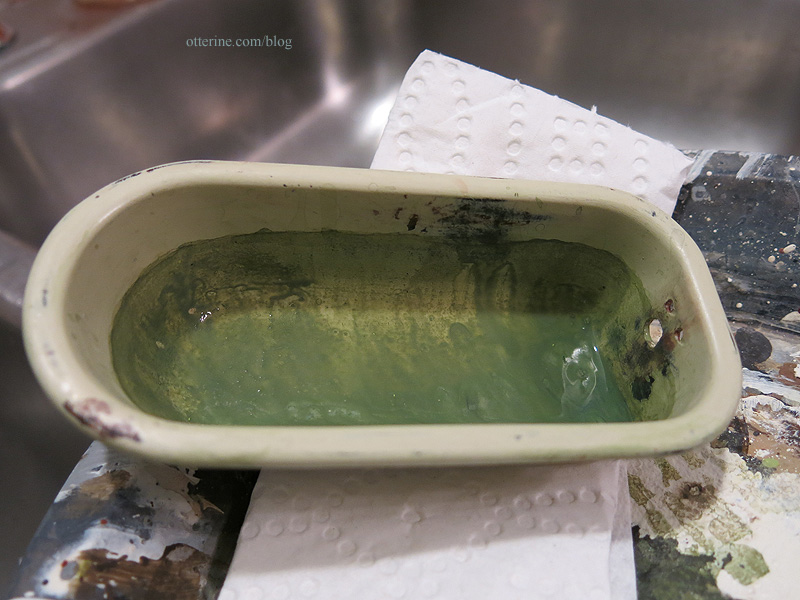
Continuing work on the abandoned bathtub. The initial algae process turned out well.
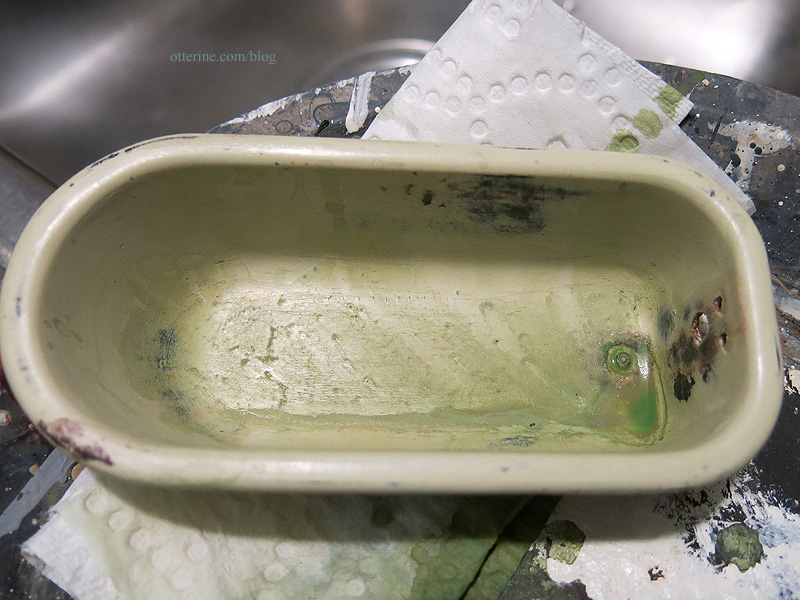
Then it was time for the ring around the tub. :D I made another green paint wash and poured some into the tub. I then took a smaller brush and kept making rounds, dropping liquid down the sides.

They were such light layers of watered down paint that they dried quickly, allowing me to build up layers of rings. I then let it dry completely after this step.
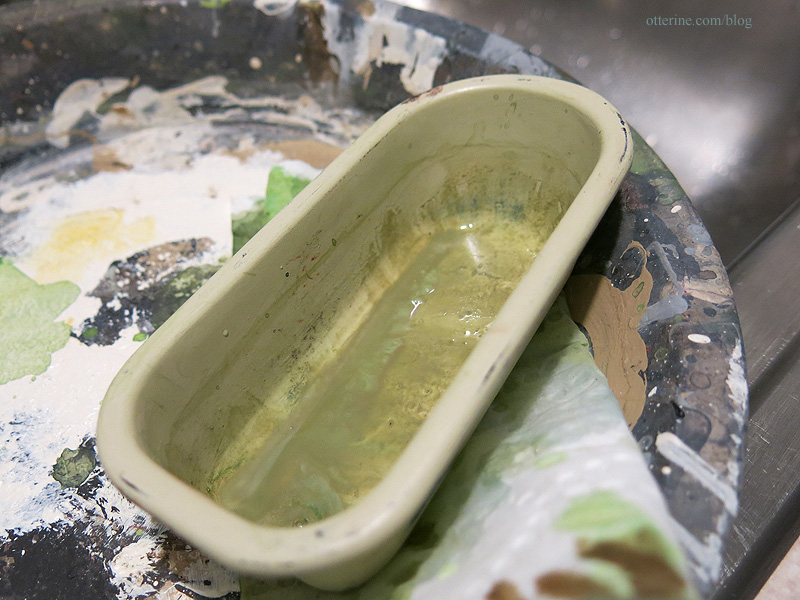
It was too light and too matte when dry, so I did a third round with darker green and satin varnish mixed in. Here it is wet.
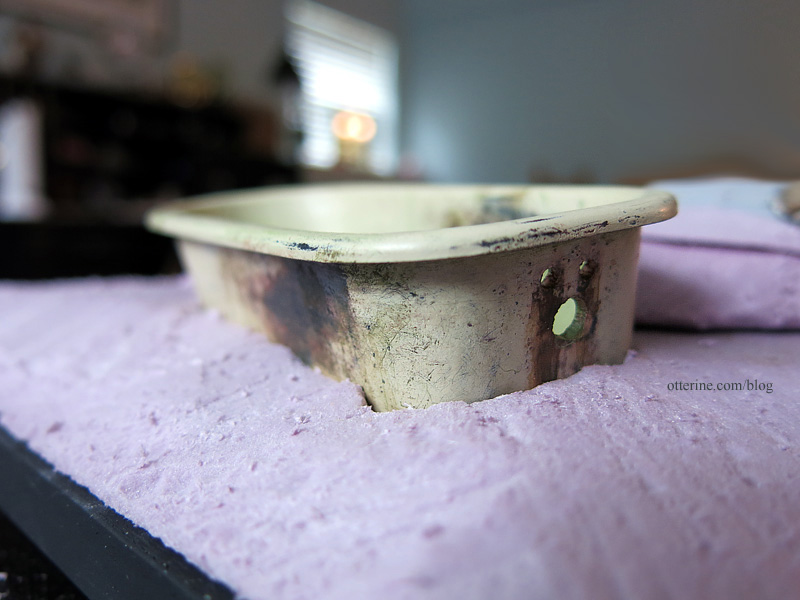
I cut away the necessary material to sink the tub into the ground. You can see why I didn’t bother with the tub legs.

This will allow for the slight angle I built into the sludge and the doors (swinging or rolling) will clear it easily. I already love it just buried in foam!
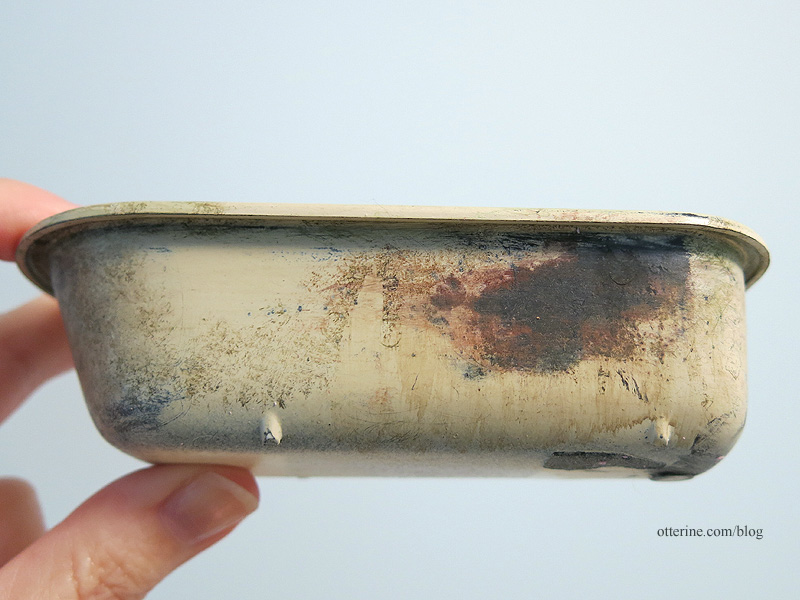
I added the final aging on the exterior using random paint washes and dry brushing.
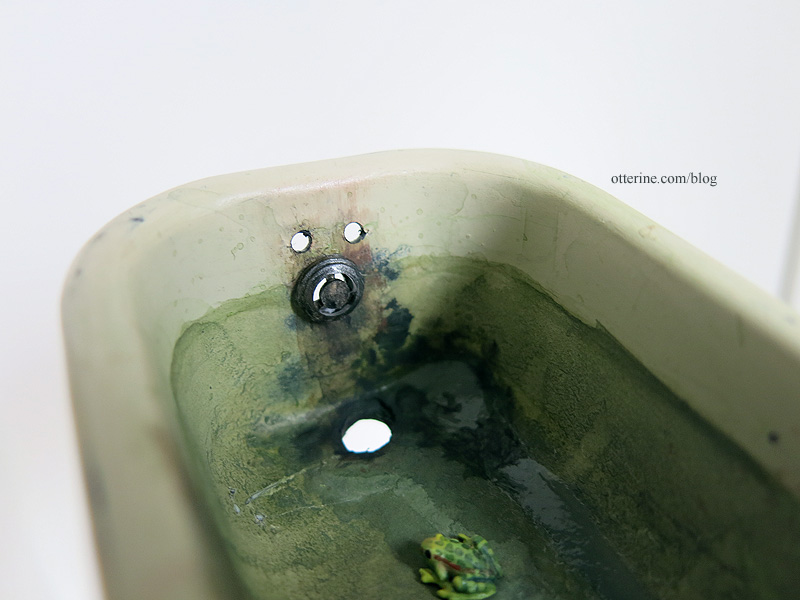
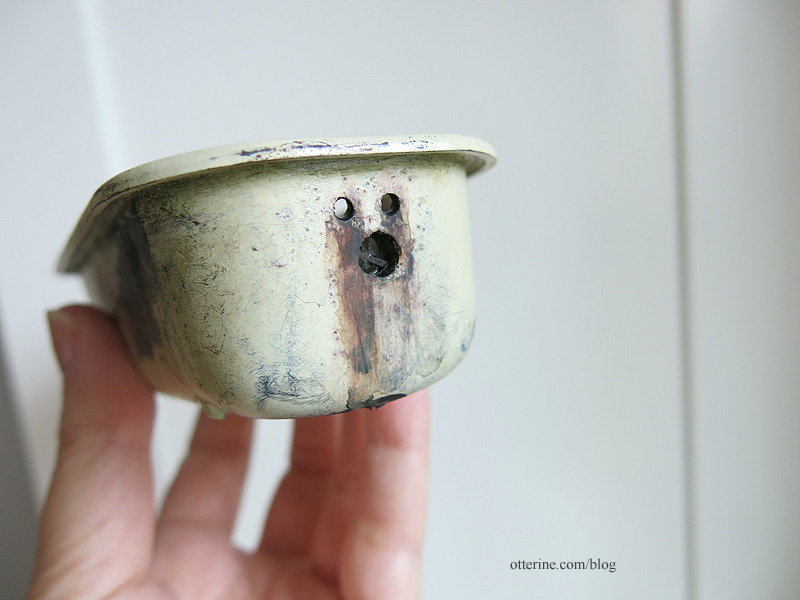
Though the faucets are long gone, I added the overflow cover plate made from a pen cap. I had done this before for the Heritage tub, and it worked well.

I painted it silver and then aged it with washes before gluing it in place. I also drilled out the drain hole and painted the subsequent bare plastic. I added gloss painted details to the interior using Triple Thick Gloss Glaze, like there’s always some moisture in there. With all the rust and grime, you can’t even tell there was a drilling misfire. :]
It looks like heavy cast iron, no?
Yes, this tiny frog feels right at home. I’ve named him Herbert. :D He was made by Amanda Skinner.
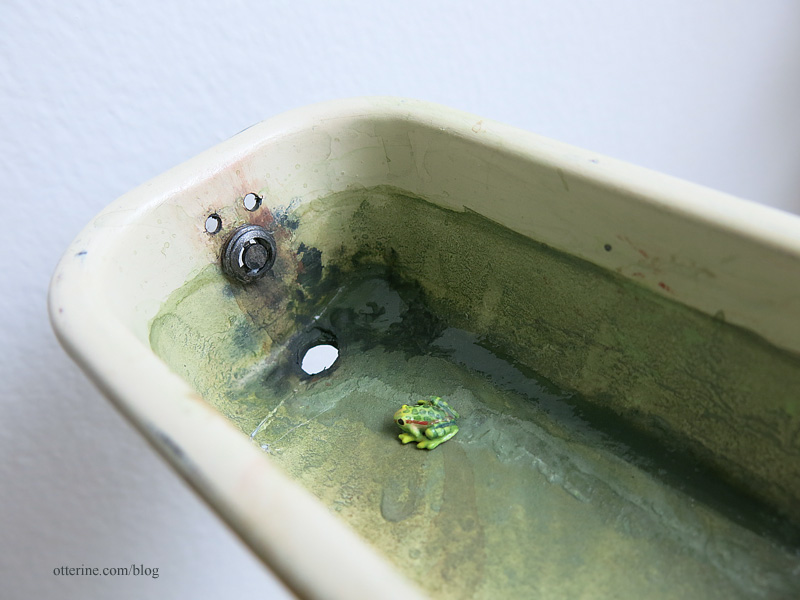
Now it will sit until I get to the final landscaping. :D
Categories: Milo Valley Farm
April 26, 2015 | 0 comments


NOTE: All content on otterine.com is copyrighted and may not be reproduced in part or in whole. It takes a lot of time and effort to write and photograph for my blog. Please ask permission before reproducing any of my content. Please click for copyright notice and Pinterest use.


