

Milo Valley Farm – siding, part 3
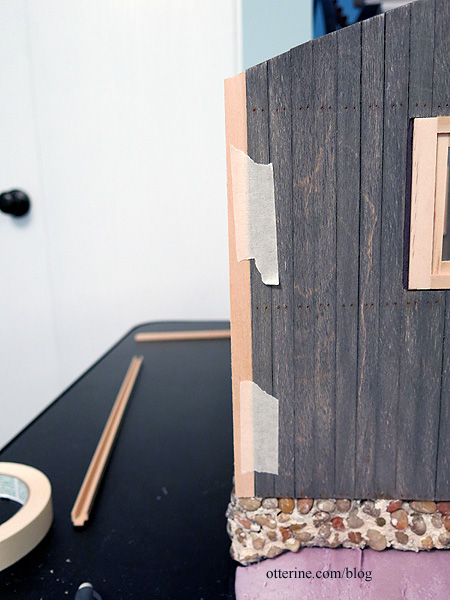
Continuing work on the siding. I sanded the exterior surface to age the wood and bring back some of the grain.

I marked where the interior wall beams will be on the outside with tiny pencil marks. I didn’t measure precisely since nails wouldn’t be completely even in real life.
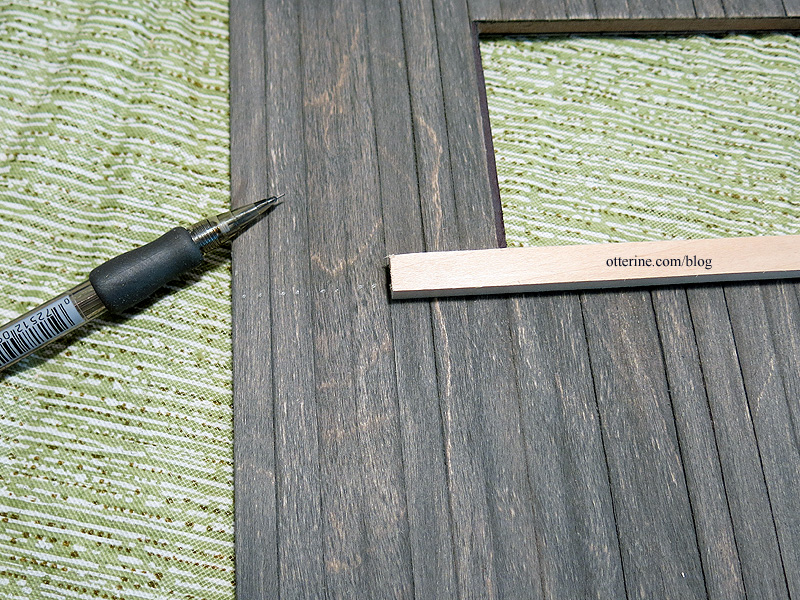
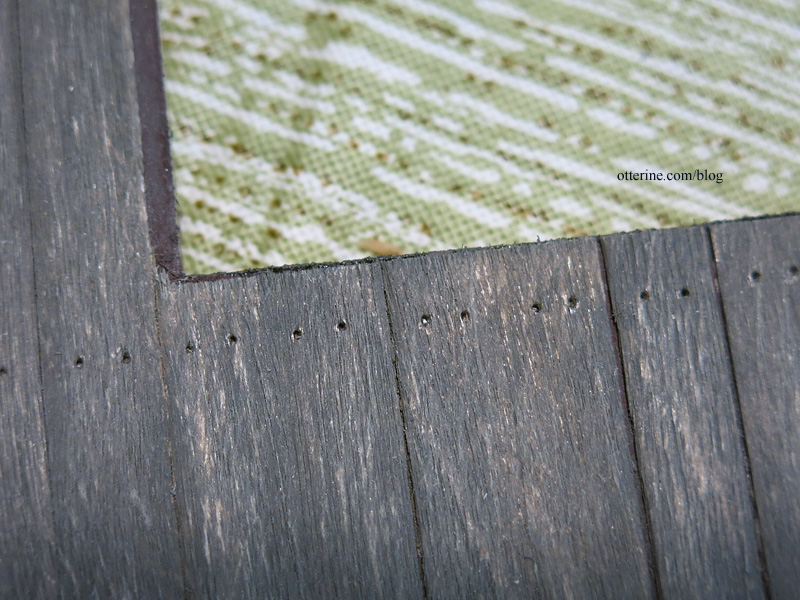
I used an awl to indent each of these marks, two per board.
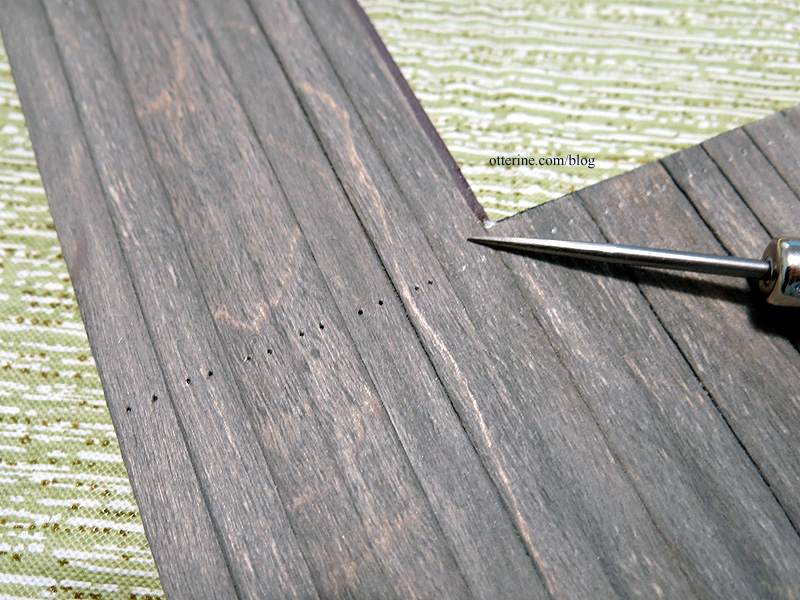
Interestingly, when I pushed on the pencil marks, the graphite remained reflective and looked like tiny nail heads. :D Happy accident.
I tapped my utility blade along the bottom edge to wear out the lower edge. It’s subtle but it’s a good texture.

I used a watery paint mixture of Terra Cotta and brown to make rusty nail halos with a tiny brush. The paint sank into the indentations, and I dabbed the excess with a tissue along the way.
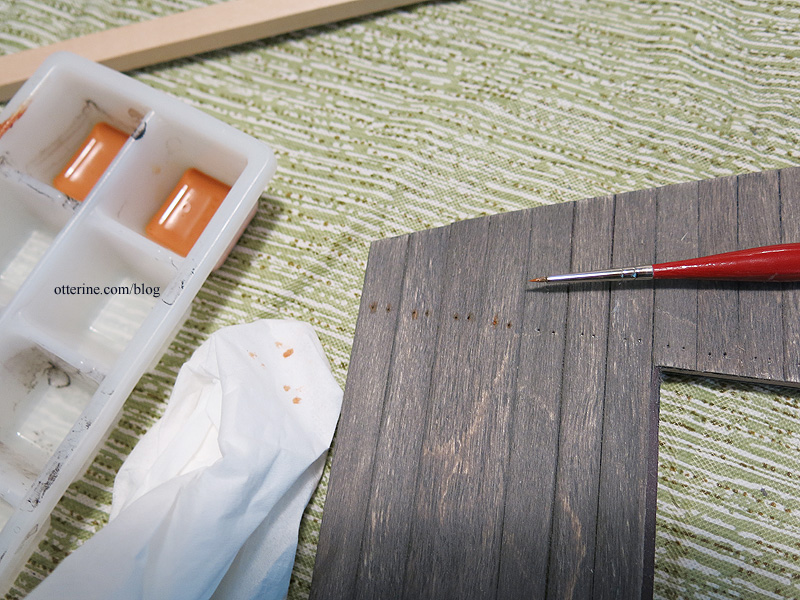
Yes, it’s tedious…but the detail will add to the realism in the end. :]
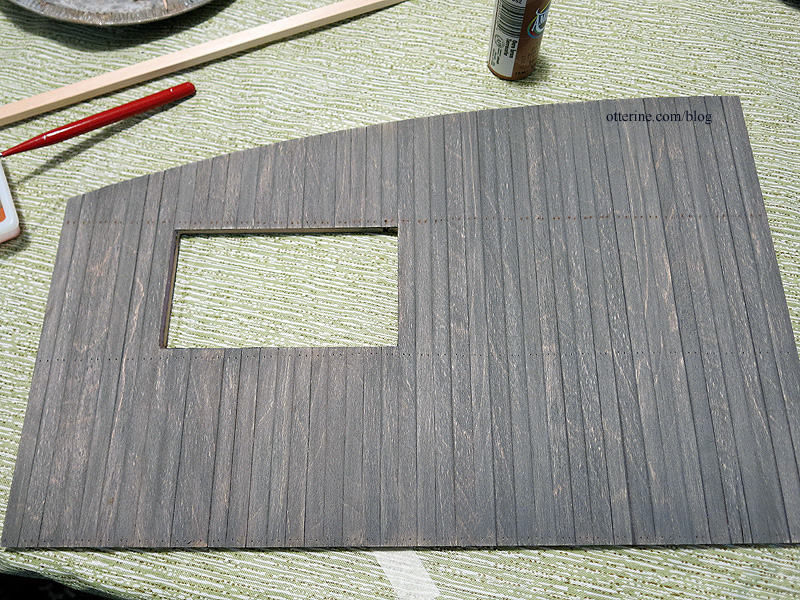
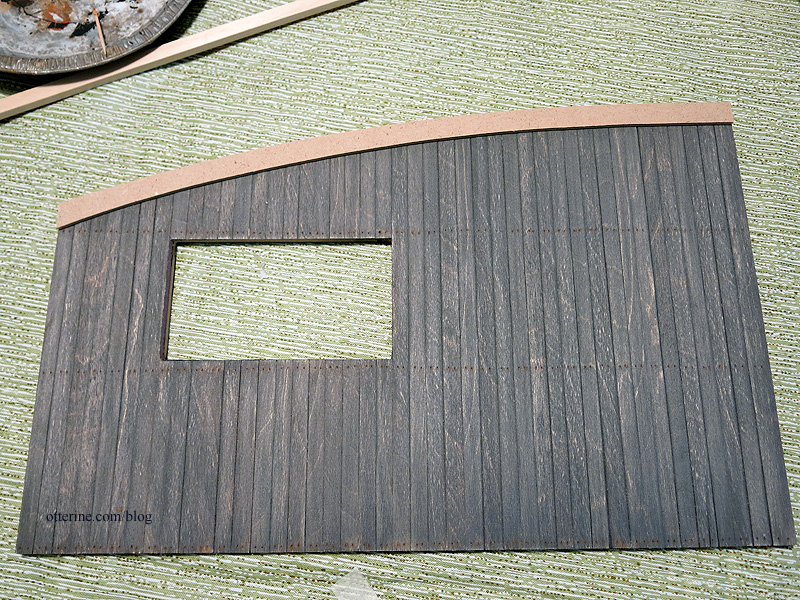
I didn’t add this detailing to the top edge since the trim board will cover that area.
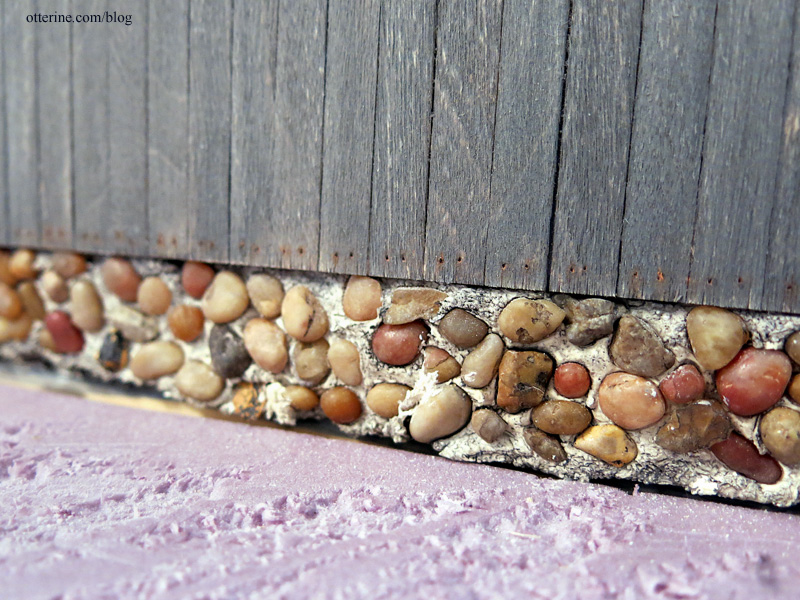
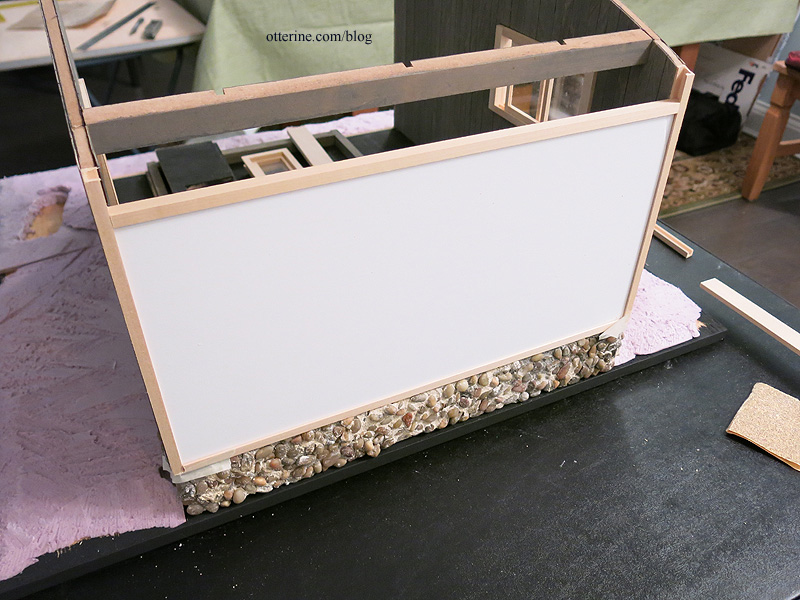
I think the siding looks fabulous with the stone foundation. :]
Categories: Milo Valley Farm
May 25, 2015 | 0 commentsMilo Valley Farm – removable back wall, part 1
When I constructed Baslow Ranch, I made a standalone board to enclose the open back when photographing from the front. It has siding on it just like the rest of the building.
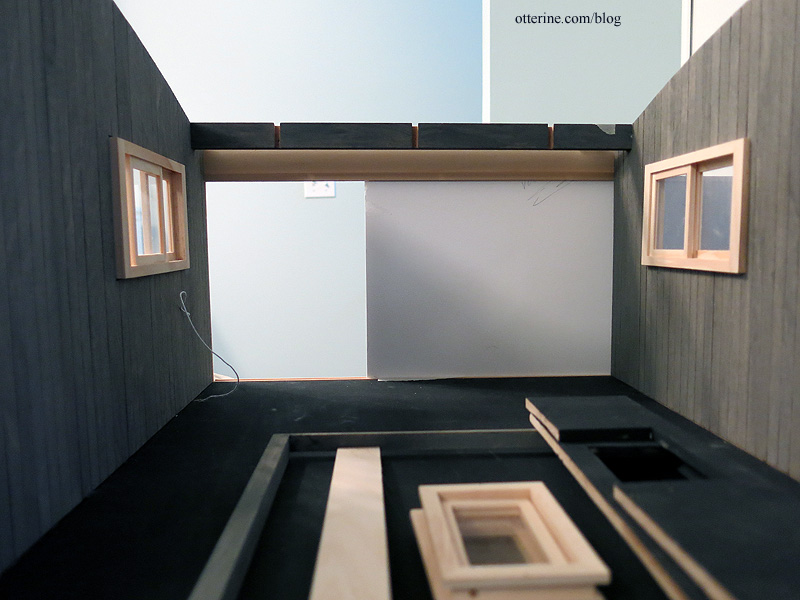
However, it is not easy to prop in place and has warped over time with nothing to keep it stable. With Milo Valley Farm, I’m going to incorporate the back wall into the build. But, it has to remain removable to access the interior. To that end, I will make it a sliding wall using channel molding.
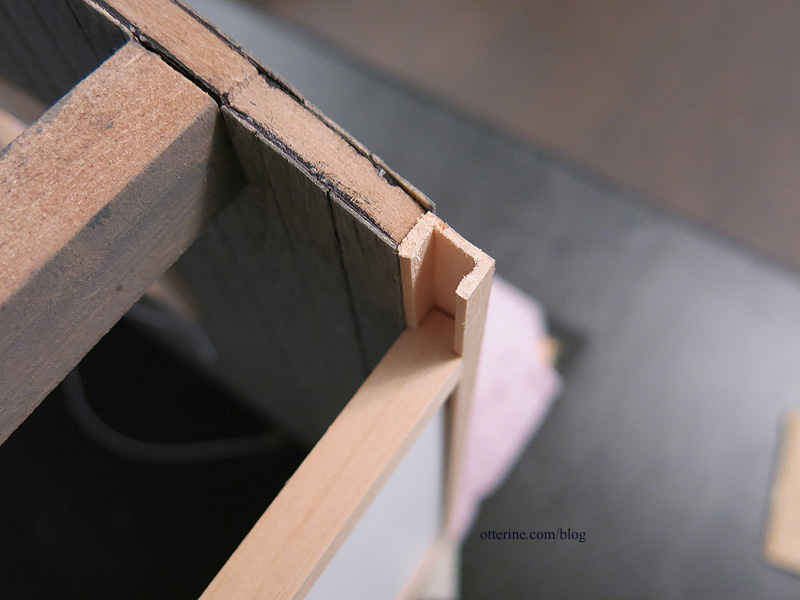
The channel molding measures 1/4″ x 3/8″ and holds a board 1/4″ thick. I left space for this trim on the foundation when planning. I cut two vertical boards floor to ceiling for the back edges.
I cut a piece of foam core board to serve as a template for my final wood wall. As you can see, I’m not making the removable part go all the way to the ceiling. I think having a static wall at the top and a removable wall on the bottom will work better for stability.
I cut two channel pieces to fit the width between the vertical boards. I notched the ends to fit inside the vertical channels. This will keep it locked in place when closed.
I cut a board from 3/16″ basswood to serve as the stationary upper wall base. I chose basswood since it was easy to sand into an angle along the upper edge.

The upper and lower channels will be glued in place as well as one side channel. The remaining side channel will be attached to the removable wall and will move with it.
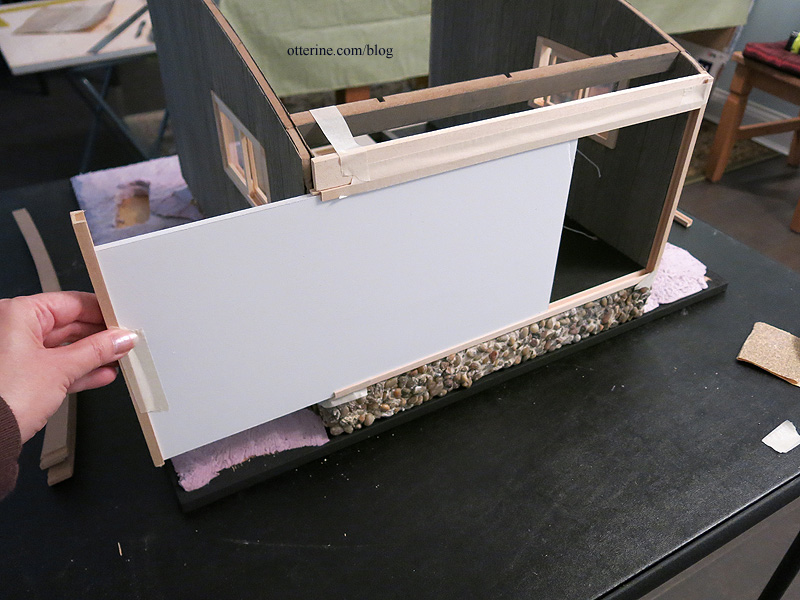
We have a plan. Now to tinker until it works.
Categories: Milo Valley Farm
May 25, 2015 | 0 commentsMilo Valley Farm – siding, part 2
Continuing work on the siding. I finished applying the siding strips to the side wall templates, both interior and exterior.

I applied Weldbond glue to the previously primed kit walls to attach the finished templates. I use scrap pieces of foam, foam board, cardboard, etc. to spread the glue evenly.


Using Staining Medium by Americana, I aged the planks with a mix of grey, brown and black acrylic paints.

The Staining Medium acts somewhat like a glaze, looks a little like an ointment, and makes acrylic paint behave like a liquid stain. I apply it thinly and then wipe away the excess with a paper towel to reveal the grain.

I did a second pass on the exterior for deeper color and less grain. I allowed the boards to dry to the touch and then pressed all of the boards under magazines to minimize warping.

I painted the cross beams and door frame with the remaining mixture. I will do more to these later, but it’s a good base coat.

I drilled a hole in the floor board for exiting wires.

After feeding some florist wire through the hole in the foundation, I glued the floor board to the foundation.

Categories: Milo Valley Farm
May 24, 2015 | 0 commentsRetro laundry
So, the roll-away bed looked fine in the modern laundry, but just look at it with a retro Westinghouse washer dryer set! :D
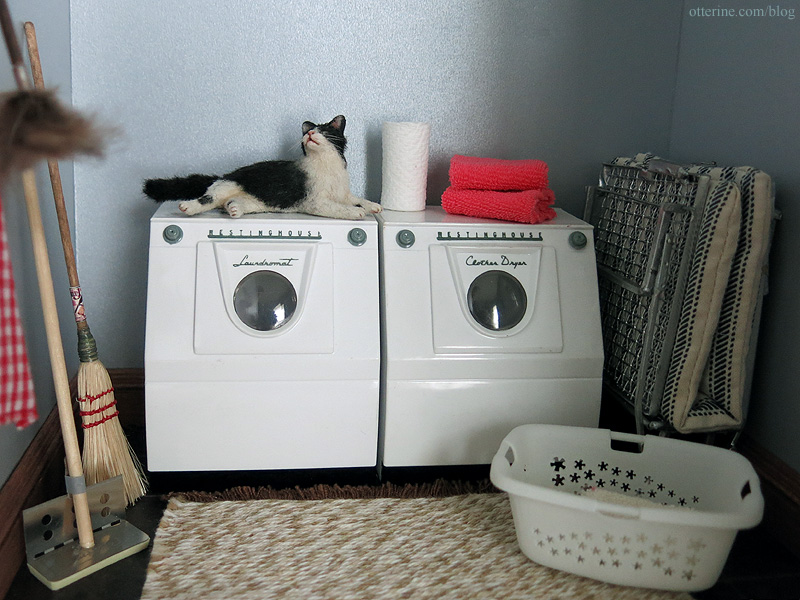
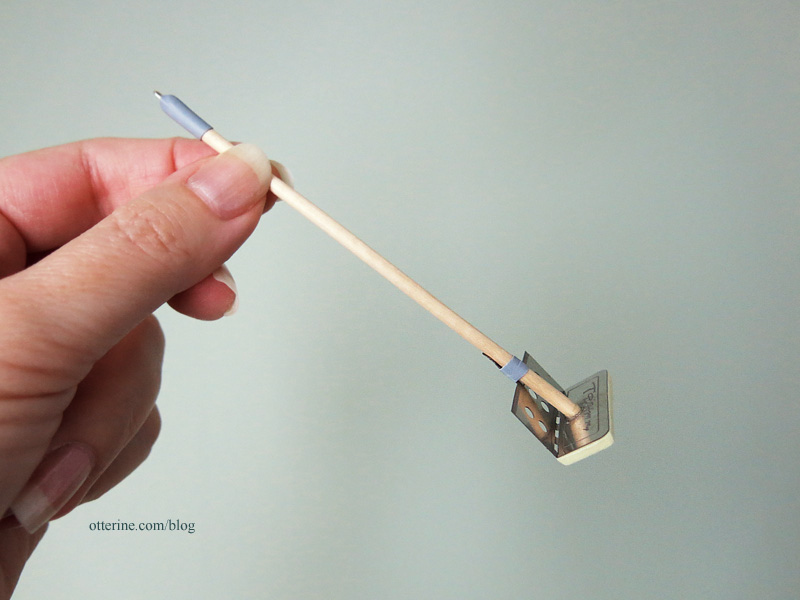
I even got a retro squeeze mop from The Dolls House Mall. The broom is from Wright Guide Miniatures.
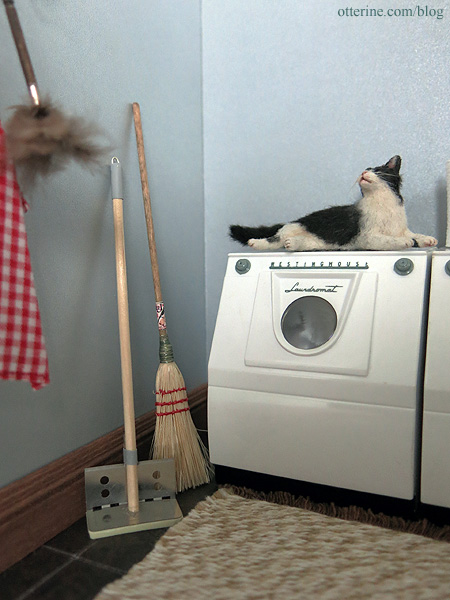
The mop doesn’t actually move, but it’s remarkably detailed with its pale yellow foam pad.
So, where did I find these beauties? They aren’t actually dollhouse miniatures. They are retro salt & pepper shakers! I found this pair from GlasskatsVitageItem on etsy. They are in a little rough condition (not a complaint about the seller at all, just stating that these are in true vintage condition with yellowing glue and shelf wear), but they photograph well and are too cute!

The wonderfully detailed 3D printed laundry basket is by Marion Russek on Shapeways, and I spray painted it flat white. Endora is from agzr*studios.
Categories: Roomboxes and Mini Scenes
May 22, 2015 | 0 commentsMini seed packets — shake, shake, shake
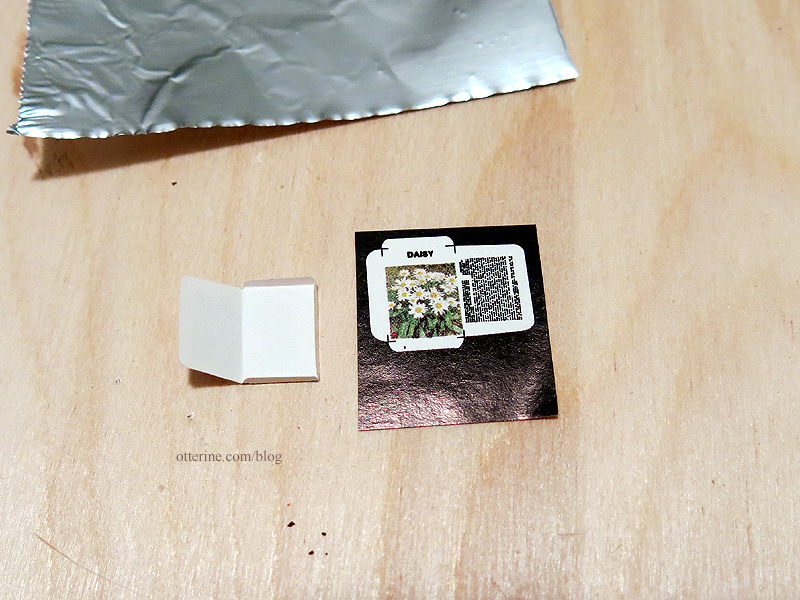
I bought a package of pre-printed seed packets by Farrow Industries at one of the local shows.
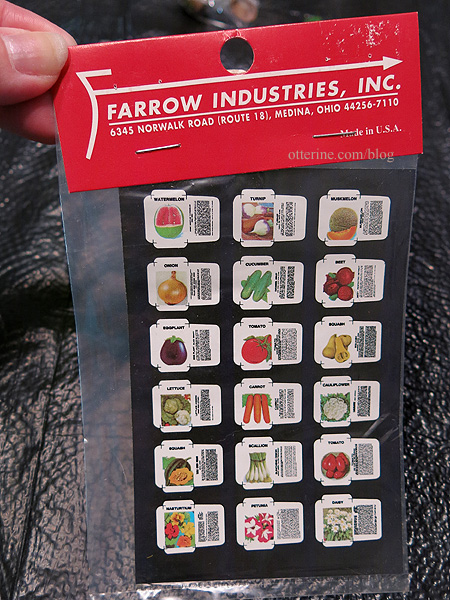
These were made before laser cutters became all the rage, so you have to cut them out individually. I used scissors to do this part.
I scored lines with an X-Acto blade, using the small guidelines printed in the design.

I added a little something before gluing them closed. When you shake, shake, shake the package, it sounds like the real deal! Little “seeds” rattle inside the package.

These are wonderfully detailed. The sheen of the paper is very much like real life seed packet material, not too glossy.

Categories: Flowers, plants, and trees, Miniatures
May 19, 2015 | 0 comments


NOTE: All content on otterine.com is copyrighted and may not be reproduced in part or in whole. It takes a lot of time and effort to write and photograph for my blog. Please ask permission before reproducing any of my content. Please click for copyright notice and Pinterest use.


