

Milo Valley Farm – random farm junk
Keli made me two crates full of delightfully grungy barn items. Her husband even made a pair of working battery cables, and though the clips are large for scale, they are fun!

Her crusty, leaking battery might just get me a fine from the EPA. :\

Her bike pump is simply awesome!

Bill has done it again! He has sent some of the most marvelous handmade miniatures and miscellaneous items for my barn find diorama! Our barn owner is a tool hoarder. He’s got all sorts of shipwright’s tools. I’m quickly learning about ship building and maintenance. We have caulking irons, chisels and mallets! Oh, my!


We even have a splitting froe! :D

Mom was over tonight, and she said grandpa had one of these large hand drills in real life. :]

Now for the random part. Bill picked up a ratty brass tiny trophy for $0.25 Canadian. He started the magic transformation and turned two bases for it. He’s left it unassembled for me to finish. With a hot car like the Datsun, it had to have been raced at some point!

This is a brass and leather barrel with big (in mini) dice.

It unscrews. errmmm. Any ideas on what this is? Bill and I are baffled.

And, it’s finally time for the trash to treasure part. I think he meant this first item as trash to treasure, but this has to be the coolest thing all on its own! It’s a tiny box of vintage dental burrs at least 60 years old. The box and burrs are in perfect condition. They may be out of true scale for tools, but closed up the box will blend in to the random tool stash. I will leave it as is.

The sanding disks almost look like free weights.

This box is so super cool I might use it as is, too. Maybe it’s a master box of individual boxes of nails. :D Bill suggested vintage signs, but I don’t think I can cut it. I like it too much just the way it is.

He was at the “free store” where there are bits and bobs to peruse. He found this and suggested it might be part of a machine, a feeder or a light fixture. I’m thinking an unsafe and completely out of code kerosene heater. :D Or, perhaps it’s meant to be a smudge pot. I believe I have some other bits and bobs around to finish it nicely.

He also visited the “not free store” and found some marvelous plastic toy barrels. He told the woman at the store about my mini projects, and she donated them to the barn for free! :D These will need a bit of painting magic.

Tiny spools of copper wire. The smaller is from a battery watch and the other is from a digital camera. Crazy small! :D

Thank you, Bill! You spoil me rotten!
Categories: Milo Valley Farm
June 2, 2015 | 0 commentsThe Maple Room
Behold the beginning of The Maple Room. Why that particular name? I just thought it was nicer than “that there room box.”
This is the Traditional Room Box Kit from Real Good Toys.

I was in a shopping mood the other day and had the monies I won for Roland’s Retreat, so I ordered the room box kit and some miscellaneous trims they had on sale. I like having the room box mockup I used for the Shapeways room, but it is very narrow.

It’s also not a permanent structure. It was built on the platform for the now defunct Mt. Sydney Chalet. I still have the room set up, but over time this will wear out.
I usually make quick scenes to photograph minis on the fly, but this takes more time and more space than you would think.
This type of setup isn’t easy to move since everything is just propped in place and scattered. How am I supposed to make microwave popcorn in this chaos?!
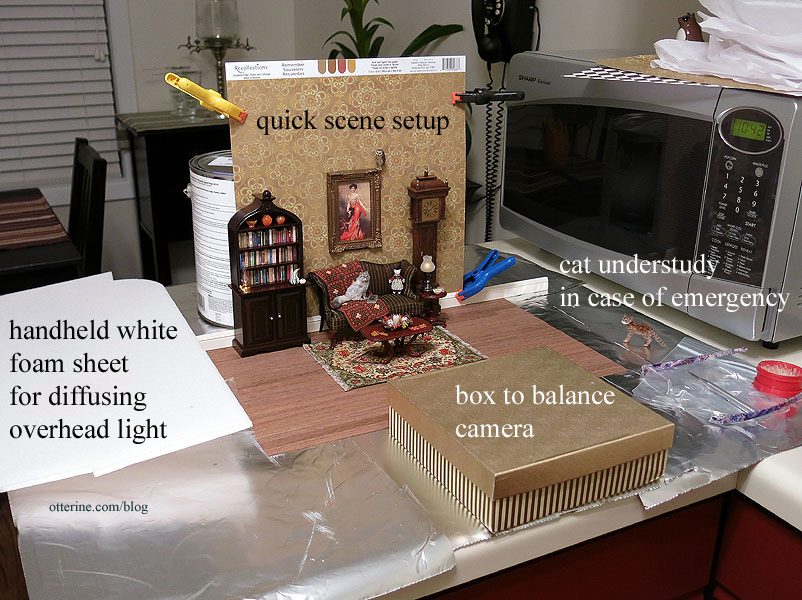
I’ve thought for a long time now how great it would be to have an actual room box I could take out, plug in and go. :] I especially like that this has a plexiglass front and top to keep the dust out and perhaps to store items I’d like to see but not have to dust in between photography studio use. It’s a large room but will fit on my bookshelf easily. It will also be easy to place tissue over the top plexiglass to diffuse the lighting.
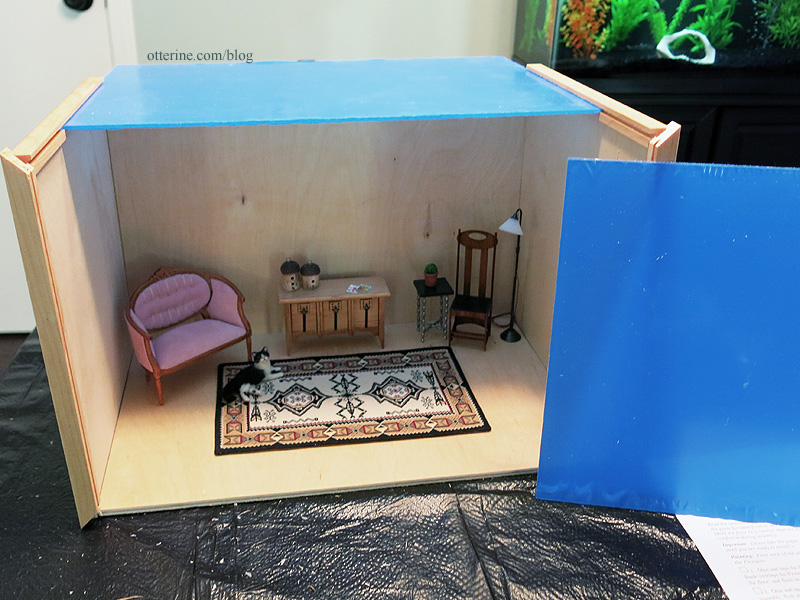
I will be making both the front and top removable since the front piece would cause glare in photographs. My plan is to also make channels so I can use different papers as needed for the scenes. Hmm…like the changing seasons…maybe The Maple Room name makes more sense than I realized. :D
I did think about buying wood supplies and doing it all myself, but that would have defeated the purpose of a quick build and I had the monies to spend! :]
Categories: Roomboxes and Mini Scenes
June 1, 2015 | 0 commentsMilo Valley Farm – barn floor, part 2
Continuing work on the barn floor. As was completely expected, many of the boards warped during the drying process causing overlaps.

I cut slivers from the edges as well as a few interspersed holes.
Using the utility blade, I scored tiny lines at the edges of the boards.

I spread Weldbond glue to attach the flooring.

To keep the warping to a minimum (some is wanted for realism), I spread magazines and photo albums over some plywood planks.

The rest of the aging will be done later.
Categories: Milo Valley Farm
May 31, 2015 | 0 commentsMilo Valley Farm – barn floor, part 1
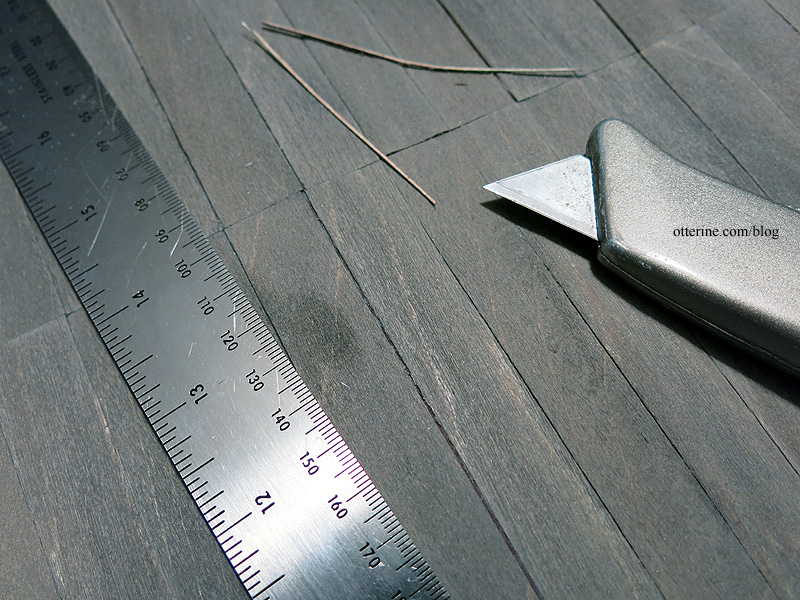
I made a black paper template of the floor.

I did some math and determined 5.5″ x .75″ boards would work best, so I drew lines on the paper to test out the placement. Starting down the middle, I glued the boards in place. This is the same material used for the siding but left full width.

After drying under the weight of magazines, I tried the fit inside the barn. All good. There will be trim around the edges, so it didn’t have to be precise.

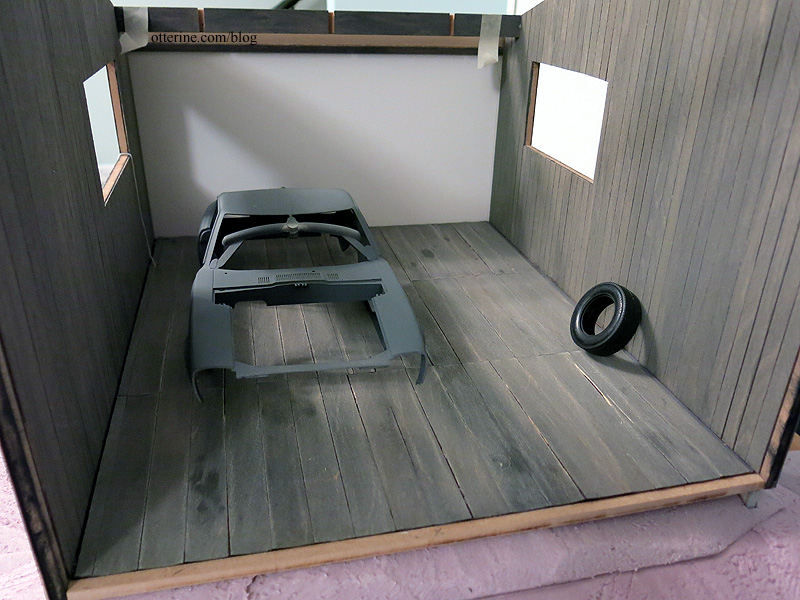
Testing it out with the Beetle.

I used the same painting technique as I had for the siding for the base color. I applied a few dark washes to age the planks, even dropping some puddles in places to make stains. These were lifted and reapplied a few times over.

I spread the glaze in my paint pan and pressed a paint bottle into it.

Here’s the ring of paint on the bottle.

I pressed it randomly in the corner of the floor.

It left some nice detailing there, where a bucket or paint can had once leaked.

I lifted the paint a little to make it less fresh.

The Datsun kit comes with 5 tires, so I took one and rolled it in black paint.

I pressed it onto the floor to leave a tread impression.

I lifted that as well and then spread a grey wash over the whole floor to tone down the stains. Then I added a few small newer ones. It’s easy to add more mess, but it’s hard to remove if you add too much.

It’s now back under magazines. We’ll see how it turns out! :D
Categories: Milo Valley Farm
May 30, 2015 | 0 commentsMilo Valley Farm – removable back wall, part 2
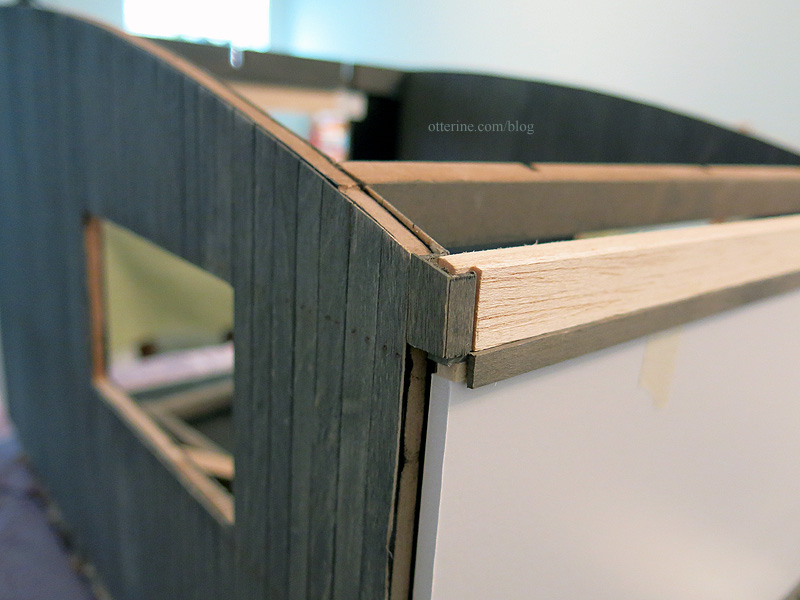
Continuing work on the removable back wall. After some further thinking, I realized I wanted my break in the wall to match up with the interior horizontal beams…so I would need to make my sliding wall taller and my anchored top shorter. Here it is adjusted.
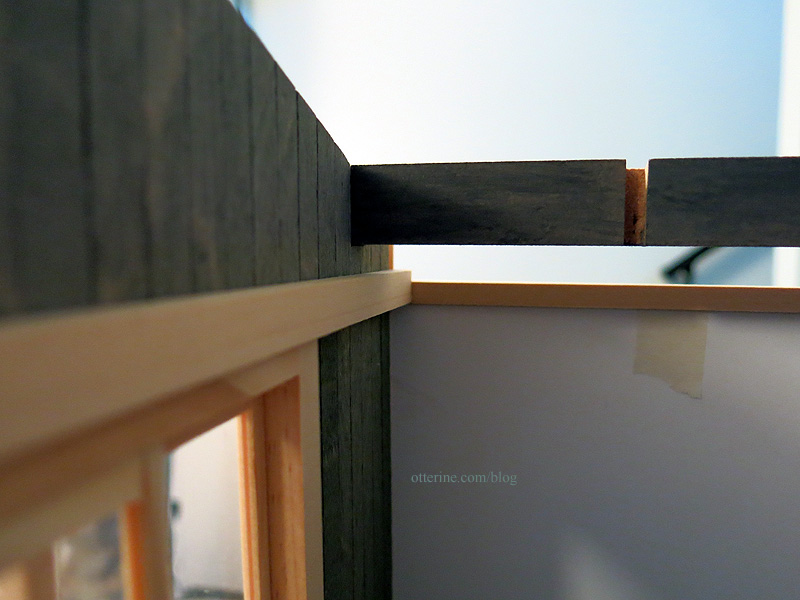
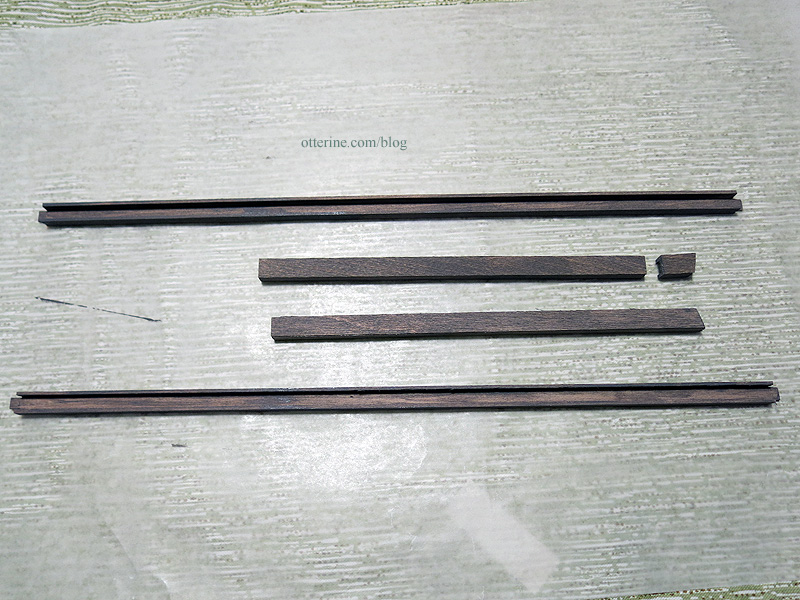
I would also need to split the vertical channel on the moving side. The top portion would anchor my top wall; the bottom portion would move freely.
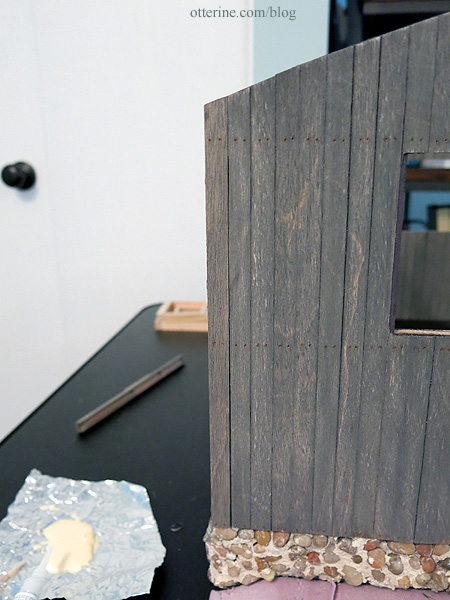
I covered the back of the vertical channels with siding strips cut to fit. I stained all the pieces to match the siding to prevent any bare wood from showing once finished.
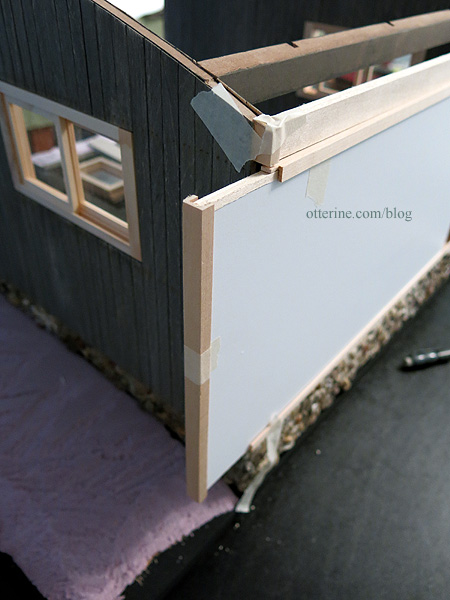
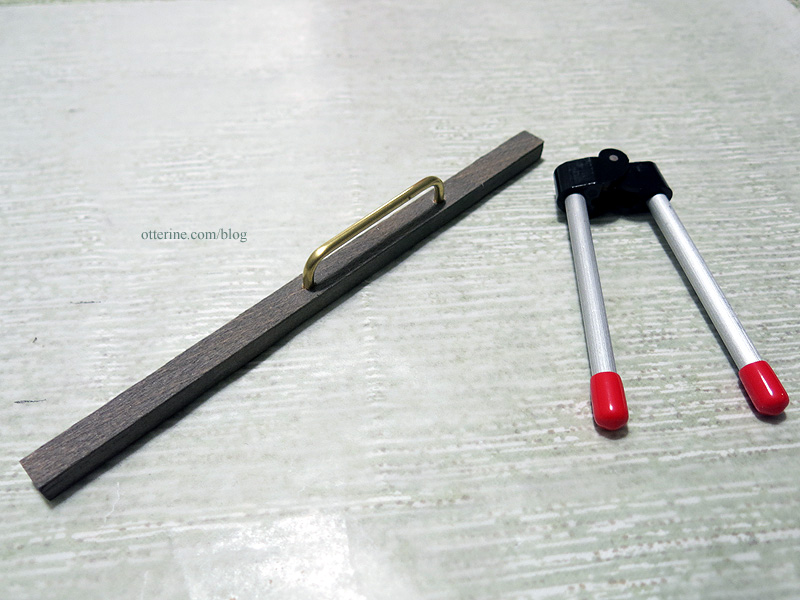
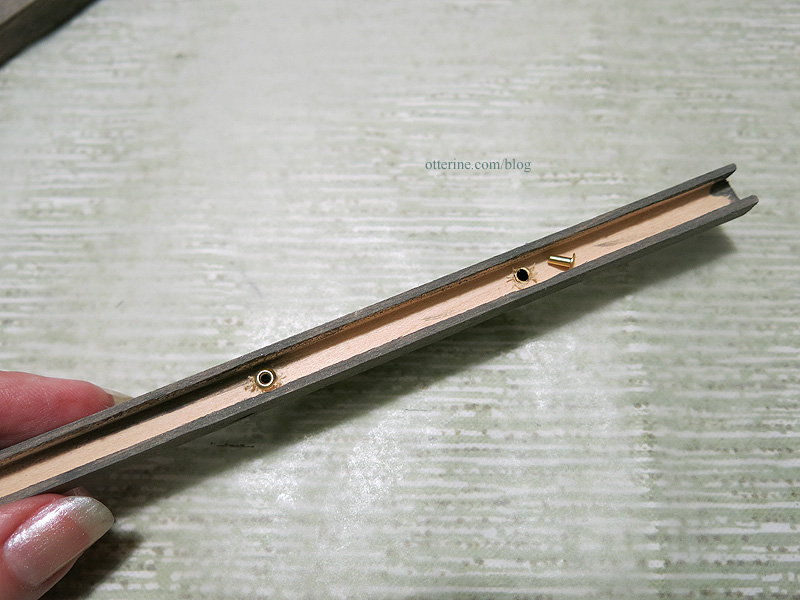
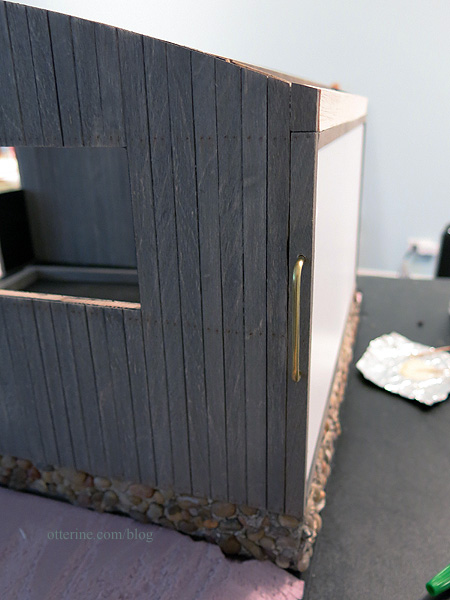
I will need a pull for the movable side, so I bent some brass tubing to serve as a handle using a Du-Bro Tubing Bender (here’s the post on how the tool works). I needed a handle large enough to grip and pull but in scale to look like a planned part of the build. Maybe this was an old bar used to tie up horse leads.
Eyelets will be glued on the inside to add stability. I’ll need to finish the metal to make it aged, so more on this later.
I glued the stationary side pieces and lower channel in place with the removable board inserted to keep things square.
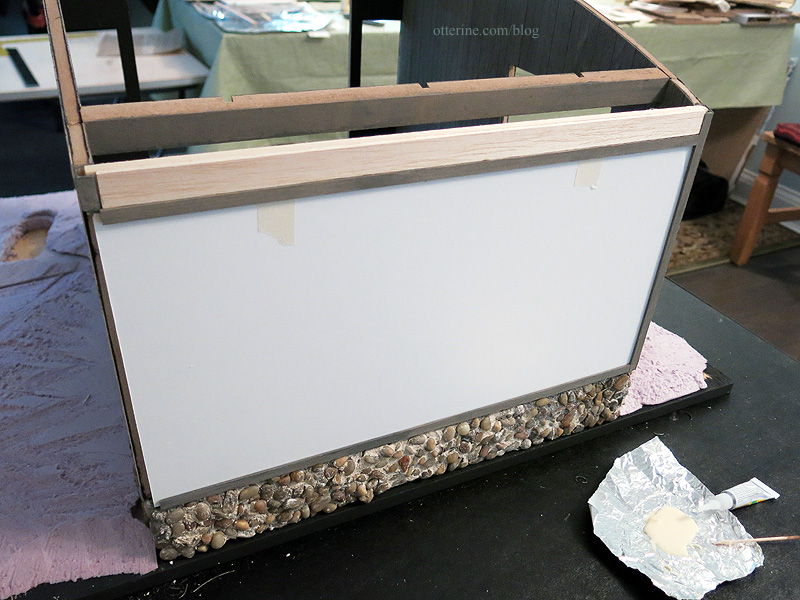
I padded the top stationary wall on the outside make a smooth surface across. Trim will cover this portion later.
The siding strips on the side channels make them blend in well, especially on the stationary side.
The side with the handle will have a break in the vertical siding board, but the upper trim should help disguise this. Besides, I’m hoping the build will be so awesome you won’t notice. :D
Categories: Milo Valley Farm
May 28, 2015 | 0 comments


NOTE: All content on otterine.com is copyrighted and may not be reproduced in part or in whole. It takes a lot of time and effort to write and photograph for my blog. Please ask permission before reproducing any of my content. Please click for copyright notice and Pinterest use.


