
Copyright and Pinterest use
This is not an all inclusive list, but here are some basic guidelines about copyright and internet etiquette. All content on otterine.com is copyrighted and may not be reproduced in part or in whole. It takes a lot of time and effort to write and photograph for my blog. Please ask permission before reproducing any of my content.
Copyright exists as soon as you create something, though there is of course an added legal process to further that notion. It should be understood that one can’t copy posts from one place and post them on one’s own blog or website without permission. Just because my work is on the internet does not mean it is in the public domain or meant to be reproduced freely. You do not have to make money using someone else’s work to violate copyright. Even if you are using the work for personal use only, if you reproduce it in print on the web or otherwise, it can be a violation of copyright. Please visit Copyright.gov for complete information.
Please do not republish my blog posts, images, and/or tutorials on other websites or blogs, including Pinterest, without permission.
Pinterest users: Please pin only one photo from a blog post — do not post multiple photos or entire tutorials on Pinterest.
If you’ve had a Pinterest pin or other image removed at my request, it is typically due to that image being hot-linked on multiple other websites and the only way to resolve the issue is to remove the source image from Pinterest. I will also have Pinterest remove multiple pins from the same post as well as any pins where the link directs to a location other than my blog or website related to me.
I do understand that Pinterest is a means for people to both save links to tutorials and to discover artists’ work in the first place. However, please understand that when large sections of my work and tutorials are pinned, it essentially equates to my work being reproduced in its entirety on another website. In fact, each pin creates a new but exact duplicate of a copyrighted work using Pinterest’s numbering/naming system. From there, the images can be republished onto other websites without links back to the original source, which is harder to track. If my work is published in its entirety elsewhere, then people have no reason to visit my blog.
Pinterest also puts the responsibility solely on the user as to whether they have the right to use the images they choose to pin. A copyright holder can ask Pinterest to levy “strikes” against a user for violating copyright. I don’t know the full policy for Pinterest, but I do know Facebook will block repeat offenders. Just because Pinterest exists doesn’t mean users are exempt from copyright law or in any way protected by Pinterest if they get into legal trouble.
I don’t mind a photo or two pinned, but this large scale copying has often gotten out of hand. I understand that many people who pin responsibly might be caught in these sweeps to remove images. It’s not a commentary on those users, and I’m sorry if it causes confusion, offense or hurt feelings. That is not my intention. As they say, it takes one bad apple to spoil the bunch.
There is no easy answer, so I try to strike a balance between being flattered at one or two images pinned and fighting copyright infringement where entire sections are posted to Pinterest, Facebook, VK.com, YouTube, or other websites.
As for images posted on other websites, if I can find a way to contact the website owner or blog writer, I try to do so. In cases of foreign language sites and sites without any obvious contact information, my only recourse is to go to the source website or hosting company.
When I contact people about removing my copyrighted works, I address it professionally and in a friendly manner. Sometimes, with the use of Google translate, it doesn’t always come across well. There are also certain legal statements that often need to be included in DMCA reports, and that legal language can seem harsh and unforgiving. I understand that some people don’t understand copyright, so I give the benefit of the doubt as much as possible.
It should go without saying that no one should put their logo on any work that is not their own, but many have done so and not just on any one particular website. I’ve read praises for my work and the work of others, but all of the photos have the writer’s logo or name superimposed on the work. Please do not put your logo or name on my work.
I offer my guidance and ideas free of charge, but my work should also be respected. I always give credit to others when I use their ideas or share their work. I love to create and share ideas on my blog, but I do think the rights of artists should be protected and respected. It bothers me when I find my friends’ works unattributed or copied in whole as well. It’s a fine balance between publicity and infringement. I am doing the best I can.
There is a contact form at the top of the page so you can send me a private message at any time.
Categories: Miniatures
June 11, 2015 | 0 commentsTamiya tool set – part 1
I’ve started working on the 1:12 scale Tamiya tool set.
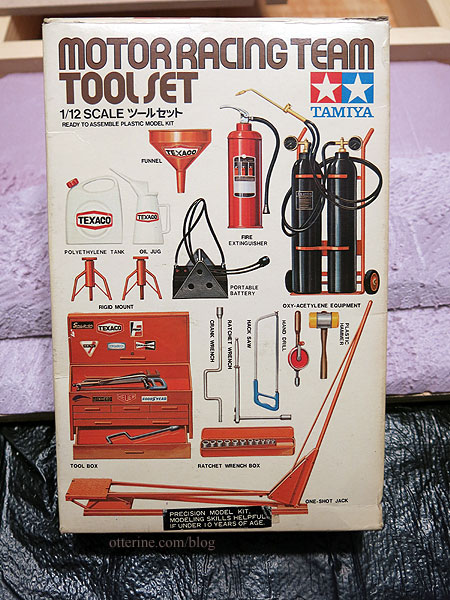
I might not make everything in the box, mainly because I already have better examples of these tools in metal and wood. The first bit of business is to remove the pieces from the sprue then sand or fill the imperfections.

Many of the pieces are assembled with glue, so I’ve done my best to fill in the joins. I won’t know how successful I’ve been until after I spray on the primer. :] They are obviously visible, but they feel smooth and might disappear under the primer.

I’ll likely age these pieces, so that will give me some flexibility.

Depending on how the cart for the oxy-acetylene torch turns out, I might remake it in metal for better realism and weight. I plan to paint the wheels separately, so they are not attached to the cart yet.

While I was at it, I’ve included the barrels from Bill. I’ve filled in a couple of holes in the red barrel with contour putty, which I will sand down once dry. I also removed the molded lines and injection marks. These have great detailing, so I hope the painting works out well.

Categories: Miniatures, Model Cars, Vehicles
June 9, 2015 | 0 commentsThe Maple Room – a weekend build
Time to make The Maple Room! :D As noted before, I’m using this Traditional Room Box kit by Real Good Toys as a quick build room that will be interchangeable for photographing minis. I always like to start with finishes that can be done while the kit is still in flat pieces. This allows me to press the boards flat while paint, stain or glue dries, therefore reducing warping while the build is in process.
I started by marking lines on the exterior of the box where the front and upper trims will be. I am finishing the exterior not only to make the room more attractive on a shelf but to add thickness and stability to the base kit wood.

I bought this siding some time back and it wasn’t exactly what I wanted for that project. I kept it in my stash, and today it came in handy without my having to buy additional materials. For the sides, I followed the guidelines. For the back, I left some overhang to overlap the sides.

I primed the interior with white craft paint and stained the exterior with a mix of Staining Medium and Plantation Pine by Americana. I chose paint stain since it dries faster. This box isn’t meant as a showpiece, but the paint stain will seal the wood while looking nice besides. I later added one very thin coat of Delta Ceramcoat Satin Varnish.

I also chose green since I already have grey and red siding builds, and The Maple Room could easily serve as an outdoor backdrop just by turning it around.
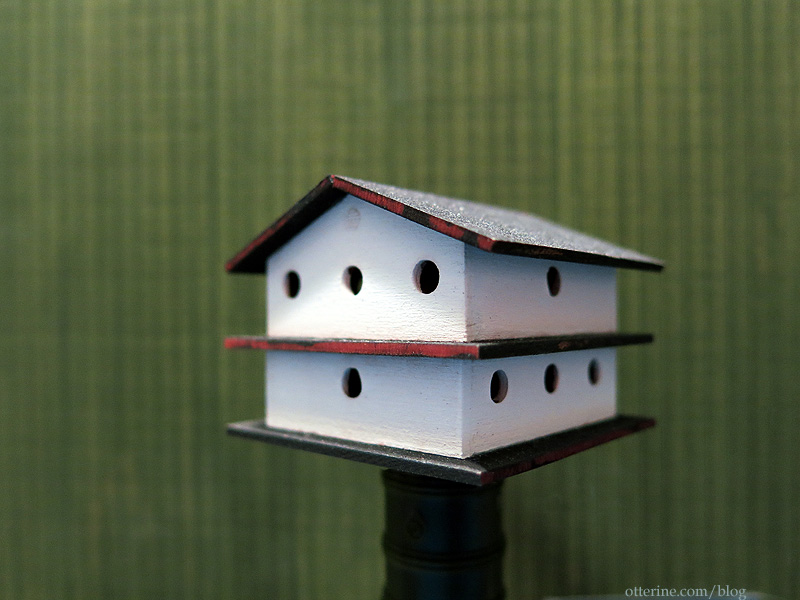
I painted the plexiglass trims, baseboards and casing trims white. The baseboards are leftovers from the Heritage. I assembled the main room pieces of the bottom, sides and back using wood glue. I had masked off the edges to keep a clean wood surface for the joins.
I glued the front lower and front side channel trims in place. The front upper trim and side upper channels will need to stay removable to swap out the papers. They each have a deep channel groove and hold in place nicely without adhesive. But, I assembled the box with everything taped in place so it would dry in the correct shape.
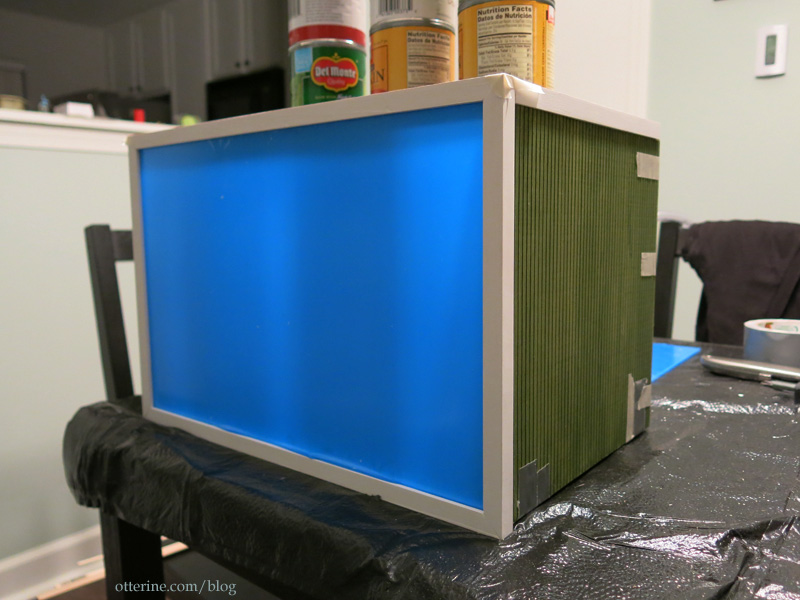
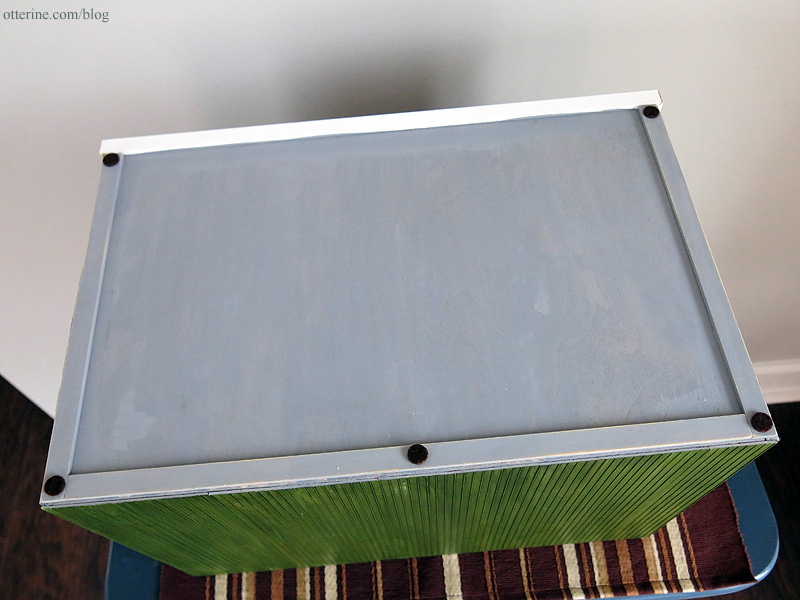
I glued the bottom trims to the underside and then touched up the paint. I had primed the floor board and these trims with grey gesso. Small felt feet added to the bottom will protect table surfaces.
I had some flooring leftover from Mt. Sydney Chalet. It was a staining mishap that I never got around to correcting. It’s a weird red-orange color that was supposed to be cherry and some of the boards didn’t take the stain very well. =shrug=
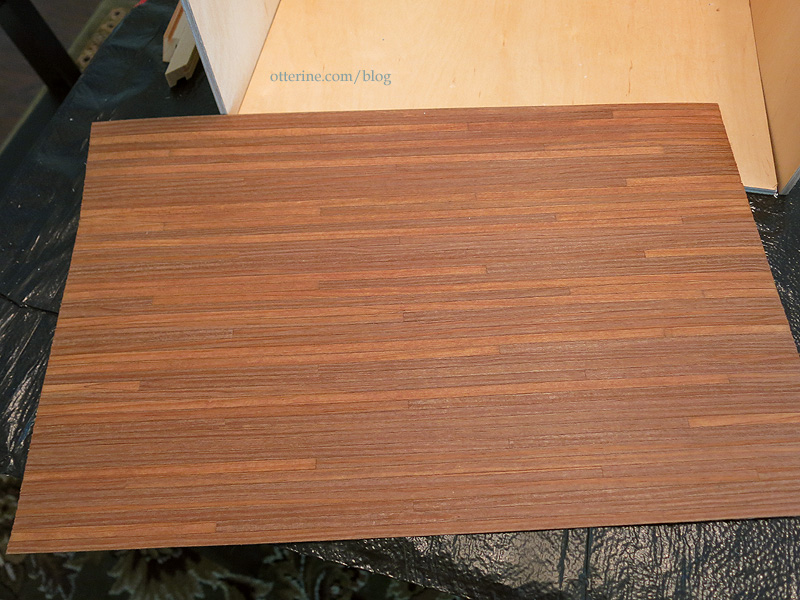
I used a mix of Staining Medium and Bittersweet Chocolate by Americana to darken the color. In a few places, I needed to use undiluted paint to cover the light boards. The final finish is Delta Ceramcoat Satin Varnish, two liberal coats. This floor is permanently attached, but other flooring can be placed on top as needs be. I glued the flooring while the board was able to be pressed flat, before assembly. During assembly, the floor board still bowed a little, but it’s not all that noticeable except in the lower left corner.
I cut some leftover baseboard trim from the Heritage to fit the room. These will remain loose, held in place with mini hold wax.
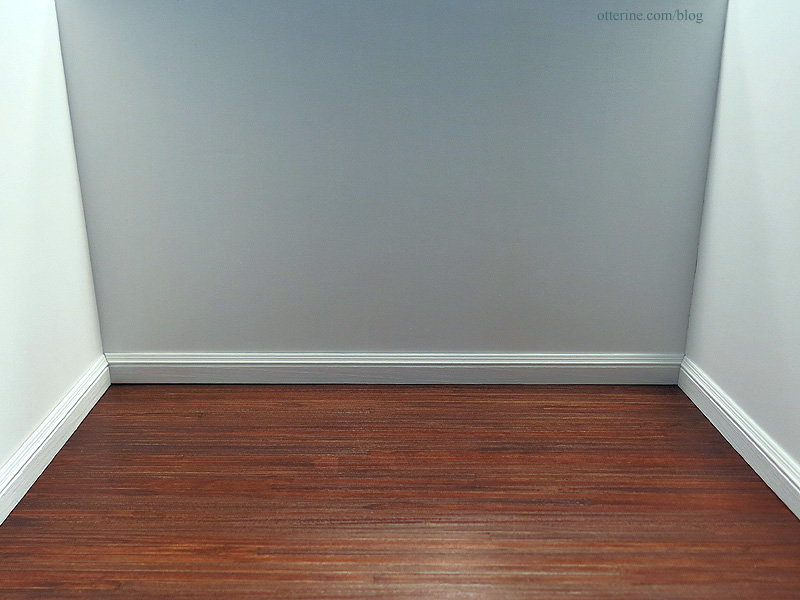
Most scrapbook papers, which is what I mainly use for my builds, measure 12″ wide. A quick clamp holds the paper in place at the top and the baseboards hold it at the bottom. A 12″ wide piece of paper is adequate most of the time, but sometimes I do need a wider room. Since the baseboards are removable, I can paper the whole room or around a corner if a scene required.

What about lighting, you ask? Any overhead lighting can be supported with the front cross beam and plugged into a power strip outside of the box.
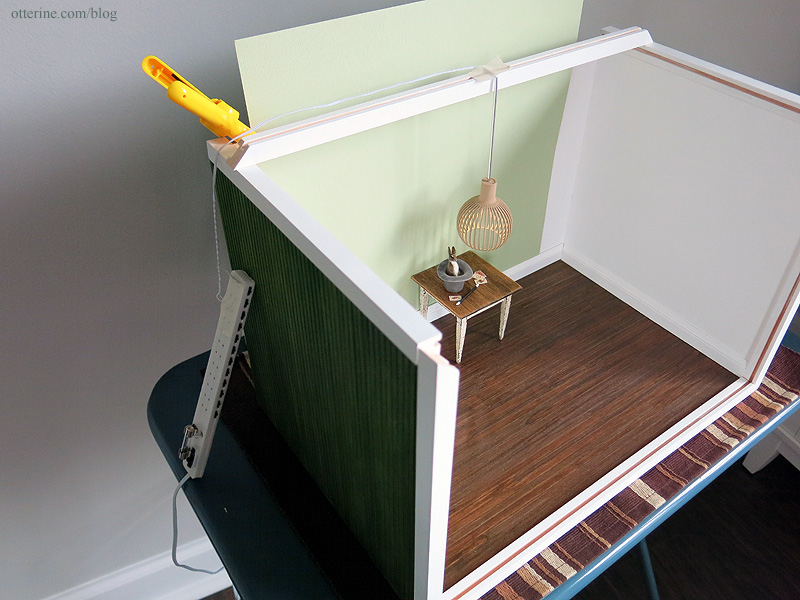
For table and floor lights, the power strip can be pulled out of the way far enough to be out of the field of vision for the camera. The lamp wires will be positioned as necessary.
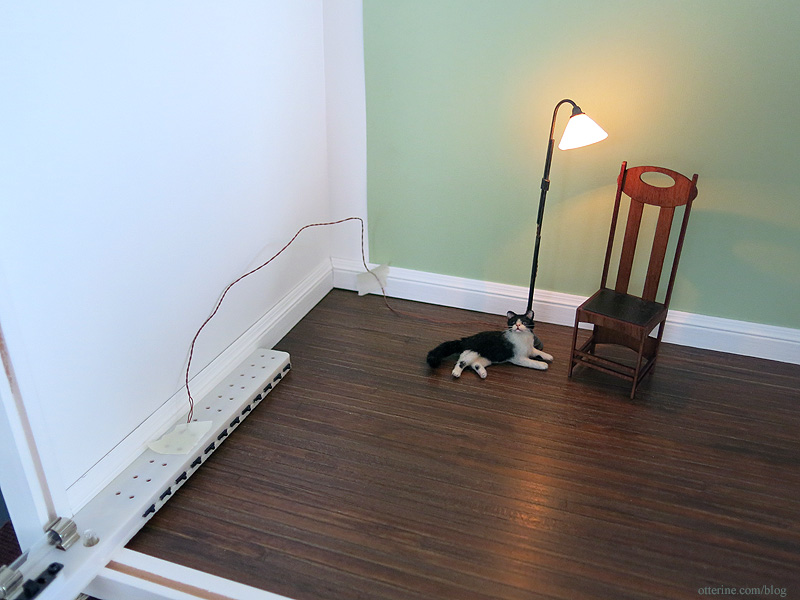
These can either be hidden with furnishings (or cats) or removed with PhotoShop. In this case, the cord is dark and thin so it’s more realistic on its own.

When not in use, the plexiglass inserts slide into place to keep the dust out.
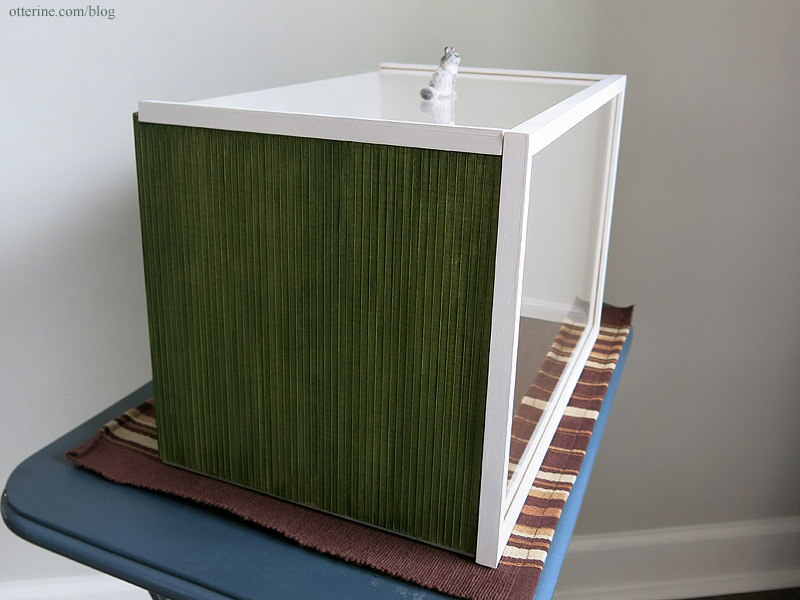
A perfect weekend project! :D

Categories: Roomboxes and Mini Scenes
June 7, 2015 | 0 commentsPresto!
I’m channeling my inner Bullwinkle and working some mini magic!
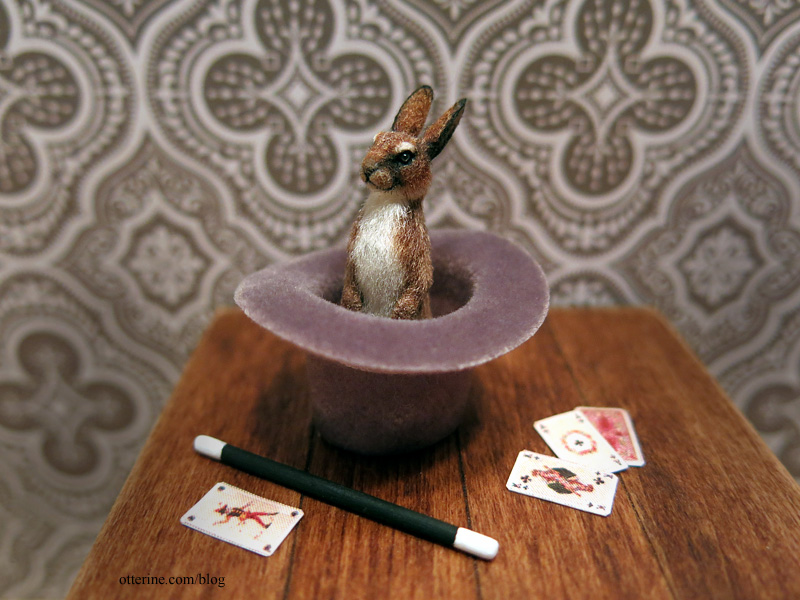
I made a few playing cards from this free printable on Wings of Whimsy. I sanded down a thin wooden dowel and painted it to look like an old fashioned magic wand. The top hat is by Heidi Ott. I chose a grey hat since it’s easier to keep the dust away in photos. Friedrich is ready to amaze you.
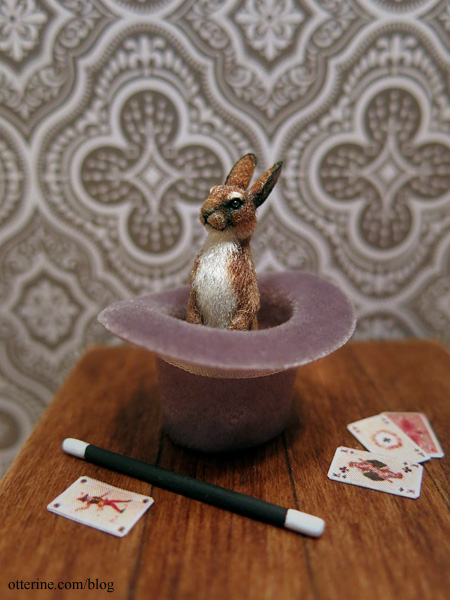
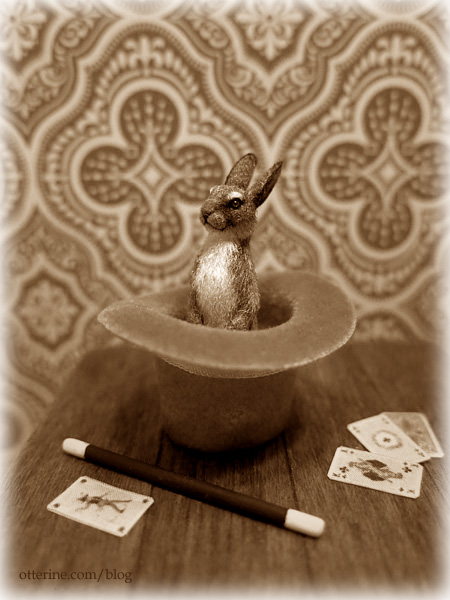
Presto! :O Whoa…we’ve gone back in time. :]
Categories: Animals and birds, Miniatures
June 4, 2015 | 0 commentsMilo Valley Farm – random farm junk
Keli made me two crates full of delightfully grungy barn items. Her husband even made a pair of working battery cables, and though the clips are large for scale, they are fun!

Her crusty, leaking battery might just get me a fine from the EPA. :\

Her bike pump is simply awesome!

Bill has done it again! He has sent some of the most marvelous handmade miniatures and miscellaneous items for my barn find diorama! Our barn owner is a tool hoarder. He’s got all sorts of shipwright’s tools. I’m quickly learning about ship building and maintenance. We have caulking irons, chisels and mallets! Oh, my!

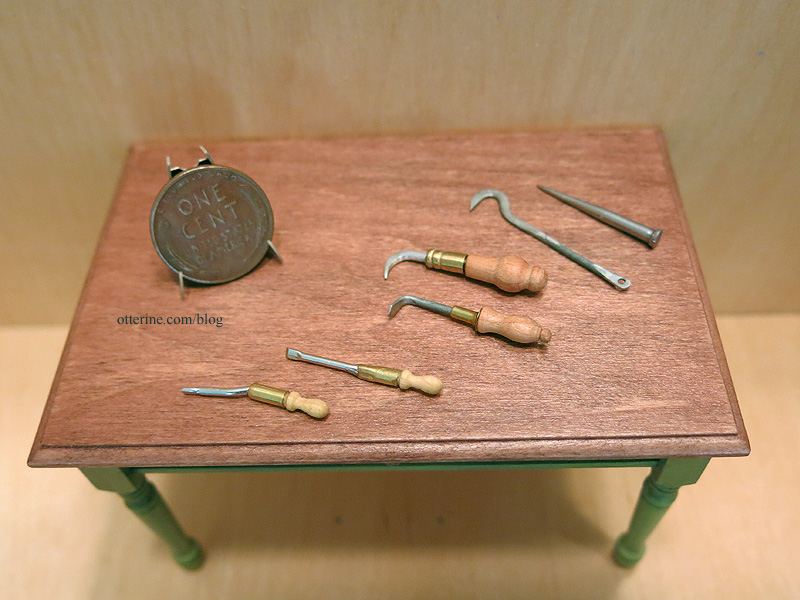


We even have a splitting froe! :D

Mom was over tonight, and she said grandpa had one of these large hand drills in real life. :]

Now for the random part. Bill picked up a ratty brass tiny trophy for $0.25 Canadian. He started the magic transformation and turned two bases for it. He’s left it unassembled for me to finish. With a hot car like the Datsun, it had to have been raced at some point!

This is a brass and leather barrel with big (in mini) dice.

It unscrews. errmmm. Any ideas on what this is? Bill and I are baffled.

And, it’s finally time for the trash to treasure part. I think he meant this first item as trash to treasure, but this has to be the coolest thing all on its own! It’s a tiny box of vintage dental burrs at least 60 years old. The box and burrs are in perfect condition. They may be out of true scale for tools, but closed up the box will blend in to the random tool stash. I will leave it as is.

The sanding disks almost look like free weights.

This box is so super cool I might use it as is, too. Maybe it’s a master box of individual boxes of nails. :D Bill suggested vintage signs, but I don’t think I can cut it. I like it too much just the way it is.

He was at the “free store” where there are bits and bobs to peruse. He found this and suggested it might be part of a machine, a feeder or a light fixture. I’m thinking an unsafe and completely out of code kerosene heater. :D Or, perhaps it’s meant to be a smudge pot. I believe I have some other bits and bobs around to finish it nicely.

He also visited the “not free store” and found some marvelous plastic toy barrels. He told the woman at the store about my mini projects, and she donated them to the barn for free! :D These will need a bit of painting magic.

Tiny spools of copper wire. The smaller is from a battery watch and the other is from a digital camera. Crazy small! :D

Thank you, Bill! You spoil me rotten!
Categories: Milo Valley Farm
June 2, 2015 | 0 comments
NOTE: All content on otterine.com is copyrighted and may not be reproduced in part or in whole. It takes a lot of time and effort to write and photograph for my blog. Please ask permission before reproducing any of my content. Please click for copyright notice and Pinterest use.


