

Watson Mill – introduction
Greenleaf Dollhouses held their Spring Fling contest for a number of years, including some years before miniatures became an everyday thing for me. The 2009 kit had an arch roof and an interesting shape. I bought one some time ago for a someday project just in case they went out of production.
Jen Barrick’s Loganberry Mill was one of the first miniature houses that drew me into the hobby. She dropped the scale down to half scale and made the most amazing sail set. It’s truly an inspirational build from the inner mechanisms to the realistic landscaping.
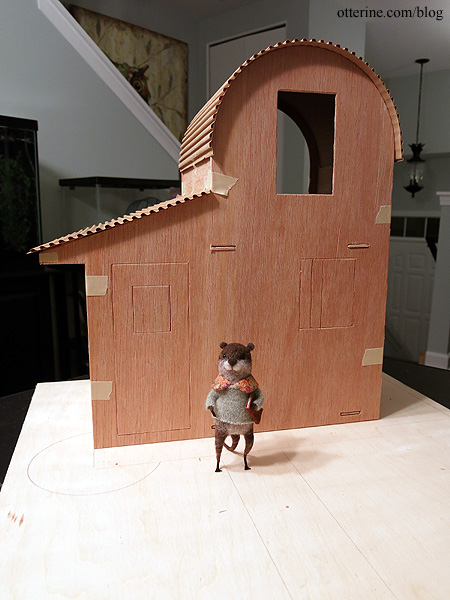
So, this is where I start…with an idea for my own take on the kit…Watson Mill. The kit is simple yet elegant in design, a cozy place. I punched out the upper window even though I will be adding sails here, because the kit had trim pieces die-cut there that were falling out. I’ll just have to patch it. I won’t be using the cardboard roof pieces, but they complete the dry fit.
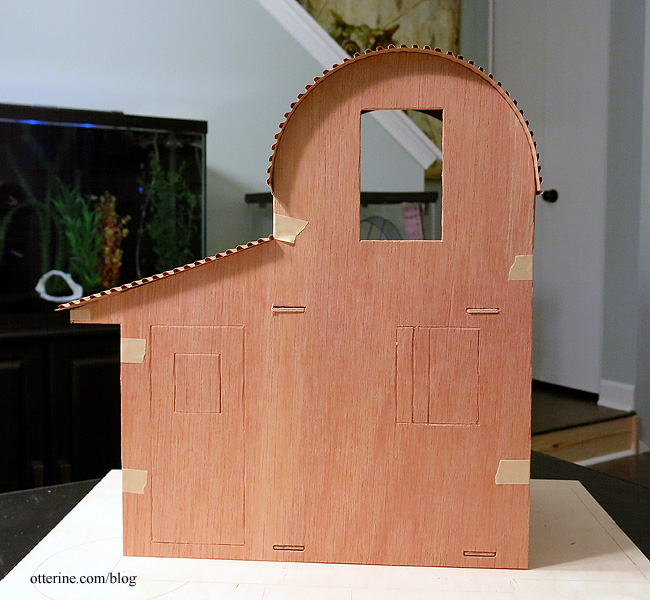
I will definitely need to move the door to one of the side walls so I’ve left it and the lower window intact for now. We don’t want to send anyone ass over tea kettle. :O
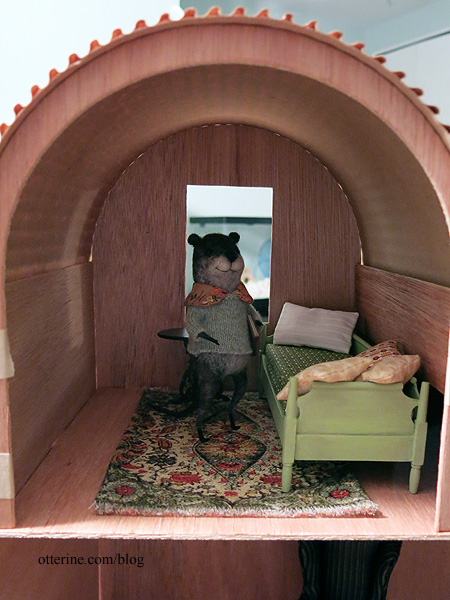
I will keep the full scale aspect and make this more of a fantasy build in the vein of Roland’s Retreat. That saves the hassle of adding a full kitchen and bathroom. This will also be a mill rehab with most of the inner workings of a proper mill long gone and replaced with the cozy decor of its current resident, Gustav. He’s independently wealthy, so he dines out all the time anyway. There might be room for snacks and a tea kettle.
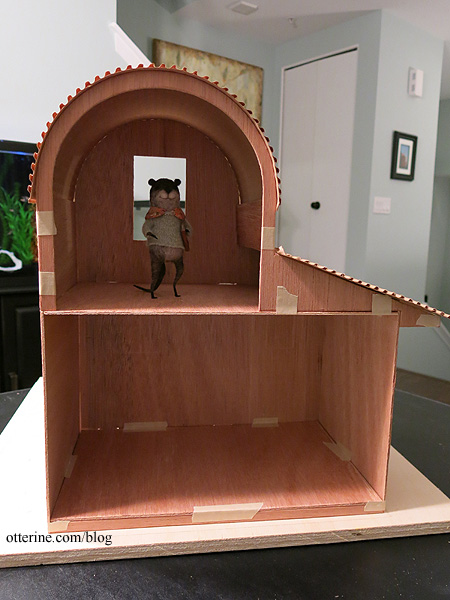
Gustav is an otter with a thirst for knowledge and culture. He loves the written word, so I foresee a good deal of books to be made. I can’t go stealing them from grandma at the Heritage, after all.
With his simple tastes, we’ll need a place to sleep and a place to read….maybe a stove to keep warm, too. Since the upper room is small, I can make a daybed for the space. This will leave room for a short dresser and a bedside table. I prefer the realism of stairs in my builds, even in the realm of fantasy, so he will also need a ladder between the floors. While I do love this rug from dalesdreams, I think a fox rug might look nice here in the bedroom. ;D
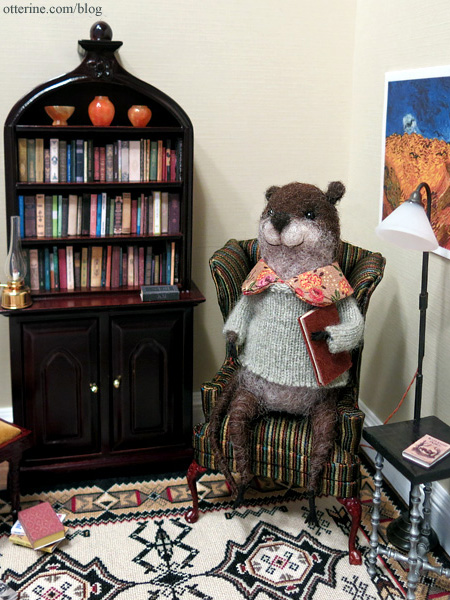
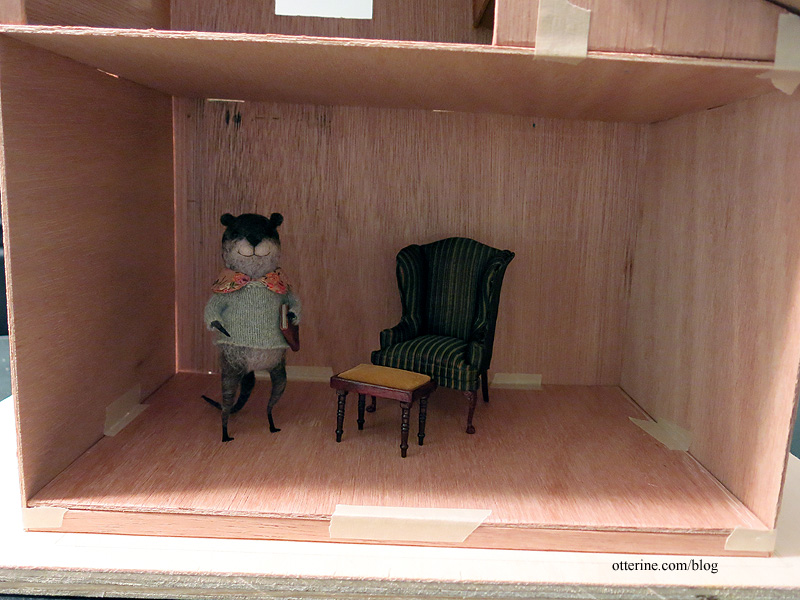
I think this Bespaq chair might stay. I have two of them, so we will see if there ends up being enough room for Gustav to be the social type.
For the exterior finishes, I am drawn to both wood shake and brick, so I might end up with a mix of the two if I can’t decide. I will likely build up the ground as Jen did to make the landscape more interesting. I’d also like to add an arched door to keep with the storybook feel.
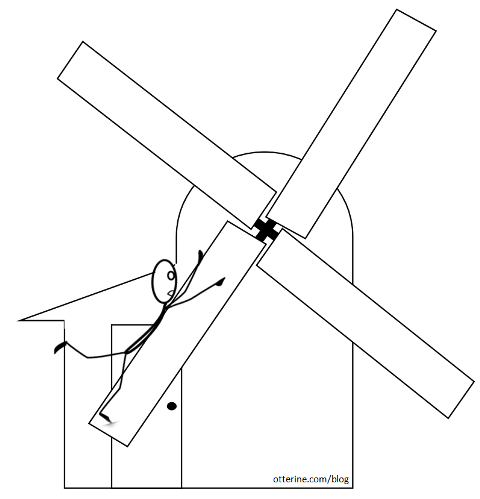
As for the sails, they are going to have to actually spin, right? :D Bruce Hirst has some great instruction on how he made his working mill, so that will be a great starting point. I have the challenge of an open back structure so I will need to be creative in disguising and setting any mechanical details. I will have to close up at least the arch near the upper back. The mechanism will have to be addressed fairly early since that will determine if I have to adjust the height of the second floor space.
First, though, I will determine if I want more depth to the kit to make the rooms larger. That’s very straightforward since I’ll just need wider side walls. I will likely have to cut an additional front wall as well to have a good thickness for a working window and to brace the sails. I’m 99% sure I want more depth since there are a couple of things I’d like to add that will require a larger lower room. The kit is relatively small to start, so there’s plenty of room to add while staying with my current landscaping board. So, I’ve put the kit in dry fit so I can stare, think, plan and play.
Categories: Watson Mill
December 29, 2015 | 0 commentsTribal Foxes Rug – introduction
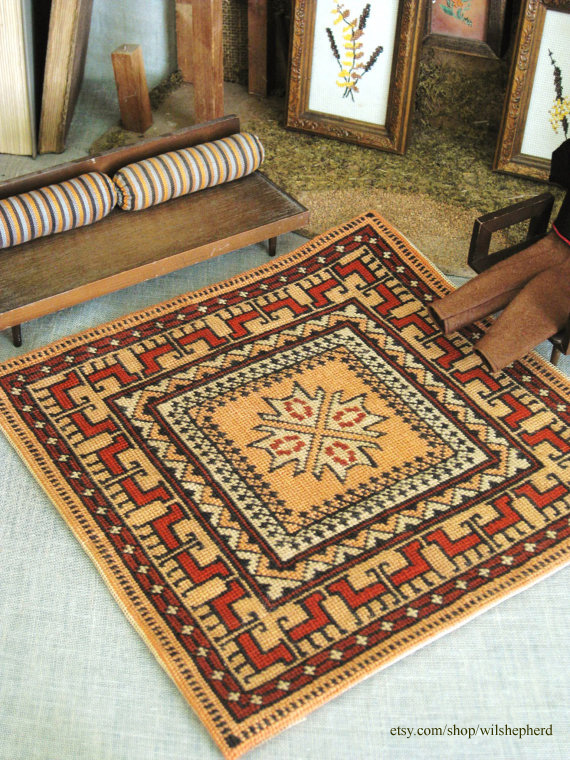
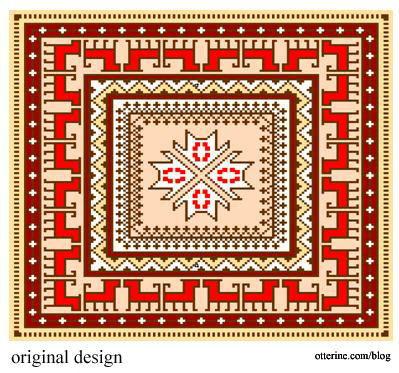
When I’m scouting around the internet looking for inspiration and vendors, I often find random bits that I wasn’t looking for but like to save for later. One such item was a vintage needlepoint rug I found from Wil Shepherd. This particular one is large at 12.5″ square, more suited to playscale than 1:12 scale. I love the colors and the red critters marching along the edges. Given their color and dog-like shape, I’m going to call them foxes.
He had two other rugs listed. There was a maroon and tan one, and I recognized it as the “Holbein” rug from the booklet Miniature Needlepoint Rugs for Dollhouses by Susan McBaine (might have to stitch this one, too). The other was the same as the modern Navajo rug from the same booklet.
Of course, the one I liked most of the three was not in this booklet or any of the others I thought to look through. I was not to be thwarted, so I charted it myself. If anyone does recognize it, I would love to be able to give credit to the designer.
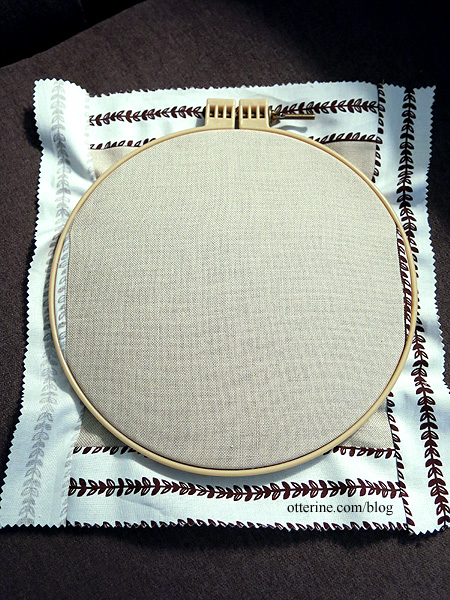
I’ll work in my usual 32 count on Jobelan, which should give me a rug just under 5″ square when finished. Perfect for 1:12 scale. I’m thinking full cross-stitch this time around, so it will be a good amount of hours for this one. My fabric piece measured 9″ square, a bit too small for my hoop, so I sewed strips of scrap cotton to the edges.
I have my colors chosen – nice and simple.
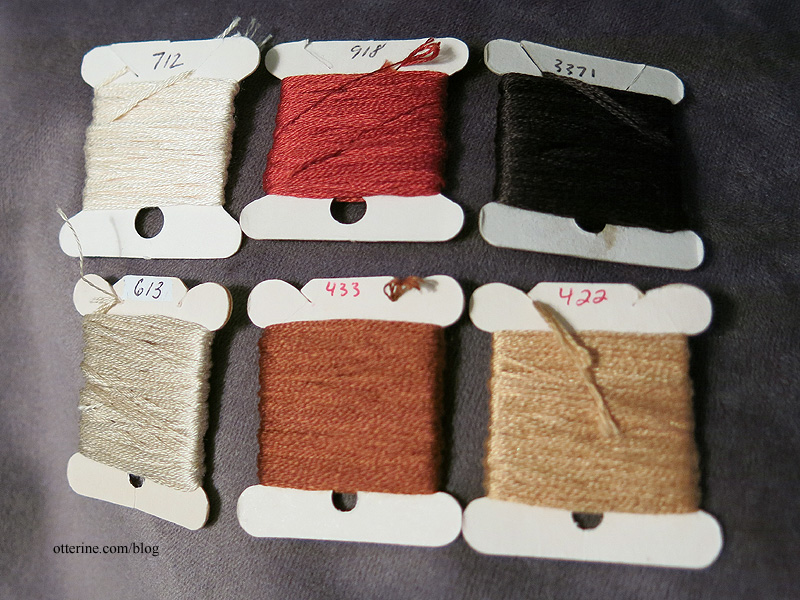
While I was drawn to the colors of the original, I wanted a bit more contrast and less yellow in my version. Below is how it looks at 23 hours of work. I am stitching full cross stitch with single thread over 32 count Jobelan.
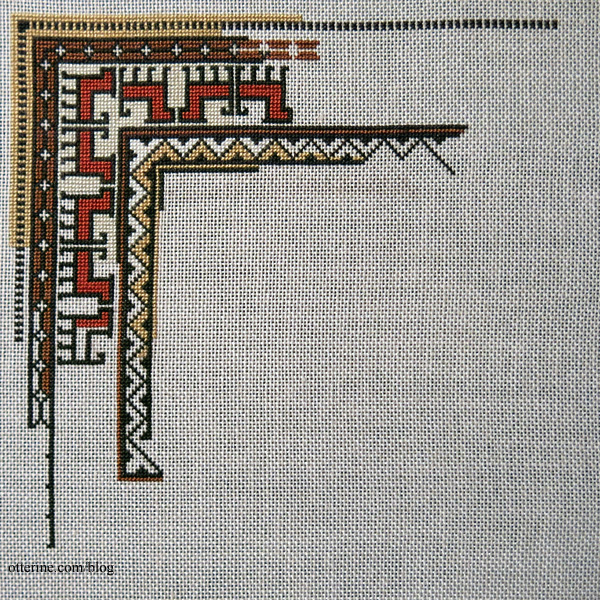
Once I reached the inner border, I decided to redesign the center. I had never been sold on the busy pattern of tiny crosses and dots in the border, and I liked the foxes so much I added four more in the middle.
I reproduced the dark border and added detailing that mimicked the dashes in the outer border to frame the foxes.

Categories: Needlework - French knot rugs, Watson Mill
December 28, 2015 | 0 commentsA quiet little Christmas
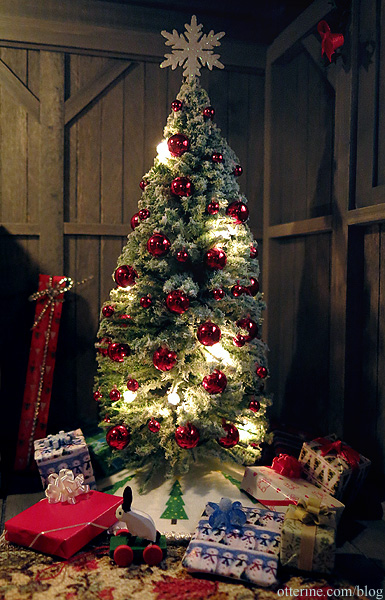
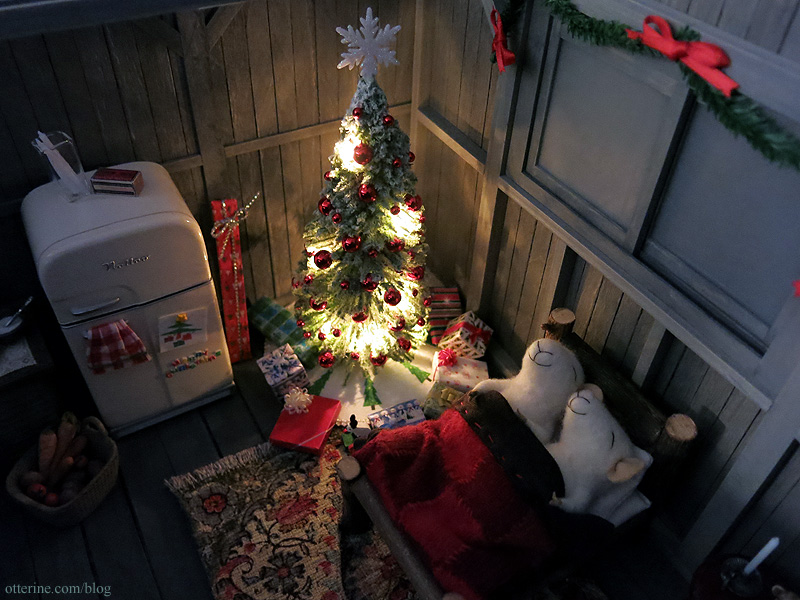
I’ve set up a mini scene in the barn of Milo Valley Farm. The plain tree is by Lemax bought from Michaels. I decorated it with battery operated lights and small ornaments cut from a miniature garland and glued on one by one.
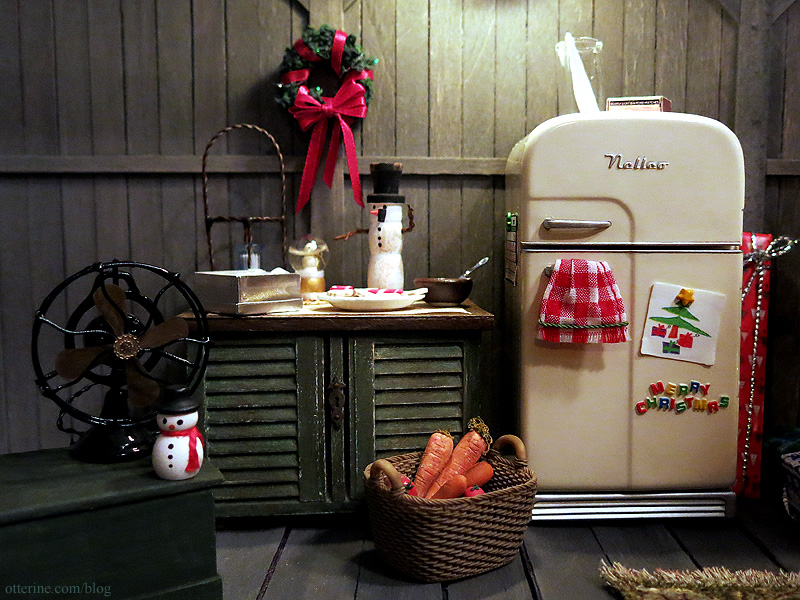
The refrigerator is an old Hallmark ornament that is battery operated.
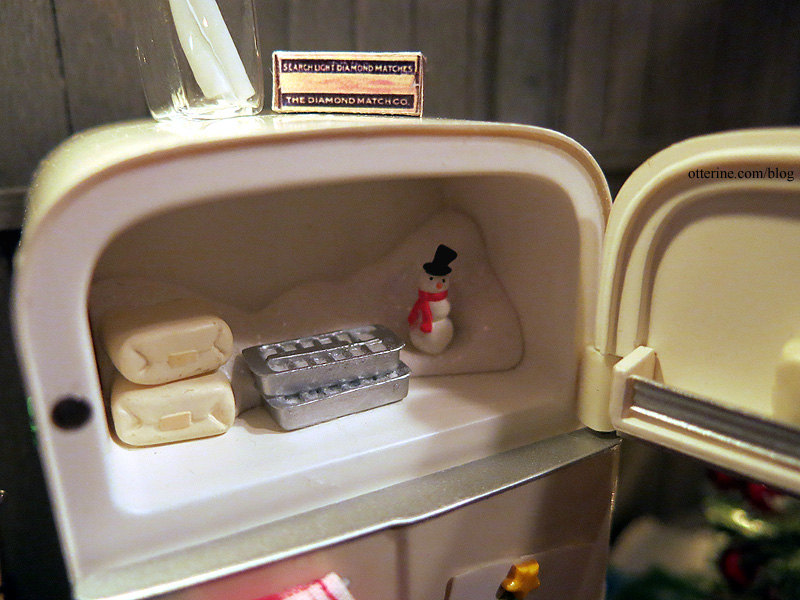
Some goodies in there for sure! The only thing it was lacking was cheese, so I added a mini from Debora.

One of the snowmen wasn’t feeling well, so he took refuge in the freezer for a bit. haaaaaaaaa! (This is an actual detail of the ornament.)
Cookies have been made for Santa (well, to share with Santa).
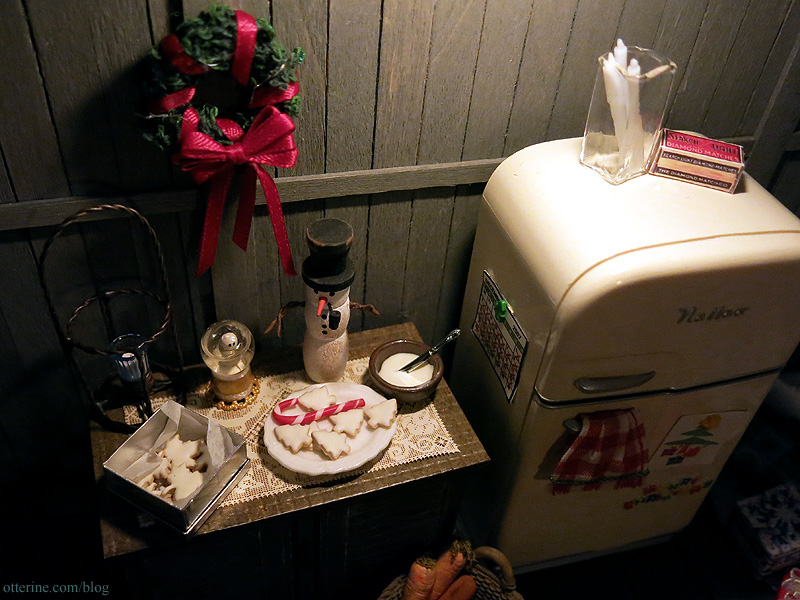
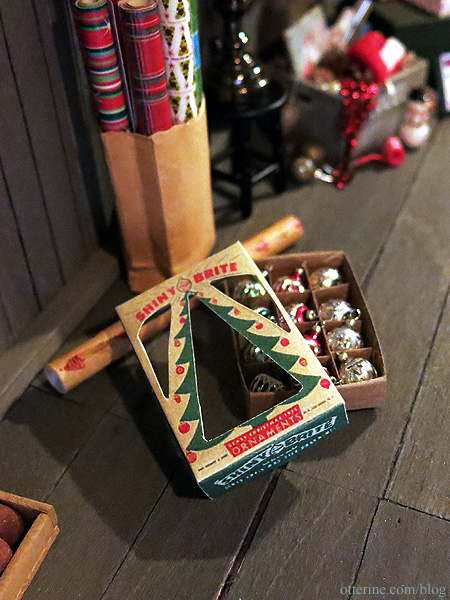
There are still decorations left over.
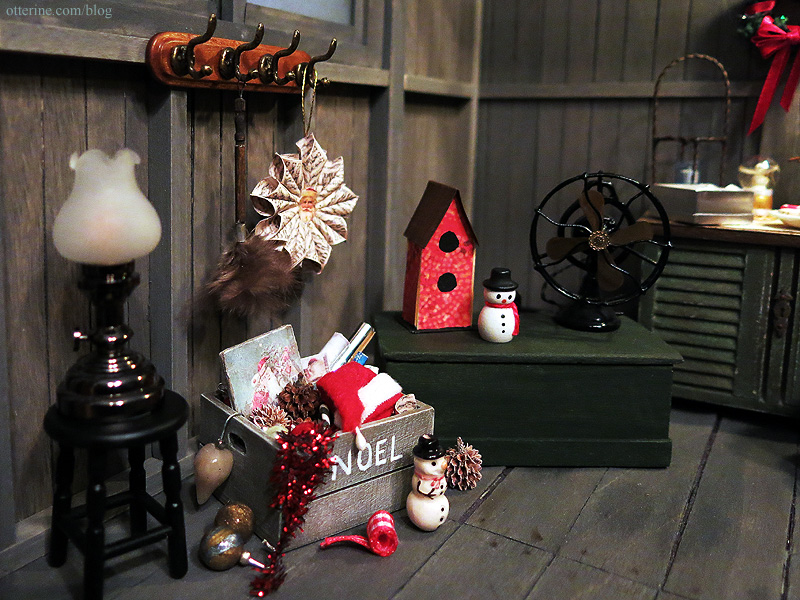
April made the box of vintage ornaments (and snowman snow globe on the cookie table).
The mice are a gift from my mom, made by Rustles from the Meadow.
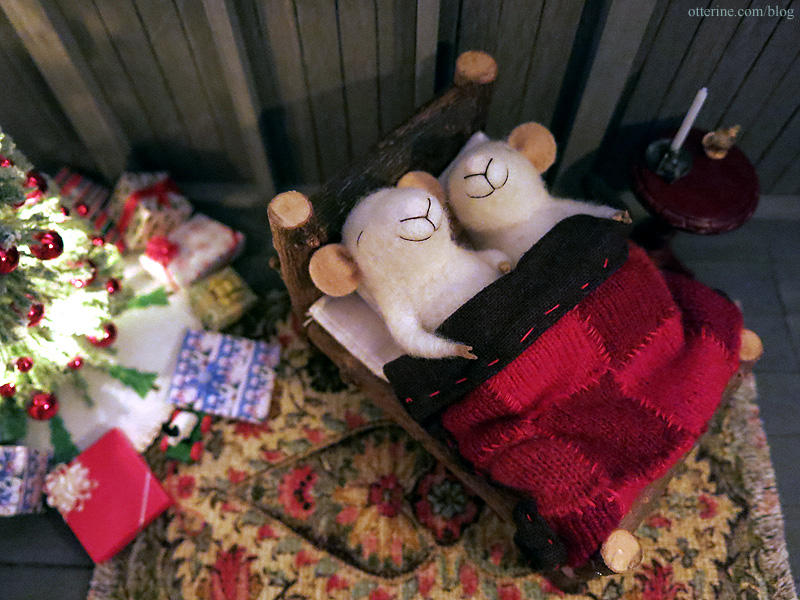
They seem to be having wonderful Christmas dreams.
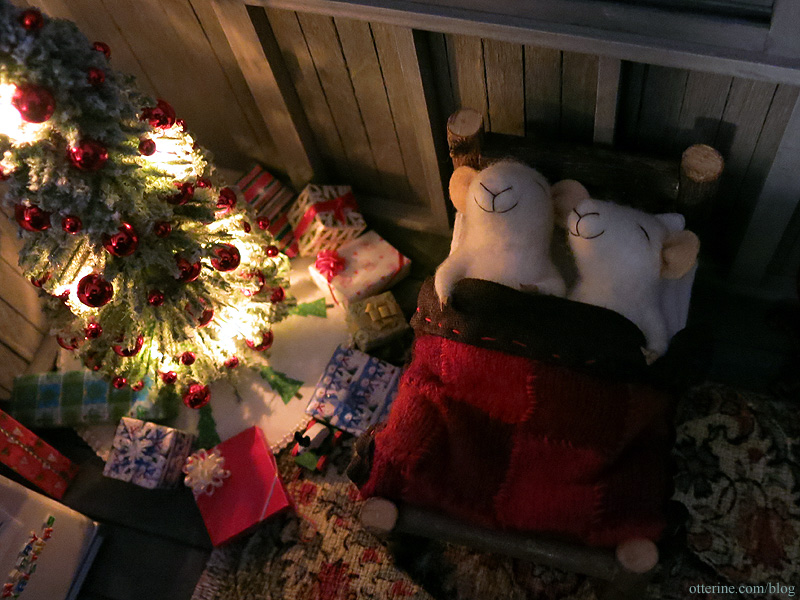
Wishing you all the best for the holidays and in the coming New Year! Merry Christmas!!! :D
——-
Box of Christmas goodies from M Carmen; glittered ornaments from Mini Fanaticus. Lyssa sent me the veggies, wreath and birdhouse. Vintage fan by The Kummerows. Tall primitive snowman from Barb’s Corner; snowman on the chest from Patricia Wehmeier Miniatures. Serving platter from Greenhouse Miniatures. Lamp, resin basket and coat rack from HBS. Bespaq side table, bird statue by Jane Graber. Rug from Dales Dreams, doily from Stewart Dollhouse Creations. Rabbit pull toy from D’s Miniatures; matches from Wright Guide Miniatures; votive holder from A Pocket Full of Wishes; shutter table from Karen Aird Miniatures.
I made the cookies, wrapping paper, some of the wrapped gifts (some purchased), bowl of icing, Chrysnbon stool, garland, tree skirt, sea chest (in progress), and feather duster.
Categories: Roomboxes and Mini Scenes
December 24, 2015 | 0 commentsOtter Cove – flooring and staircase
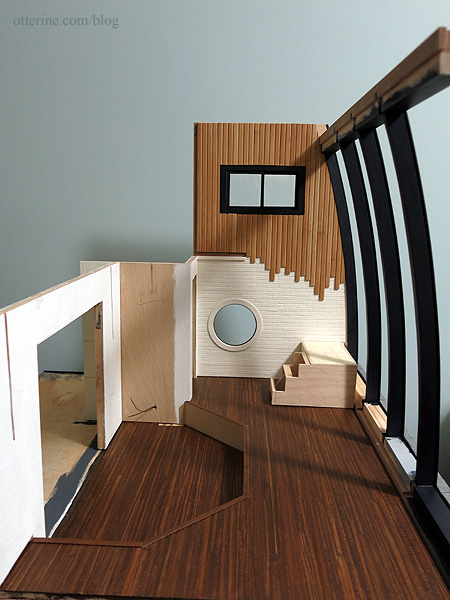
There’s wood flooring throughout the first floor. Since the room is longer than the standard wood flooring sheets, I had to piece it end to end.
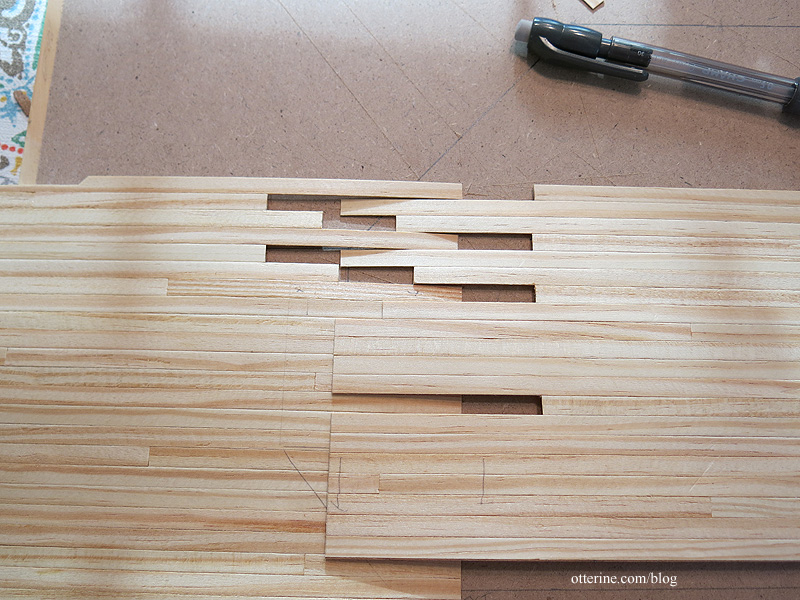
You can somewhat see it still after staining, but it worked as best it could without being a solid sheet.
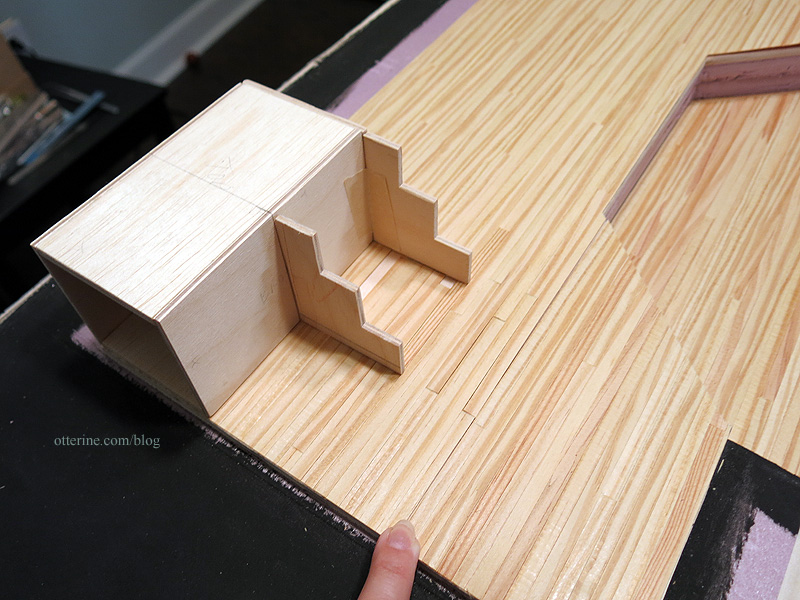
The two-story front wall has what I call waterfall bamboo paneling made from a bamboo table runner. I’ve painted this material in the past, but this time I left it untouched. The paneling is floor to ceiling on the upper floor but cascades in a random pattern next to the open staircase. It was almost a shame to block the view with a floor board…so I might revisit this design for a future build where there is nothing in the way. :]
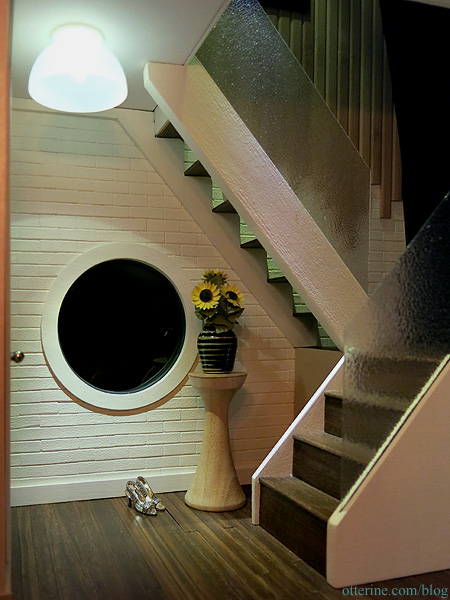
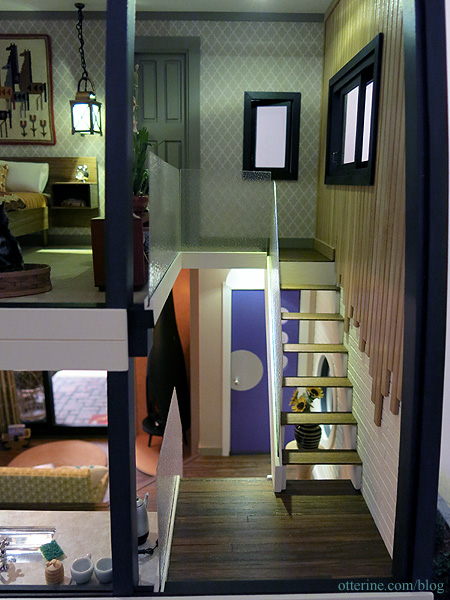
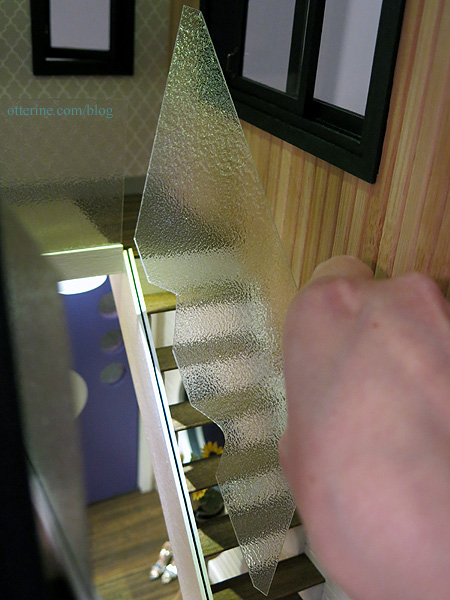
With that in place, I could work on the staircase. The staircase is a full turnaround set of stairs with rippled glass railings made from Rippled Water Sheet.
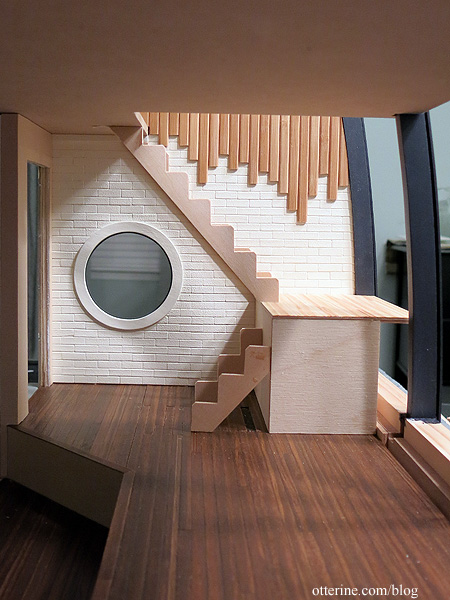
I started with a box. This would serve as the landing portion for the turn of direction. I used the stair step wood stringer that is available on the market to make my supports.
The railings required a decent amount of engineering, so I used mat board and random recycled office materials to test out the process.
The lower stairs are enclosed, so that was fairly straightforward. I used scrap wood to keep the structure square and sound, topped the treads with basswood and used the same flooring for the landing. It is all stained to match.
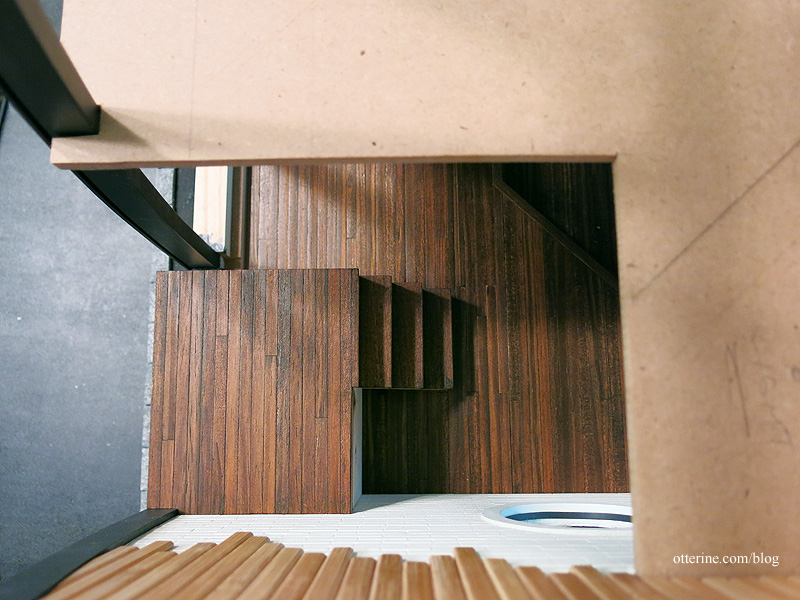
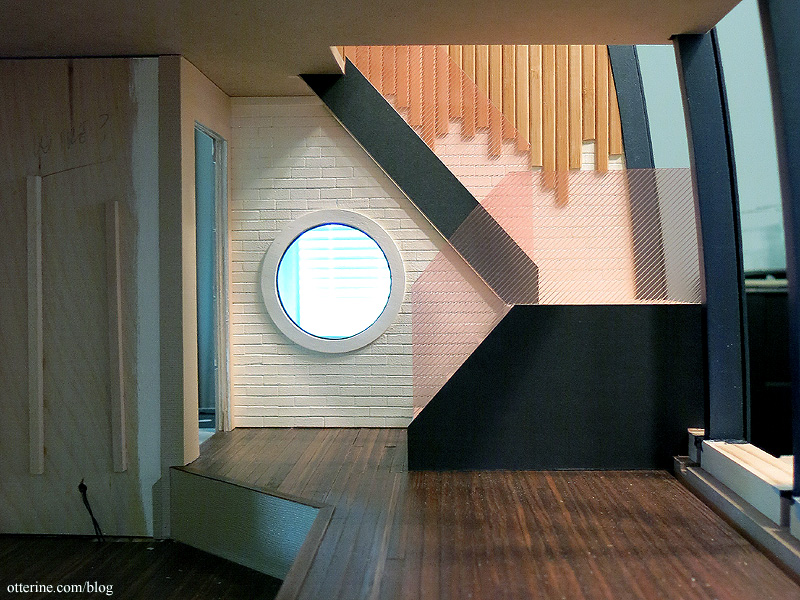
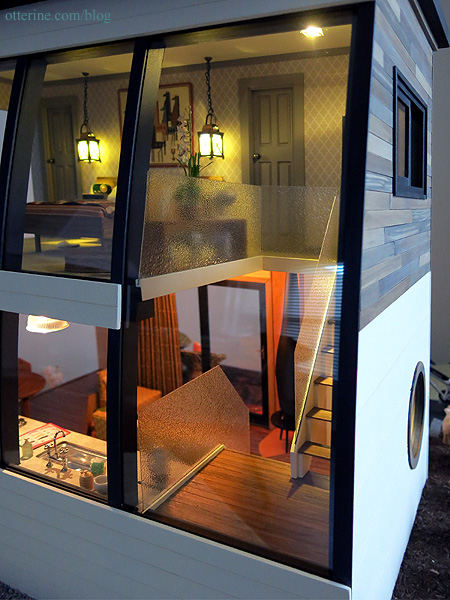
The upper portion required a bit more finesse. I made similar base strips to support the treads, but there are no risers on the upper stairs except for the top one. I like the light that carries through the open space.

The glass pieces slip into grooves so they can be cleaned or replaced as needed.
It was a fair amount of maths, but I love the way it turned out. :D
Categories: Otter Cove
December 13, 2015 | 0 commentsTree Ring Rug
My inspiration is a lovely rug by YLdesign called the Woody Wood Carpet. While theirs is printed, mine will be done in French knots. I like the idea of an organic process for an organic subject matter. And, I can just stop stitching once I reach the diameter I want. I’ll be using four colors of tan and brown — two lighter ones (DMC 422 and DMC 167) for the interior rings and two darker ones (DMC 839 and DMC 938) for the bark edges. I usually keep track of my time when stitching, but I don’t think I’ve ever captured the first stitch of a project. One French knot down….

This was a completely freehand project. I made no pattern or markings on the fabric.

At 13 hours, I reached 1 3/4″ diameter. I planned to reach roughly 5 3/4″ diameter. The progress was deceiving since it took longer to make a full perimeter of French knots each time around.
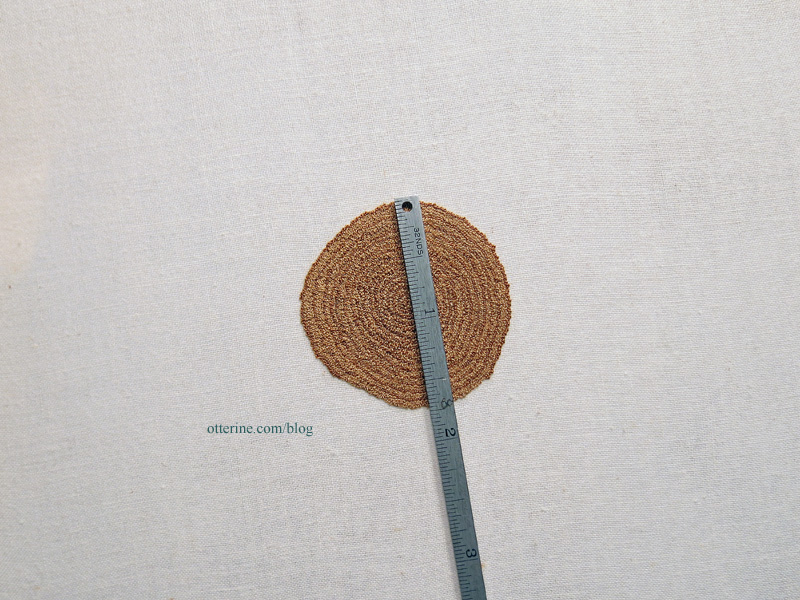
At 31.25 hours, the diameter was 2 3/4″ and taking on a lovely shape as I would make some areas of the lighter tan wider in areas.

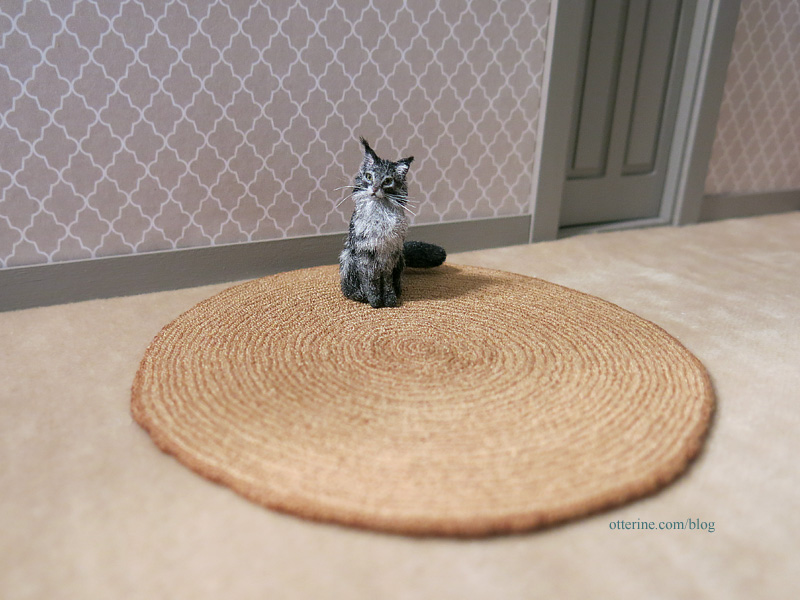
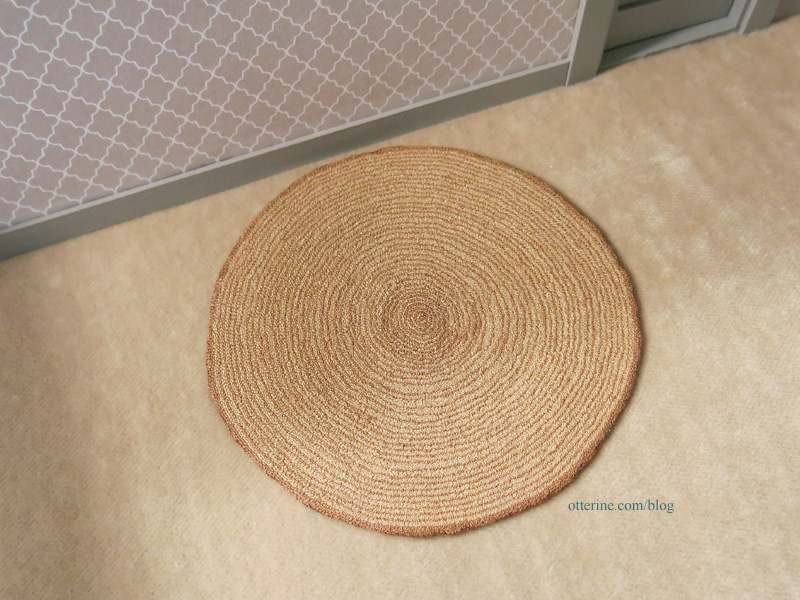
I finished stitching the Tree Ring rug for Otter Cove just in time! I stitched this rug in 77 hours over the course of 61 days. Yeow.
The inner ring portion ended up 4.25″ in diameter, a full inch smaller than I had originally planned. As the rug grew larger, I tested out the sizes and was able to save myself a lot of stitching time. Toward the end, making one full circle of French knots took over an hour and added a mere 1/32″ in diameter. After final finishing, the diameter ended up at roughly 4 5/16″.
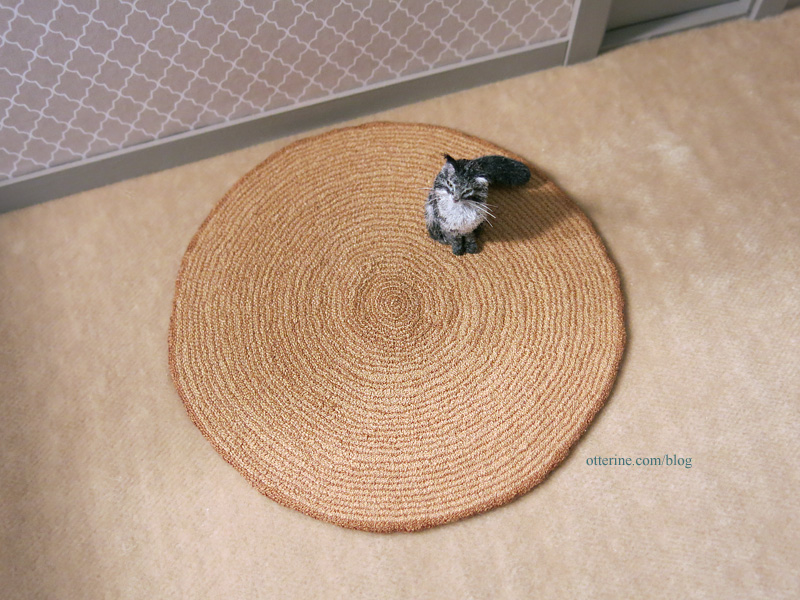
There are 37 rings to the rug, and each of those rings is made from 1-4 rows of light tan (DMC 422) and 1 row of brown (DMC 167). The outer edge bark is the same brown from the ring portion with a border edge in a slightly darker brown (DMC 869). I didn’t make my bark portion as pronounced as the inspiration rug.
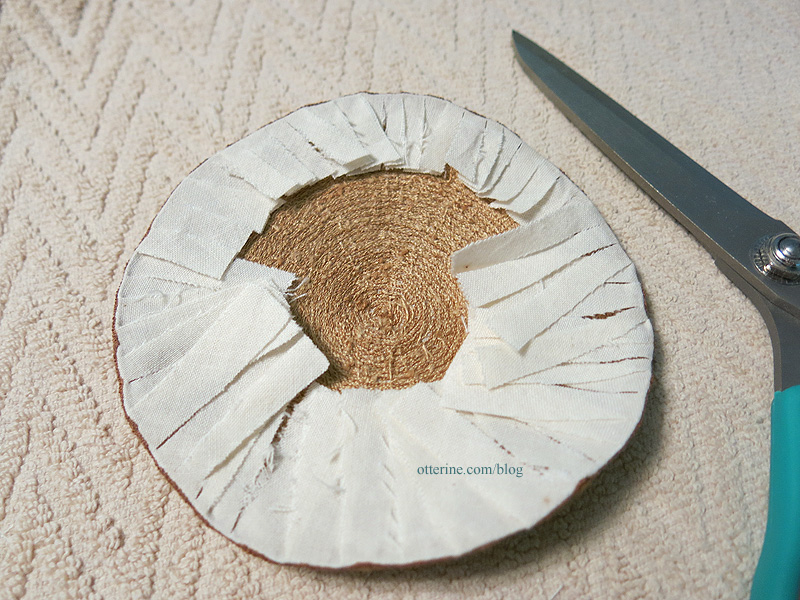
To finish the edge, I added a thin line of Fray Check around the perimeter. I then snipped up to the stitching and turned the pieces to the back.
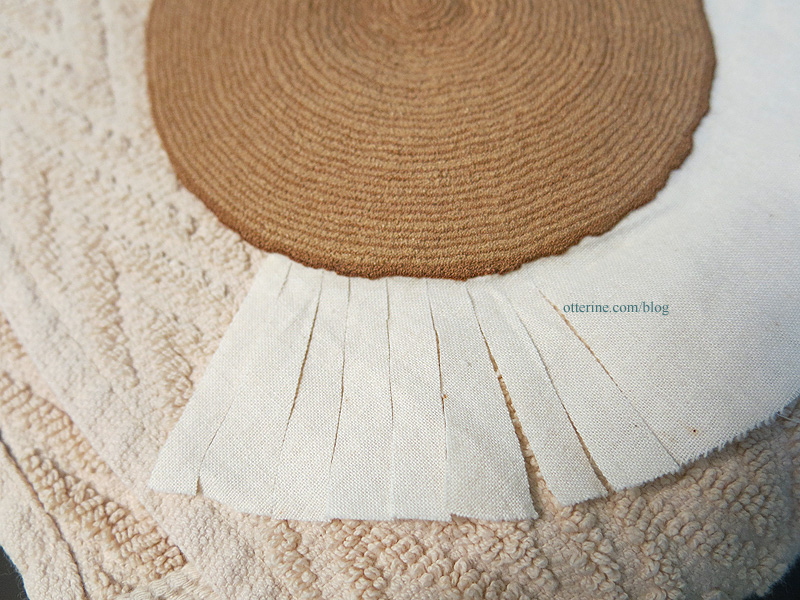
Once done, I trimmed the loose pieces.
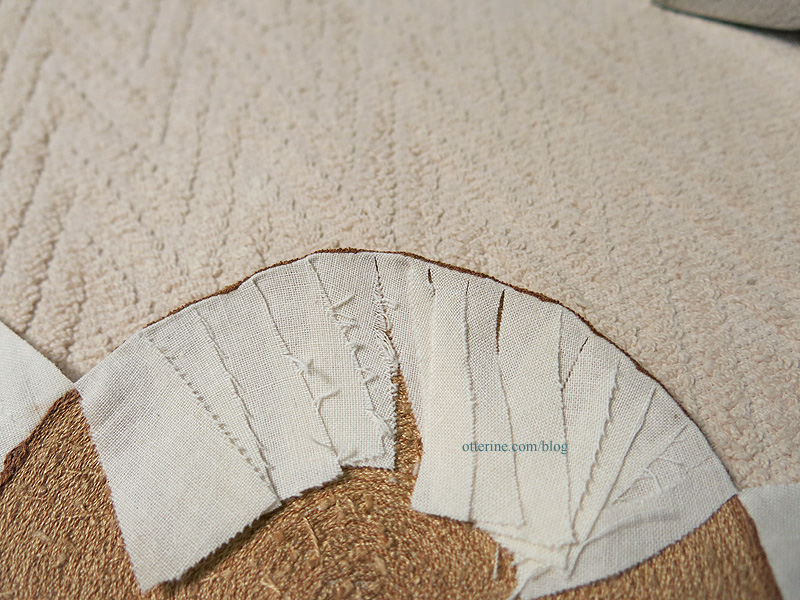
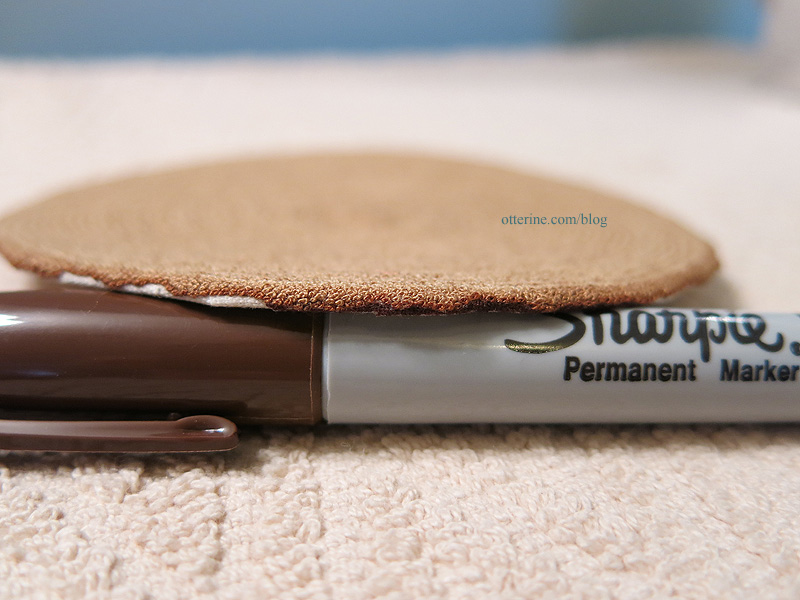
I added a circle of muslin to cover the back using Heat -n Bond (full process here).

Because of the uneven edge, some of the fabric showed. I used a brown Sharpie to color in the slight underneath edge. You do have to be careful with this method and use a light touch, but it works well.
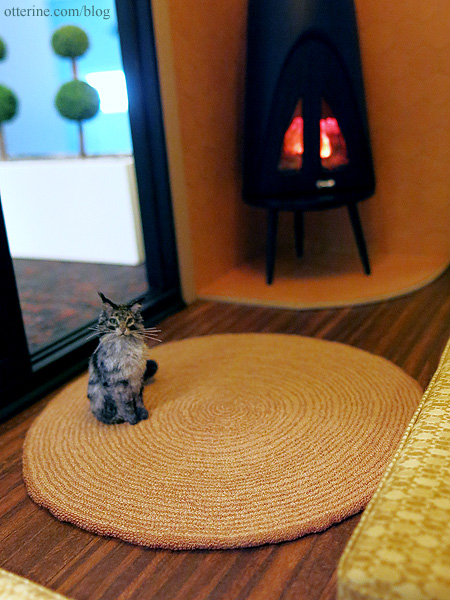
Though mine differs from the original rug by, I think I’ve captured the essence. And, I love the texture.
Isabeau approves.
Categories: Needlework - French knot rugs, Otter Cove
December 12, 2015 | 0 comments


NOTE: All content on otterine.com is copyrighted and may not be reproduced in part or in whole. It takes a lot of time and effort to write and photograph for my blog. Please ask permission before reproducing any of my content. Please click for copyright notice and Pinterest use.


