

1913 Model T Van – part 12
Continuing work on the Model T Van. A dry fit of the body panels shows that the back doors do not open fully.

This is partly due to the outer raised hinge detail, the hinge brackets not being wide enough to clear the body panel and my heavy-handed paint job. I’ve seen one other model with the doors open wide, so this is also likely operator error on my part. :D

Had I known this earlier, I would have removed the hinge detail altogether before painting. If you didn’t know it was supposed to be there, would you miss it? I took an X-Acto blade and scraped off some of the paint. I’ll touch it up with paint later.

The rear cabin has molded rack detailing on the inside walls. You are to add pre-cut micro wood strips as accent. Since there will be such limited visibility, I opted for the easy way out and painted the interior black, leaving the one forward wood wall I did as is. I won’t open the cabin often, just to change the battery, so seeing inside is irrelevant. I’ve added the remaining micro wood pieces to the interior as well as the side seat padding and the oval window.

I drilled a hole in the floor board so I could run all the wiring into the rear cabin. Why such a large hole? I didn’t want to have to do this more than once! :D

Jasper offering moral support while stealing my chair….

To limit the wear and tear on the rear door hinges, I installed a remote control from Evan Designs for the lights.

It will even dim the lights.

The sensor is installed on the rear frame for ease of access while blending in with the undercarriage.

The taillights had solid brackets, so there was no way to just feed wires as is. Since I have two kits, I had spare parts to see what I could come up with. I modified the lamps using custom cut and bent 1/16″ diameter aluminum tubing to hold the wires.

I kept the plate that attaches the lamp to the bumper, drilling a hole adequate for the tubing. The left shows the original bracket; the right shows my modified plate before painting.

At this point, I needed to glue on some of the body panels. I had a problem with the driver’s side, so I ended up prying those off. More on that later. I needed one side on to glue on the back piece, so I used the other side instead. The door is meant to open, but I have no idea how these parts were supposed to snap together without breaking the hinges. I tried with the spares and the tiny pieces snapped off as expected. So, I cut the tab on the interior and glued the door in place. Considering just how many parts have broken during assembly, opening and closing the door is not a priority.

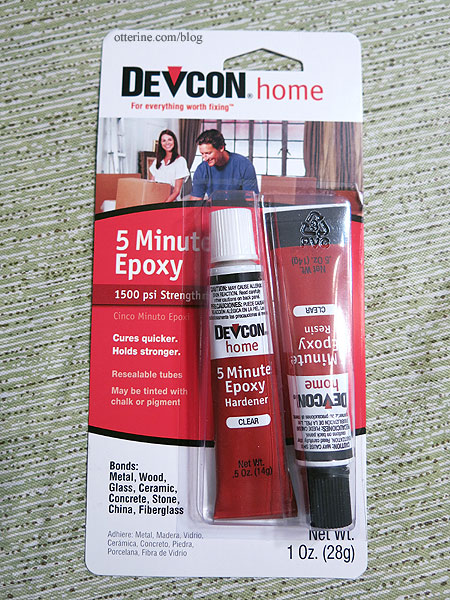
I used Devcon 5 Minute Epoxy on the taillights to get a firm hold since I was using mixed materials. This stuff stinks to high heaven with the hardener smelling like rancid, rotten eggs, but it is as advertised.
I painted the lamps black to disguise the sprue marks and to blend the aluminum.

The red is Testors Metallic Red paint. Using a tip from the guys at Hobby Town USA, I didn’t shake the bottle to mix the paint but used the clear tint from the top of the bottle. It colors while remaining transparent, though it takes a few passes. I touched up any bare spots with a red Sharpie.

The tube runs long under the bed for stability and connects to the same type of flexible tubing I had used for the headlights. I’ll do touch-ups later.

All the tubing and wires enter through the hole in the floorboard. The electrical work is all enclosed in the rear cabin. The door hinges are very delicate. If one breaks after assembly, I don’t think there’s a way to repair it. As it is, one broke as I assembled the hinge holders, so I had to glue one door closed. I am not hopeful for its longevity. With this system, I will need to open the door only every once in awhile to change or remove the battery. The wire length allows me to work outside of the van for battery replacement. As for accessing the wires in the cabin, if one goes out, it will be out for good.

I dabbed a bit of amber glass paint on the LEDs to tone down the whiteness for the rear lights.

The license plate further disguises the sensor. It’s pretty sensitive; you don’t need to aim the remote directly at the sensor for the lights to work.

Testing…okay, so now we can be seen coming and going. :D
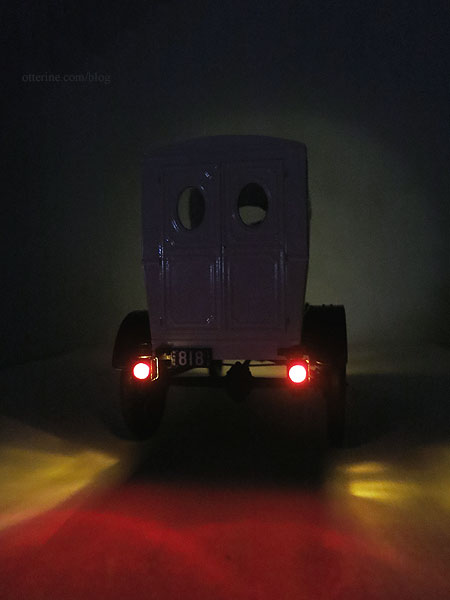
They might look a little rigged if studied closely, but at least the taillights work. :]

I will let the epoxy gas out for awhile before adding the clear side glass pieces to the taillights.
Categories: Model Cars, Vehicles
December 8, 2016 | 0 commentsTags for the devil wagon
I’ve been working on getting through the remaining steps for the Model T Van, and things have not been going well. Mishaps with the insanely delicate steering and suspension parts means the wheels had to be glued so they will not turn or spin. The model is still salvageable overall for looks, so far that is, but it’s disappointing that it won’t be poseable or roll around. But, I forge ahead…
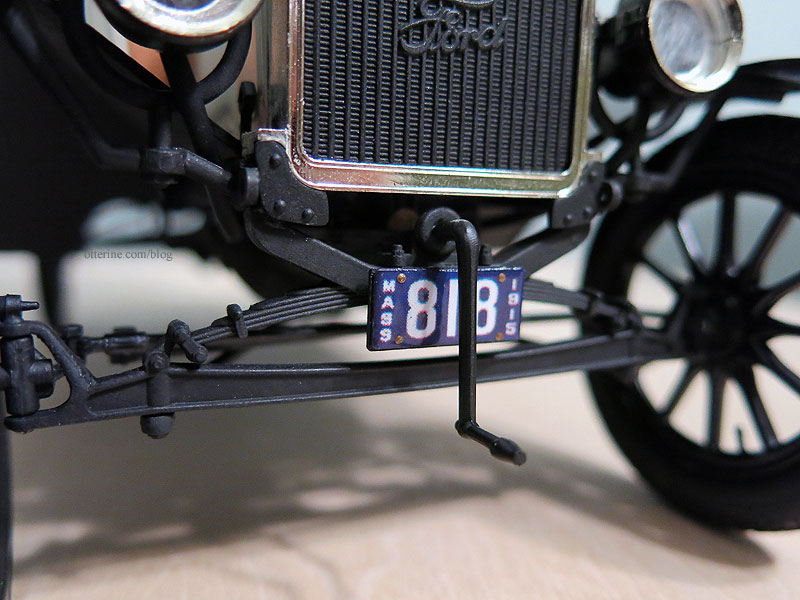
———————Apparently, license plates started out as porcelain not stamped metal, and the 1913 Model T Van fits squarely in that time frame. This is an awesome article on porcelain plates. I find it amusing (and not surprising) that tags came about due to miscreants wreaking havoc on the general public in their “devil wagons.” :D Yes, I so would have been one of those miscreants.
I measured the plate holders for the model and printed up some old time plates. I edited the image to remove imperfections and the long holes that would have been part of the plate. Instead of making these stamped like my previous versions, these are finished in a smooth gloss surface using Triple Thick. They are glued on with paint dabs simulating screws. Crank it up and hit the road! We’re street legal! :]
Categories: Model Cars, Vehicles
December 4, 2016 | 0 commentsGrover
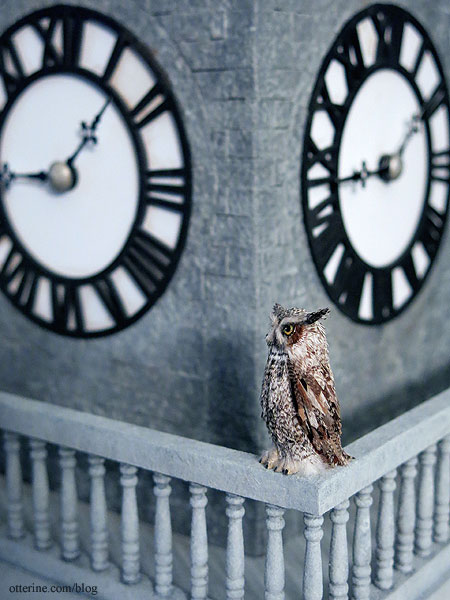
There’s a new bird in my collection. :D It’s becoming rather a zoo around here. This is Grover, and he is a Great Horned Owl made by tmd_art on eBay.
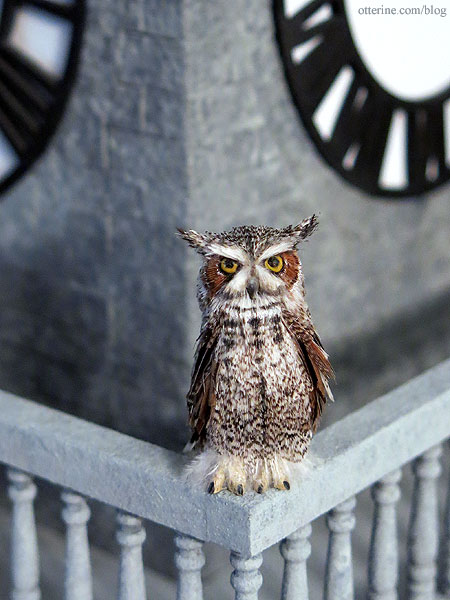
The feathers are so well done and true to life. Looks like he’s found a rather good perch on the railing of Roland’s Retreat.
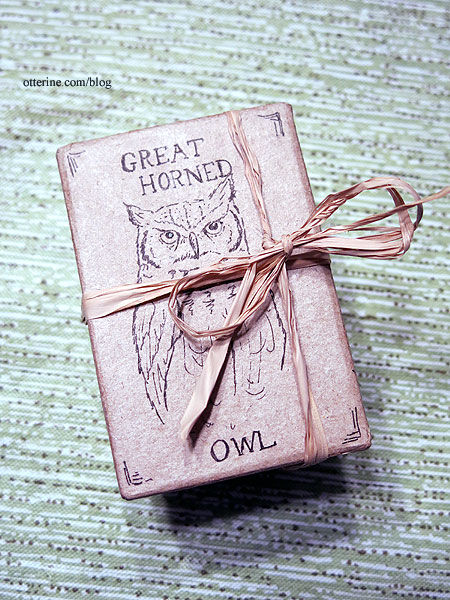
Even the box he came in is a work of art. :D
Categories: Animals and birds
December 1, 2016 | 0 commentsMaking a tree – part 4
I stumbled across a wonderful tutorial by Connie Sauve on making realistic trees. (As of 2024, it seems her tutorial is no longer online.) She used a natural leaf material called candytuft.
I ordered candytuft in basil green from Scenery Solutions. I looked at the local floral shops, but the floral sprays they had were different and not really workable. I bought two bunches since I wasn’t sure how much I would need. I probably should have ordered more for this tall tree in the first place, and I did end up ordering three additional bunches. I will likely use three bunches overall, so I’ll have some leftover for next time and other projects.
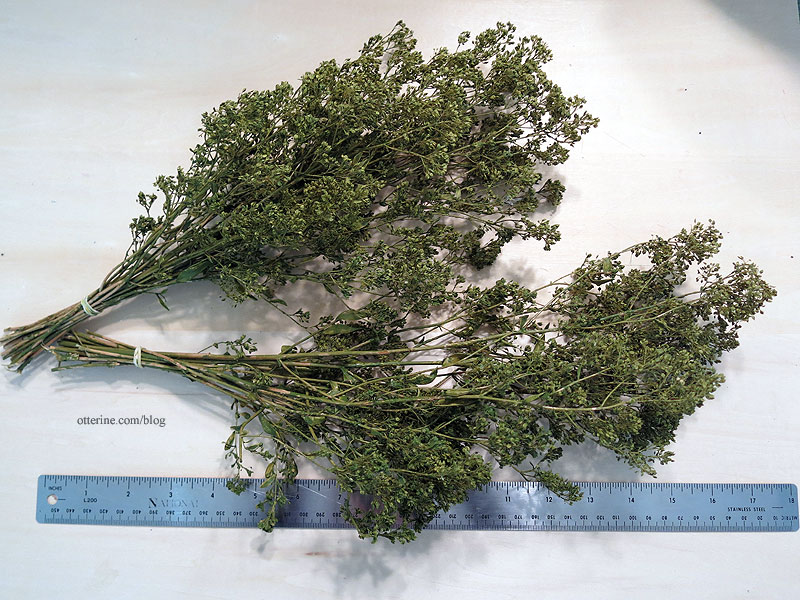
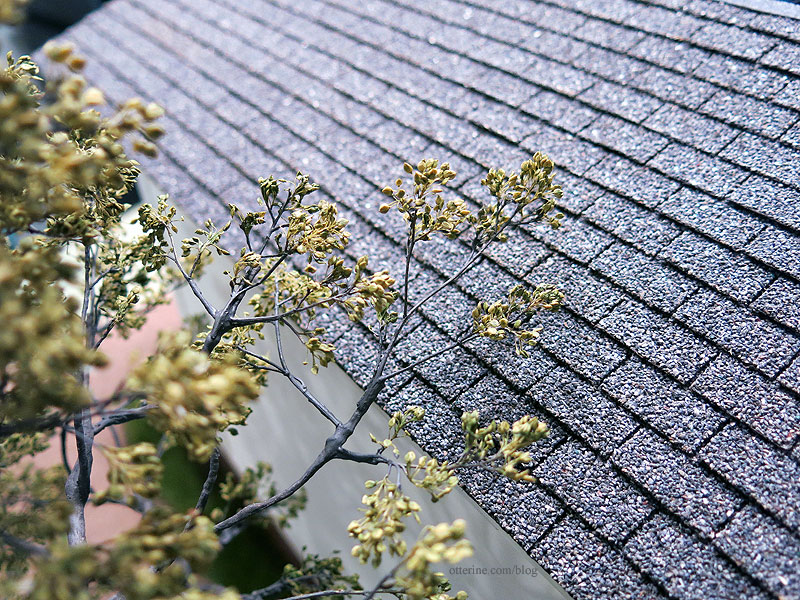
Detail of the “leaves” shows the variegated color that works well for visual interest. (Unfortunately, as of 2024, candytuft is no longer readily available.)

Since I started with green, I had to paint only the stems. Quick and dirty, no fine detailing here. It transformed them immediately. I can certainly see why these are so popular in model railroading.
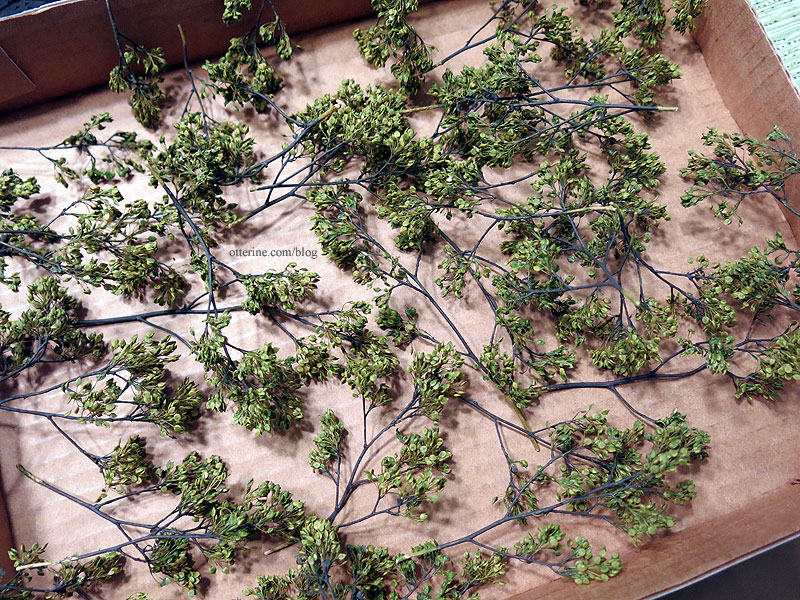
Since I changed the type of foliage, I ended up clipping a lot of the wire branches I added since the candy tuft flares out and works better with a shorter base branch. I bought clips at Michaels and used Aleene’s Quick Dry.

Adding the branches was actually less of a pain than one-at-a-time leaves with a quicker payoff.

I touched up the paint around the glued bits to blend in with the tree branch tips. Hooray! :D

Looks full until I turn it to the side.

Once the additional candytuft arrived, I was able to finish the tree and plant it.
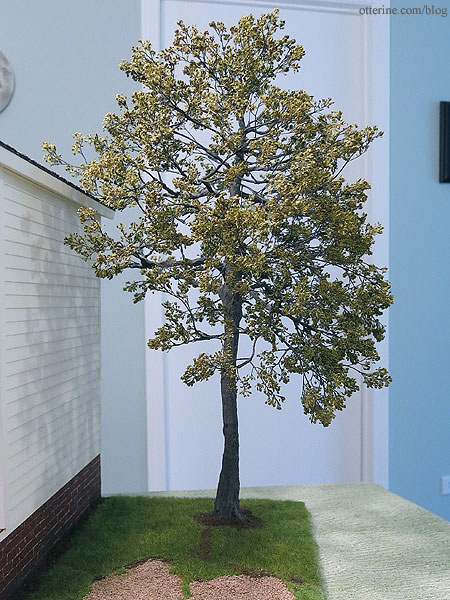
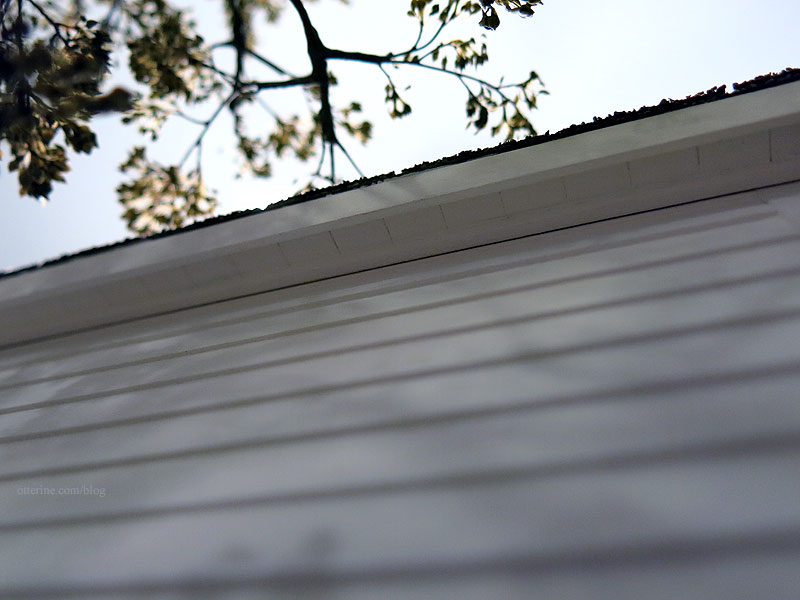
I made one branch to fit over the roof, because who is going to climb a ladder to trim it?
After trying out this method of foliage, I will have a hard time going back to any other way.
Categories: Flowers, plants, and trees, Ye Olde Taxidermist
November 26, 2016 | 0 commentsMow, mow, mow your lawn
I’ve built a handy push mower to make quick work of the upkeep.
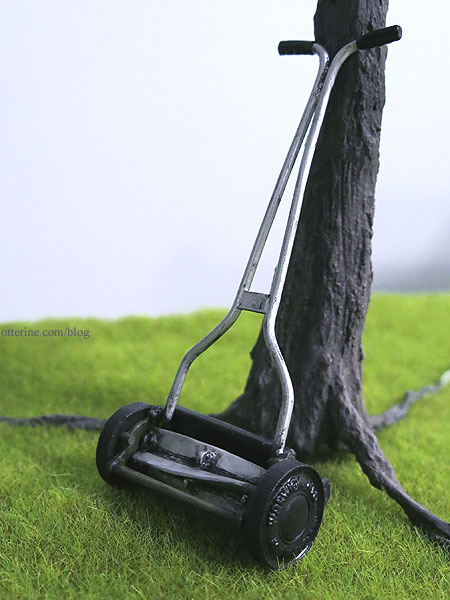
It’s a Phoenix Model kit from Jennifer’s of Walsall.
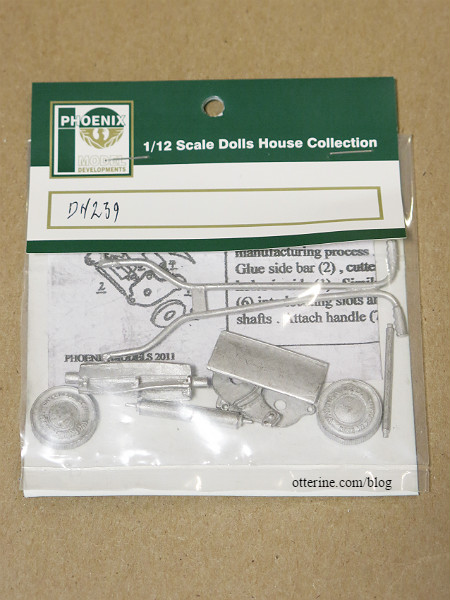
It’s recommended to use Devcon 5 Minute Epoxy, so I bought some from amazon. This stuff stinks to high heaven with the hardener smelling like rancid, rotten eggs, but it is as advertised at least.
I prepped and washed the pieces with dish soap in preparation for painting before assembly. I primed with Rust-Oleum Self Etching Primer. It’s a smelly primer, but its purpose is to bond better with bare metal surfaces. I sprayed the handles with Testors Model Master Metalizer Lacquer in Aluminum Plate. It buffs to a fine metallic finish. I hand painted the grips semi-gloss black.
The blades are also painted in Aluminum Plate. I detailed the roller in the middle and added some grime from use. At first, I thought I might be able to get the wheels and blades to turn independently, but it didn’t end up working. These are rather fiddly kits as the epoxy sets, so I was happy to get it assembled at all.
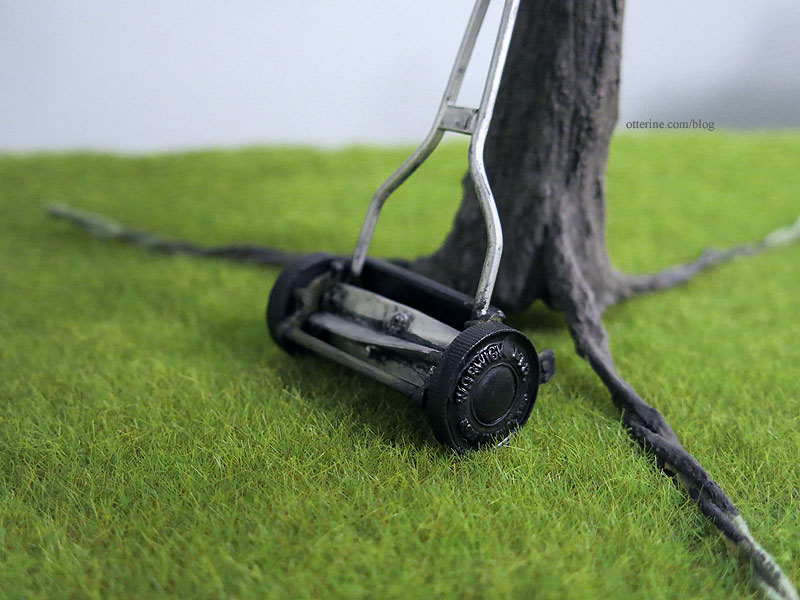
To keep it simple, I chose black for the wheels and guard. The hubs and connecting rods are Testors Flat Olive Drab, leftover paint from the Sopwith Camel from years back. After assembly, I touched up the paint and added a bit more grime detailing…just enough to give this mower a few years of service. I glued the handles half-way between resting and upright so it would look natural while still being able to sit close to a wall, or against a tree.
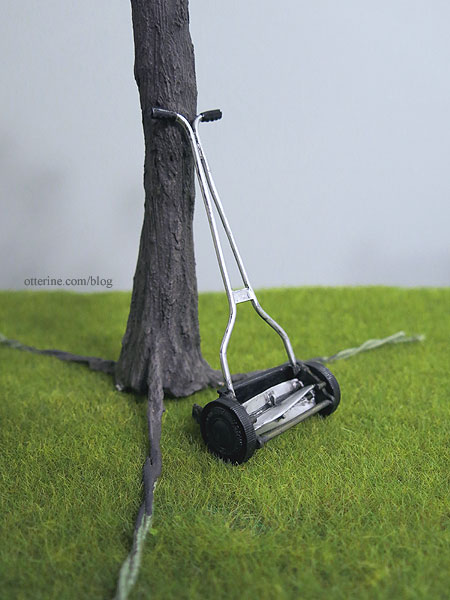
In the interest of time, I am stopping here though I’d like to add a grass catcher at some point.
Categories: Miniatures
November 22, 2016 | 0 comments


NOTE: All content on otterine.com is copyrighted and may not be reproduced in part or in whole. It takes a lot of time and effort to write and photograph for my blog. Please ask permission before reproducing any of my content. Please click for copyright notice and Pinterest use.


