

The Persian – introduction
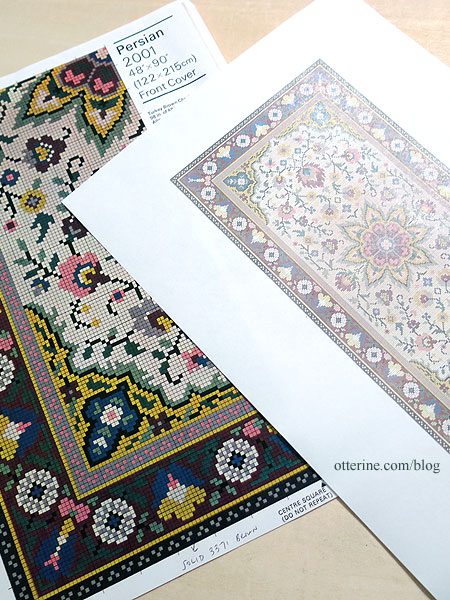
Quite awhile back, I saw a vintage needlepoint rug on eBay from an estate sale. It was miniature, though done on a lower count of 18 or 22 and therefore a large rug for 1:12 scale. I loved the pattern but knew nothing about it. There was some discussion on the PetitPointers group I belong to, and one of the members Frances said it was from an old purse kit by Patons. She had made up a miniature rug for herself on higher count silk gauze from the pattern.
After some sleuthing, I found some further information. This was the C201 Persian Needlepoint Tapestry chart made in Patons Beehive Tapestry Wool. It was a kit that made a clutch purse. I’ve seen partially finished kits on eBay along with another miniature rug rendition in slightly different colors.
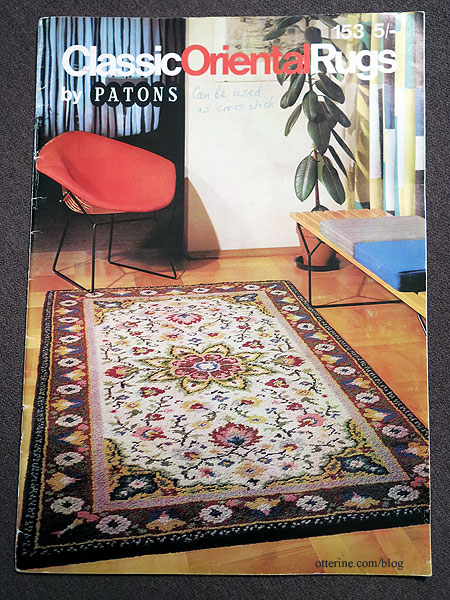
Luckily, this pattern is also found in the latch hook patterns booklet Classic Oriental Rugs By Patons No. 153 (it’s pattern 2001 in the booklet and featured on the cover). I picked up an inexpensive copy and now can get to work on my own version. I will be changing the colors slightly, though I do think the original is lovely.
There are nine colors listed on the original Persian chart, but I have added a few additional colors to bring my total to sixteen. I opted to print the existing pattern directly on fabric. I scanned the pattern from the book on a high DPI setting and then copied the quadrant in PhotoShop to make a whole chart image. I edited the image for contrast, brightness, hue and saturation to make a very pale version. After resizing in Word, I printed a facsimile of the rug measuring approximately 8″ x 4 3/8″ on regular paper. This seemed a bit tight to me considering the fine details of the chart versus knot size, so I printed a second version at 8.5″ x 5 3/8″ on regular paper. Using this method, you can make the rug a custom size without being limited by thread count of your fabric. This will be a large rug, but lovely.
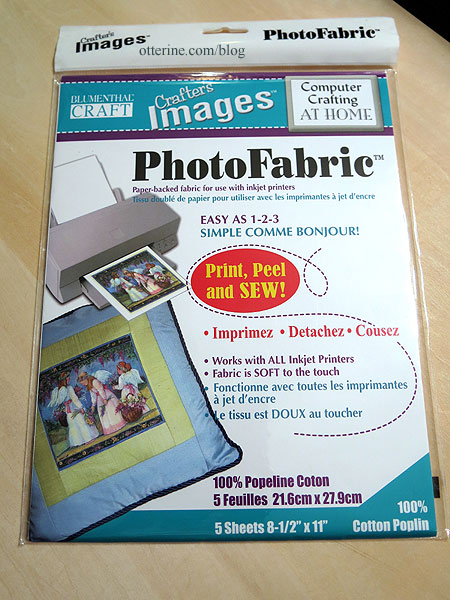
I’ve printed on fabric in the past with mixed results. In this instance, it doesn’t much matter if the color is true or vibrant since my threads will provide the final color and texture. I recently helped a family friend with a fabric printing project, and she gave me the leftovers. This is the particular brand of printable fabric I will use for this project.
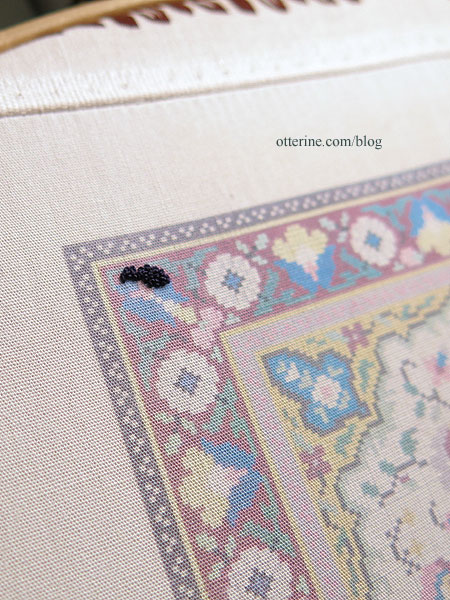
After printing on the finest settings, I let it dry completely. Here it is before removing the paper backing.
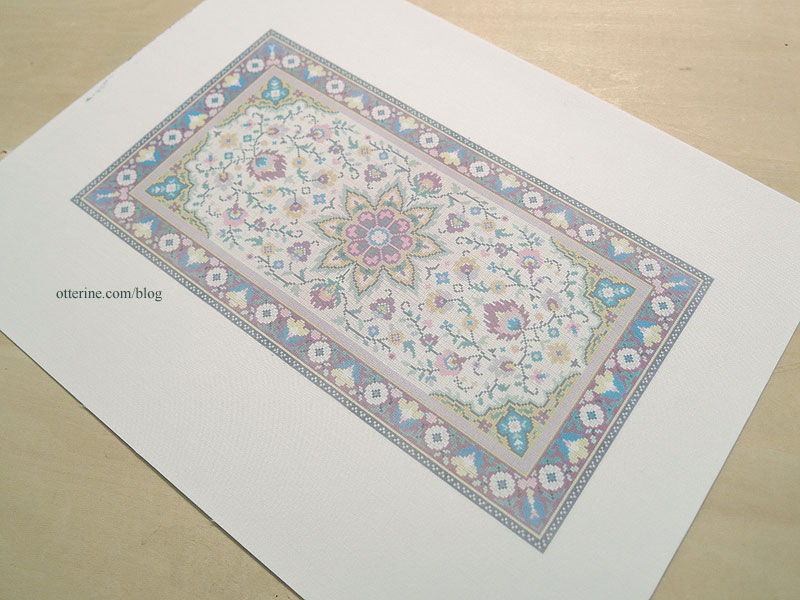
Per the instructions, I ran the fabric under water. Ink residue discoloring my stitching over time would be bad, bad, bad. I sped up the drying process with a hairdryer. There’s a hint of the grid in the whiter areas and even the color areas are boxy from the chart image.
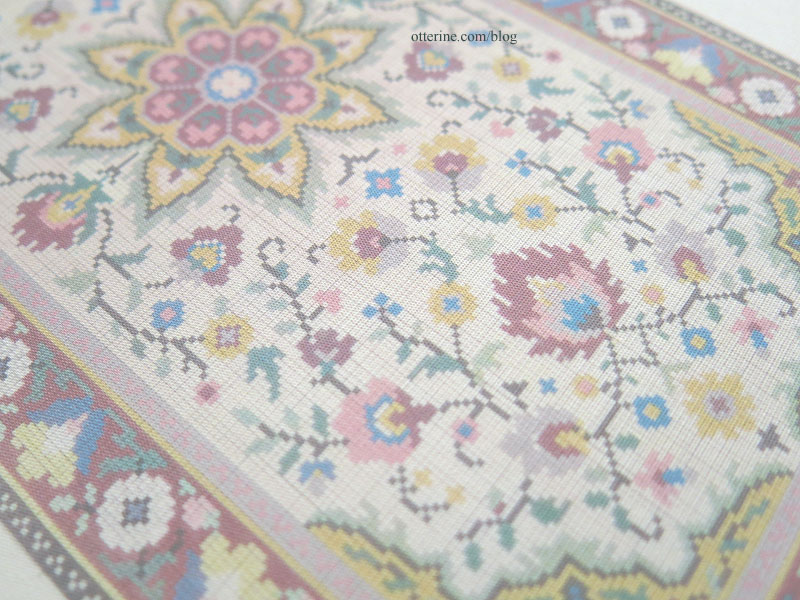
It’s a faint pattern but good enough to follow. The advantages are the precise replication of the original design and the fact that the colors are printed in place, so I can keep better track of which colors to use where. I’m not following the exact grid here, but it will help with knot placement overall.
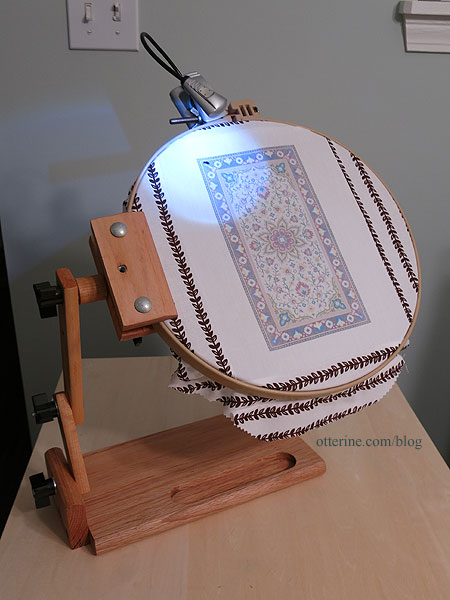
Since the printer fabric measures 8.5 x 11″, I sewed on scrap fabric to mount the print in the Morgan 12″ No-Slip Hoop. It has a groove in the middle that keeps the hoop from coming apart until you loosen the wingnut. (My review here.) I use this hoop with the Baby Z Lap Frame. I have a clip-on LED and can use my magnifying readers for needlework. :]
Categories: Needlework - French knot rugs
January 31, 2017 | 0 commentsHaunted Heritage photo book
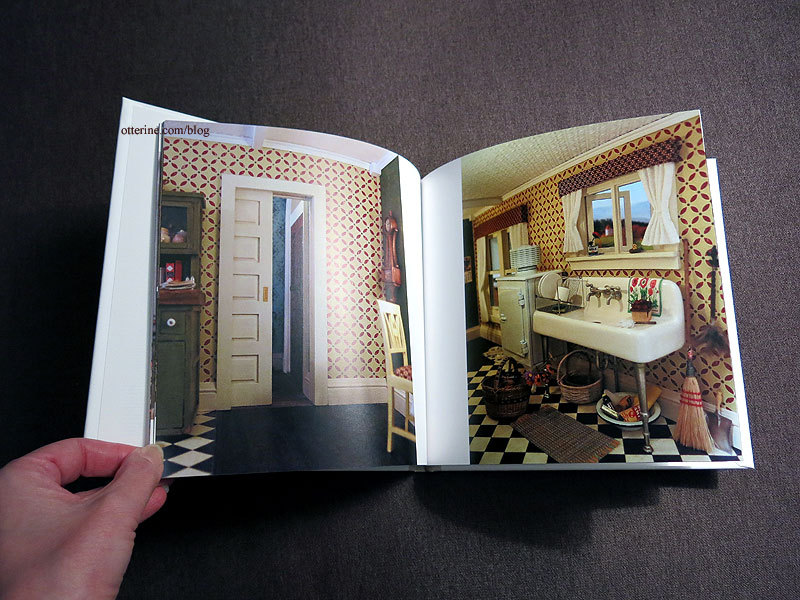
I’ve listed a new item in my etsy shop. It’s a full sized 8″ x 8″ hardcover book featuring photographs of the Haunted Heritage built and photographed by me.
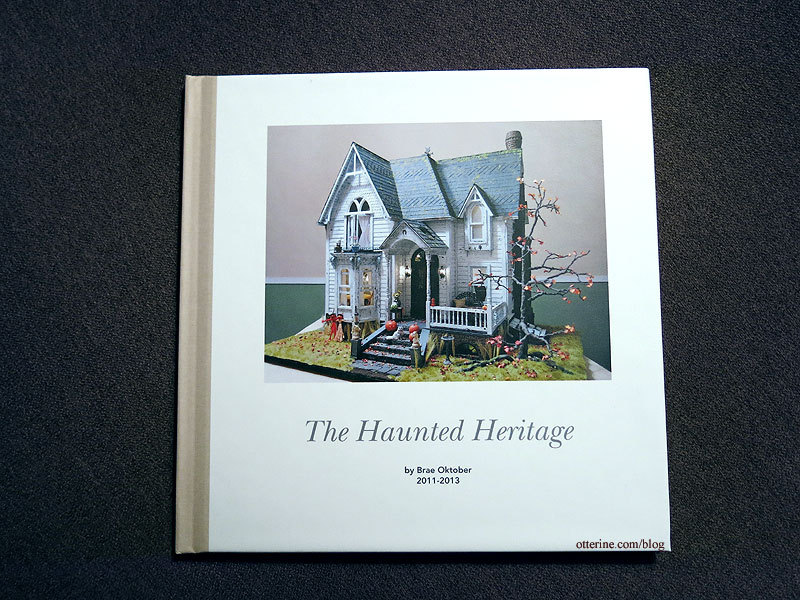
It has 20 pages of full color photographs showing the exterior and each interior room as well as a bonus image from a Halloween scene done after completion. I have signed the book as well. :]
Categories: The Haunted Heritage
January 16, 2017 | 0 commentsWatson Mill – sails, part 3
Continuing work on the windmill sails. I’ve done some research on windmills and a fair bit of virtual sightseeing, but I am by no means an expert. I am also not planning a precise model, though there are some remarkable works out there. The first one I ran into is a 1:30 scale mill kit by Amati. The model has a hub made from wood that looks fairly straightforward for me to recreate for my own model. I’ve been using an offset alignment on the mock-up hub mainly for ease of use, but I plan to have a hub setup more like the real life mills (and this Amati model).
Another fabulous resource is Penterbak, where you find many different scale models with exacting details. It’s in Dutch and google translate works only so well, but you can see from the photos alone just how much work went into these. The hub on the windshaft here is remarkable and gives me some ideas on how to dress it up.
Finally, let’s learn some terminology. There’s a wealth of information in the online publication of The Dutch Windmill by Frederick Stokhuyzen (link no longer active), though I admit I skipped around to parts I needed. There’s also this awesome website with a video by The Yorktown Windmill Project showing how to make a common sail. (They also have a great page on the conical roof, which I have done in miniature in the past.)
After seeing this real life example, I decided to change my design to match. My sails won’t have the gentle curve of the true sails unless the wood warps so let’s hope it warps in the right direction.
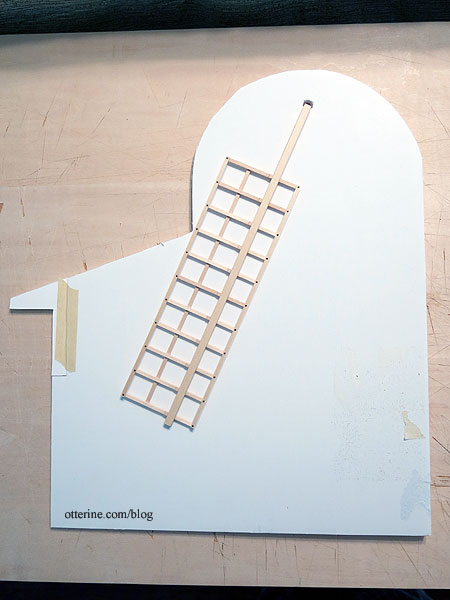
In the Bruce Hirst model, he used 1/8″ square strip wood, but mine will have mainly 1/16″ x 1/8″ strip wood. The adhesives used were Elmer’s Wood Glue supplemented with super glue gel. The Easy Cutter Ultimate was a lifesaver here. Mom also gave me a box of 100 X-Acto blades for Christmas. Maybe that will be enough.
I cut four 12″ lengths of 1/4″ x 1/8″ strip wood to make the whip (center shaft of the sail). This is longer than I will need, but I wanted extra just in case. Instead of trying to cut holes in the whip to form mortises, I notched the pieces every 3/4″ from the end.
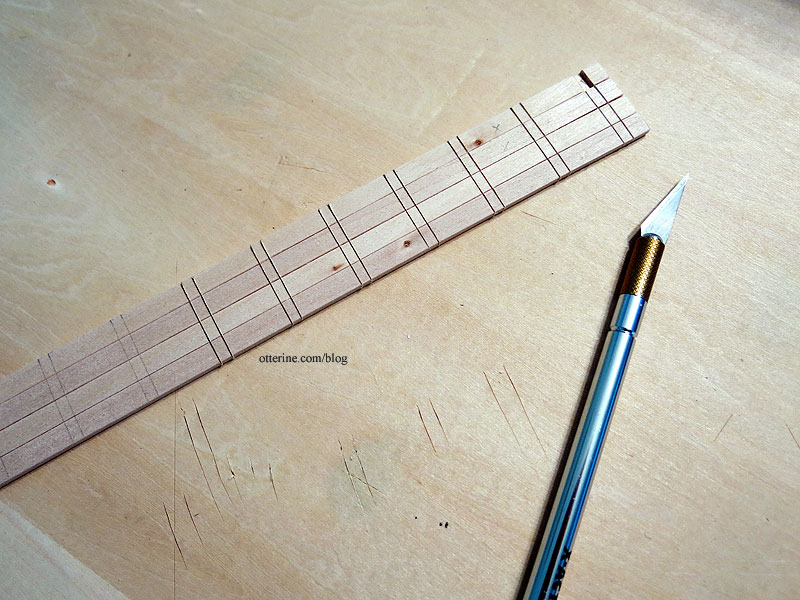
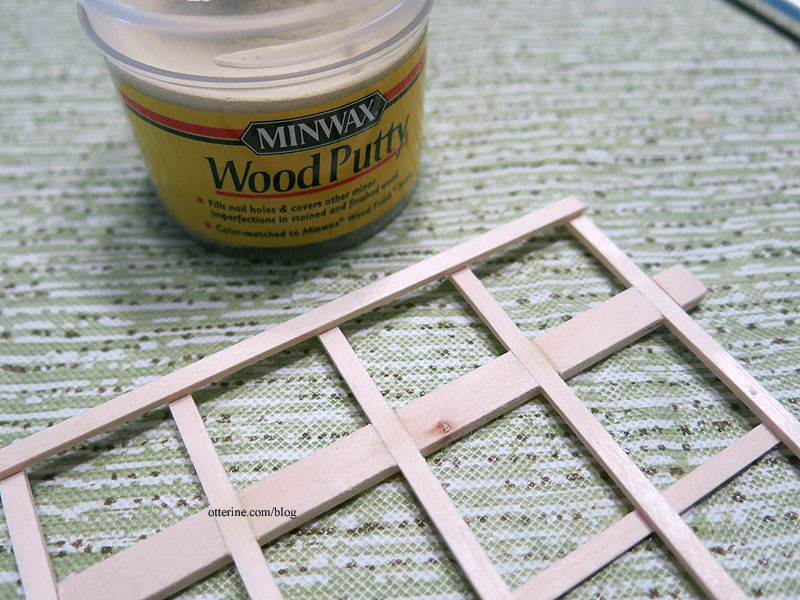
Time to cut 44 sailbars, 11 per sail, at a length of 2.75″ each. This is more than I had in my cardboard mockup, but it should add stability. I also cut 12 hemlaths (outer vertical strips), 3 per sail, at a length of 9″ each. Again, this is slightly longer than my mockup, but it made for easier math.
Since I was cutting by hand, there were some gaps. I used Minwax Wood Putty in natural pine as filler. Could I have been more precise? Maybe, but I get in a hurry for tedious portions of a project. Once it’s all stained and aged, it will all blend in.
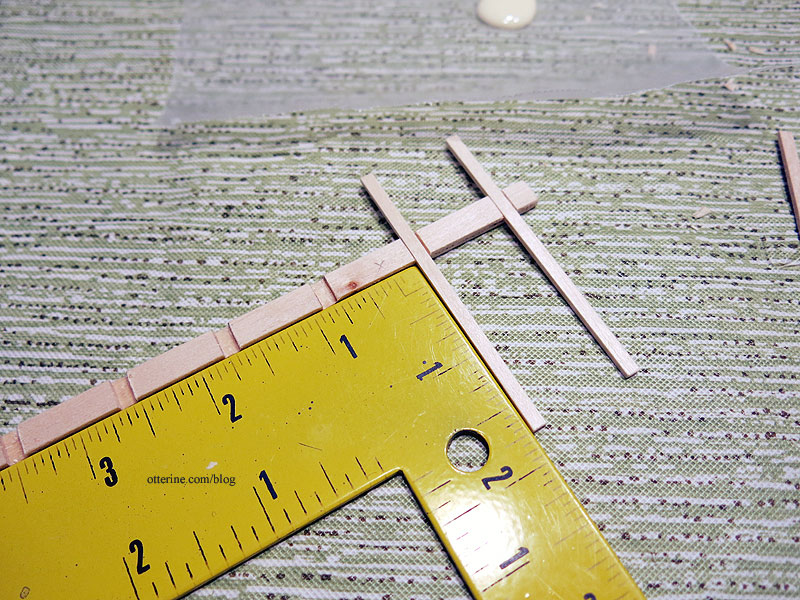
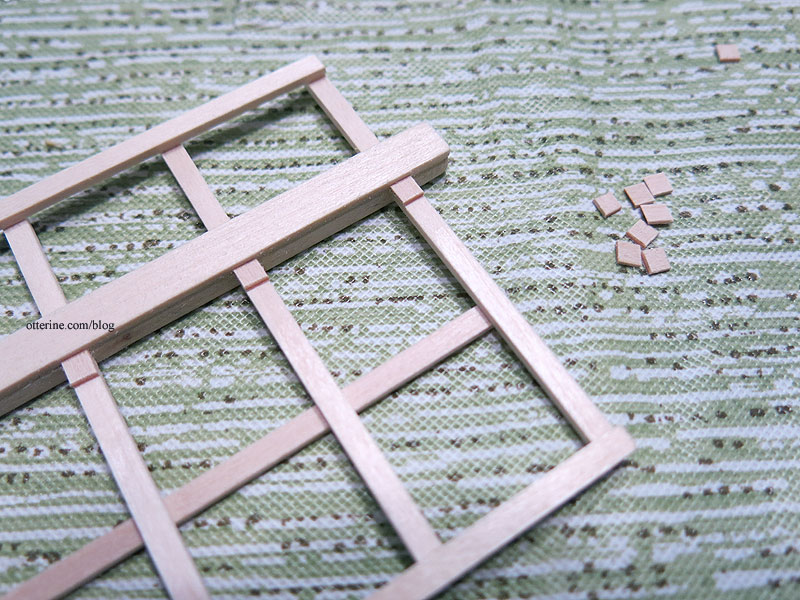
A corresponding piece of 1/4″ x 1/16″ strip wood encloses the notches to make the mortises in the whip. I cut and added the little blocks (don’t know the term) that keep the sailbars uniform along the whip. This makes me lament all the times I’ve discarded tiny bits of wood. Who knew?!! They add detailing that makes the sails seem more realistic.
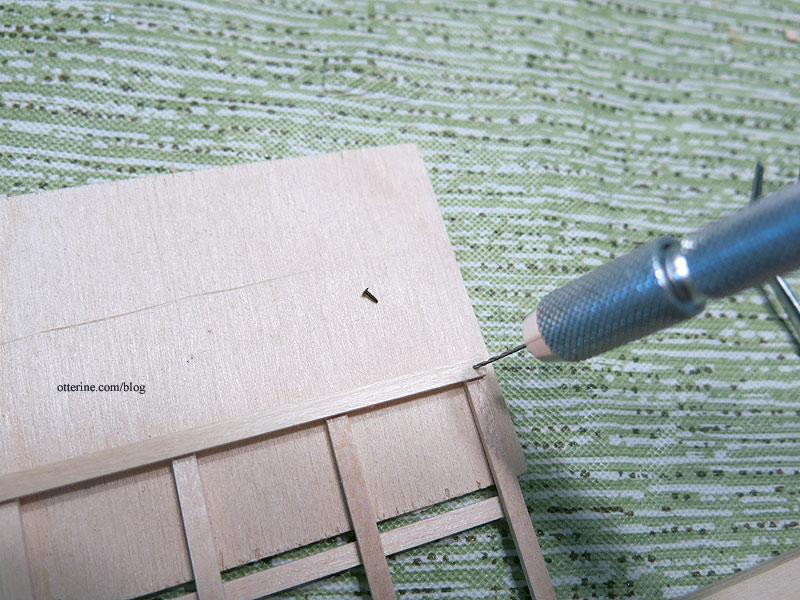
This might have been a bit of overkill for a model, but I also used nails in addition to the glue. I don’t need these suckers popping apart later on down the line, and since they will be motorized it’s likely worth the extra time and effort. I did drill pilot holes so I wouldn’t split the boards.
I am going to leave the final finishing as far as stain goes until after I have all the parts fabricated just in case something breaks along the line and needs to be redone.
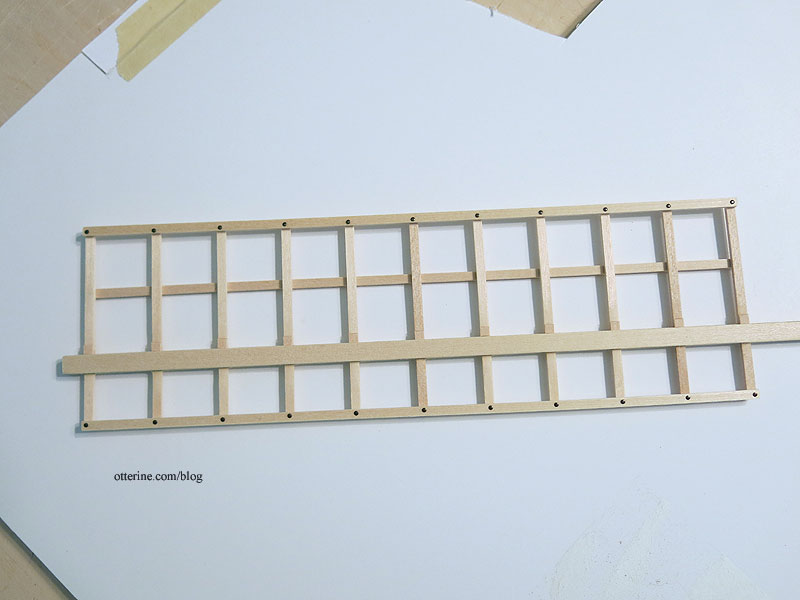
One sail down, three more to go. :]
Categories: Watson Mill
January 15, 2017 | 0 commentsHappy New Year – on to 2017!!!
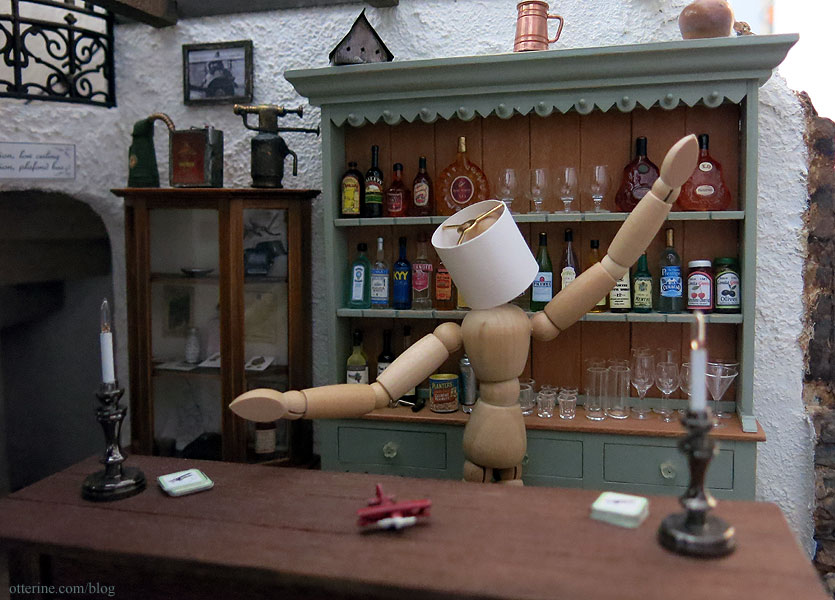
Coming to you live from The Aero Squadron Lounge! Wishing you all a safe and Happy New Year! :D It’s ok to get a little crazy, just be sure to drink plenty of water. Cheers!!!
Categories: Roomboxes and Mini Scenes
December 31, 2016 | 0 commentsEasy Cutter Ultimate
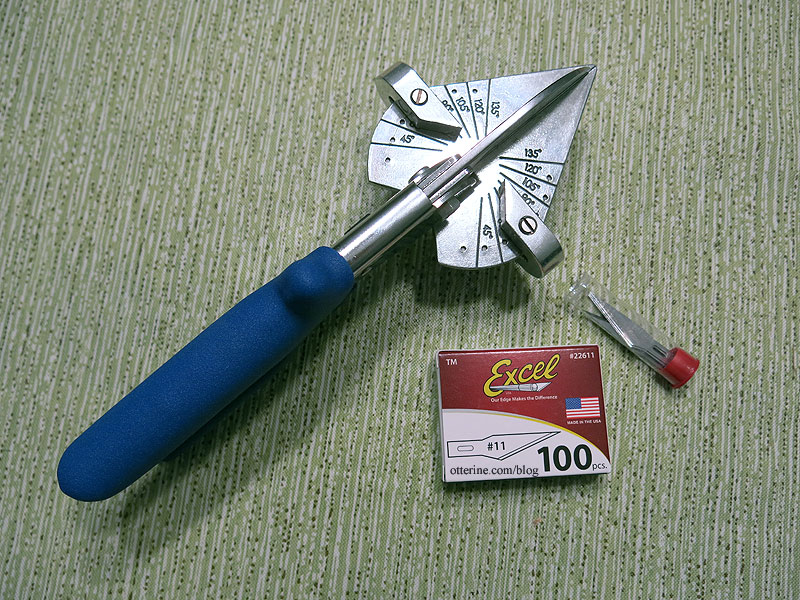
I bought an Easy Cutter Ultimate from Hobby Lobby back in 2009/2010. I raved about its usefulness and found changing the blade to be straightforward. It was a quality product that I recommended to other crafters.
I made a mistake and tried to cut something too hard, marring the plate. I knew I could change the blades but not the plate. It still worked well, but I had intended to replace it once it was time to change the blade again.
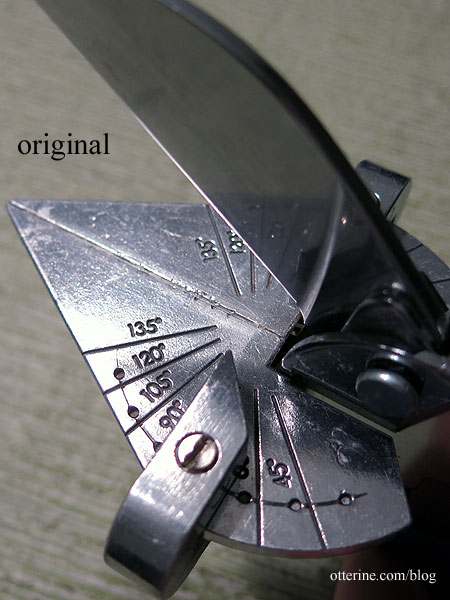
A few months ago, I bought a new one from Hobby Lobby then immediately returned it after opening the package. My previous one had a rivet on the bottom; the new one had a screw that kept loosening. The angle selector swung freely and had a lot of give in the newer version. I had to tighten the screw constantly but then it loosened when I changed the angle. This slows down the work and means I always have to have a screwdriver nearby.
Thinking it might be a fluke, I recently tried again from Amazon. This one had the same issue with the screw, so I returned it as well. I now understand why people I’ve recommended the tool to are not impressed with it.
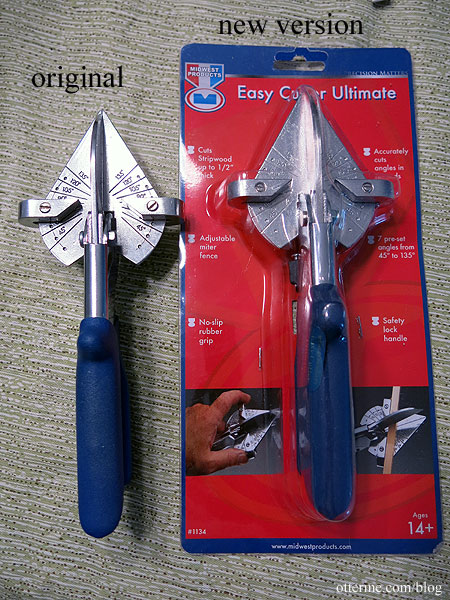
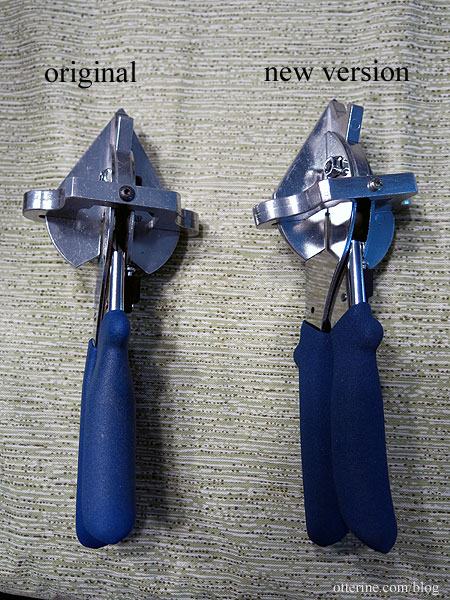
I just bought a new old stock Easy Cutter Ultimate with the rivet on the bottom from eBay. It has the same great quality of the original one I had.
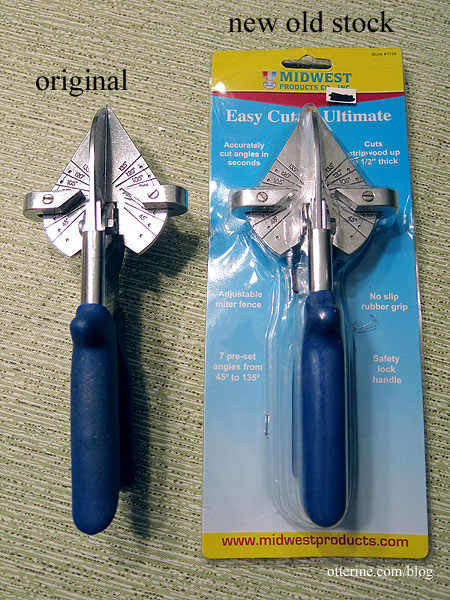
You can see the difference without opening the package since the rivet/screw sticks out from the packaging.
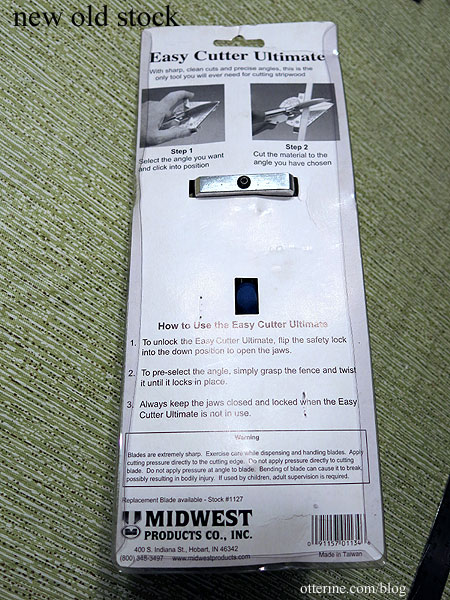
I’ve sent my concern to Midwest Products hoping they return the product to its former design. I’ll update this post if I receive a reply.
Categories: Miniatures
December 30, 2016 | 0 comments


NOTE: All content on otterine.com is copyrighted and may not be reproduced in part or in whole. It takes a lot of time and effort to write and photograph for my blog. Please ask permission before reproducing any of my content. Please click for copyright notice and Pinterest use.


