

Watson Mill – circle library, part 4
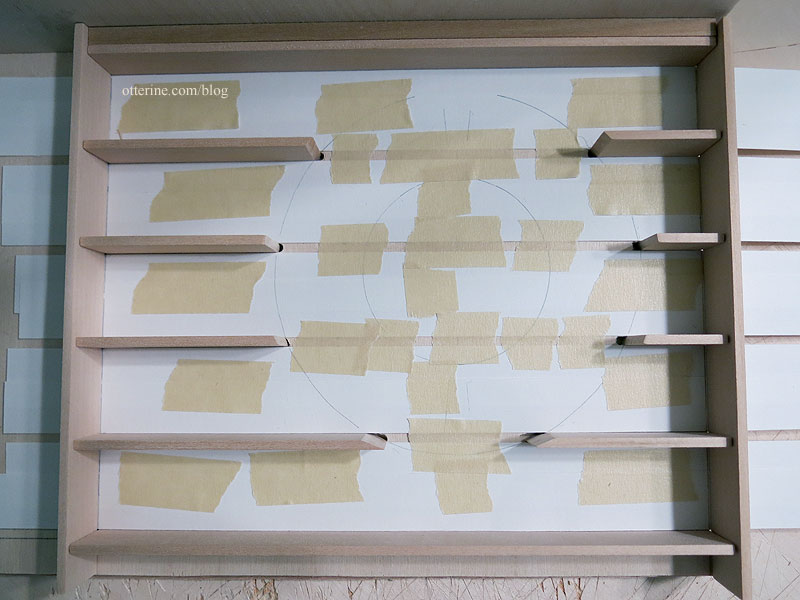
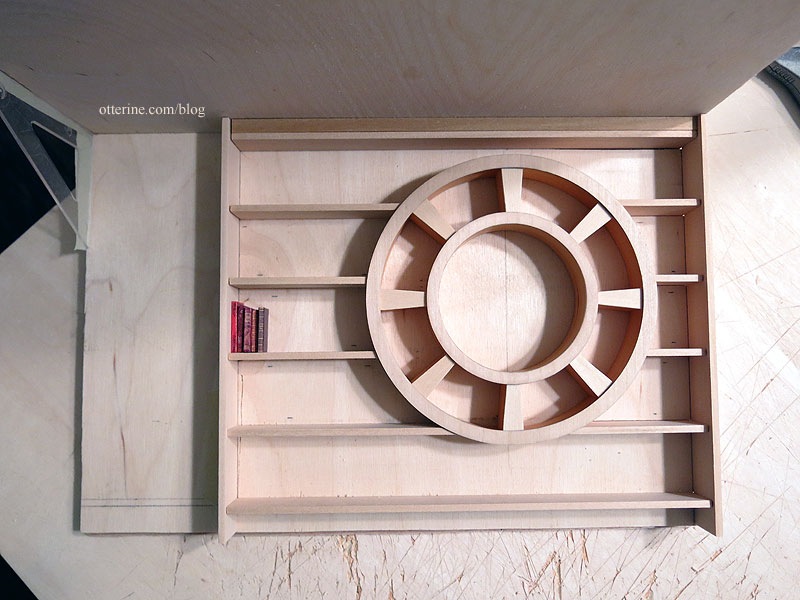
Continuing work on the circle library. Since the plywood wall would stain different from the basswood and veneer, I needed to cover it. That’s why I wasn’t especially careful in marking it up during the rest of the construction. To make custom templates, I taped drawing paper between the shelves.
During my class with Bill Studebaker, I learned to work on the longest portions first, because you can always cut shorter sections from those long pieces if you mess them up. Yep, it took me five times to get that long bottom liner right, so I cut the smaller shelf liners from those incorrect pieces. Less waste. I cut the liners from 1/32″ thick basswood. This thickness of wood barely reduces the shelf depth, and I did take that into consideration when I cut the horizontal boards.
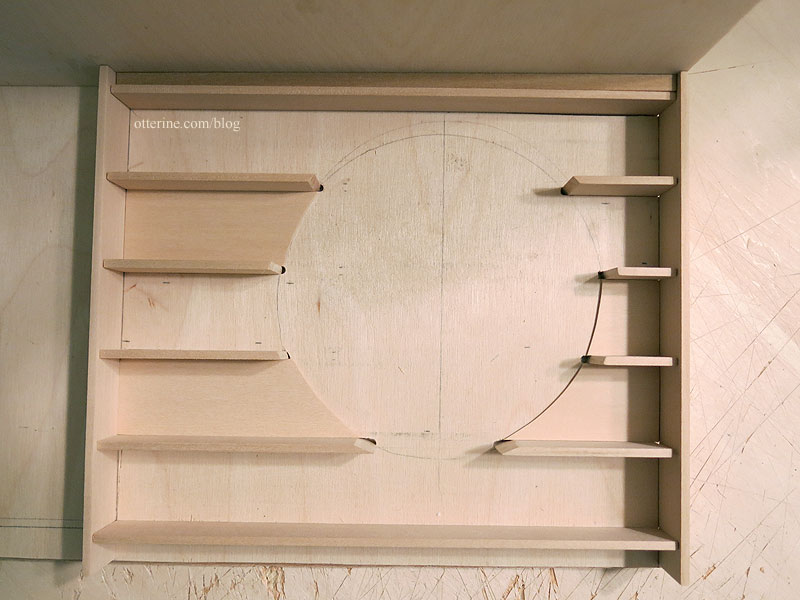
The curved edges sit under the circle, so the joins are not visible when the circle is in place. I cut two curved shapes for behind the shelves of the circle. The curves didn’t need to be precise, so I cut them with an X-Acto knife by hand.
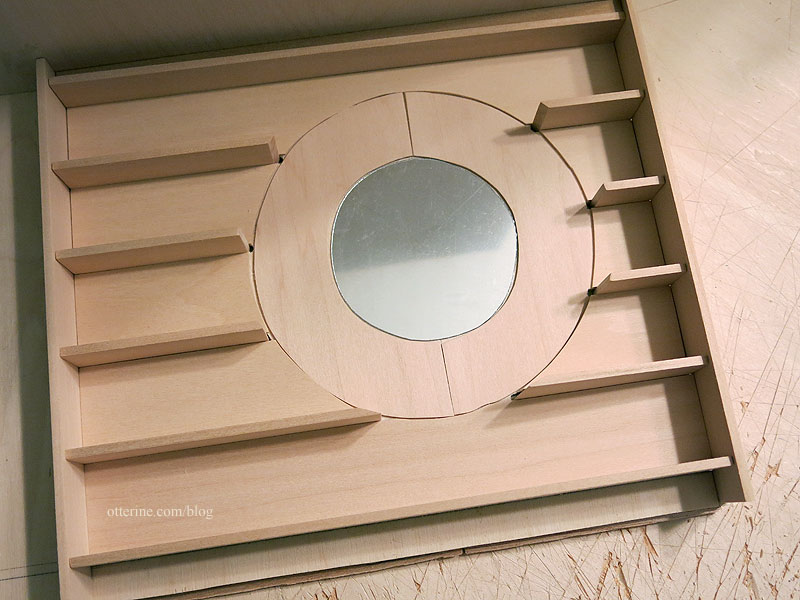
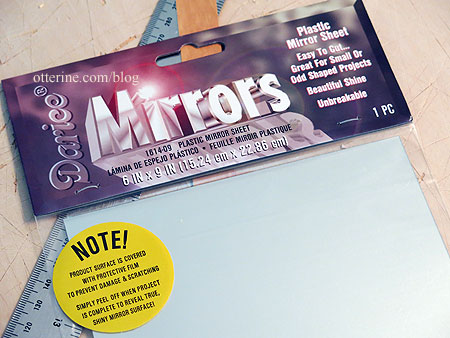
I cut Darice mirror sheet for the center section. I will have to line the back of the mirror to bring it up to the matching 1/32″ thickness. I’ll use layers of paper when I get to that part. For now, I’ve left the protective film on it.
The original has what appears to be a light in the center, but I am skipping that part, too.
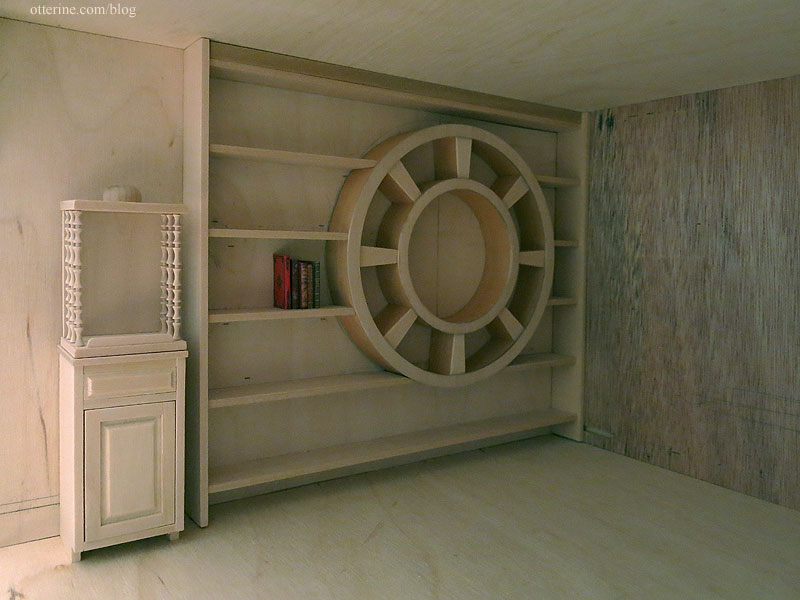
no discernible source I will cut the vertical support under the circle after assembly just in case things shift in the process. I’ll also decide whether to add the long curved trim after assembly. In the meantime, I plan to stain and finish these pieces separately in case of disaster. I can always recut, remake, redo, etc. But, it would be a right proper pain to tear out once installed. Besides, I have window/door/floor holes to cut and walls to prime. Best to install the library later after the mess.
I also have books to make behind the scenes. If I display full shelves of books with only spines facing the room, I would need roughly 30 inches worth of books. I have two inches worth of books currently made and a whole bunch in progress. There are a number of covers I like, so I will make a handful of book display stands so some covers face outward. I also would like to add some bookends and perhaps some knickknacks. This decreases the number of books needed, so I’ll finish what I have in progress and see if I need more. I have plenty of covers cut and insert strips ready.
Categories: Watson Mill
May 24, 2017 | 0 commentsWatson Mill – circle library, part 3
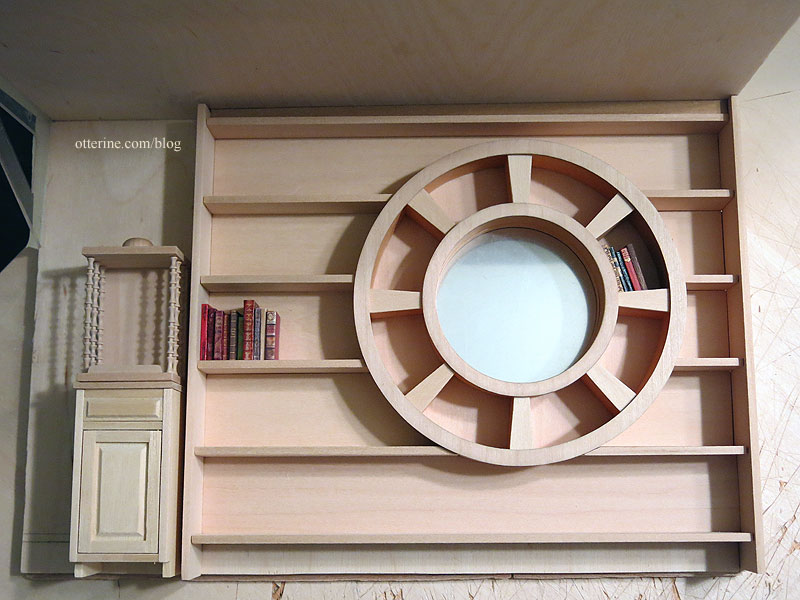
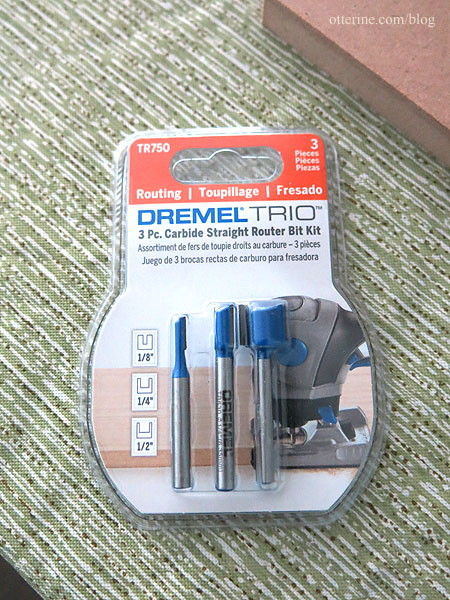
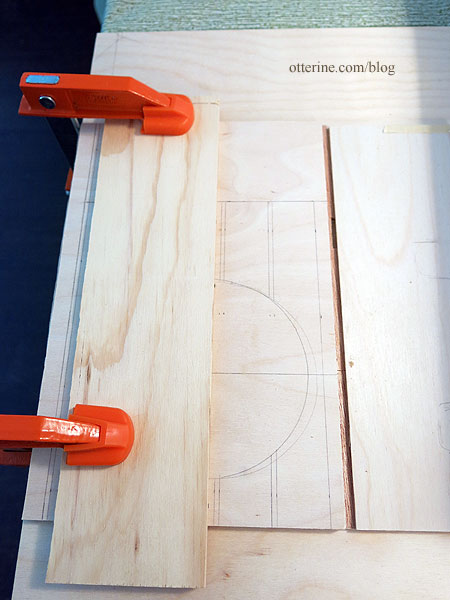
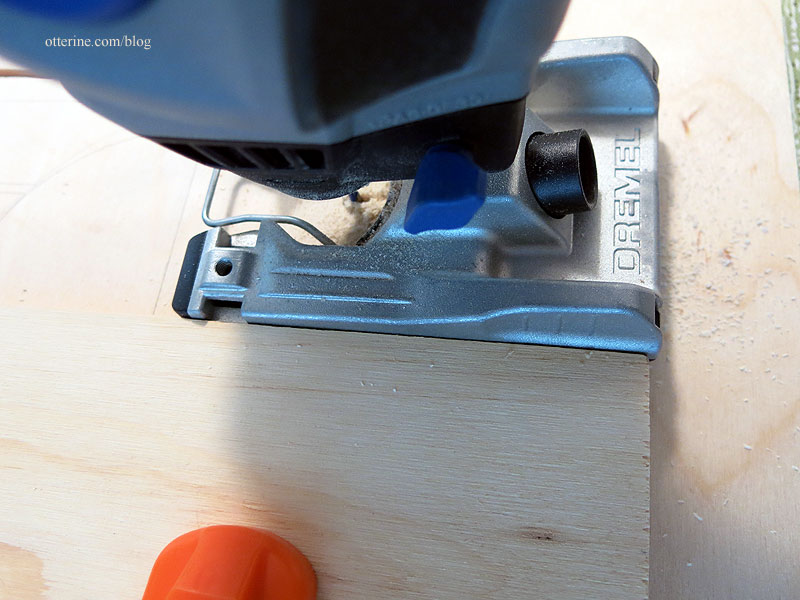
Continuing work on the circle library. With the ladder moved to the front wall, I now have 8 3/4″ of library wall space not including the two vertical end boards that will close it on the sides. I marked the final position of the center circle. This gives me a bit of shelf space to the right but allows me more room on the left to play. The left will be more visible anyway. To build the shelves, I cut 1/8″ wide channels in the plywood wall using the Dremel Trio.
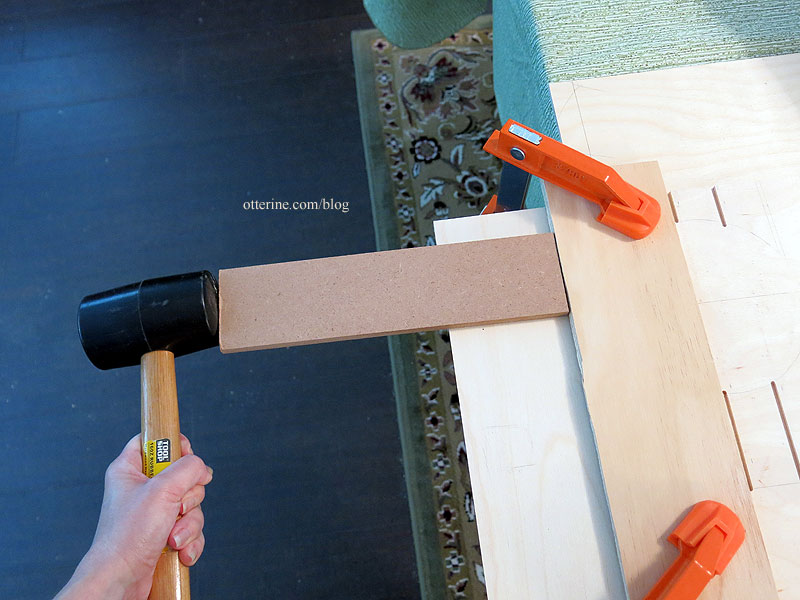
Since I didn’t trust the wall edges to be straight, I used a fence board clamped in place.
You can plunge cut with the Trio, which is a great feature. You can start anywhere along your line.
The bit made a channel slightly too narrow, so I tapped the fence board with a rubber mallet for a second run, widening the final channel to the proper width needed to fit the 1/8″ shelves.
The top channel is rough because there was something catching the bit in the wood and it was close to the edge. Once the ceiling is in, I will add trim to enclose the top space to keep it from being a dust-catcher space that’s difficult to clean, so the rough cut didn’t matter much. These might not be square to the floor or ceiling after the build is in place, but they are reasonably parallel to one another.
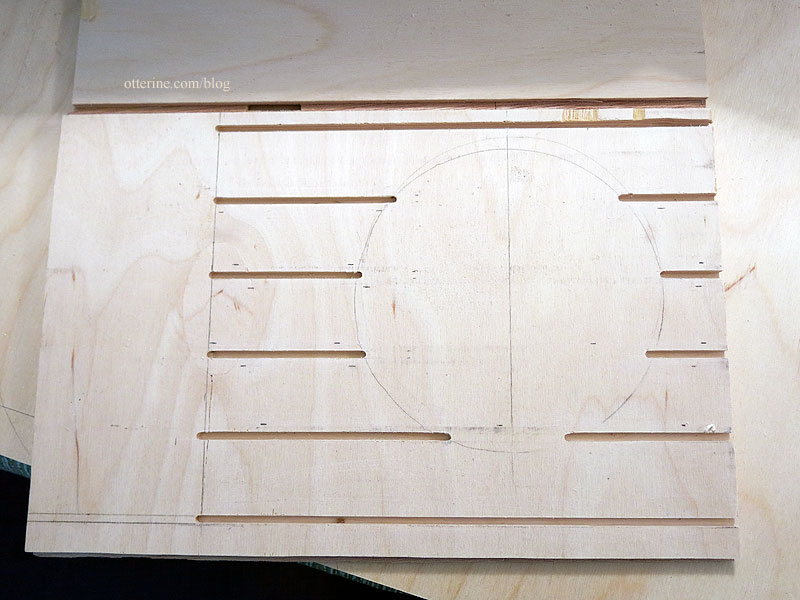
The channels provide a sturdy hold for each shelf cut from 1/8″ basswood. I started with 1″ wide basswood strips and cut them down to end up with a roughly 3/4″ deep shelf. I hand cut the angles around the circle supports. Not easy.
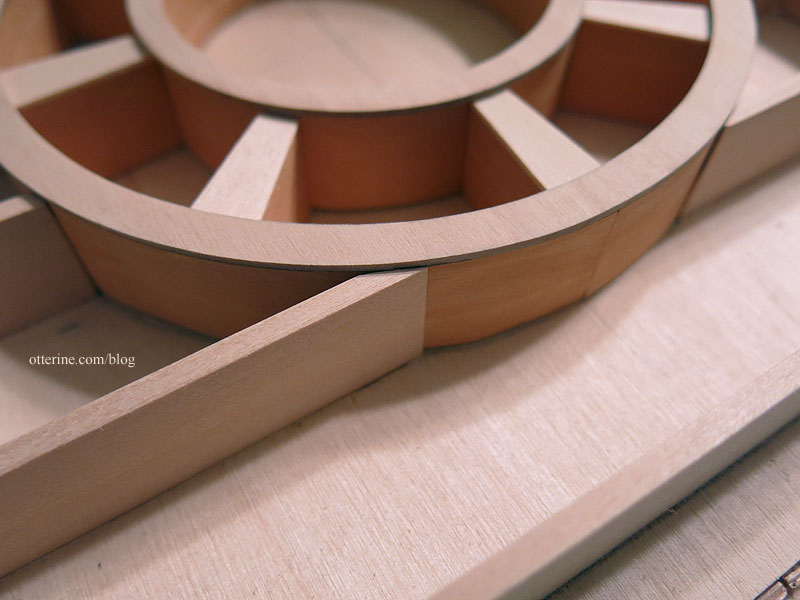
The two end boards are slightly deeper than the shelves. For the top, I cut a piece of 1/4″ strip wood for stability for the eventual final trim. I still need to cut the support piece for the bottom of the circle, but I am tapped out for the night. :D
The space under the bottom shelf will be enclosed by trim or baseboard in the end, and I left a bit of clearance on the bottom for flooring thickness.
Next up, covering the plywood back between the shelves and cutting the mirror for the center.
Categories: Watson Mill
May 21, 2017 | 0 commentsWatson Mill – circle library, part 2
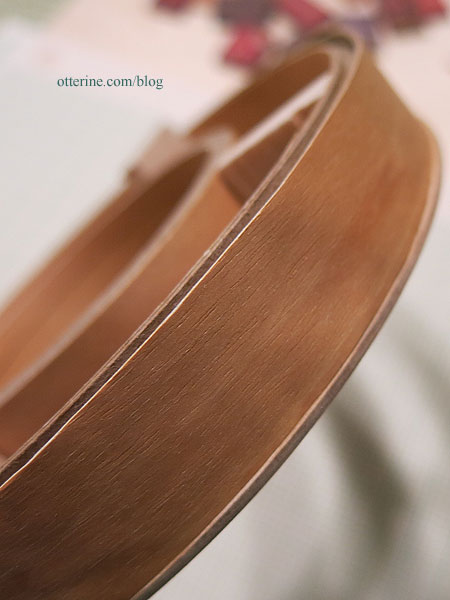
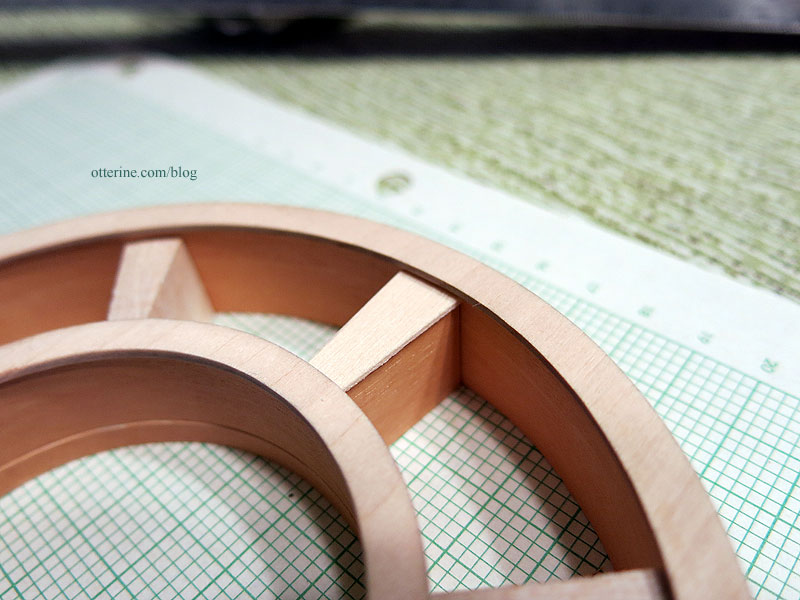
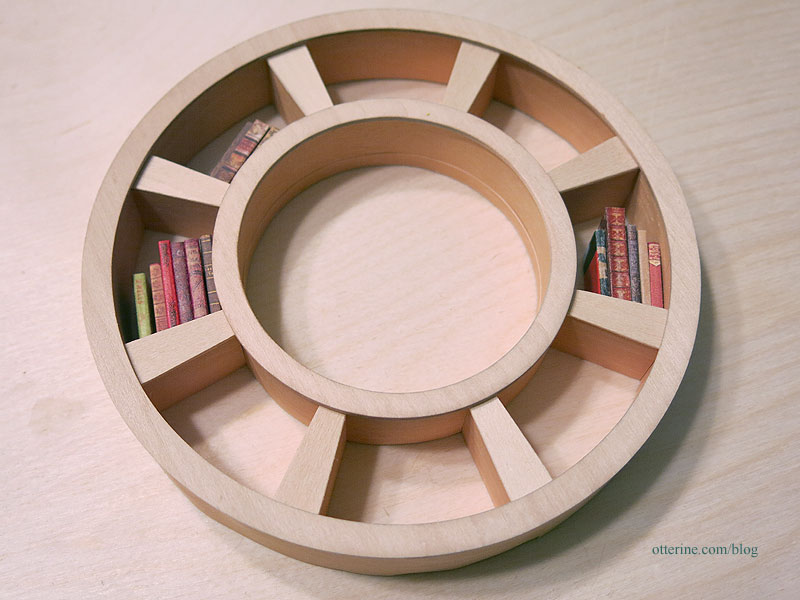
Continuing work on the circle library. The wood veneer buckled on the outer surfaces of the circle supports. I didn’t have enough to redo both circles, so I redid only the smaller one. I hope once the books are in place it won’t show. I also will have straight shelves abutting the large circle, so that might help, too.
The original inspiration had 18 dividers, but my version has only eight for balance and fit. I used scrap wood to try out the look first.
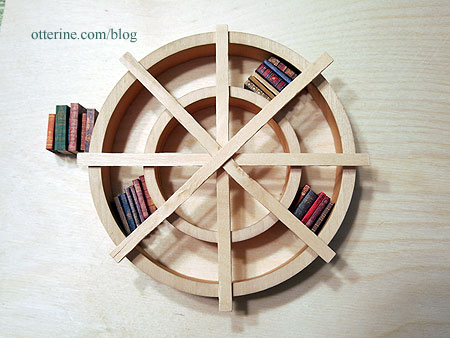
I made angled dividers to match the original. I covered the sides of the angled inserts with peel and stick wood that I had left over from the Model T Van build. I used additional adhesive just to make sure the bonds will hold over time. I again used the Elmer’s stainable wood glue. To finish the front edges, I cut shapes from 1/32″ basswood to match the laser cut circles.
I think this is a good approximation of the original. :]

Next up, the long straight shelves.
Categories: Watson Mill
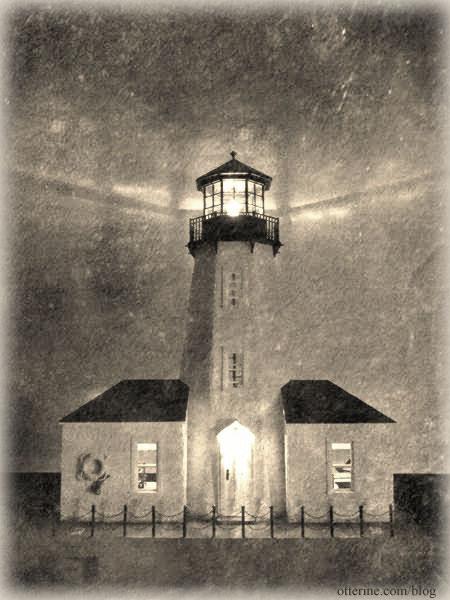
May 20, 2017 | 0 commentsWalnut Bay Light – vintage photo
I finally gave FotoSketcher a try – it’s a software a Greenleaf forum member showed us not too long ago. You can make drawings, paintings, etc. from your regular photos. I took a photo of Walnut Bay Light and played with the settings. I love the vintage photo effect. :]
Categories: Art and paintings, Walnut Bay Light
May 19, 2017 | 0 commentsMod Flowers rug – intro and prep
Many years ago, I ran across a rug called Parasols by Thomas Paul and printed it on regular paper to see how it would look in a miniature scene (here in the Newport).
Although the paper printout photographs beautifully, I wanted to create something that looked more realistic in real life. I tried a specialty velour paper. The colors still weren’t as deep at they had been on the regular paper printout, but the texture was lovely.

I thought stitching the rug would be a good way to more accurately recreate the design. I would be certain to end up with the right coloration since I could match the embroidery floss to the paper printout.

I found a great site called pic2point (now defunct) where you can convert an image to a needlepoint pattern for free. The site created a pdf of the pattern, and I started stitching on 24 ct Congress Cloth. It was a lot of work, approximately 60 hours worth, and I wish I could say I loved it in the end. Needlepoint on a lower count fabric can look choppy, especially when there are a lot of curves to the design. The background also showed through more than I liked, and I ended up with more of an oval than a circle once I cut the rug from the cloth and turned the edges under.

This was all before I had done a miniature rug in French knots, which are such a great scale texture in miniature. I decided to make a new rug and used a transfer pen and tracing paper method using Aunt Martha’s Tracing Paper and a blue fine tip transfer pen from Sublime Stitching. I bought blue and black pens but used blue in this instance, because black lines can be hard to cover when stitching with white floss.

I took the velour paper printout and taped it to a sheet of non-transfer tracing paper. I taped the paper to the window in the afternoon light and traced the design using a fine point Sharpie.

I then flipped the Sharpie traced image over and traced it with the blue transfer pen onto the iron-on transfer paper. Having had ink shifting issues in the past, I taped the paper to the muslin fabric before ironing. The transfer ink didn’t spread very much if at all.

This is 3.5 hours of stitching.

Categories: Needlework - French knot rugs
May 16, 2017 | 0 comments


NOTE: All content on otterine.com is copyrighted and may not be reproduced in part or in whole. It takes a lot of time and effort to write and photograph for my blog. Please ask permission before reproducing any of my content. Please click for copyright notice and Pinterest use.


