

Watson Mill – electrical plan
Before I could apply the wallpaper, I had to figure out my wiring plan. I’ll need two lines, one AC and one DC, since the windshaft motor and dollhouse lighting differ. Ceiling light channels are simple enough, but I needed to know which direction I was headed. I like to build in some access to the lighting, so I opted to head toward the empty space covered by the angled side roof. I can make this a removable roof panel easily enough, so my wiring will gather here.
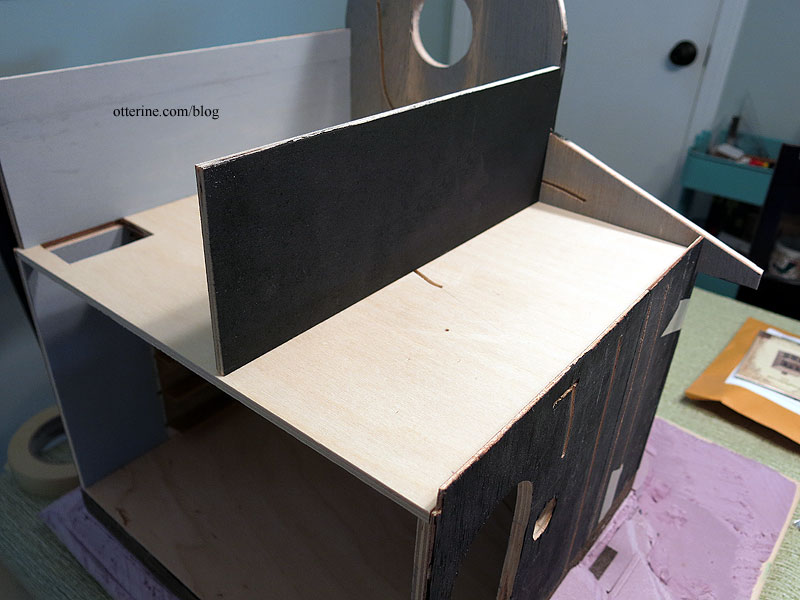
I made a channel on the front wall for the bedroom wall sconce. I’ll drill a hole for the table lamp later on during furniture placement, but I did drill a hole for the floor lamp in the lower room.
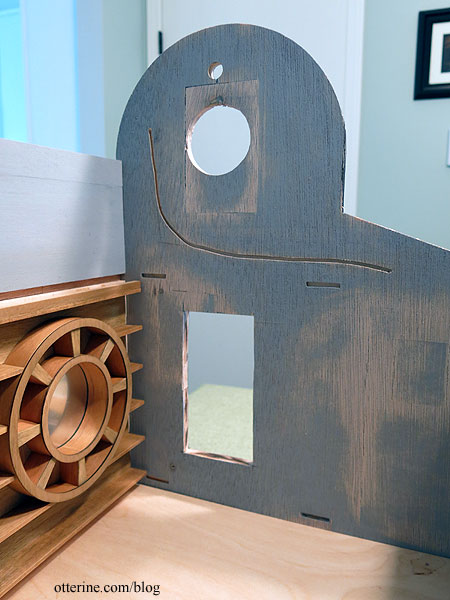
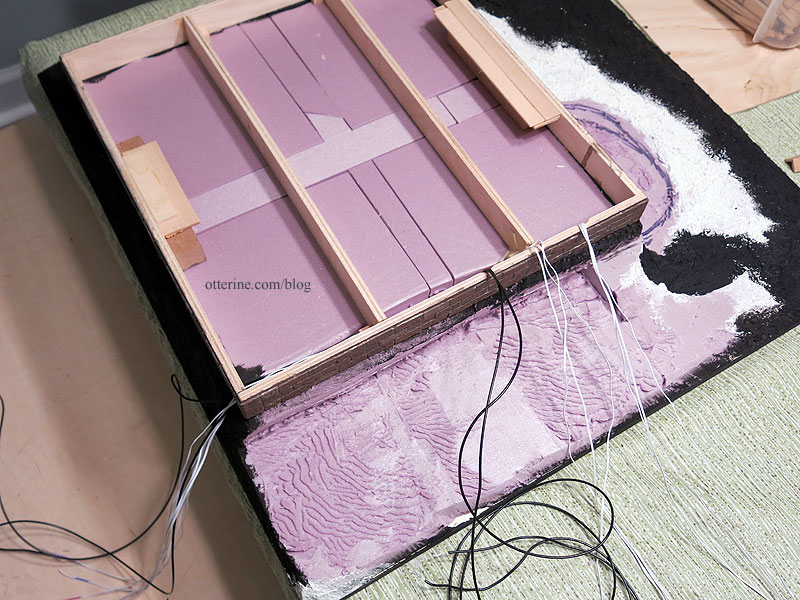
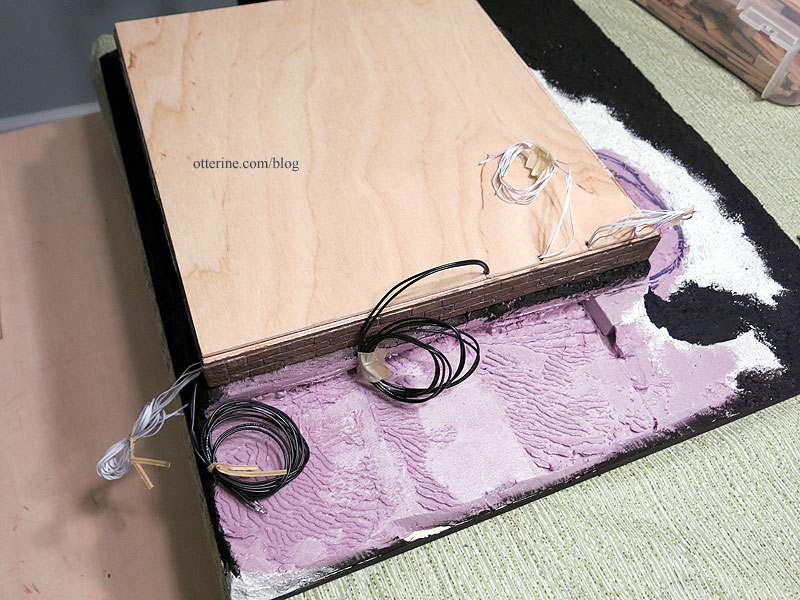
I made a channel for the coach lamp on the exterior heading up. I’ll likely use aluminum tubing to make conduit for the motor, hiding the wiring in plain sight, so I’ll wait on drilling final holes for that. This plan requires five dollhouse lighting wires and two motor wires in the tiny attic space (the floor lamp wiring will be buried in the landscaping foam without leading up to the attic space). I always add an extra dollhouse lighting wire in case inspiration strikes later, so I’ll up that to six wires in the attic space. I made three vertical channels on the side wall to run long wires from the attic space down the wall, through foundation and the landscaping foam, then out the back.
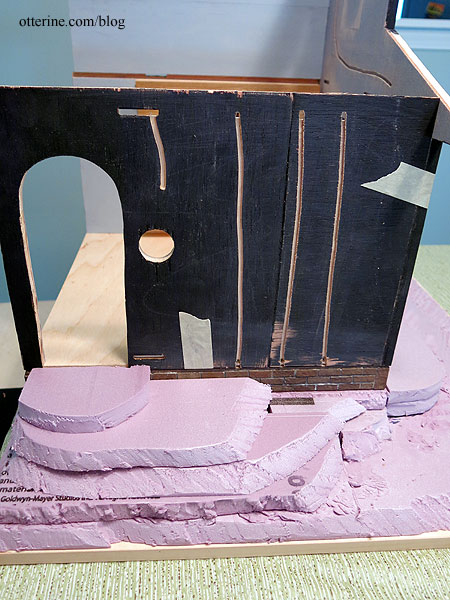
Getting out of dry fit for me always entails a lot of prep due to the chicken-or-egg scenarios that pop up along the way. Before I could glue the brick foundation in place, I needed to address part of the landscaping since I didn’t want to risk marring the brickwork. I used stucco patch to even out the builders foam slopes on three sides, leaving the door wall until later. I painted the finished portions black brown afterward.
I glued the brick foundation to the builders foam using Weldbond glue and weighted it under magazines overnight. The next night, I ran my wires for the attic space through the foam and out the back.
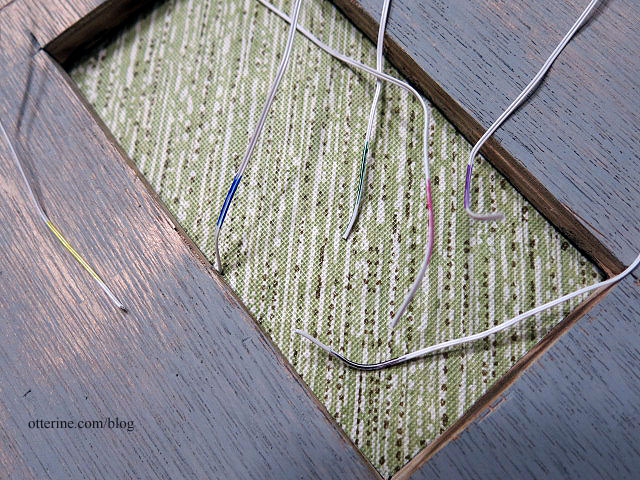
I used Sharpies this time to mark the ends so I didn’t have to guess which wire was which later on.
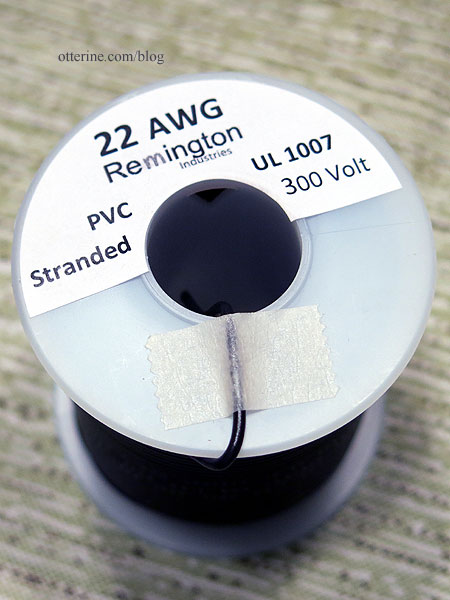
I didn’t bother for the motor wires since there are only two of them. I am using 22 gauge wire because it matches the lead wires from the motors.
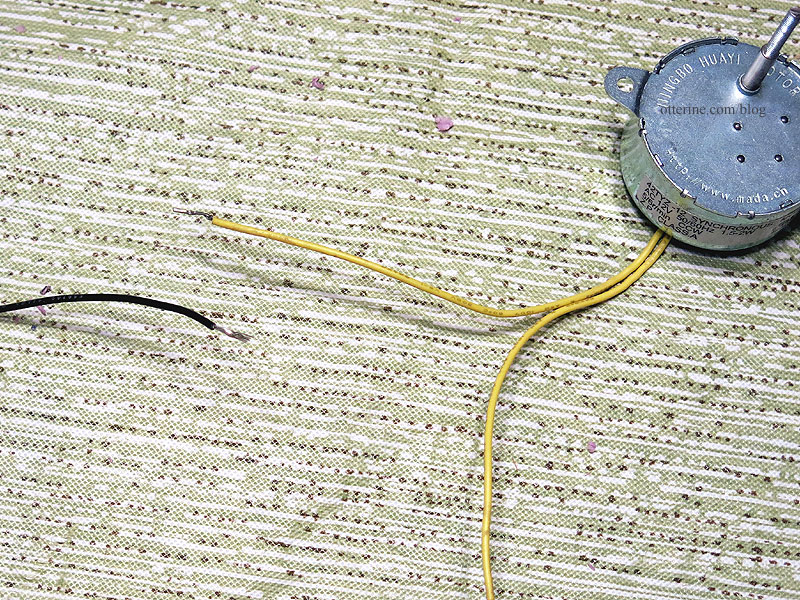
I left a lot of lead for the motor wires but will still likely use an extension cord for the transformer. I ran the wire bunches through holes in the floor board that correspond to the side wall channels. To keep things from getting unruly, I taped the wires into looped bunches. For the wires coming out the back, I used twist ties since tape residue will wear off on the wires if you leave it too long. The taped bunches will be used right away.
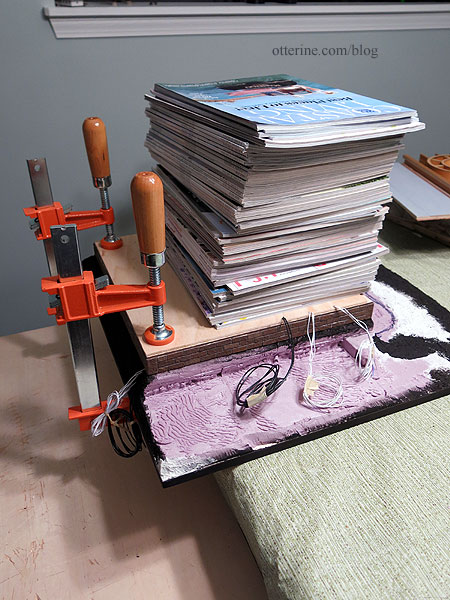
I then glued the bottom floorboard in place and weighted the assembly with magazines and large Jorgensen 6″ bar clamps. More drying time….
Categories: Watson Mill
August 2, 2017 | 0 commentsAuguste
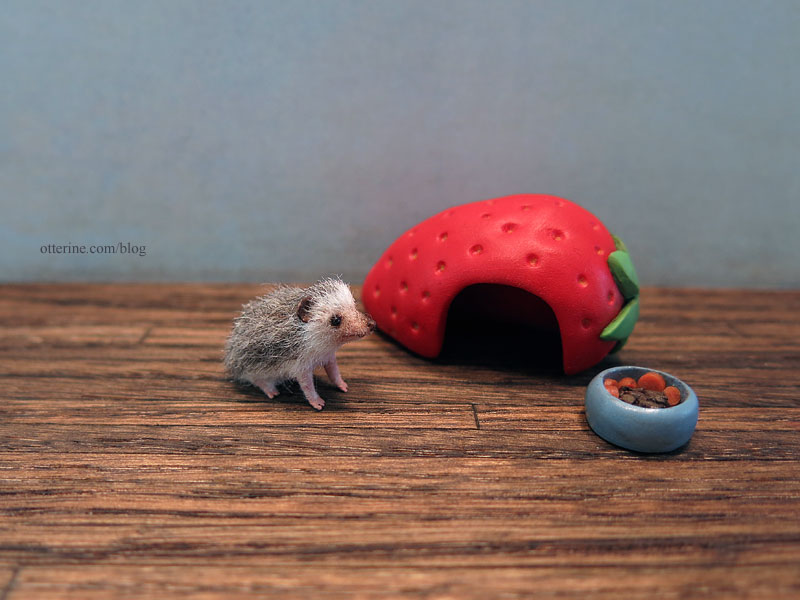
This is Auguste, and he is as cute as a button. :D

Auguste is a clever hedgehog made by A. Gabriela Z. Rodriguez of agzr*studios.

She included a strawberry house and food bowl. I love the strawberry especially. It’s the perfect hideout and makes me want to build a blanket fort for myself! :D
Categories: Animals and birds
August 1, 2017 | 0 commentsBargello seat covers in green
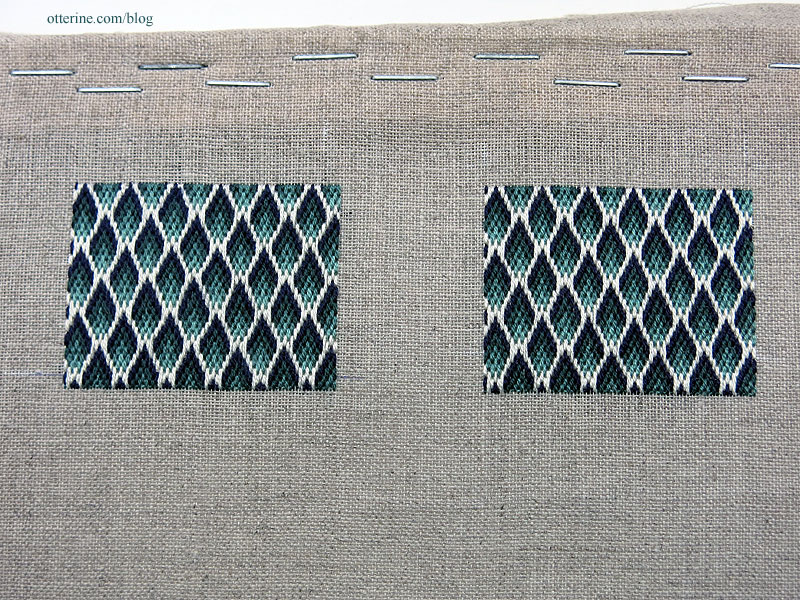
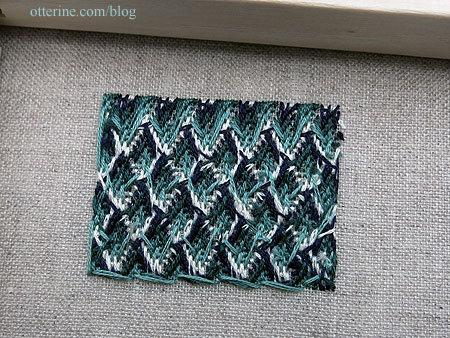
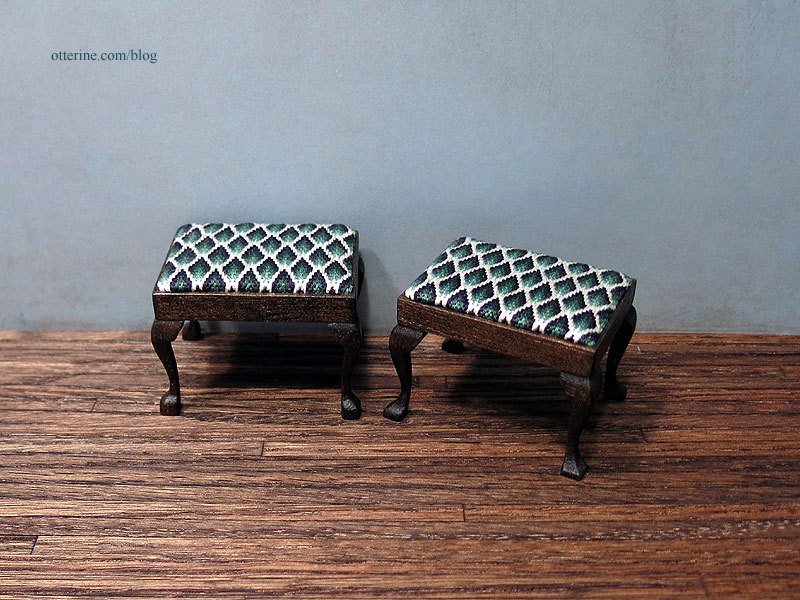
I’ve always liked bargello needlework, and since Gustav has an eclectic taste I thought it would work well in the Mill. Bargello is also called Florentine or flame stitch, and there are a lot of lovely patterns out there. Being in miniature, keeping it simple is best. I found a suitable pattern in the book Miniature Needlepoint and Sewing Projects by Kathryn Falk.The pattern is for a wide bench, but the geometrical nature of bargello makes it easy to adapt to other sizes. You just stitch more or less to cover the area you need. To make it easier to follow, I charted the book pattern in full color using Pattern Maker Pro by HobbyWare.
The pattern called for 5 colors worked on 42 mesh cotton Penelope canvas. I chose three blue-greens, one navy and one cream color from my stash of DMC floss. I didn’t have the canvas, but I still had the 40 count silk gauze from my previous attempts at petitpoint and French knots, both of which were unsuccessful. This was no exception. My eyes want to focus on the holes, not the threads even with high magnification. Again, I could feel a headache developing. Here is the old silk gauze photo…too sheer for me, but you can’t say I haven’t tried multiple times.

There is 40 count linen on the market, but I figured I would try a quick sample on 32 count Jobelan to see if I even liked it. I used three strands to cover the fabric here. It does bulk up quickly, but that works fine for upholstery. I’ll just cut down on the padding underneath. This was much easier for me. I need substantial fibers to see in order to stitch.

Since the sample on 32 count turned out so well, I ordered a small piece of 40 count linen. My test on 32 count Jobelan required three strands, but the 40 count linen needed only two. I did try a sample of single thread but it left noticeable bare patches. I opted for medium beige linen to mask any bare spots that might arise with the two strand coverage as well. The linen is less even in texture than the Jobelan, but bargello stitching covers more area so it’s doesn’t seem to impact the end result.
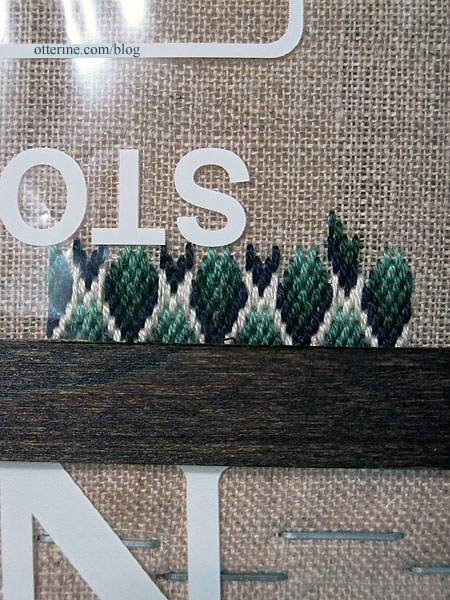
Below is roughly an hour’s work so it does cover a good area rather quickly. The linen works better than gauze for me, though it does take some concentration to start. You have to be so careful with the count, but I can at least see the threads this time. Once you get the pattern started, it seems to go faster as well. I’ve stopped short on the right since I wanted to measure against the seat insert and didn’t have it handy. Bargello makes for a bulkier end fabric, so I want enough to cover the seat insert without having to tuck stitched portions underneath.

I finished up the seat overs rather quickly. The first took roughly 5.25 hours of stitching, whereas the second took only 4.25 hours since I had worked into a rhythm and had pretty much memorized the pattern.
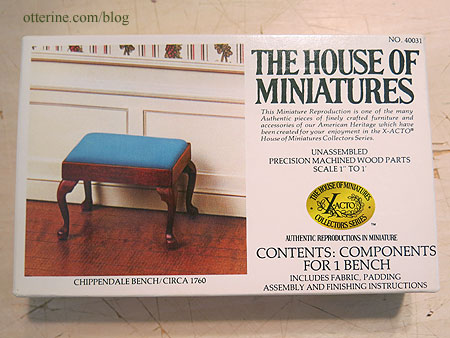
I built the two Chippendale Benches by The House of Miniatures.
I wanted a stain that would complement the vivid bargello needlework, so I opted for Minwax Jacobean. It’s a rich dark chocolate brown. Hmm…now I want brownies. Anyway, I tested a swatch next to stitching to see if it would work before staining the benches.
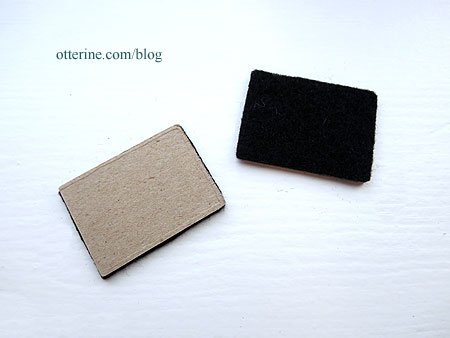
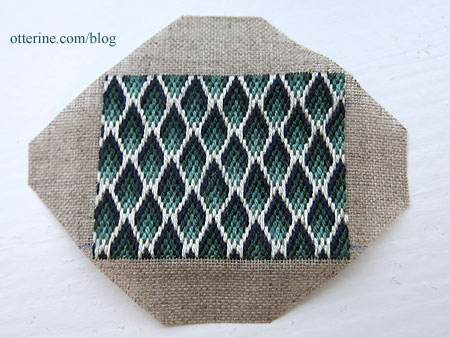
The stitch itself makes for a bit of a hairball on the back, so I used only one layer of black felt on the cardboard insert as padding.
I glued the felt in place.
Though the 40 count linen is rather stiff, it will still fray. I ran a line of Fray Check around the stitching and let it dry.
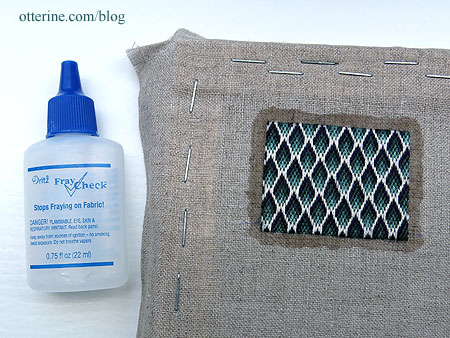
I cut within one square of the stitching.
I had stitched 1/8″ beyond the seat insert so there would be excess to still add padding, but I could have used a little more around the edge. I used a black Sharpie (not shown here) around the edges after gluing the linen flaps to the back of the cardboard just in case the linen showed above the wood frame.
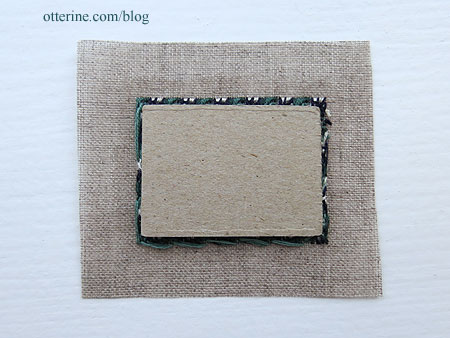
I glued the seat inserts in place with a small amount of tacky glue.
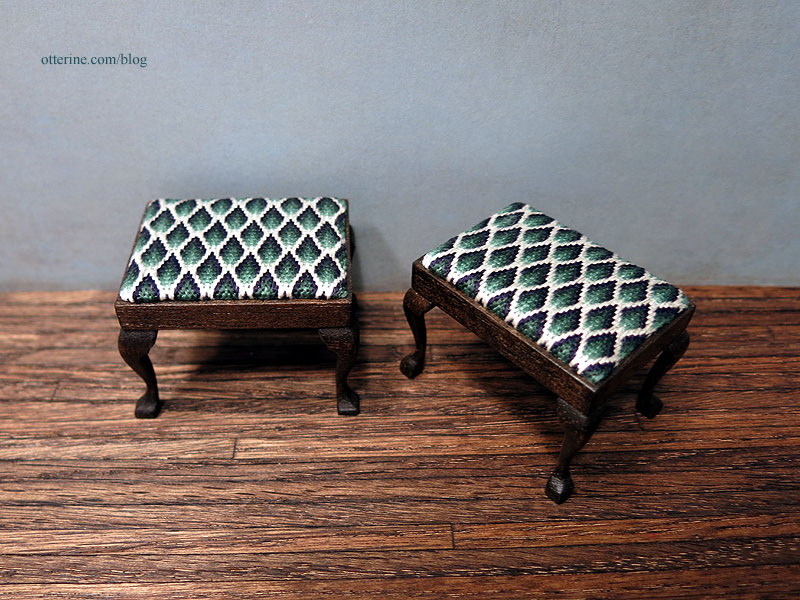
I probably should have used a more subdued lightest color than the cream. I think these will be a redo. With roughly 5 hours of stitching time each, it wouldn’t be a big deal to try again with different colors.
In the end, I did sell these on eBay and moved on to a different coloration.
Categories: Needlework - French knot rugs
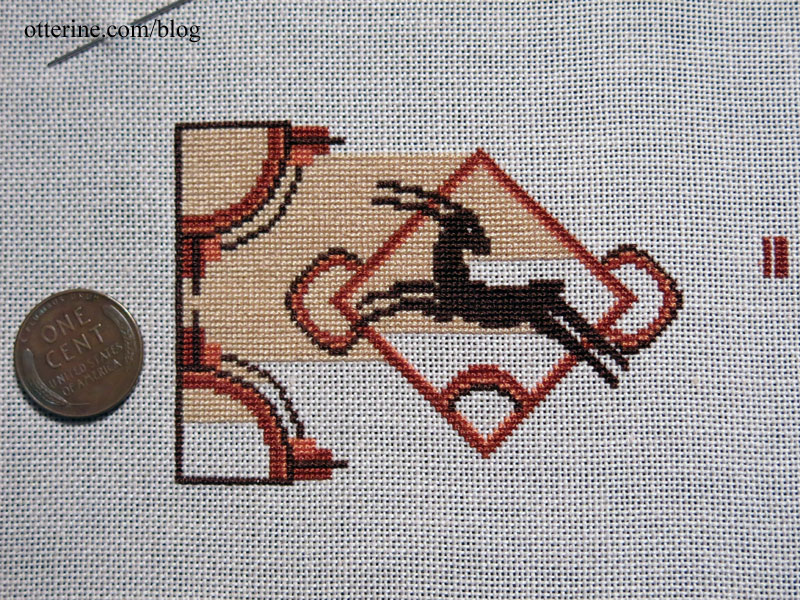
July 15, 2017 | 0 commentsGazelle Rug – work in progress
I ran across this work while organizing this weekend. I had already done the center detailing in late 2015 with the intention of having it in Otter Cove. This is 4.25 hours of stitching. Cross-stitch on 32 count Jobelan. Pattern from Miniature Embroidery for the 20th Century Dolls’ House by Pamela Warner.

I’ve also done a little more work, now up to 12.75 hours of work.
Categories: Needlework - French knot rugs
July 10, 2017 | 0 commentsWatson Mill – circle library, part 5
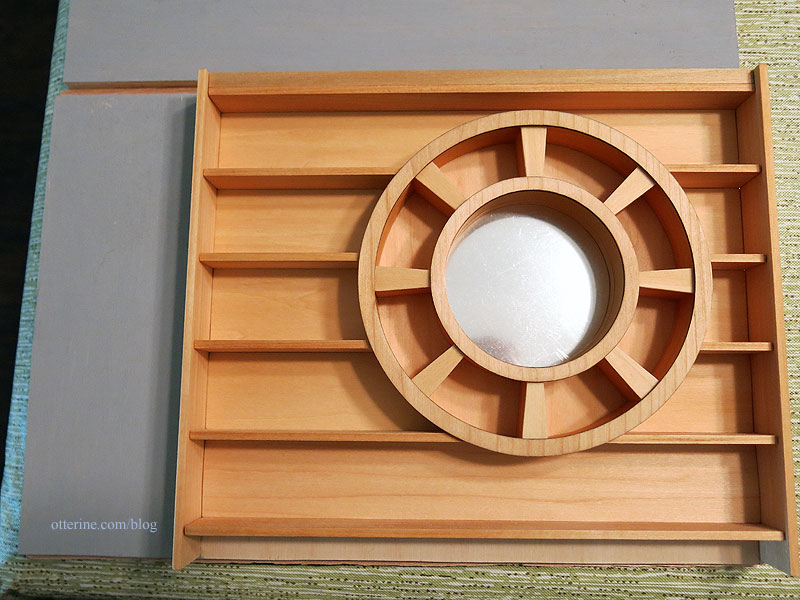
Continuing work on the circle library. As a recap, here is where the circle library was last time: finished but bare wood.
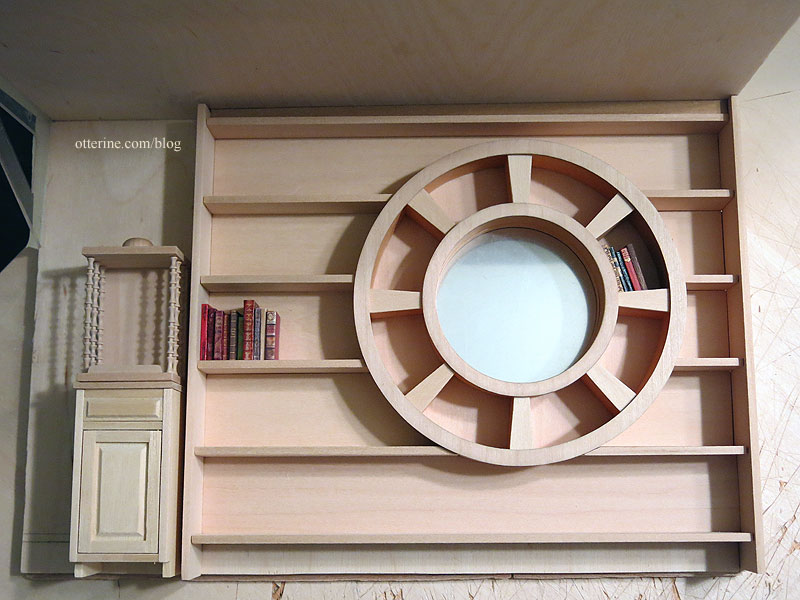
The walls have been primed with grey gesso, which is in the same color range of the wallpaper I’ve chosen. Here’s what that paper looks like.
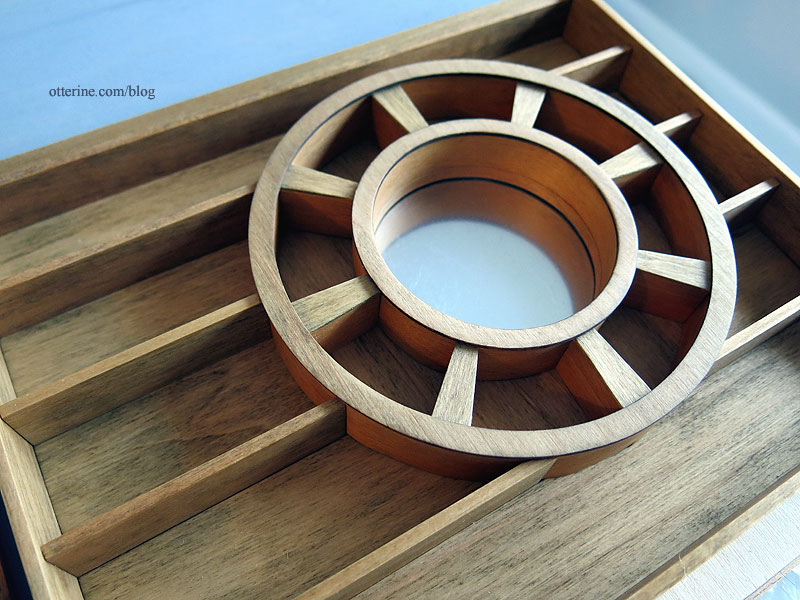
I had planned to stain the library Minwax Natural after my test sample seemed to bring out the grain while leaving the color minimally changed. Well, in a large area, that didn’t really work so well. It turned rather orange, like raw salmon cutlet orange. The edges of the circles darkened significantly as well.
I knew it was going to bother me, so I opted for a second coat of stain, this time using Minwax Driftwood. I had nothing to lose really since I wasn’t going to leave it orange so I would be redoing parts if not all of it whether the attempts to fix it worked or not.
The green in Driftwood balanced the red in Natural, and the end result is darker but a better color overall. The darker edges of the circles no longer seem out of place. It actually looks like it was made from reclaimed wood, which makes a lot of sense for an old mill. :] A happy accident.
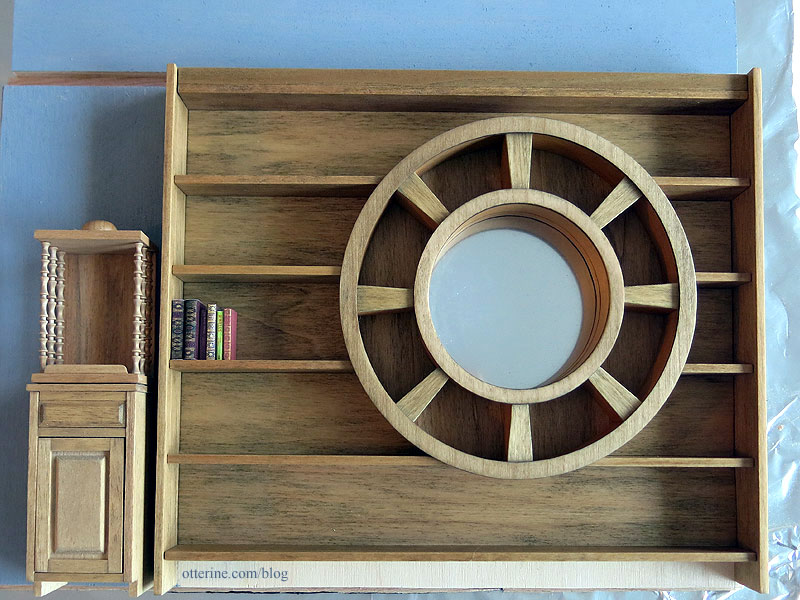
The dumbwaiter and its cabinet have a first coat of stain but aren’t finished.
Categories: Watson Mill
July 4, 2017 | 0 comments


NOTE: All content on otterine.com is copyrighted and may not be reproduced in part or in whole. It takes a lot of time and effort to write and photograph for my blog. Please ask permission before reproducing any of my content. Please click for copyright notice and Pinterest use.


